 zakqwy
Note to self: design-for-manufacture is NOT the same as design-for-assembly. Especially when DFM translates into "who cares, we're 3D printing it anyway, I'll just watch wall thickness and drain holes and be good to go". Mocking up the X4 frame proved quite difficult; the 4mm spacers that are supposed to hold the CFRP plates AND the arms in place don't like staying still, and the arms are... well, they're round, so they roll off the table a lot.
Space Glue, my previous CFRP weapon of choice, features an unfortunate 3-hour cure time. I couldn't figure out any ways to align the parts that would require less than half a dozen or so glue-ups, so I nixed this idea due to impatience. Fortunately, I located a tube of cyanoacrylate--just the tool for the job!
I've always been leery of Super Glue. I mean.. I always hear it has its place, and maybe my bad experiences had more to due with my tendency to expect more gap-filling properties than actually exist, but the damn stuff never seems to stick to anything but my fingers. But in this case, concerns about strength and joint brittleness (and my fingers) were outweighed by a strong sense of urgency--if I could get the whole mess glued up tonight, I might be flying by bedtime.
I was pretty excited so I didn't take any assembly pictures. Suffice it to say that everything went fairly smoothly; pulltruded CFRP rods need a good abrasive cutter, so I used my carbide tipped hacksaw. Rotating the tube during the cutting process, as recommended by the manufacturer, is key--otherwise you end up with splintery ends. I scored, snapped, and cleaned up the 0.8mm CFRP plate using a utility knife with minimal difficulty.

It's not perfectly square, but I think this will work fine. A few observations:
- I shortened up the pesky battery lead to keep it from getting caught in the prop.
- The motor leads aren't terribly long. I tried to give myself as much leeway as possible by milling a fairly large square hole in the top CFRP plate.
- The leads were still way too short, to the point that even once I'd soldered one of the rear motor leads in place I didn't have enough slack to flip the board into place. Before getting too frustrated, I ordered some fine-gauge wire and a bottle of liquid electrical tape.
Before putting everything away, I pulled the motors out and ran the most important test of all:
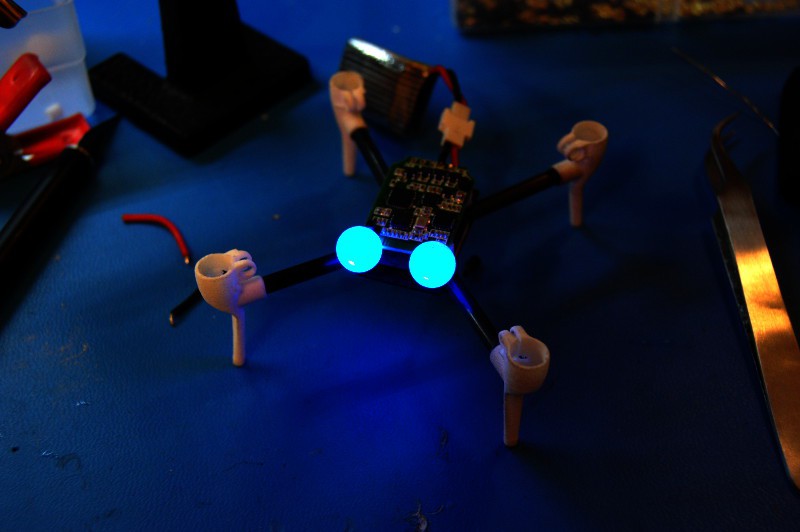
Suffice it to say that I'm quite happy with how the eyes turned out.
Discussions
Become a Hackaday.io Member
Create an account to leave a comment. Already have an account? Log In.