Close
0%
0%

MURB

A binary clock

Similar projects worth following
MURB stands for Mais Um Relógio Binário (yet another binary clock in Portuguese). I made it as a birthday gift to my wife. It has 24h format with three binary numbers: hours, minutes and seconds. It also has an interface to setup the time and variable brightness. And blue LEDs.

MURB is based on an ATmega328P. The time is shown by three binary numbers, hours on top, minutes in middle and seconds on bottom. Each number is a row of 5 or six LEDs, with most significant bit to the left.

For interface, it has a push-button and a rotary encoder. It is powered via an USB plug.

When first powered, MURB enters in time setup mode, with the minutes blinking. The user can then enter the minutes with the encoder. The value is saved with a push on the button. The next state has the hours blinking and the user can again enter the desired value. When the user validates the hour, MURB goes on to the normal state. Here the present time is show up to the seconds. In normal state, the rotary encoder controls the brightness of the LEDs. A long push on the button brings back the time setup mode.


I had a lot of fun building it. And I liked so much the result that I build another one for me.
  • 1 × ATmega328p Microprocessors, Microcontrollers, DSPs / ARM, RISC-Based Microcontrollers
  • 17 × 3mm blue LED Kingbright L-7104-QBC-G
  • 17 × 5.6k Ohm resistor
  • 3 × 10kOhm resistor for pull-ups
  • 1 × 16000kHz crystal

View all 9 components

  • PCB

    Bira03/31/2015 at 09:50 0 comments

    I used the gEDA project tools for the schematics capture and PCB layout. The tutorials in the project wiki were very important to get me from total newbie level to a point where I could produce a working layout.

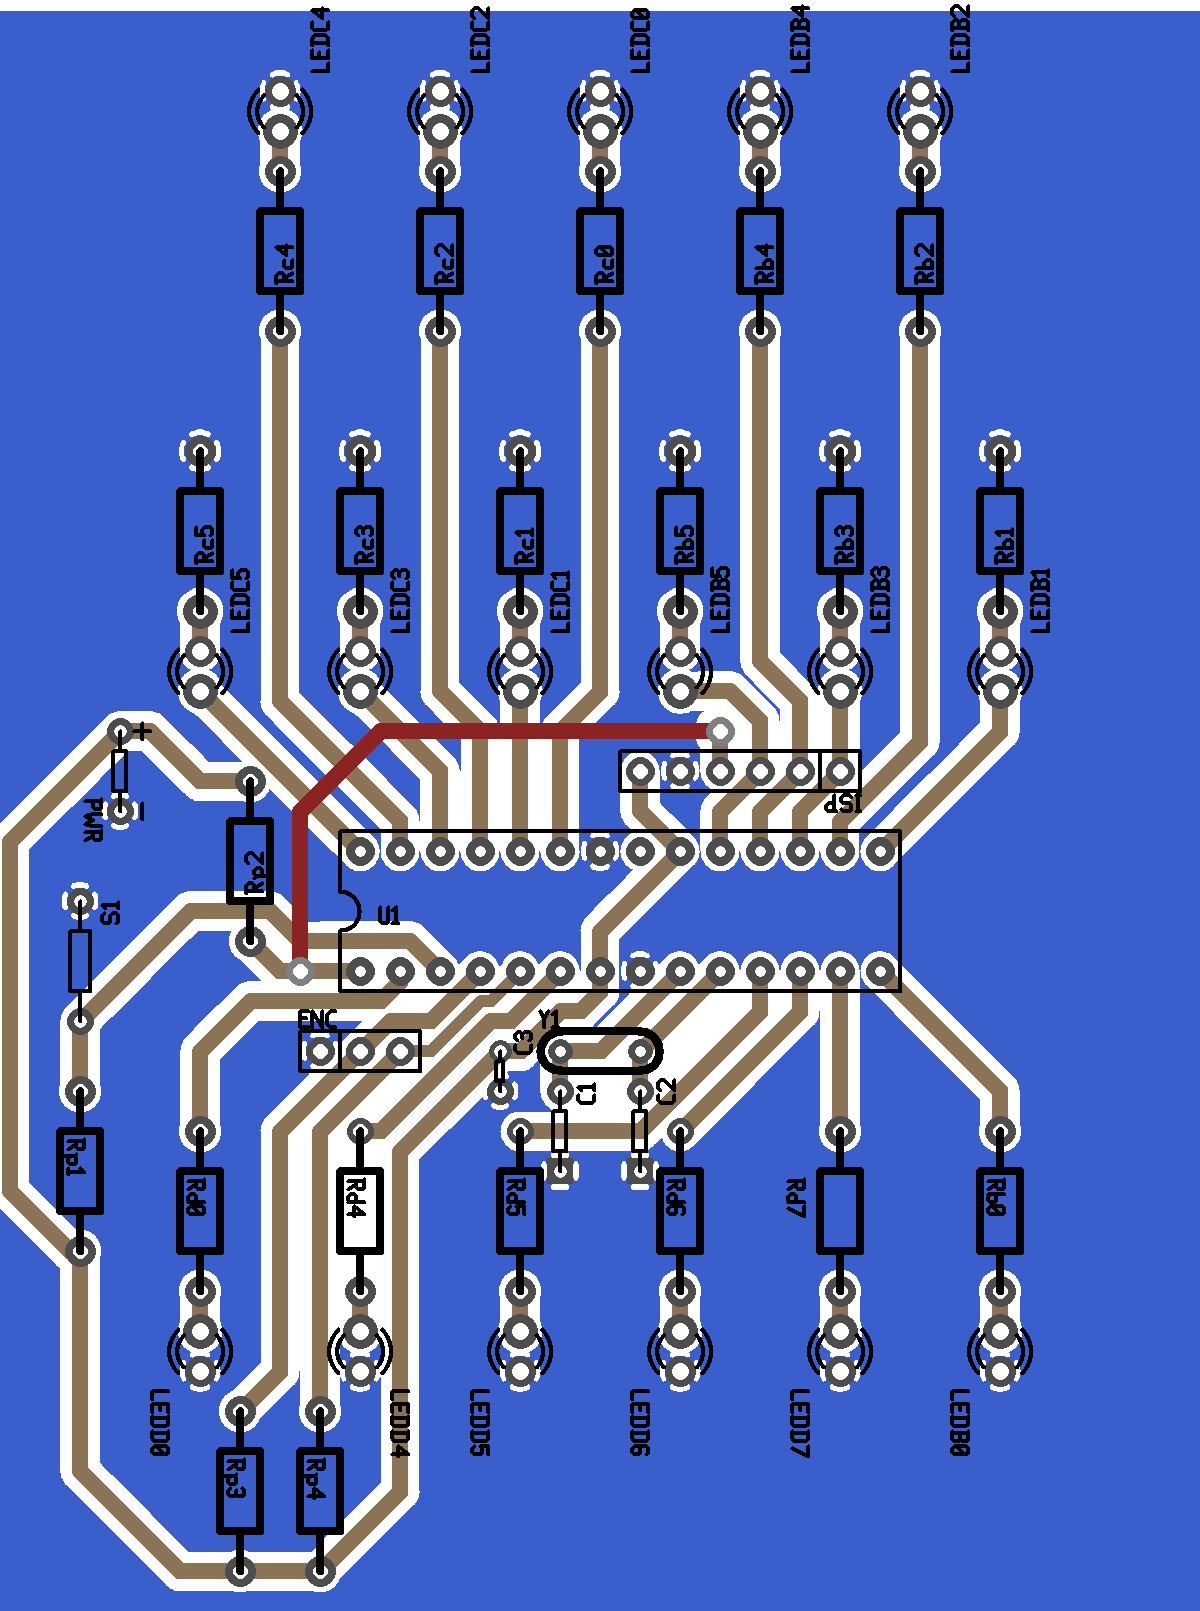
    Here is the final result (top view):

    I tried to keep the layout as simple as possible. First, I aimed for a single layer, since I thought a two-layer PCB was (and still is) beyond my skills. The dimensions are 3 inches by 4 inches, which fit in the wooden pencil holder I had bought for the project. There are three rows of LEDs more or less evenly spaced. The middle row has the LEDs connected to the pins and the resistors to the ground, and the other rows have the resistors connected to the pins and the LEDs to the ground. The middle and bottom rows (the minutes and the seconds) have the LEDs horizontally alined, while the LEDs an the top row (the hours) are alined with the spaces of the other rows. The layout implies that hours and minutes use alternate pins in PORTB and PORTC of the ATmega and seconds have a reverse bit order in PORTD. This makes the software a little bit more complex but keeps the layout straightforward.

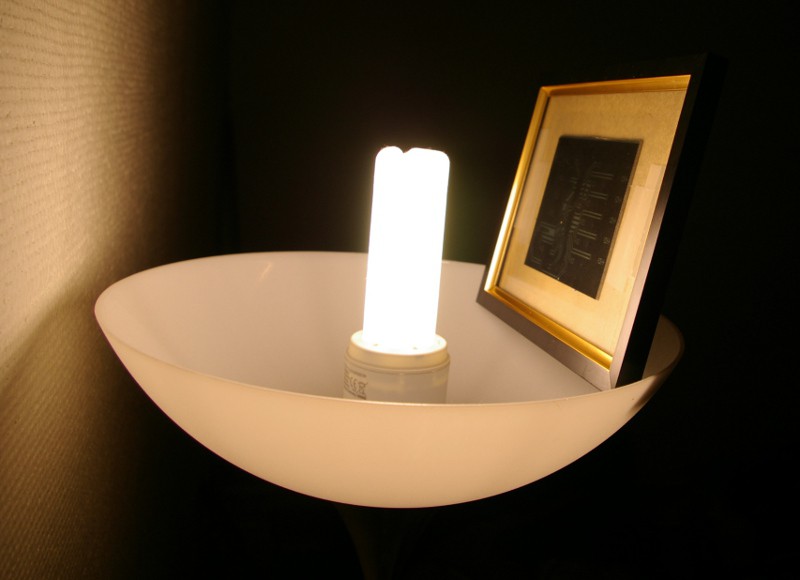
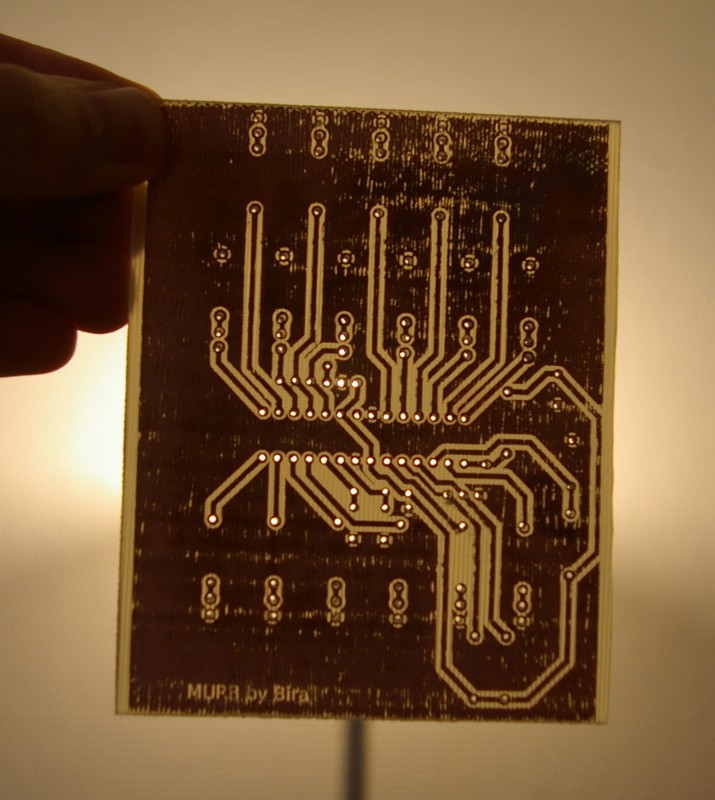
    To make the PCB I followed most of the excellent instructions at Blondihacks, including using the homemade etching solution of vinegar, hydrogen peroxide and salt. Here is the PCB being exposed:

    Using this setup I found out that a little less than 2 minutes of light is enough. The bulb here is a 25w. My results, however, weren't as neat as Blondihacks'. Somehow the etching solution attacked the photo-resist and I got a few defects. I don't know the reason though. Maybe I over-exposed the PCB?

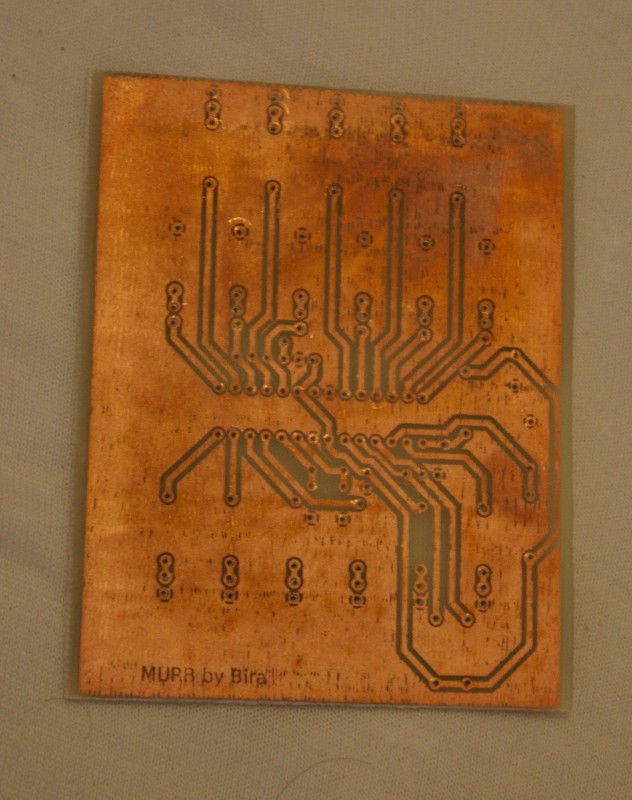
    Here is what I got:

    Despite the defects the board was usable. I had to solder a couple of jumpers in some traces, though.

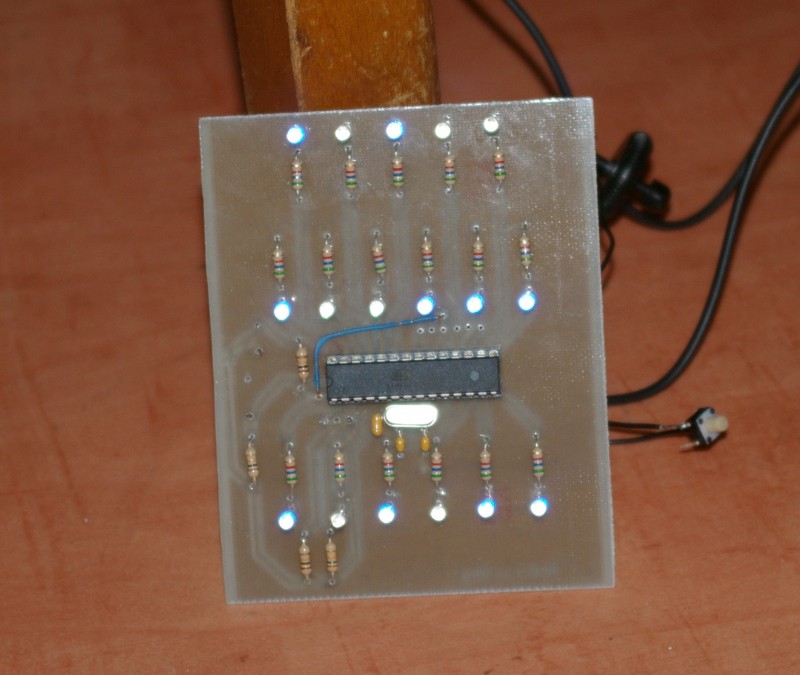
    Here is the PCB with the components and powered:

    Next post: software!

  • Circuit

    Bira03/17/2015 at 17:27 0 comments

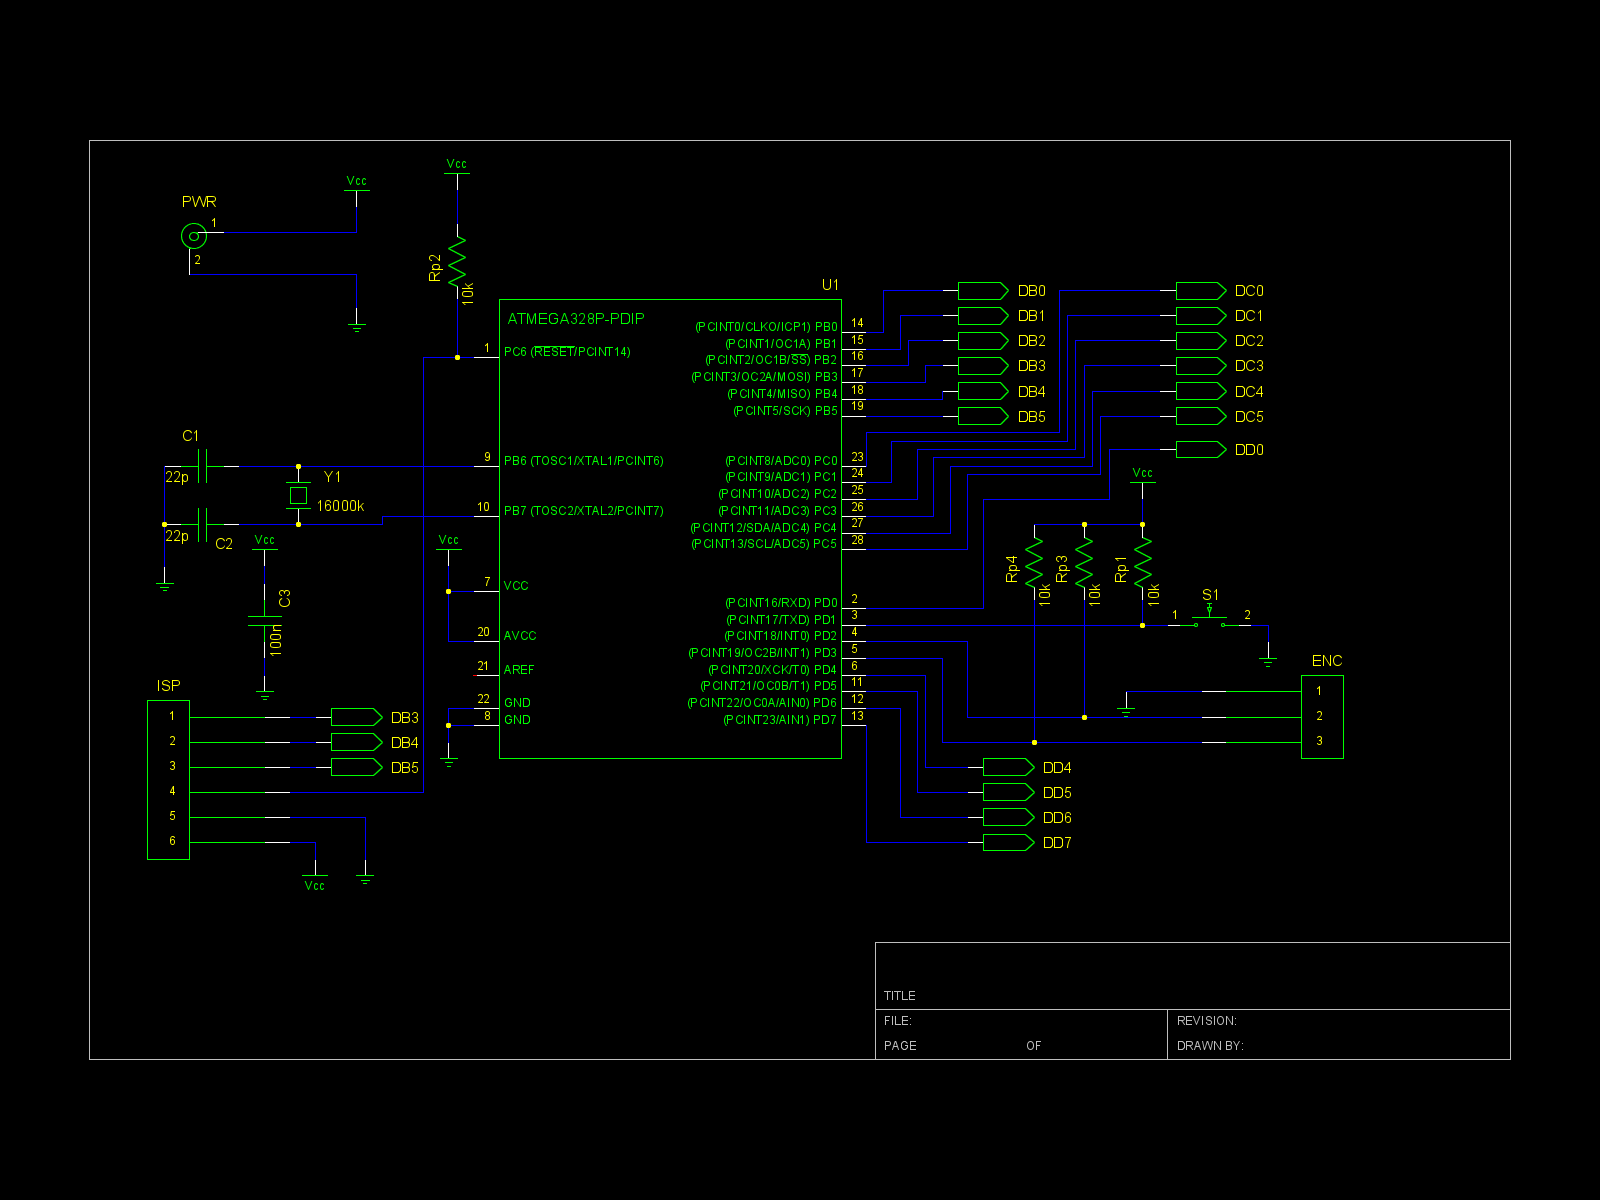
    I've added circuit schematics and PCB layout files to the GitHub repository. Circuit is almost as simple as it could get. LEDs are connected to ATmega pins, with current limiting resistors. The encoder and the push-button are also connected directly to the µC pins, with pull-up resistors. All the LEDs, the push-button and the two encoder channels are each connected to its own dedicated pin. A 16MHz crystal, three capacitors, a programming header and another pull-up resistor complete the circuit.

    I used gEDA for schematic capture and the PCB layout. I'm a beginner with those and it took some time to learn it. But it was worth it.

    MURB's precision as a clock depends on the crystal. One MURB I built advances about 4 seconds per day. This is a frequency error of about 50ppm. Maybe a different crystal would have better precision.

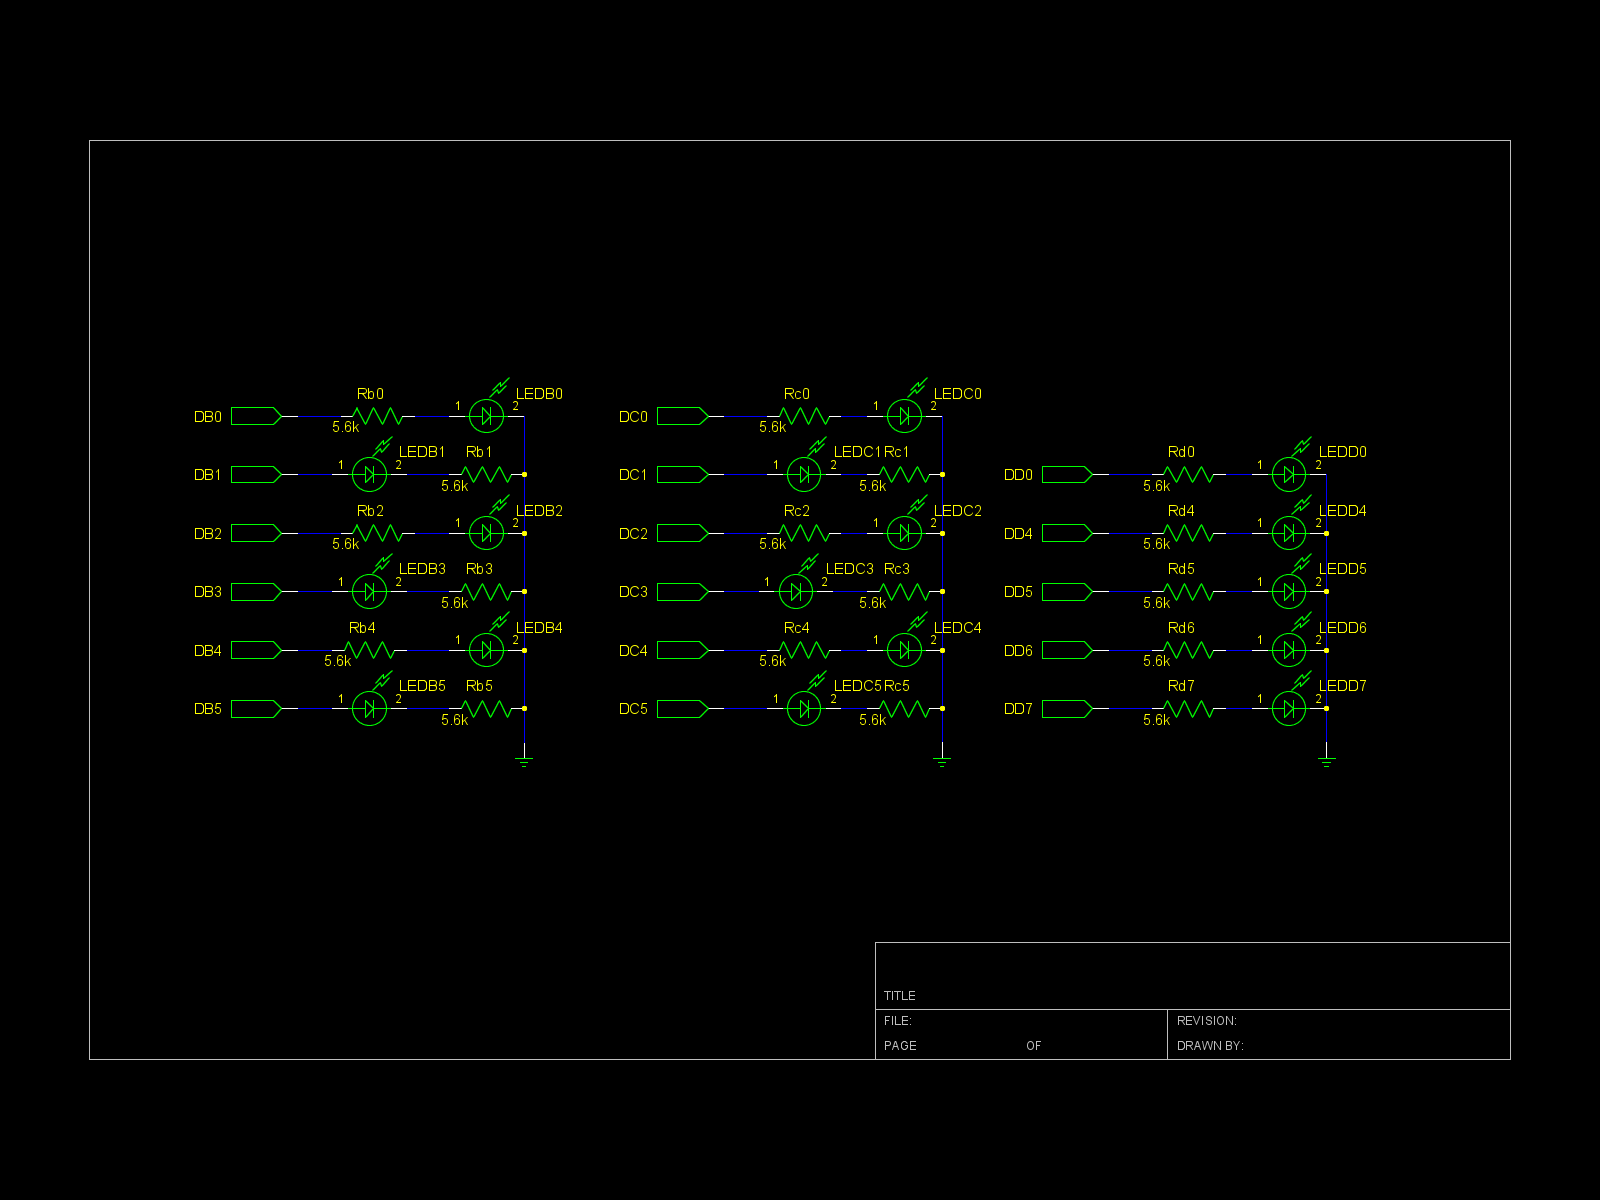
    This is the LED part of the circuit. At first, I selected the resistors to have a current of 20mA through the LED when on, the nominal current according to the datasheet. But these LEDs are bright! I'm using the L-7104QBC from Kingbright. At 20mA I could only dim it with a very small duty cycle in the PWM. So I went on and reduced the current. The final resistor value used was 5.6kOhm. I didn't measure the current, but it is below 1mA, probably below 0.4mA.

    Another thing to note on the circuit above is the position of the resistors. Usually it doesn't matter much because they are in series with the LEDs. But since I'm using the schematic to create the PCB, I had to alternate the order LED-resistor in some pins to simplify the layout.

  • GitHub

    Bira03/11/2015 at 16:54 0 comments

    I just created a github repository and added the source code. It doesn't have many comments yet. I intend to describe it in detail via posts here.

    I also plan to upload pcb file and schematics.

  • User interface

    Bira03/11/2015 at 13:42 0 comments

    I wanted an easy to use interface for MURB. I've always hated having to go around all the 60 minutes because I've missed the right time by one and the clock's interface didn't let me go back. I decided to go for a rotary encoder. I had an old mouse lying around so I "recycled" its wheel encoder into the project.

    My first approach was to treat the transitions via interrupts. However, I never got it to work. Perhaps the old encoder was bouncing too much (lame excuse) or I couldn't find all the bugs in my code (more likely). Finally I gave up and went with a pooling strategy. MURB is not a high performance position control project after all. The result is that MURB miss a step or jump two at once from time to time but this is nothing too annoying.

    Still, I hasn't too happy about not getting the interrupts right. I should probably have tried one of the solutions here.

    The rest of the interface is composed of a single push-button, with debounce done in software. The button is also pooled.

  • First steps: breadboard development

    Bira03/10/2015 at 17:48 0 comments

    This project idea started a long time ago for me. Back then, I tried to make it work with a simple PIC, a homemade parallel programmer and assembler. That didn't go very far. Some years later I hear about the Arduino and the project became much easier to do.

    So I ordered a Uno and started learning. My first plan was to use the Uno directly in the MURB. It has enough gpio pins. I needed 17 LEDs, 6 bits for the minutes, 6 for the seconds and 5 for the hours. With a Uno I wouldn't need multiplexing. But then it occured to me what a waste would it be to block my nice little arduino permanently in MURB. It would be better to use just an ATmega328 instead of the whole uno, but I was afraid of how difficult it would be. For instance, I didn't even have an AVR programmer.

    It turned out, however, that using an atmega standalone is really simple and well documented. You can use the arduino to program the standalone atmega. The process is well described here.

    I got myself a couple of ATmega328, along with some other components, and stated developing directly on the breadboard using the Uno as a programmer.

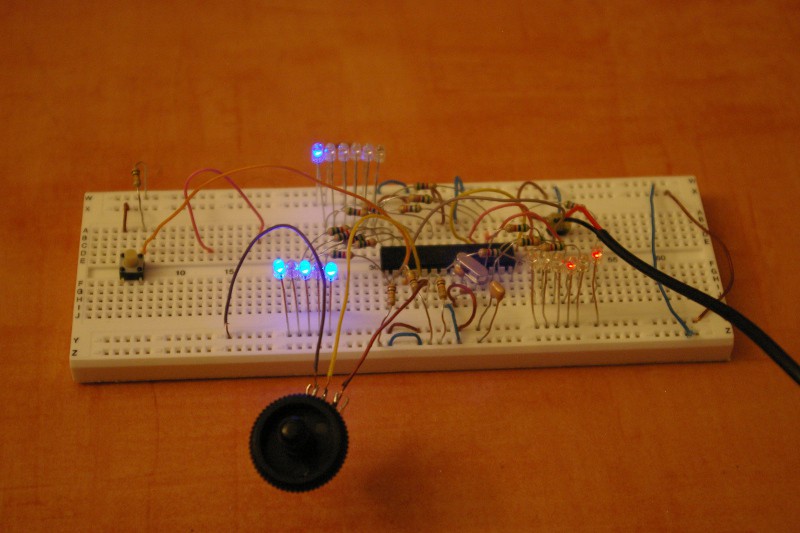
    Here is a late version of the circuit on a breadboard.


View all 5 project logs

Enjoy this project?

Share

Discussions

Similar Projects

Does this project spark your interest?

Become a member to follow this project and never miss any updates