Close
0%
0%

Drone Swarm

Drones of varying complexity swarm an area, forming a distributed sensor and actuator network.

Similar projects worth following
Swarm drones vary from extremely simple to powerful computing and network nodes, together forming a network of sensors and actuators to be used for good and not evil! Tasks vary from monitoring environmental parameters like temperature, wind, sound, pressure, etc. to helping in accident, rescue, and crime situations. For example, screaming "HELP" will attract the attention of smarter drones.

Drones are designed to be harmless to nature, property, and humanity including features like enclosing cages and end-of-life communications. Computing platforms vary from modest micro controllers to powerful AI based Raspberry Pi nodes. Drones may have simple single-purpose construction or may be designed as complete with wifi and full sensor / actuator assortments.

Drones are self-charging and self-surviving, though they may accept commands or generate commands for other drones through an assortment of communication methodologies. Drone mechanicals are 3D printed when practical.

My approach in developing these drones will be incremental. At first they will be simple sensors only. Then I will add communication of sensor readings, possibly through high brightness LEDs or through AM radio transmission. Then simple transport mechanisms will be added including tires on geared DC motors and later flight methods including lighter than air craft with drone style propulsion and actual quadcopter designs.

So the idea is to grow in complexity as time develops, starting with the simplest of basics and working up from there. It will be some weeks before I can solder again due to living space restrictions (oxygen tanks nearby!) so I will have plenty of time for planning of basic circuits and designs.

  • 1 × ATtiny84 Microprocessors, Microcontrollers, DSPs / ARM, RISC-Based Microcontrollers
  • 1 × 1/2 breadboard PCB for soldering components together and providing sustrate
  • 1 × 14 pin socket holds chip
  • 1 × adxl335 Semiconductors and Integrated Circuits / Misc. Semiconductors and Integrated Circuits
  • 4 × DC motor

View all 10 components

  • The Little Motor that Should Have

    Les Hall03/30/2015 at 18:16 6 comments

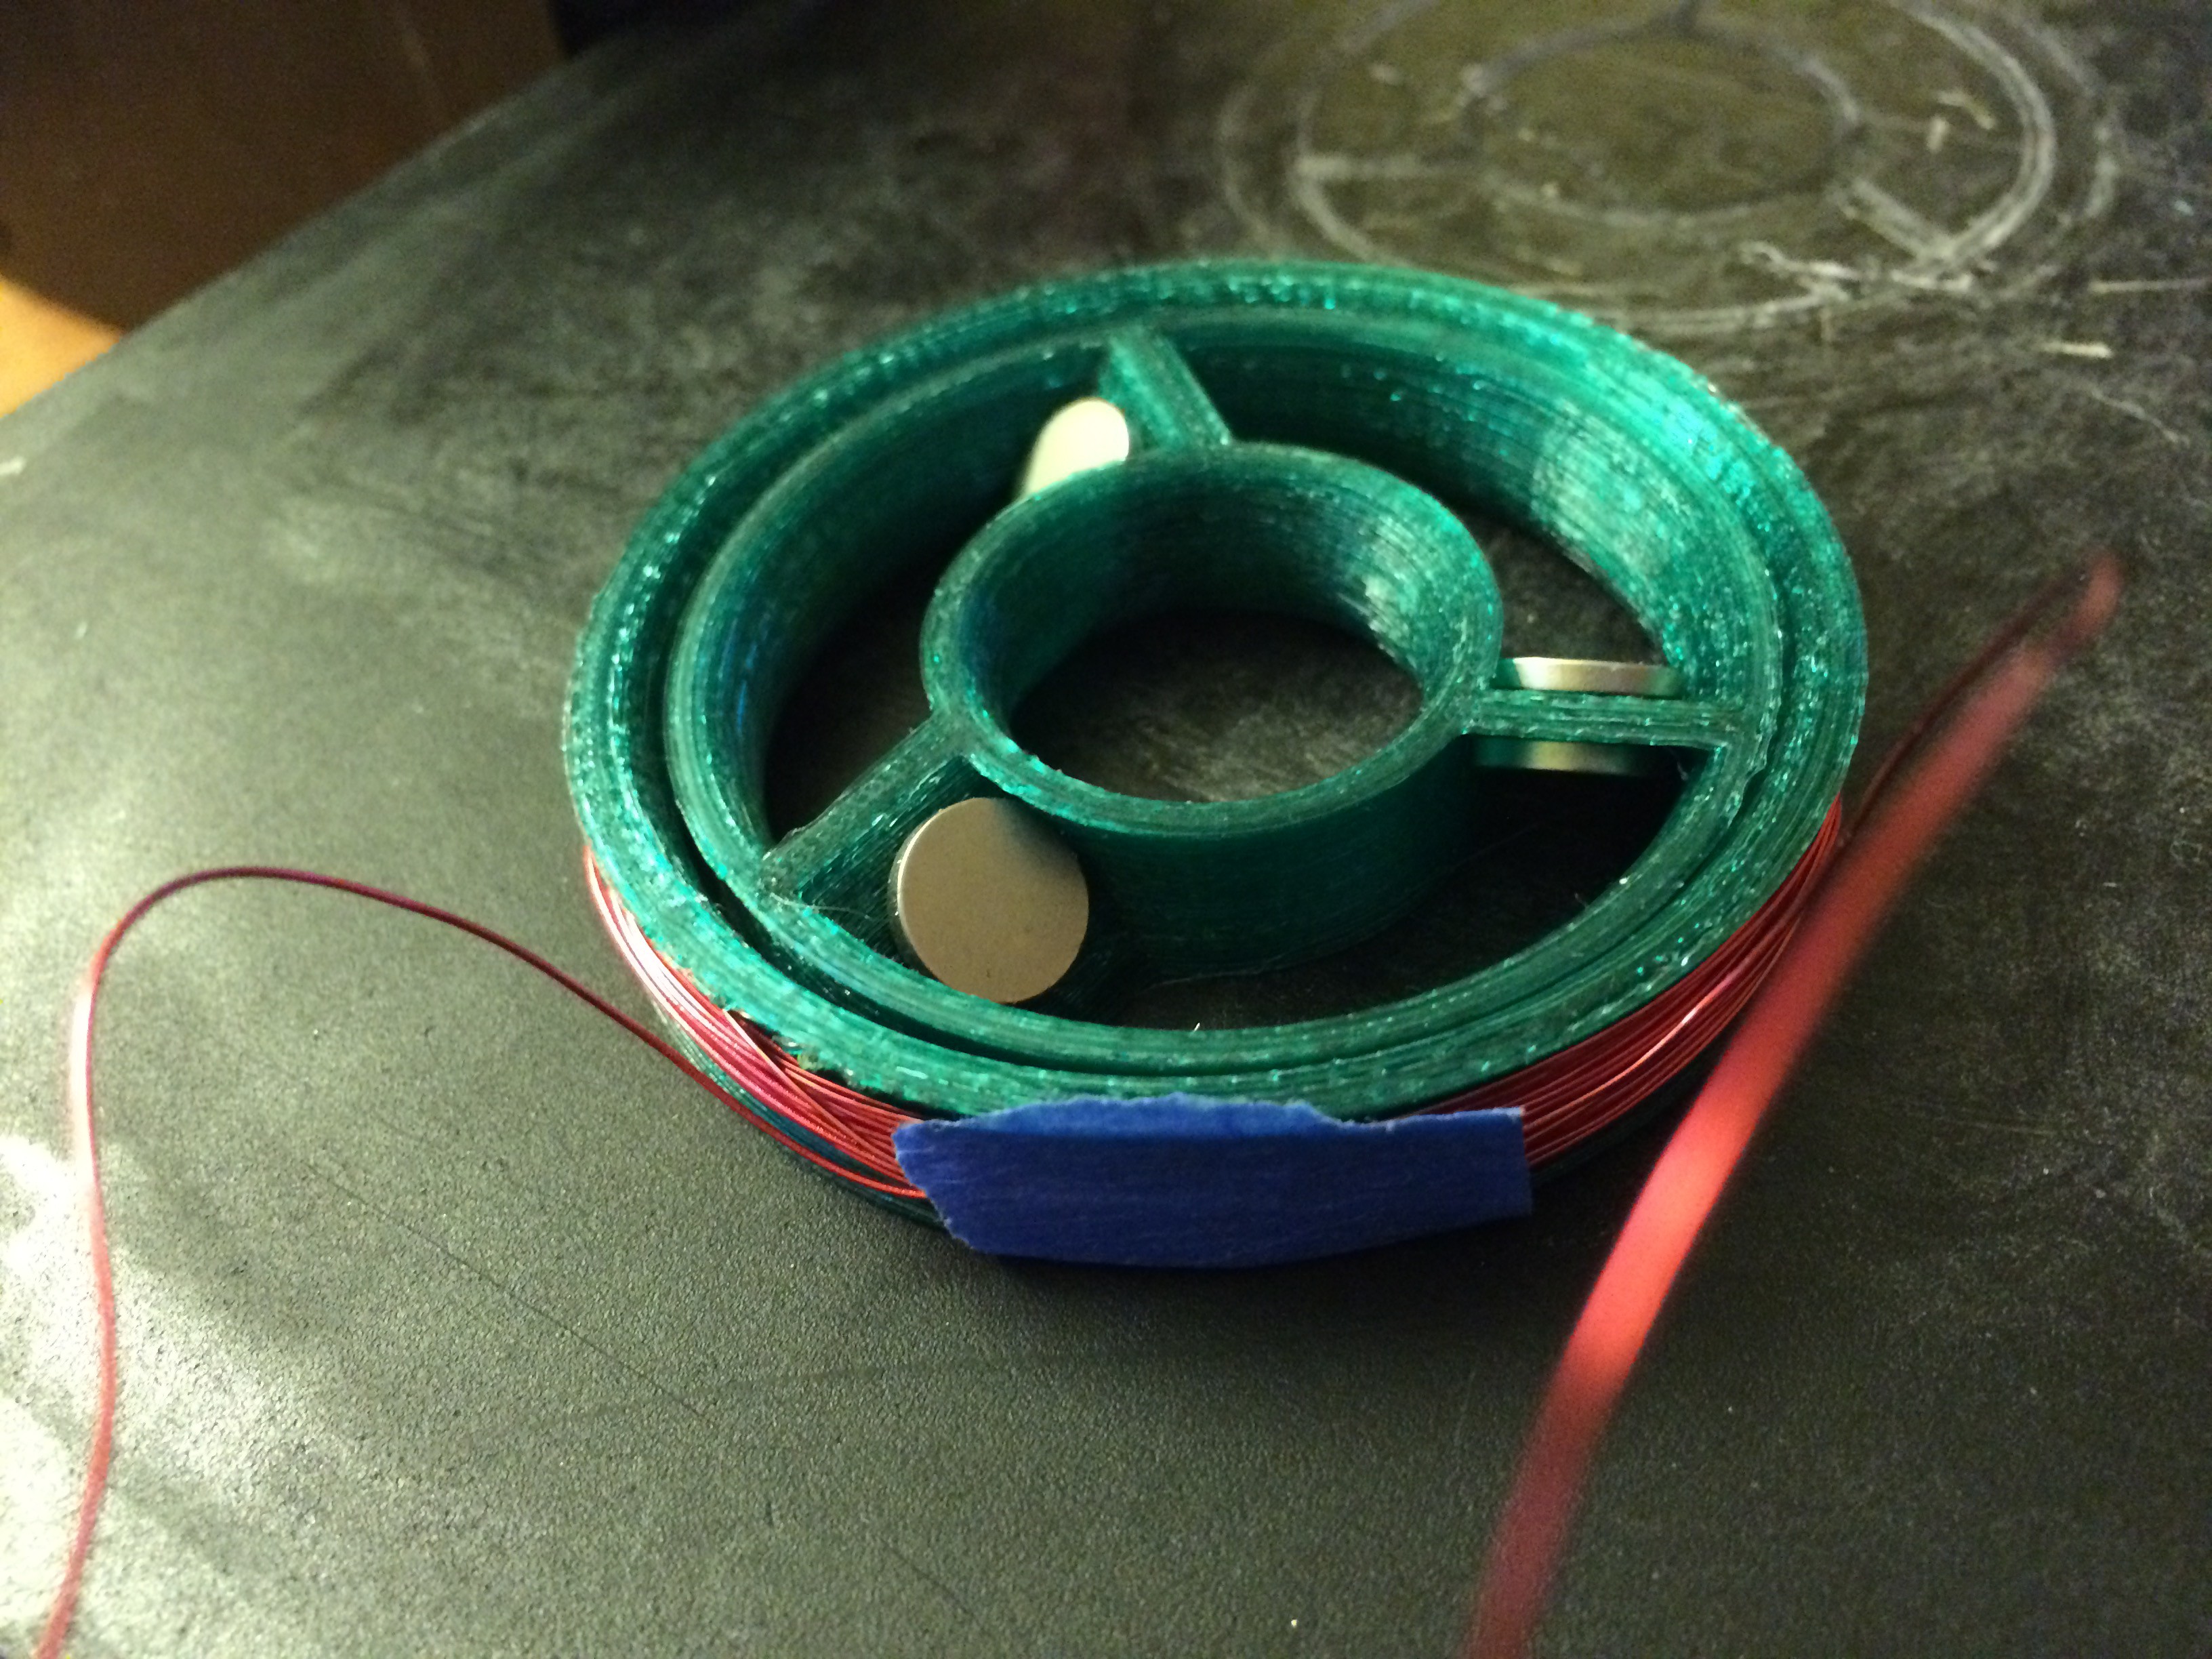
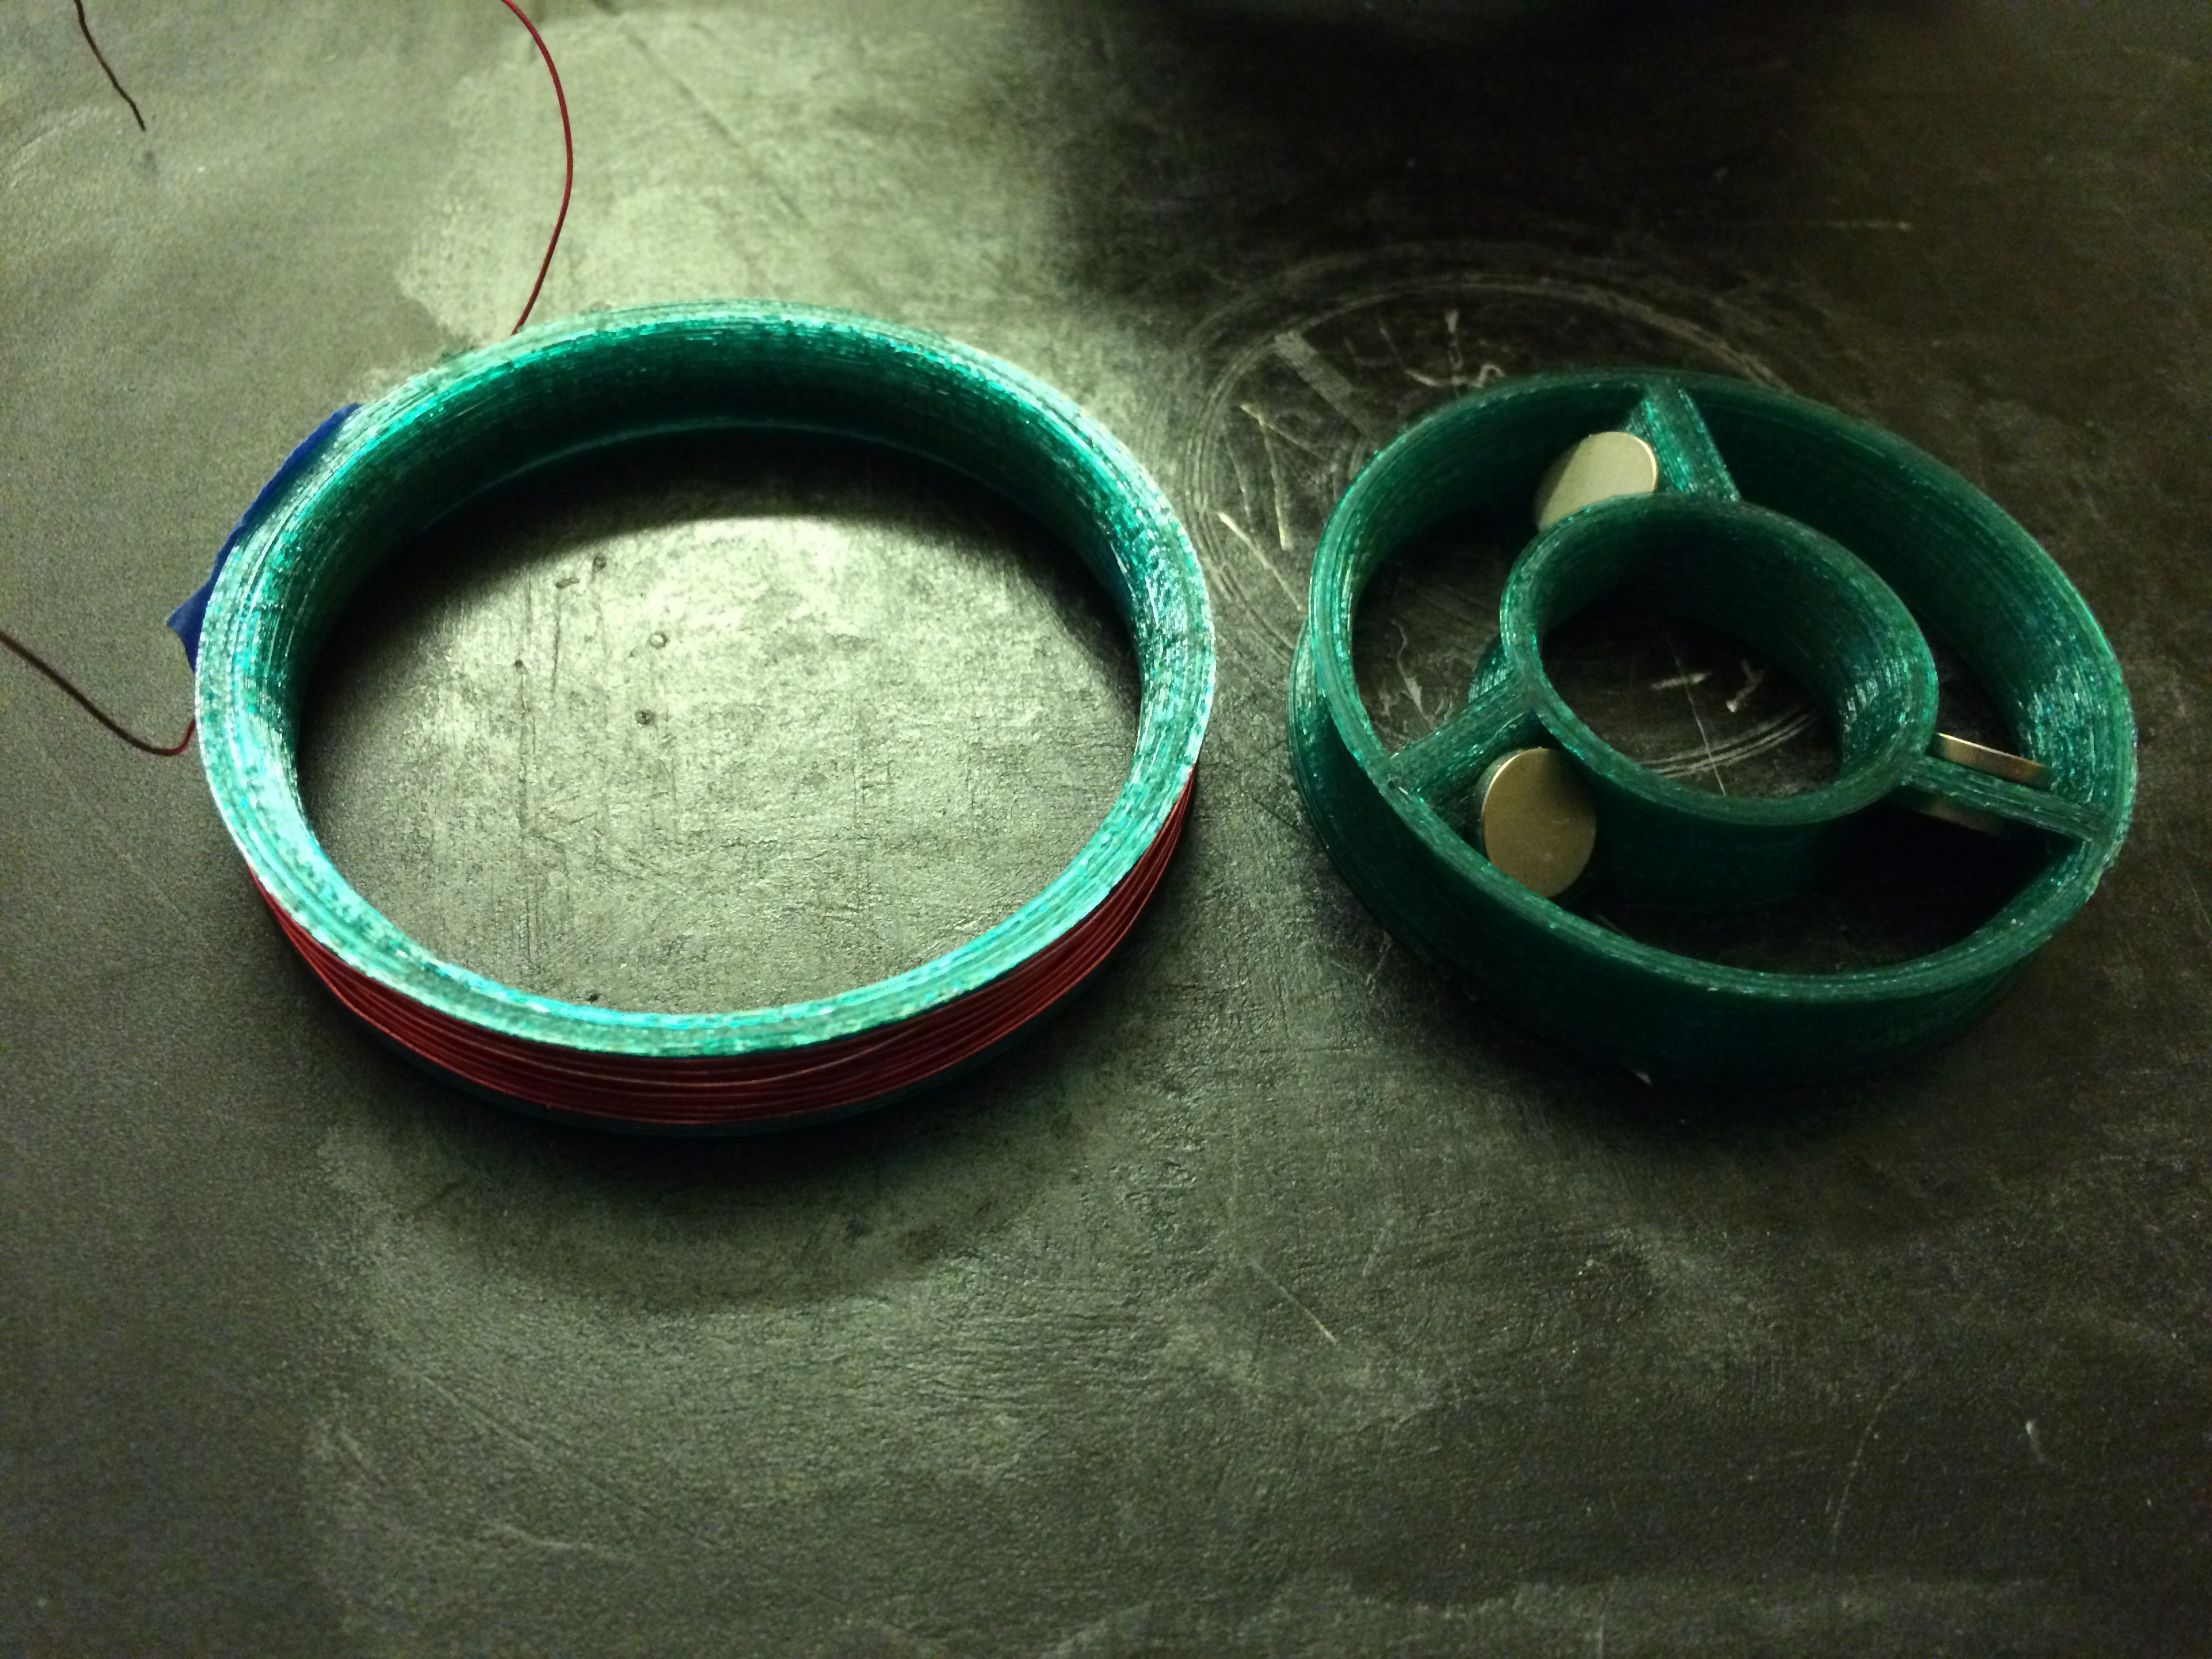
    The thing pictured above was an attempt at a "motor" that I created on my printer. It has three pairs of magnets gripping three fan blades in a rotor and a coil wound around a stator. The motor doesn't run, of course, because I didn't pay homage to the right hand rule before building it, and I shamelessly (or perhaps shamefully lol) post it here for your enjoyment as an example of yet another idea that didn't quite make it in prime time. That's OK though, because if you look closely you'll see that I figured out some cool stuff, like how to wind a coil on a form (and how to make that form in the first place), how to get magnets to stay put by having them grip each other in pairs, and how to make moving parts fit together in a single print.

    So there was experience gained and lessons learned on this effort also (and iI did do it from thought to failed test in one day) as in my previous work. Don't worry, I'll stop shooting arrows all over the place and hit the dang target if not the bull's eye pretty soon, just you wait and see.

    I thought for some reason i'd make a boat propeller for my water craft drones. I have a bit of a notion to combine the moving part with the engine when possible, so that led to the magnetized propeller concept. It would be cool if you could have just a magnet or iron core thingie in the water and all the coils and electrical what-not on the dry boat hull (suppoedly dry!).

    The easy way to fix this debacle is to turn it into a stepper motor, which I have built before like this. I can just arrange some coils radially and set those magnets in radially also and with the right control setup using an ATtiny95 mocrocontroller chip and an L293D motor driver chip just zap those coils in the right way and the thing will move, I've done it before. It just requires a core to make it work properly so the ciols would need a magnetic core each and that should do it.

    I think I'll redesign this motor that way. More to follow...

    Les

  • Battery Holder Print

    Les Hall03/30/2015 at 18:01 0 comments

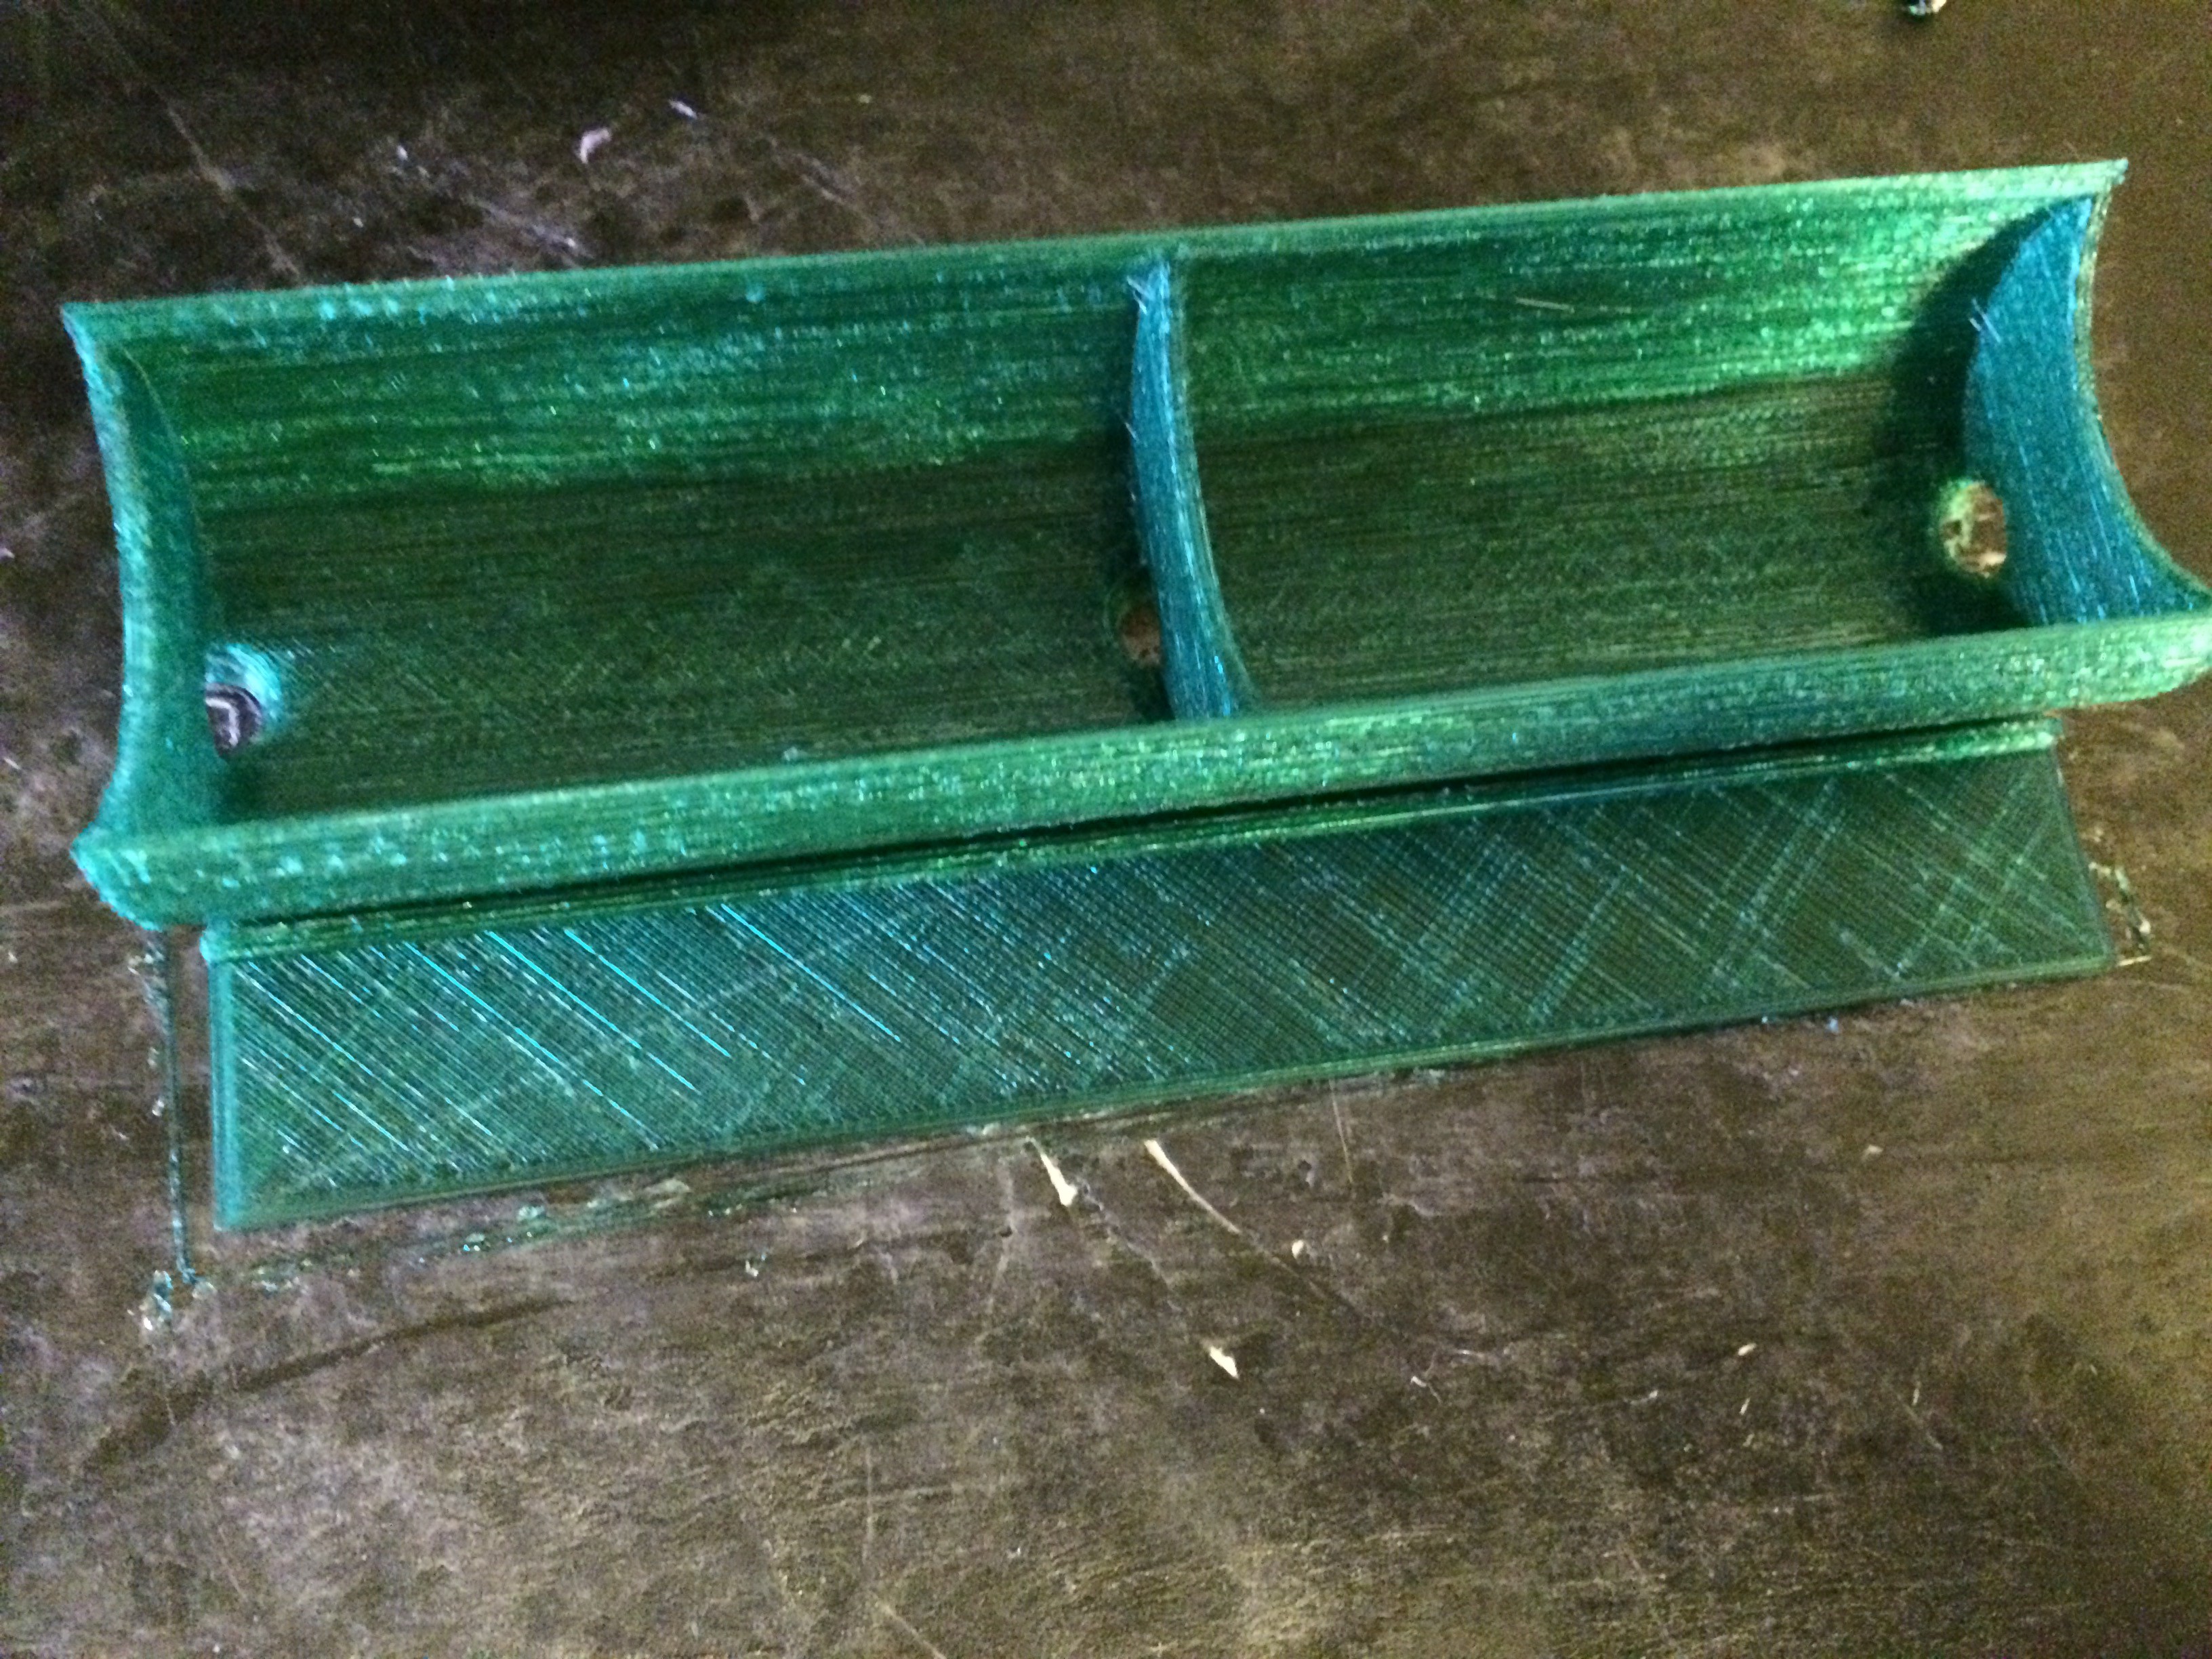
    The battery holder above is designed to hold two D cell Alkaline batteries and provide center-tapped ground, Vdd, and Vcc. I noticed that the D cells provide a full 2V unloaded when new so they are not really 1.5V cells and as such they are sufficient to drive opamp dual supplies and logic single supplies when operated in a pair like this. Even as the voltage drops to 1.5V or so, we still have enough voltage to run modern parts. And, well, I have four D cells so there!

    This is all part of my new motivation to get back to basics before continuing. You see, some folks have offered excellent advice to me like "use motors designed for the task" and "get store bought propellers" and such things that cost money. I'll have money for that in a few months but for now I don't so why not spend my time now using what I have - NOT to build a working project, BUT to build the pieces of that project that I can build with what I have.

    To that End I thought I'd take one of my last remaining breadboards and make a nice battery holder for it. See above, obviously it grips the battery (or I hope it will) by being slightly over half-round and the three horizontal segments with spherical holes in the bottom are designed to wrap about six inches (150mm) of wire around each piece there to make battery contacts. I left 2mm on each side as play for that (4mm per battery) and the wall thickness is 2mm for reference, so that should work out fine.

    I'll keep you posted and thanks many times over for all your great advice, I do appreciate it!

    Les

  • Lessons Learned

    Les Hall03/19/2015 at 04:46 8 comments

    So the birdcopter has served its purpose and that was learning lessons. The first is that I do need a driver, the 40mA from the processor is insufficient to drive even these tiny motors. I have always wanted to drive directly from the processor and this attempt proves I cannot do that. Of course we all knew that but I had to try.

    Next up the motors may not spin fast enough to generate enough lift. I will try some additional prop designs but as it seems there is insufficient lift. Mostly because the circuit board is too heavy (it is durable, thick fiberglass, not sure why I was thinking it could be the basis of a flying bot.

    Finally as predicted the props do not move enough air. I will attempt to come up with a printed prop design that does. The photo shows a 4.5V (three AA cells) power supply directly driving the pink propeller and it does not lift the craft when balanced on the center.

    So more work to do, I learned a lot and I will tinker with this some more before calling it quits and going with a new one. Having fun!

    Les

  • Birds of a Feather...

    Les Hall03/17/2015 at 19:04 0 comments

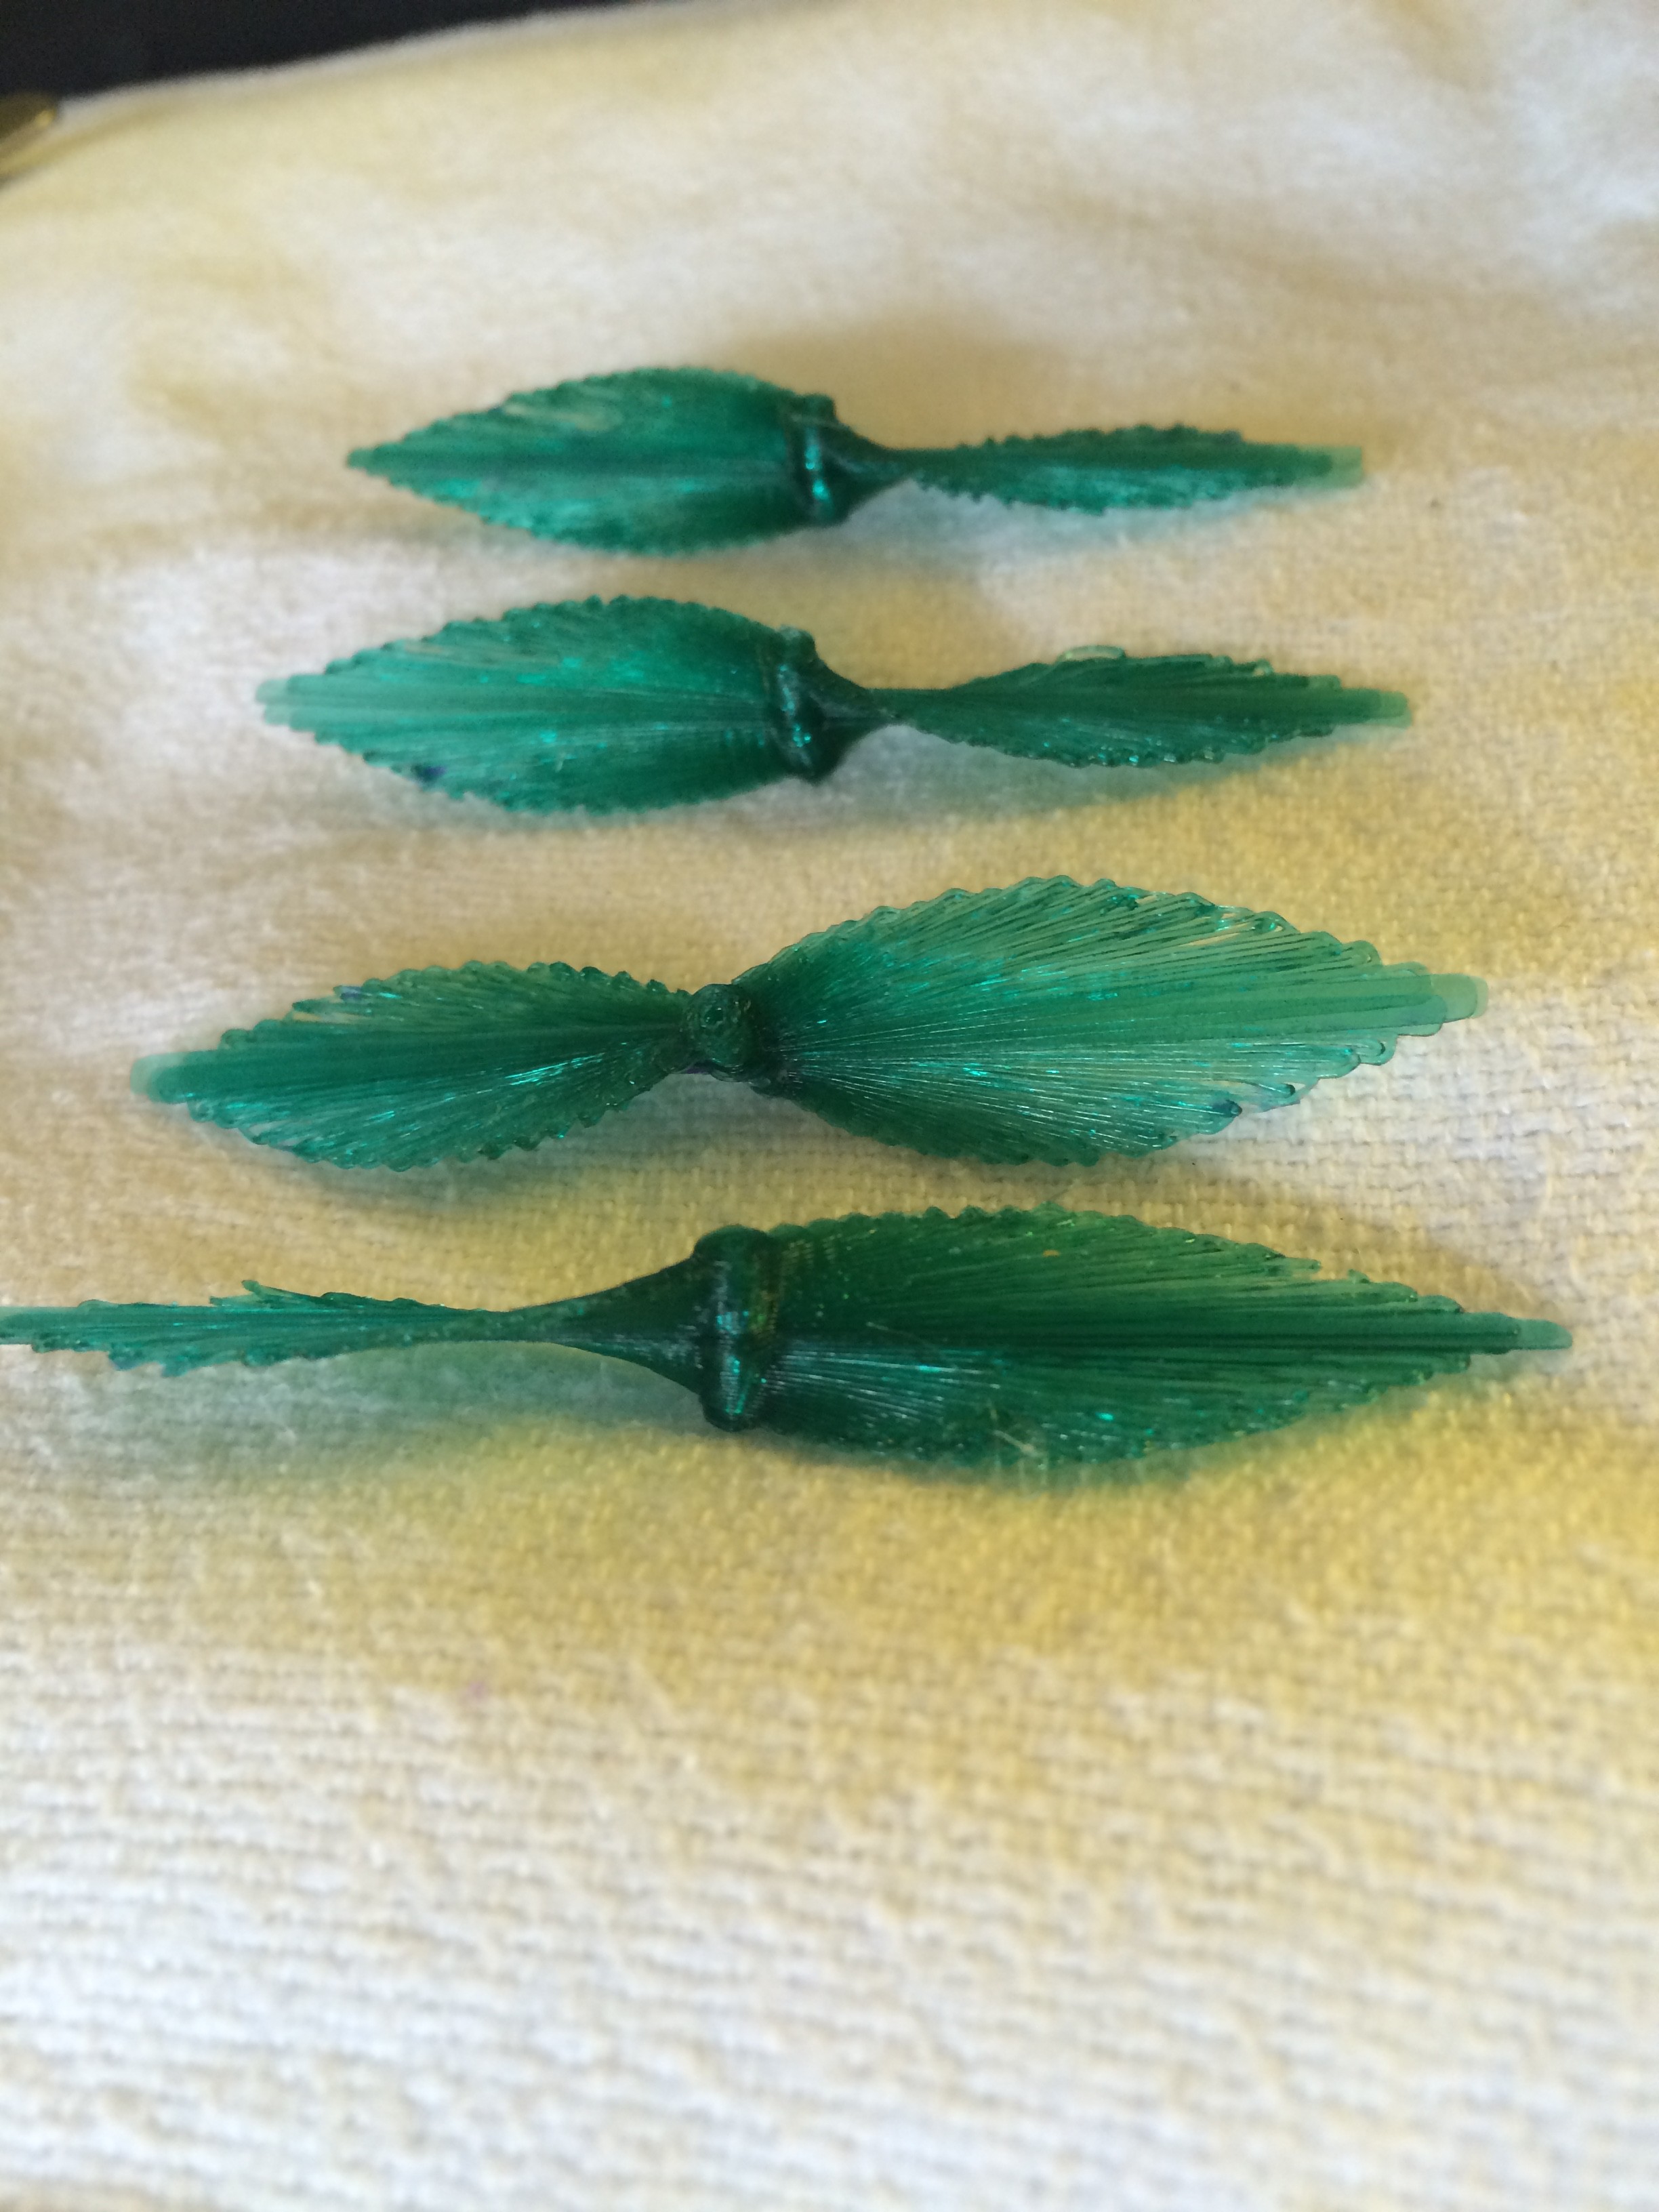
    Side view of four props (glued together in pairs)
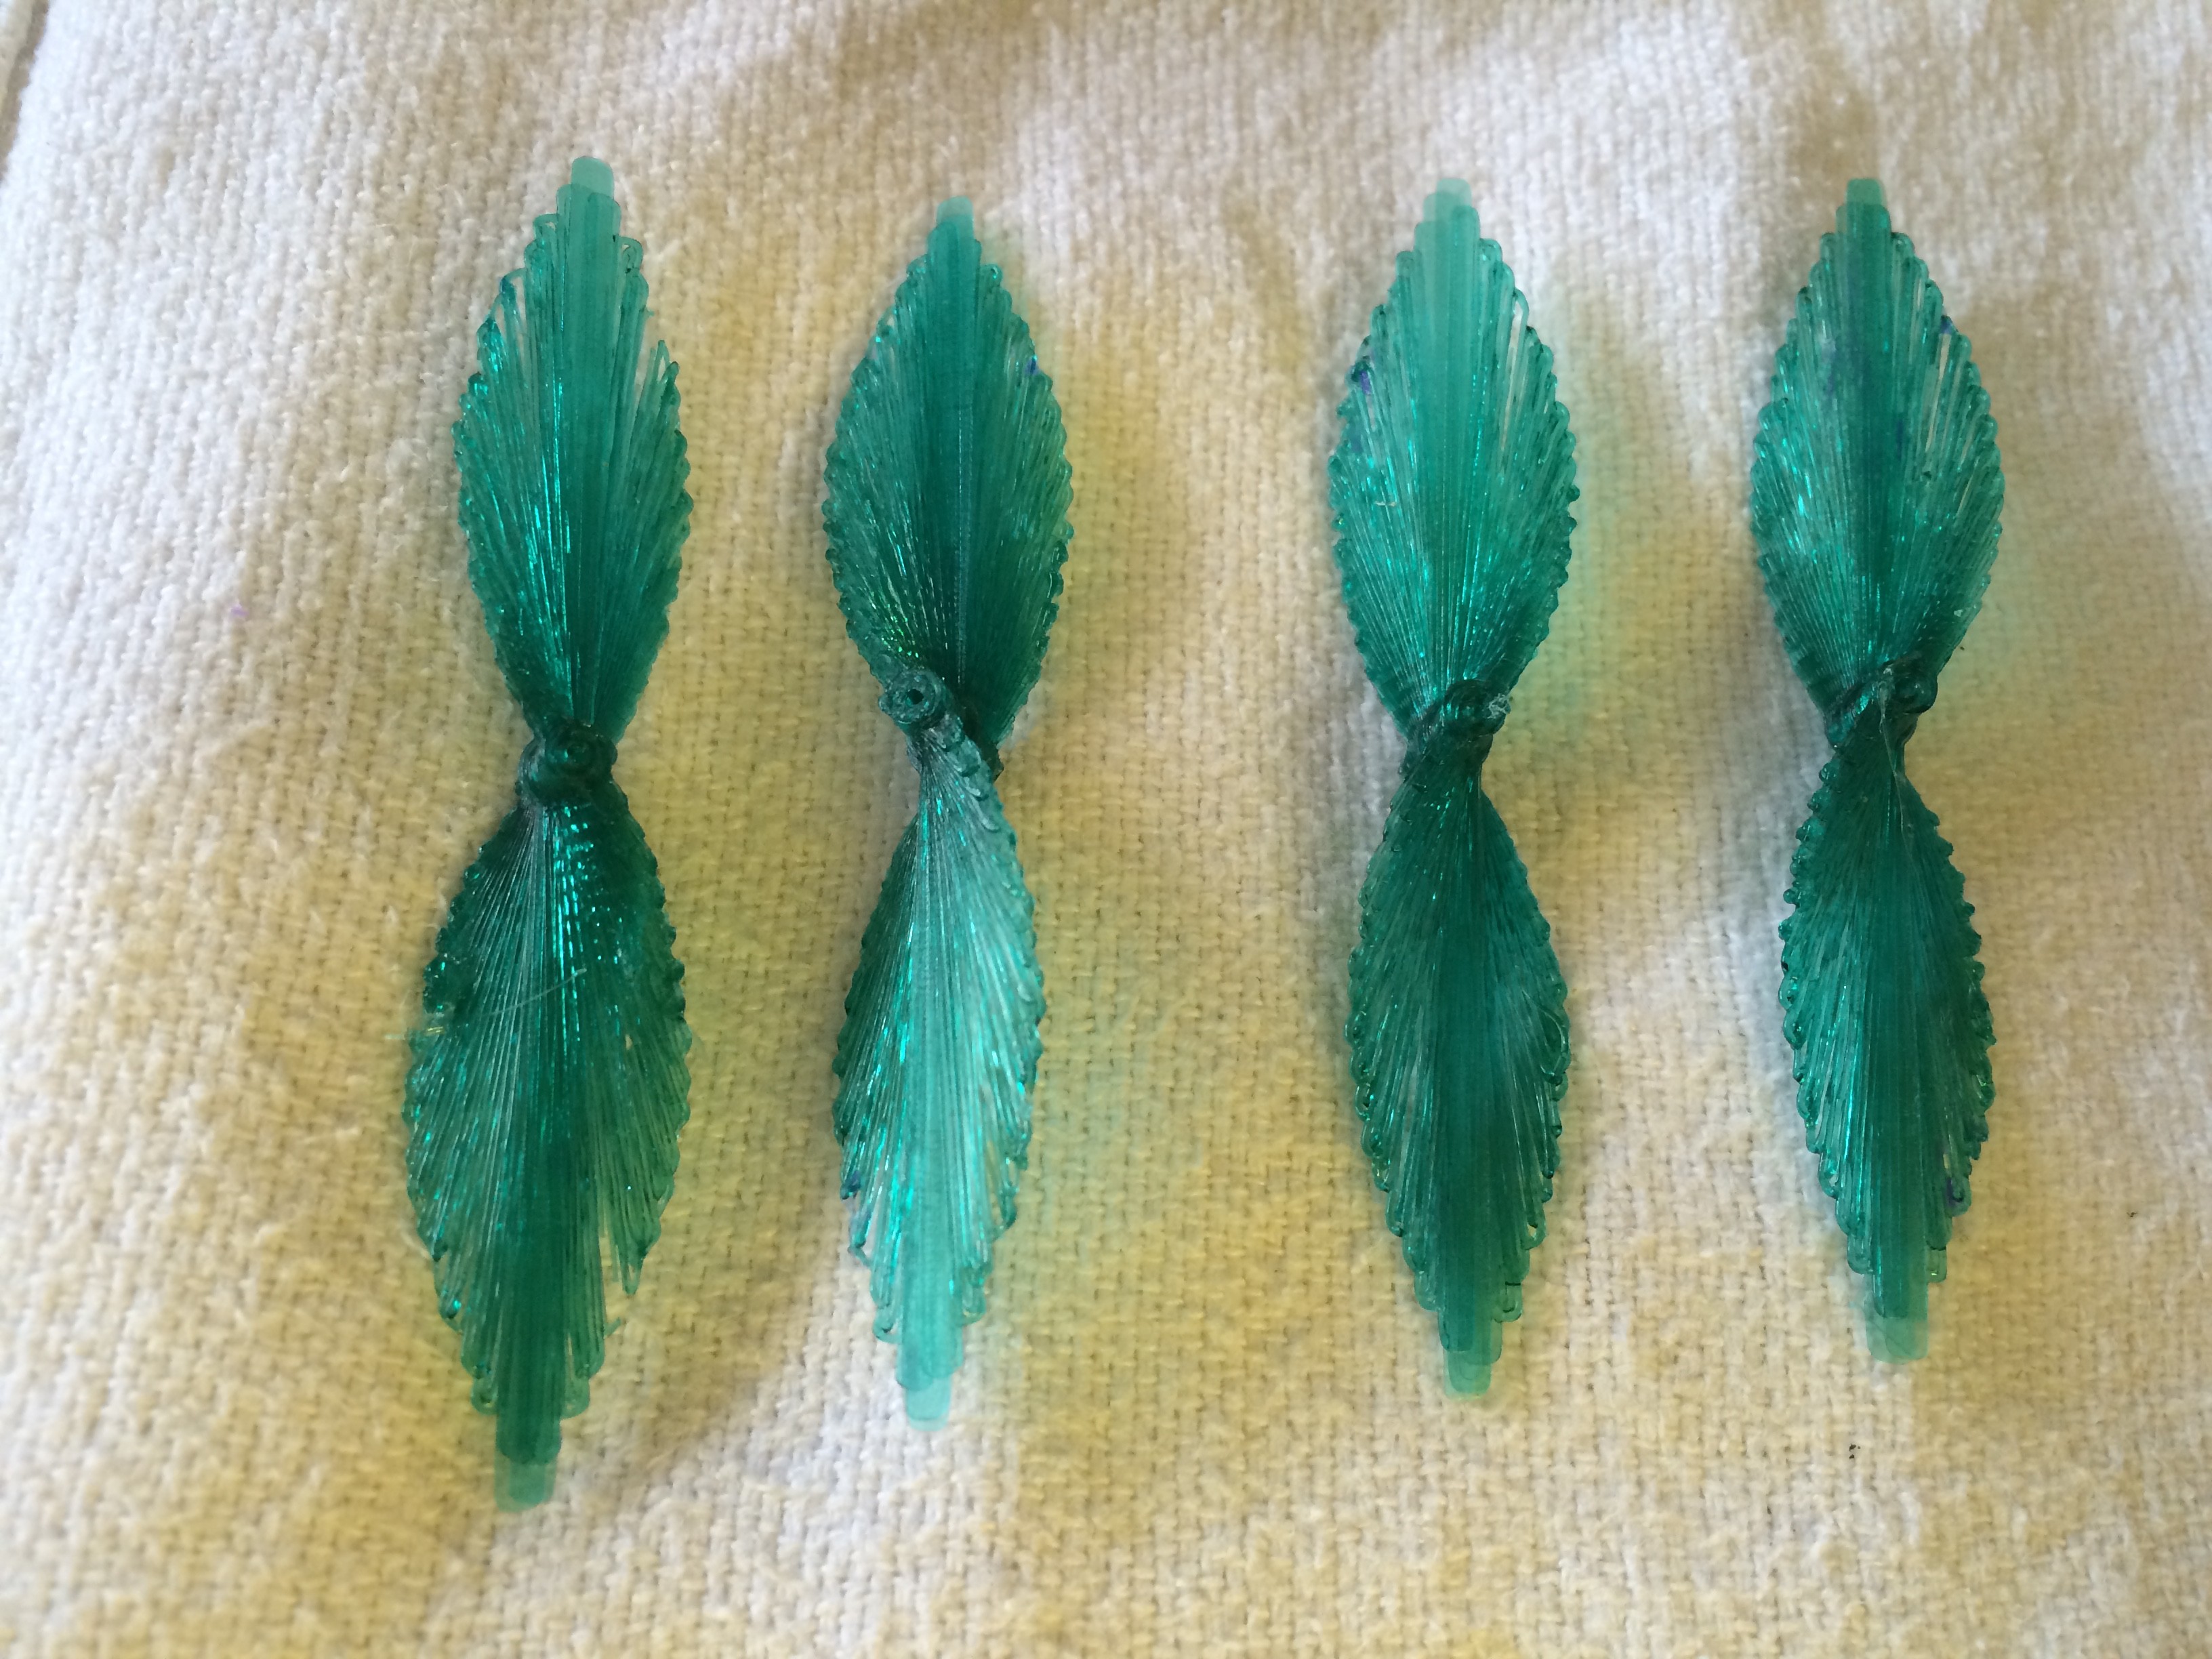
    top view of same props

    The above photos show four propellers that I have made by printing eight prop halves and glueing the halves together. These props look cool in that they are leafy, feathery shapes accentuated by the stepped feathered texture and edges.

    Their beauty is not skin deep, however, as they have the interesting property of adjusting their angle as a function of radius. This means that air at the core has one angle and air at the tip another, with gradation in between.

    So in the center where the prop rotation is slower, you get more pull on the air from the angle and as we approach the edge we get less of the pull due to the prop angle and more due to the higher velocity of the prop at that radius. neat huh?

    I don't know if regular props are made this way or if this is a new thing, but i thought it would be nice to share with the hive mind and see what the reaction is

    Les

  • the BirdCopter

    Les Hall03/17/2015 at 03:55 9 comments

    I often evangelize on the element of divine inspiration in creativity and today a clear example occurred. I was wondering how I could ever make a decent propeller when All I could do was make those goofy wheel-like things you saw in a recent log entry on this project. Not knowing what to do, I decided to clean up the OpenSCAD file by deleting unused modules and unused parameters.

    I managed to delete only unneeded things and i did however delete one useful parameter. Open SCAD simply substituted a 1mm (near zero sized) value for that parameter and BAM! out popped a gorgeous bird-inspired wing/feather like propeller of classic proportions. I was happily surprised and a bit startled that a mistake like that could produce such a dramatic rags to riches result, then I remembered the divine inspiration component. Here is a look at that propeller (and a nice new light frame for the copter):

    You see, and I'm sure you know this already but it's worth putting into words, God works that way. YOU have to make the first effort, take those first steps and plug and chug your way along the path until you get stuck on something and that's when God steps in and BAM! tiny miracles happen.

    So anyway I did some testing and this new design is the result of redesigning for improved lift and lighter craft. More to follow, tomorrow: soldering a test circuit!

    Les

  • Minimalism in QuadCopter Design

    Les Hall03/16/2015 at 12:54 0 comments

    Someone (I have a tough time with names) followed this project and made an insightful comment about my control system. I was trying to make a stable quadcopter without a gyro - and that's a nono! Mainly because the copter would spin out of control without angular information. I should know better having actually bought a toy quadcopter that was so low in cost that it had no gyro, resulting in very unstable flight. Not to mention I did some test engineering work for the Navy on the Harrier's equivalent internal sensor. I should know better!

    What drew me into it was minimization, or the excessive exercise of same. I really want to make a very small quadcopter so it can be used in new ways, so I want to use the ATtiny84 processor (which is an Arduino chip with only 14 pins) and the smallest sensor package possible. I thought that perhaps I could do some temporal decision based control by mounting the sensor offset from the copter's origin and detecting common-mode signals between X and Y, then differentiating between drift and rotation by observing the copter's reaction to control signals. I may just try that while I'm waiting for parts to arrive which will take at least a week and a half (sigh on a tight budget right now).

    But really you do need the right system in place, so I must choose between using a second accelerometer mounted opposite the first or a wonderful little $20 part sold by Adafruit. I know I can read the analog signals of the dual accelerometer approach easily, but the other part presents a problem with the software. I went ahead and tried to compile the example program provided after installing all the Adafruit control libraries and dontchaknowit it ALMOST works on an ATtiny84. The problem was that the soft serial library is required on the ATtiny85 and when I fixed those errors then i got errors from the Wire library and at that point i quit because I don't know of any softWire equivalent library or other fix. Also the program may not fit on the 8k of space available, not sure about that.

    This left me exploring minimalism alternatives including other chips and so on and looking into all that is required, on my slim budget, i decided to punt and just go with a dual accelerometer solution. I certainly will, however, attempt the single accelerometer hack just to see if it works.

    Les

  • QuadCopter Design

    Les Hall03/16/2015 at 00:51 2 comments

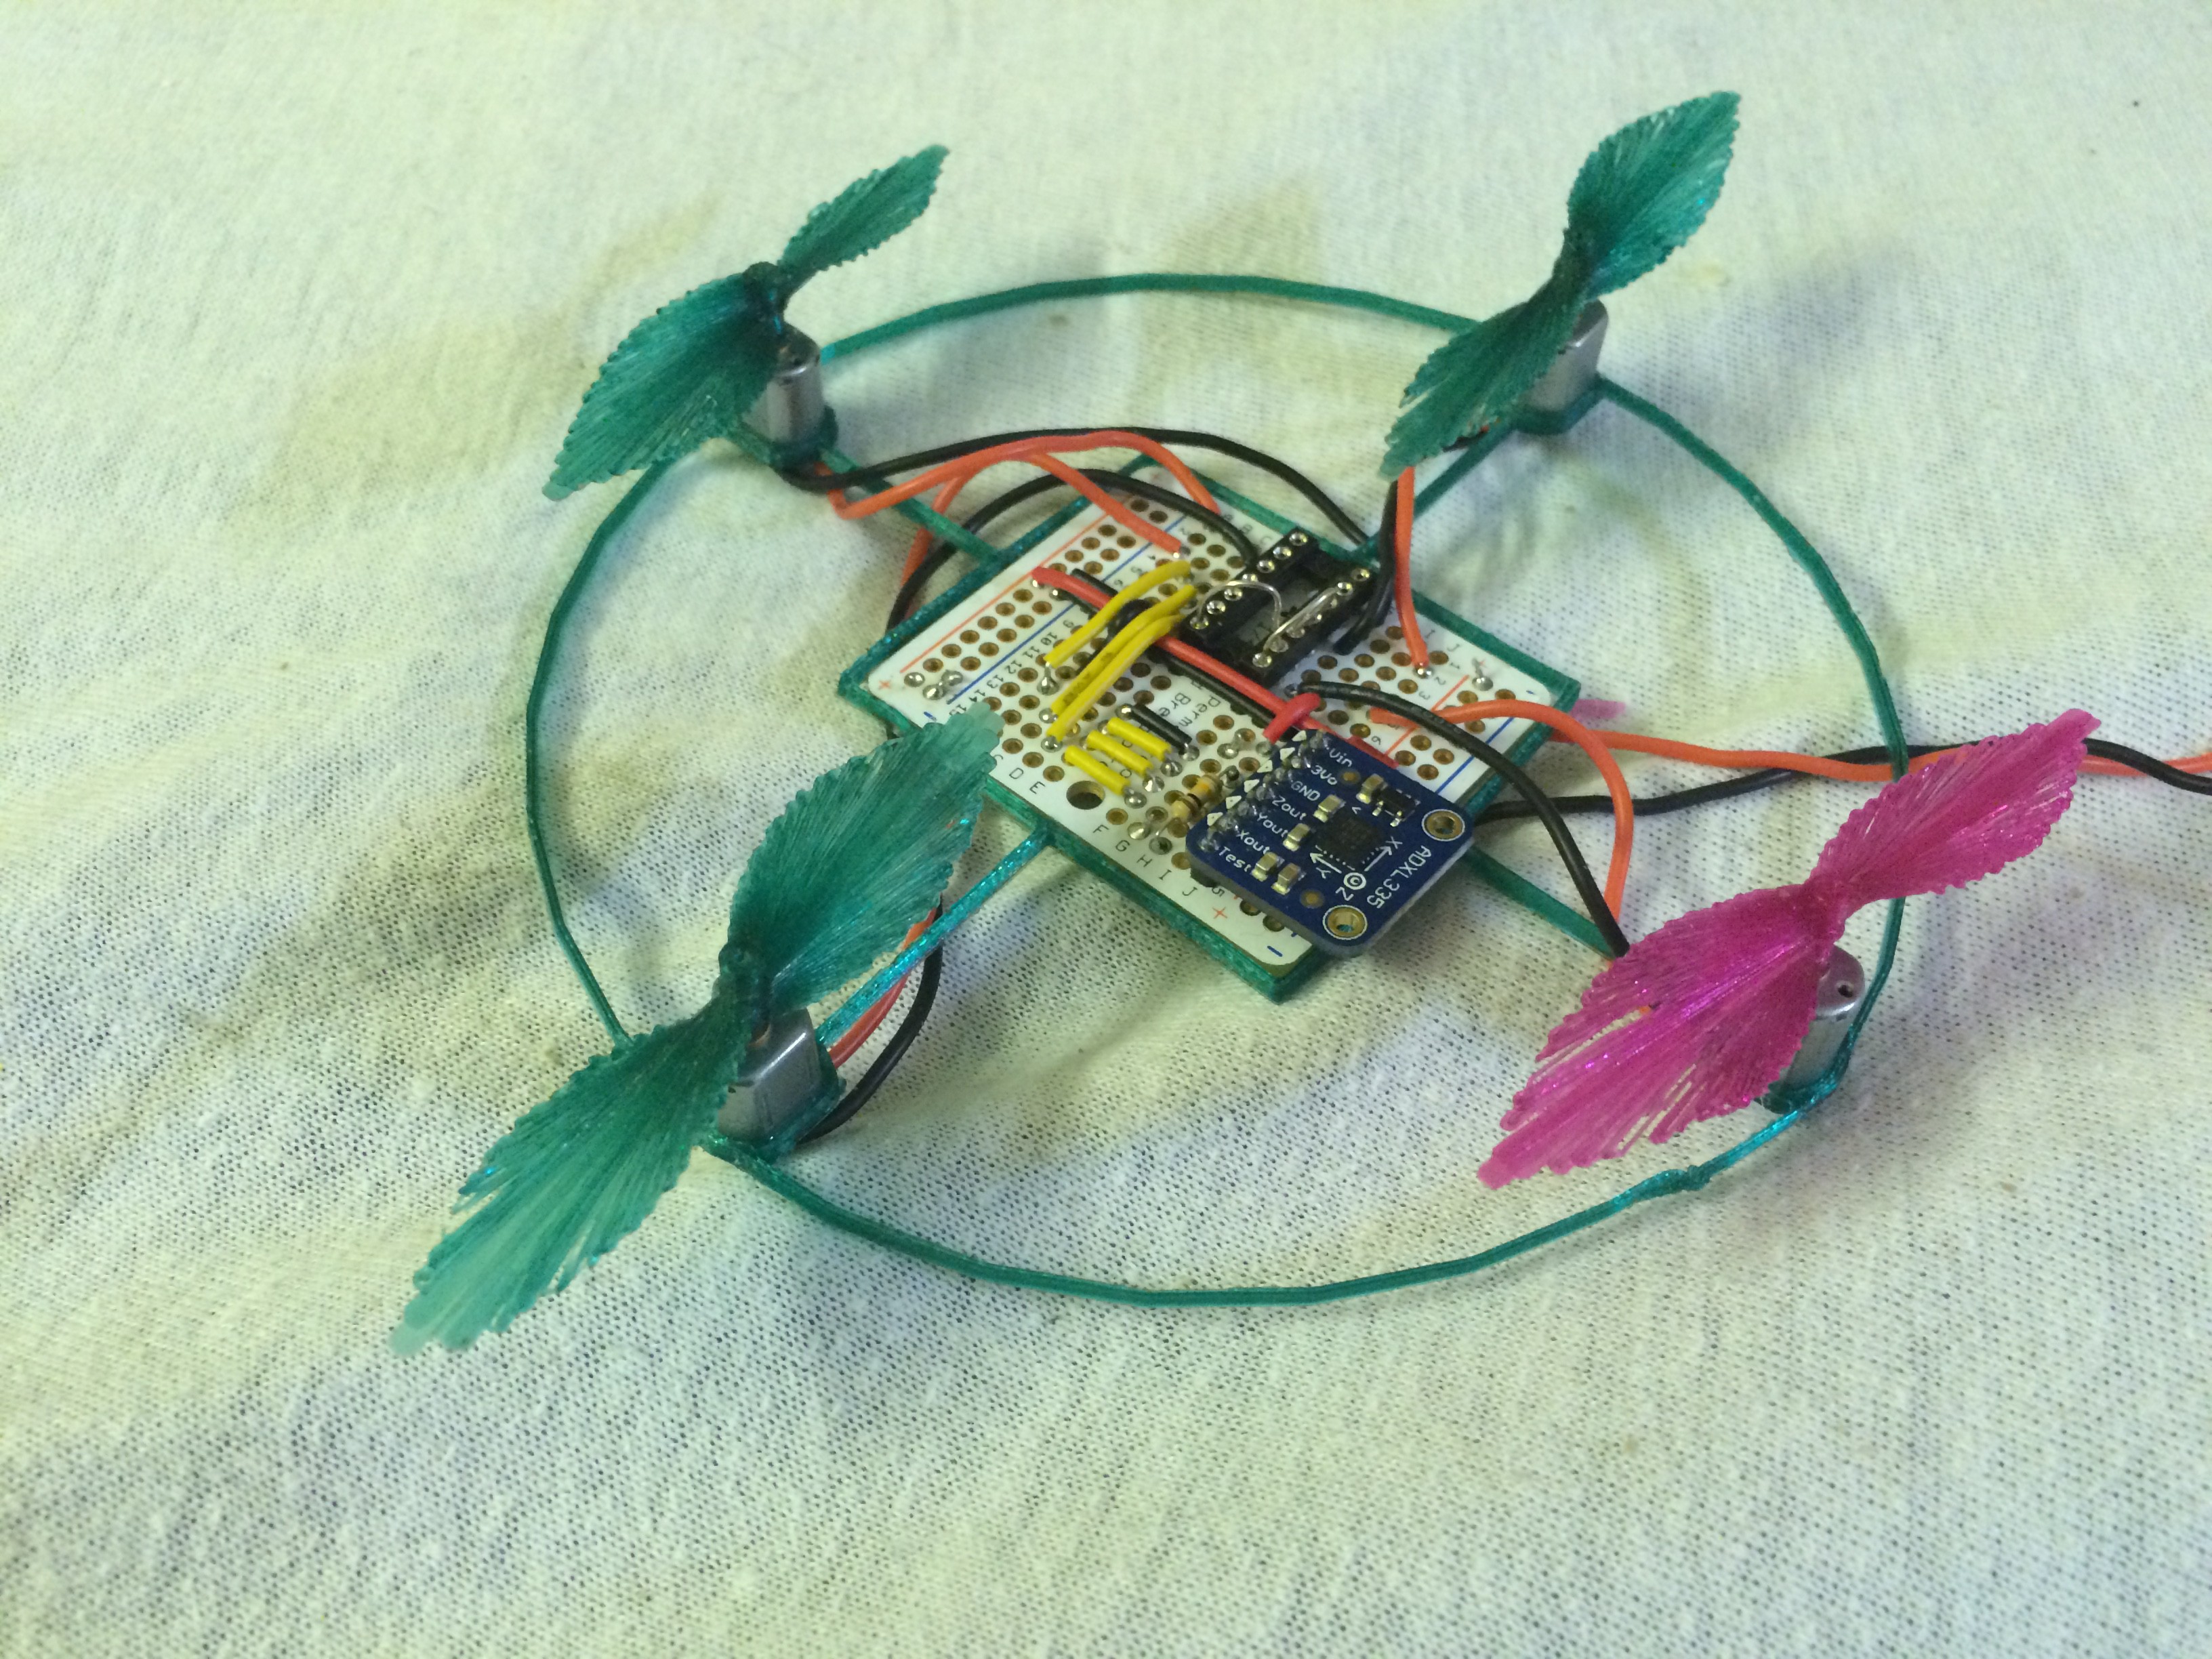
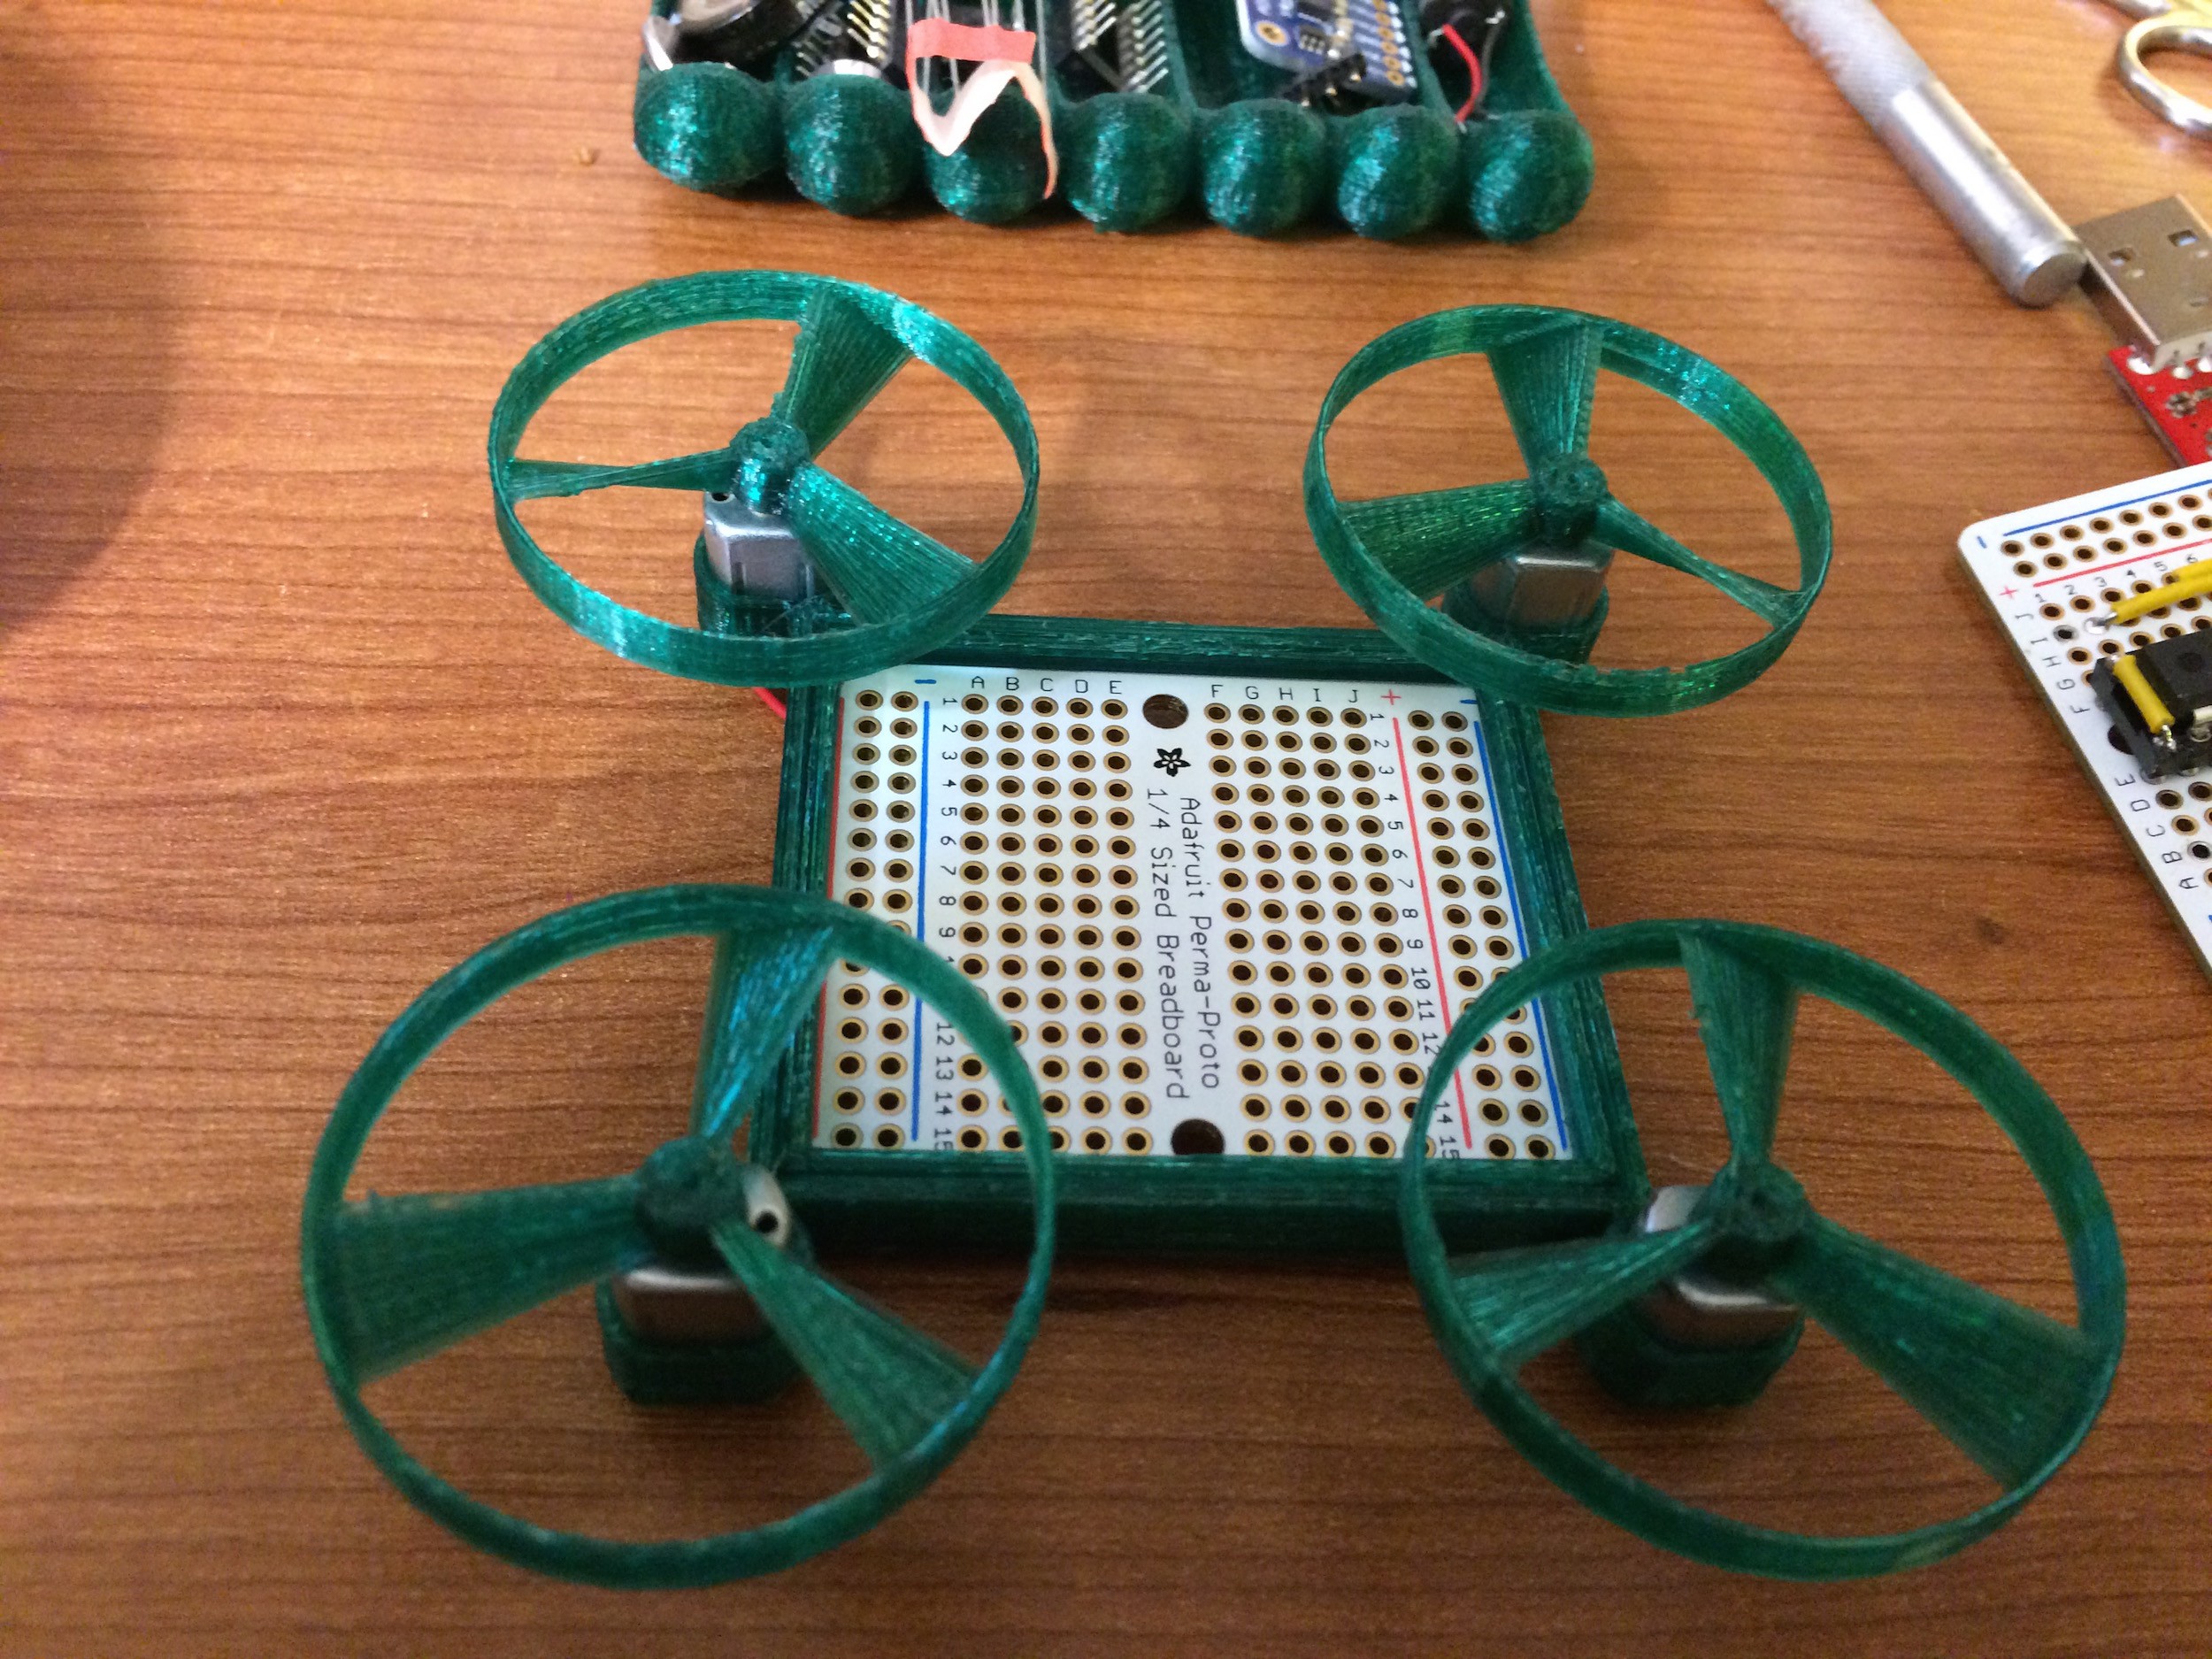
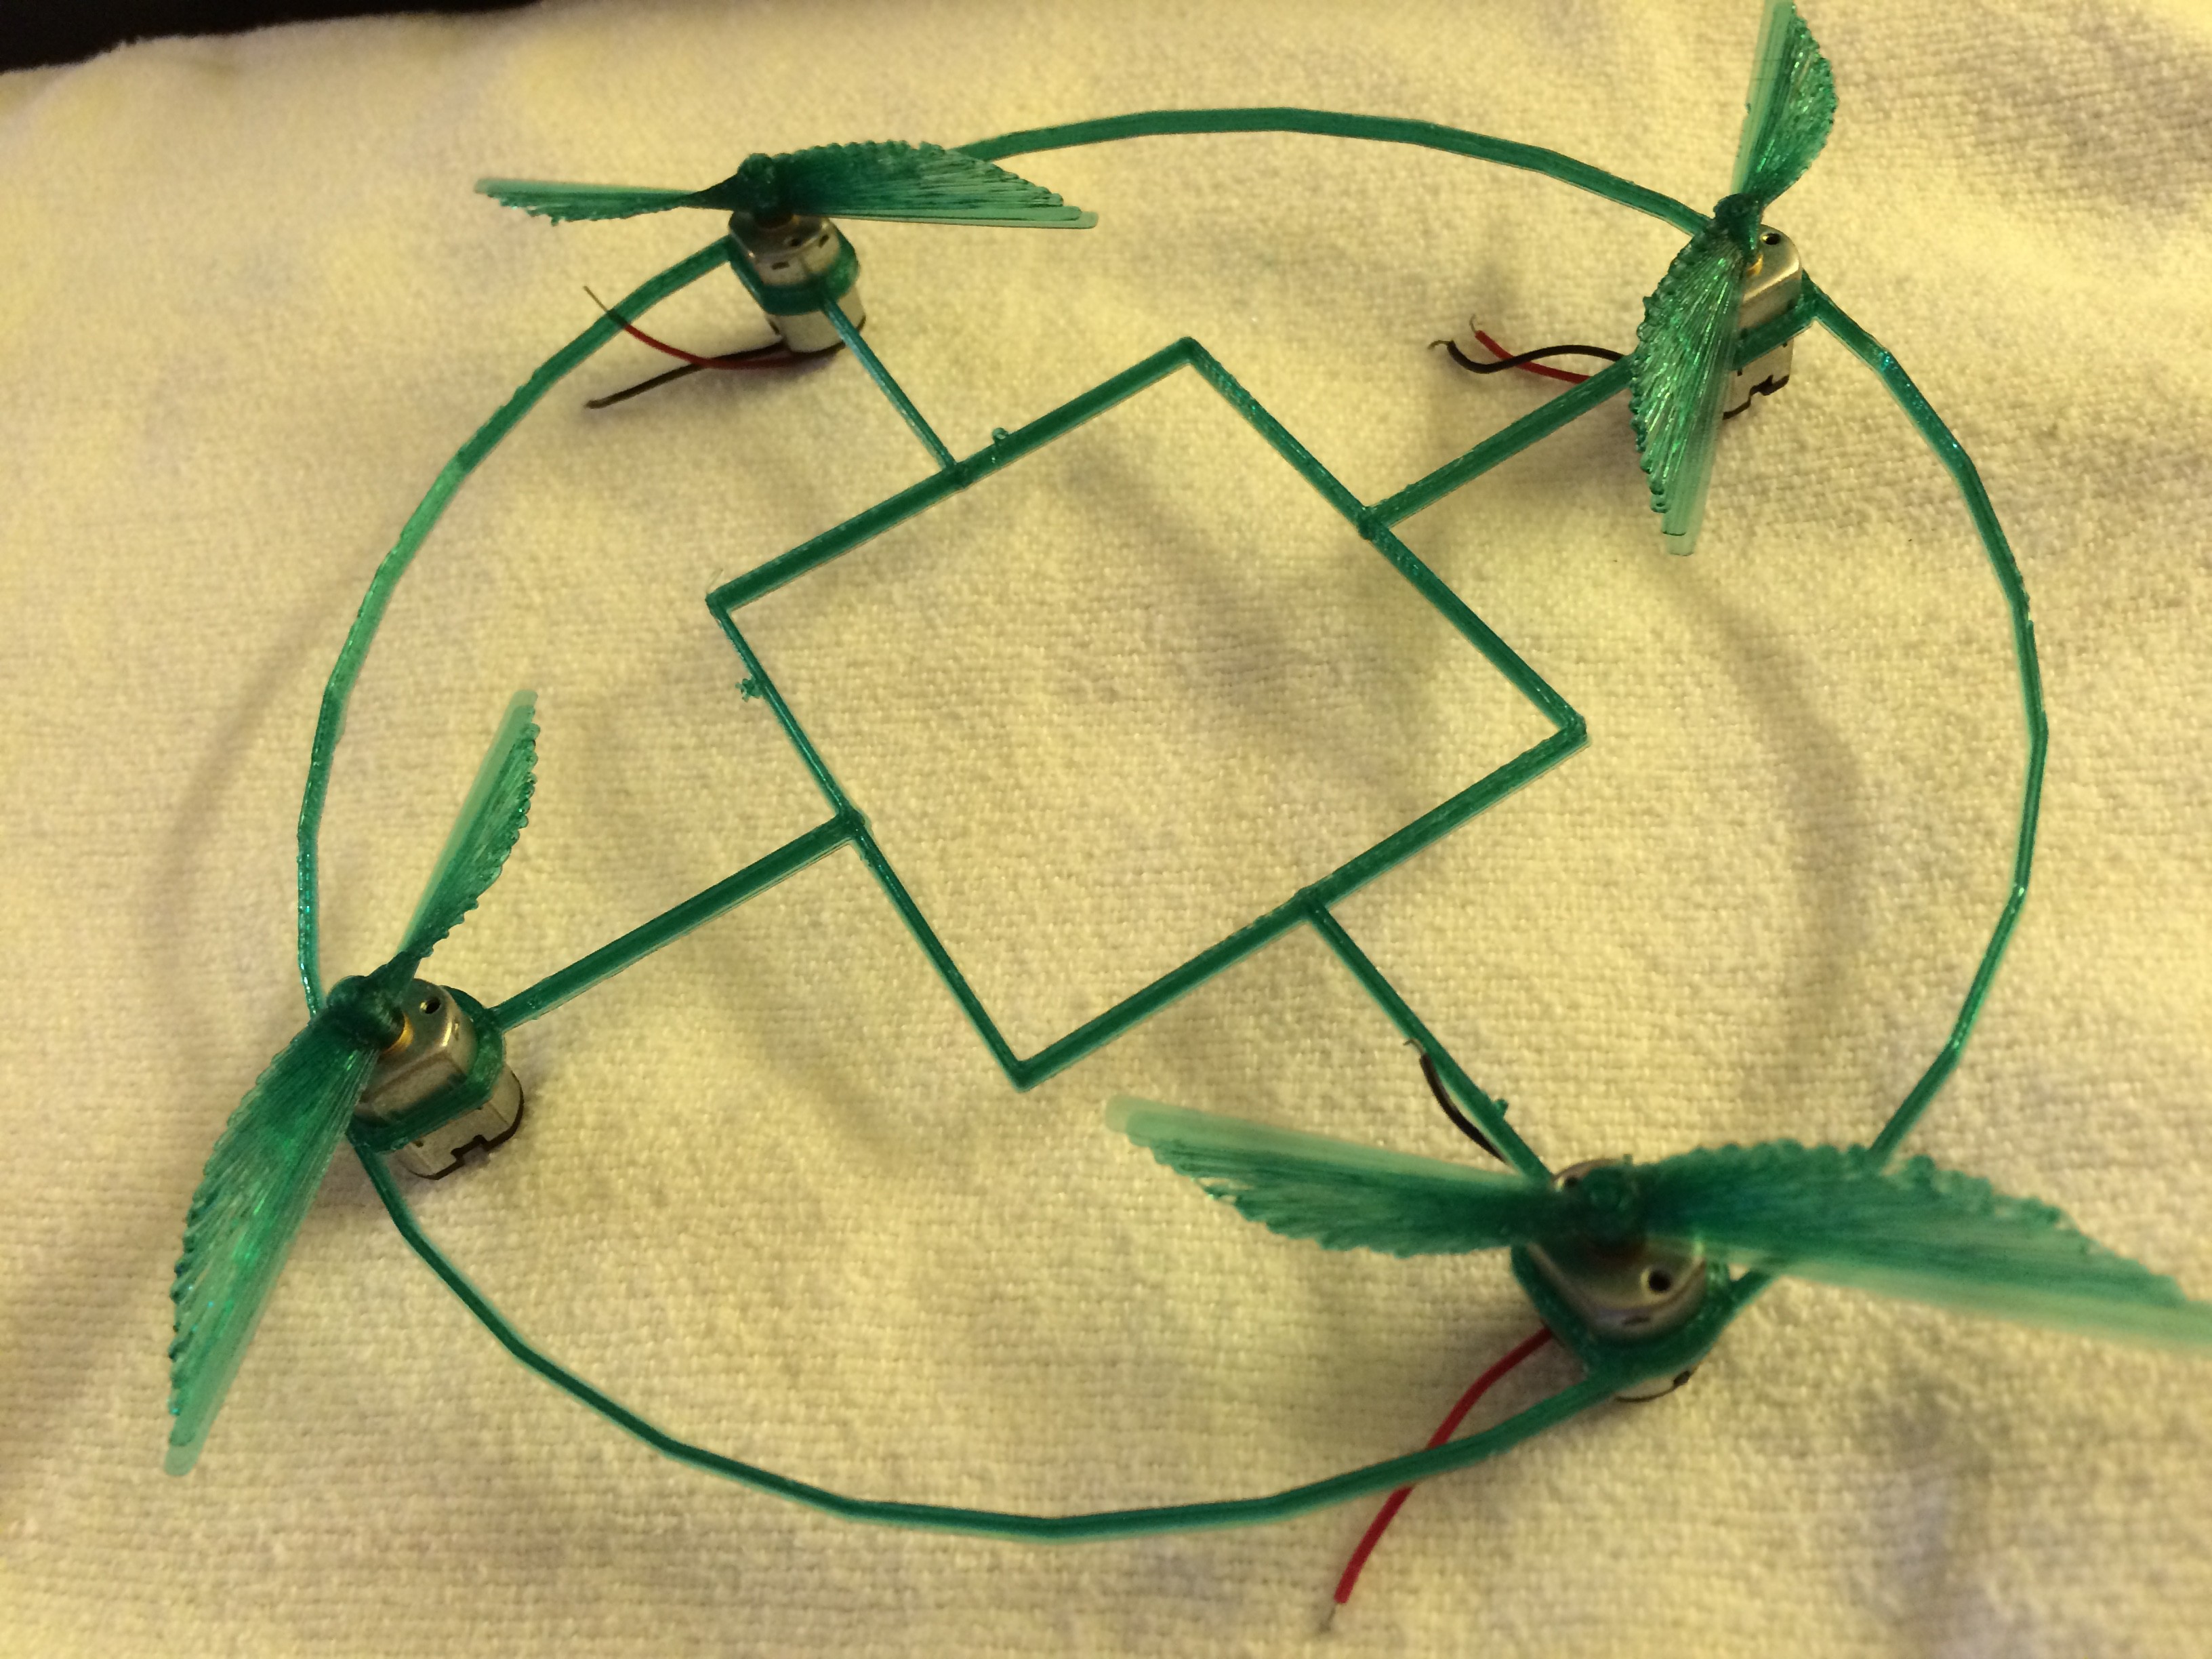
    The photo above shows the 3d printed quadcopter that I designed. i have no idea if it will fly. The motors are 1.5-3.0 Volt DC motors but they are not the skinny type typically used for quadcopters. also part of their airflow is blocked by the circuit board. On the plus side I found an ADXL335 accelerometer and I will mount it off-center in an attempt to detect rotation with it. Unfortunately I have no gyro.

    The purpose of the quadcopter will be to hover in place. That's it, just hover with no controller. That's my first baby step in moving toward an autonomous drone fleet. If the motor and propeller arrangement is not strong enough to lift the craft, I will try to make a more capable frame for the board.

    I plan to solder the circuitry together soon (I have to do this outside and it requires permission due to oxygen tanks nearby). I will put the ATtiny84 in the center of the board, the ADXL335 in a corner in an attempt to measure rotation by sensing the x and y common mode component. This technique may be helpful for stabilization with no gyro.

    I am currently glueing the retainer in place to hold the circuit board and due to the show shaft length of the motors Ive had to glue on the propellers. Soon I will do an initial lift test. wish me luck!

    Les

  • Rethinking Things

    Les Hall03/13/2015 at 03:02 0 comments

    After giving the project some thought, I made some practical decisions. First, the concept of a dual environs vehicle is cool but overly challenging. Second, I want to get started and build something that works sooner rather than later (not wait for the move to occur in a month or two). Third, I get $60 in cash next week to spend on toys. Fourth, what the heck is that mock-up thing I made, a flying box that rolls on the ground? Puhleeze do a reality check on yourself, Lester!

    Well the utility of the box was an exercise in making parts fit on my 3D printer and also fitting a circuit board into the mix. great, so I did that and had fun doing it, but really... really... shouldn't the car be COOL? I mean, shouldn't it look like a lead sled from the 1930's or some other rad vehicle? Of course it should!

    So I took stock in my parts and decided to spend the $60 at a local Radio Shack. I have heard that Radio Shack has begun to offer quality parts for fair prices, unlike the rip-off days of the past, and since my moolah is cash, why not give them a shot. I'll need an inexpensive solder kit, some motors, and maybe i'll shop around for more sensors or switches because as it is with only motors and a 3 axis accelerometer, sensing of the environment will be king of bumpy, as in bumping into things, lol!

    Also I just realized that the filament i have is this beautiful translucent green and some small amount of translucent purple, plus the LEDs I have are red. These are nice Christmas colors so I will maybe think of something Christmassy for the theme.

    I'll be back to report more later.

    Les


  • LAW Drone Mock-up

    Les Hall03/12/2015 at 17:36 0 comments

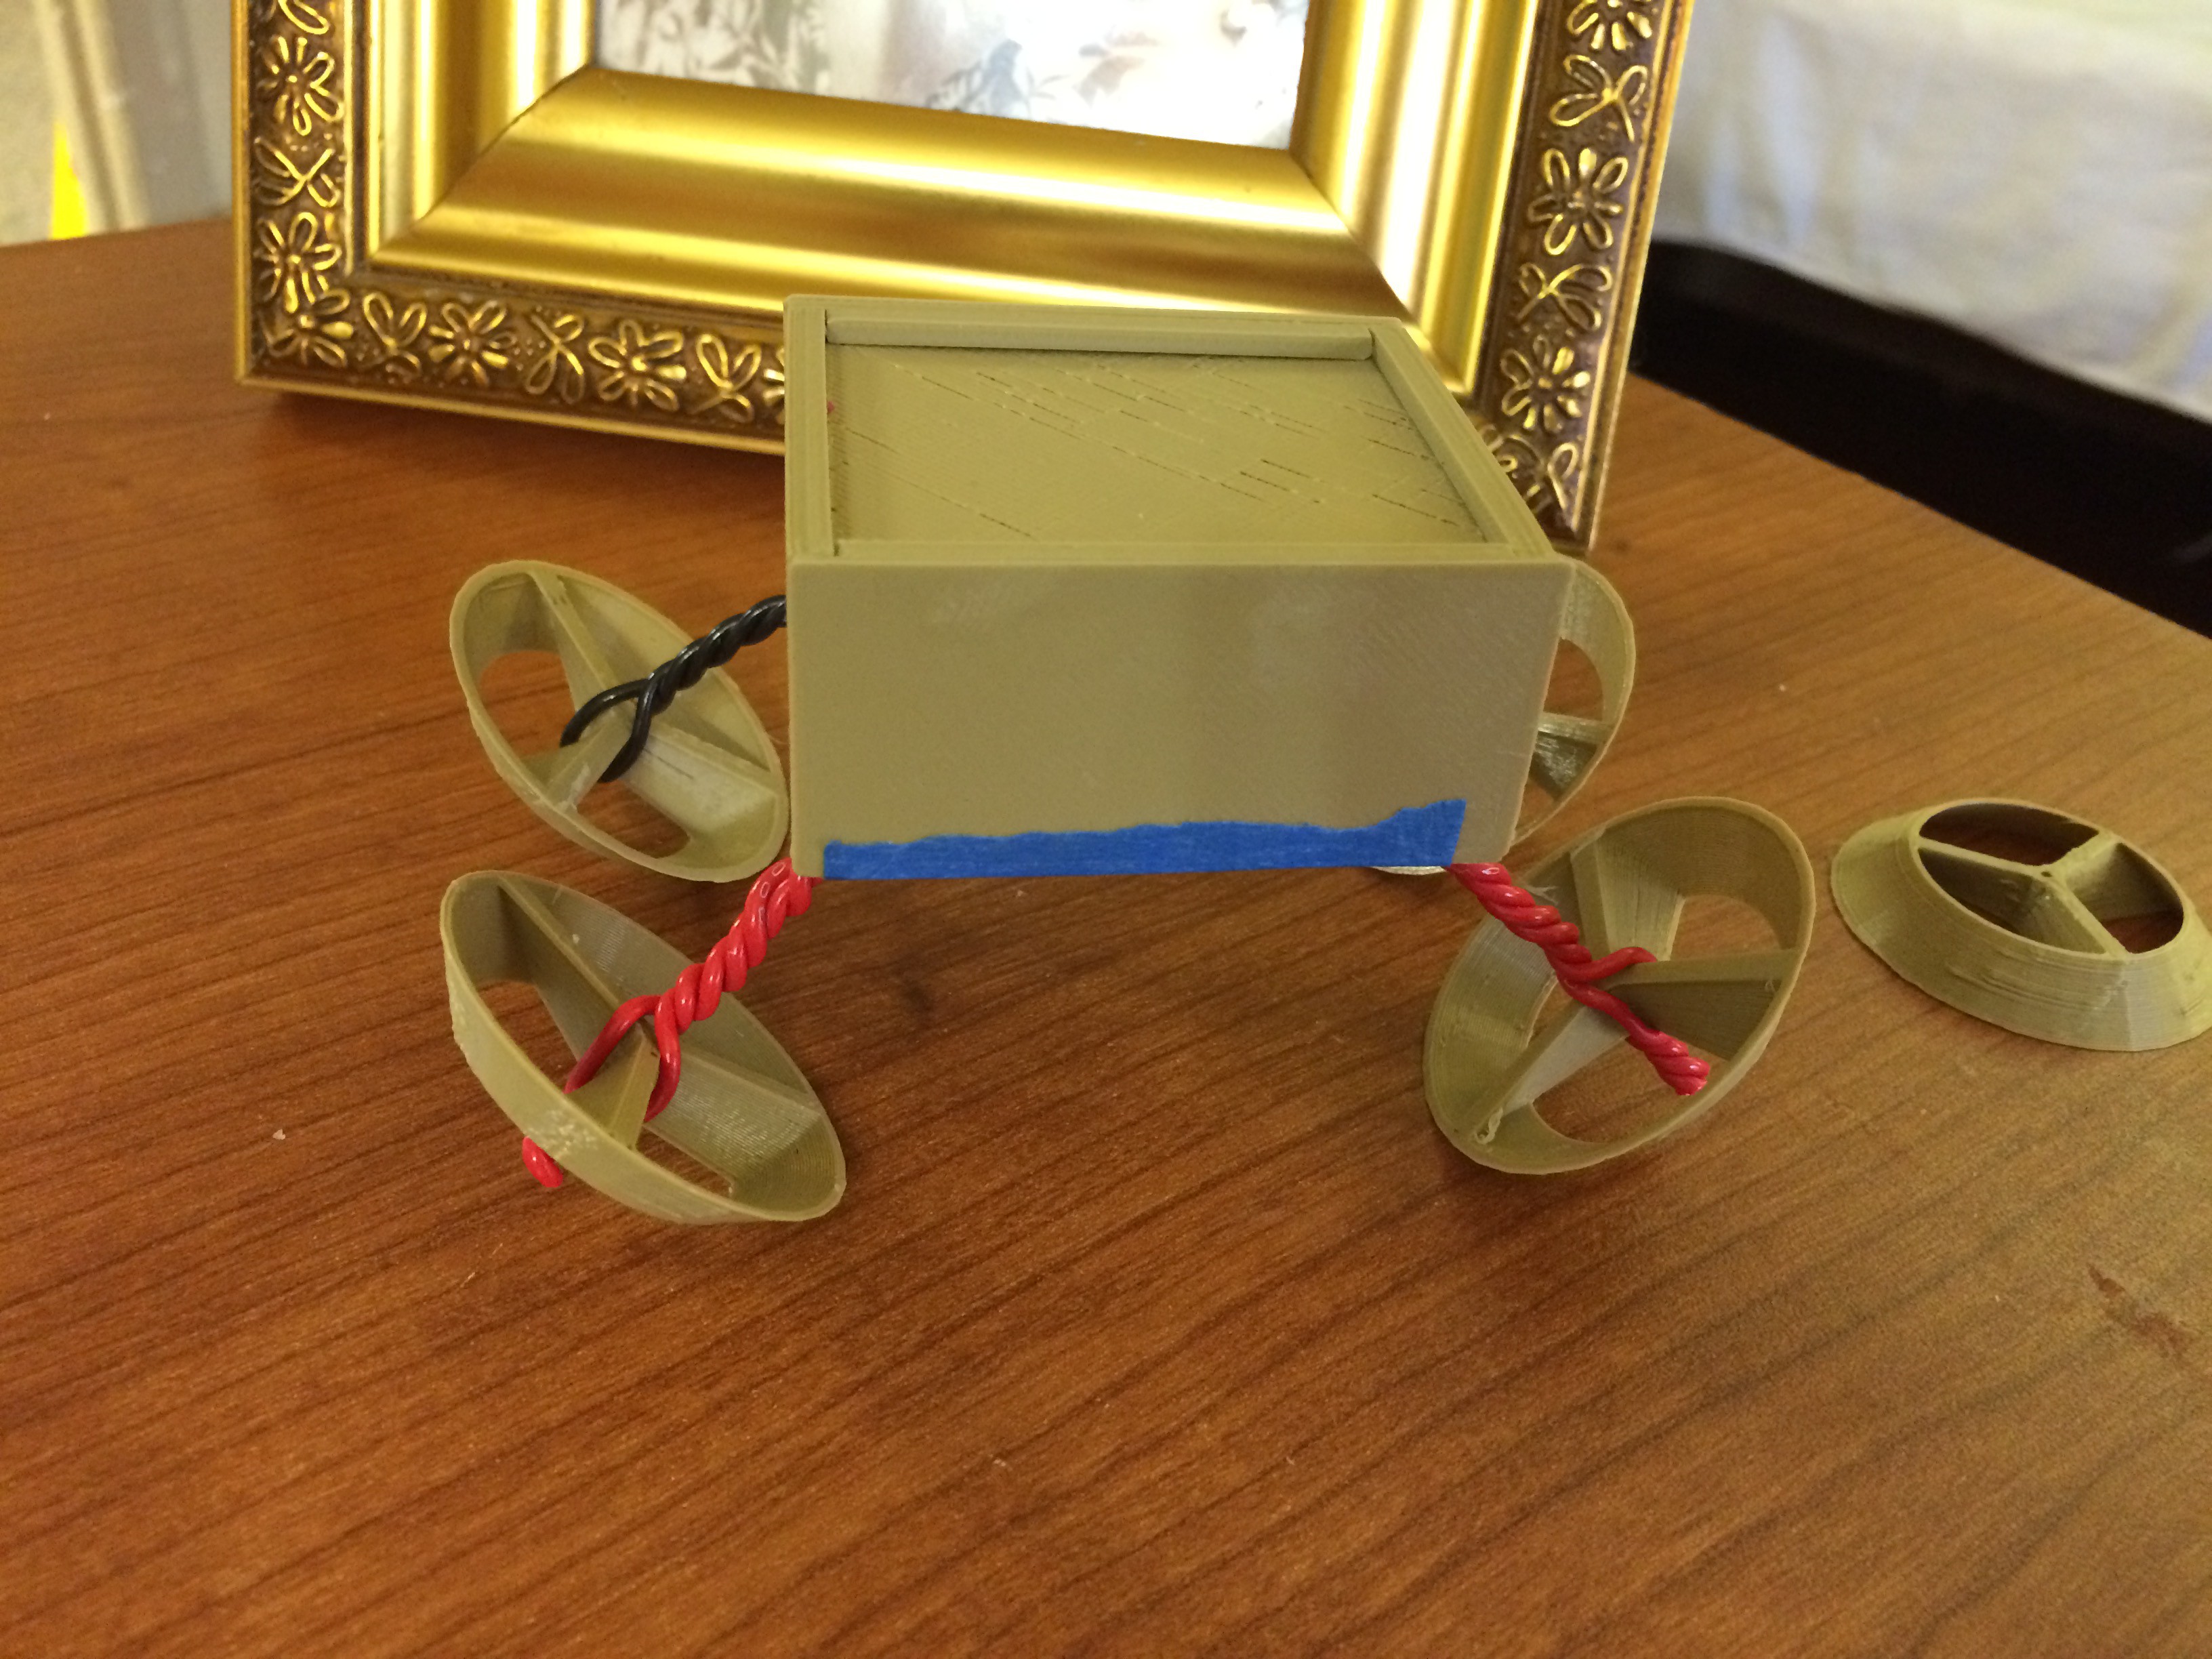
    The following image shows a crude mock-up of the direction I'm going with this Land/Air/Water drone that I am calling a LAW Drone, interesting acronym:

    Here you can see how a propeller can be a wheel and a wheel can be a propeller, plus probably work in water if the box is waterproofed and shaped appropriately. Of course such a craft will operate poorly in any of its three domains so it's value is in it's diverse utility. For certain situations and environments it will be well suited.
  • Drone Chassis and Flying Wheels

    Les Hall03/12/2015 at 16:44 0 comments

    I have made some progress on the Drone Chassis, which is basically a parameterized OpenSCAD box holding one circuit board. Revision 2 of the box does away with the unnecessary posts for holding the circuit board in place as they did not print well and uses the end caps and walls to do that job. The box super glues together nicely and the unglued cover snaps into place.

    I emailed the 10BitWorks Hackerspace here in San Antonio Texas about my ideas for a "LAW" drone which is capable of traveling on Land, in Air, and over Water. My friends told me that typically a vehicle performs well in one domain only and mixed domain vehicles perform poorly in either domain. I take this advice to heart and change my plan to include single purpose vehicles, dual purpose vehicles, and the oddball triple purpose vehicle. Why not, it's a swarm isn't it?

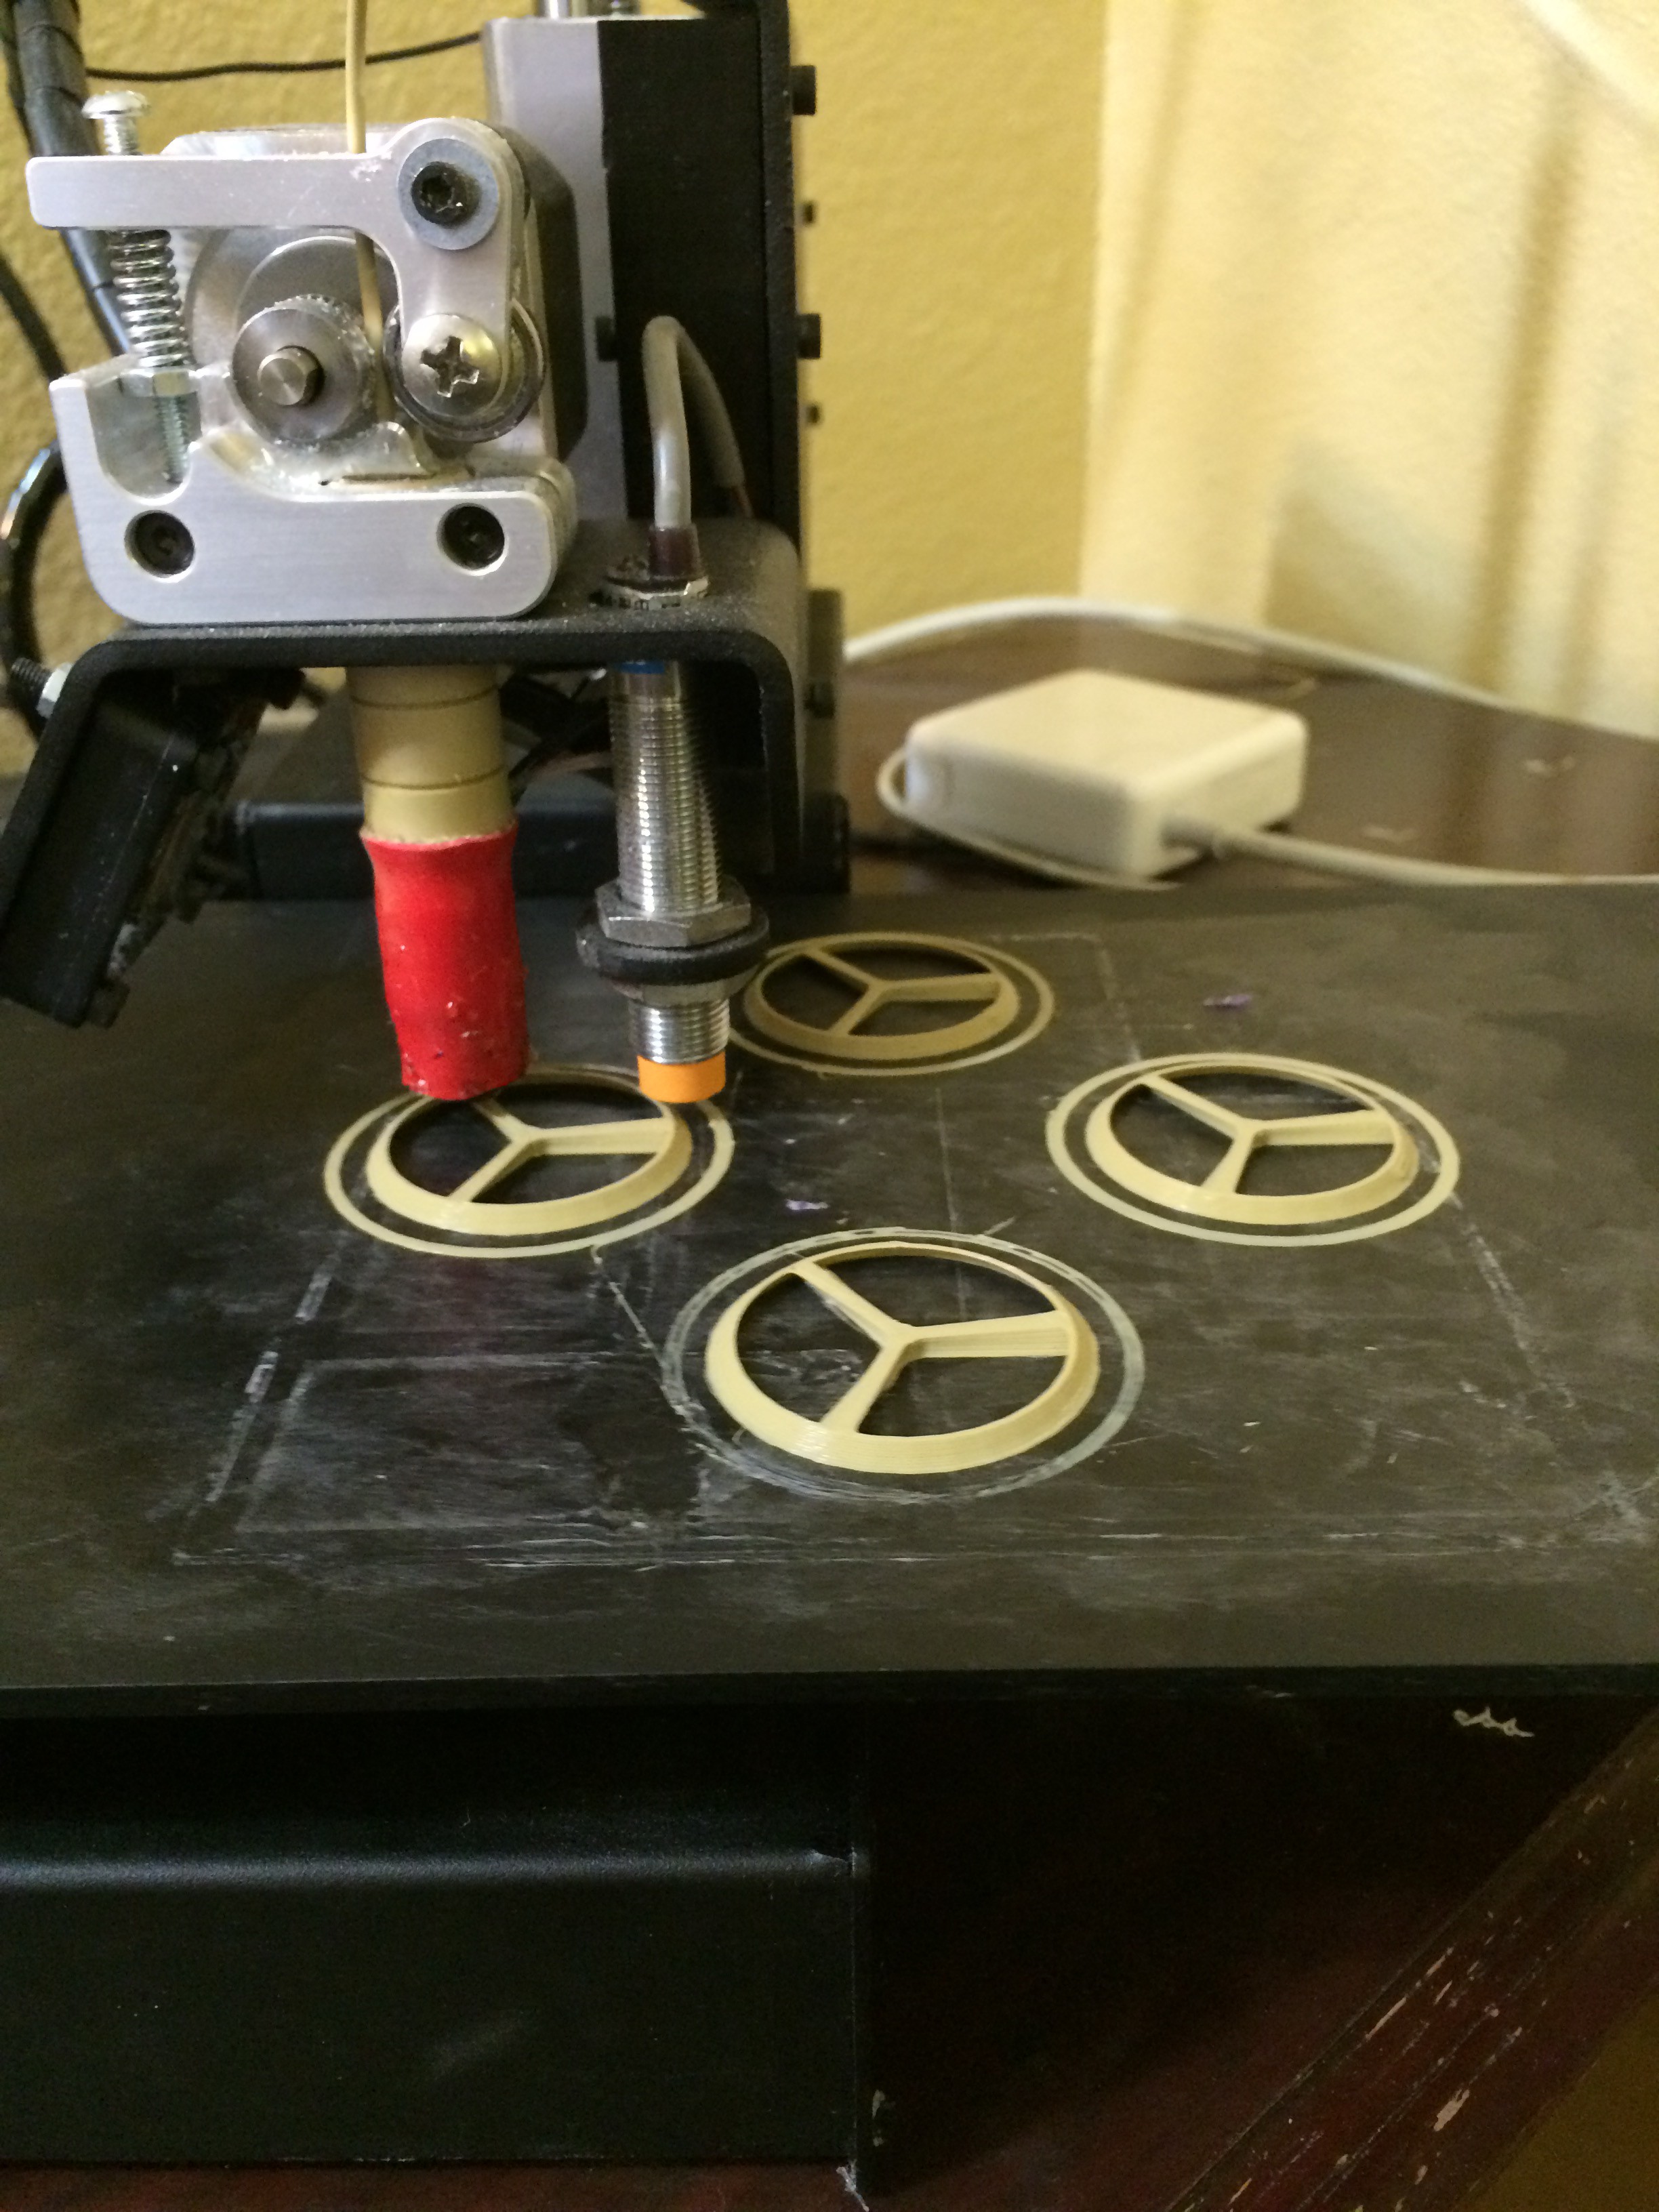
    To that end I figured out the math (trig) behind a tire/propeller that can function in both Land and Water environs. Here is a photo of the 3D printer printing four of them:

View all 11 project logs

Enjoy this project?

Share

Discussions

Similar Projects

Does this project spark your interest?

Become a member to follow this project and never miss any updates