SauronPi - autonomous Raspi camera
Standalone or network camera based on a Raspberry Pi A+
Standalone or network camera based on a Raspberry Pi A+
To make the experience fit your profile, pick a username and tell us what interests you.
We found and based on your interests.
gasket.stlThe gasket that goes between the fixation base and the sun skirt.Standard Tesselated Geometry - 84.45 kB - 03/11/2016 at 01:07 |
|
|
camerapi_closed_top_211523.jpgtop front view, box closed, hi resJPEG Image - 431.79 kB - 02/20/2016 at 02:08 |
|
|
camerapi_face_211542.jpgFront view, box closed, hi res.JPEG Image - 747.99 kB - 02/20/2016 at 02:08 |
|
|
camerapi_top_open_211558.jpgThe top view in high res, with box opened.JPEG Image - 1.17 MB - 02/20/2016 at 02:07 |
|
|
PareSoleil.stlThe sun protection for the camera (for better image quality). A piece of plexiglass should be glued in this to have a waterproof box. In future version i will include a grove for a rubber o-ring. Once printed, it screws on the support that's glued to the derivation box.Standard Tesselated Geometry - 88.58 kB - 02/20/2016 at 00:45 |
|
|
As you may have noticed, there are quite a few openings, which is not best for a waterproof system. But fear not, i have a solution :)
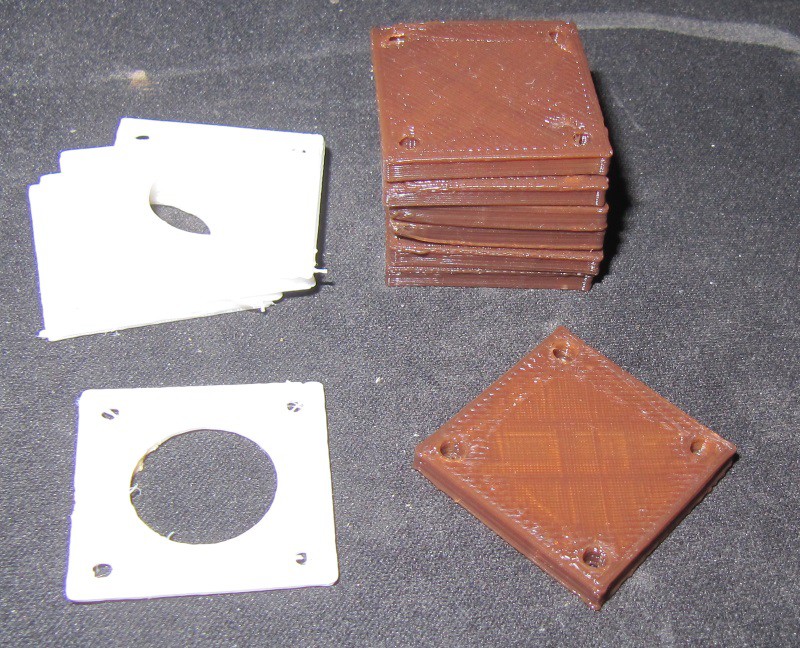
I did print a ninjaflex gasket for the main lid of the case :
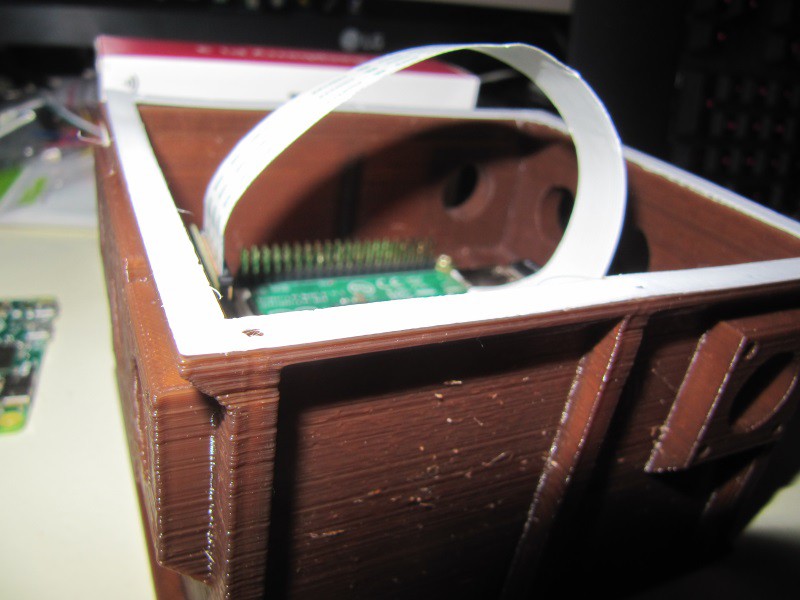
As ninjaflex is elastic, it can be squized when tightening the screws on the lid, thus ensuring a gapless interface between the top lip of the box and the lid.
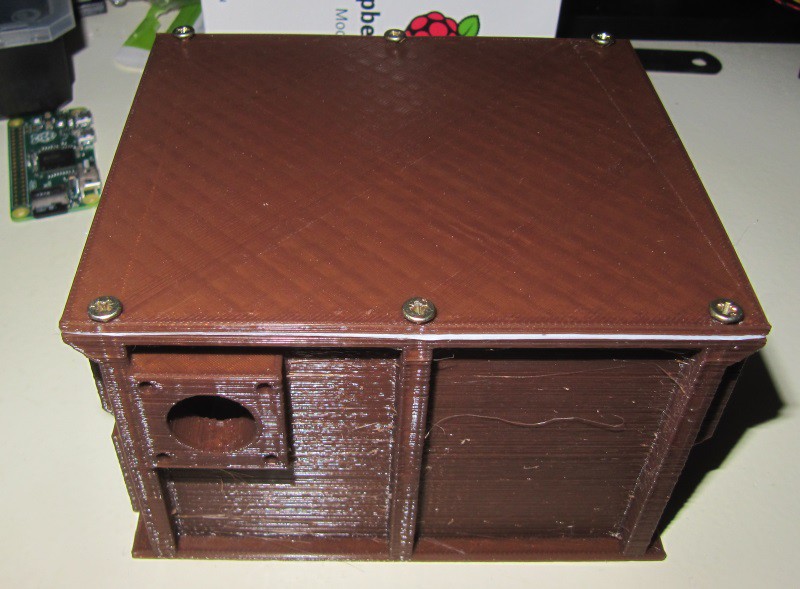
I did use white ninjaflex in place of black one so that the gasket is visible. It's not huge, so it shouldn't disturb animals, but can be seen when putting everything in place. Thus, a quick visual inspection can ensure the user that everything is in place, and that the box is correctly assembled.
On the sides, i also have some openings, and i did print the corresponding gaskets :
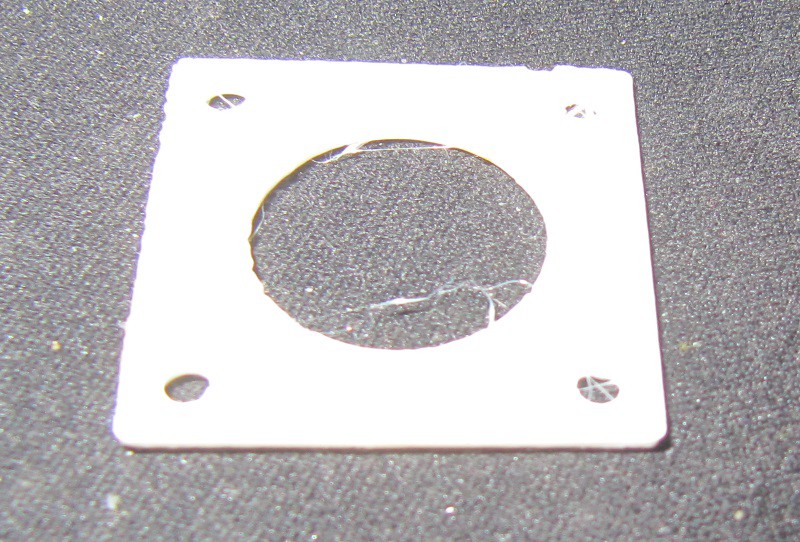
On the next picture, you can see that it is indeed flexible filament :
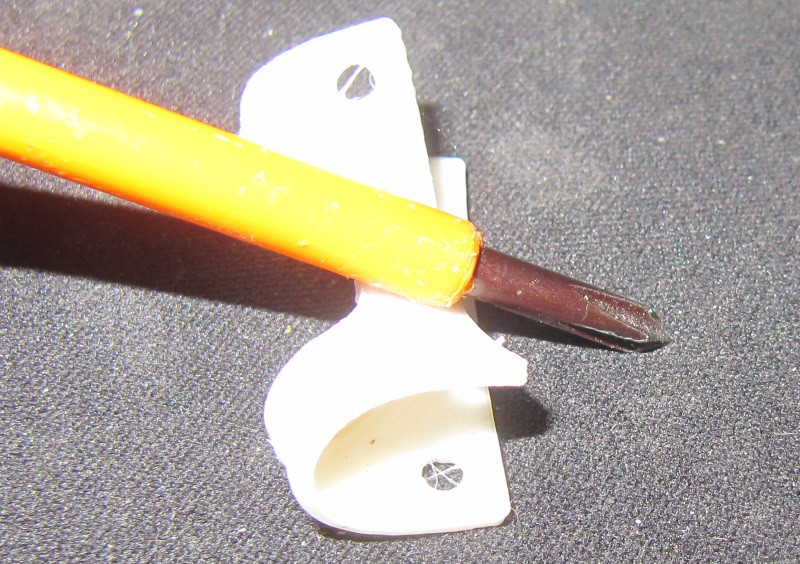
I did print some lids with the gaskets :
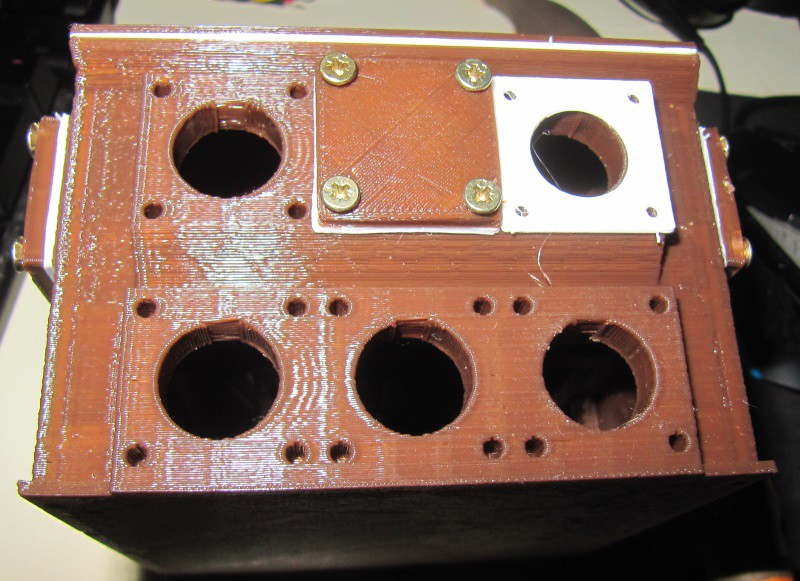
here is what it looks when installed :
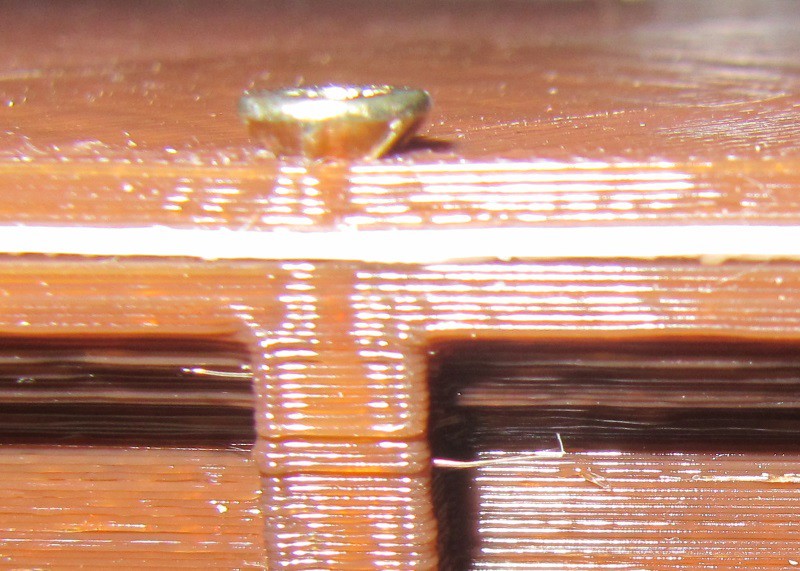
Here are some close-ups on the gasket in place :
and for the side opening :
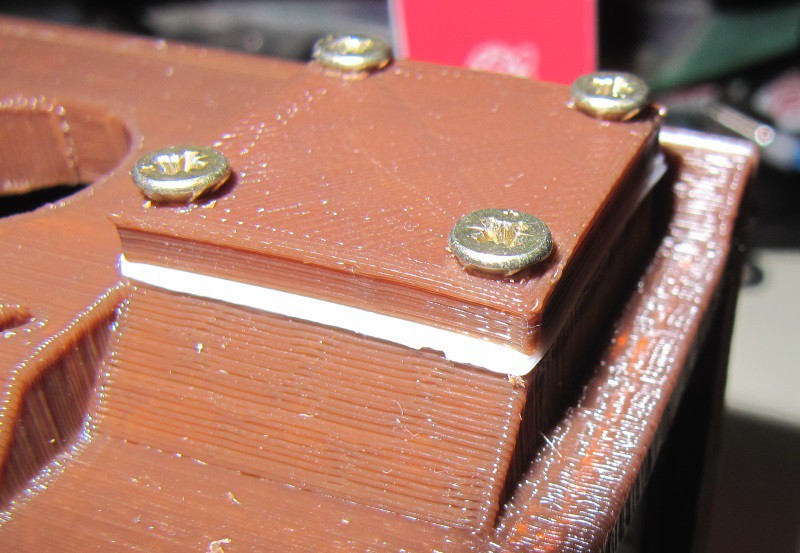
On this picture, both gaskets types can be seen :
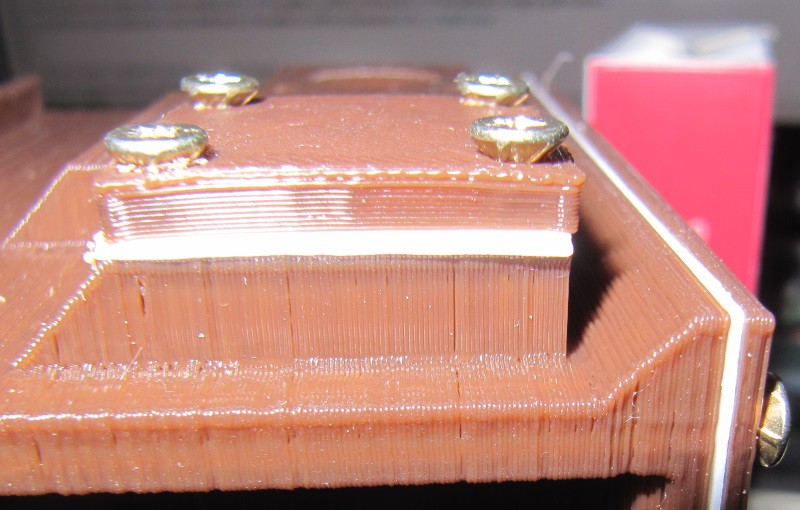
Ayway, after some screws tightening, almost all holes are properly sealed. Now, 4 holes remain :
More on the next update!
I printed the enclosure, and it worked out well. There are slopes for easy printing without support, and everything went fine :
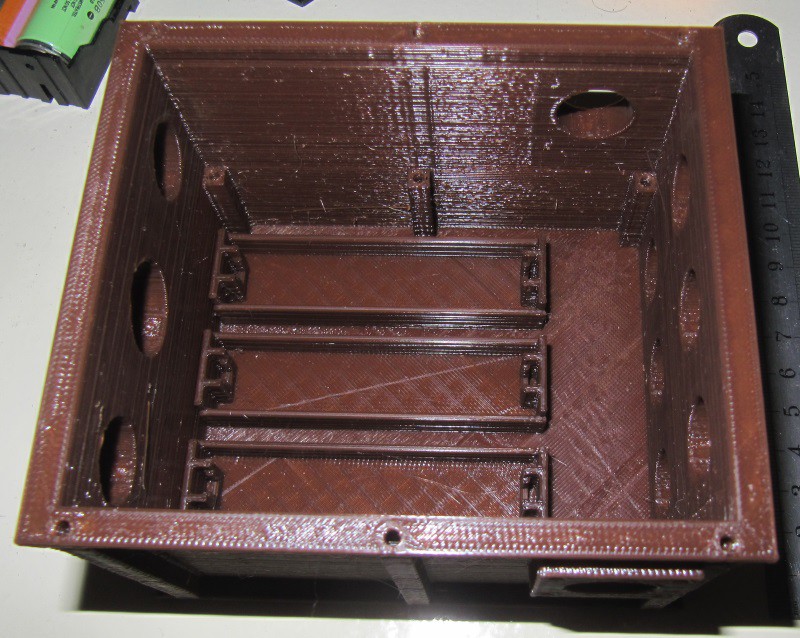
Some cleaning to do, but nothing problematic.
I added a second row of holes on the back :
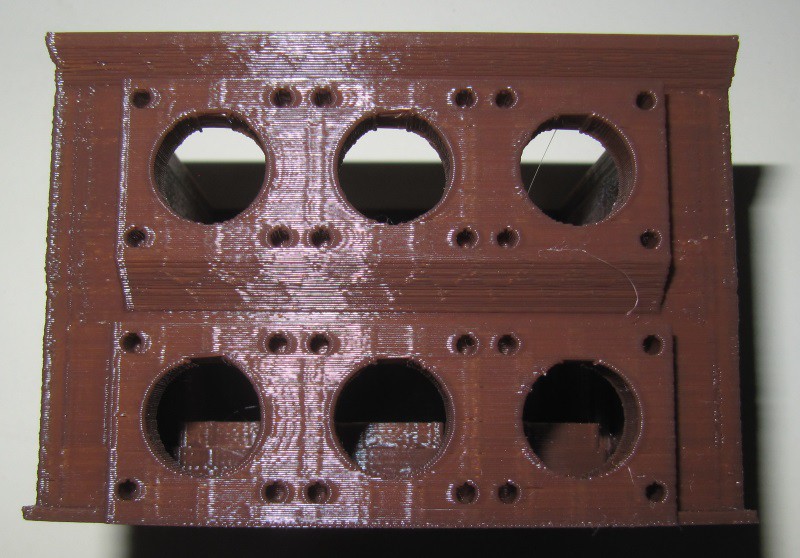
Compared to the previous design, i added a thicker base for the bottom holes, so that those ones can also be closed using lids and gaskets, thus waterproofing the box if needs be.
For this version i did put a lot of holes, since i don't know yet what add-ons i'll be connecting to the box, and since it took 6 hours to print, i went all-in on openings, considering that those can be closed but not the other way.
I decided to design an enclosure for this project for 3D printing. I want it to be waterproof, and functionnal. I'm finishing the design, but here is what it looks like :
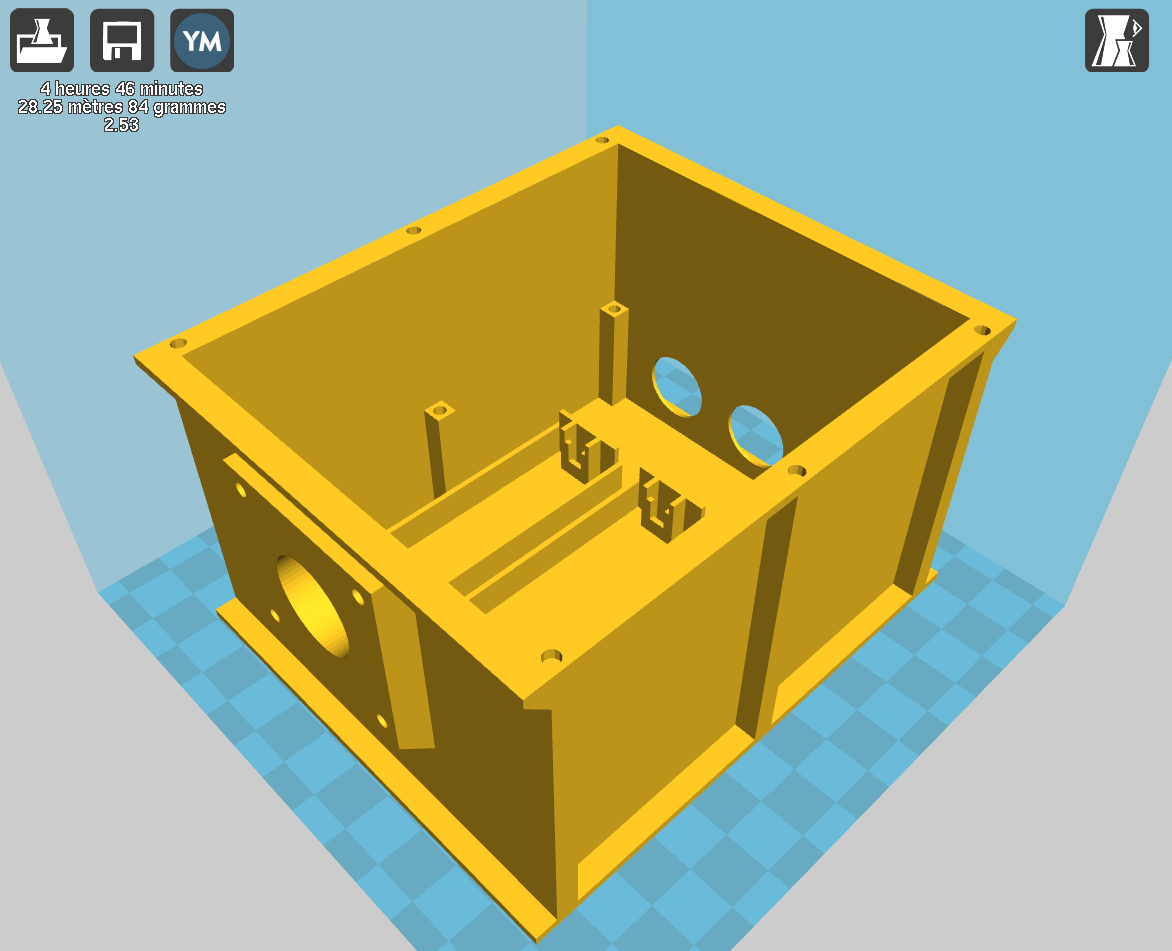
The box is parametric, and dimensions can be adjusted. In this version, it contains up to 3 18650B lipo cells, 3 buttons, a mount for the Raspberry pi A+ and the camera. In the front of the box, a thicker part can be seen. The central hole is the camera hole, and the 4 holes around it are here to secure a sun protection for the camera in order to keep it from being over-exposed and having washed out pictures. This part secures with screws, and has a gasket.
Of course, there is a lid that is not here so that we can see the internals. The lid is secured onto the box using the 6 holes on top (the gasket is secured the same way) :
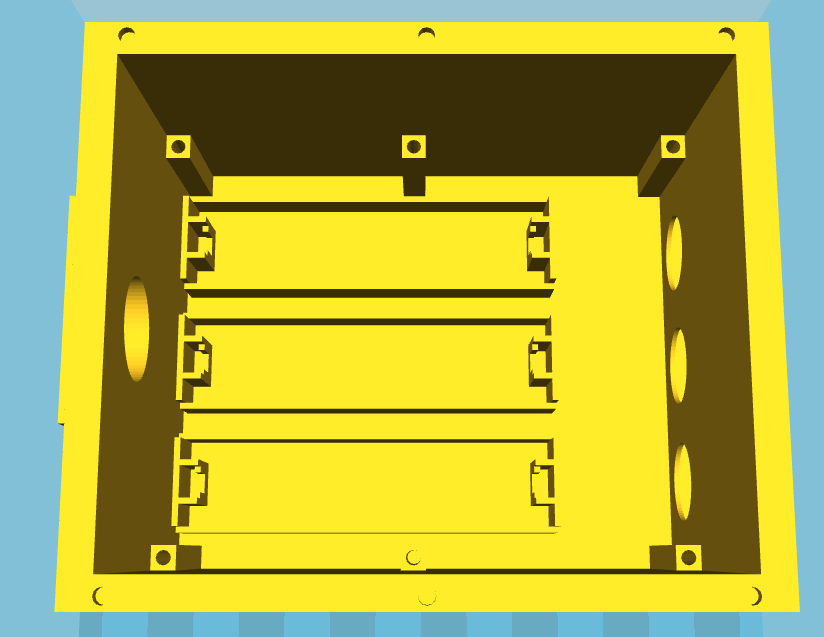
Inside the box, we can see the 3 battery slots (the number of slots can be set, by default, it puts as many of those as possible given a selected Y dimension. 6 pillars are visible, with central holes. This is to secure the electronics plate onto this. This plate is 0.5mm smaller on each side in order to easily fit in the box, and then secured with screws.
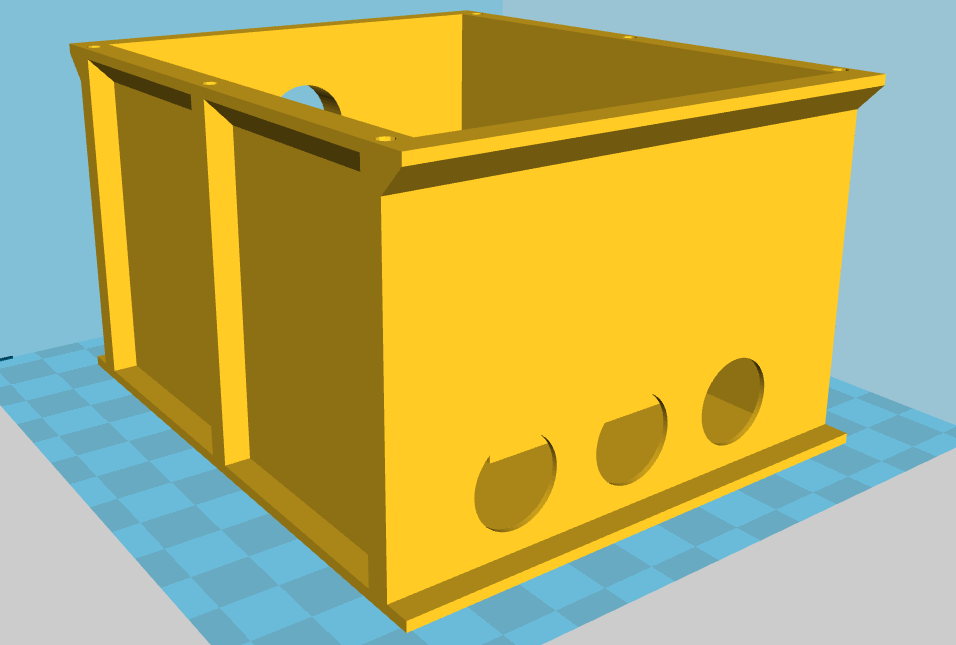
On the back of the box, there are 3 holes for 16mm buttons, each one with it's gasket. The number of buttons can also be adjusted, as well as their radius. In all cases, everything is evenly spread on the first level.
I want to add holes similar to the camera hole at the back and sides, whith lids to close those openings for waterproofing. Those holes will serve as cables pass-through , be it for solar panel input, or an LCD panel (again, i have a plan for sealing the LCD and make it waterproof).
Weather or not the holes are present can be defined in the scad file (set a variable to 1 to have the holes, and 0 to have plain walls), so that if needs be, the box can be adapted. The camera hole can be removed in the same way. This would be a way to reinforce the waterproofing for immersion, for instance.
The camera hole should hold up some pressure, but i don't expect the buttons to be immersion proof, only splash proof. Hence removing the buttons in that case. The front camera sun protection could also in that case be replaced with a plexiglas sheet.
Also note the slopes on the top lips, this is meant to make printing easy, without supports. I had plans for a rectangular LCD opening but it would make it harder to print without support, and i want the print to be easy.
See you in the next update!
I'm in Marie-Galante, for the CaribeWave2016 event, for which Gwadalug (my Linux User Group) are doing a wifi bridge over 50 km (from Guadeloupe main island to Marie-Galante, but also to La Désirade), We're also doing high resolution 3D mapping with fixed wings drones, generating 4G alert signals, making an alert system based on accelerometers, and other stuff.
While there, i brought my piCam prototype, wanting to take a timelapse of the evenement, but in the heat of things i forgot to do it. However, with a nice view, i decided to set the camera in position for a timelapse.
I configured the wifi to be able to launch commands, then put everything back in the box. I'll have to find a way to be able to configure everything headless.
In order to take a picture, i used the following command :
raspistill -vf -hf -o pic.jpgThe flips are there because of the position of the camera.
I took a picture, and it was fine:
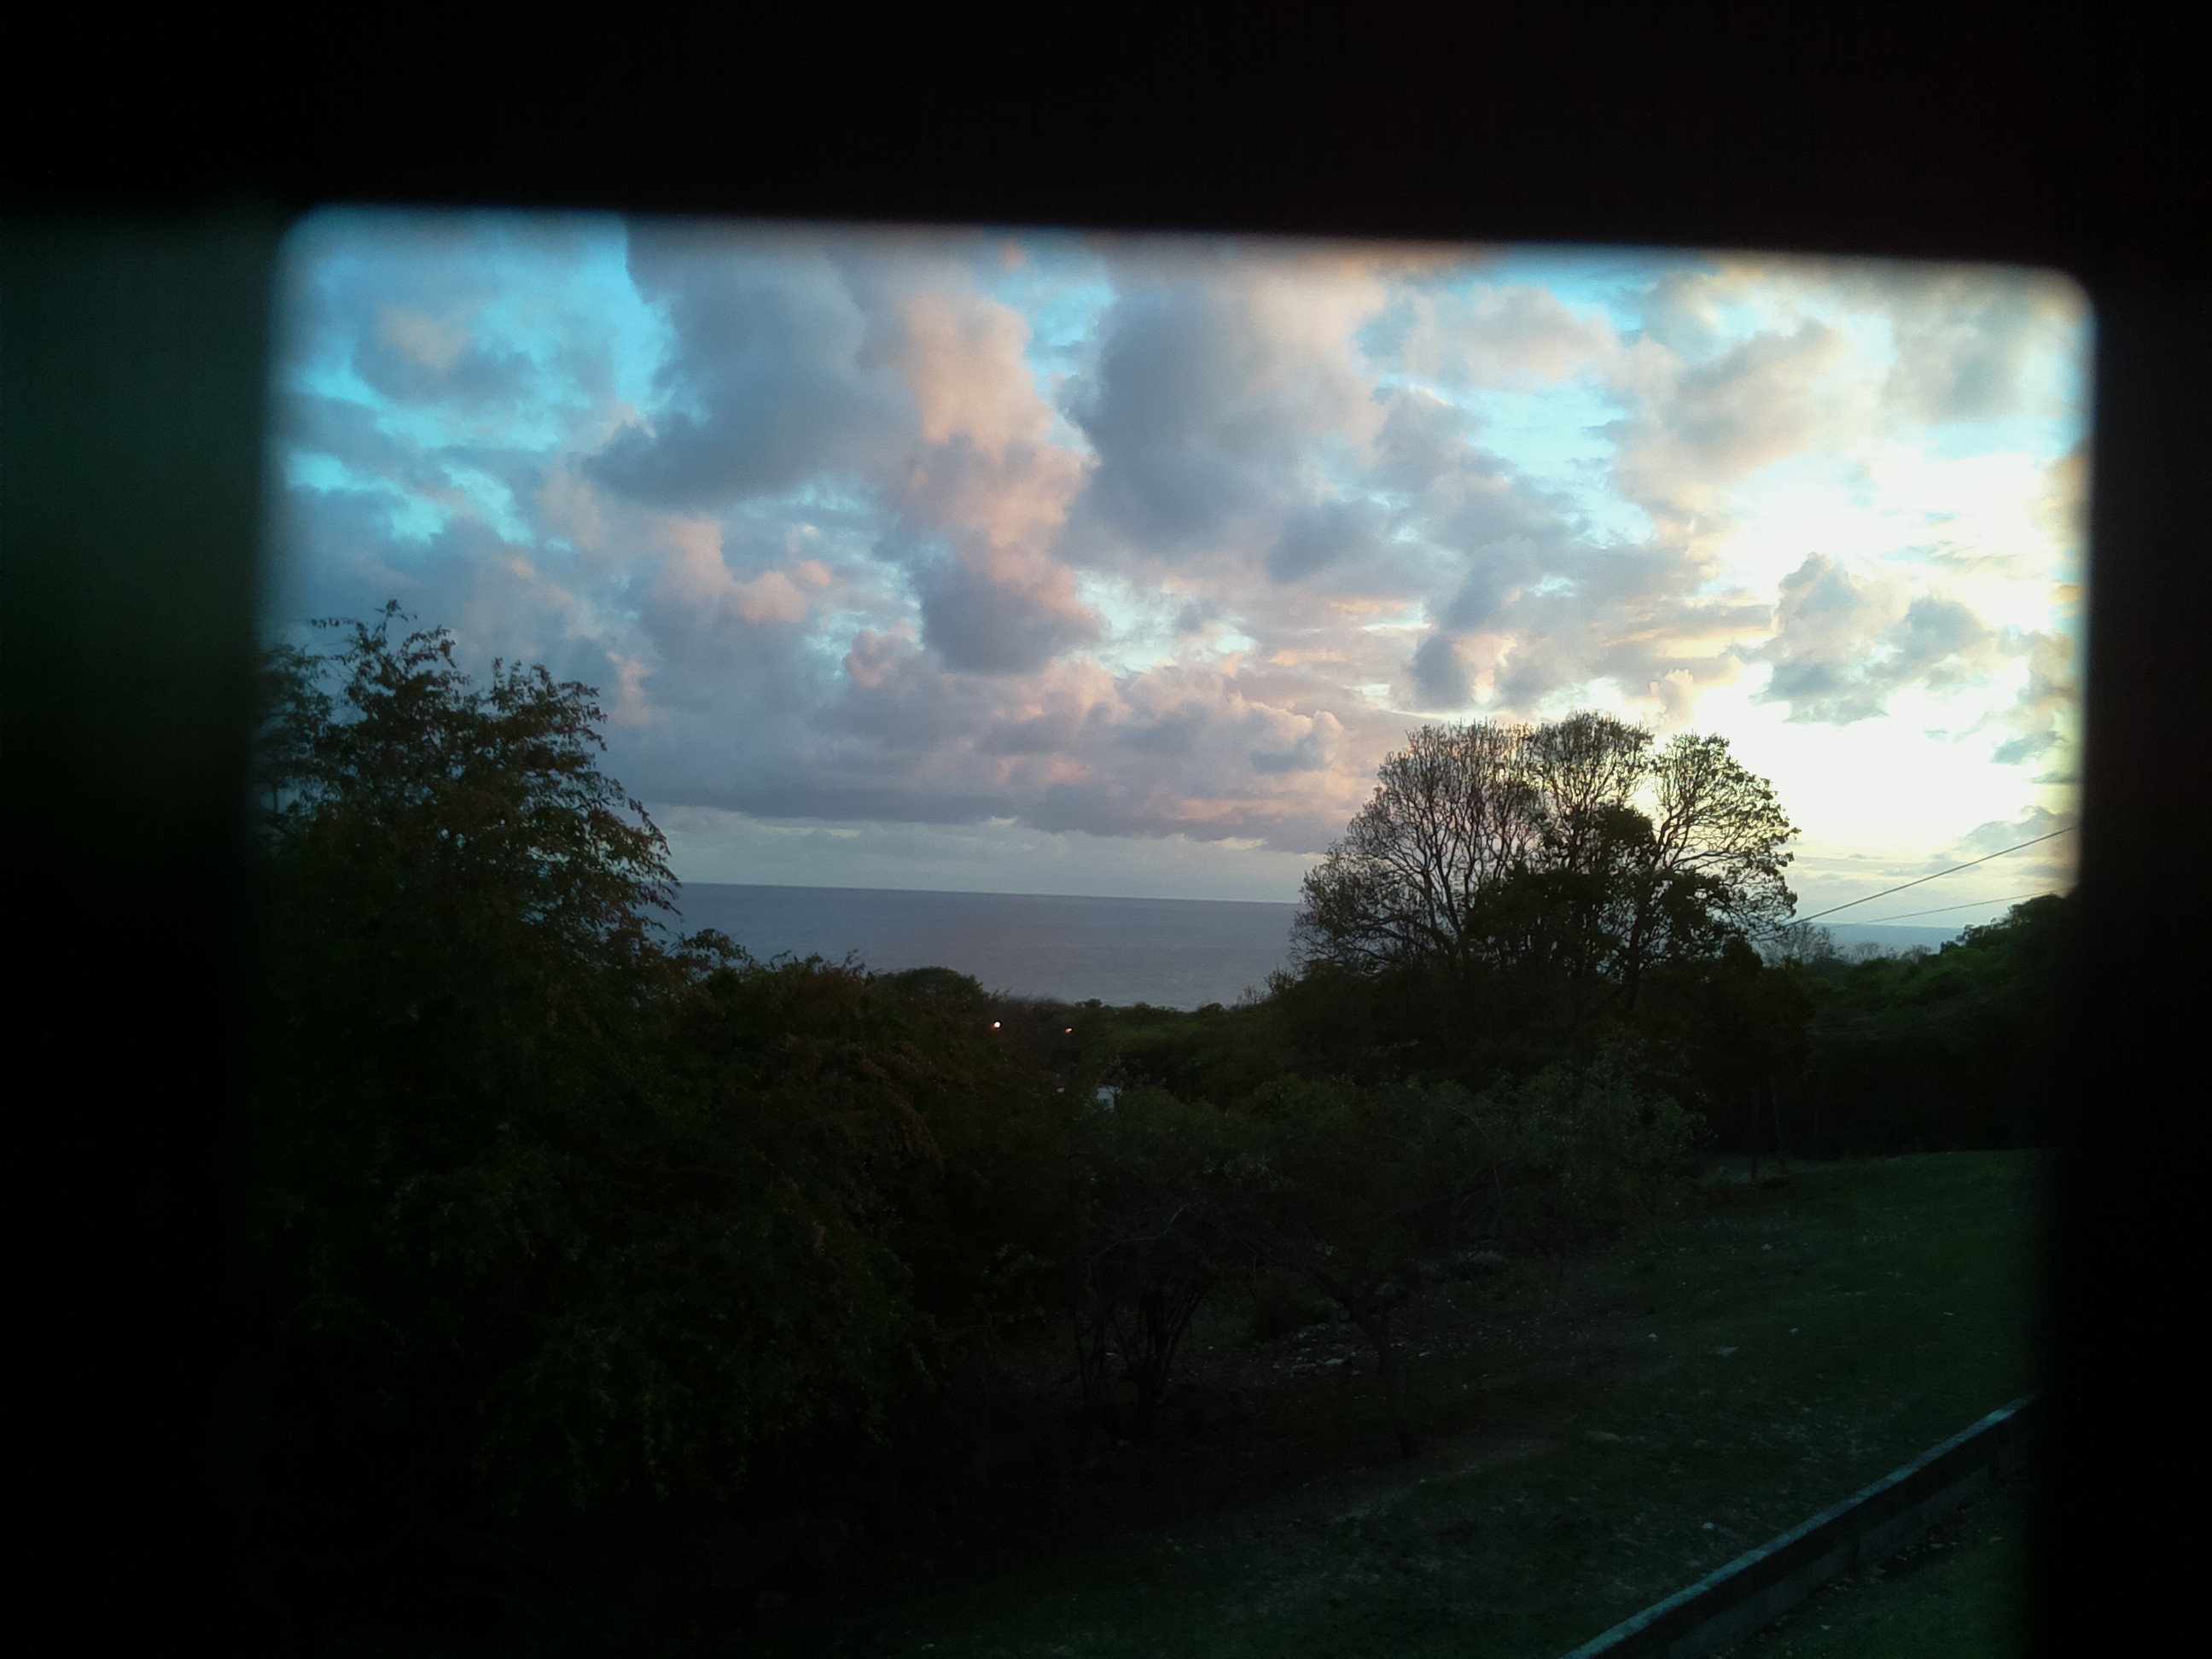
Obviously, to make a timelapse, i needed to take multiple pictures, with changing names, so i made a script :
#!/bin/bash

while true
do
DATE=$(date +"%Y-%m-%d_%H%M")
raspistill -vf -hf -o /home/pi/picsMG/$DATE.jpg
sleep 60
done
In this script, i take a picture, and save it using the date/time it was taken. I then use sleep to wait for 60 seconds. It means that i'll take a picture each minute, so for 24 hours, it will take 1440 pictures. At 24 FPS, that will generate a 60s clip.That will be the occasion to test 4K video.
I made the script executable using a chmod :
chmod a+x timelapse.shSince i'm launching my script from ssh over wifi, i need to have it keeping going on even if i logout. In order to do so, i used nohup to launch it :
nohup ./timelapse &Now it's been running for less than 1 hour, and i'll let it run until my departure. Normally, i should have about 40 hours when taking a picture every minute. However, with wifi on, it should decrease the total runtime. However, it should be enough for this timelapse.Now it's nighttime, and the pictures are really less interesting, i'll see if i keep those :
See you in the next update :)
In a previous log i mentioned that i'd be adding a gasket. Here is why :
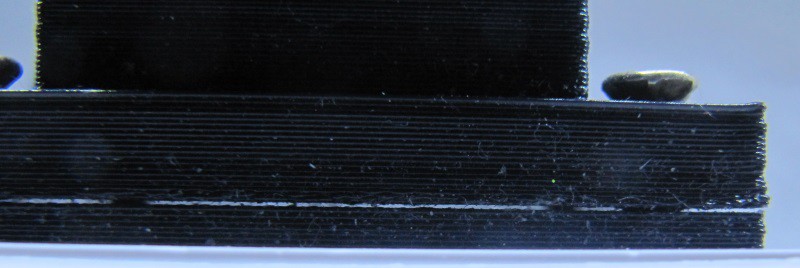
On this picture, the gap between the sun protection and the fixation base can be seen. Not a huge one, but water would creep in, be it direct rain, or simply humidity. Thus the need for a gasket. I did update the openscad file in order to add the gasket as a module, and you can download the stl file ready for printing in ninjaflex (semiflex could work, untested by me).
Here is what the gasket looks like after printing on my Printrbot simple metal (8 minutes at 30mm/s and 225°C with full infill, 50cm of 1.75 ninjaflex) :
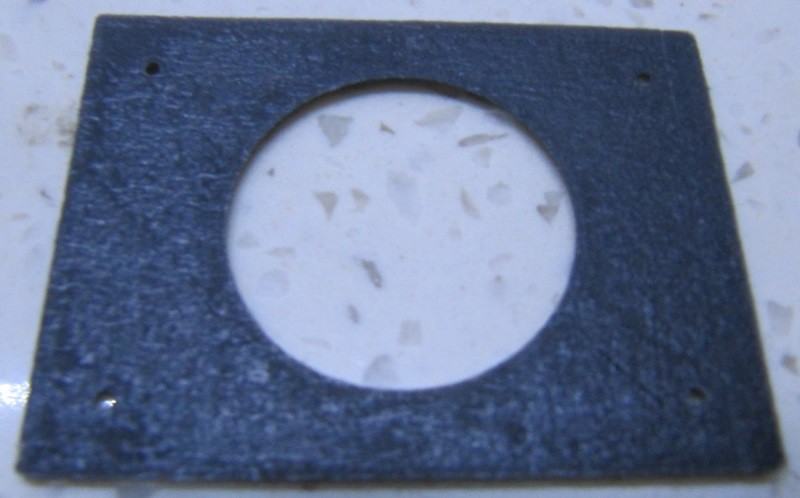
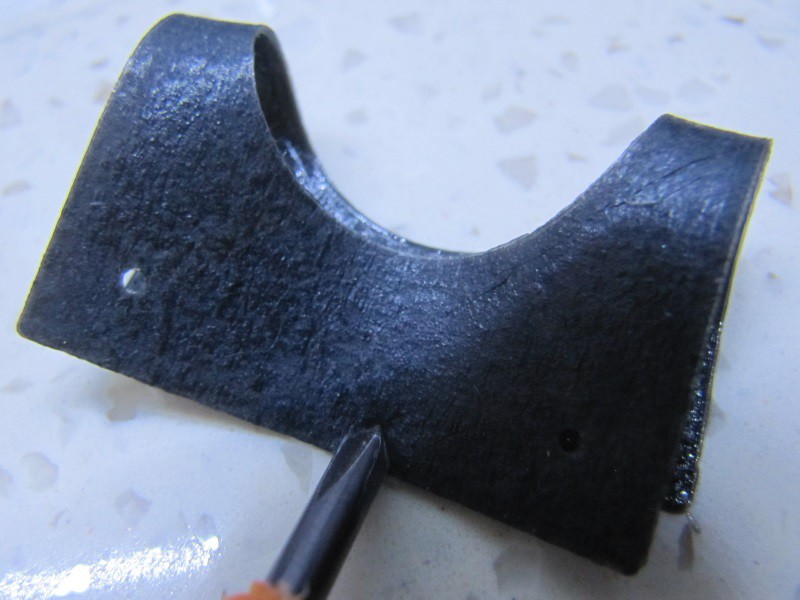
Since it's nijaflex, it is elastic :
In order to install it, nothing special, just put it on the base :
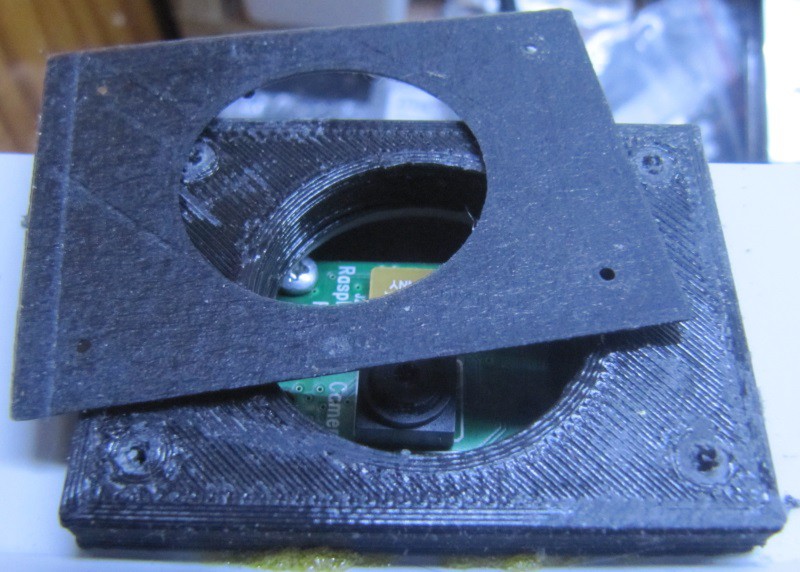
You can see the surface finish of the base, and thus how it will benefit from a gasket. of course align everything, put the sun skirt onto it, and secure it with screws.
Once tightened, there is no more gap :
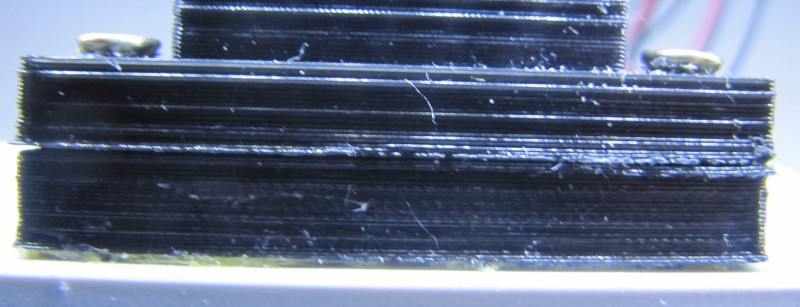
Now, no more water coming from there! I will next add a small plexiglass window, and glue it to the skirt with silicon or a similar glue, to really close the box. After that, i'll test the box by spraying it with water using a garden hose and the highest pressure setting.
I have not decided all the objectives of this project. However, in order to "get things done", i started a subproject : an outdoor, battery powered and wifi camera. This one is designed with a friend of mine who does birds pictures, and thus is meant to be cheap, and autonomous so that we can drop them in the wild, and have it take pictures of stuff. Wifi allow the user to remotely control it, view pictures, etc.
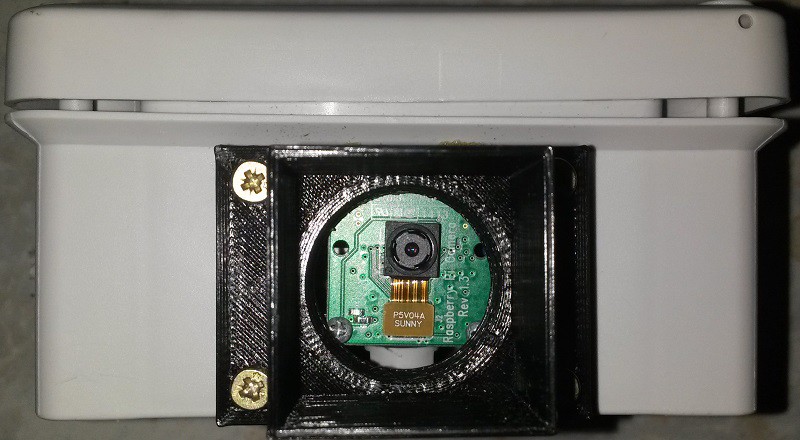
For that project, i used a derivation box, because those boxes are rated IP54 or more, so it should be able to endure rain without problems.
The box i bought is 104*104*55mm, IP54, but there is the same version with better rating (they add a compression ring), for more bucks.
In this box, i put a raspberry pi A+, with a short wifi dongle, an ATmega328p for various measurements (this one doesn't really needs to be here, but since i have the room, i decided to put it in place, and it will talk via serial to the pi, and will be in charge of monitoring the battery tension, control LED, etc), a switching regulator (step-up) and a lipo battery (6.6Ah, 22Wh) with a lipo charger.
About the battery : i tested the system and got 44 hours out of it, when recording the battery tension out of an MCP3008.
Here is what i got : 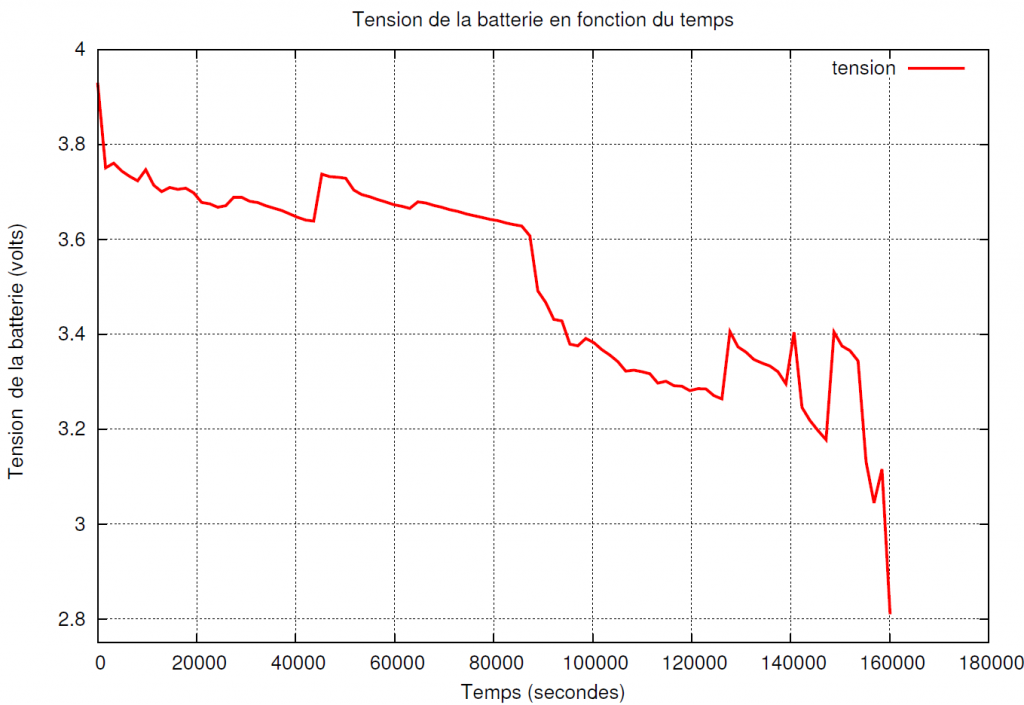 On Y axis is the measured battery tension, and on X axis the runtime in seconds.
Taking a picture approximately adds 100mA, so we go from 100 to 200 mA of power use, so it should last a pretty long time even taking pictures all the time. And if we take 2 pictures per minute, it will be 2 seconds of higher current per minute, we'll get to approximately 105mA average, so we should still get a really long runtime.
The box has plastic locks that keeps it closed (90° turn on those locks secures the box closed, as seen in the picture below :
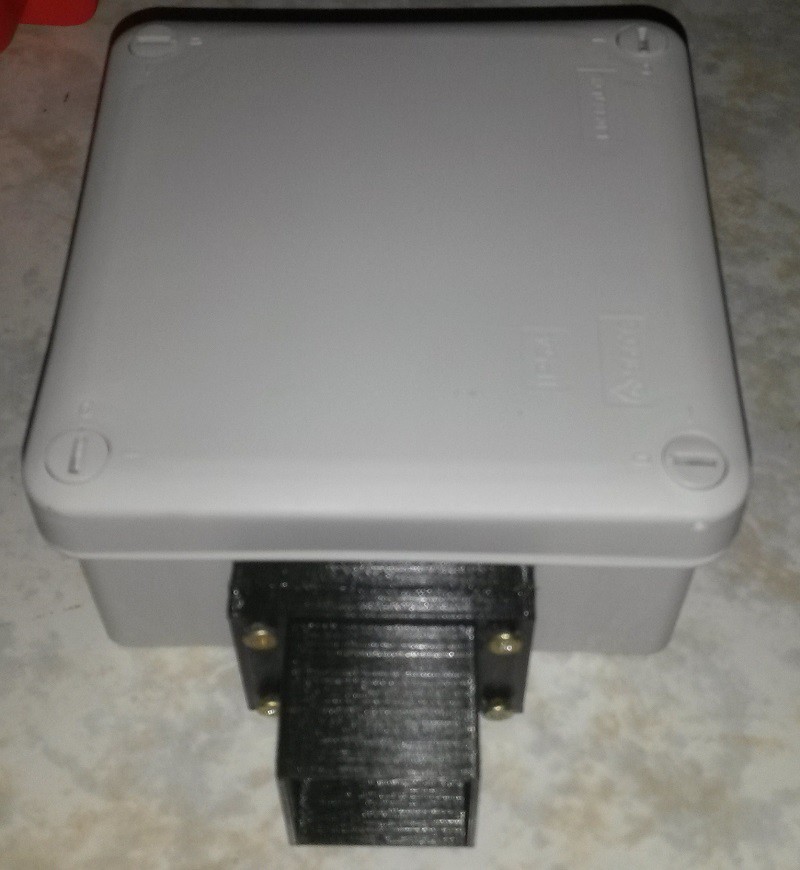
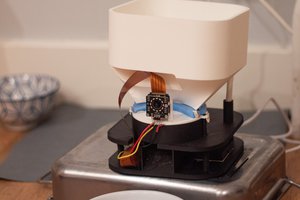
In the front of the device, there is a black 3D printed part. It is meant to protect the camera module from the sun. Without it, the sun makes the image grayish, and washes the colors out if it is coming from the sides. I printed it in black to avoid reflections inside the opening. This is composed of two parts :
The first part (stl file) is a rectangular base, with a hole in the middle, that gets glued onto the box. It has 4 3mm screws holes on the sides. It serves as a fixation base for the second part.
The second part (stl file) has a base similar to the first part, and a square hollow tower to shade the camera module. It is secured with four 3*12mm screws.
On this part, a piece of plexi gets glued to close the box properly. If the plexi gets less clear over time, we can reprint this part, and change it.
On a future version, i'll include a grove for an o-ring to improve waterproofing. (i'll probably 3D print the o-ring as well out of ninjaflex, but i'll try to find standard size so that one can buy regular o-rings).
If needs be, here is the openscad file if you want to modify both parts.
On the inside, there is another 3D printed part (stl file) that screws to the bottom of the box on some kind of fixation rails, and here is the openscad file for this fixation plate if you need to adjust things.
On the inside, this is what it looks like :
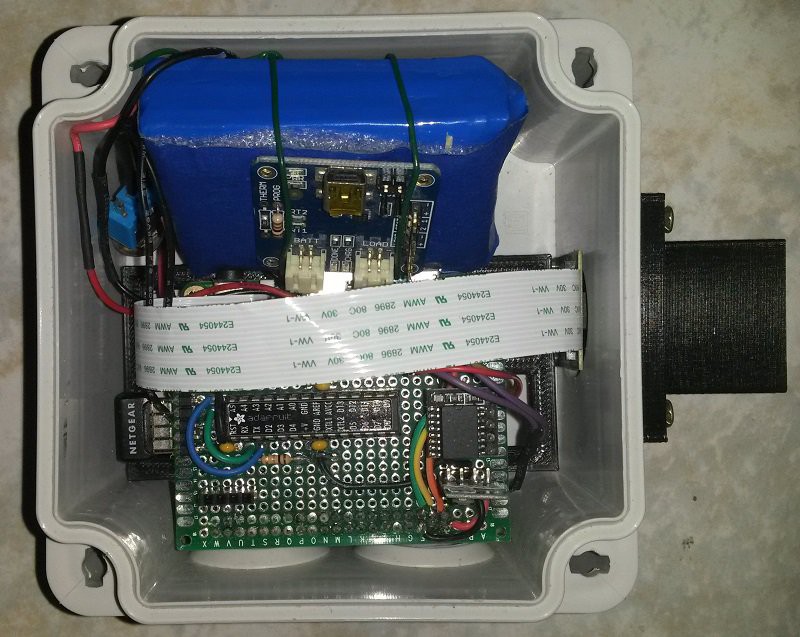
If i can have a solar panel powerful enough to charge the battery, i should have virtually endless runtime, since i get nearly 2 days out of a full charge. I have a 10W solar panel that will sure do the trick, but if i can get away with smaller panels i'll do that.
Of course, battery will degrade over time, so it should last no longer than the battery durability. As for other components i have no worry about them running for long times.
The Atmega chip will also monitor the solar panel tension, the temperature, and perhaps a few other sensors (since it's there, why not add a few more sensors?)
If needs be, it will be in charge of controlling LED in PWM (perhaps IR LED with an infrared camera...
Read more »One of the subprojects i want to make is a network camera.
I'll start simple, then add options to the design. But first let me explain why i think making an IP camera out of a Raspberry pi is a good solution.
Why not just use an ordinary network camera?
A few years ago, i bought a motorized network camera (heden something). It had a motorized pan/tilt, ethernet and wifi, with a web based administration interface, for 80 to 100€. It was a good price, but however this device has limitations : the resolution is quite low (640*480), and the only way i could interact with it was through the web interface. On the plus side, it could capture infrared lighted scenes, so "night vision", using the IR LED included.
However, with such a low resolution, it could only be used for basic monitoring, it is unlikely to be able to read a licence plate or whatever. I'm not certain that i would recognize someone's face at a distance either.
The web interface's problem is that if i want to use it in a different fashion than what the constructor had in mind, i'll have to either hack it, or change my mind. Not that hacking a device is bad, but in this case, i spent some time writing a program to control the camera's pan and tilt via command line, and it worked. But the performance was sub-optimal, and it was not the most efficient and elegant way to do so. If i want to do more advanced stuff, that would require even more hacking.
In the end, do i want to spend so much time to end up with VGA video/pictures? probably not.
One could look for other network cameras, and find higher resolution ones, but everything comes at a price, and higher resolution cameras are available at higher price, or without pan/tilt at the same price. And in all cases, there is no open protocol to control it, nor nice documentation on how to do this or that. All in all, those devices work well, and are satisfying if you want to use them as intended.
I thus realized that i could build a more generic system, with higher video resolution, and have it beeing fully programmable, configurable, adaptable.
Why build a network camera using a Raspberry pi? how much will it cost?
If using a Raspberry Pi, i can chose the video module. The Raspberry Pi costs 20 to 35$ depending on the model, plus 5-10$ for an SD card. Add a webcam, or better, the camera module, and that's another 20-25$. If i consider 5$ for the wall wart, it will cost 45$ to 75$. So, cheaper than ordinary network cameras. Of course, the cheapest model, using an A+ would require a wifi network adapter, or usb ethernet adapter; so we're spend 55$ to 75$.
I have yet to estimate the cost of the box, but if we are generous, let's say 10$.
That means that the complete project cost would be 65 to 85$ for a non motorized ip camera. I would require a few more dollars for a motorized version, so let's add 15$ for two small servos and a few other pieces.
We thus obtain a price of 65$ to 85$ for a non motorized camera, and 80 to 100$ for a motorized version.
For cheaper than traditional IP cameras, i can thus obtain an high resolution camera.
The Raspberry pi enables us to do MORE.
The advantage of this solution is not only the price. indeed, we could probably source other systems with comparable prices. However, we have here the advantage of an higher resolution. Furthermore, we gain total control on the camera. Rather than just have a basic web interface, we can add whatever functionality i want to it. We're not limited to web languages, we can us python, ruby, C, etc... Having a full blown Linux, with a classical package manager means that we can install multiple programs, and do almost whatever we want with this device. Possibilities are almost endless. But i'll present a few functions that are specially interesting on such a device :
Create an account to leave a comment. Already have an account? Log In.
Become a member to follow this project and never miss any updates
 Egle Marija Ramanauskaite
 Pranav
 David Lockley