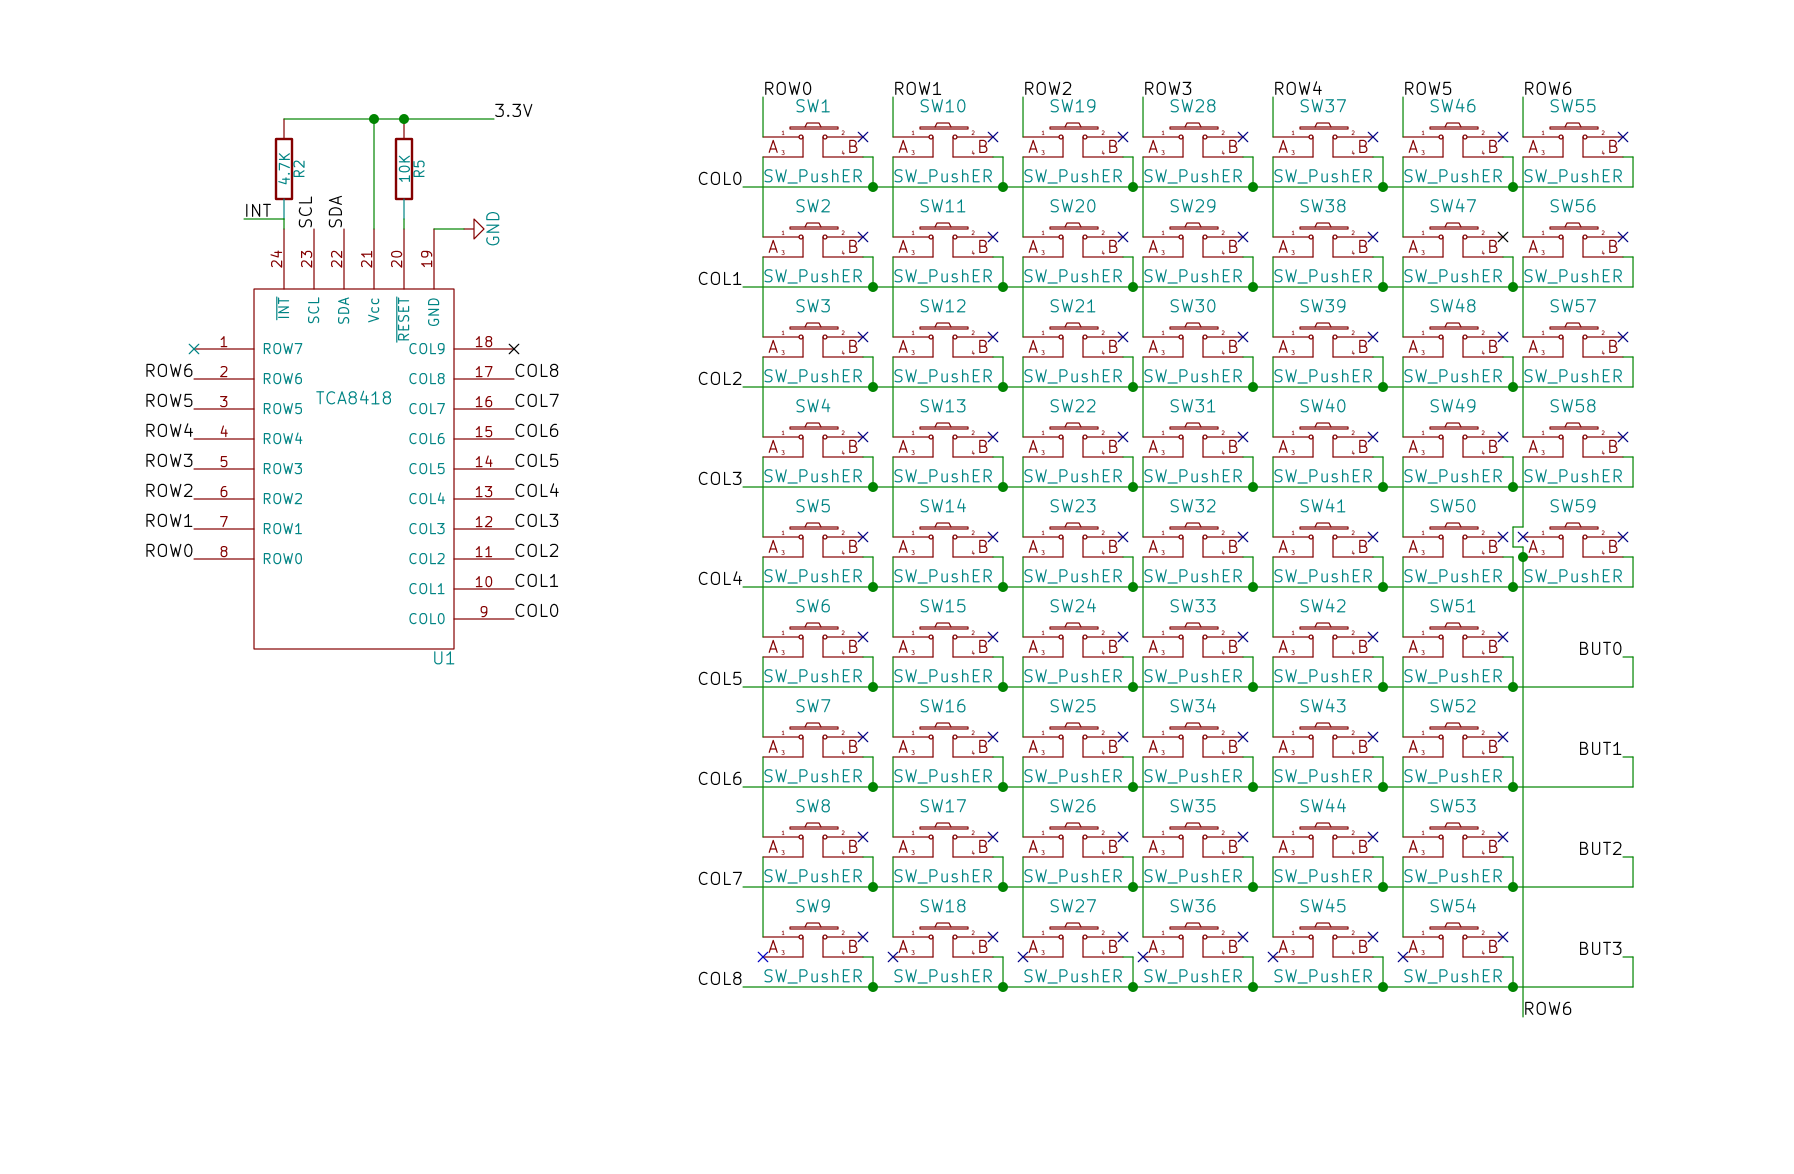
The first prototype is assembled and working. The power circuitry is being a little finicky but the keyboard works great. Here's the schematic for it:

To get the keyboard working with the Raspberry Pi A+ (what we're using for our current prototype):
3.3v --> Pin 1
SDA --> Pin 3
SCL --> Pin 5
GND --> Any GND Pin
INT --> ***Is Not Connected
On the software side of things we compiled a custom Kernel with the TCA8418 Driver. By far the easiest method I found for cross compiling the Kernel is found Here. The total compilation time was only about 20mins. The tricky part was getting the device tree overlay working. Take a look at the Raspberry Pi device tree documentation.
Here's the overlay:
/dts-v1/;
/plugin/;


/{

compatible = "brcm,bcm2708";

fragment@0 {
	target = <&i2c1>;
	__overlay__{
		tca8418@34 {
	        compatible = "ti,tca8418";

	        reg = <0x34>;


	    irq-gpio = <&gpio 11 0x2>; /* IRQF_TRIGGER_FALLING */
            interrupts = <11 2>; /* high-to-low edge triggered */
            interrupt-parent = <&gpio>;
            interrupt-controller;

			keypad,num-rows = <8>;
	        keypad,num-columns = <10>;
	        linux,keymap = <
	    /* row | column | key-code  ex: 04,08,0010 q key*/

	            0x04080010
				0x04070011
				0x04060012
				0x04050013
				0x03040014
				0x03030015
				0x03020016
				0x03010017
				0x03000018
				0x02000019
				0x0507001e
				0x0506001f
				0x05050020
				0x05040021
				0x04040022
				0x05030023
				0x04030024
				0x05020025
				0x04020026
				0x0603002c
				0x0602002d
				0x0601002e
				0x0501002f
				0x04010030
				0x04000031
				0x05000032
				0x0201000e
				0x0600001c
				0x0508000f
				0x0308002a
				0x00070008
				0x00060009
				0x0005000a
				0x0004004e
				0x00030069
				0x00020067
				0x0001006a
				0x0000006c
				0x01070005
				0x01050007
				0x01060006
				0x0104000c
				0x02070002
				0x02060003
				0x02050004
				0x01030037
				0x0306000b
				0x03050034
				0x02040035
				0x06040039
	        >;
			};
		};
	};

};
You can find the keycodes in /linux/include/input.h just convert them to hex.
Here's a couple of sites with additional information:
http://xillybus.com/tutorials/device-tree-zynq-1 Not Raspberry Pi Specific but Has Great Info On The Device Tree
https://aababilov.wordpress.com/2012/10/09/setting-up-the-keyboard-in-linux/ Good Info on How Keyboards Work in Linux
Now that we have the keyboard working the next step is get the PCB re-printed with modified power circuitry once we figure out exactly what went wrong.
That's all for now. We're posting a video of Malti running soon so stay tuned. Also, if you want to get your hands on our prototype check us out at the 2015 Chicago Northside Maker Faire.

 Jayda Van
Discussions
Become a Hackaday.io Member
Create an account to leave a comment. Already have an account? Log In.