Homebrew Computer Case
Building a computer rack/case to hold standard computer parts with improved accessibility for service and upgrades.
Building a computer rack/case to hold standard computer parts with improved accessibility for service and upgrades.
To make the experience fit your profile, pick a username and tell us what interests you.
We found and based on your interests.

... (and day 3)
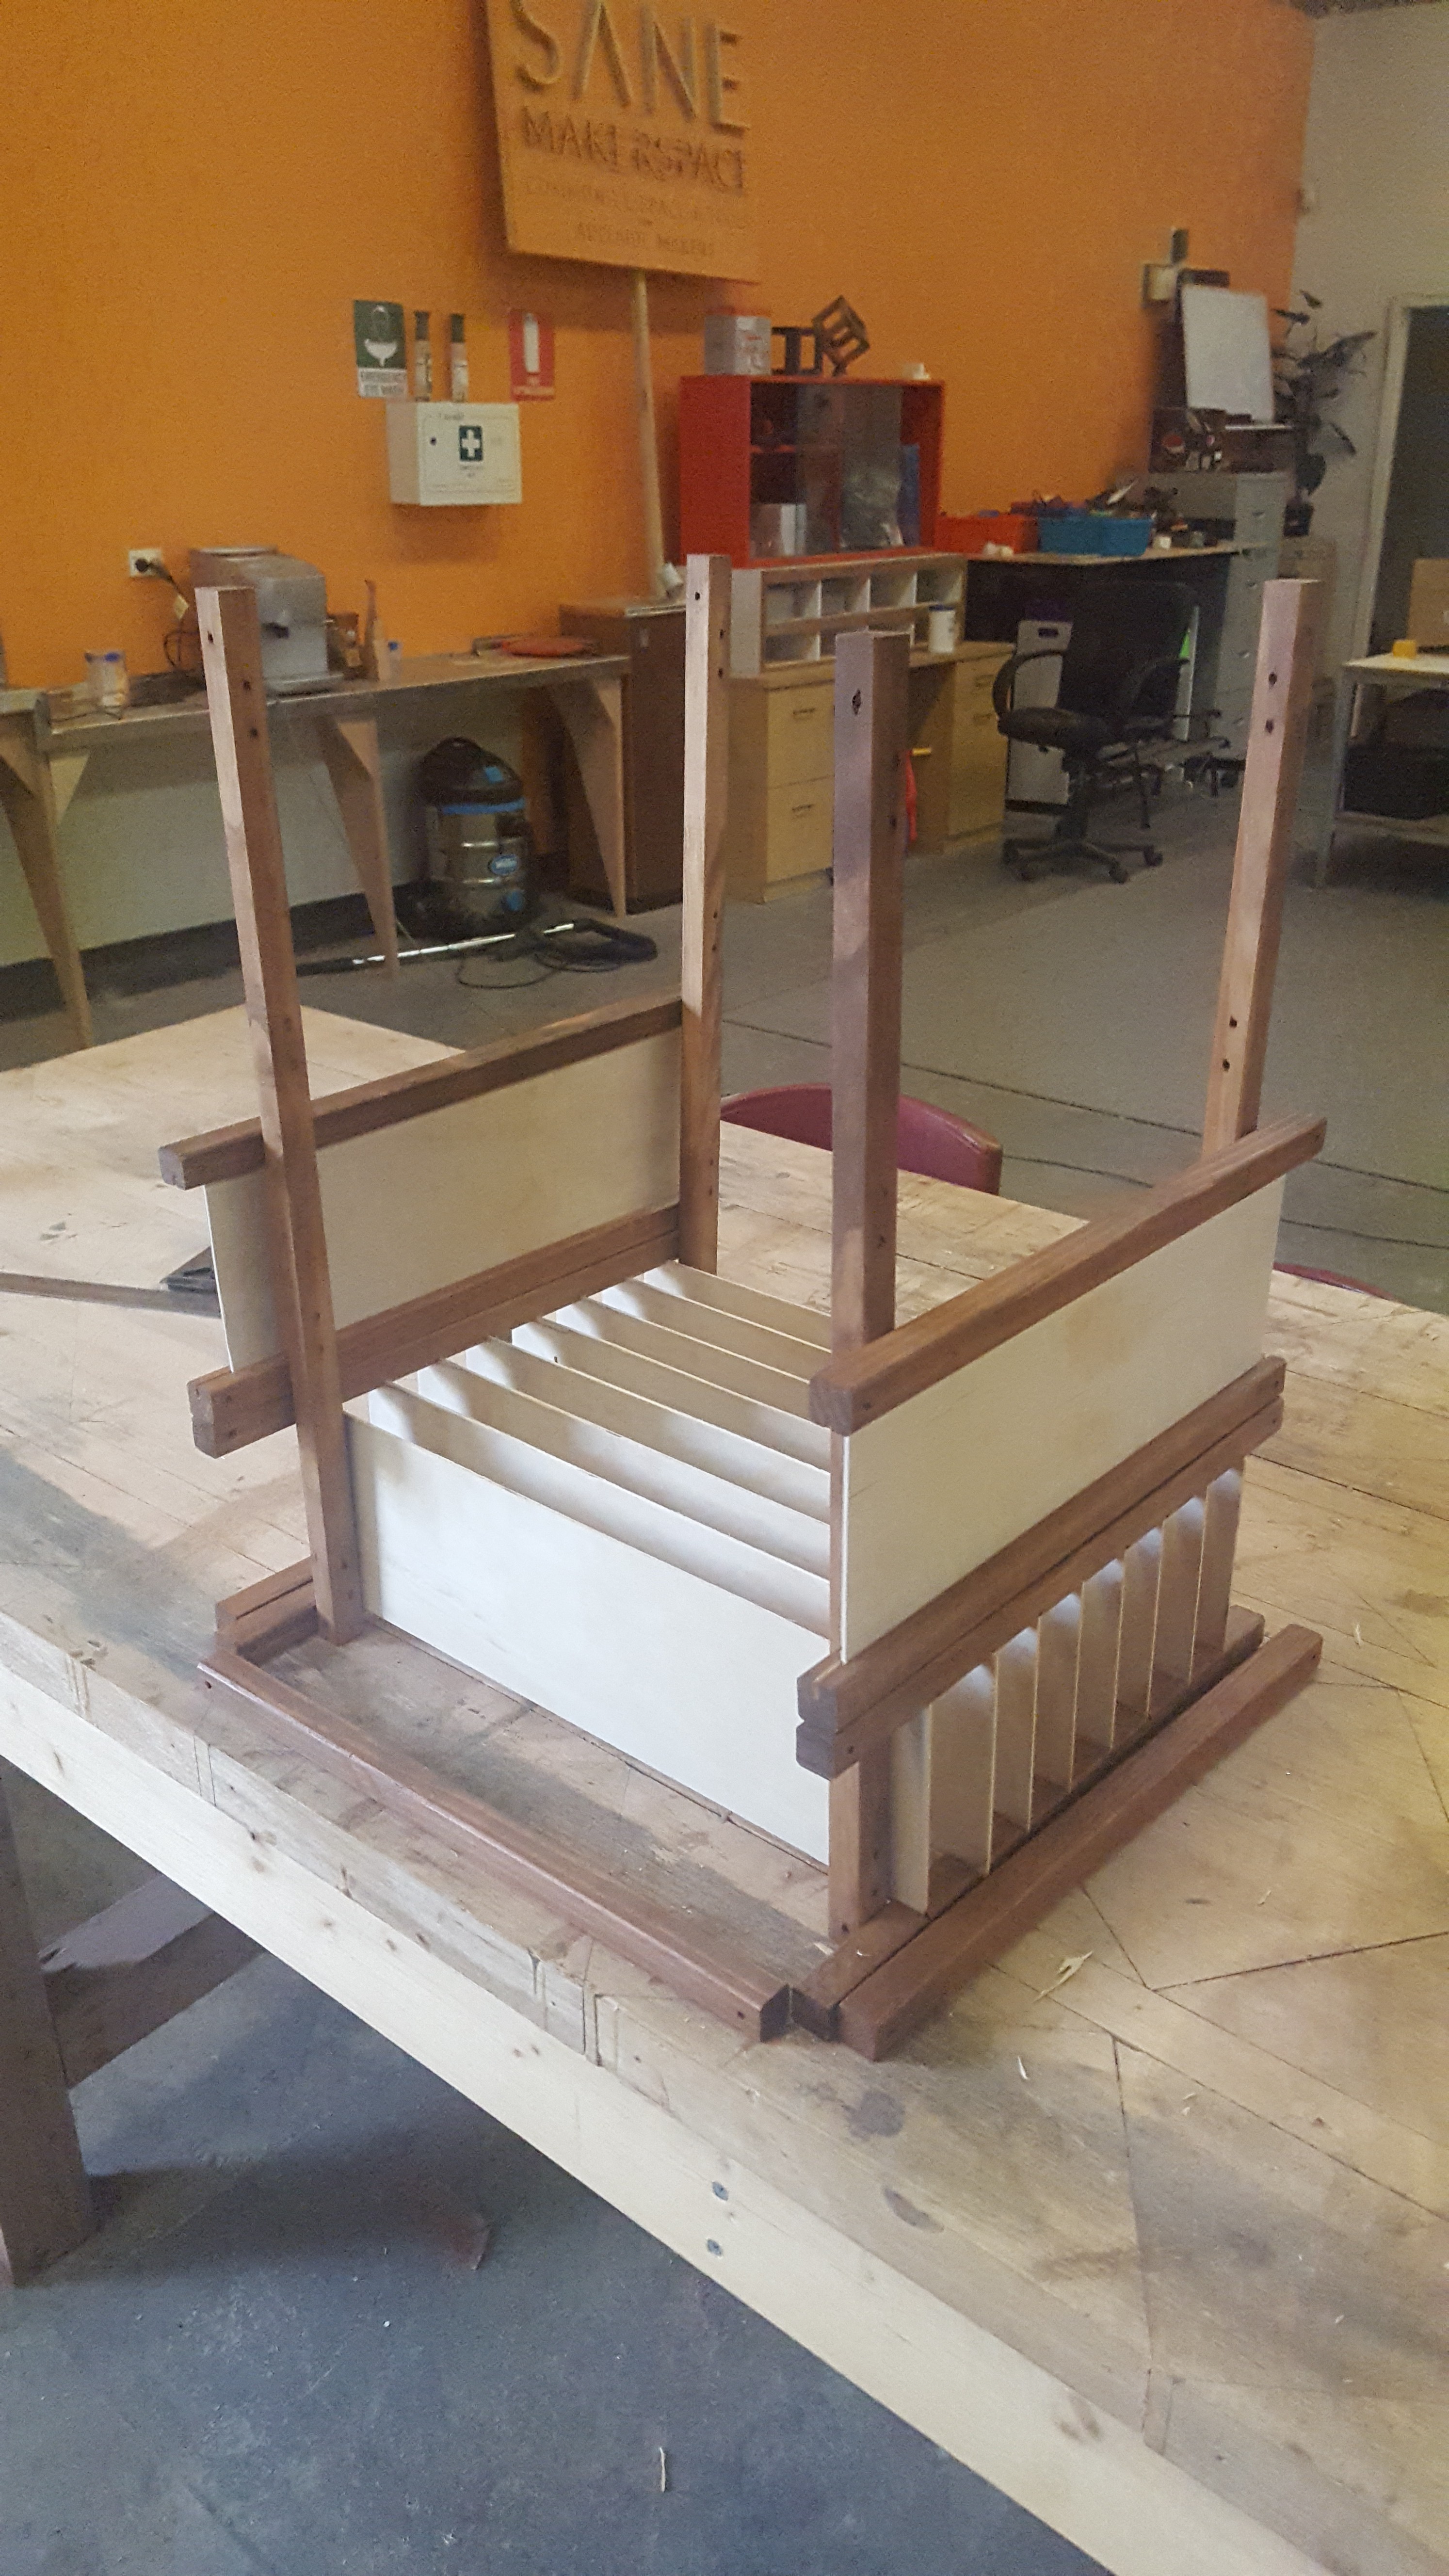
Went back to SANE Makerspace and cut up 3mm plywood for mounting disk drives and power supply. Found (recycled) a 5mm plywood board for mounting the motherboard.
Cut some slots is frame to mount panels front and back.
Construction Plan
Wooden batons were cut from scrap timber on a table saw, - 20mm x 20mm
Most of this work was done at the local 'SANE Makerspace' in Adelaide.
This appears to be a non-standard size for wood sold at local hardware store, which sells a size of 19mm. Not really a problem when making use of using scraps.
These were then cut to size with a drop saw.
Holes were drilled for M4 x 50mm bolts on an drill press.
A template was used to ensure the separation between holes was 380mm on the cross pieses, and the same placement of holes on the post.
This could have been done better, as there was some movement of the template on the piece being drilled. Some holes will need to be re-drilled when final assemble is done.
The edge was taken off all pieces with 45 deg bevel bit in the small router.
Pieces were sanded.
Some slots were cut in four of the cross pieces to hold plywood for mounting disk drives. Cross cutt radial arm saw cuts a grove which nicely fits 3mm 3 ply plywood.
Photo: SANE Makespace
Pieces were then stained in preparation for finishing./varnishing.
Create an account to leave a comment. Already have an account? Log In.
Become a member to follow this project and never miss any updates