 Blake W. Ford
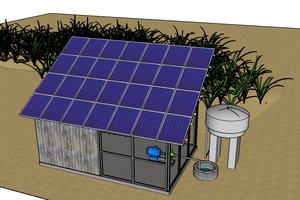
Step one: Purchase a proper barrel
In Austin, the city provides per gallon rebates on rain barrels which I find compelling. I wanted a large barrel, but with dimensions based on annual rainfall and reason. The end result is a 150 gallon barrel based on the dimensions of a guttered section of my roof. The math goes something like this: Approx 300 square feet of roof area, or 43200 square inches yields 189 gallons of water with a storm providing 1 inch of rain. This seemed reasonable given the Flood Early Warning system rain gauge reports provided by the city, http://www.ci.austin.tx.us/fews/rainfall.cfm.
Step two: Calculate interval
I don't have a real interesting calculation for this, every two weeks or so I wanted to empty the barrel if no rain was present. Final distribution settings are 5 mins at 5 gallons per minute every 3 days, ~18 days of watering with no refills.
Step three: Dig a trench
I have existing conventional irrigation in the backyard, so I carefully dug a 60 foot trench to my back garden with a pickaxe, about 6 inches deep. Next I laid some PVC with a few access points into the trench. At one end of the pipeline is a two foot high bush sprinkler, the other has a quick connect buried underneath the ground, but accessible via a plastic in ground porthole.
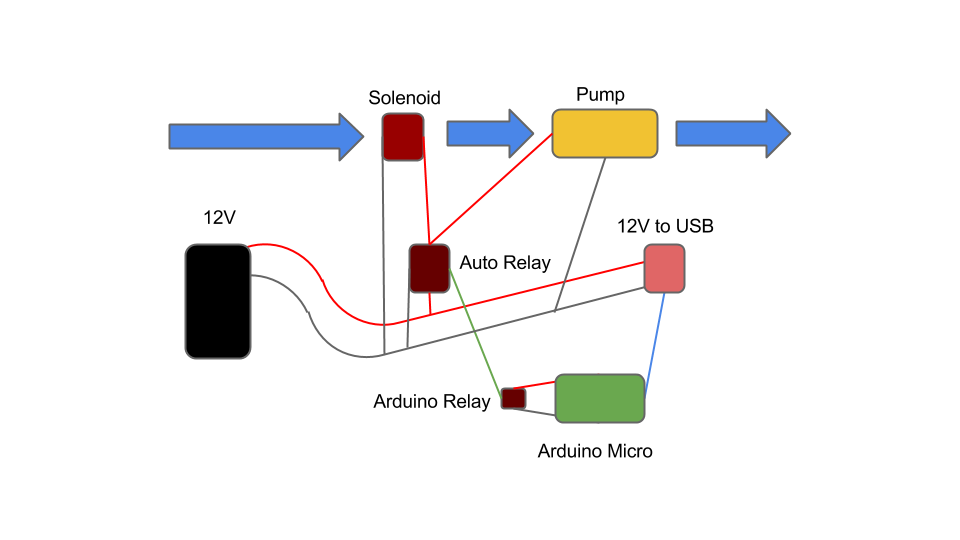
Step four: Buy the kit
This step was basically get on Amazon and find components that fit my needs, mentioned below. I often use the SLA batteries or banks of them combined with Instapark charge controllers and panels in projects around the house. Cheap and decent. All of my power tools, including my mower, are charged using similar solar configurations.
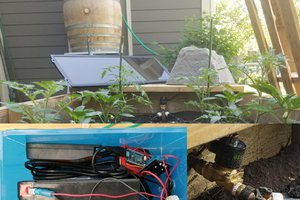
Step five: Build!
 iarakistain
 Kent Rueckert
 Benjamin Blundell
Control/monitor your system on WiFi using NodeMCU.
https://sites.google.com/site/nodemcu12e/