Close
0%
0%

Retro Robot Restomod

Breathing new life into a 22 year old robot toy

Similar projects worth following
When my brother and I were kids we each had one of these robots. They used to flash, beep, boop, and shuffle around, but after a while they both died, so as an ambitious kid I opened mine up with the intention of fixing it. Needless to say, I was never able to even put him back together again and his pieces were eventually thrown away.

For some reason I just love the retro-future styling of this robot, so for the last couple of years the survivor has sat on a shelf in my lounge (much to my wife's dismay). This Hackaday contest has given me the impetus I need to have a go at fixing and possibly improving him.

The goals are pretty loosely defined at the moment, but I foresee something along the lines of opening it up, getting the mechanicals working nicely, potentially replacing the electronics and giving it some sort of remote control or more interesting autonomy. A laser pointer in his gun might be fun. Time will tell.

This is the end result of our restoration/modification of the Hap-P-Kid Chromed Crusader toy.

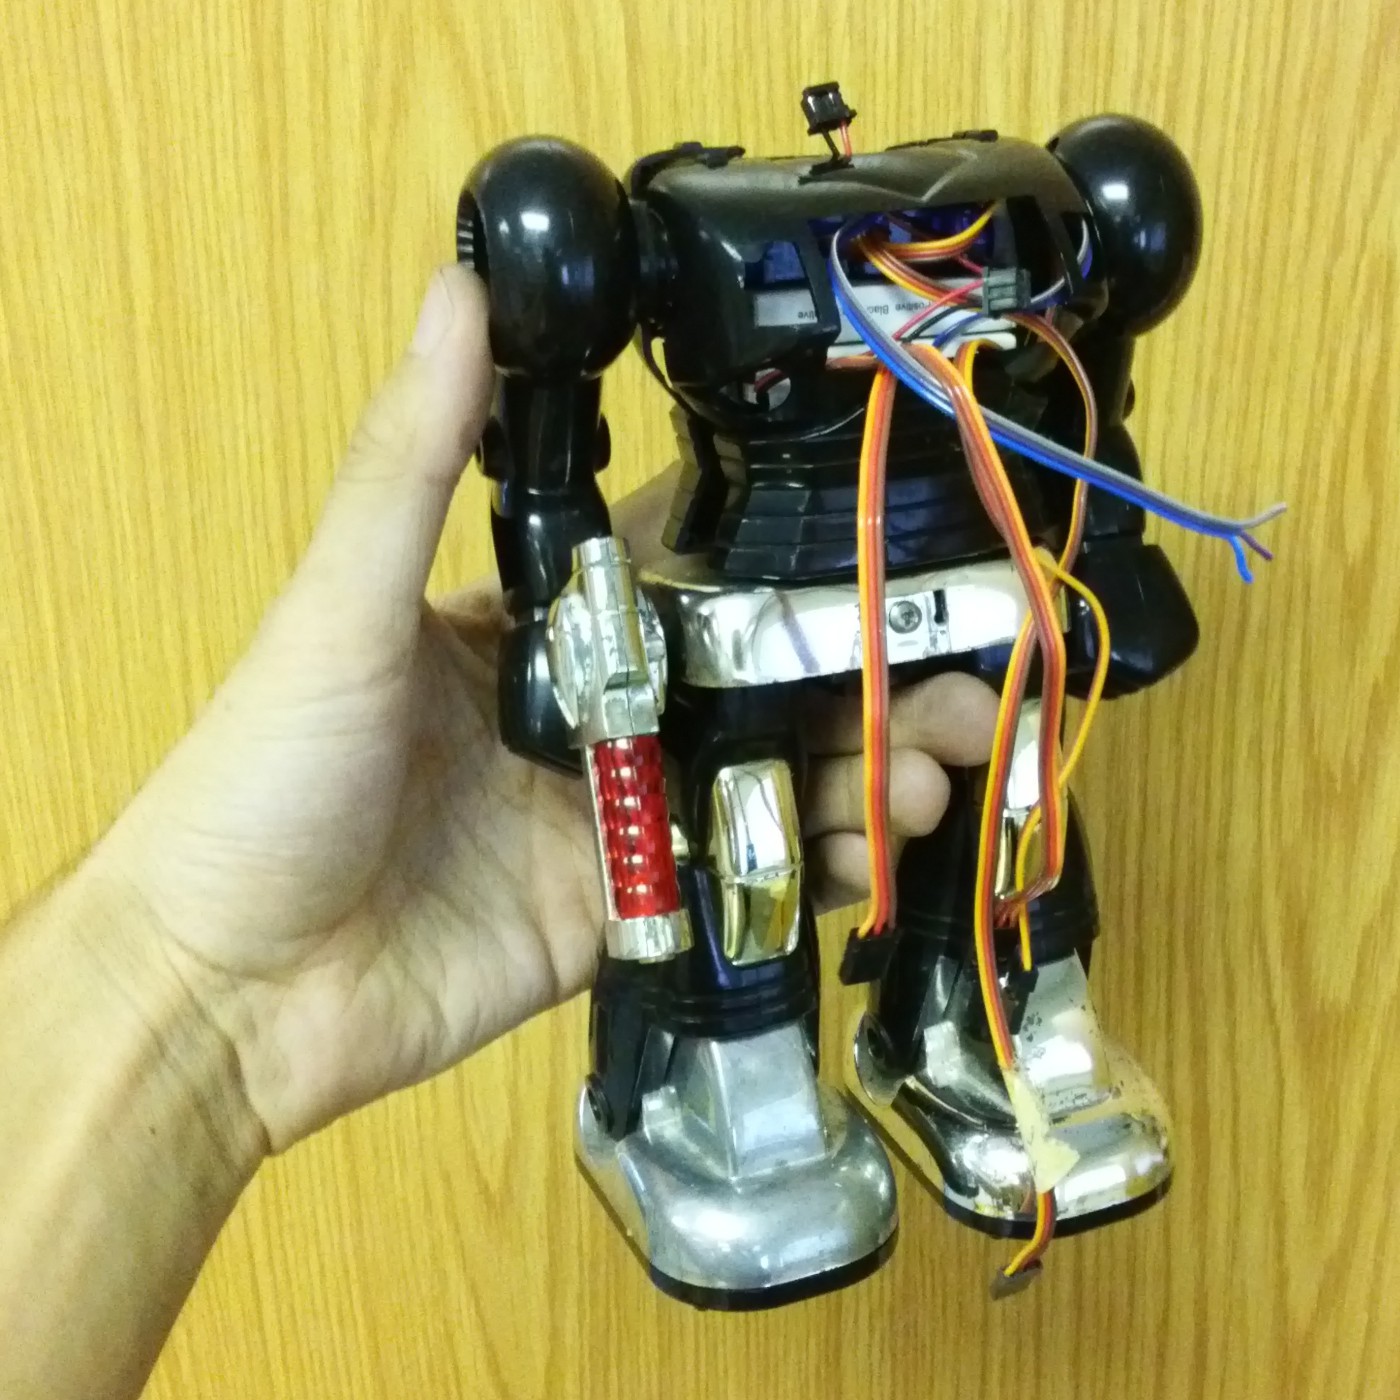
The original robot toy just had one motor driving the same walking/spinning/waving actions over and over again. We removed the guts of the robot replaced with rechargeable batteries, an Arduino Nano, Bluetooth, a Laser, speaker, SD card, LEDs and far too much rainbow ribbon cable, resulting in a an upgraded robot controllable from an android phone. He also curses a lot more than the original, but we tried to keep the videos suitable for work.

Here is an unaltered original robot:

Here is our version:


  • 2 × 9g Servo 9g Micro Servo
  • 1 × Arduino Nano Obligatory Arduino, chosen for its size and availability (we had a few lying about)
  • 1 × Hap-P-Kid Chromed Crusader A beat-up toy robot from 1992. He hasn't worked for many years and was missing an internal component or two.
  • 2 × Corona DS-239MG Servo Low profile, metal gear servo. One of them is converted to continuous rotation
  • 1 × 5mW Laser Pointer Module 6mm red laser pointer module from DealExtreme

View all 9 components

  • Complete: Glamour Shots

    Ossum04/29/2014 at 08:45 0 comments

    Time for some pretty pictures and far less pretty video.

    An unexpected awesome effect is that the Arduino's blue LED is showing up through the chest plate, wherever the plastic is badly worn. Arc reactor ahoy!


  • Radio Controller App

    scott04/28/2014 at 15:31 0 comments

    Seeing as how we don't have any CPU cycles left in the arduino for a neural network, we figured we'd just have to make a remote control app, and leverage the human operator's biological neural network.

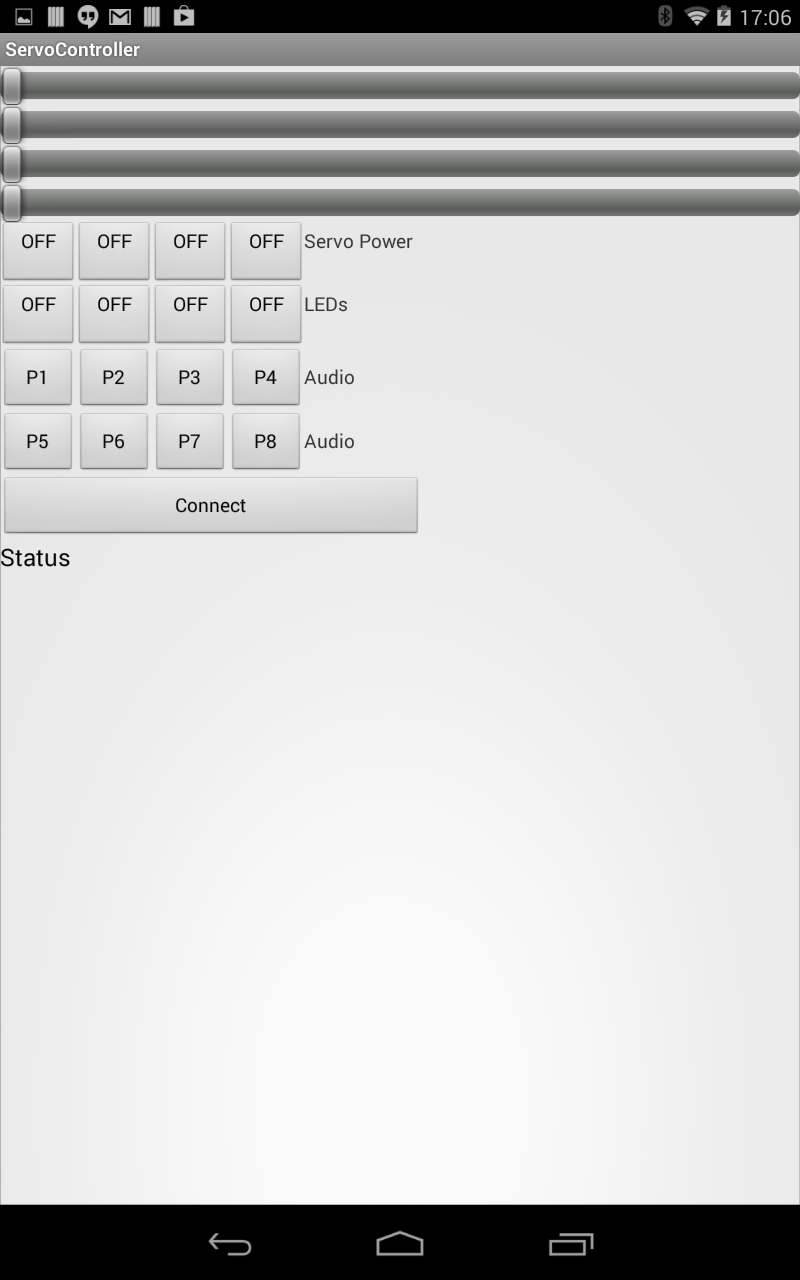
    At the moment it's very bare-bones as you can see. Up till now I didn't know the servo assignment, so it's all generic, (which is nice for you, dear reader, if you'd like to use this app for your own nefarious purposes.)

    Basically the connect button looks for the 'linvor' bluetooth module in your paired devices list, and connects. If 'linvor' isn't in your bluetooth device list then it just connects to the first one.

    The sliders at the top set the servo PWM values, and the first row of buttons turns the PWM on and off. RC servos use PWM between 1 and 2ms for the position, but it turns out if you just cut the signal they basically turn off. This is quite handy for the continuous rotation walking drive servo, because you can never quite find the zero point. So now you can just set the direction with the slider and turn it on and off with the button.

    The implementation uses a 200ms update timer to avoid overflowing the RX buffer on the arduino. To set the PWM it sends 'a' thru 'd' then 00 thru 64, then LF.

    The LEDs row simply toggles IO's on and off, we've got the laser and some LEDs on here. This just sends 'A' thru 'D' for the channel then '0' or '1', then LF.

    The next two rows send commands to play different wav files. (At the moment they're a bit NSFW). To do this it just sends 'p' then '0' thru '5', then LF.

    Limitations a'Plenty:

    At the moment the code does nothing to read from the device, Any returned text is placed in the status label.

    What would be nice is a way to get a listing of the audio files on the SD card and allow you to map the audio buttons. It would be relatively easy to implement, just make the arduino code run a directory listing on command, and parse the result.

    The state can also get out of sync. If you reset the arduino and some buttons are still toggled etc, they wont match up. Some sort of periodic sync message would be nice.

    The UI sucks, I was imagining skinning all the controls with a nice retro looking chromed crusader theme, but unfortunately my GIMP skills aren't up to the task.

    Anyways, here's the code for your enjoyment:
    https://github.com/scottwday/ServoController

  • Finishing Touches

    Ossum04/28/2014 at 12:32 0 comments

    Scott and I got together on Saturday to hammer out the final details and give Scott a chance to the Bluetooth module working properly. Armed with a scope this time he made much better progress than I had. Having the hardware also meant that he could do some tweaks to his code to fix a few bugs, I'll let him elaborate on that though.

    In the meantime I got stuck back into the wiring. Most of the wires needed to be trimmed and terminated, because excess length was wasting valuable space.

    I also wired up the LEDs for the shoulders and visor, with inline resistors. It seemed simplest if we ran the LEDs directly off the micro's IO pins, so they got resistors to bring the current down to about 15mA (The visor got two hi-bright red LEDS in series with 120 Ohms of resistance for 15mA current. The Shoulders got 270 Ohms for their single green LEDS, aiming at a similar current.)

    The shoulders didn't diffuse the lights very nicely, so I took a bit of waterpaper and dulled up the inside of the green lens as well as sanding the LEDs themselves to make them less directional.

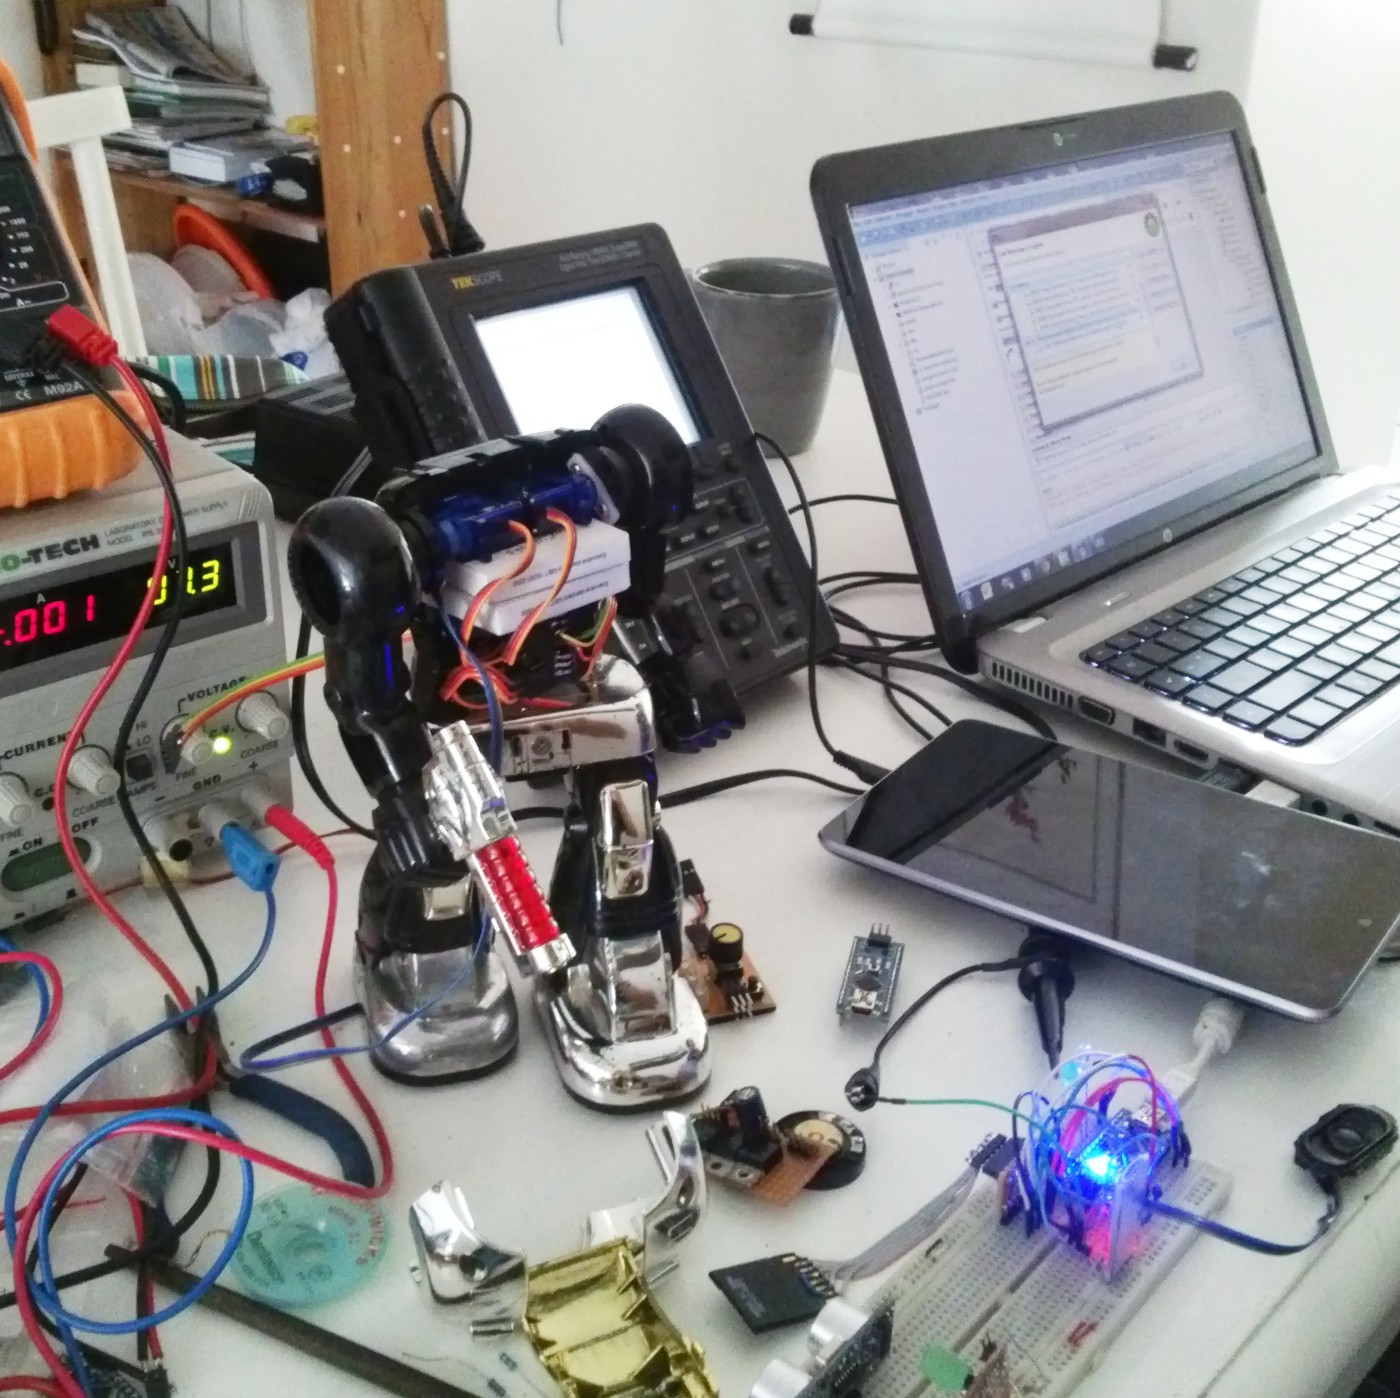
    Testing the power distribution board is working, feeding it from a supply and checking the current draw.
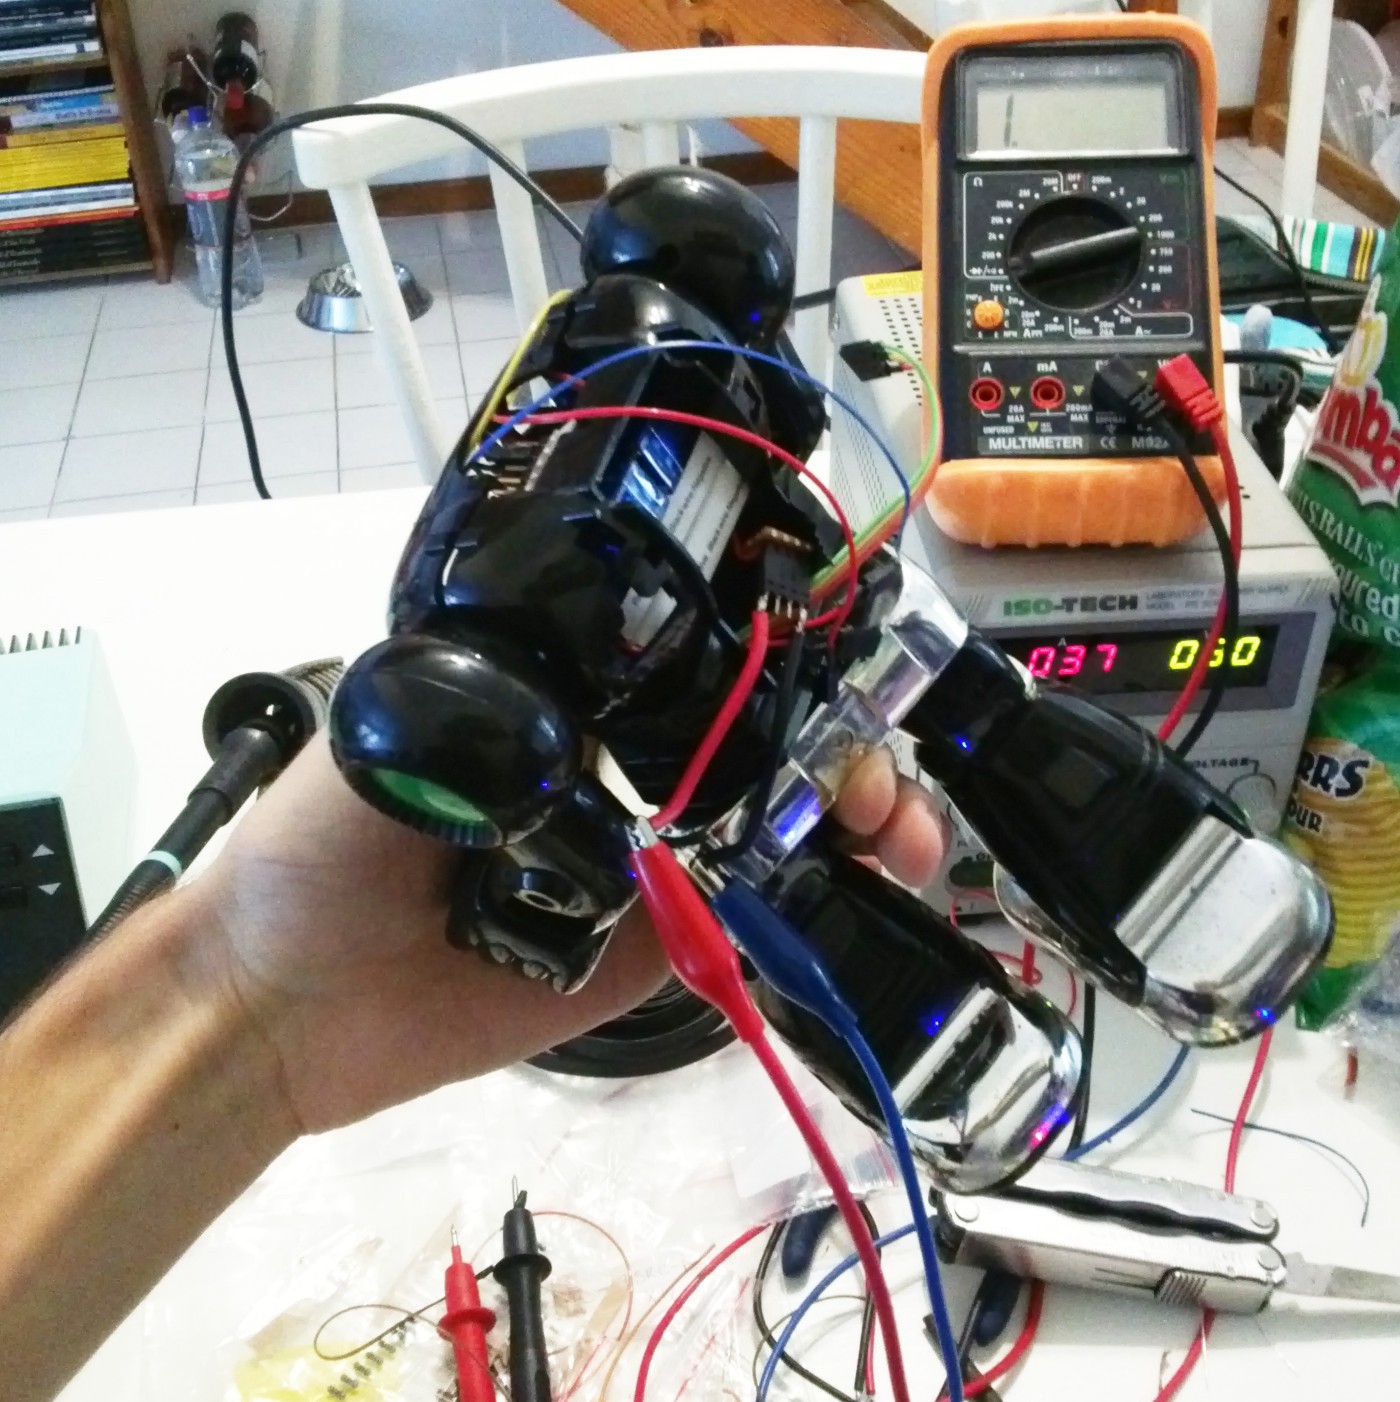
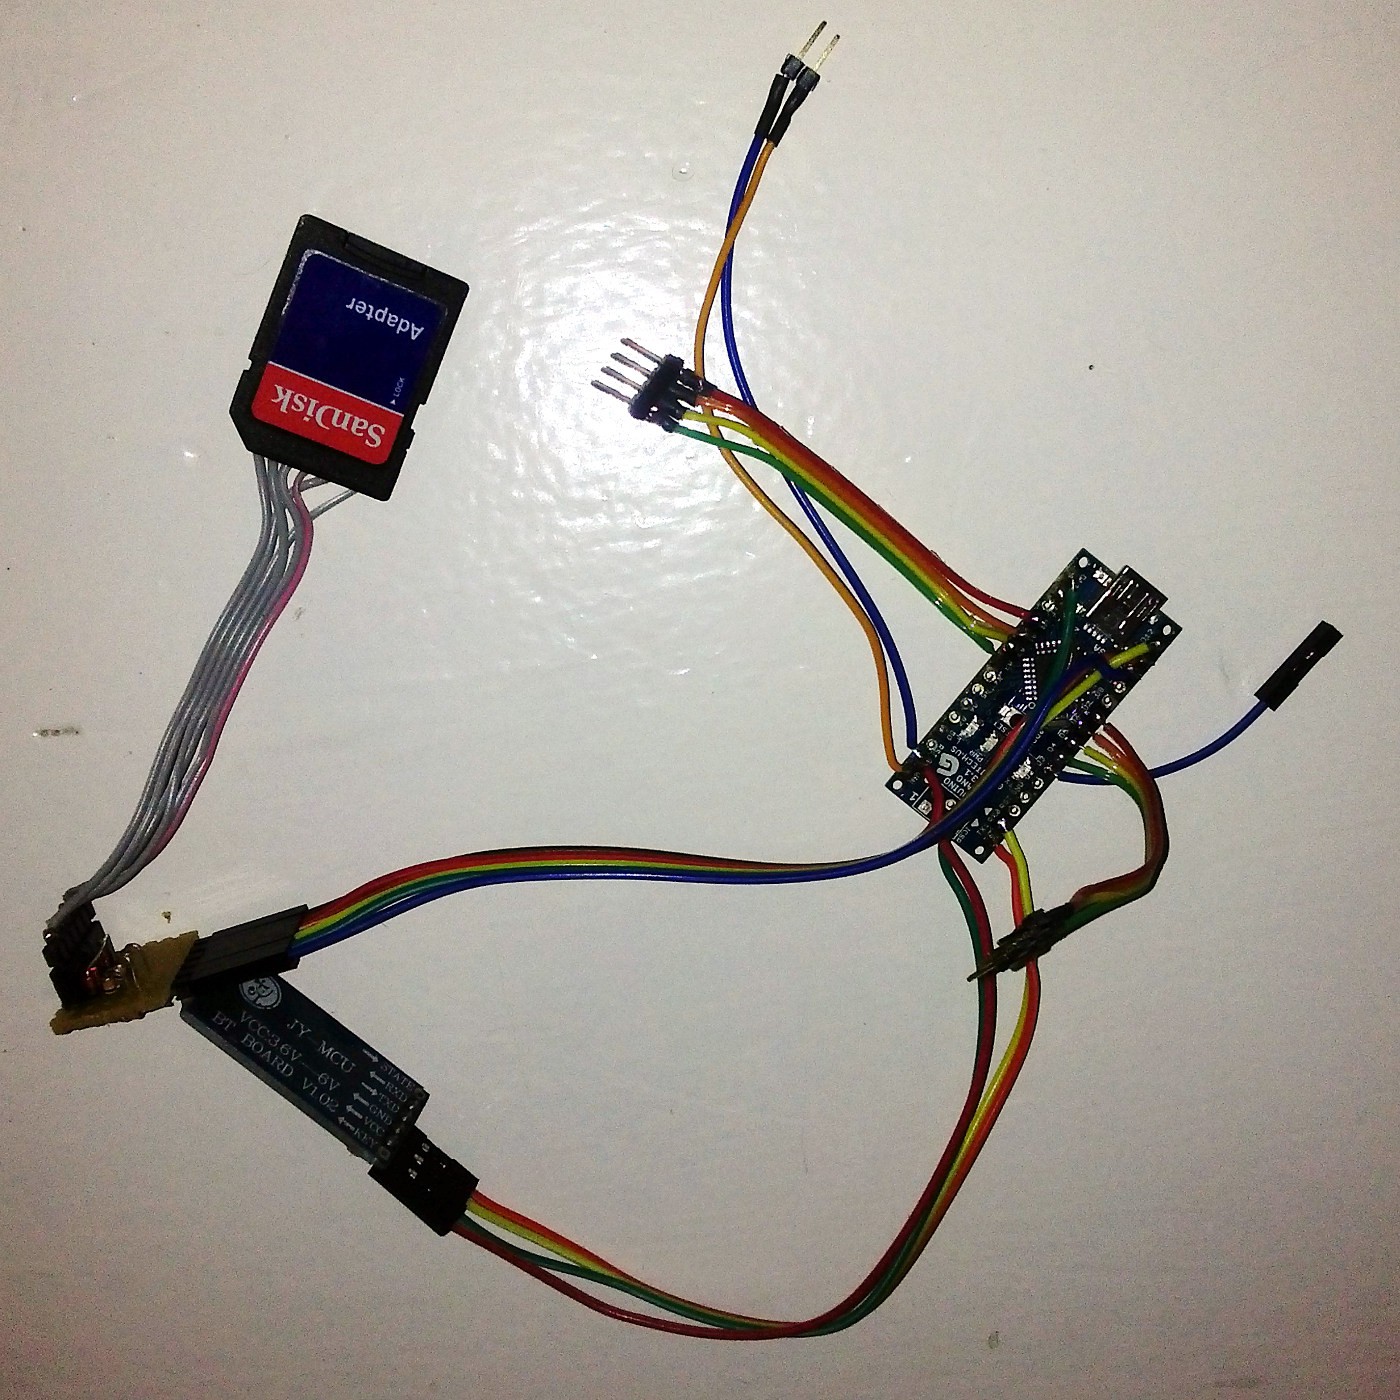
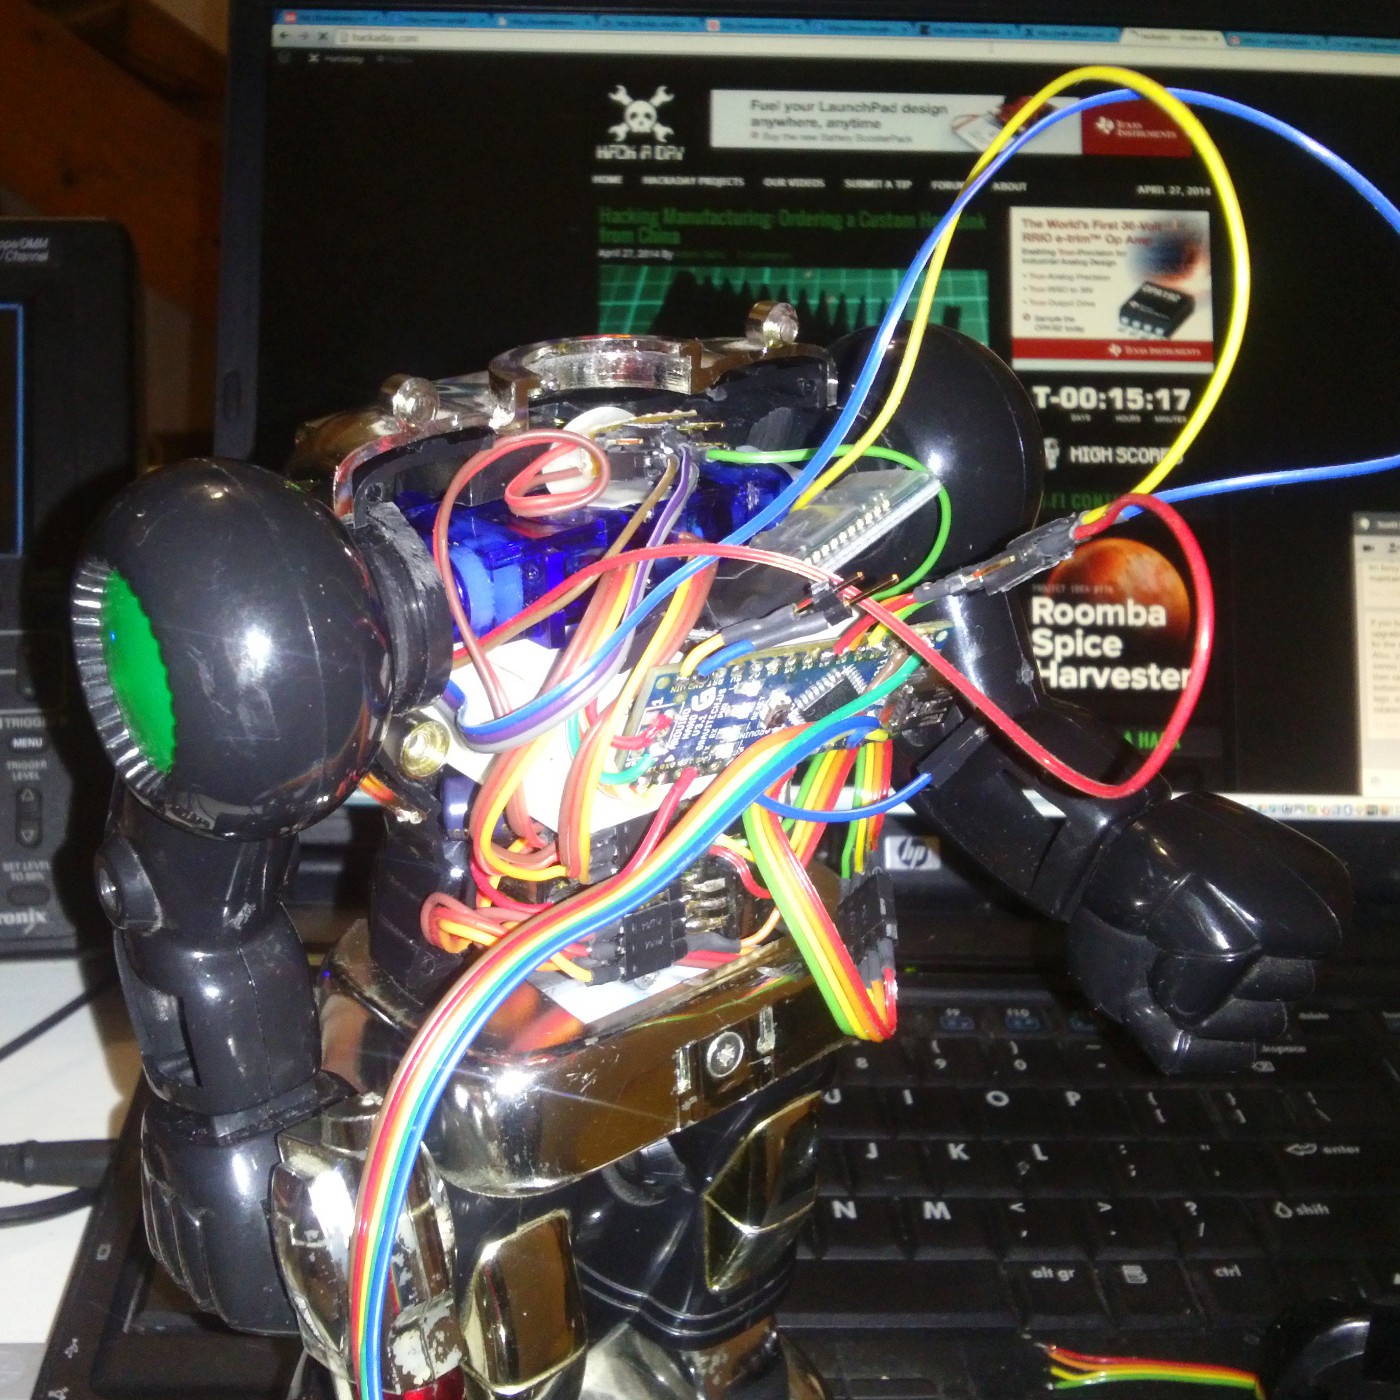
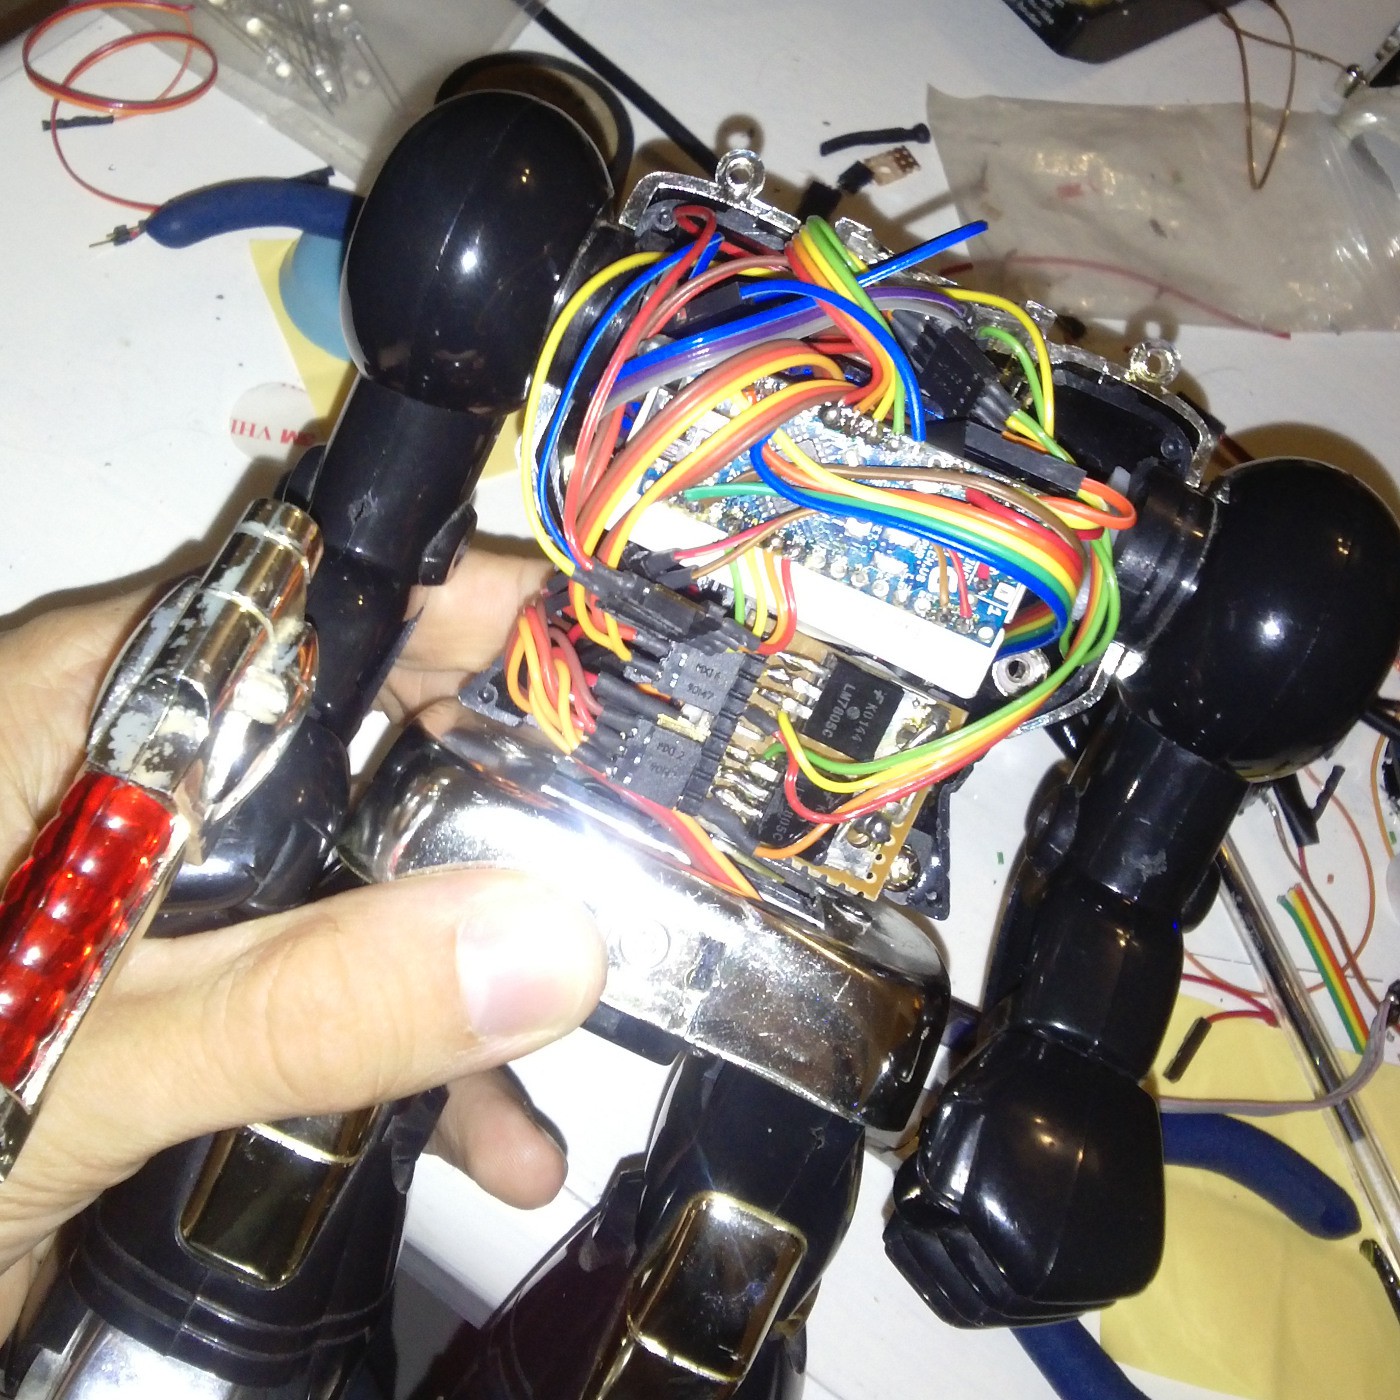
    The original plan had been to put the Arduino and Bluetooth module in the "backpack" where the AA batteries used to be, but space was just too tight. instead we soldered cables with pins and sockets directly to the Arduino, which I had previously removed the headers from. Here it is with long wires for testing, these are got trimmed dramatically once I knew where things were going to fit.


    It was important that the Bluetooth module can be disconnected, since it cannot be attached while the Arduino is programmed.

    Here I am starting to get things into the right places, this was really a puzzle to fit everything in such a tight space.

    By 2:30AM this morning things were starting to look a bit neater, most of the cables have been trimmed to their final lengths and the chest plate can bit fitted on (barely!).
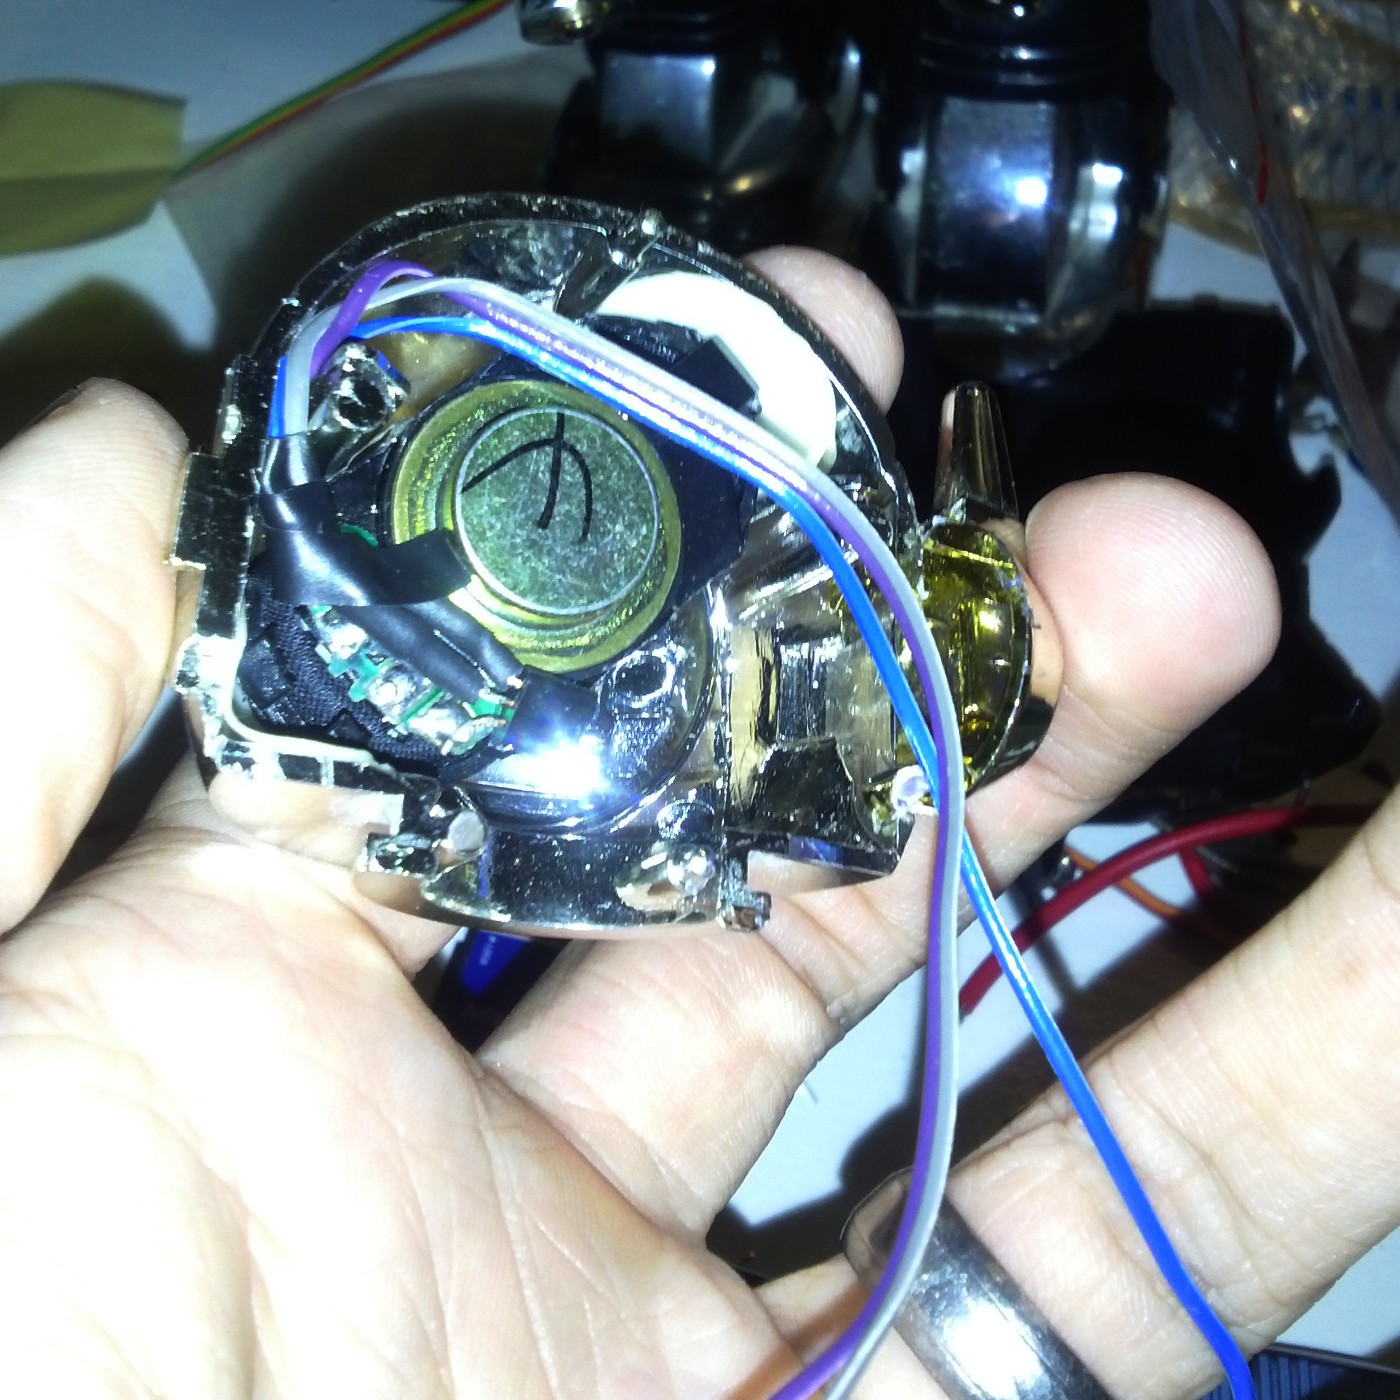
    The old 4 Ohm speaker that I scavenged out of broken 15" LCD monitor just fits into the head, after some liberal chopping of the plastic bits with side cutters. I made sure that the speaker and LEDs in the head were well stuck down with 3M adhesive pads, to make sure that nothing vibrates annoyingly when the speaker is working.

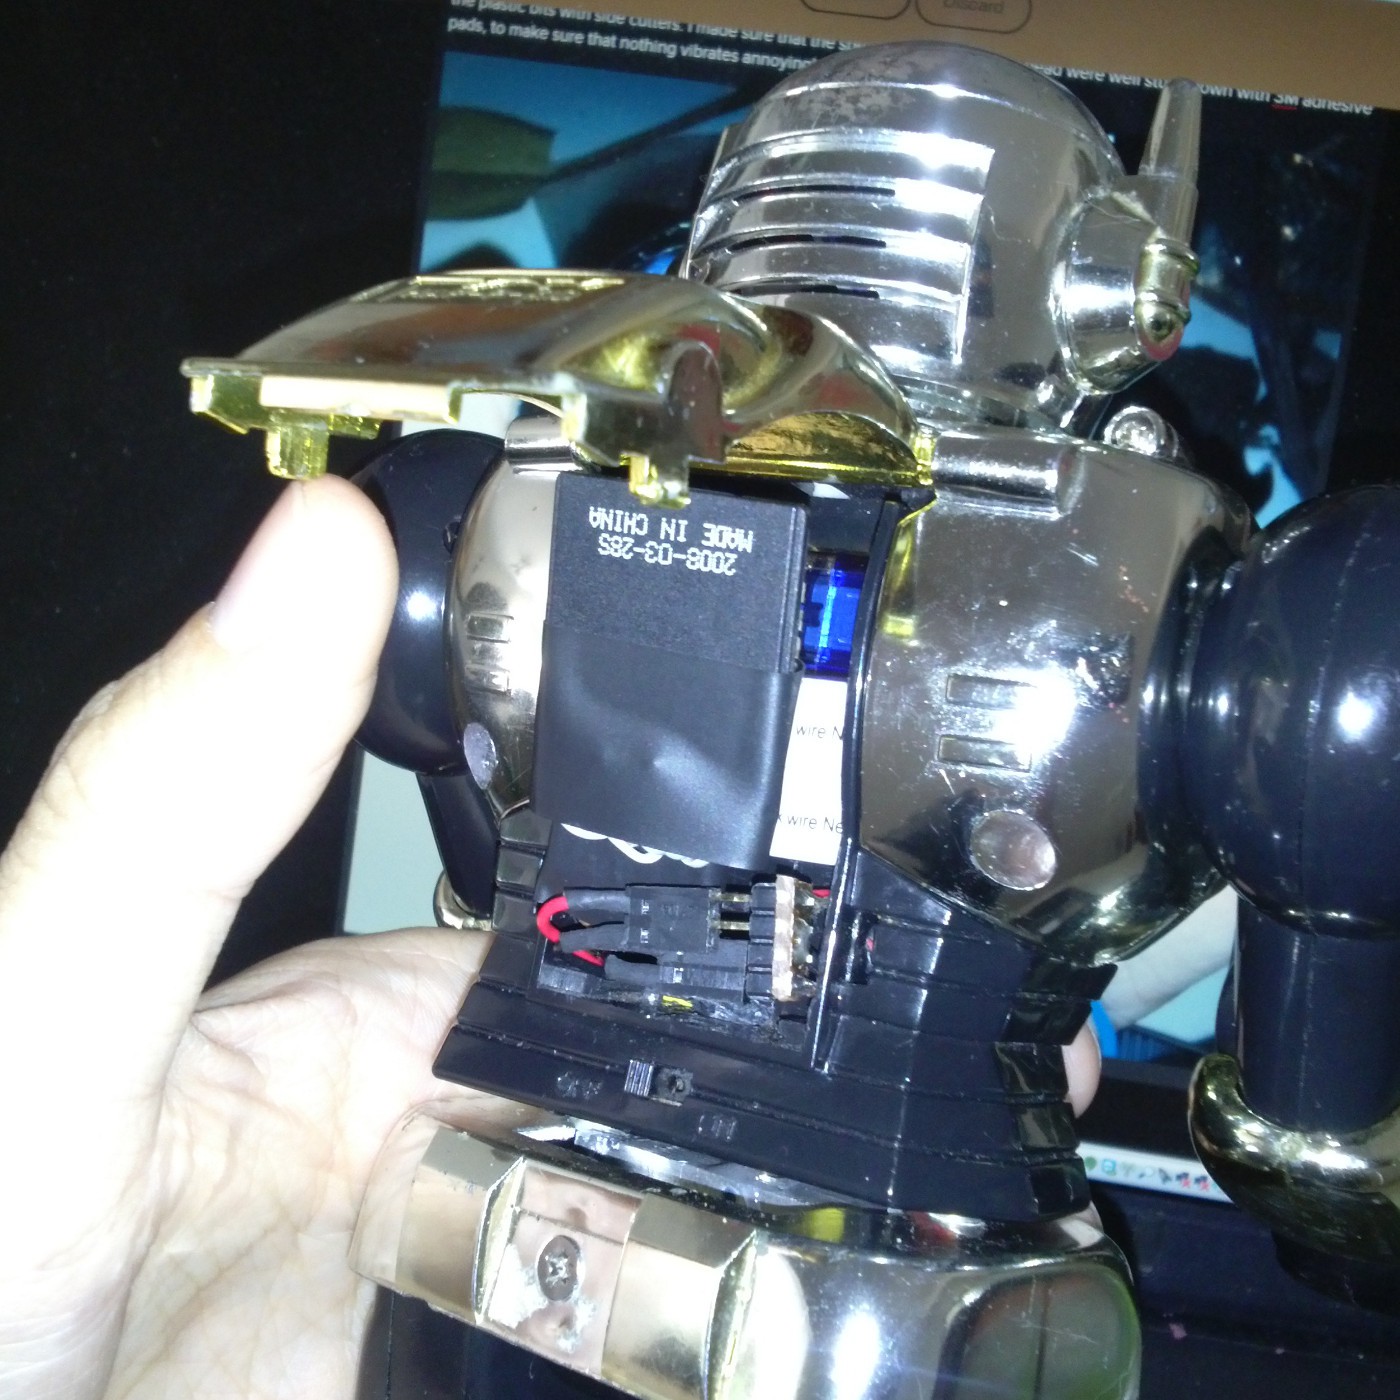
    The micro SD card adapter sits in the back, which is actually quite convenient, allowing us to upload new soundbites whenever we like. You can see the battery connectors too, so the batteries can be charged without disassembling anything.

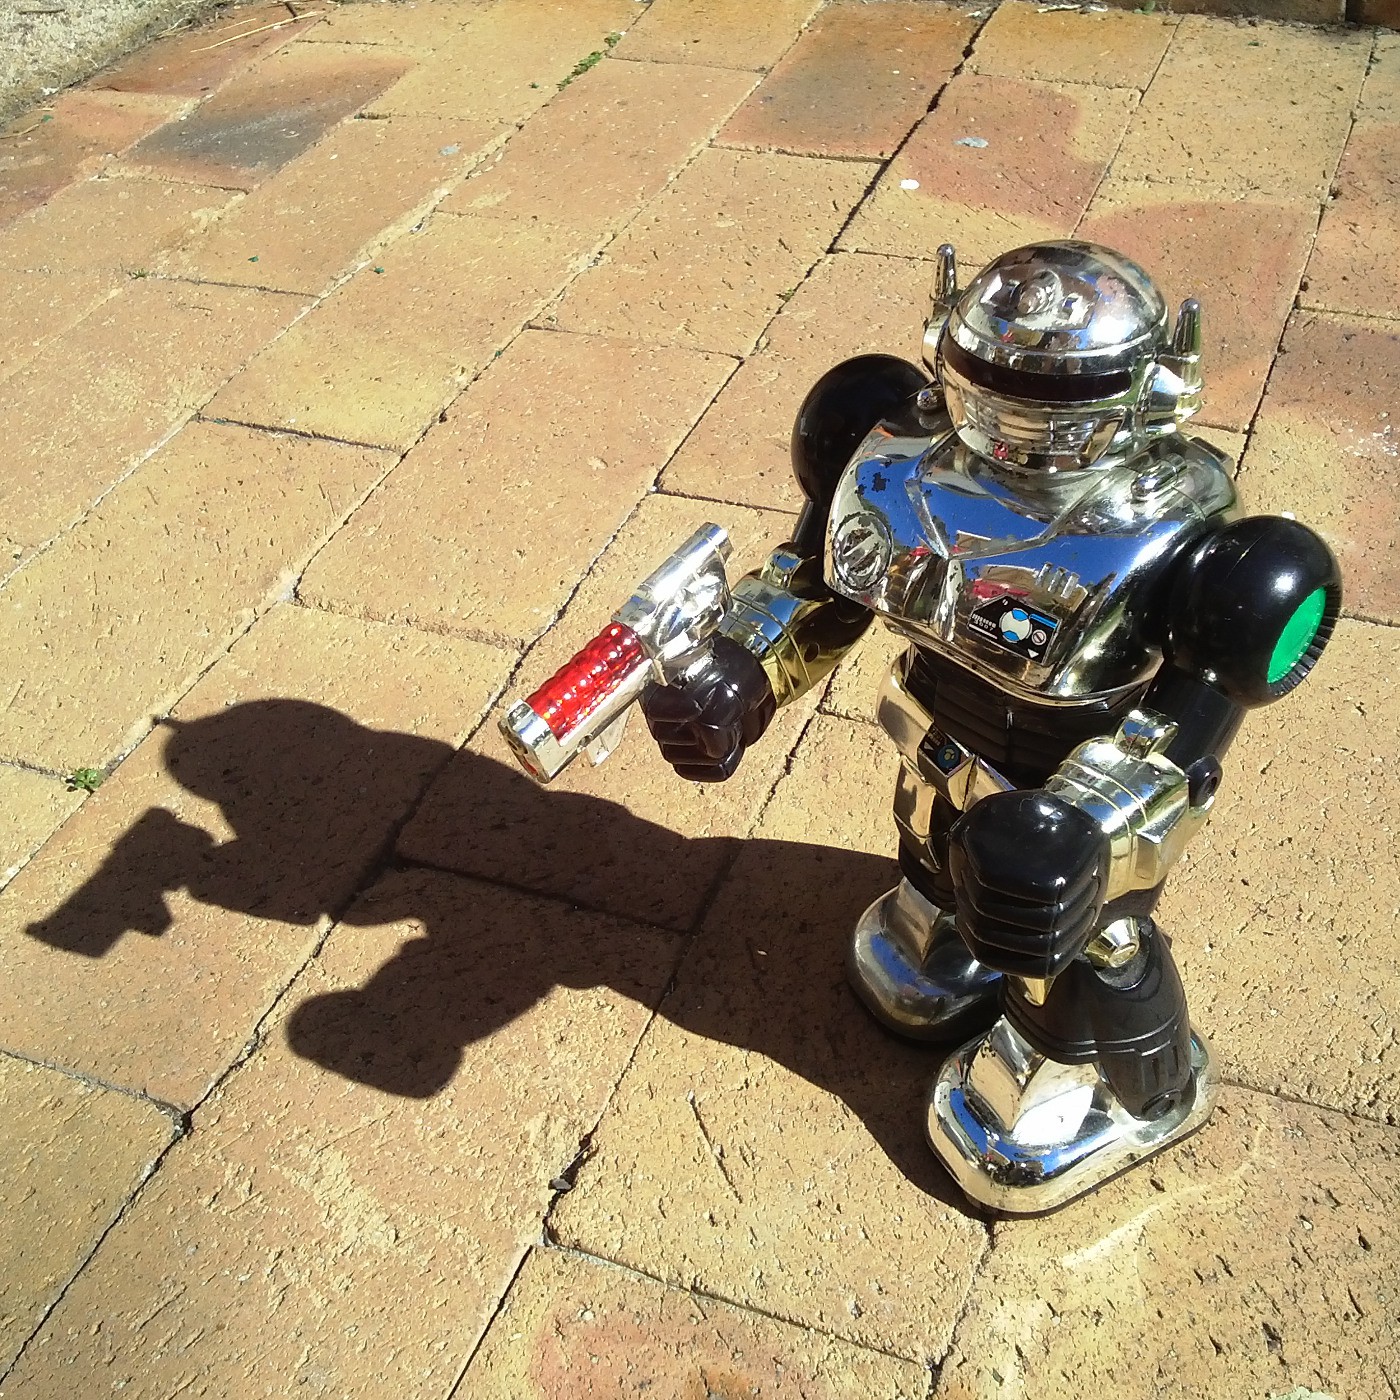
    And here he is, complete, all trim re-installed, looking like his good old shabby self, yet stuffed with modern technology! I will get some video tonight, but I would say we can call this project done. At least for now!
  • Power Distribution

    Ossum04/28/2014 at 09:43 0 comments

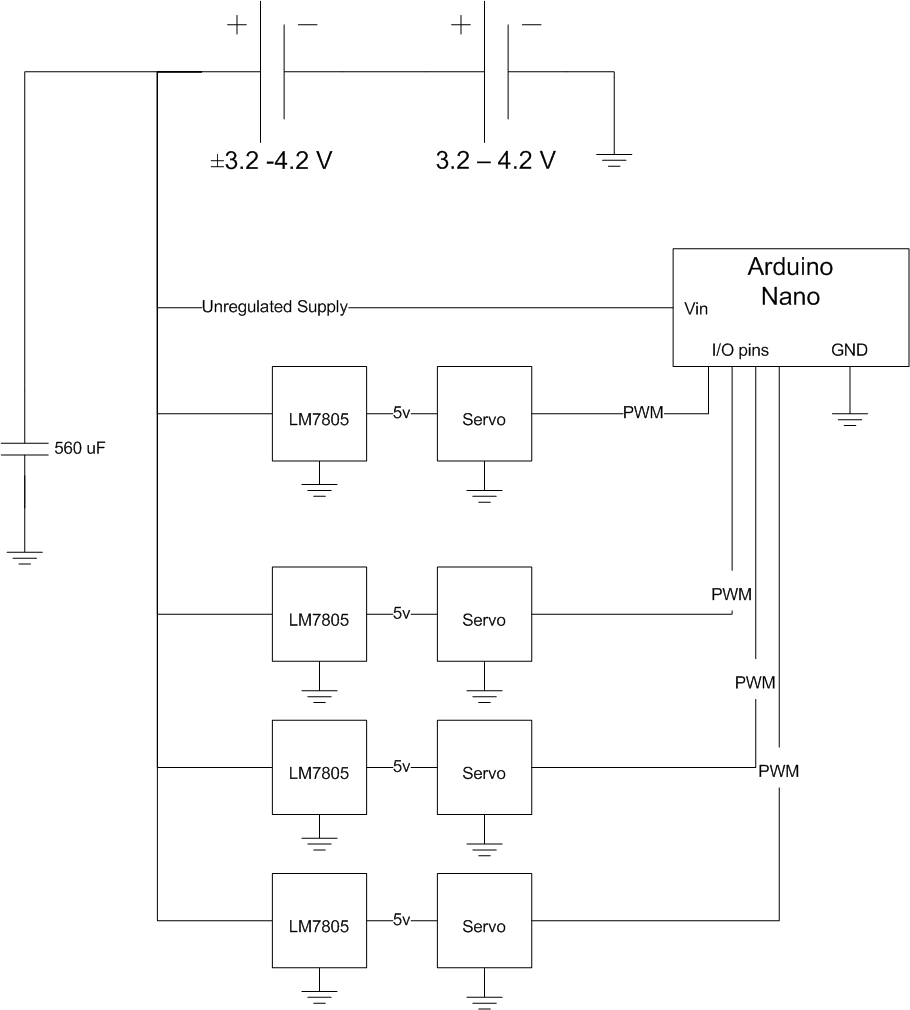
    Most of the components in the robot require 5V (some can take more than 5V, but the servos could not tolerate the 8.4V that the batteries would supply at maximum charge). The arduino has a regulator onboard,  but it is not sufficient to supply regulated power to everything, so I need to find another way of supplying 5V to the components that needed it.

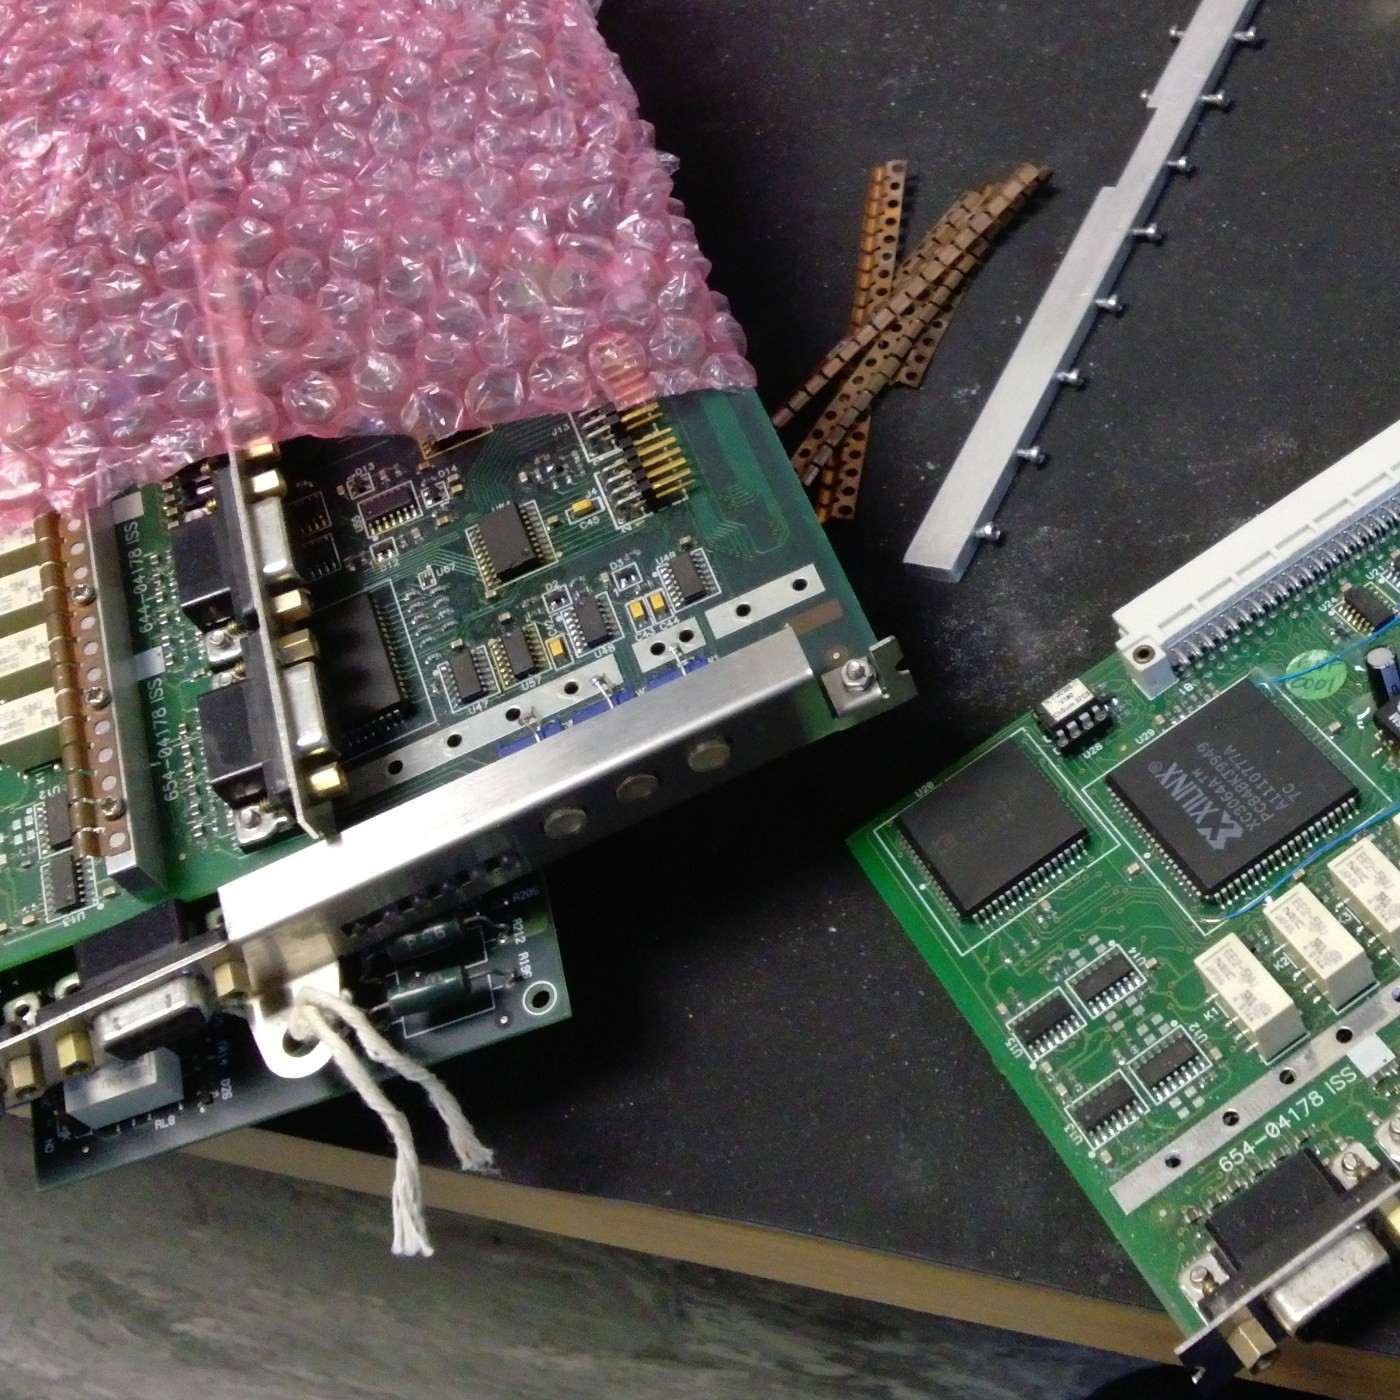
    The metal gear servos seemed to be drawing close to an Amp when under load. I don't have any compact 5V switching regulators handy, so linear regulators are going to be the order of the day. They were easy to scavenge from old telecoms equipment. 

    A LM7805 regulator is only rated around 1 Amp in the TO-220 package, depending on heat sinking, so we decided to go with one per servo. This also left extra capacity, especially for the regulators powering the 9g arm servos, to power anything else that wanted 5V.

    I ended up with a circuit as drawn below. The capacitor was definitely needed, the regulator's output was not stable under sudden loads without it. The value was pretty much just what i had lying on my desk though.

    My first attempt was too bulky to fit into the torso, so I remade it into what you see below. The bottom two rows are in series, which gives me extra pins to take off regulated or unregulated supply as needed.
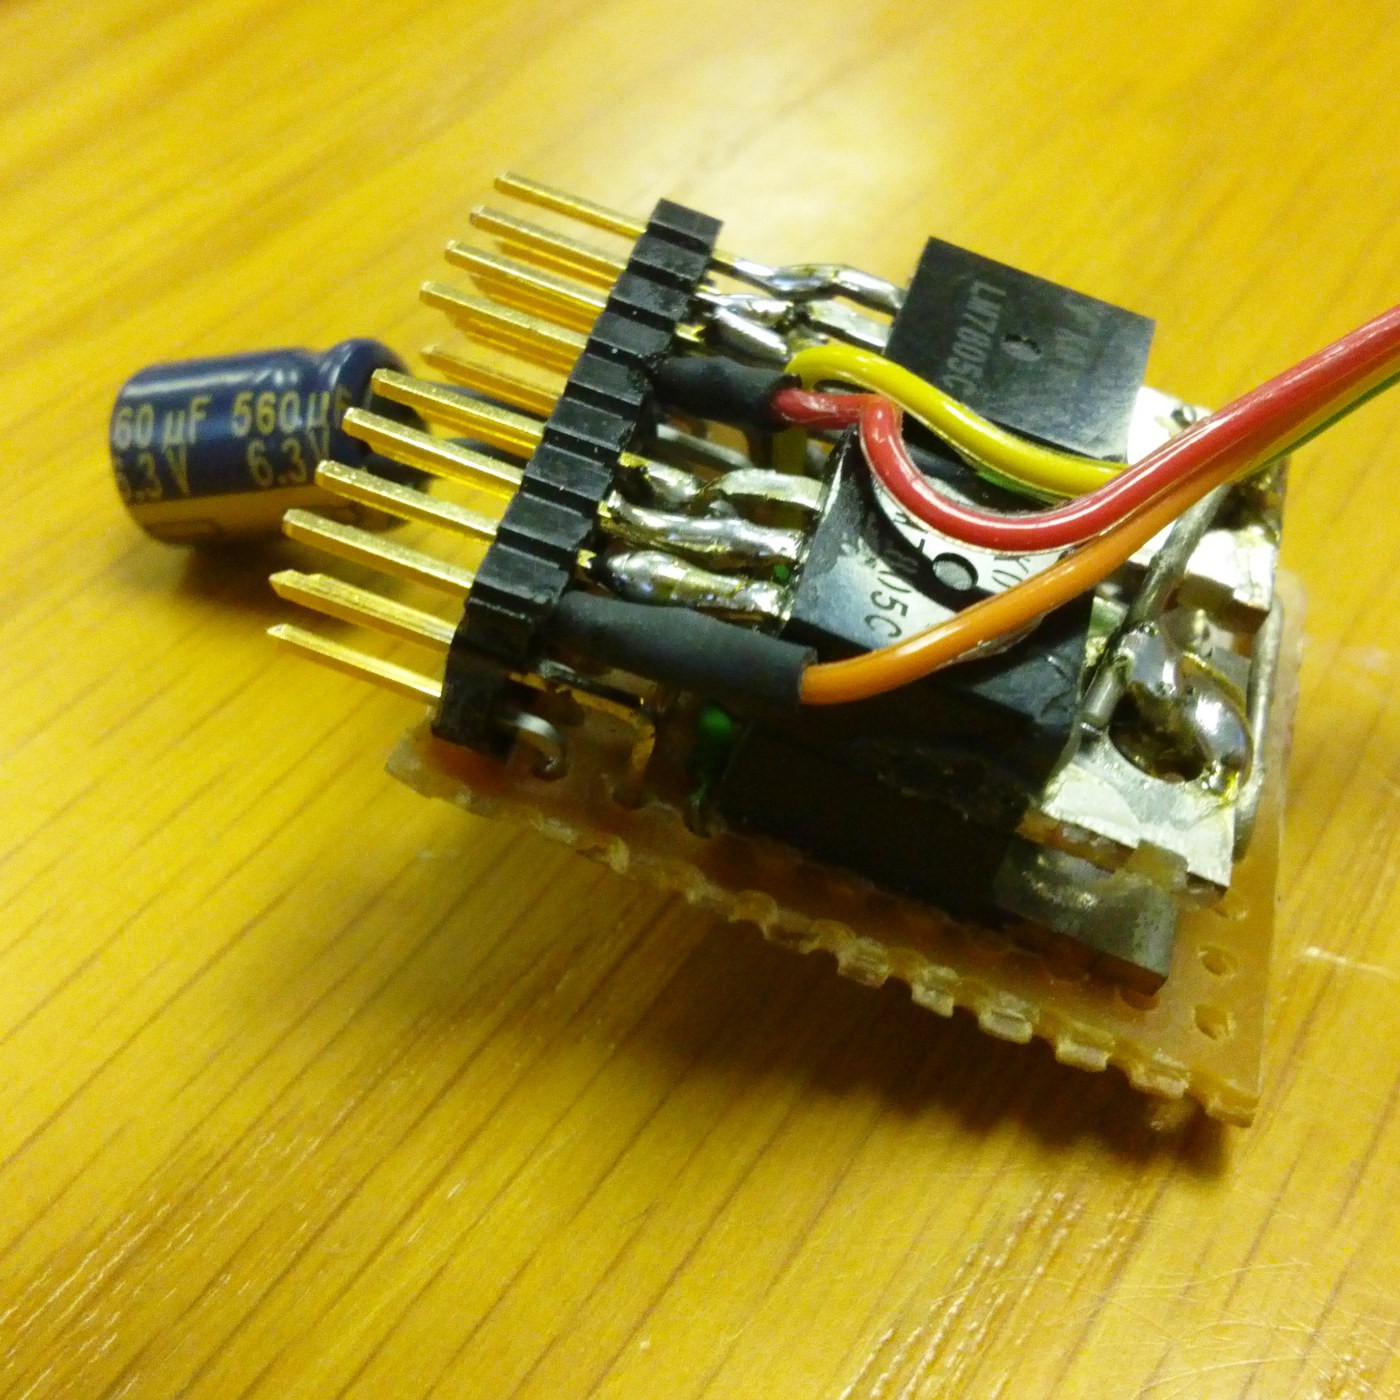
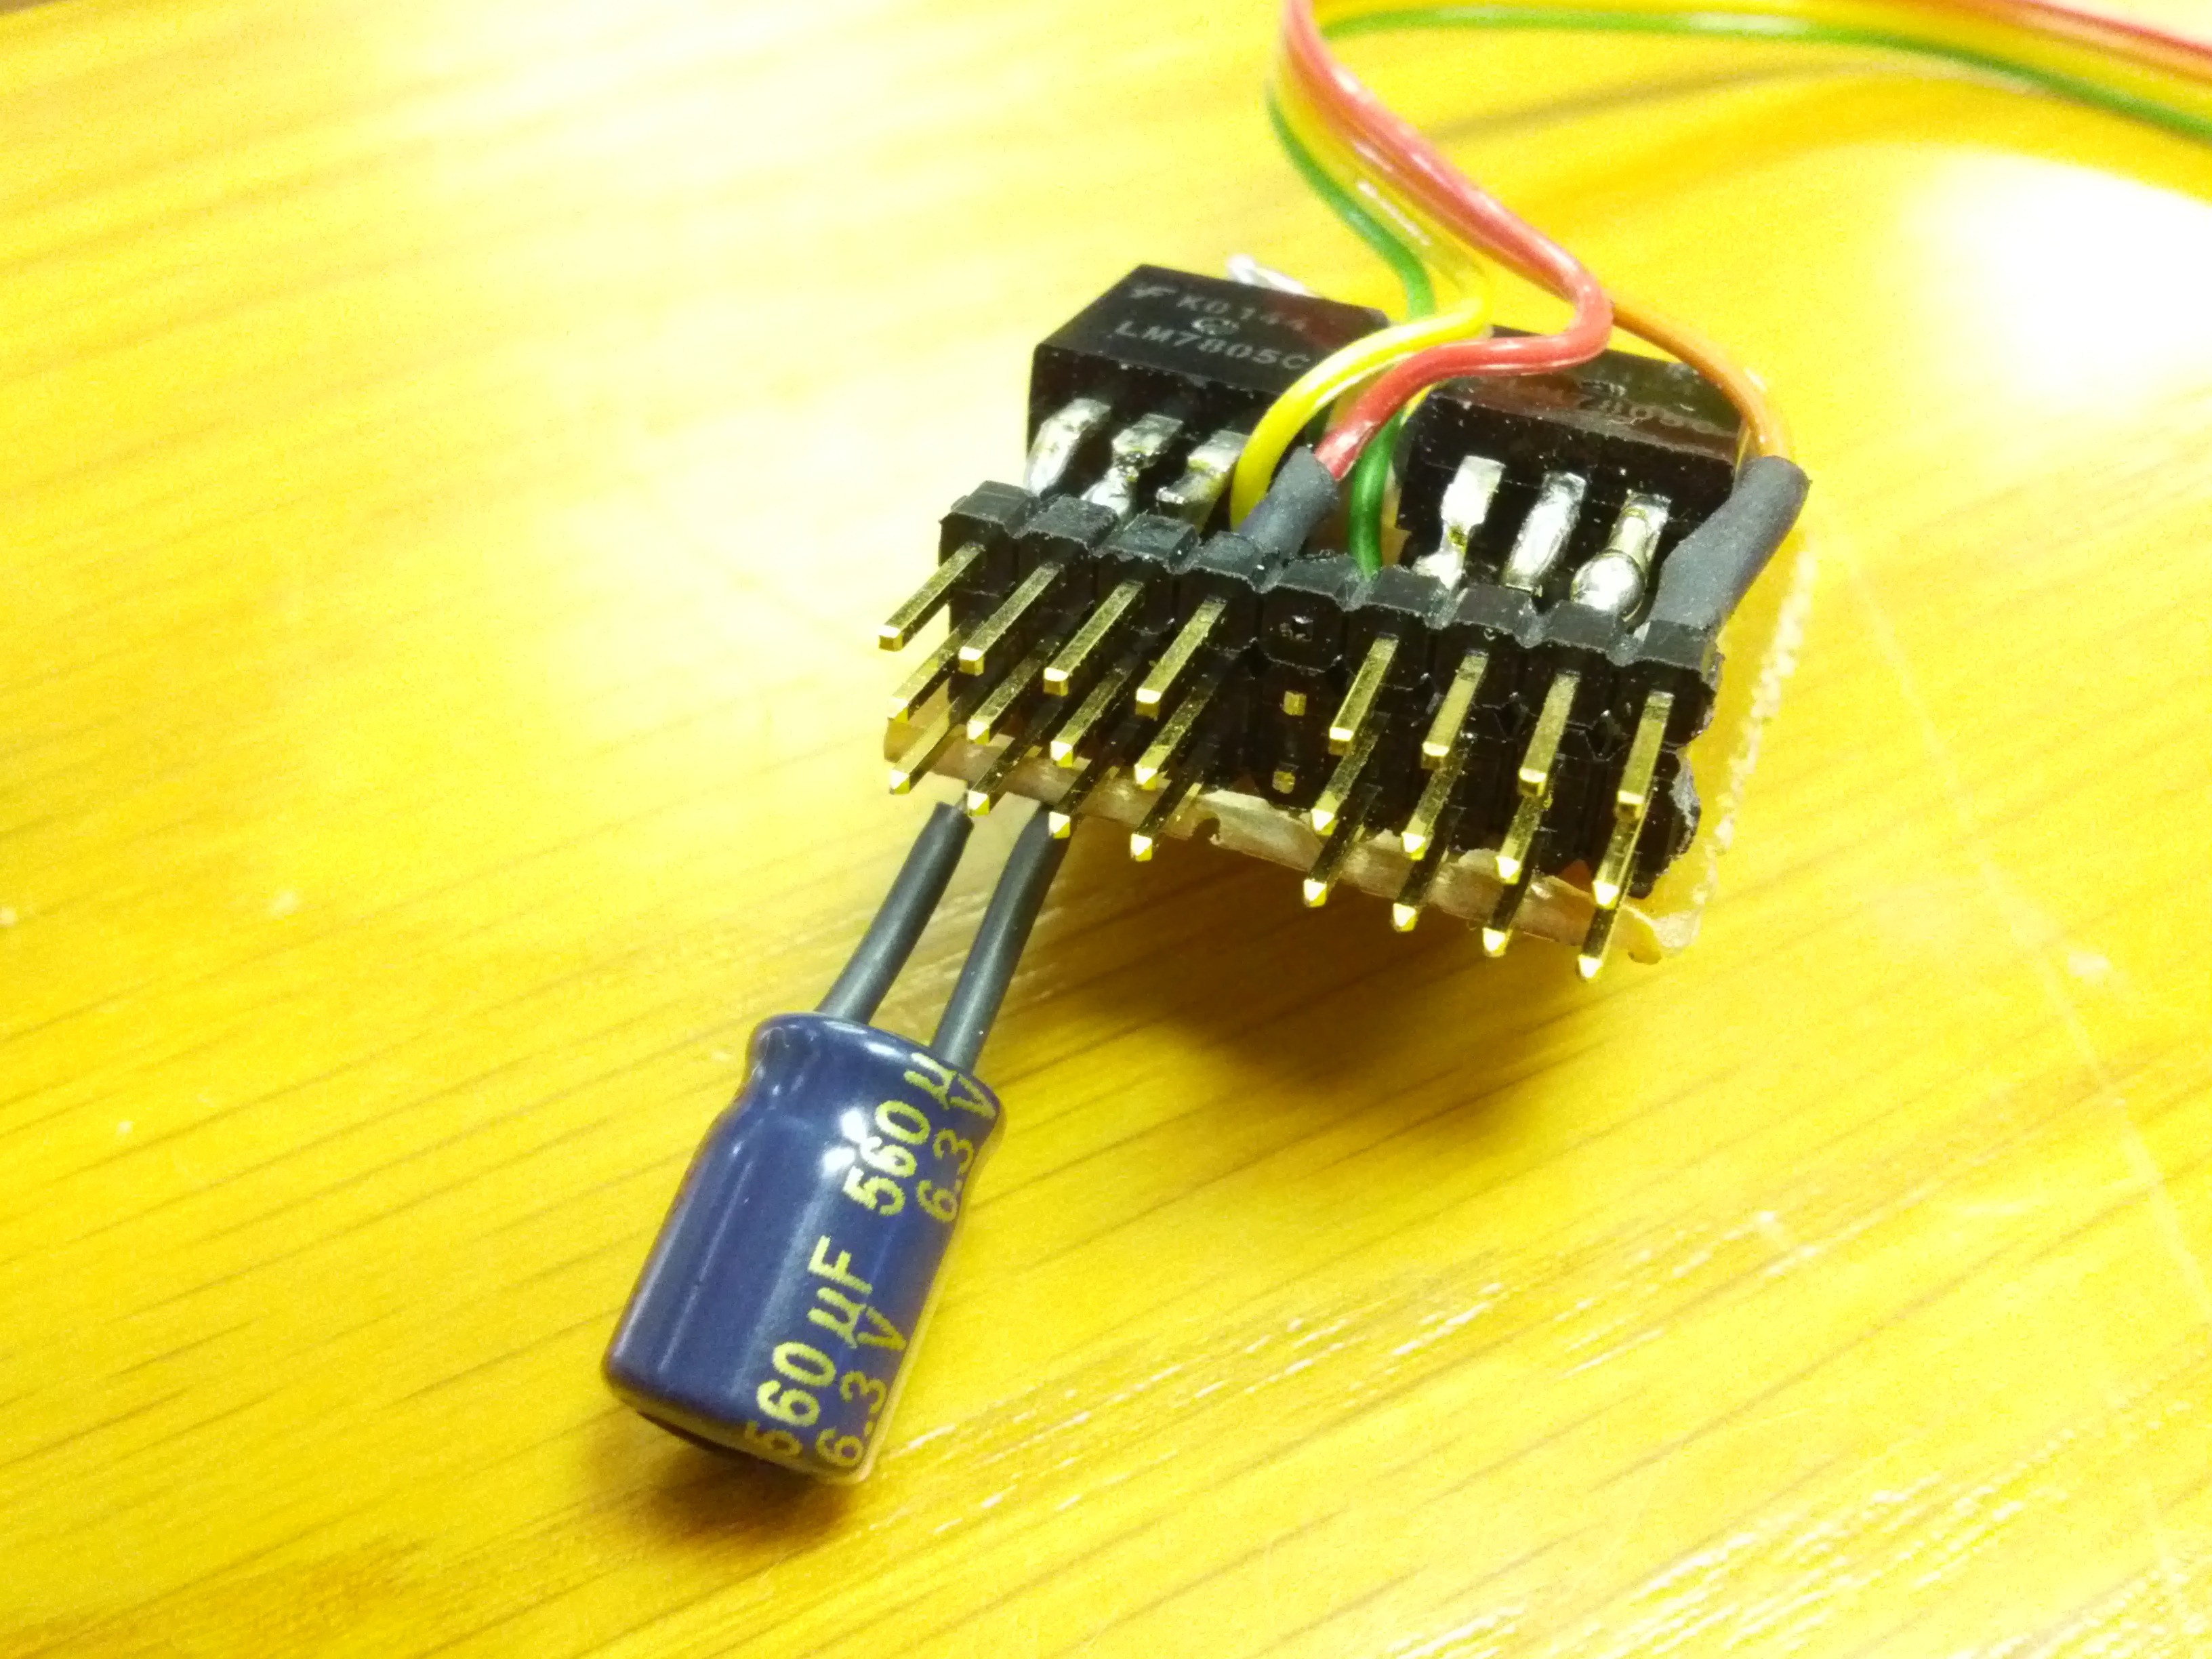
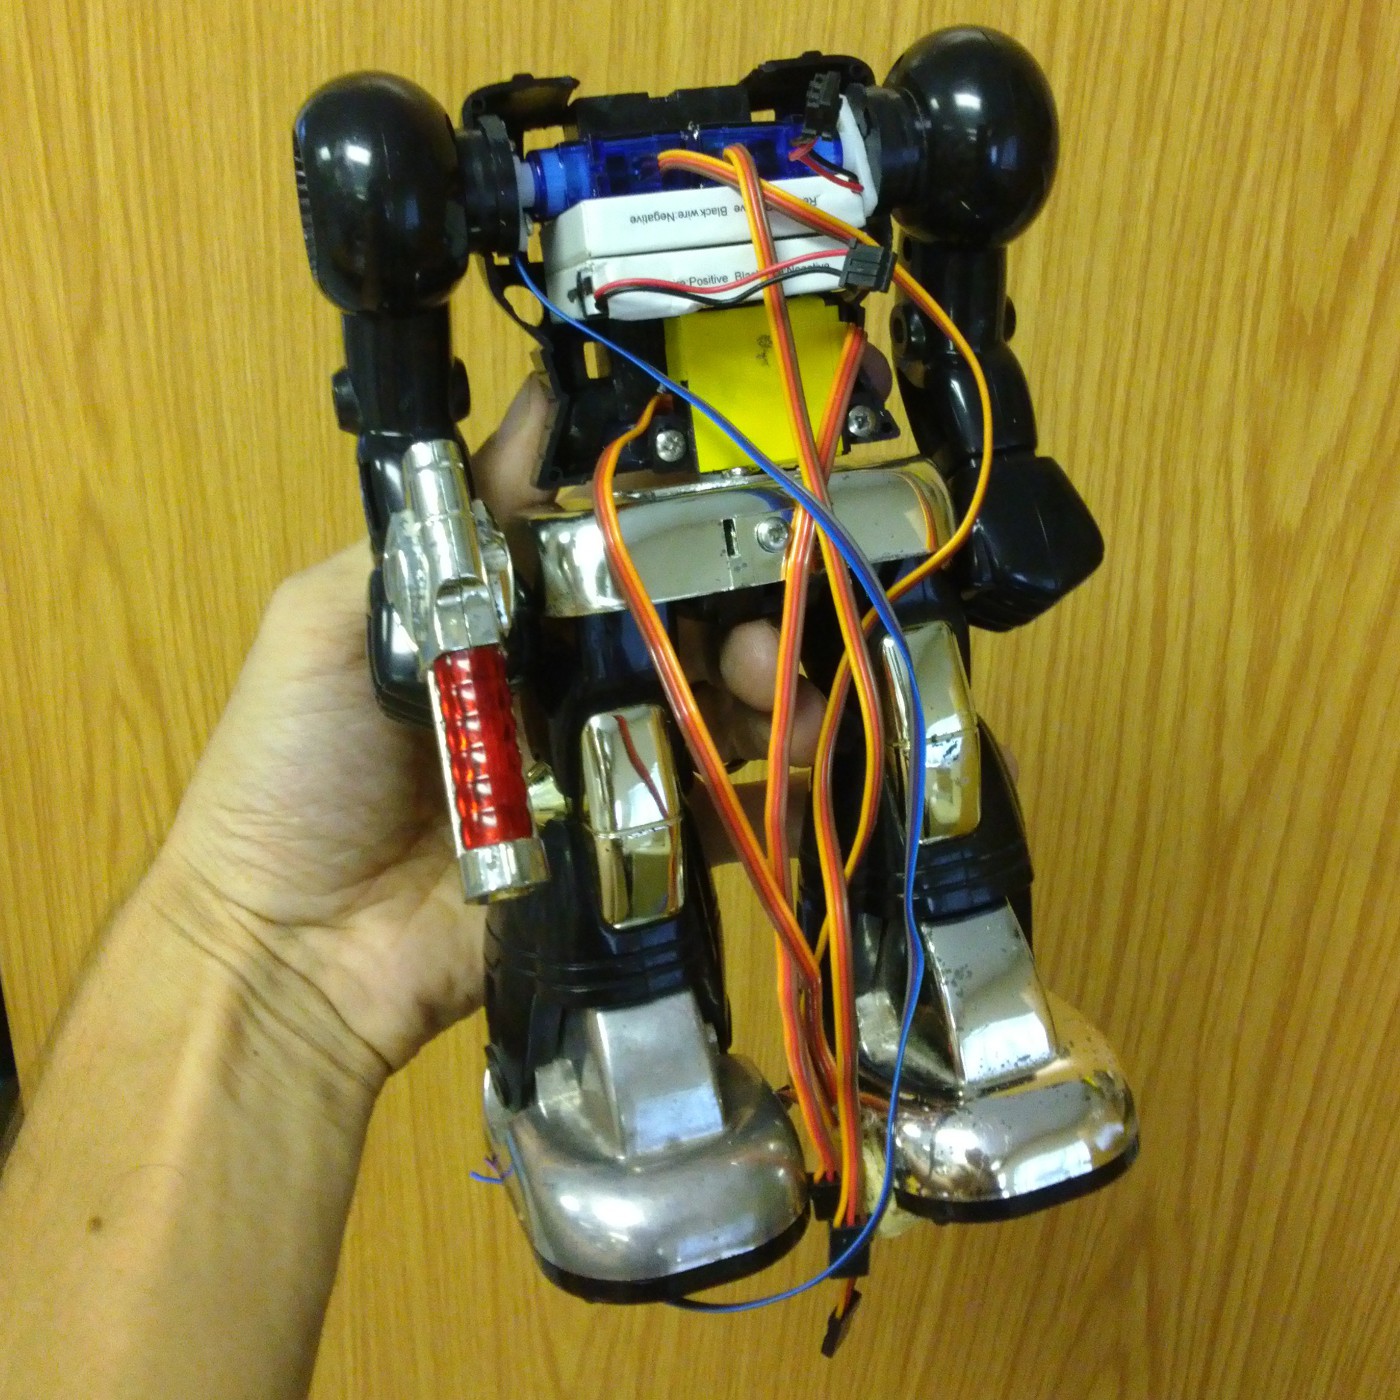
    The ribbon cable brings in the IO pins from the Arduino, meaning that one can just plug in a standard 3-pin servo connector. Obviously this setup is not ideal for heat sinking, but space is at a premium, they are all running under capacity anyway, so it seems to be fine so far.

  • Packing It All In

    Ossum04/22/2014 at 21:15 0 comments

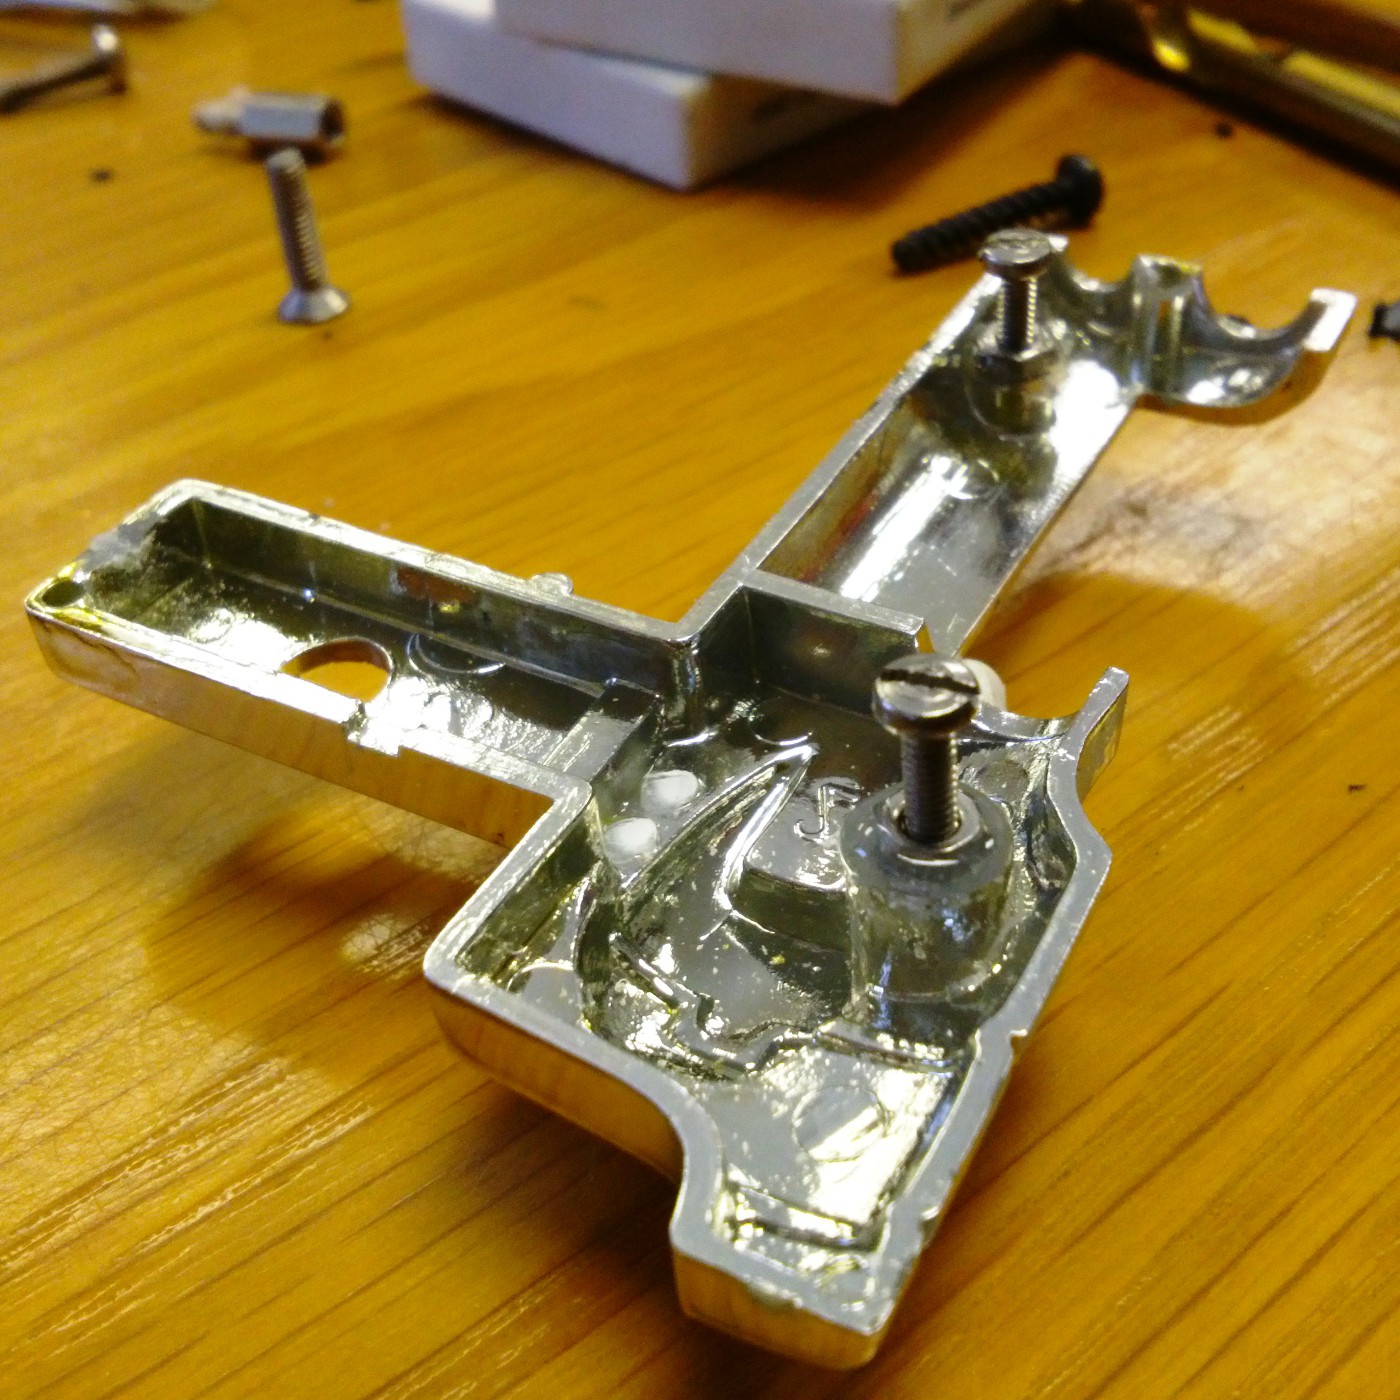
    There was not a lot of space left in the chest after installing the arm servos, but they couldn't go anywhere else. The next biggest things are the batteries, so they needed to be placed next. I tried all the orientations I could think of, the only way that they would fit, while still leaving room for a torso servo, was to cut out some more of the battery bay and put them directly under the arm servos.

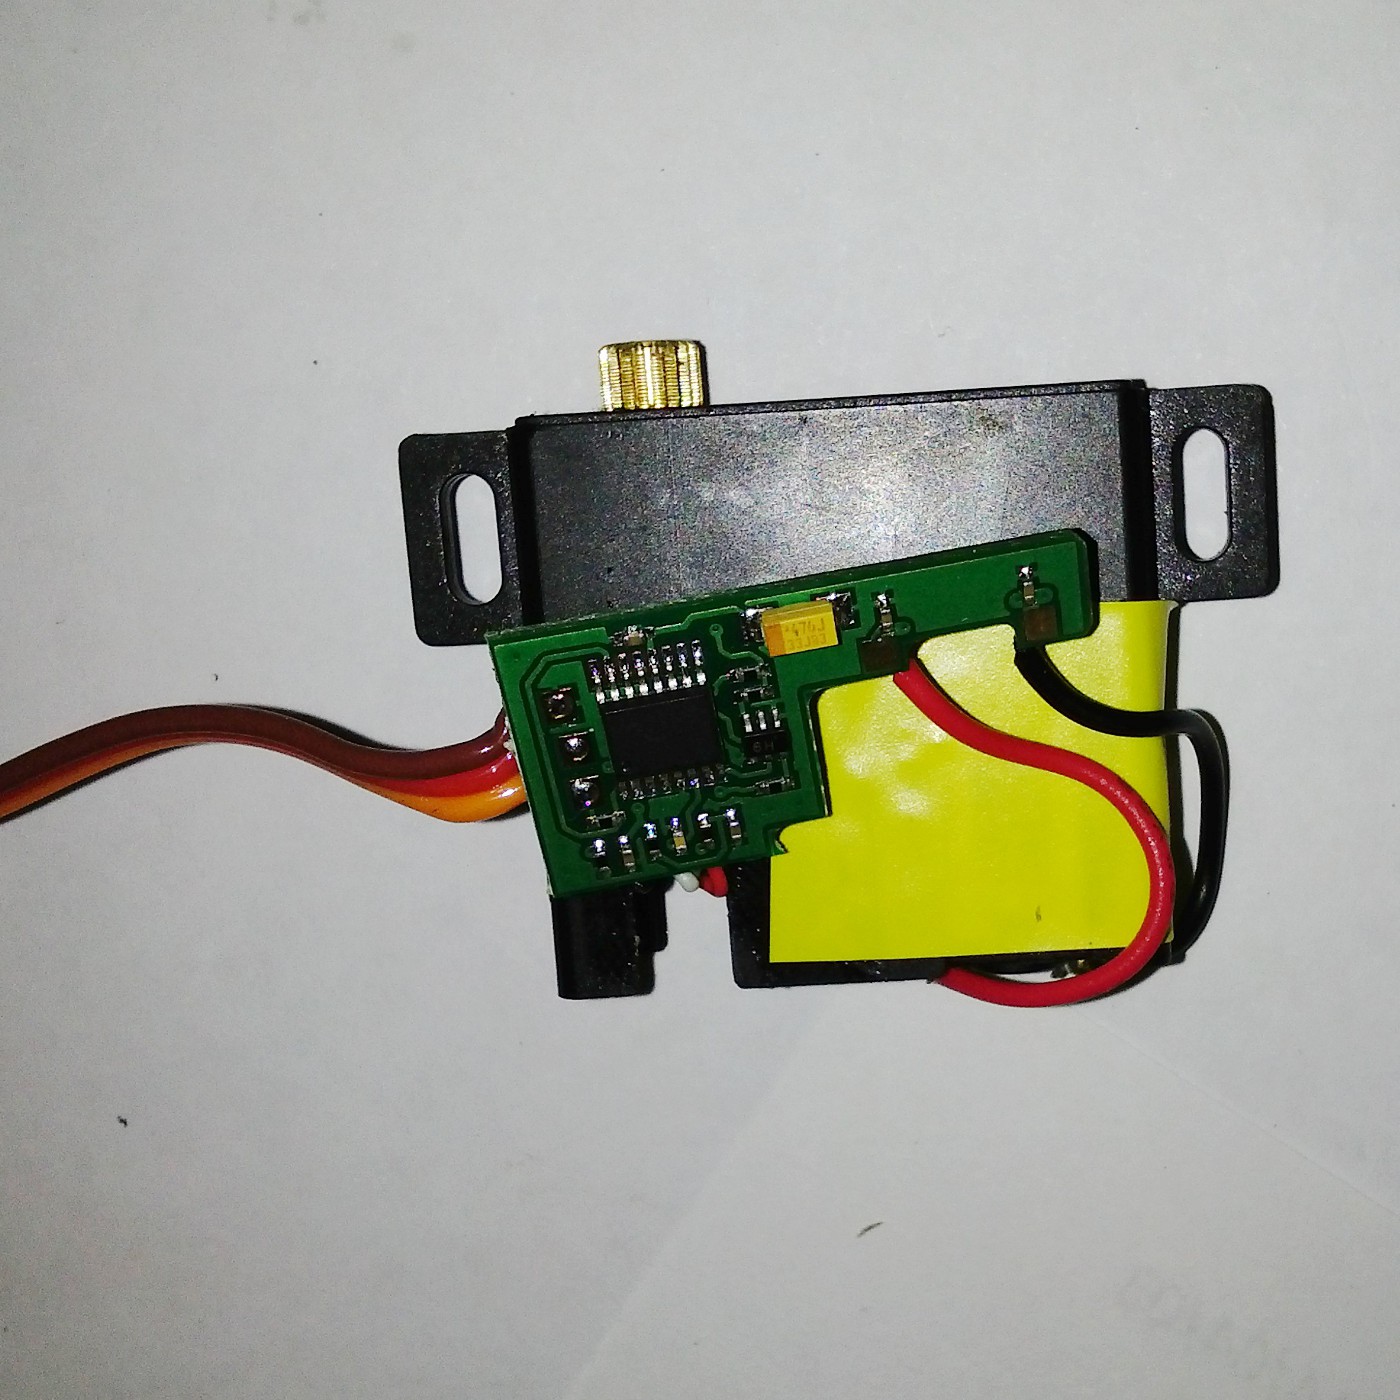
    The torso servo just fits under the batteries, although I had to disassemble it, move the circuit board and remove some of the casing to make it fit. In fact, everything is so tight that the batteries and arm servos don't need any fasteners at all.

    Here is the modified servo.

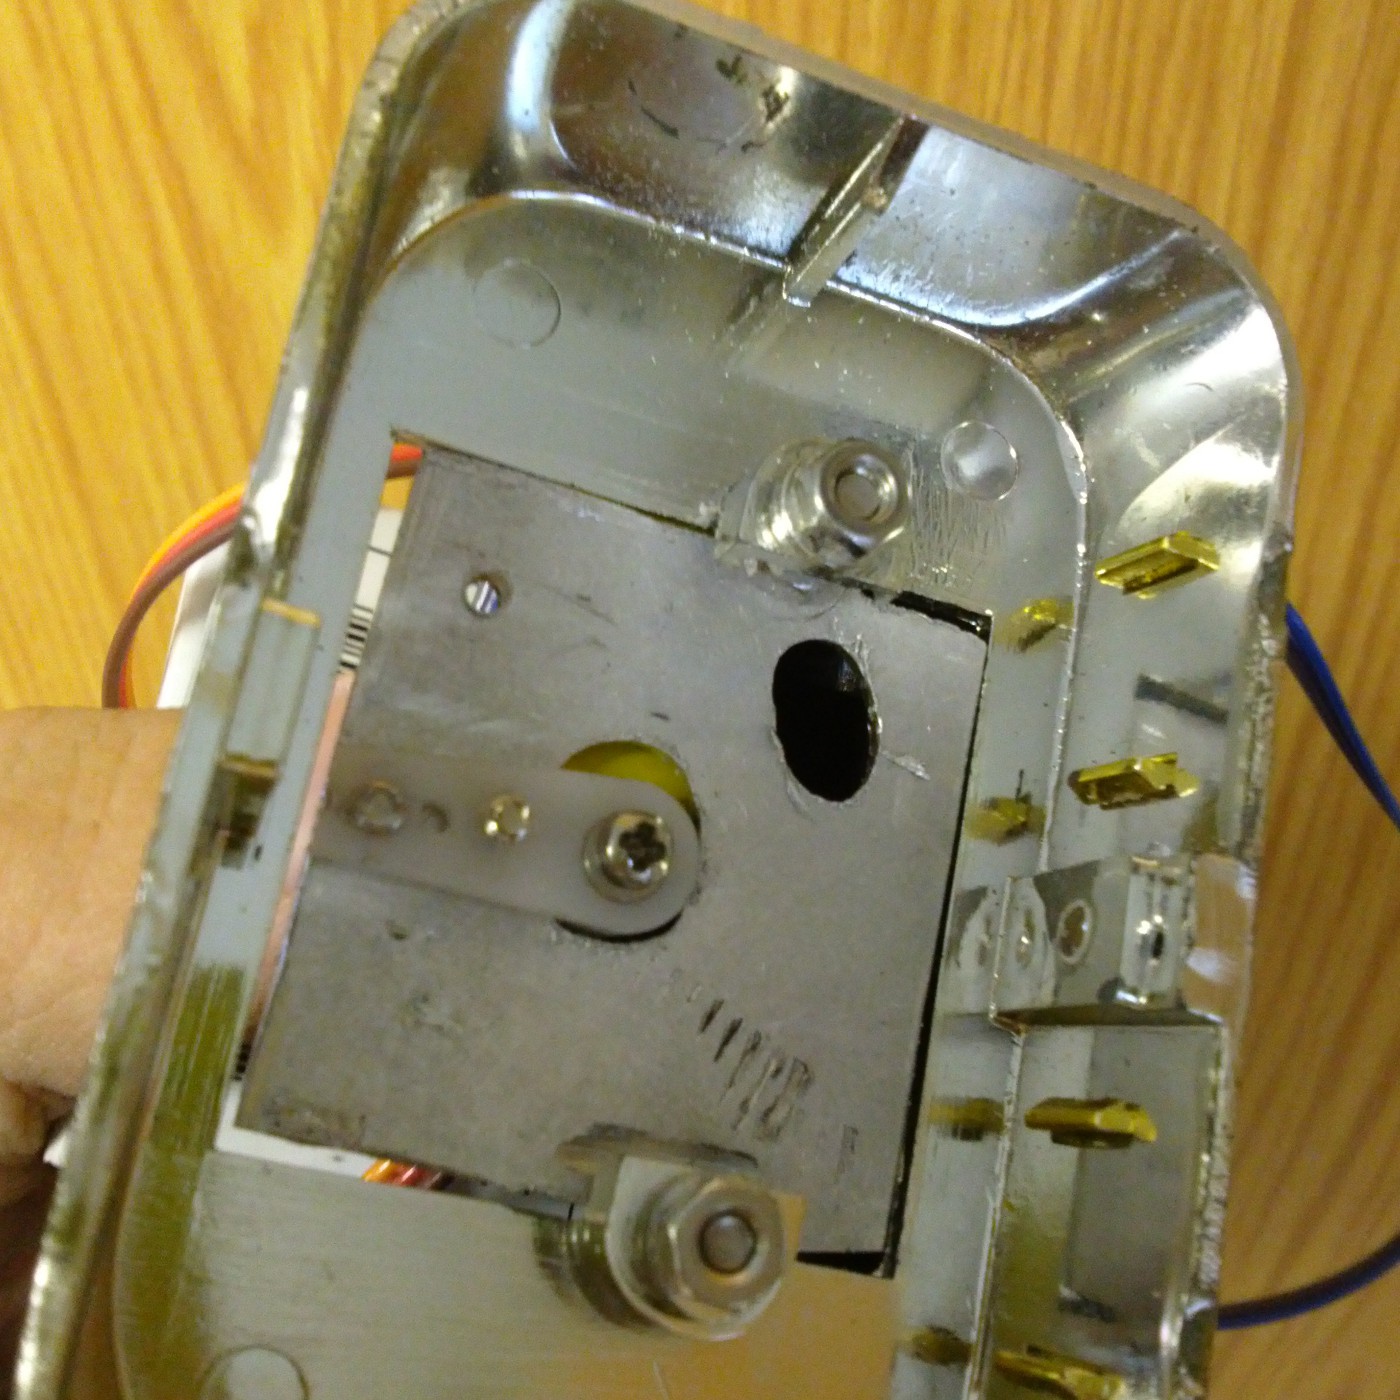
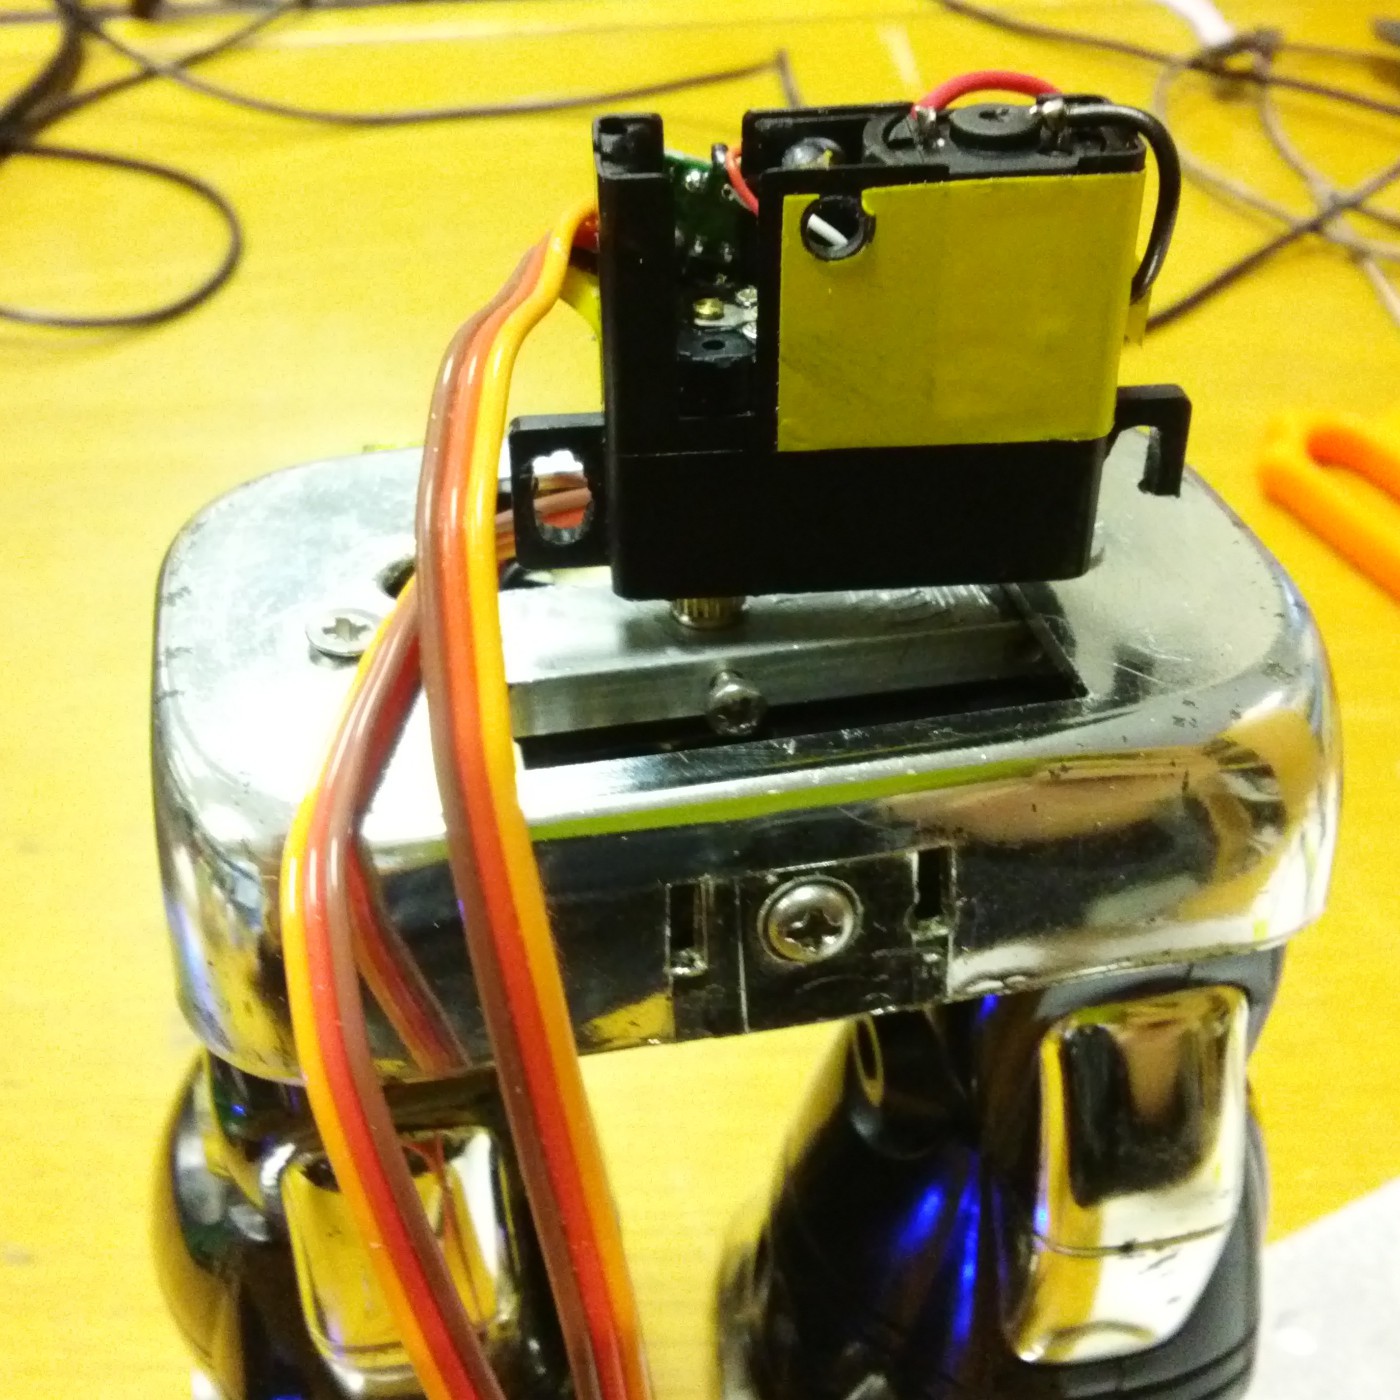
    Mounting the torso servo to the legs took a number of iterations. The thin sheet of aluminium, cut to fit the opening, was the second attempt. Using an plastic servo horn screwed into the metal worked nicely, but since the aluminium sheet was only supported in two places there was too much flex forwards/backwards. 


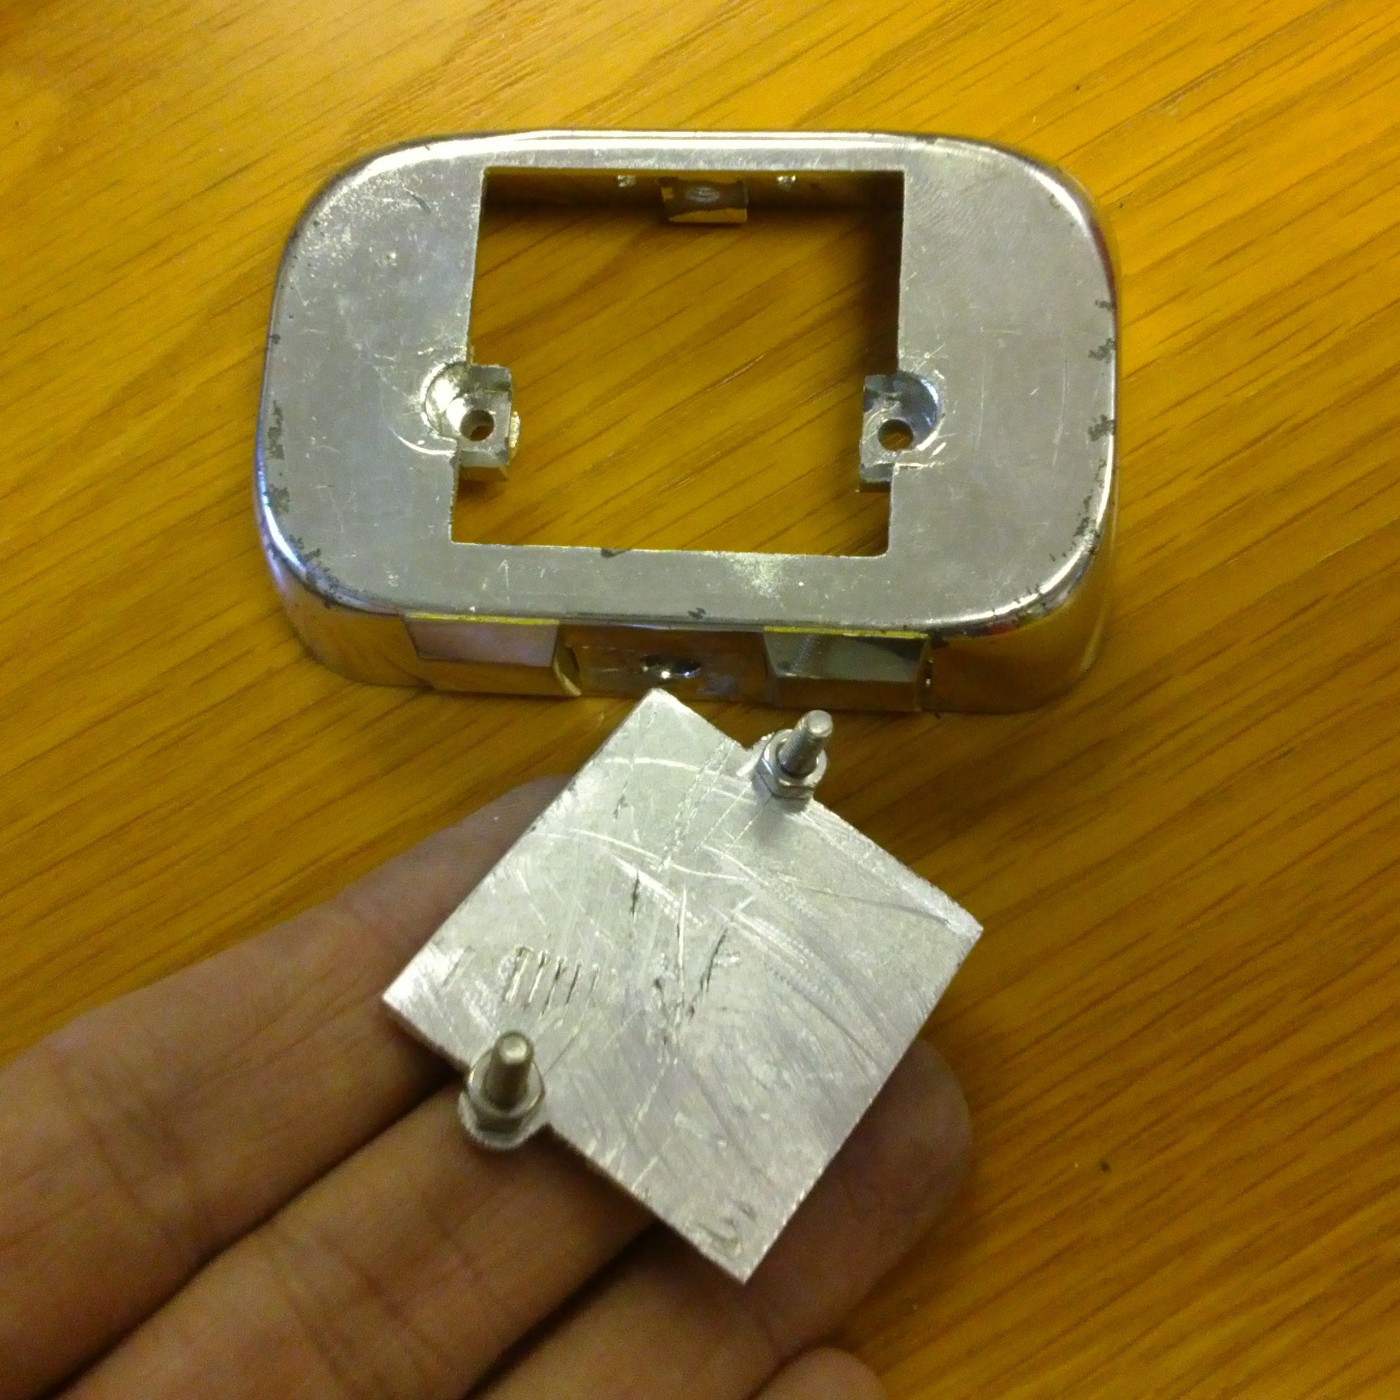
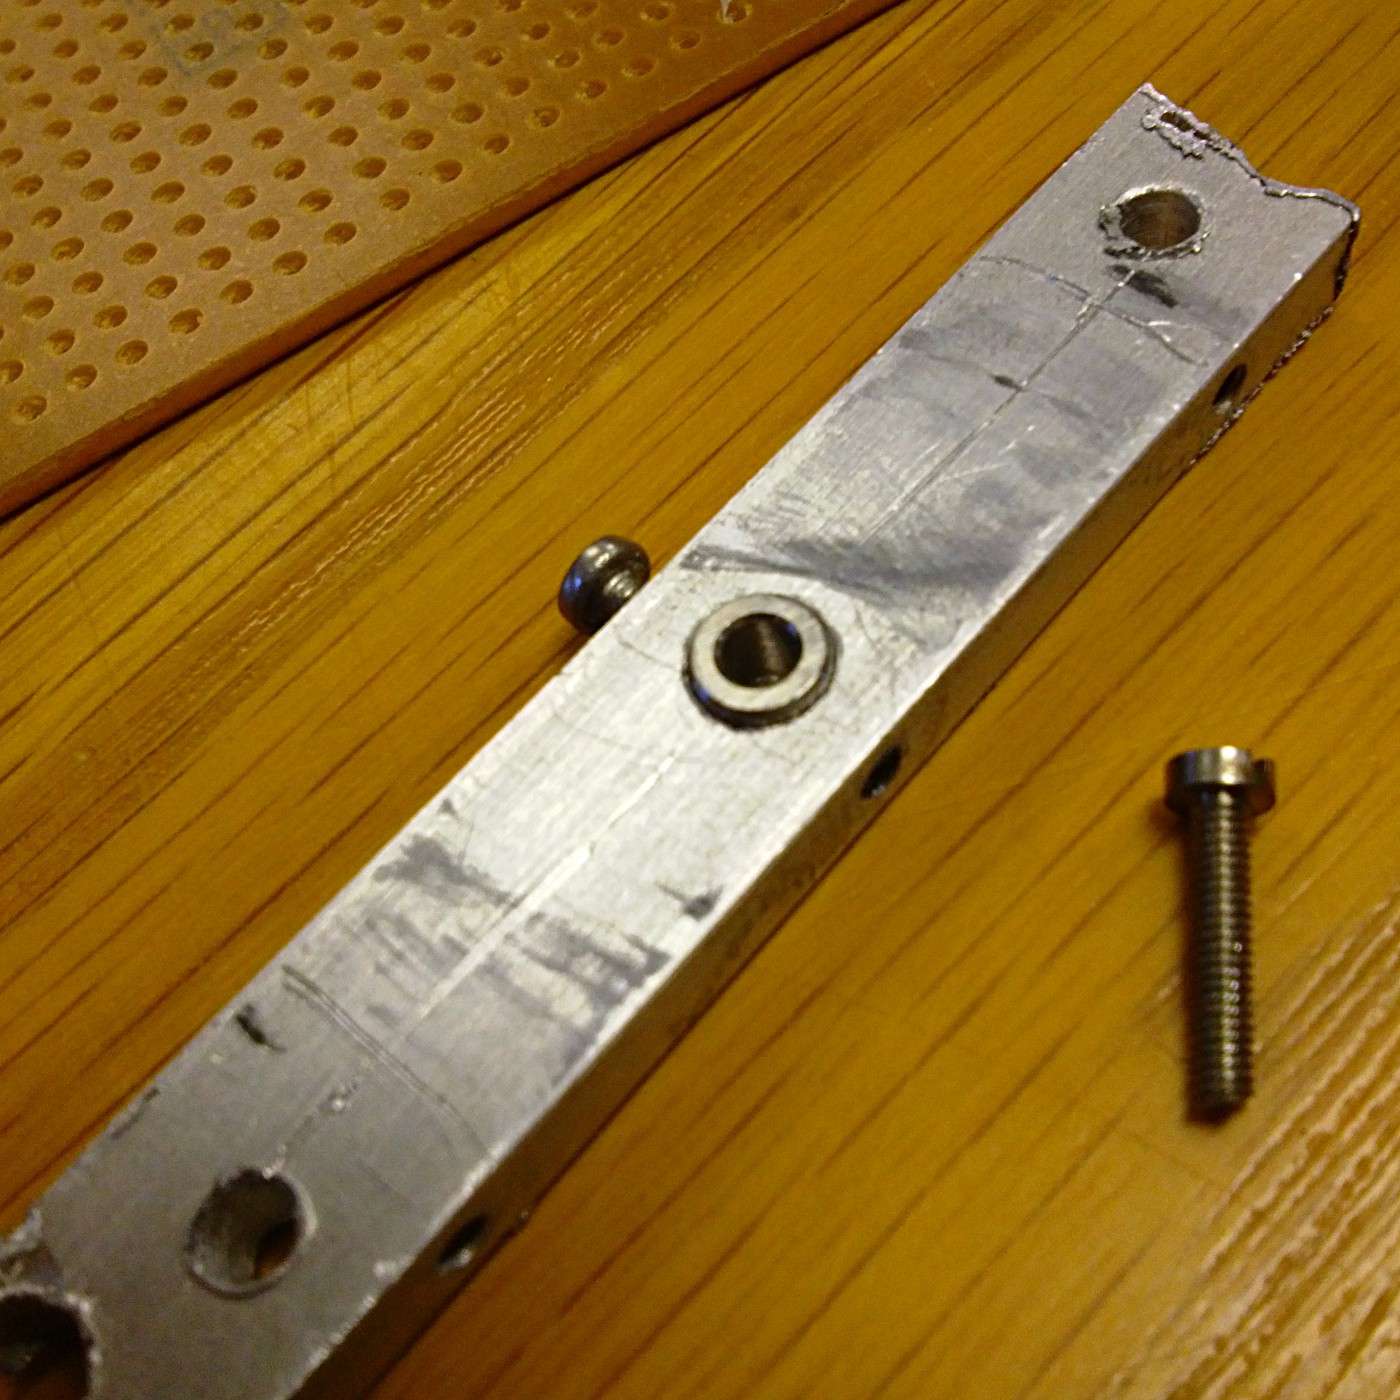
    I then tried an approximately 4mm thick bit of aluminium that I scavenged out of an old circuit board (it was a heat-sink). It has tapped holes down the lengths, so I drilled a 4.9mm hole perpendicular to those that the servo's output shaft would fit into (almost all the way through) and a 2mm hole the rest of the way. The servo was too low like this, so i popped a stainless steel spacer in the hole and put the servo on top of all of that, supported by a long M2 screw. The whole assembly is very sturdy now, there is no play to speak of.


    The servo is affixed to the upper body with 3 standoffs which have been epoxied into the back half of the torso shell.

    I am now working on placing the Arduino Nano that is the brains of the operation. I also need a regulator board, to bring the batteries' voltage to an acceptable level, while still providing enough current for all the servos. After bouncing some ideas off Scott we reckon that a 7805 regulator per servo will be the way to go, but I only had two. I took a stroll down Scrap Alley behind the factory at work and picked up some vintage boards destined for the scrap yard. As expected, some of the boards had 5V regulators and other useful bits and bobs, so it looks like I am in business for the next phase.

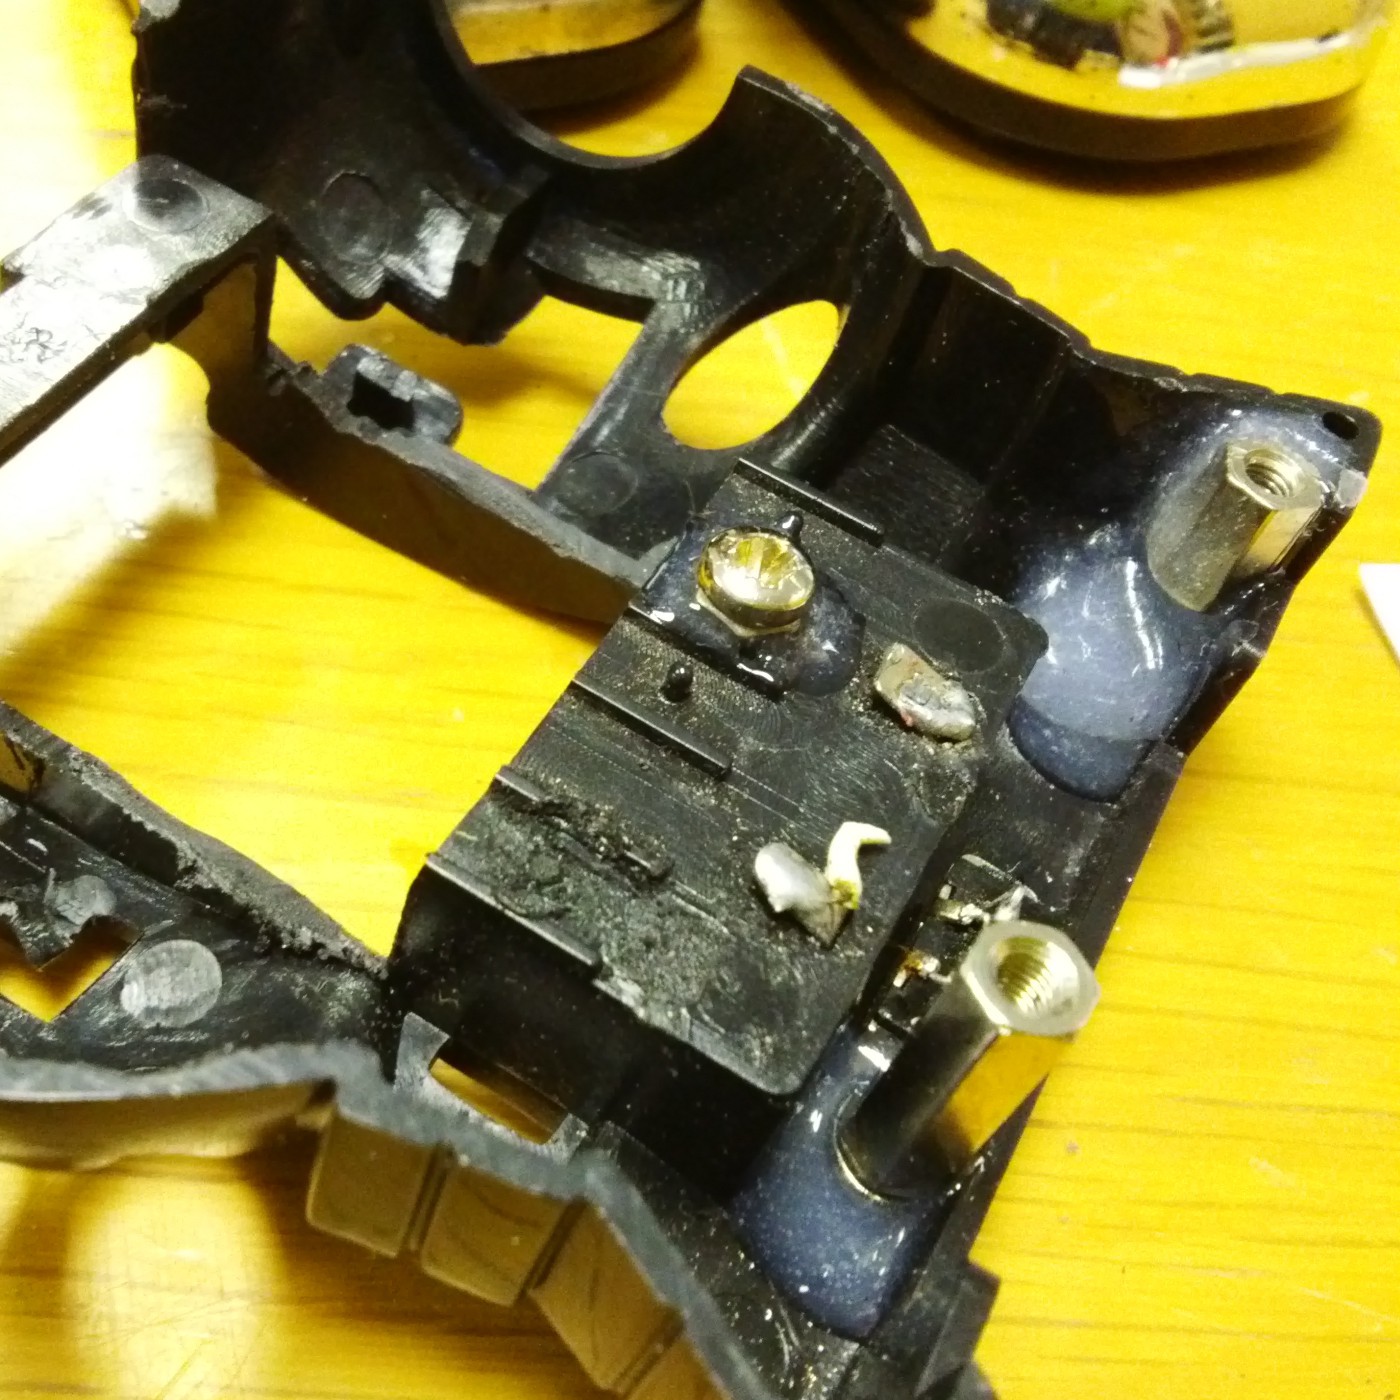
    Here are other things that have been going on in the background too, such as setting a pair of nuts into the pelvis, since the original fasteners were just screwed into posts on a bit of plastic that is no longer being used. I used a long screw to make sure the nuts on either side were aligned, made a dam out of tape and carefully poured in some more Smooth Cast Onyx to set them in place.
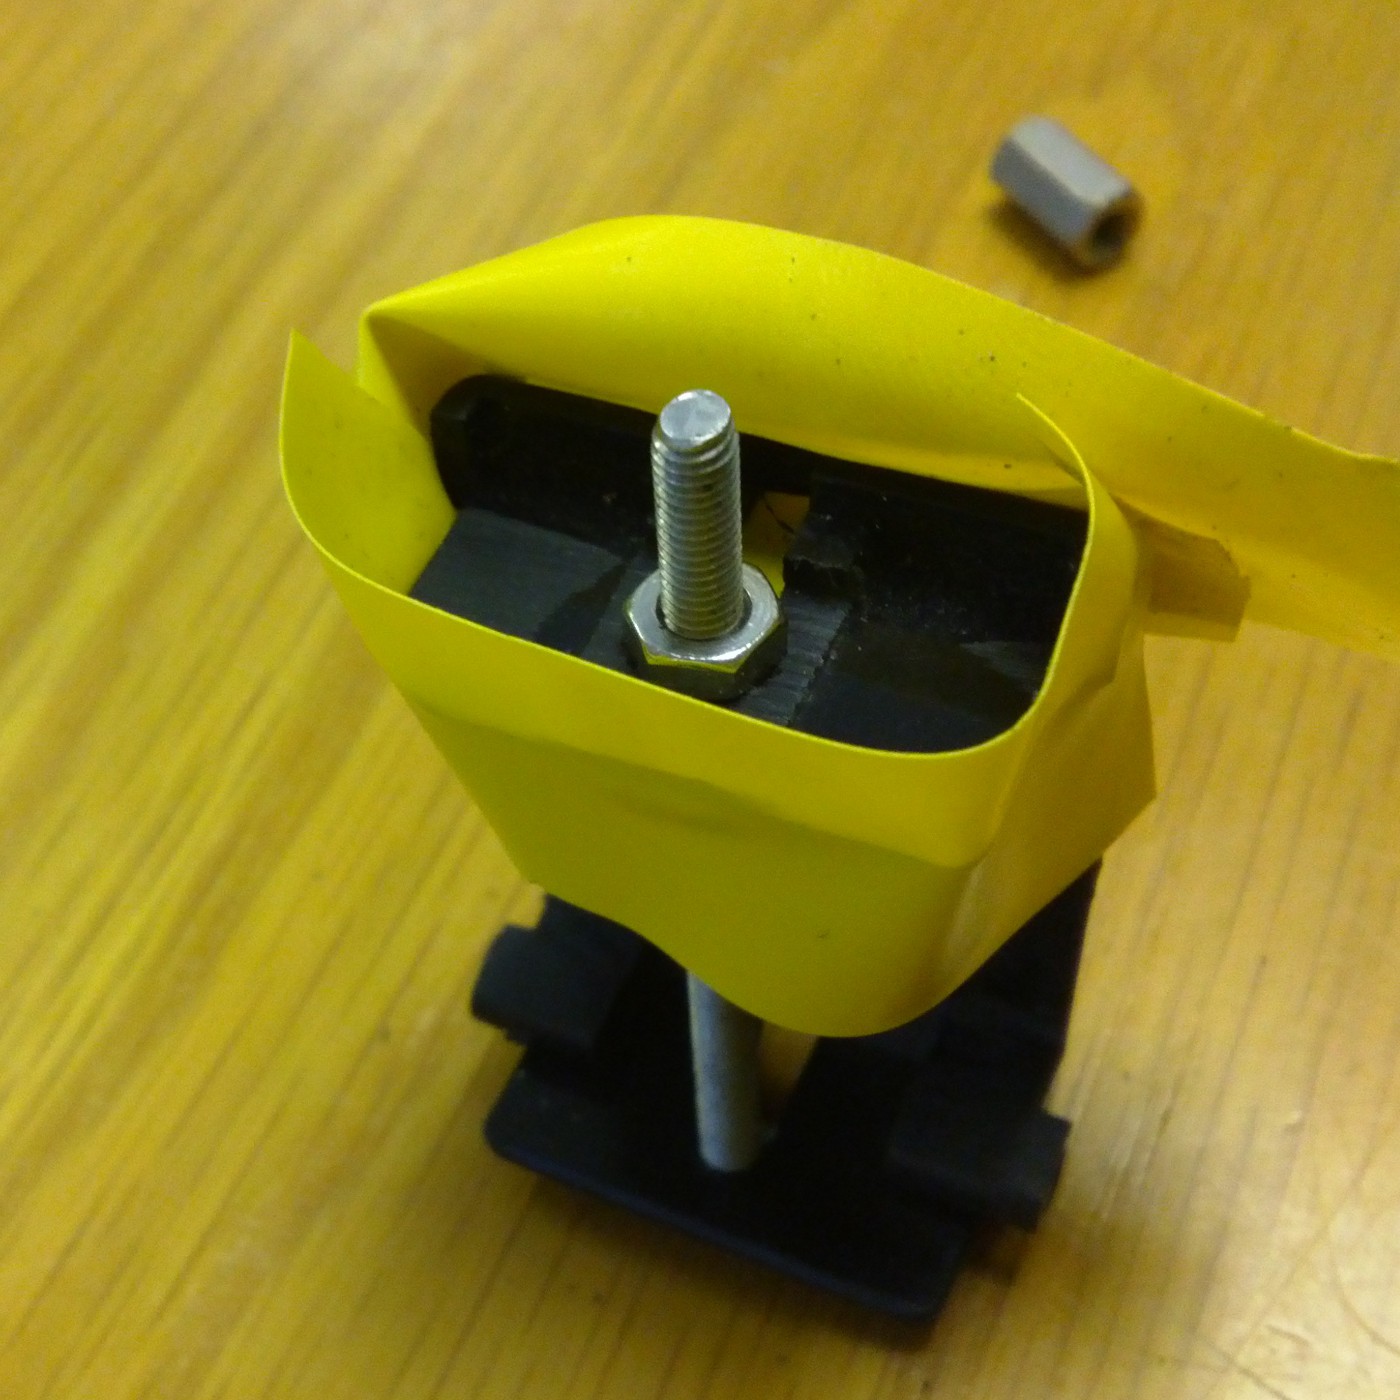
    In retrospect, epoxy would have been a better choice, since the Smooth Cast has such a short pot life (2 minutes or so), it is very hard to work with. I had made a mistake before of not mixing it properly and ending up with a gooey mess that never set, so this time I mixed it like crazy, but ended up with a lot of bubbles that made the resulting plastic quite weak.

  • Laser Time!

    Ossum04/17/2014 at 15:25 0 comments

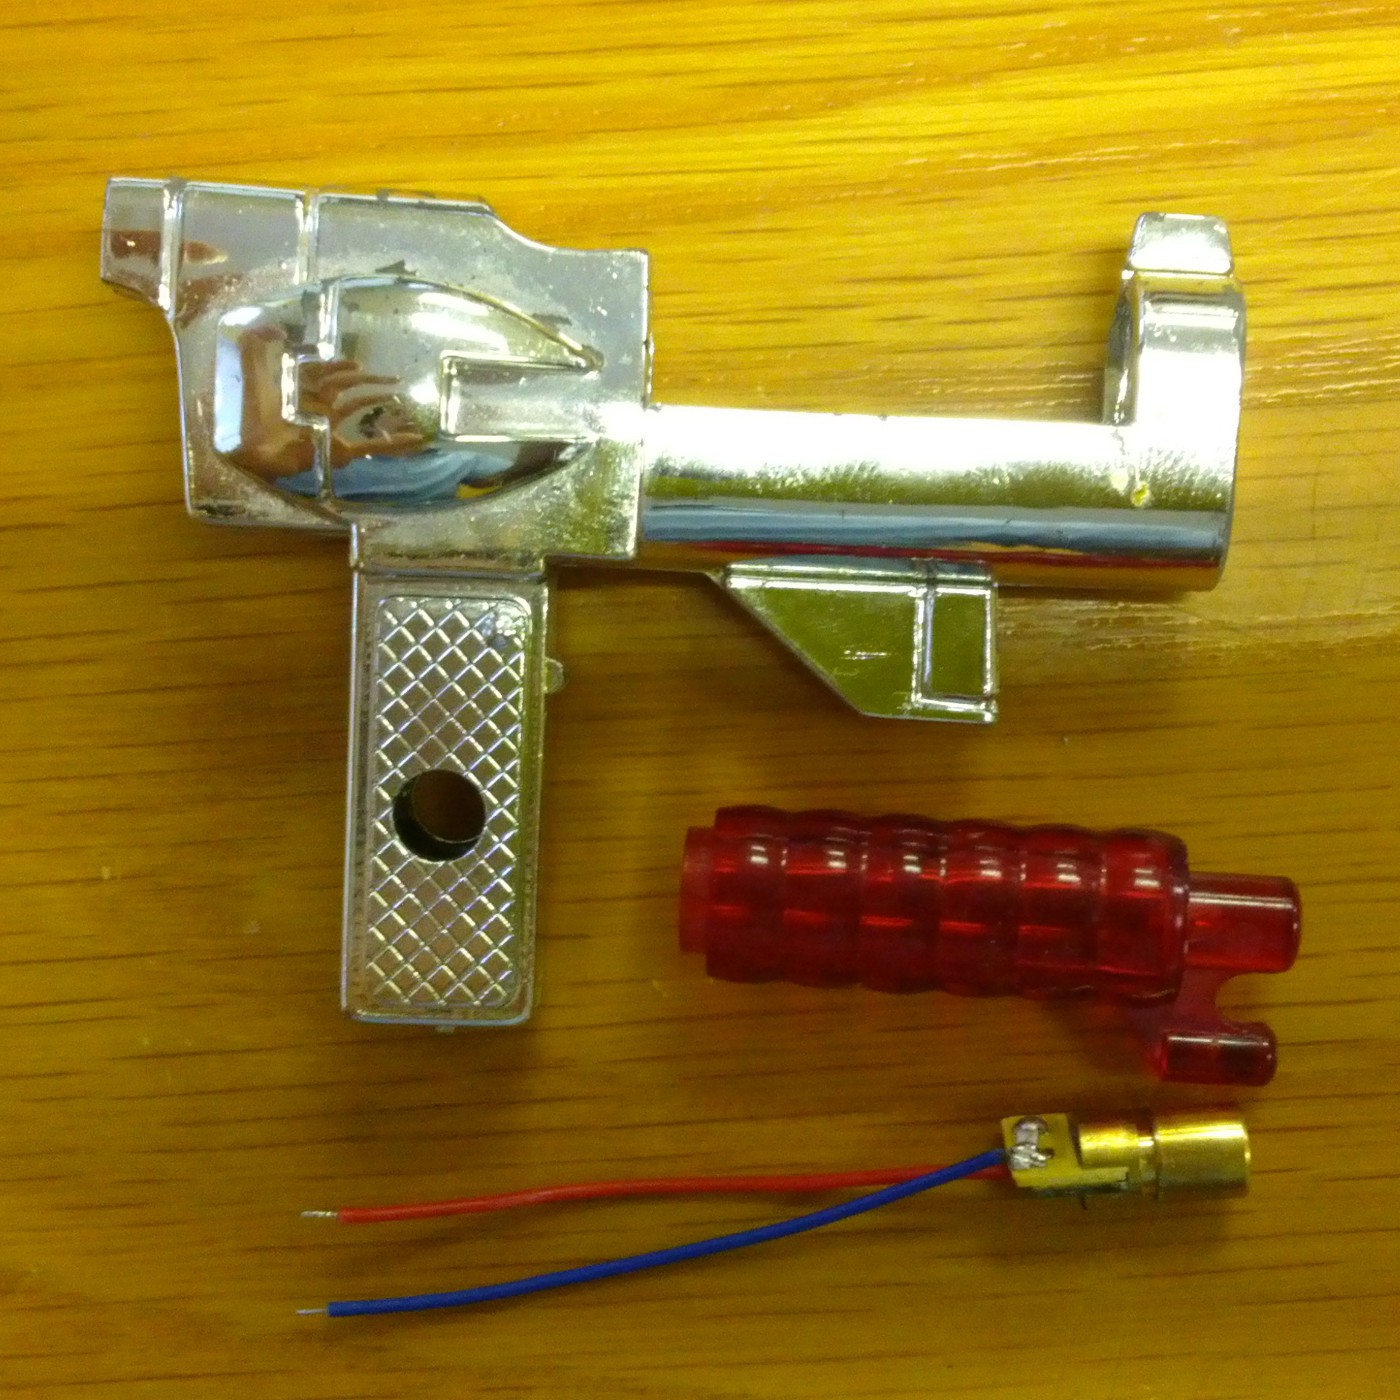
    Finally we take a break from mechanical nonsense and play with lasers. Fortunately Scott always has a shipment coming in from DealExtreme, and the most recent one happened to have a 6mm, 5mW, laser pointer diode in it.

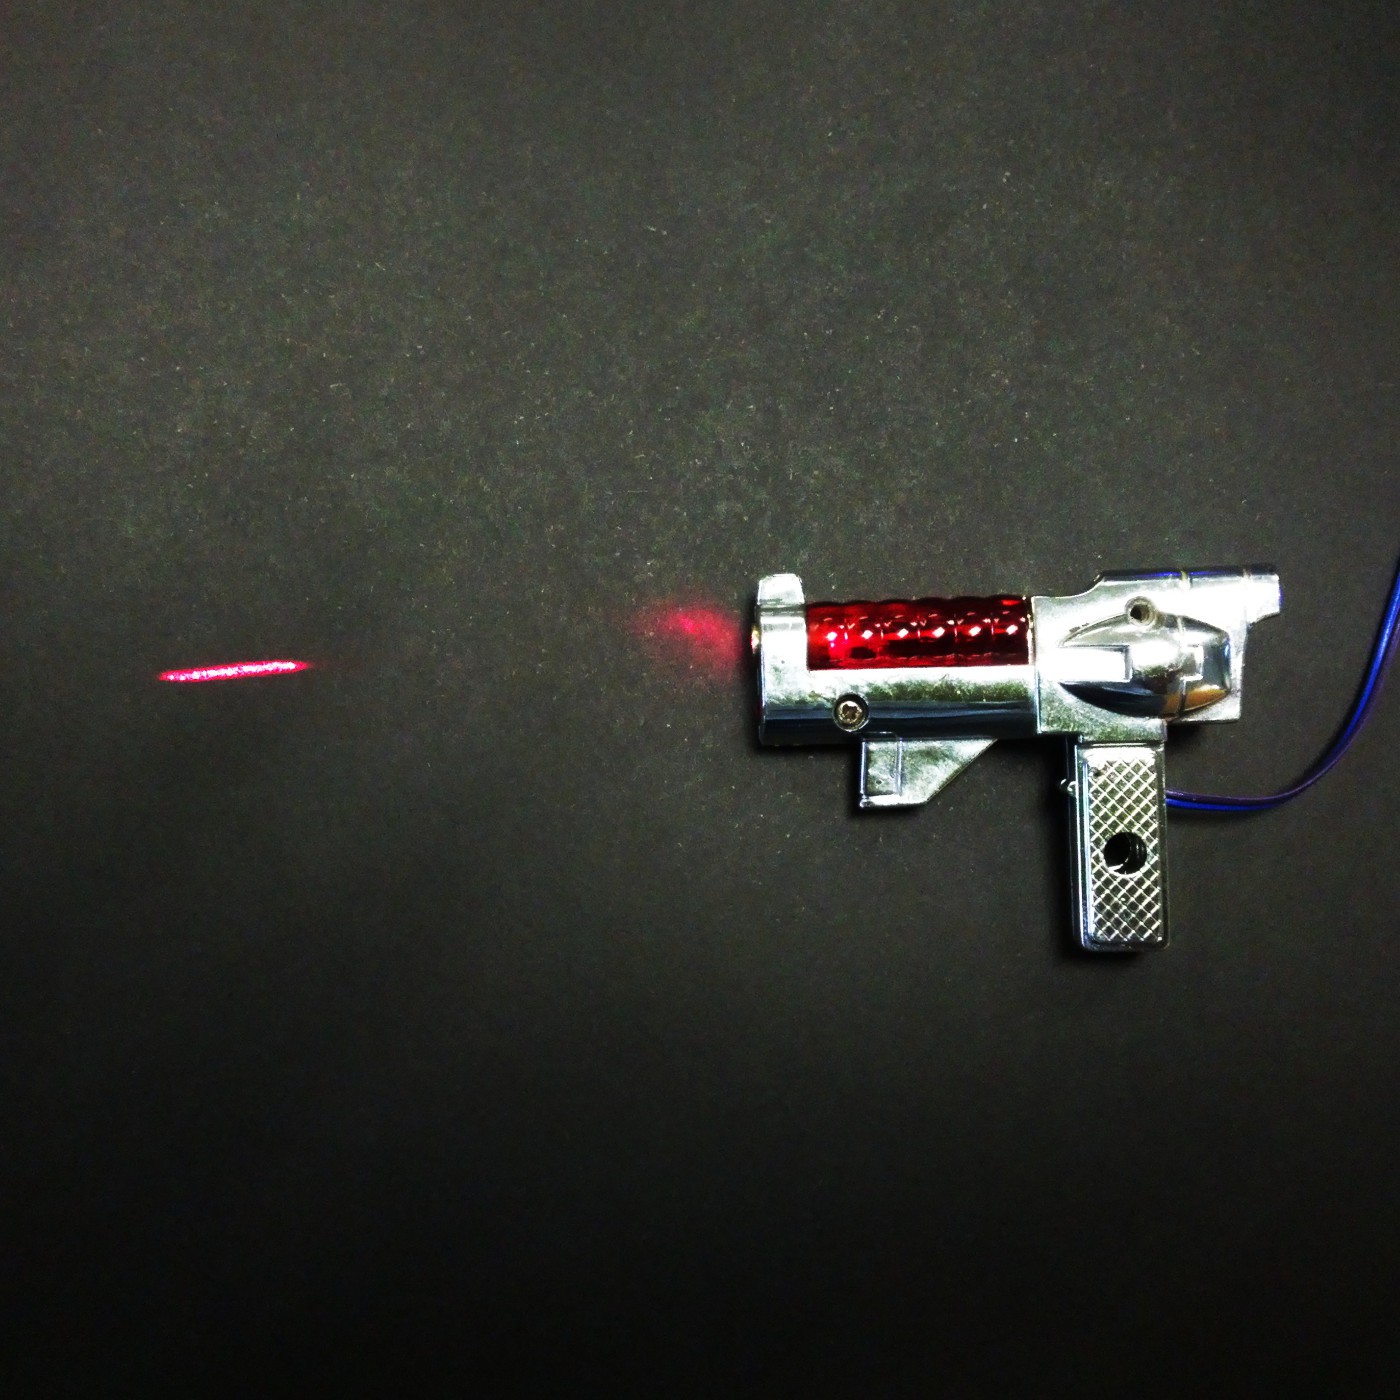
    The diode could have been made for this application, the diameter is perfect for the gun barrel. All I had to do was (very) carefully drill the front off the red lens. Since the plastic is so old and brittle I just turned the bit by hand. Trying to use the power drill on this plastic just bites in and tears out chunks.

    I popped in a current limiting resistor (although it has a 33 ohm in series already, it is designed for a 3V supply, so a bit more resistance was required) and got this result:

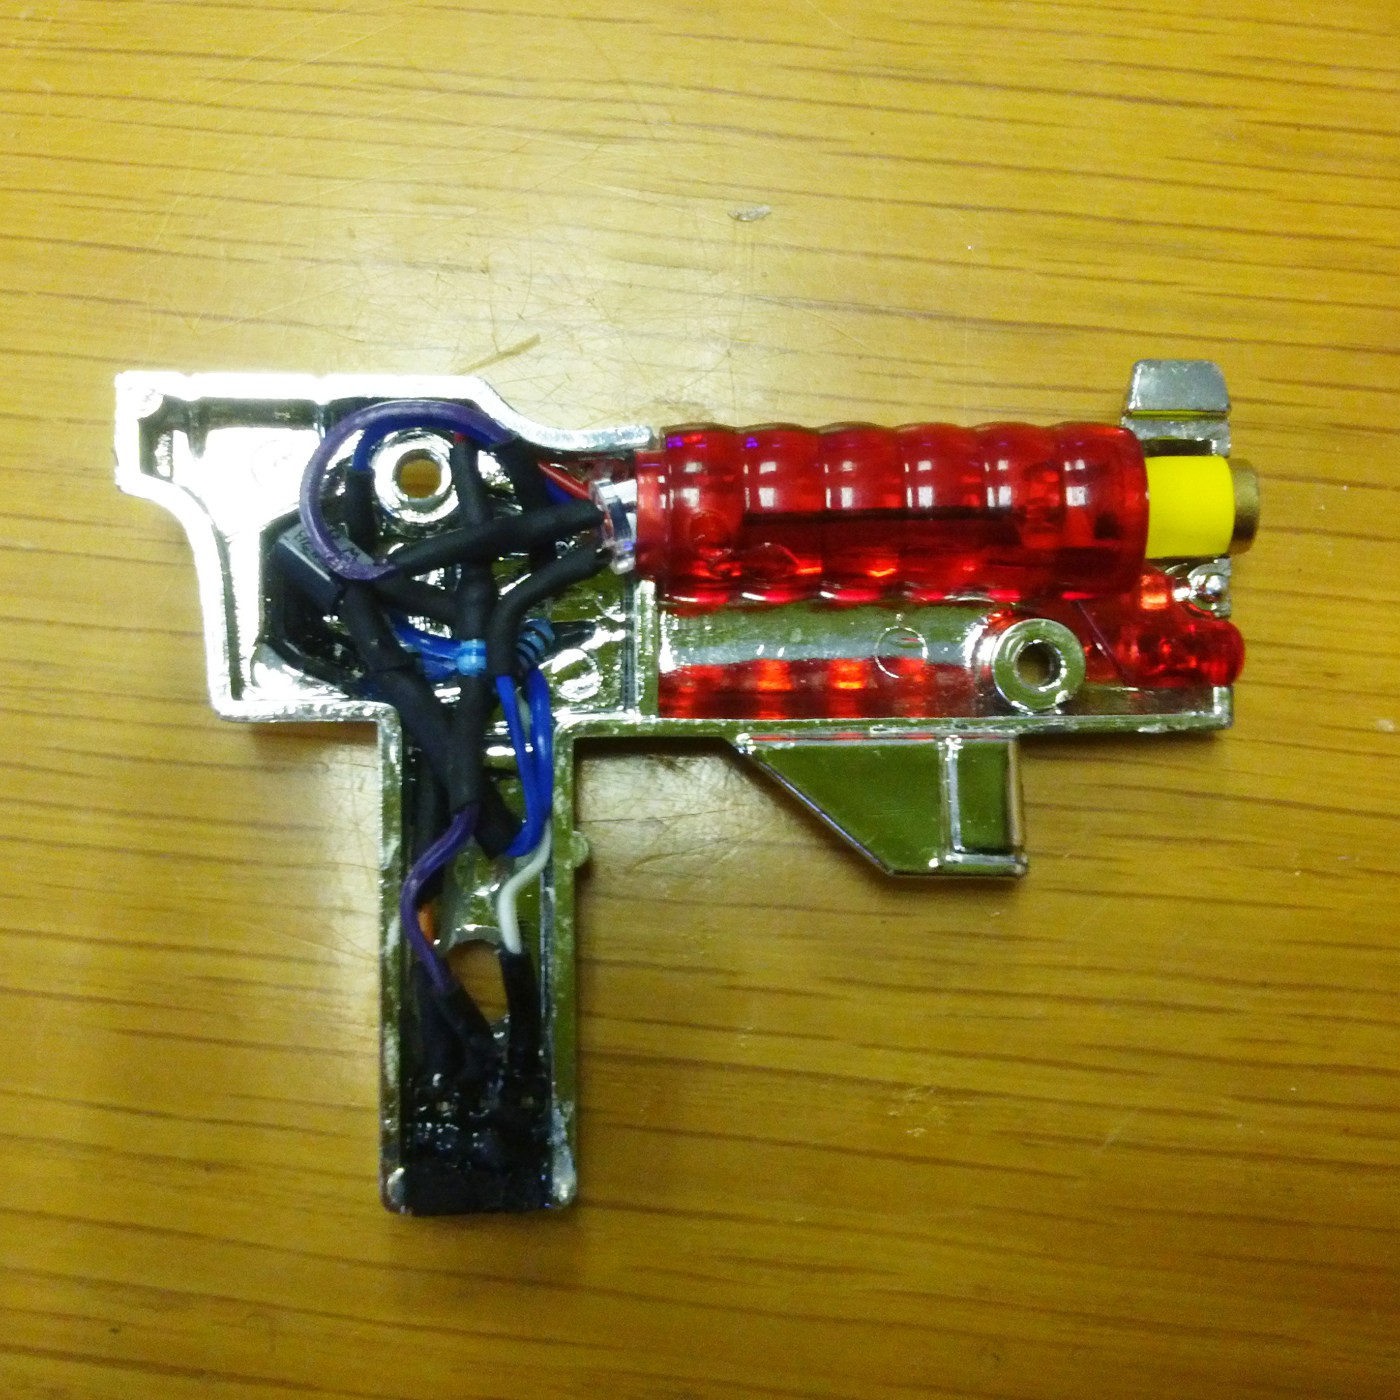
    That is pretty cool, but it would be a lot better if the gun itself still lit up, so I opened it up again and put in a bright red LED to light up the barrel.
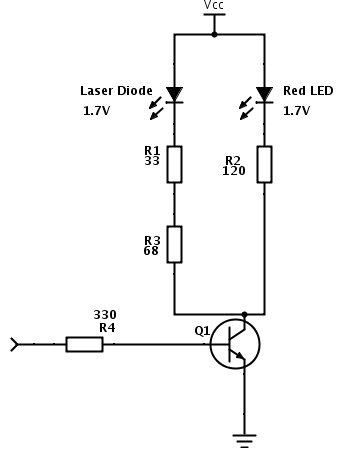
    Scott introduced me to DigiKey's handy tool for simple schematics called schemit, so here is a diagram that I drew with it.


    Since we are now pulling more current than the micro can supply directly I have included a transistor to turn them on and off. It seemed like a cool idea to be able to swap weapons out at some stage, so I attached this whole lot to a bit of 2.54mm socket, so that it has the same interface as all the servos.

    Here it all is, shoved back into the gun. You can see the 2.54mm socket at the bottom.

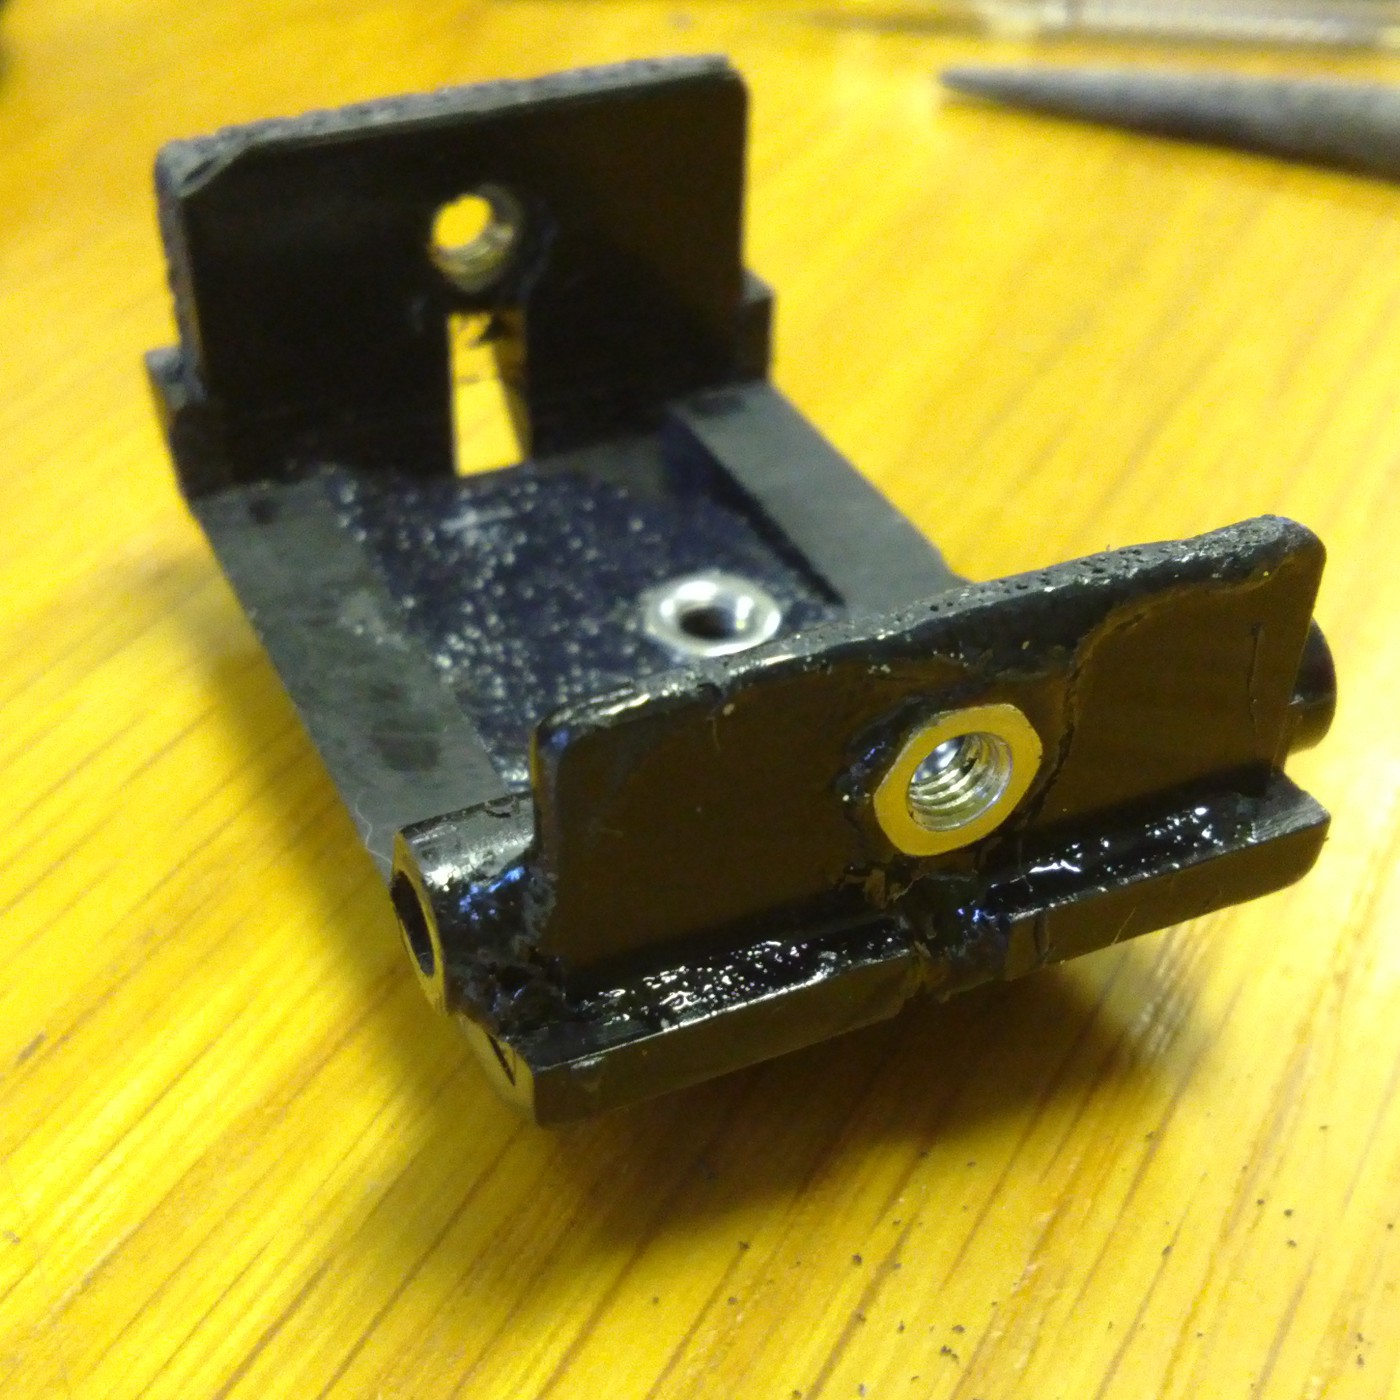
    The gun, as with everything else, was originally held together with self-tapping screws, tightened into the plastic. This is deeply offensive to me, so I cut away some of the crappy plastic "thread" and epoxied some M2 nuts in its place. I can now open and close the gun as many times as I want without worrying about stripping the threads (you know, for when I need to install the burning laser that someone sponsors us).


  • Shake a Leg

    Ossum04/15/2014 at 21:37 0 comments

    This update has been a long time coming. Although I had roughly this leg drive system in mind since the beginning, it has proved quite fiddly to implement, as mechanical things often are. 

    My plan was always to use a servo converted to continuous rotation to drive the legs, this has the twofold benefit of extremely low gearing as well as including all of the driver circuitry, making it easy to control from a micro.

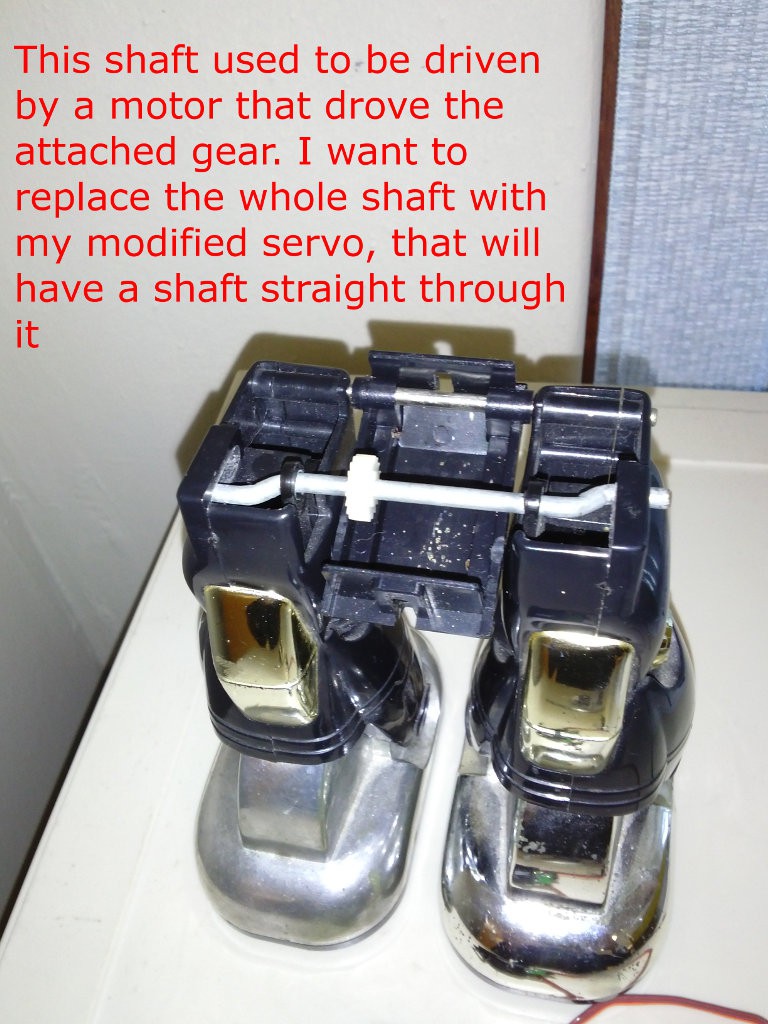
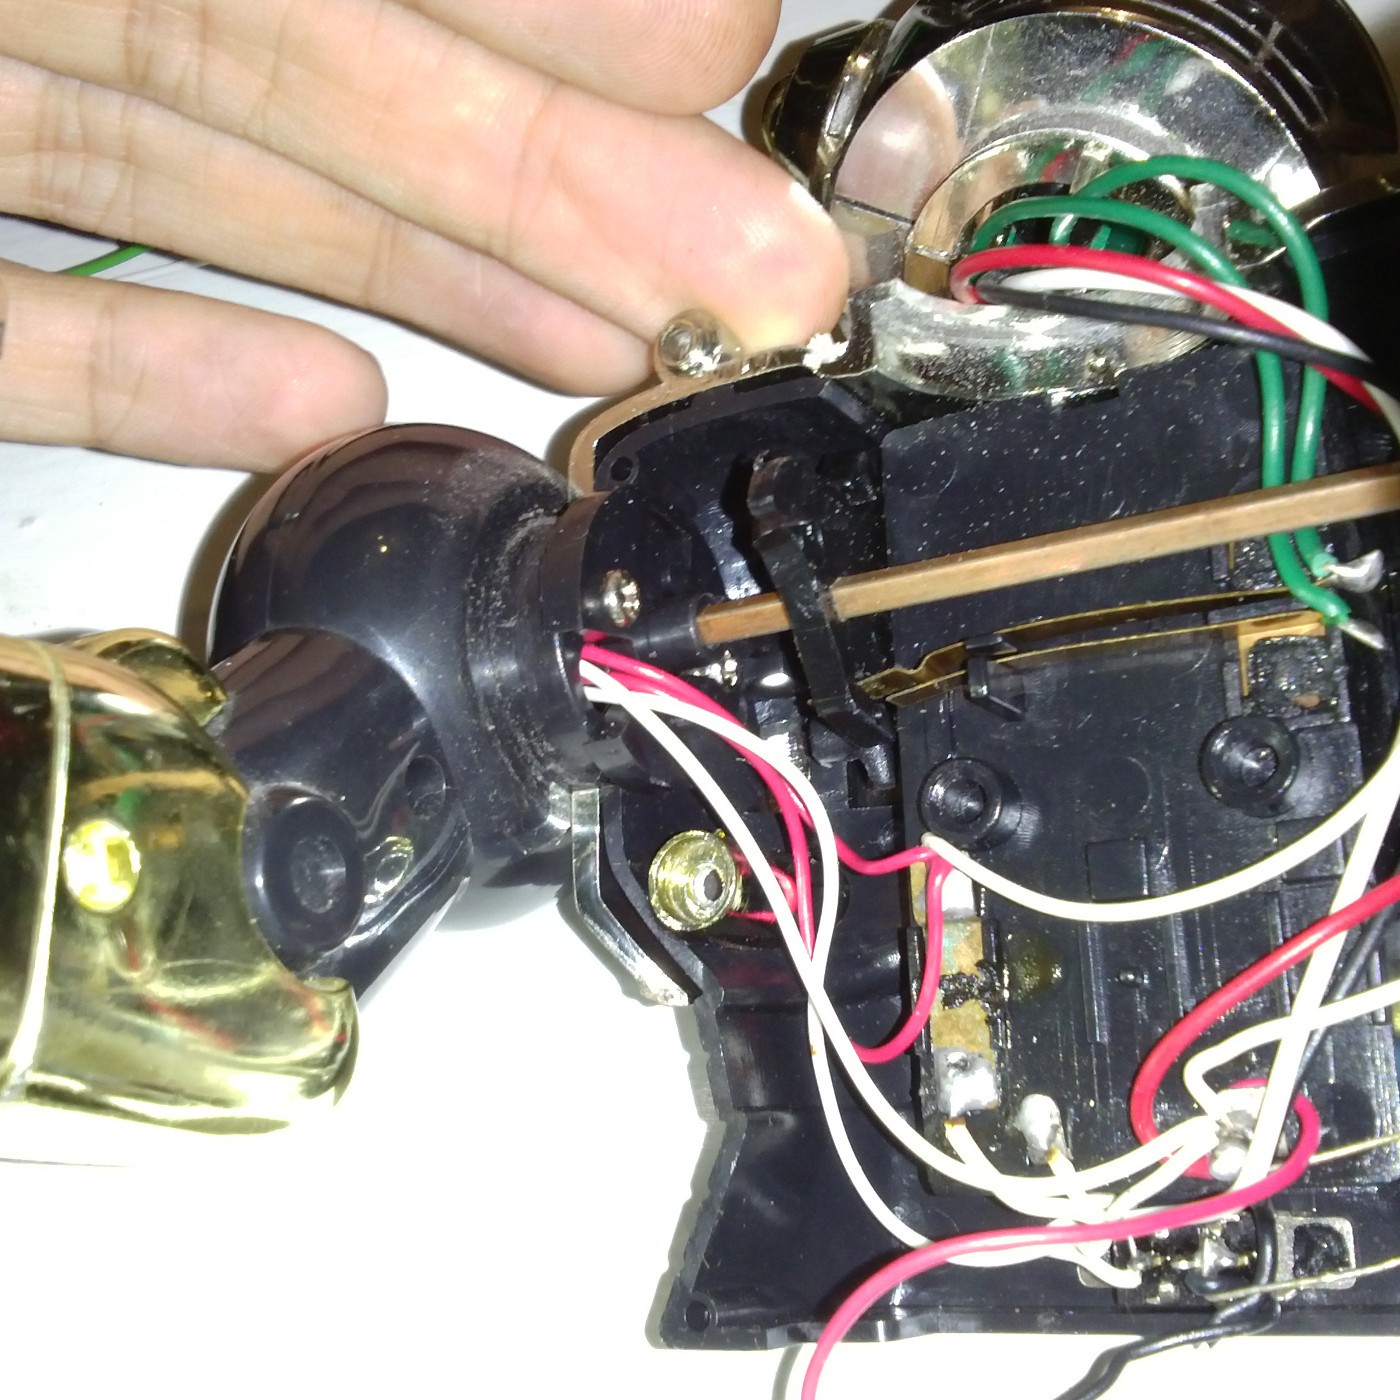
    In case you are reading this log in a vacuum, here is how the leg drive axle looked before.

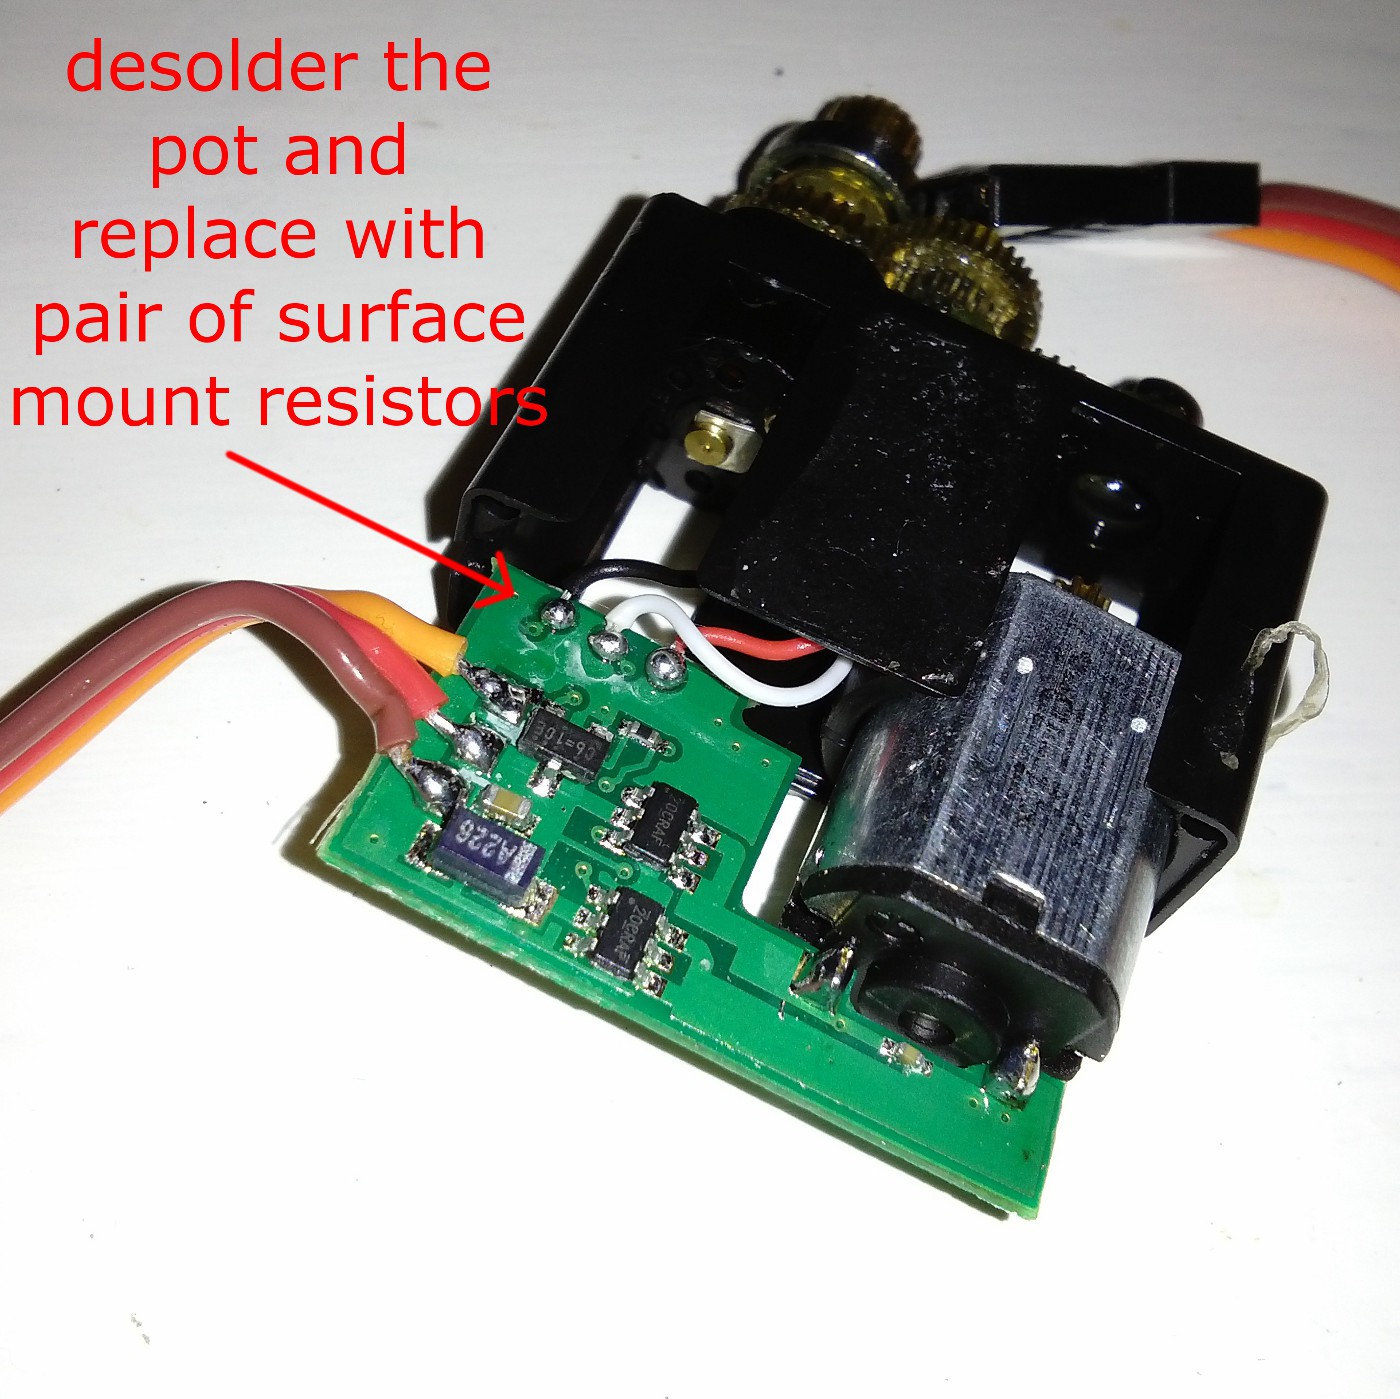
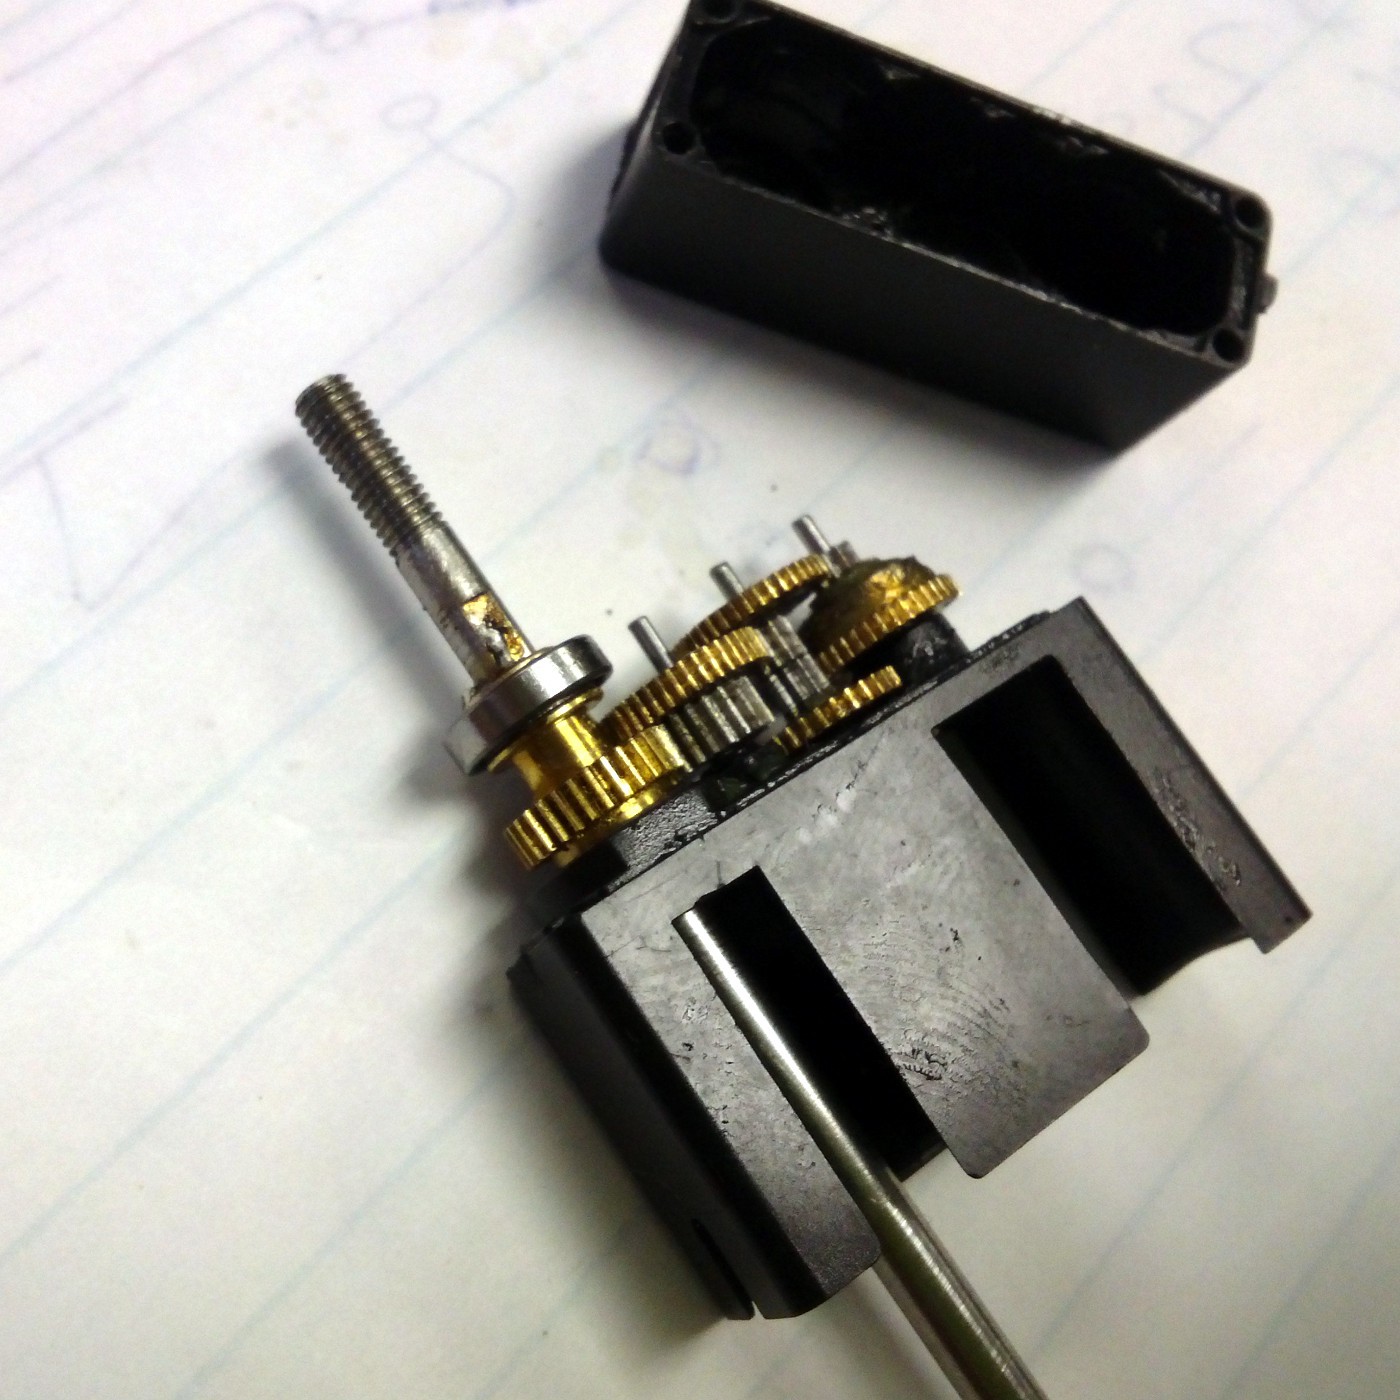
    I will not delve into the conversion of the servo into continuous rotation since it is well documented (Here is one guide ), but here are a few pictures of how mine looked inside. The fortunate part of this particular servo was that the output shaft is supported on both ends by a pair of tiny ball bearings, this meant that I could remove the pot altogether (in many of the cheap plastic servos the pot's shaft is actually used as an axle for the output shaft).

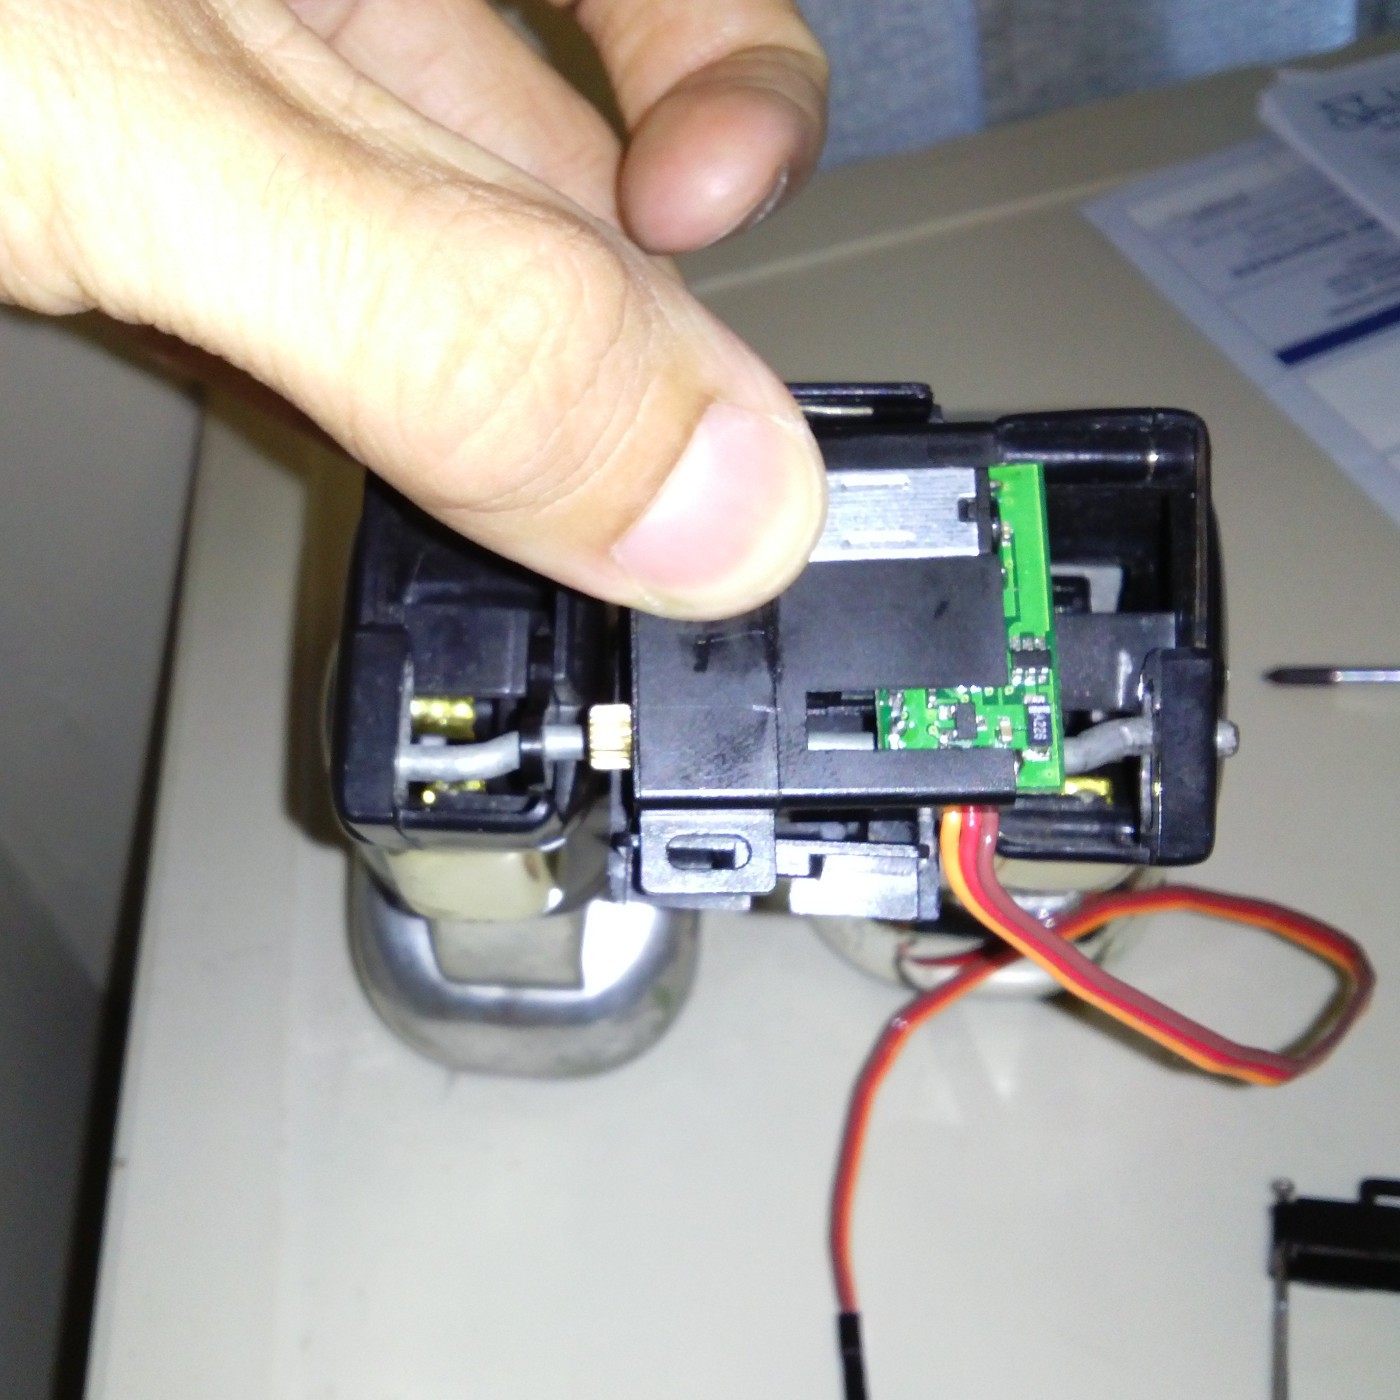
    You can see that the servo was almost narrow enough to fit between the legs, but more importantly, the output shaft was exactly where it needed to be. I unsoldered the circuit board from the back of the motor and moved it out of the way of the shaft, this made the servo narrow enough to fit.

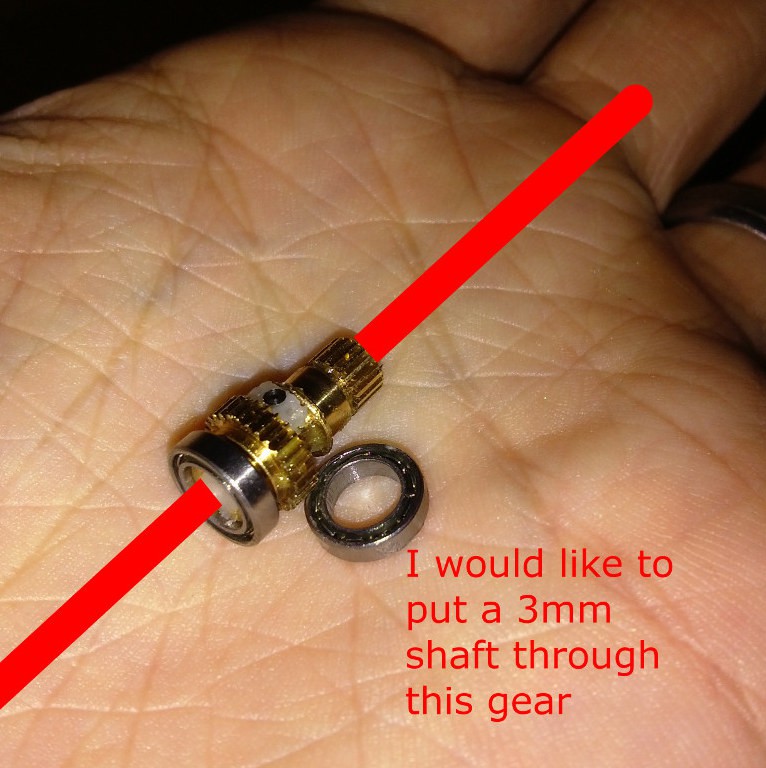
    A friend was good enough to put a hole through the length of this little gear with his milling machine (although an accurate drill-press and some careful clamping would have sufficed I imagine). There isn't much room for error, since the gear is 4mm at its narrowest diameter and the shaft is 3mm.

    This is the picture I sent him to describe what I needed:

    Here the servo is mostly reassembled, with a 3mm shaft passed through the gear (I salvaged the shaft from a busted old business card scanner).

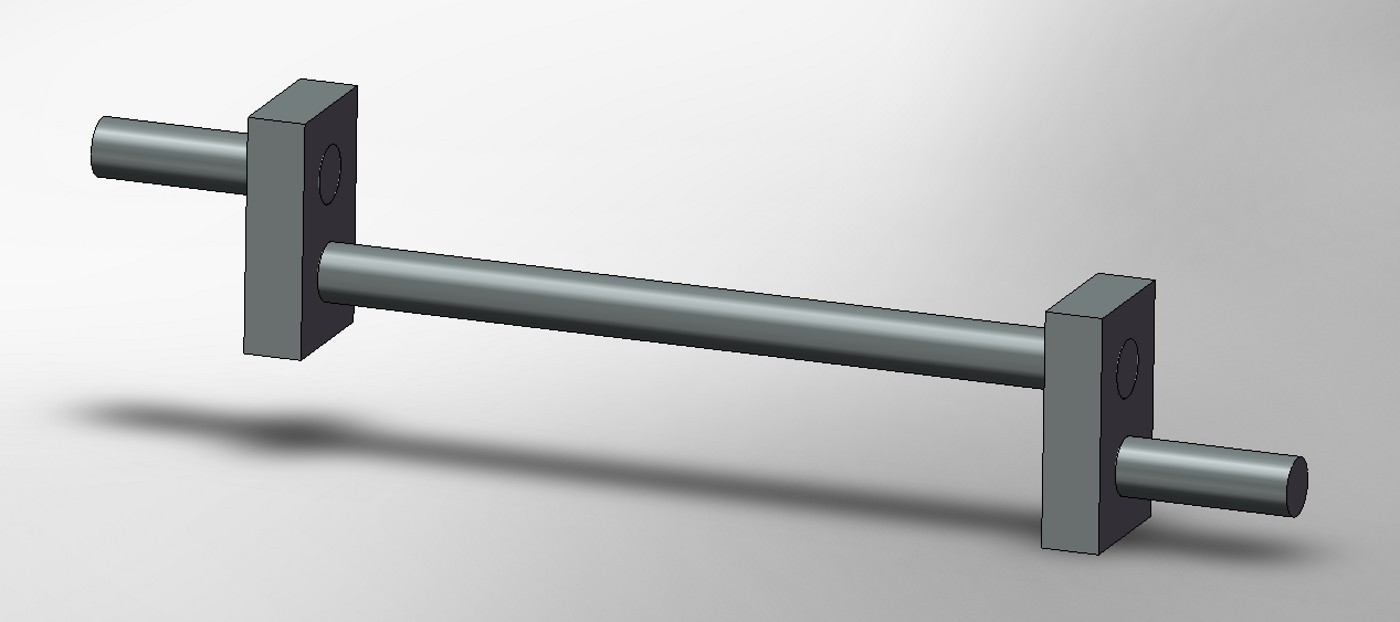
    The next step was to recreate the dogleg shaft that drives the legs. Since I obviously can't pass the original bent shaft through the gear I attempted to make a new shaft, in pieces that would bolt together.

    This drawing shows the idea

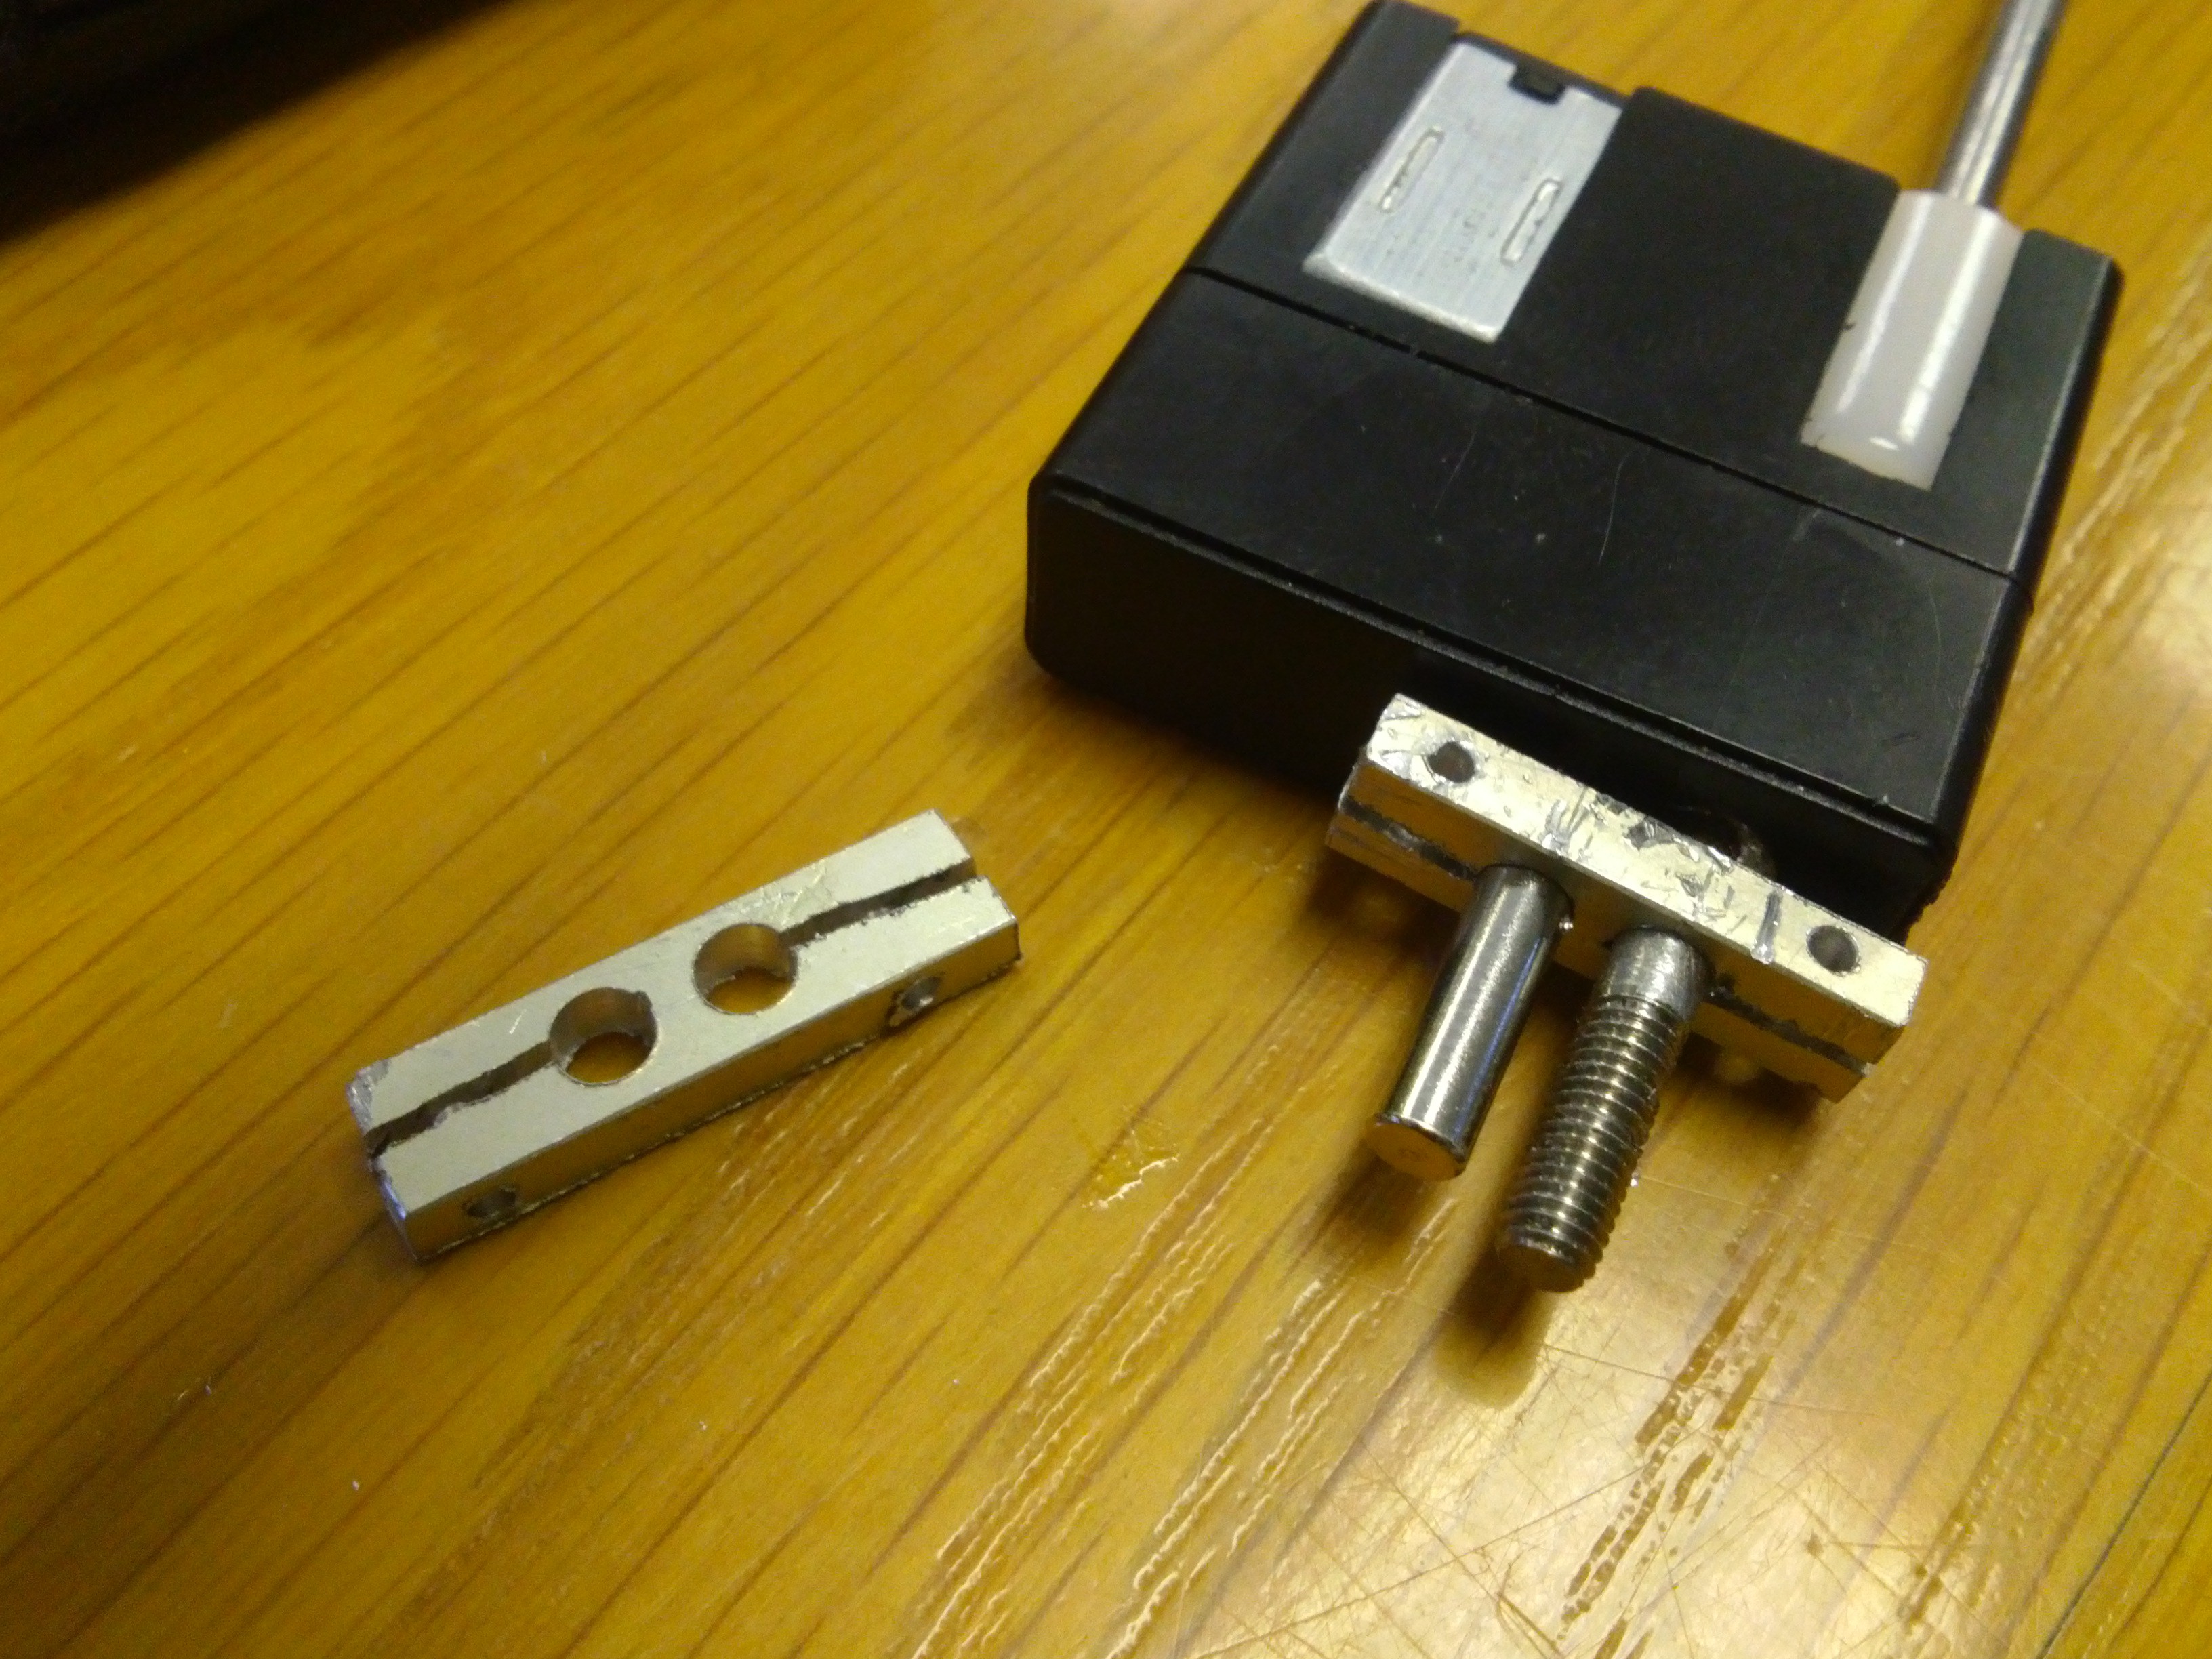
    I set upon some scrap aluminium with the Dremel, drill-press and hacksaw to make some brackets. Here you can see one of the earlier attempts. The brackets actually worked out quite well, considering their small size and my tool selection, but when I tried to reassemble the whole thing, the tolerances just weren't tight enough and the legs kept jamming.

    After staring at it all for a while I went a new direction. If I could cut the original shaft in half, put it through the servo gear and then reassemble it, all would be well. I would drill two holes in the shaft, then put a sleeve with matching holes over it and screw it all together. Unfortunately the drill slipped off the shaft, even though I had filed a flat spot to try and prevent this, and kind of cut it in half.
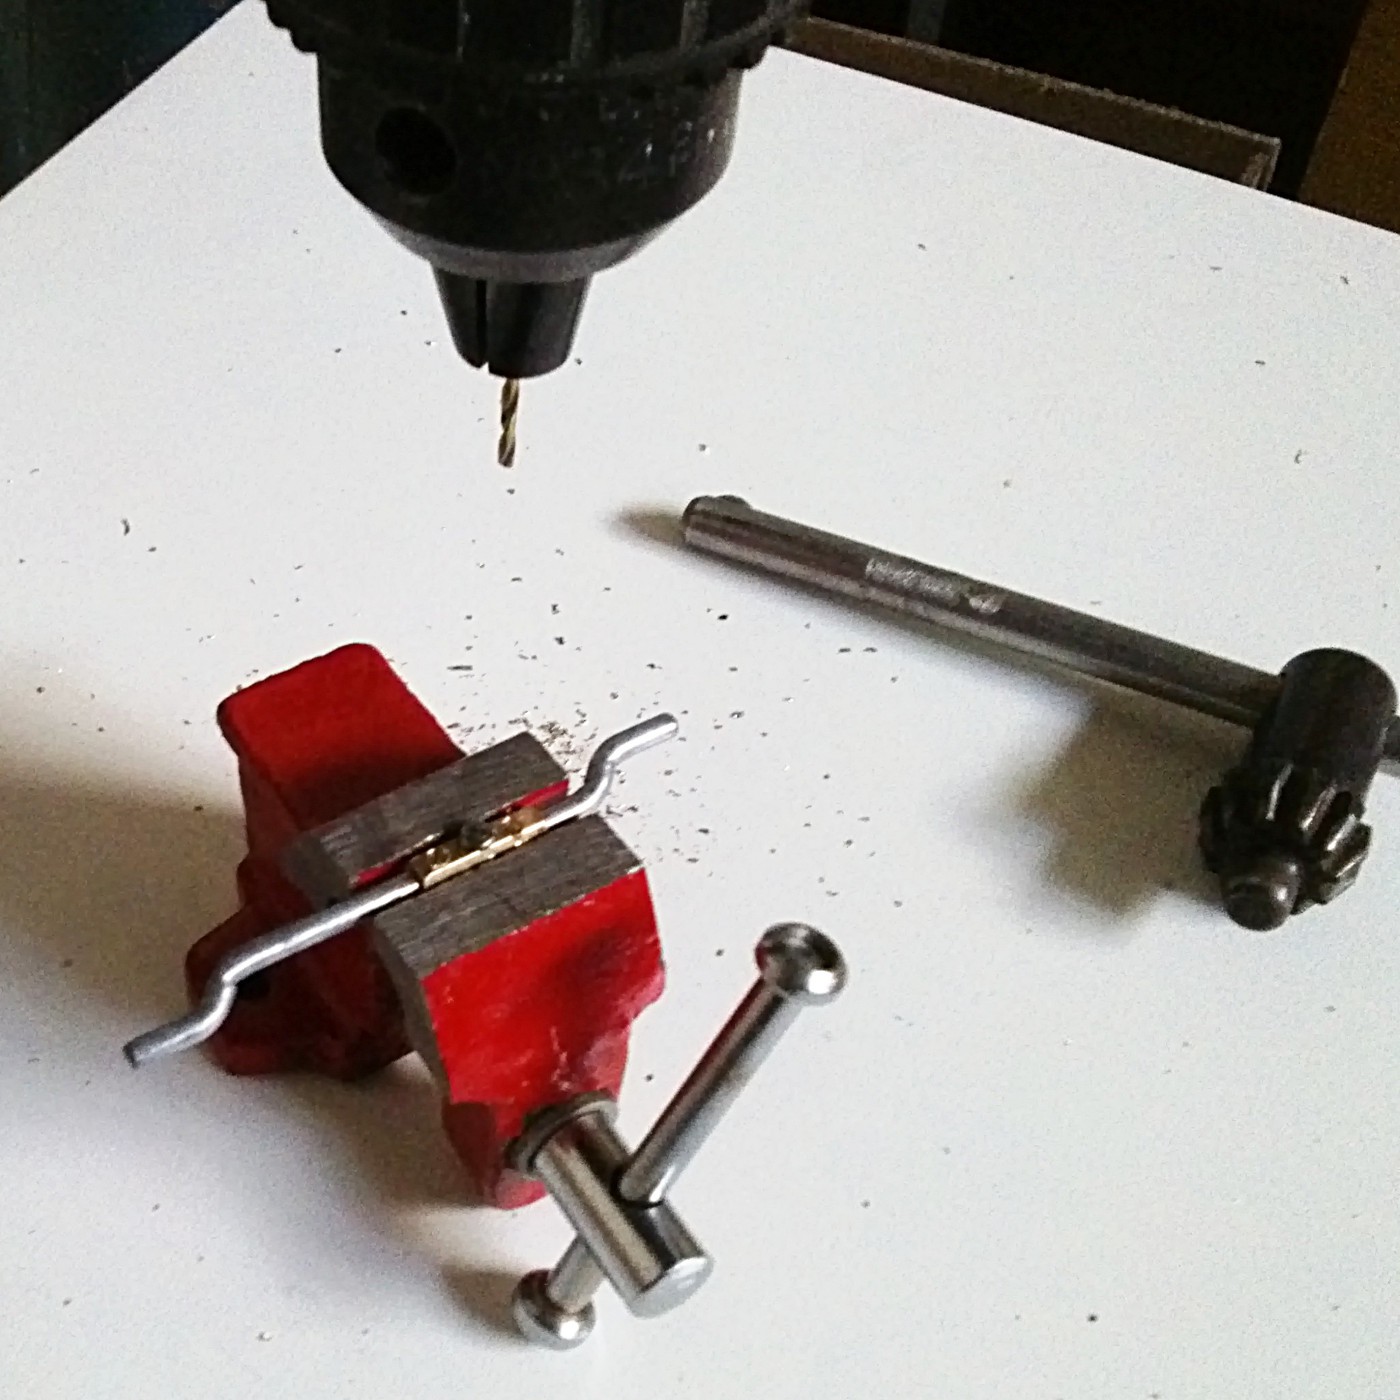
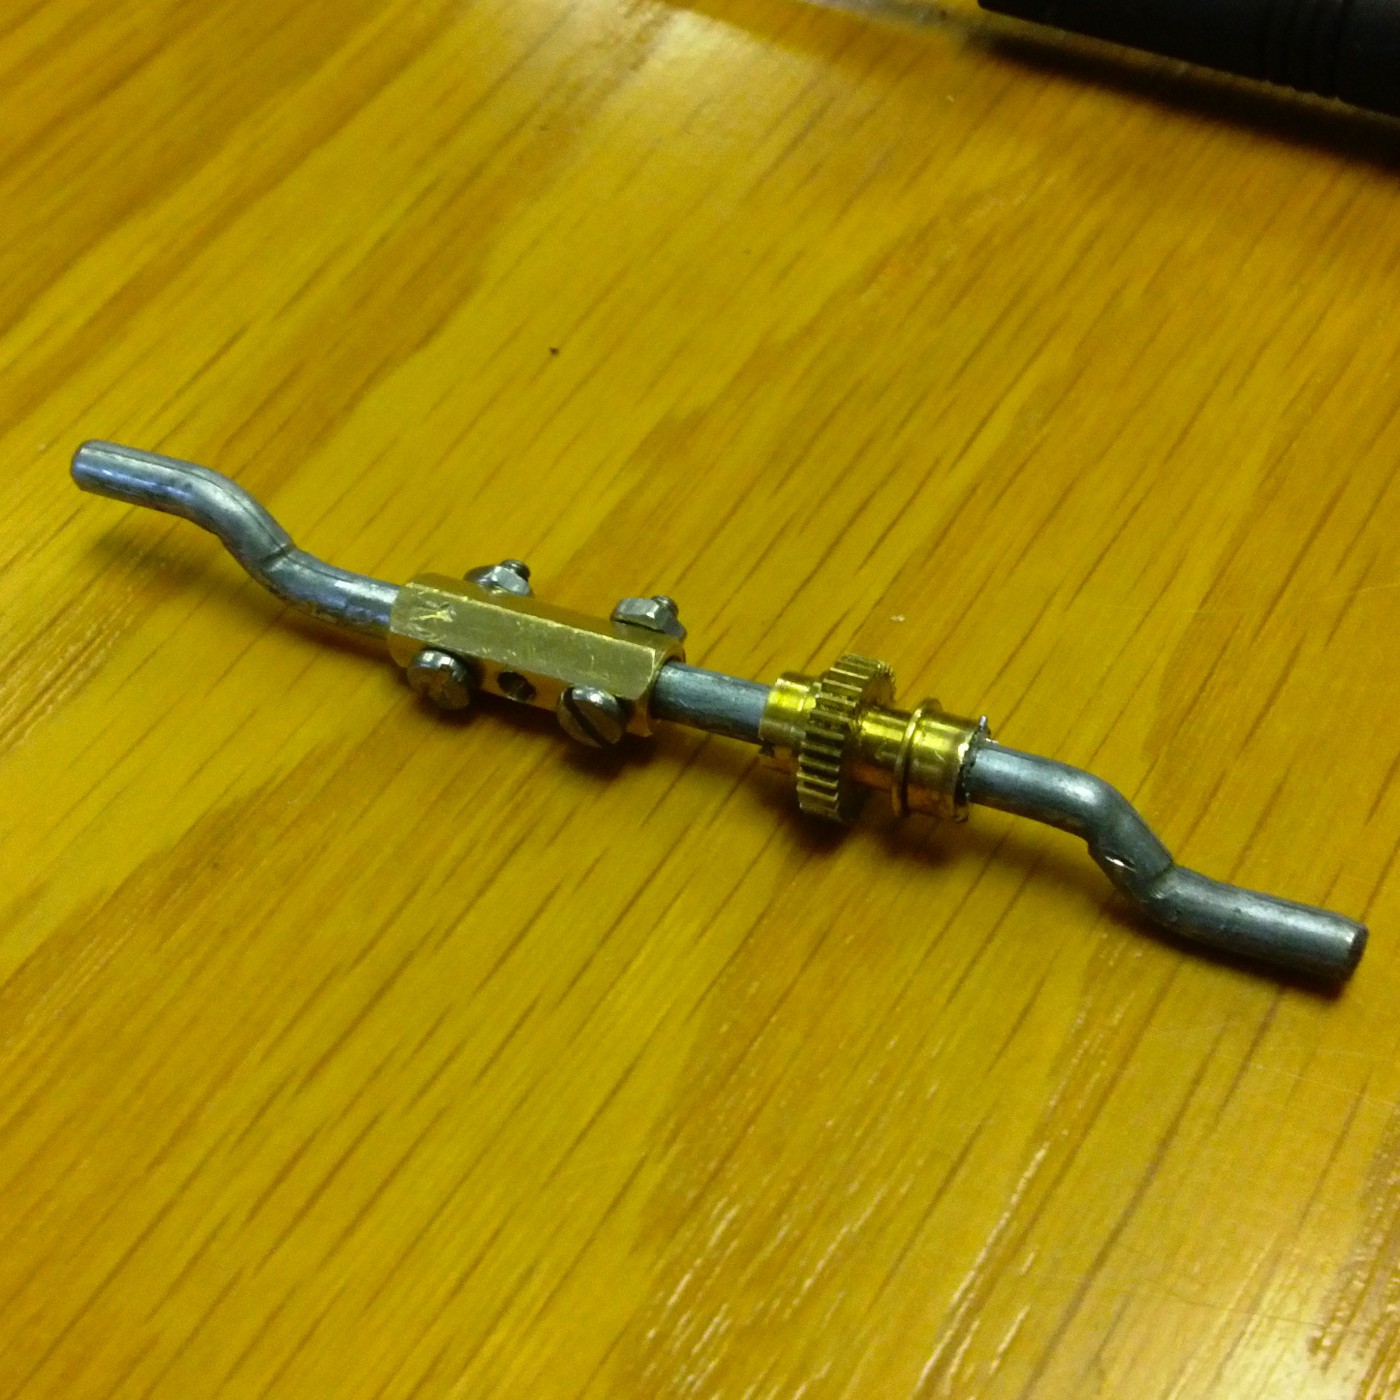
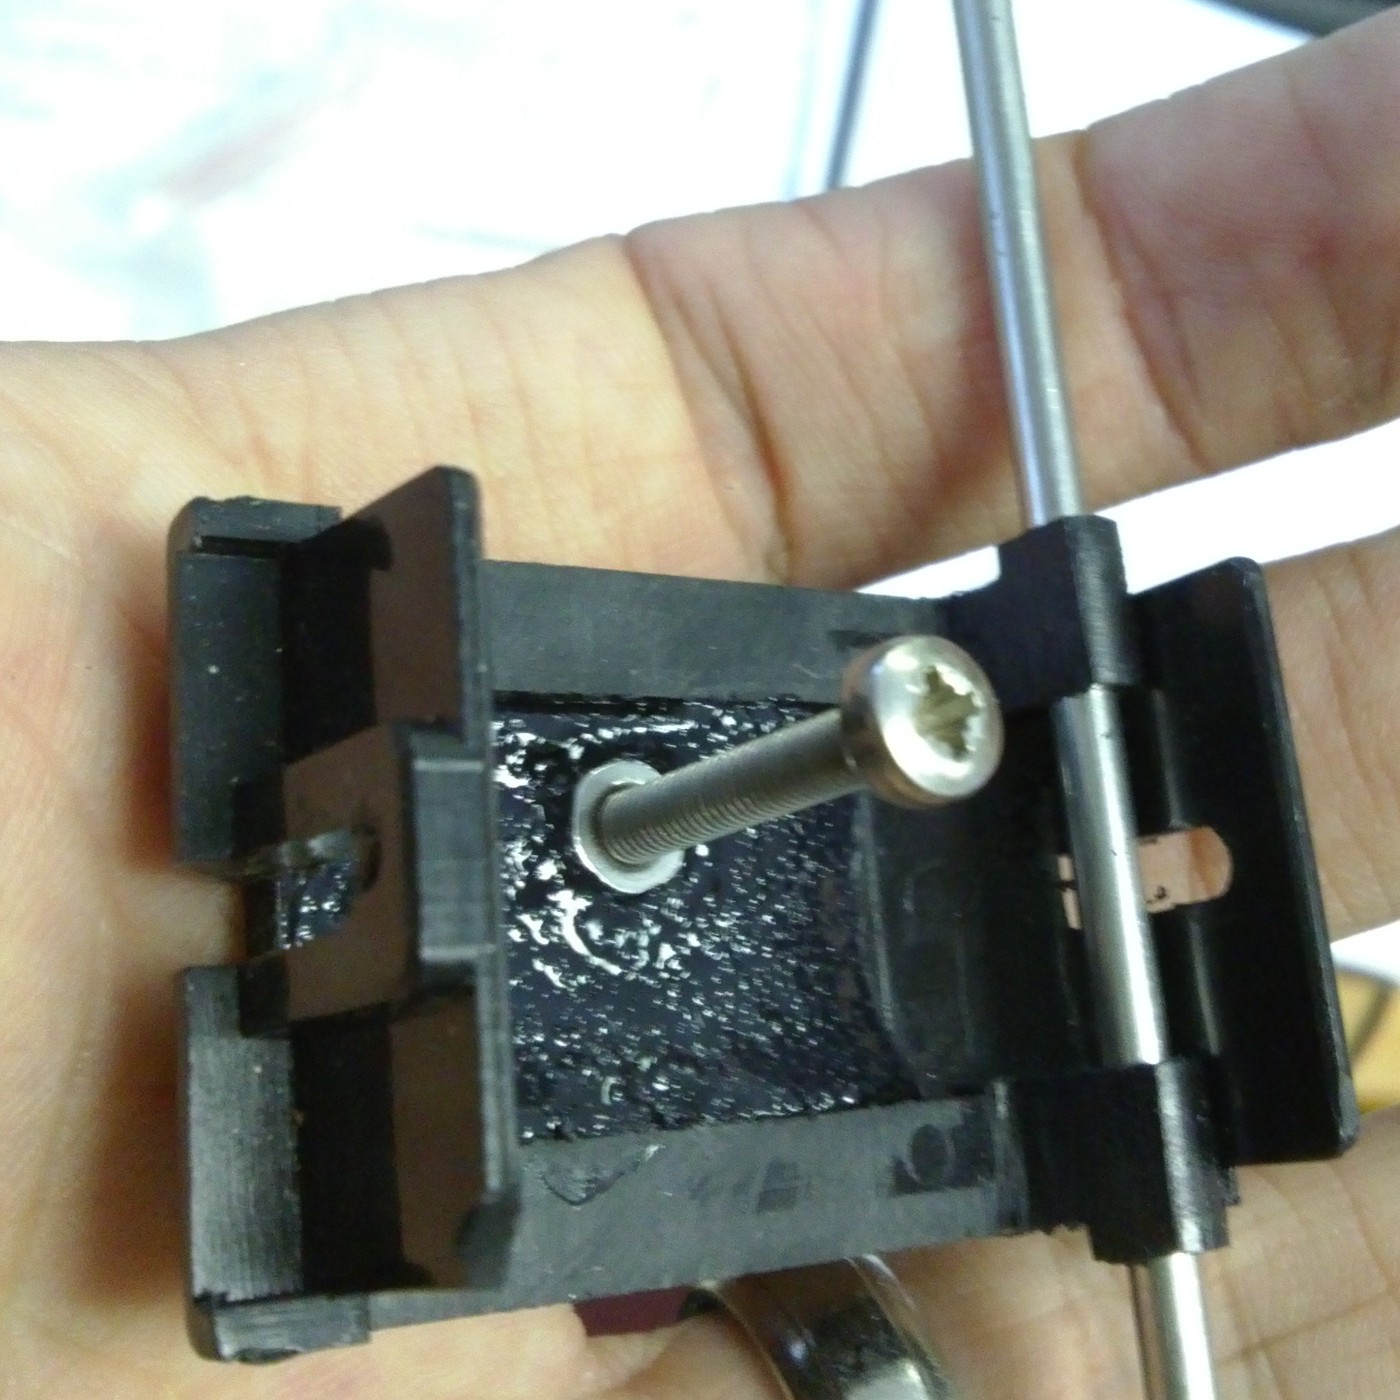
    Next I took an M3 brass hex standoff and drilled the thread out with a 3mm bit. It was easy to drill a 2mm hole though the center of one of its sides after making a little dent with a punch. With a 2mm screw through that hole I could slide the two half shafts in and the screw kept them orientated correctly, since their ends were crescent shaped (from when i cut them in half with the drill by mistake).

    The flat surface of the standoff meant that I could now (very slowly) drill a 2mm hole through the standoff and the shaft, without the drill skedaddling all over the place, and then bolt the two halves together.

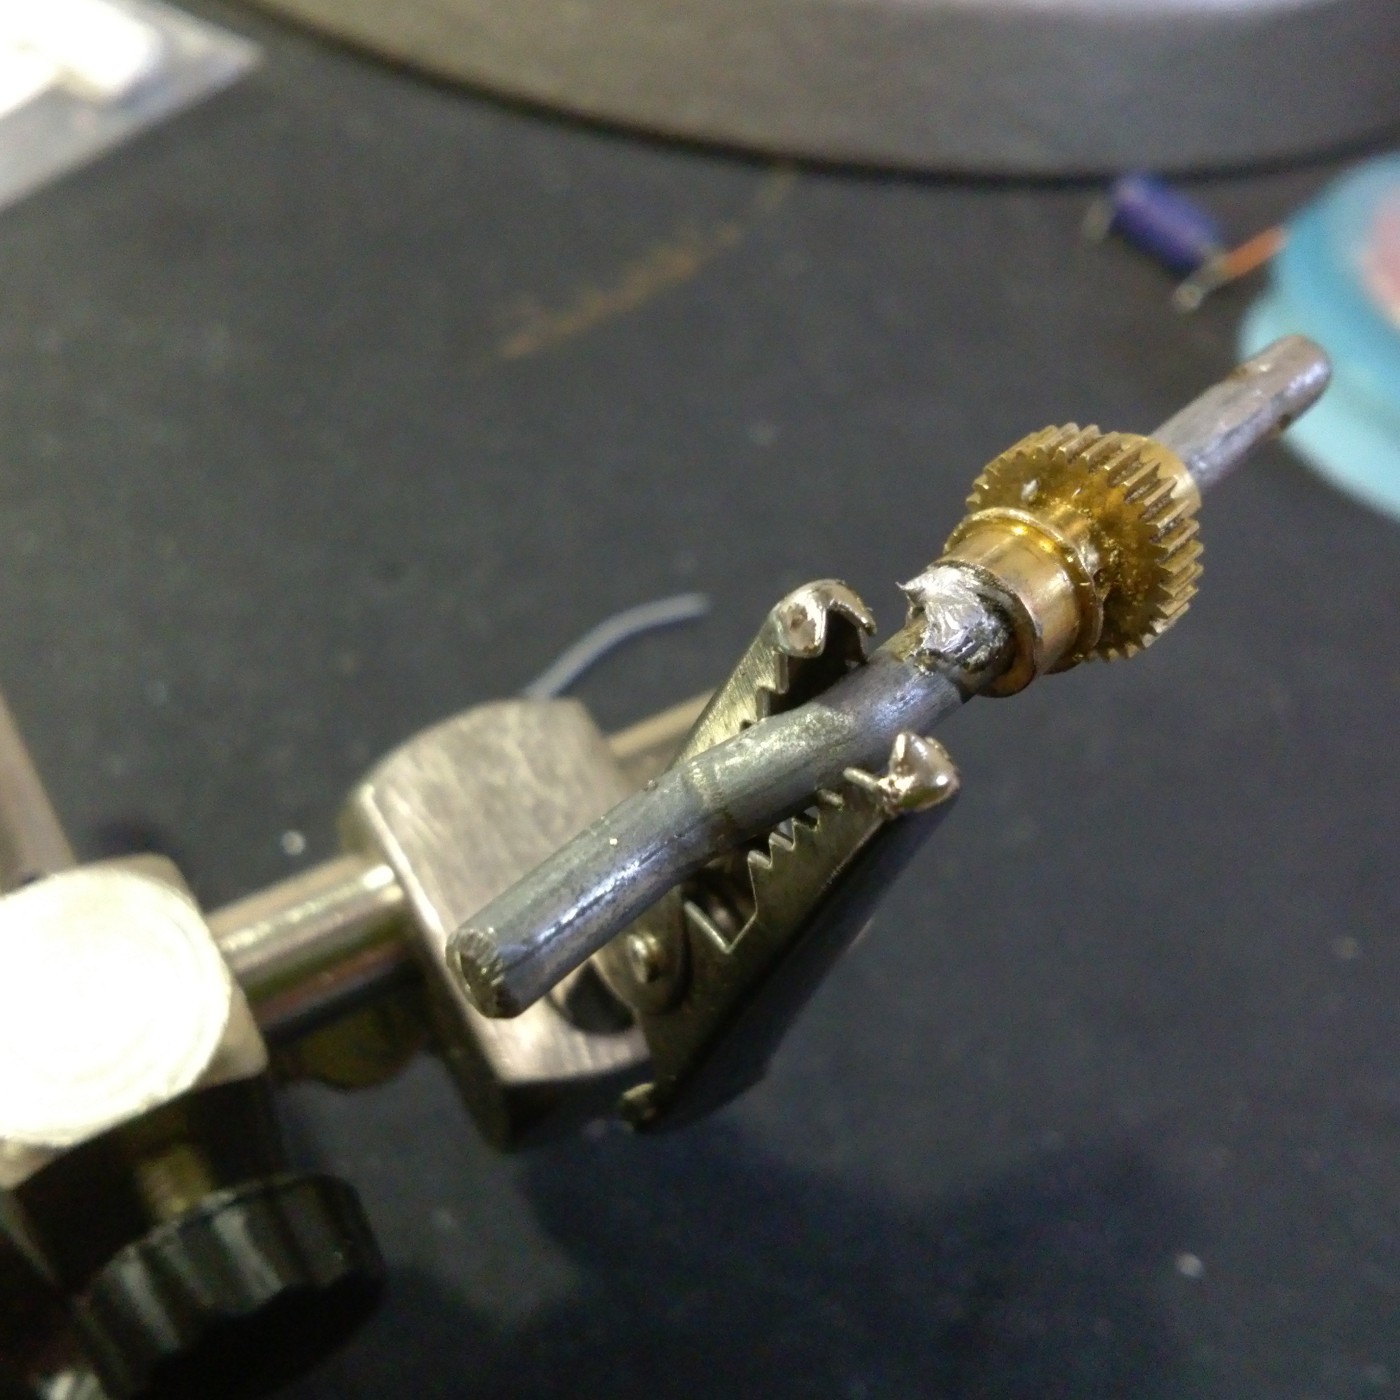
    I then used a regular soldering iron (actually, two at once, to get enough heat) to solder the gear to the shaft and prevent it slipping.

    Once this was all sorted I still had to mount the servo into the plastic pelvis bit. If possible I am trying to prevent the robot looking at all different from the outside, so I couldn't just put a screw right threw it. Instead I drilled through the servo and slightly into the pelvis plastic (to leave an indent that I could use for alignment) and the used a bit of Smooth Cast Onyx resin that I had lying about to fasten a nut in place.
    A bit of bent aluminium...

    Read more »

  • A robot has the right to bear arms

    Ossum04/08/2014 at 20:28 0 comments

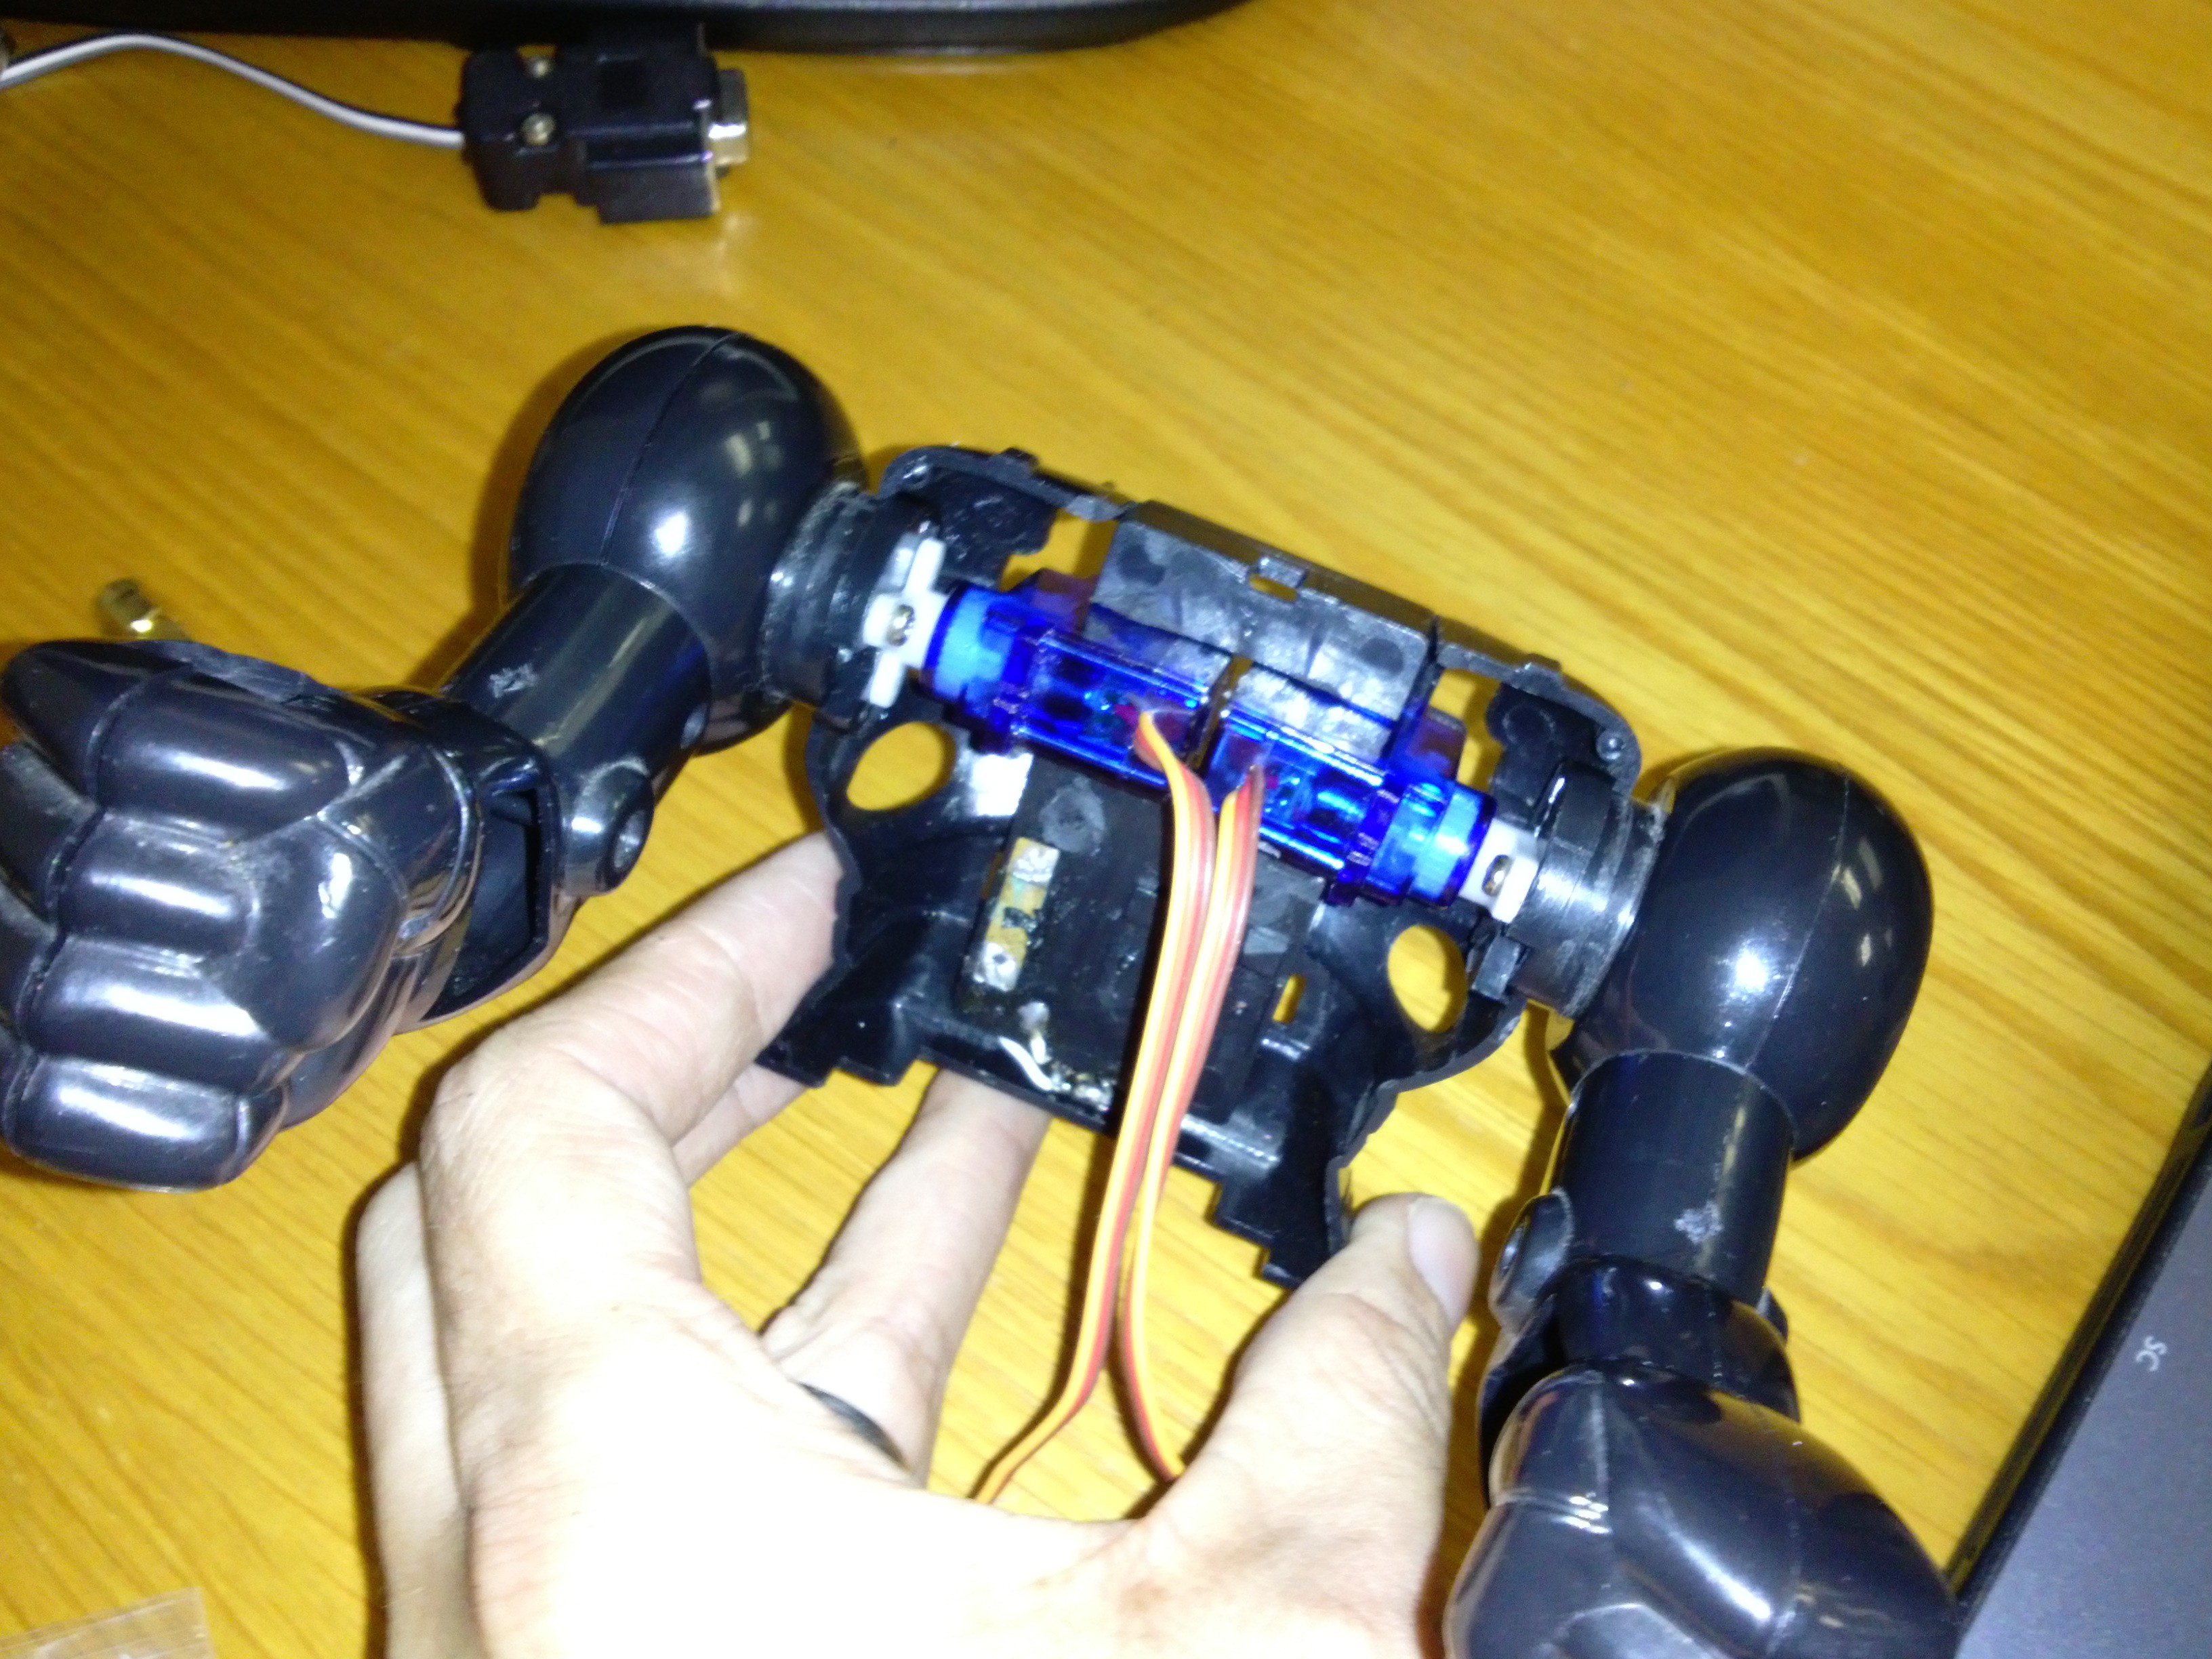
    Today I finally got a chance for some quality time with the Dremel. I have decided to drive the arms directly with small 9g servos. This meant removing the square bar that connected them and carefully chopping away various protrusions, including the two little stubs that limited the arms' movement.  Since we will no longer be using AA batteries I was able to cut into the battery bay and use some of that space for the servo bodies, as well as using the bay itself as a support.

    Here you can see the original guts of the shoulder

    And here we have the new and improved version

    For good measure I present you a video of a headless robot waving his arms like he just don't care. The servos are simply hooked up to a servo tester, which is why they move in opposite directions, being physically inverted. This will be easily fixable in software of course.

    I have also made some exciting developments in the leg drive system, but I shall leave that for another log when I have it all put together.

  • More more sound stuff

    scott04/07/2014 at 10:12 0 comments

    I've modified the firmware to drive a couple servos and toggle GPIOs on serial command.

    The servos are being software driven in the audio interrupt. The interrupt runs at 31250Hz, so it means we can drive servos with 32 positions.
    To set the servo position, send 'A' thru 'E' followed by 2 decimal digits.

    The timing was reeally tight, so only the first 3 servos are updated at full resolution, the rest are half resolution. (setting the digital out pin takes interrupt time which is very precious)

    The A pins are set as outputs.

    Send 'a' thru 'f' followed by 0 or 1 to set them.

    https://github.com/scottwday/Arduino/tree/master/SdCardWavPlayer

  • More Sound Stuff

    scott04/04/2014 at 06:24 1 comment

    I've got basic code together to play wav files off SD card.

    https://github.com/scottwday/Arduino/tree/master/SdCardWavPlayer

    At the moment I'm sending the audio to amplified speakers via an RC low pass filter, but obviously the robot itself will need an amp to play sound.

    One option is to make one- I have some TDA2003 10W amps lying around but they need 8V which is impractical. Maybe I can find a good old LM386 somewhere...

    The other option is to find one of those crappy little external cellphone speakers <rant> that all the children like to use to assert their obnoxiousness on public transport. </rant> I'll have to swing by China Town and see how much one will cost.

View all 13 project logs

Enjoy this project?

Share

Discussions

Dr. Cockroach wrote 10/16/2017 at 23:54 point

I grew up in the 60's and after seeing your work, I wish I had kept the robots I had back then :-)

  Are you sure? yes | no

Ossum wrote 10/17/2017 at 11:05 point

There is something charming about "vintage futurism", I've always enjoyed the aesthetic. I'm lucky that my parents still live in the house that I grew up in, so most of my old toys are still there, it's fun seeing my kids start to play with them now.

  Are you sure? yes | no

Similar Projects

Does this project spark your interest?

Become a member to follow this project and never miss any updates