OK, so this one started about 3 years ago. I had an old digital video camera (that also takes stills). Unfortunately the maximum video resolution is 640x480 and stills are taken at 3MP, so not a lot of use by today's standards (my phone can do better).
So after a bit of pondering, I thought it would be cool to make a time-lapse camera by remotely controlling the power and shutter functions. Unfortunately, after soldering in the necessary connections to the camera, I had no suitable transistors to earth the button pad (and activate it) and some of my connections broke off internally.
At this point the project got shelved.
After completing the LED projector, i found in it's project box some transistors that were surplus. So I thought it only polite to finish what I had started.
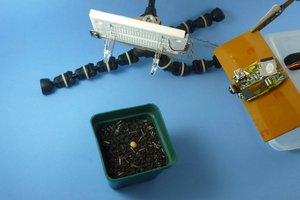
I wont bore anyone with the circuit details (unless you really want them, if so let me know) but the little breadboard (yeah I like things old school) connects the shutter and power button pads, through their perspective NPN transistor to earth. The LED is just there to flash periodically, and provide basic status information. The power for all this is pulled from the 6v camera batteries.
The PIC is ICSP programmable (hence the little 6 pin header) allowing easy code updates to timing and similar.
Programming the PIC was a doddle, using Great Cow Graphical Basic. If you are not familiar with it, I would recommend having a look. While I can write assembler, this would have taken me hours rather than minutes.
The flow code basically goes something like :
- Wait 10 seconds after power up (just in case you didn't want it to start)
- Hold the power button for 2 seconds
- Wait 10 seconds for the camera to start (and for the flash to charge if needed)
- Press the shutter for 0.5 seconds to take a photo
- Wait 20 seconds for the image to save
- Hold the power button for 2 seconds to turn off the camera
- Wait 5 minutes, flashing the LED once every 15 seconds or so
- End Loop
Fortunately the camera retains it's settings for flash and similar, and does all the heavy lifting / processing. As the system is only running the PIC during idle between photo's, the batteries last about 3 - 4 days and on a 2GB SD card, theoretically about 2500 images should be possible.
Before I could use the camera, I needed something to protect the control board. I settled on a well fitting Kinder Surprise Egg toy container. Through which the LED can be seen.
So far I have run the setup for about 3 days looking at our local cathedral. 714 pictures make up the first short video.
The next question is, what else would look good time-lapsed?!
 ric866


 Gradivis

 Absolutelyautomation
 Robert Gowans
Oh hey, I did almost exactly the same thing on-and-off again for a couple years.
http://jrainimo.com/build/?cat=3
It ended up working great, and then suffering a broken flex cable when I tried to fit it all in a chassis :/