 strofo
Board software detail:
- OS: Raspberian
- Programming language: C# powered by Mono
- Imaging libraries: AForge Framework by Andrew Kirillov
Robot software detail:
- Platform: Arduino
- GUI: Arduino IDE or Atmel Studio
- Robot libraries: <grigore.h>
Let everyone write and test code, on the same platform, by just having an intelligent line-following table.
Already have an account? Log in.
To make the experience fit your profile, pick a username and tell us what interests you.
Board software detail:
- OS: Raspberian
- Programming language: C# powered by Mono
- Imaging libraries: AForge Framework by Andrew Kirillov
Robot software detail:
- Platform: Arduino
- GUI: Arduino IDE or Atmel Studio
- Robot libraries: <grigore.h>
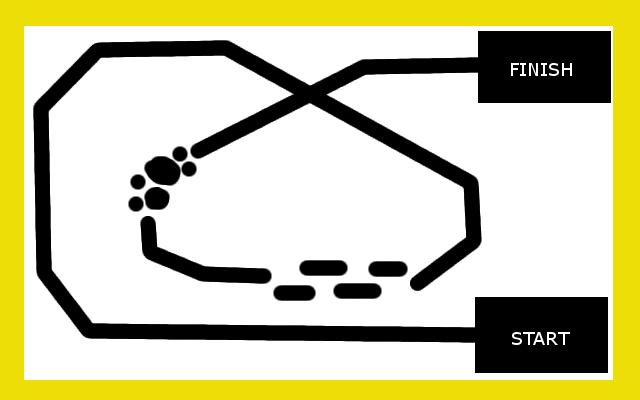
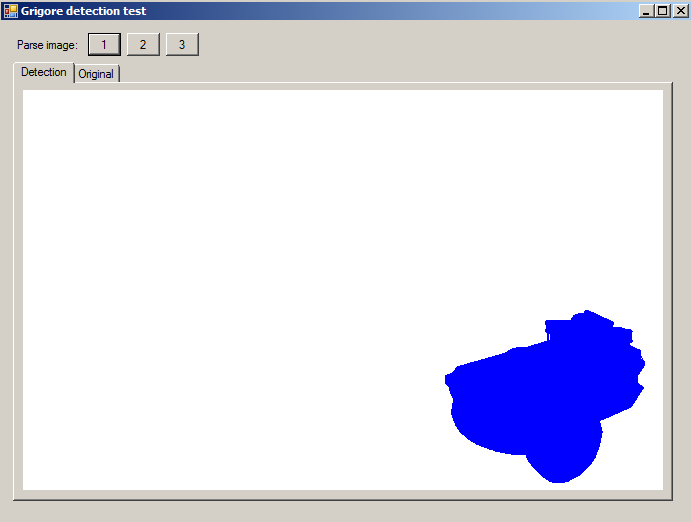
On the left is the generated image, on the right the processed image. Everything looks ok! So there must be something wrong inside the edges processing algorithm.
Here is the corresponding repository containing everything to make this project work:
https://github.com/strofos/grigore/tree/master/SOFTWARE - Board/Test02 - Detection using AForge Mono
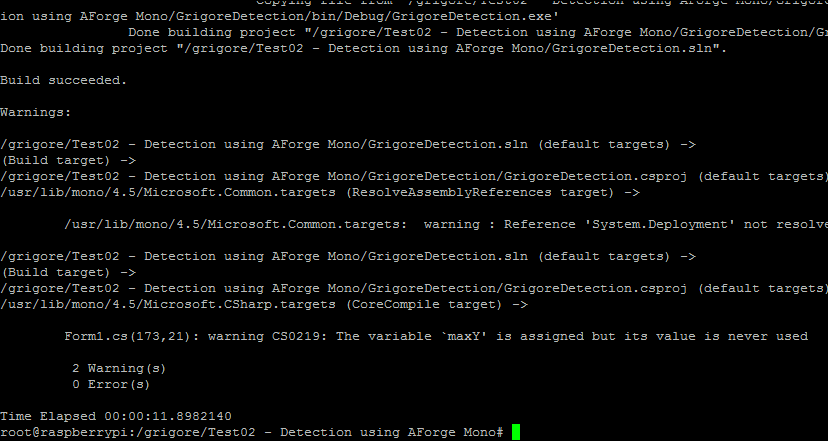
After downloading it, we must compile it. Just navigate to the folder "Test02 - Detection using AForge Mono" and run the "xbuild" command:
root@raspberrypi:/grigore/Test02 - Detection using AForge Mono# xbuildIt will start compiling the hole solution, project by project:

Unfortunately I am not that familiar with Linux so I didn't set the lines to move the generated libraries.
So we have to manually move "AForge.dll", "AForge.xml", "AForge.Imaging.dll", "AForge.Imaging.xml", "AForge.Math.dll", "AForge.Math.xml" to the "GrigoreDetectionConsole\bin\Debug" folder.
Each library can be found in its project folder, inside [Project]\bin\Debug
Now we can run this test:
root@raspberrypi:/grigore/Test02 - Detection using AForge Mono/GrigoreDetectionConsole/bin/Debug# mono GrigoreDetectionConsole.exe and will get a response like this: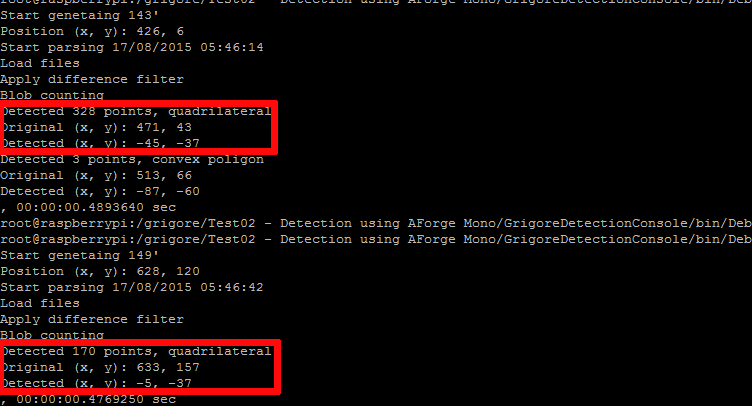
As you can see the code runs, but the detected position is not quite what it should be. I will output the difference image and edges to debug it.
I also added a Windows project that does this in real time but unfortunately I can not run the X Server in remote, so I can't use it for the moment.
The detection duration is half a second, which is great for this project.
This was still a success, so soon I'll be starting to write the main code.
Install Raspberian
First boot: resize to max size of SD card. Enable camera support
Login: pi/raspberry
Change super pass to "pi"
sudo passwd
# introduce new password
Enable camera in RPi configuration
Enable camera in condif
raspi-config
Enable camera ..
Check camera configuration
Login as super and take a snapshot: http://www.raspberrypi.org/documentation/usage/camera/raspicam/raspistill.md
DATE=$(date +"%Y-%m-%d_%H%M")
raspistill -vf -hf -o /home/pi/camera/$DATE.jpg
Install mono
apt-get update
apt-get install mono-runtime
apt-get install mono-complete
Check if is Mono was installed correctly
Create a file named "HelloWorld.cs" and write the following code inside
#####
using System;
public class HelloWorld
{
public static void Main()
{
Console.WriteLine("Hello World!");
}
}
#####
Compile and run it
gmcs HelloWorld.cs
mono HelloWorld.exe
Unfortunately Windows 10 IoT is lacking the namespace System.Drawing so any code that uses Image or Bitmap objects will not compile. I was looking forward to have the project on Windows but, as Mono has this functionality, the next step is to reinstall Raspberrian + Mono and give it a try there. I also have to recompile the AForge code over Mono.
I love the AForge framework from Andrew Kirillov so it made sense to use it because Microsoft just released the Raspberry Pi support in Visual Studio C#.
Right now I am still in doubt weather I will use Mono or .Net but is clear to me that I will use C# instead of Python. I can use some advices and feedback on this matter.
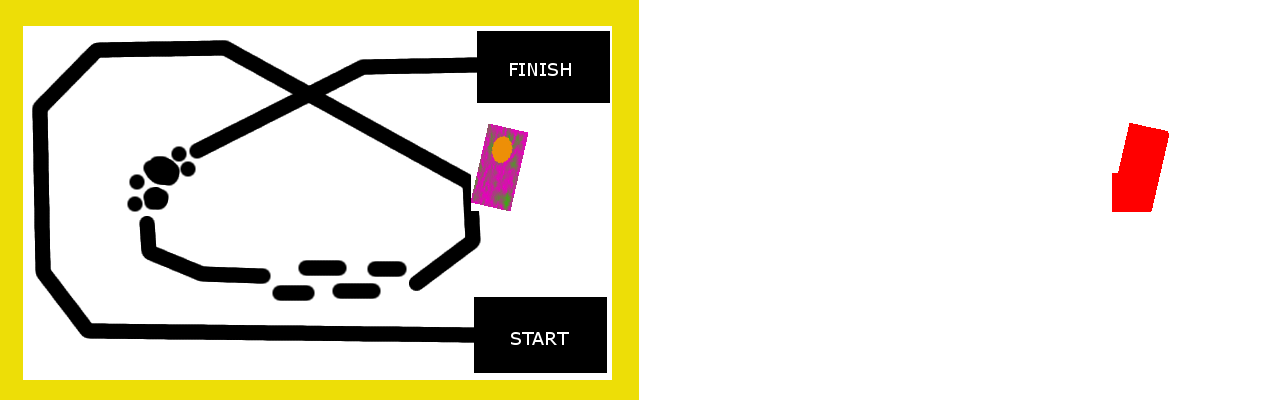
The code just makes a difference filter between an original empty board image:
and an image containing the robot (made using GIMP):

and returns an image containing the resulted edges:
https://github.com/strofos/grigore/tree/master/SOFTWARE - Board/Test01 - Detection using AForge
First I mounted an Arduino on the Magician chassis and a breadboard. On the breadboard I added the L298 driver and wrote some code to drive the robot over the serial.
Next use RPi to control the Arduino to some desired position by tracking Grigore's position.

 Brenda Armour
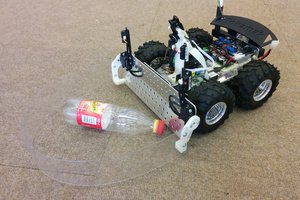

 Pascal Buerger
 Eugene