For the 2016 Hackaday Prize, I've decided to incorporate this project into a much larger set of projects that altogether I call my Lego Optics Lab. The following are all the various parts an projects that are included:
This project (the one you're looking at right now), of course.
Lego Optics Lab: Mirror/Filter Holder
Lego Optics Lab: Small Lens Holder
Lego Optics Lab: Large Lens Holder
Lego Optics Lab: Panoramic Mount
Lego Optics Lab: Simple Pan/Tilt Mount
Lego Optics Lab: Worm Drive Pan/Tilt Mount
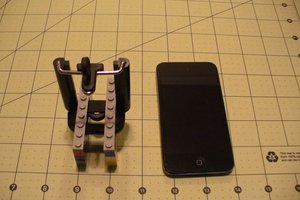
Lego Optics Lab: Mobile Phone/iPod Mount
Lego Optics Lab: Laser Interferometer
Lego VR Goggles: Lego Optics Lab DIY Stereoscope
I finally took apart a broken computer projector. Some of the optics were burned or broken but I managed to salvage several lenses, mirrors, filters, and a curious little glass cube.
On three sides of the cube were attached tiny LCD screens. It seemed then that the little cube was a beam splitter, or rather, the reverse of a beam splitter that combined the images from the three LCD screens to be projected onto a big projection screen. It is called a "dichroic prism.” You can learn more about how computer projectors work here.
There were three filters glued to the faces of the cube underneath the LCD screens. I tried as best as I could to peel the filters off, but unfortunately they were torn in the process and left a glue residue on the three faces of the cube. I couldn’t clean all of the glue off but managed to remove the glue from the center of each face so I could shine a laser through each face to see how the beam would be split.
I’d been thinking about building an optics lab out of Lego for a while now, but hadn’t gotten round to it for lack of lenses and whatnot to test. Now that I’ve got some lenses, mirrors, and prisms from the computer projector, I decided to build and test a beam splitter as the first bit for my Lego optics lab.
I originally published "Lego Optics Lab: Beam Splitter" in my column Square Root of Not at Science 2.0 and it got a link on io9 (my name is misspelled) and on Scientific American.
Follow me on Twitter: @SteveSchuler20 and right here on Hackaday: KRA5H
Parts Needed
1 Dichroic prism
1 LEGO Turntable Legs with click Assembly (76514)
1 LEGO Baseplate 32 x 32 (3811)
2 Lego Technic beam with holes 1 X 6
6 Lego Technic beam with holes 1 X 2
1 Laser pointer
To hold my laser pointer I used my Erector Set stand: build instructions are here and here.
On the bottom of the glass cube is a mounting bracket that's glued on. This mounting bracket conveniently snapped into the center of the Lego "turntable with the click assembly." I can rotate the cube one click at a time or several clicks at a time to set the cube to 90, 180, 270, and 360 degrees. I stacked the Lego turntable brick on two 1 X 6 Lego Technic beams to raise it up a bit off the Lego base plate. I also mounted three paper targets on the edges of the base plate with six 1 X 2 Lego Technic beams.
The following pictures show how the laser beam is split as I rotate the cube to 90, 180, and 270 degrees (I taped a piece of paper with an arrow drawn on it on to the top of the cube to show its orientation):


Lego Optics Lab Parts next article: Small Lens Holder
Lego Optics Lab next article, Lego VR Goggles: Lego Optics Lab DIY Stereoscope
 Steve Schuler


 Adrian


oszczypek, I'll try to see how well I can fit the various Lego bricks that I have to the lenses that I salvaged from the computer projector. I don't actually know that much about grinding/machining lenses.