We want to pick you up right where you are, and that's probably in some cozy arduino environment. Or in your garden (this seems to be a popular place in this year's prize). Let's take a piece of Verilog and compile it into a binary!
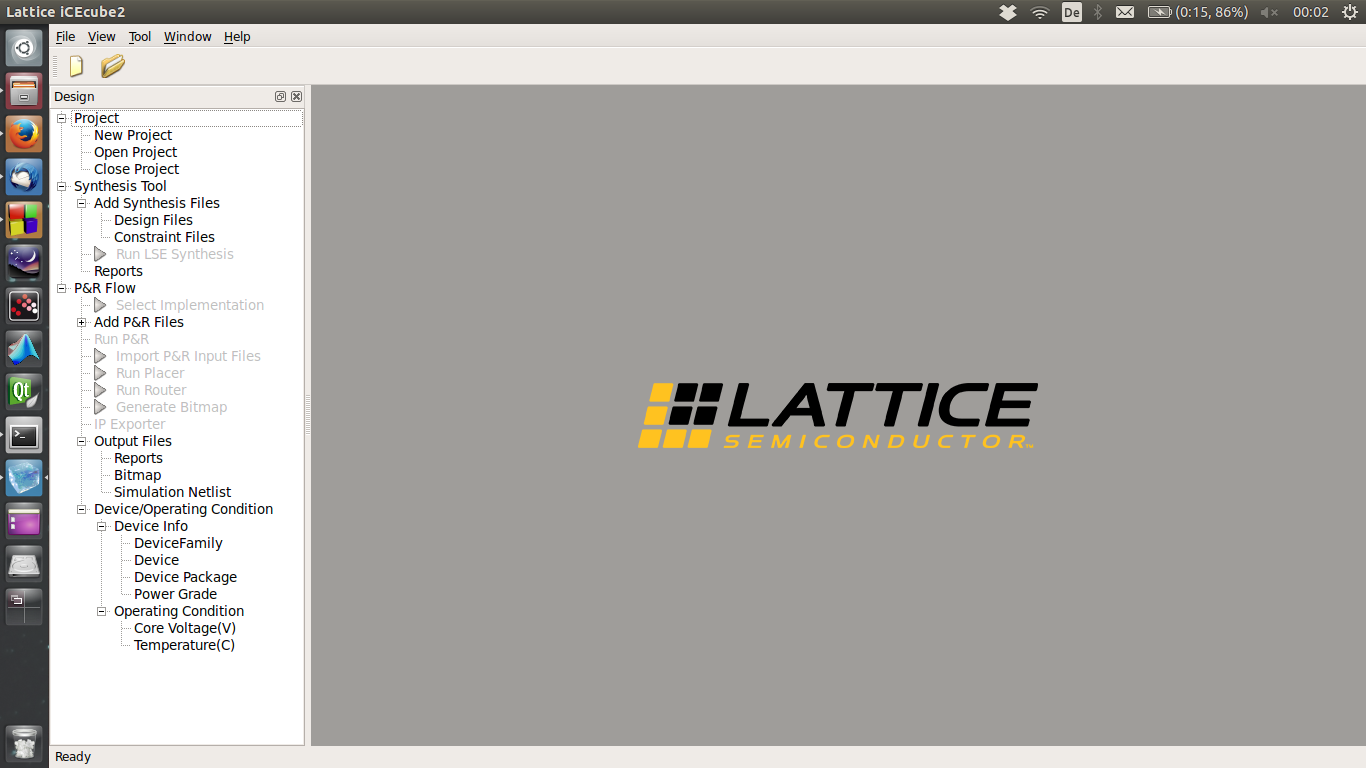
After you started iCECube2 you should see a simple main window with menus, a project property tree and an inactive editor area:

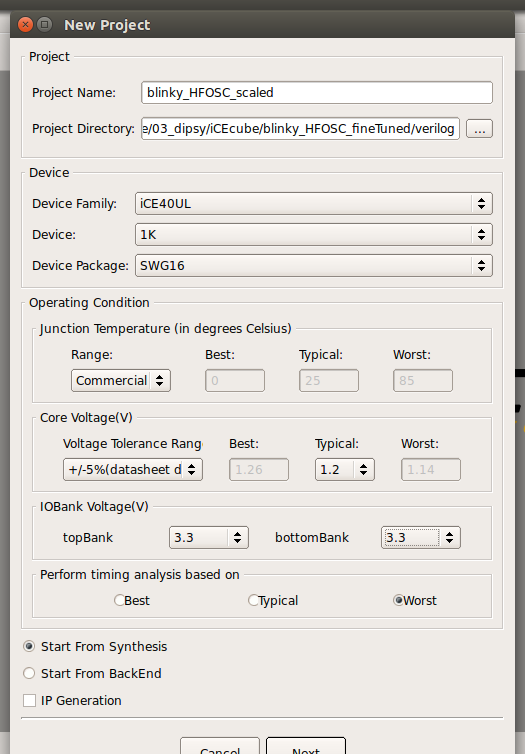
In the project tree, double-click "New Project". The project and device setup dialog appears:

- Select a directory for your new project and give it a name.
- Select the correct device: the dipsy's FPGA is an iCE40UL, 1K, in an SWG16 package.
- Select 3.3V for the I/O banks.
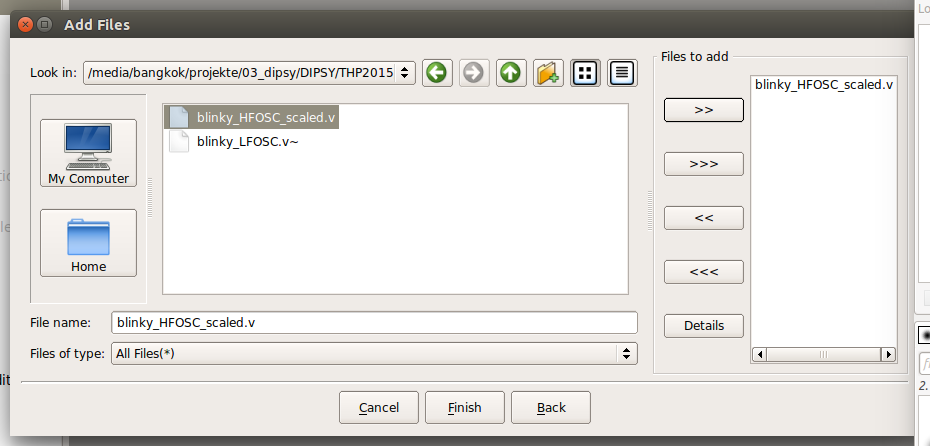
The project wizard now asks for "Files to add" - we can now add HDL files, both VHDL and Verilog are ok. One quirk is that we can't create new files in this dialog, so we have to create a new file externally. Open your favourite editor and add the following magic:
module top (
// input:
// outputs:
ledout
);

output ledout;

wire hfosc_clk;
wire led;
wire ledout;

SB_HFOSC OSCInst0 (
.CLKHFEN(1'b1),
.CLKHFPU(1'b1),
.CLKHF(hfosc_clk)
) /* synthesis ROUTE_THROUGH_FABRIC= [0] */; // don't know the implications of this, sorry
defparam OSCInst0.CLKHF_DIV = "0b00"; // divide by 1; 48 MHz output

SB_RGBA_DRV RGBA_DRIVER (
.CURREN(1'b1),
.RGBLEDEN(1'b1),
.RGB0PWM(led),
.RGB1PWM(1'b0),
.RGB2PWM(1'b0),
.RGB0(ledout)
);
defparam RGBA_DRIVER.CURRENT_MODE = "0b0";
defparam RGBA_DRIVER.RGB0_CURRENT = "0b1";
defparam RGBA_DRIVER.RGB1_CURRENT = "0b1";
defparam RGBA_DRIVER.RGB2_CURRENT = "0b1";


reg[31:0] cnt = 0;
reg[31:0] factor = 48000000; // divide clock down to 1 Hz

reg divout = 1'b0;
assign led = divout;

always @(posedge hfosc_clk)
begin
  if(factor != 0)
    cnt = cnt + 1;
  if (cnt == factor)
    begin
      cnt = 0;
      divout = ~divout;
    end
end

endmodule
Save the file wherever you want to, but please pick a place you can find again!Add the file to you project:

make sure to not only select your files, but to move them into the right part of the window by double-clicking the file or by selecting it/them and clicking ">>". Click "Finish".
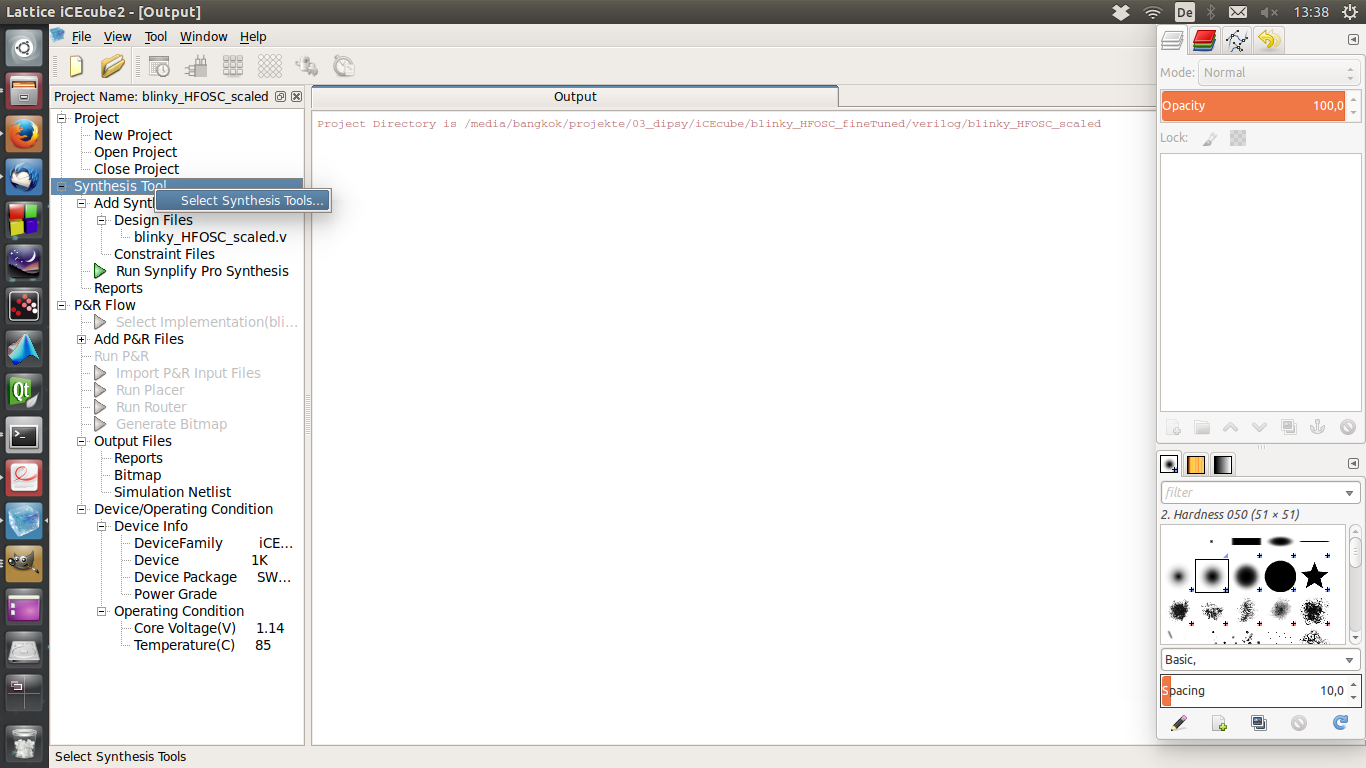
Before we can synthesize out design we need to pick the correct synthesis tool. Right-click the respective tree item:

Select "Lattice LSE" in the dialog that pops up.
Now, to synthesize, go to Tool -> Run All. If everything is fine, iCEcube2 will do all synthesis, place & route or whatever else is needed (I have no clue, to be honest) and give you a binary file that you can use to configure a dipsy.
 Christoph
Discussions
Become a Hackaday.io Member
Create an account to leave a comment. Already have an account? Log In.