16 Channel Frequency counter, the easy way:
Step 0:
Start Vivado, Create project, Create new Block Design.
Step 1:
Type freq.. and let the drop down to populate, then select the IP Core to be added:

Press Enter!
Step 2:
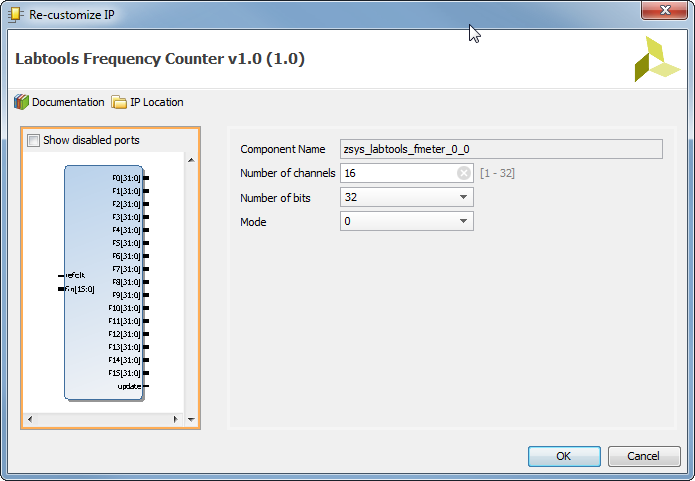
Doubleclick and set number of channels to 16

Press Enter!
Step 3:
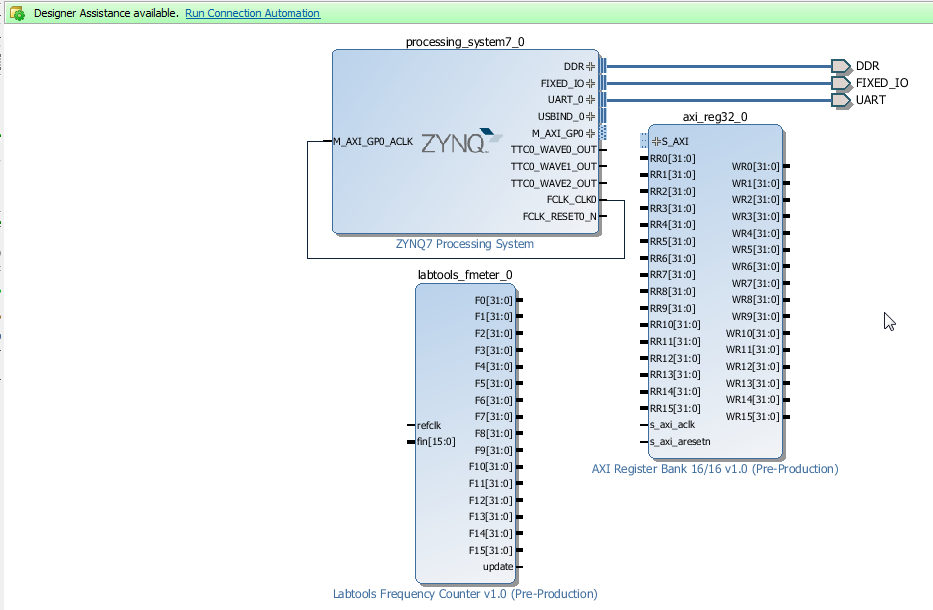
Add AXI Register Bank, the Block diagram should look like this:

Step 3:
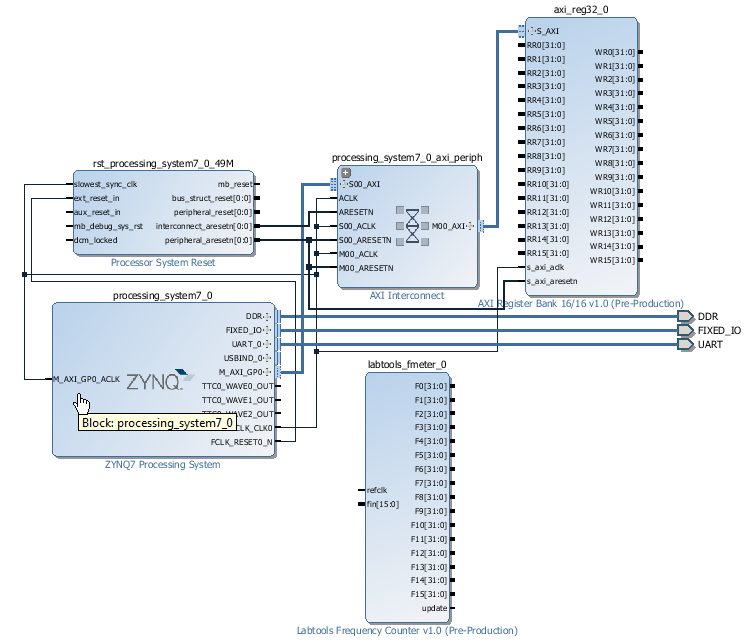
Click on the "Run Connection Automation! Click on OK!

Step 4:
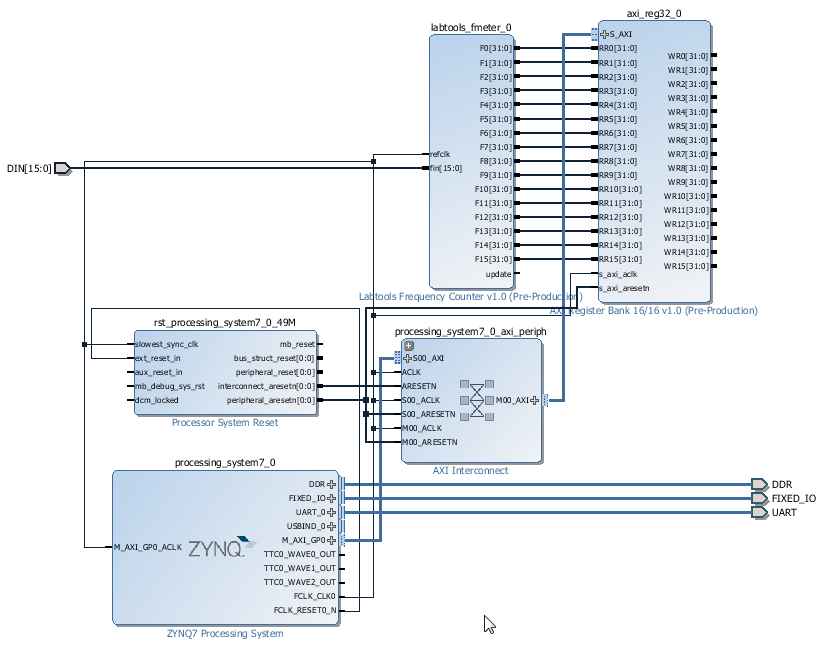
Connect Frequency meter outputs to the register inputs, then connect the ref clock to Fabric Clock output from PS7 Processing Block, and make the Frequency meter inputs external, this is all done by a few mouse-clicks.

Step 5:
The Hardware is now ready for build, before final bitstream generation we would need to assign the DIN[..] pins to actual pins in the Arduino headers. After that we can close Vivado and continue with Software.
Step 6:
For quick test without Software, Vivado labtools VIO can be used:

Frequency meter in action, D2 in Arduino header was connected to test clock with 33MHz
This Frequency meter was used on the "zynq arduino" board during proof of concept testing of LiLi (Light Link) where a DDS was usd to generated the LED blink rate and the "frequency meter" IP Core did display the Frequency..
This is Free IP Core, and if not yet published soon will be. It is fully ready for Vivado IP Core repository.
 Antti Lukats
Discussions
Become a Hackaday.io Member
Create an account to leave a comment. Already have an account? Log In.
Where did you get the ip for "Labtools Frequency Counter V1.0"?
I havent been able to find this IP in vivado...
Are you sure? yes | no