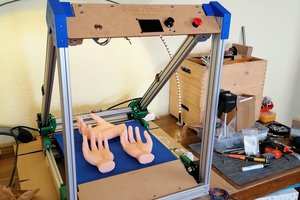
[Update: 2015/11/13] - About to finally get this going. First step will be to re-wire the force-sensing resistors. They are currently going to the bed temp analog in (i.e. old style) . They need to be rerouted to the digital probe calibration switch pin (new style) and the firmware updated. Once that's done the heated bed can be installed.
This project is the heated bed for my delta 3D printer. In addition to the bed and circuitry, I also need to replace the bed mounts as the stock ones are printed plastic and won't take the heat...
The steps for this project are-
- Affixing the heater to the glass bed.
- Carve 3 bed mounts out of basswood or balsa which will insulate.
- Cut 3 gaskets which will insulate the bed from the force sensing resistors that are used to auto-calibrate the bed.
- Wire the heater so that the RAMPS controls the 30A relay which runs the heater. The Heater has its own dedicated power supply. The ramps only drives the relay
- using a non-contact thermometer, calibrate the heated bed
- Test the system in both heated and non-heated modes
This one is a work in progress...
 Alpha Charlie
 ingenium3D
 Benchoff
 RenierM
 Eric Cantrell