The Origins
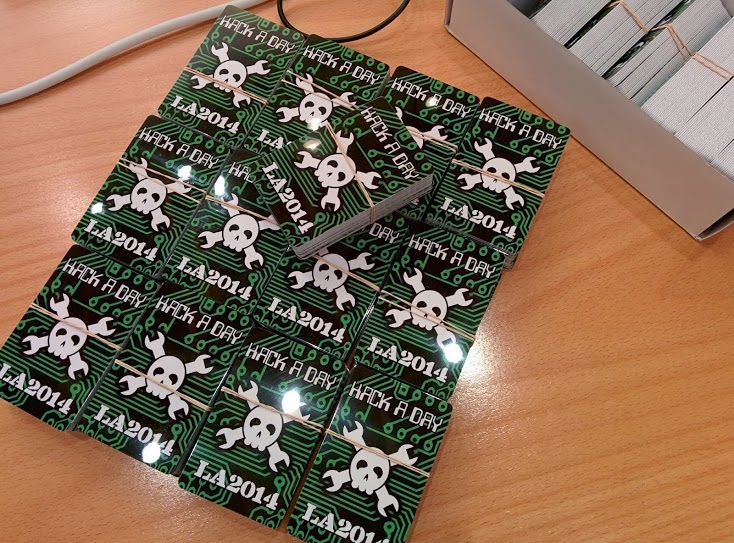
When we decided to throw a party in LA (which became know as The Gathering) I wanted it to be more than just free t-shirts and beer. Laser Graffiti popped to mind and I was glad that Ben was willing to take the lead on that project. But I figured there should be more; something that people could take home with them. I had under one month to pull it together so custom PCBs would be a stretch. The idea for NFC tags sprouted up mainly because we don't see them in very many hacks. Why? After all, the tech is pretty cool. I discovered it's because there aren't any easily found hardware libraries that are NFC standard compliant. More on this in a bit. Here's an image of the 500 custom printed cards I ordered for The Gathering.

Library Failure

In my mind I figured I'd study the specification and datasheet for the PN532 card reader and write my own library. After an hour of trying to control the reader with my Bus Pirate I realized this was a good way to spend months on a project when all i had was a couple of weeks (sixteen days to be specific). I switched to getting a proof-of-concept put together using an Arduino and known code from the good folks at SeeedStudio by way of our friends at Adafruit. Had I know that ElecFreaks was using the code examples from these other two companies I would have order from them instead just to support their open source efforts. Oh well, next order!
The Library can read the hardware Unique ID from the NTAG203 hardware, but that's it. It can't read or write a data payload to the cards. It does support the Mifare cards, which I understand are a deprecated protocol and not standards compliant (which is why I opted to order NTAG203 instead).
This is a huge issue that the Hackaday community should address. I know that libnfc supports these tags. So porting the code to a manufacturer-agnostic microcontroller library should be fairly trivial given enough time! At some point I'll put out a call on Hackaday to do this, and offer up free cards and shirts to readers who want to work as a team toward open sourcing such a project.
Changing the Plan
To get around this I hacked my own project before I even built anything. As I mentioned previously, the cards have a UID which is a feature from their RFID origins. I coded a proof-of-concept that read the 7-byte UID and printed it to the terminal. Later, this was turned into a jumper-enabled mode that prints the UIDs as a C header file. When the 500 cards arrived it only took me about 10 minutes to scan all of them, save the output as a header file, and write it back to the Arduino as a lookup table to ensure that each card could be used just once for voting.
To save space in EEPROM I used a bit-packed array to track the tokens. When the card is read, the lookup table is searched for a matching UID. The index at which it is found is then used as the "address" in the bit-packed array. 1 means it's already been used for voting, 0 means it has not.
Finishing the Hardware

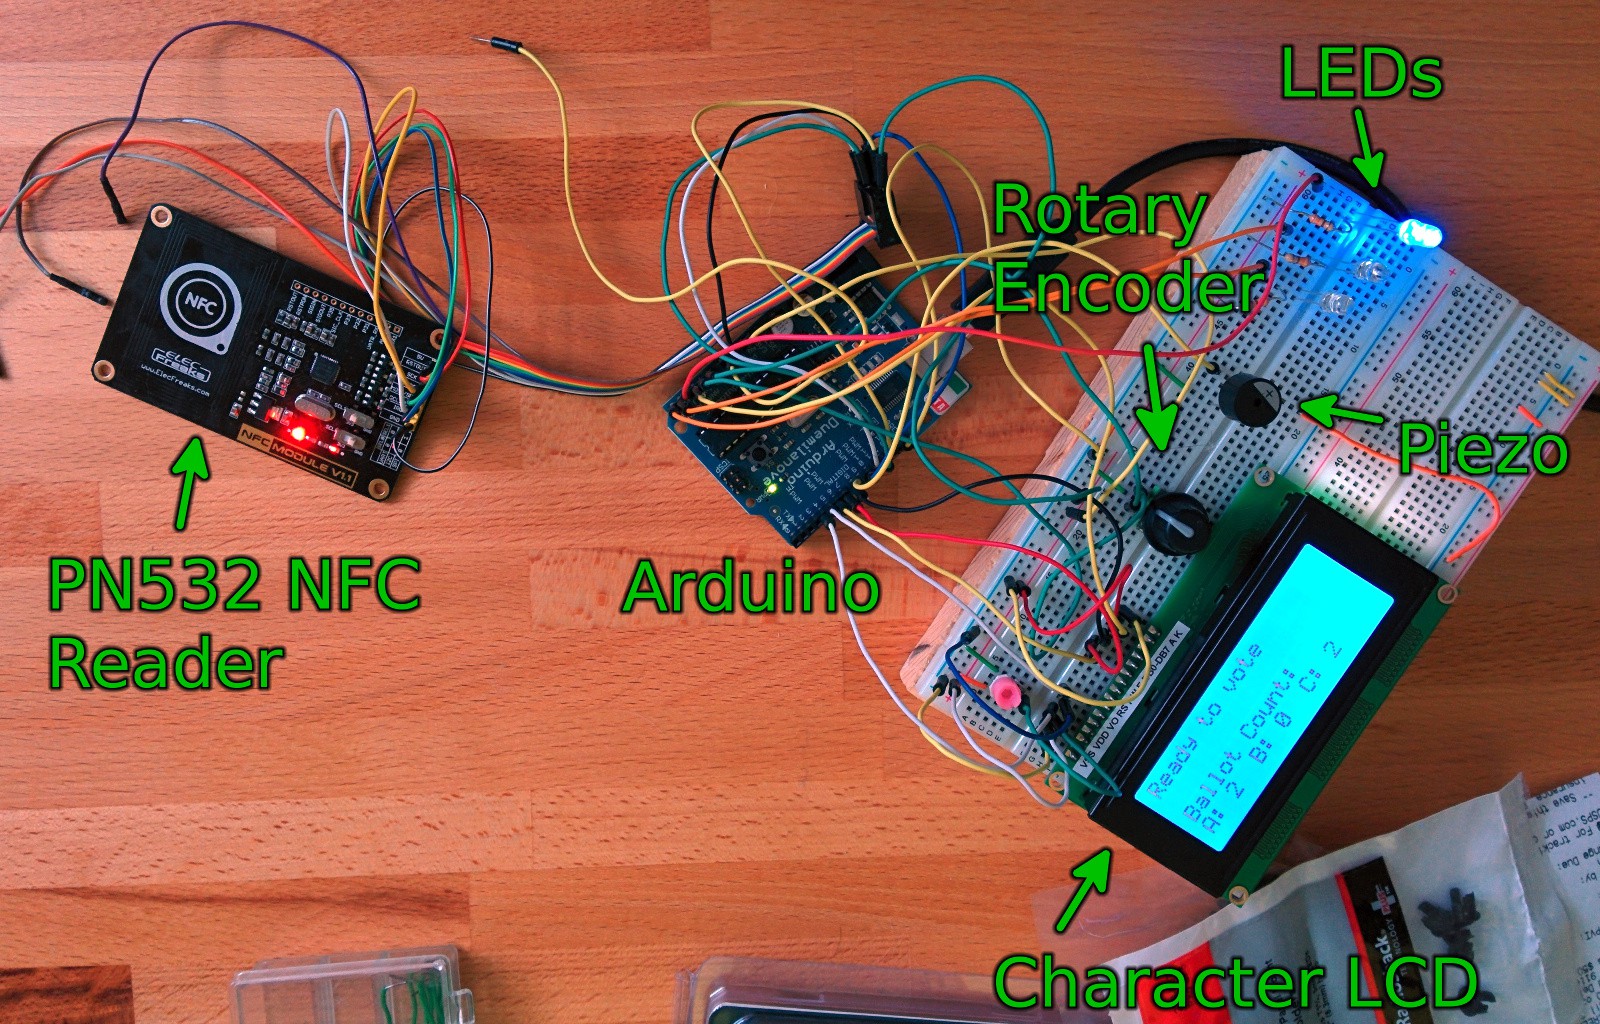
I was most concerned about reading the cards. Once I had that handled the rest was a snap. Above you can see the prototype in its full glory. On the breadboard: For feedback I added a 20x4 character LCD. Just above and to the left you can see the pink trimpot for contrast. In the middle of the breadboard there is the rotary encoder used to select one of three voting options which are shown by a blue LED. Just above and the right of the rotary encoder knob is a piezo buzzer which also provides feedback.
I actually used every pin on the Arduino for this. Two of them were jumpers for the UID reading mode and for clearing the EEPROM that keeps track of which tokens have already voted as well as the ballot count. Here's a link to the build log discussing this prototype.
Assembling the Voting Rig

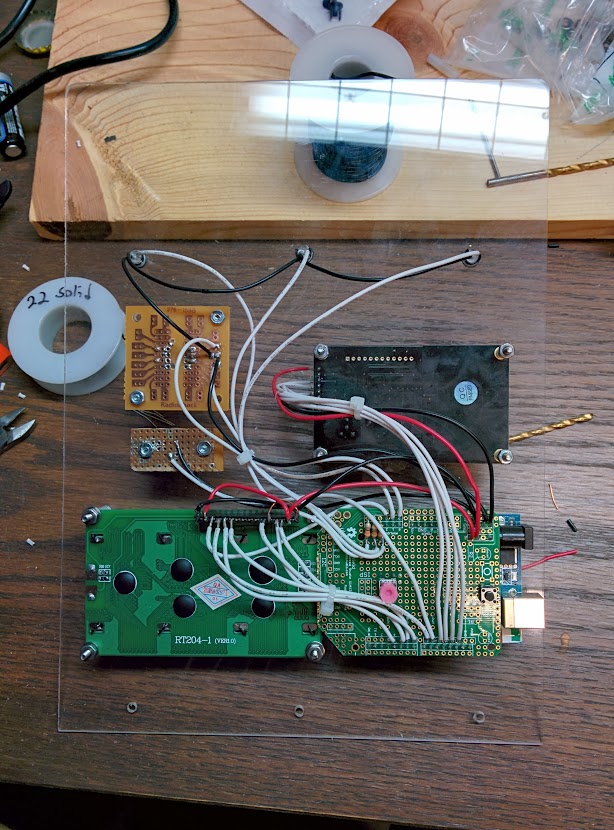
This is the first full build I've done using an Arduino instead of a bare microcontroller. I didn't want to solder directly to the Arduino so I was happy to see that Radio Shack had the SeeedStudio prototyping board in stock. I did have to cut this board using some tin snips as I laid out the modules before I realized the prototyping board has a larger footprint than the Arduino.
You can see the scrap of culled acrylic that I got for a song at the local hardware store. I was able to layout and mount all of the components in one night using 4-40 stainless steel hardware (hardware store didn't have this size in anything else). I had enough time left for half of the soldering and finished up the rest the next night. More on that in this Build Log.
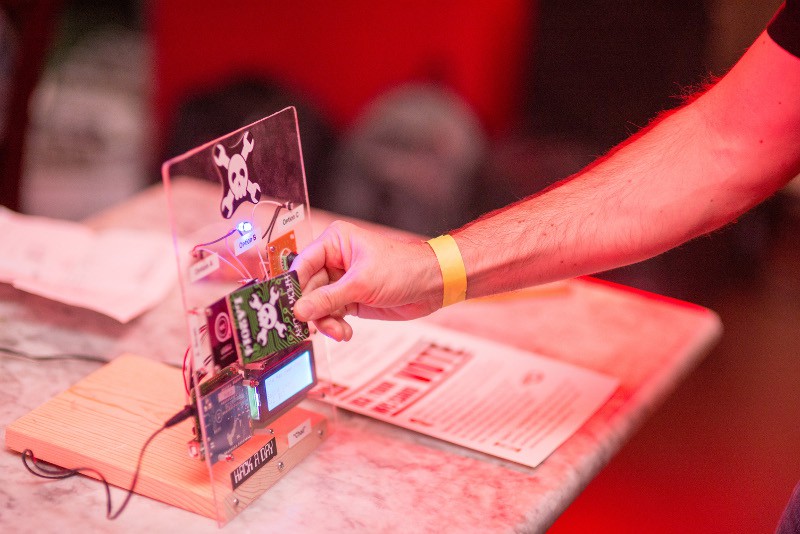
After a bit more polishing of the firmware and decorating the faceplate with a sticker and some labels I shipped it to LA for The Gathering.
It Worked!

I think for both Ben and I, the fear was that the hardware we built for official use at Hackaday's Live event might break before the evening was over. I'm so thankful that didn't happen. Part of this is thanks to attendees being gentle with it. Adam Fabio pointed out that attaching the acrylic to the beveled wood base using three screws was just asking for it to be shattered by the jovial crowd. It was a valid concern but didn't happen.
Where Do I Go From Here?
I feel like we don't see enough projects that take advantage of NFC. I know part of that is because you can do so much more by just using an Android device. For instance, you could easily and quickly write an Android program that uses NFC sticker on the side of a box full of T-shirts to track how many of each size are stored within. The phone would read the tag, format the data in a custom UI, allow you to adjust based on how many shirts you take out or put back in, and write the changes back to the tag.
But there MUST be great uses for NFC with dedicated embedded systems. I just haven't come up with them yet. If you have an idea, I'd love to discuss it here!
 Mike Szczys