 Eric Hertz
Check Out @johnowhitaker's new project: #Mini PCB printer, which describes a technique to laser-melt toner directly onto copper-clad board!
If you haven't seen it already, a while-back @johnowhitaker came up with a technique to laser-melt toner directly onto materials such as copper-clad board, and was cool-enough to share it here first!
NOW, he's started a prize-entry/project-page! See: #Mini PCB printer Seriously, check it out!
----------------
(I was originally going to publish this, here, but I think it's better over at that project-page... so this is just redundant for my own memory... Again, Check Out #Mini PCB printer)
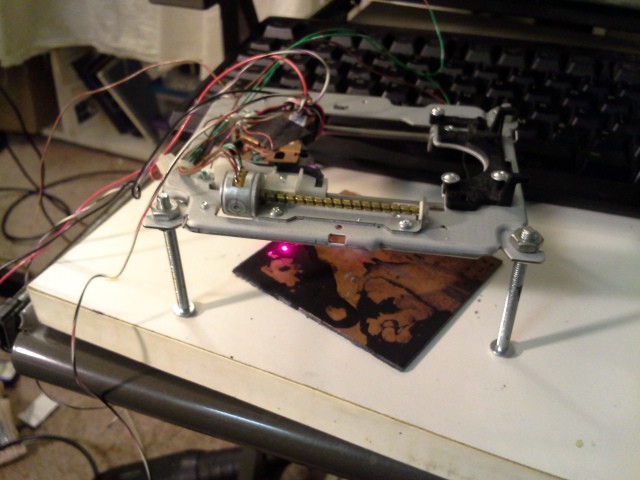
Here's a log of my (@esot.eric) attempts. Result: VERY PROMISING.
See More... Click below!
This particular laser I've been running at 250mA reliably. I haven't attempted to go higher. (And, for the above photo, I accidentally wired it backwards. Thank Goodness it didn't blow! My supplies've run out and my graveyard is large!)
-----------------
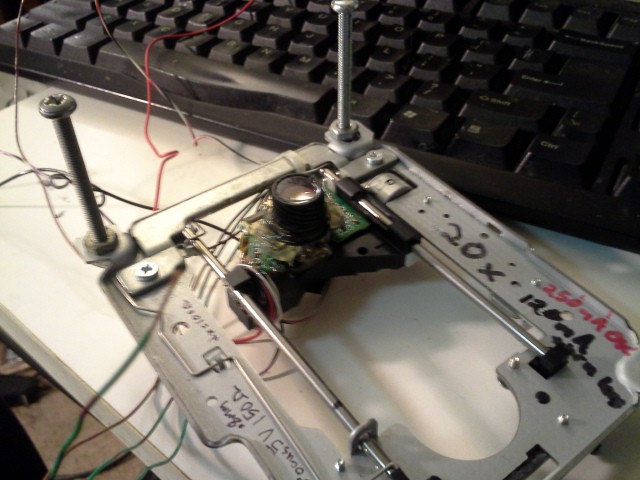
These attempts are all moved by hand... Now that I've got these VERY PROMISING results, I'm going to rig up an X-Y system soon.
-----------------
Here's an early (failed) experiment.
Note also: Do Not Shake the mixture! Stir it carefully so as not to introduce air-bubbles!
@johnowhitaker's formula is: Rubbing Alcohol and Toner. It took a few tries to get the right thickness (and, actually, I'd almost given up before finding it).
I used the butt-end of a pen cap, with a white/clear housing, to stir the mixture. First I poured toner into a margarine tub, then I added a little alcohol while the tub was tilted. The toner didn't mix in entirely, so I kept scooping more in until the thickness was *just enough* to coat the pen-cap (no more!) and still drain off slowly, revealing the color of the pen-cap.
At that point, pour it onto the PCB and drain it off...
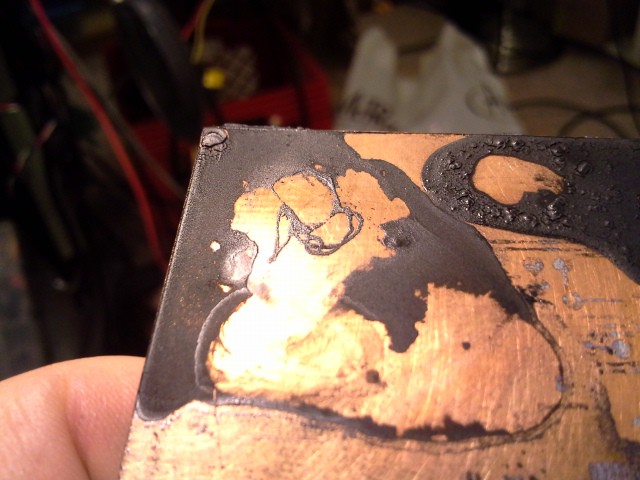
Here's another from the first failed attempt(s):
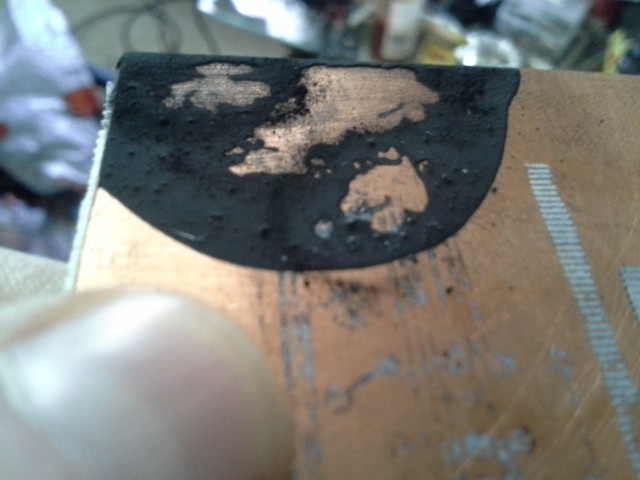
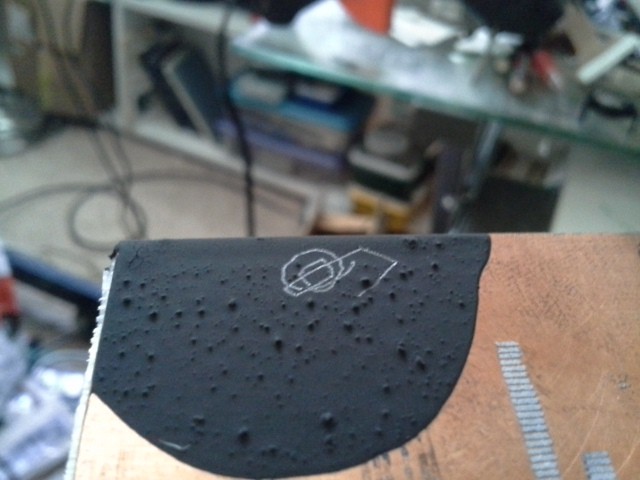
The idea is to use a cotton-swab to remove the un-melted toner surrounding the lasered-portion. If the mixture is too thick, it seems to dry like thick paint, and the amount of rubbing necessary to remove it is enough to damage your traces. This one *seemed* to work, but wasn't quite right, and by the time I got it all cleaned up the traces were damaged... here's the lasered-portion for comparison:
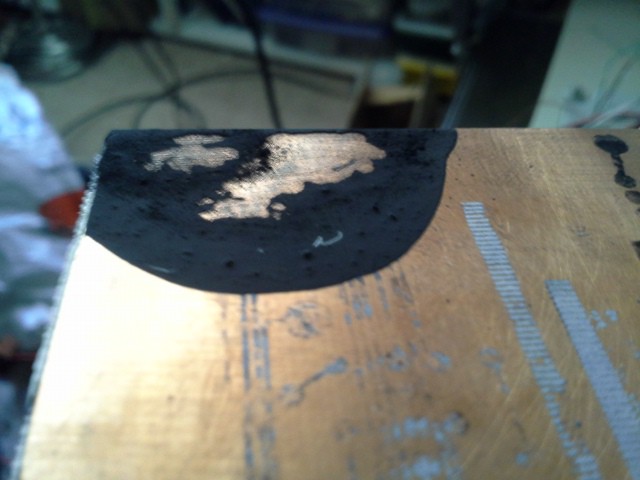
Note how there was no lasered "cross"-piece... Frustration with trying to remove that and surrounding material ruined the traces.
Note: Don't rub vigorously with the cotton-swab, friction creates heat, heat melts toner.
(For size-comparison, the row of pads on the right are for a compact-flash connector, using the old toner-transfer-paper method, long ago).
Note also: Don't try using alcohol to clean up (until later)... it just rips the traces right up.
Now for the VERY PROMISING results:
This, again, was with it *just* thick enough to coat the pen-cap while still draining off slowly:
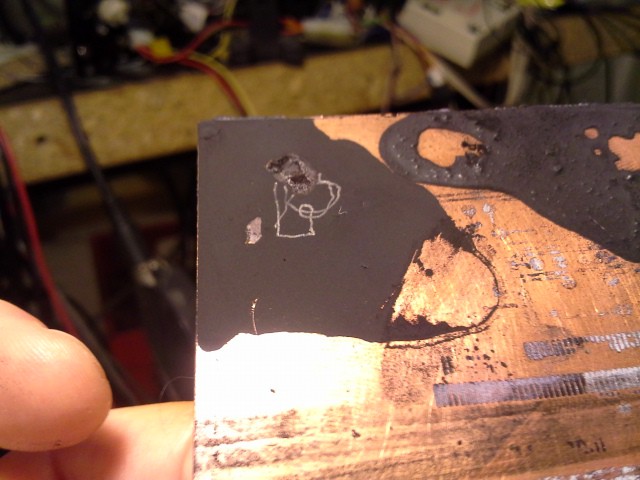
This is a little bit confusing, I didn't clean the board first, so there's a patch of permanent-marker near the corner interfering with the toner and traces... This was a handy unintentional experiment, too... I'll talk about that later.
I also added a square later-on... Here they are rubbed off with a cotton-swab (note the ugly permanent marker still under the first squiggles).
The traces actually have a bit of heft, almost like... the results of a layer from a 3D "cornstarch-printer" (whoa! hmmmm).
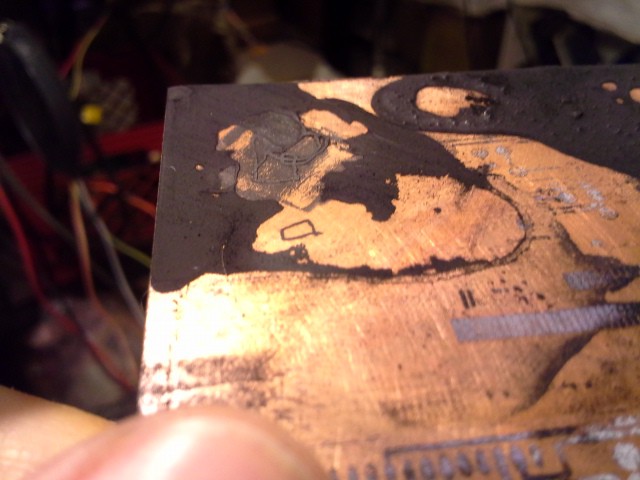
After that I heated the "squiggled" area with a heat-gun to "set" the traces. Worked well... And then, I tried alcohol again... this time to clean up that permanent marker... and... NO PROBLEM.

So, some observations... This turned out much better than I expected, especially after those initial failed attempts. I hesitated to rub too hard to clear out the unmelted material between corners and in tight spaces, but I think I could've been more vigorous (or at least more patient) and gotten even better results. Maybe a thinner mixture would work even better. And, one could design boards around these constraints, as well. (or might not even have to). I was thinking to try to avoid things like sharp corners, thinking about material-removal... but then again, where there are sharp corners, there's probably not going to be *another* trace nearby, so even if the excess material isn't removed, it probably wouldn't matter.
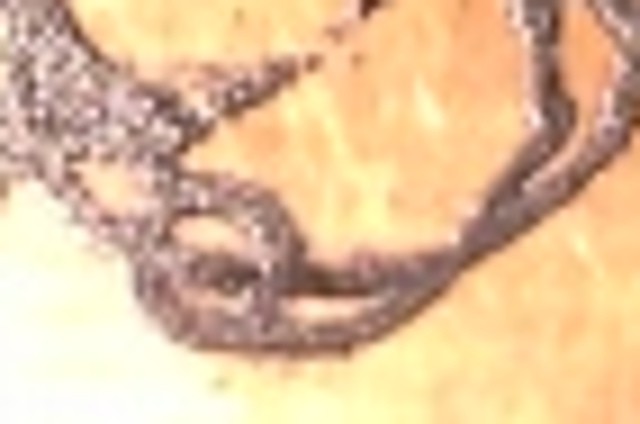
And, besides, look again at that detail (WTF? My camera was set to 640x480?!)
Now, as far as resilience for PCB-etching, I think it's pretty much a sure thing. Awesome.
(I'll wait 'till I can actually etch a usable board before trying).
As far as using this method for e.g. creating labels on metal instrument-panels... I'm not sure yet. It can be scratched off, but I didn't try heating it more (and from the bottom?). Clear-coat over the top might be a good idea. Or maybe even a clear pre-treatment under the toner to make it grab better?
Again, Check Out #Mini PCB printer!
Discussions
Become a Hackaday.io Member
Create an account to leave a comment. Already have an account? Log In.