This won't surprise most of you, but the SD card makes up for like 99% of the power-down current consumption...
Current draw is <2µA in sleep mode when no SD is present. So I'm going to add the high-side switch again and do my tests/code rewrites till I manage to turn the SD off. On/off itself is just one line of code, but re-initializing the SD after power-off isn't exactly supported by the library. Seems to work for others, so I'll give it a shot. Hardware-side of things is done by soldering the framed components and moving the solder bridge from # to *:
---------- more ----------
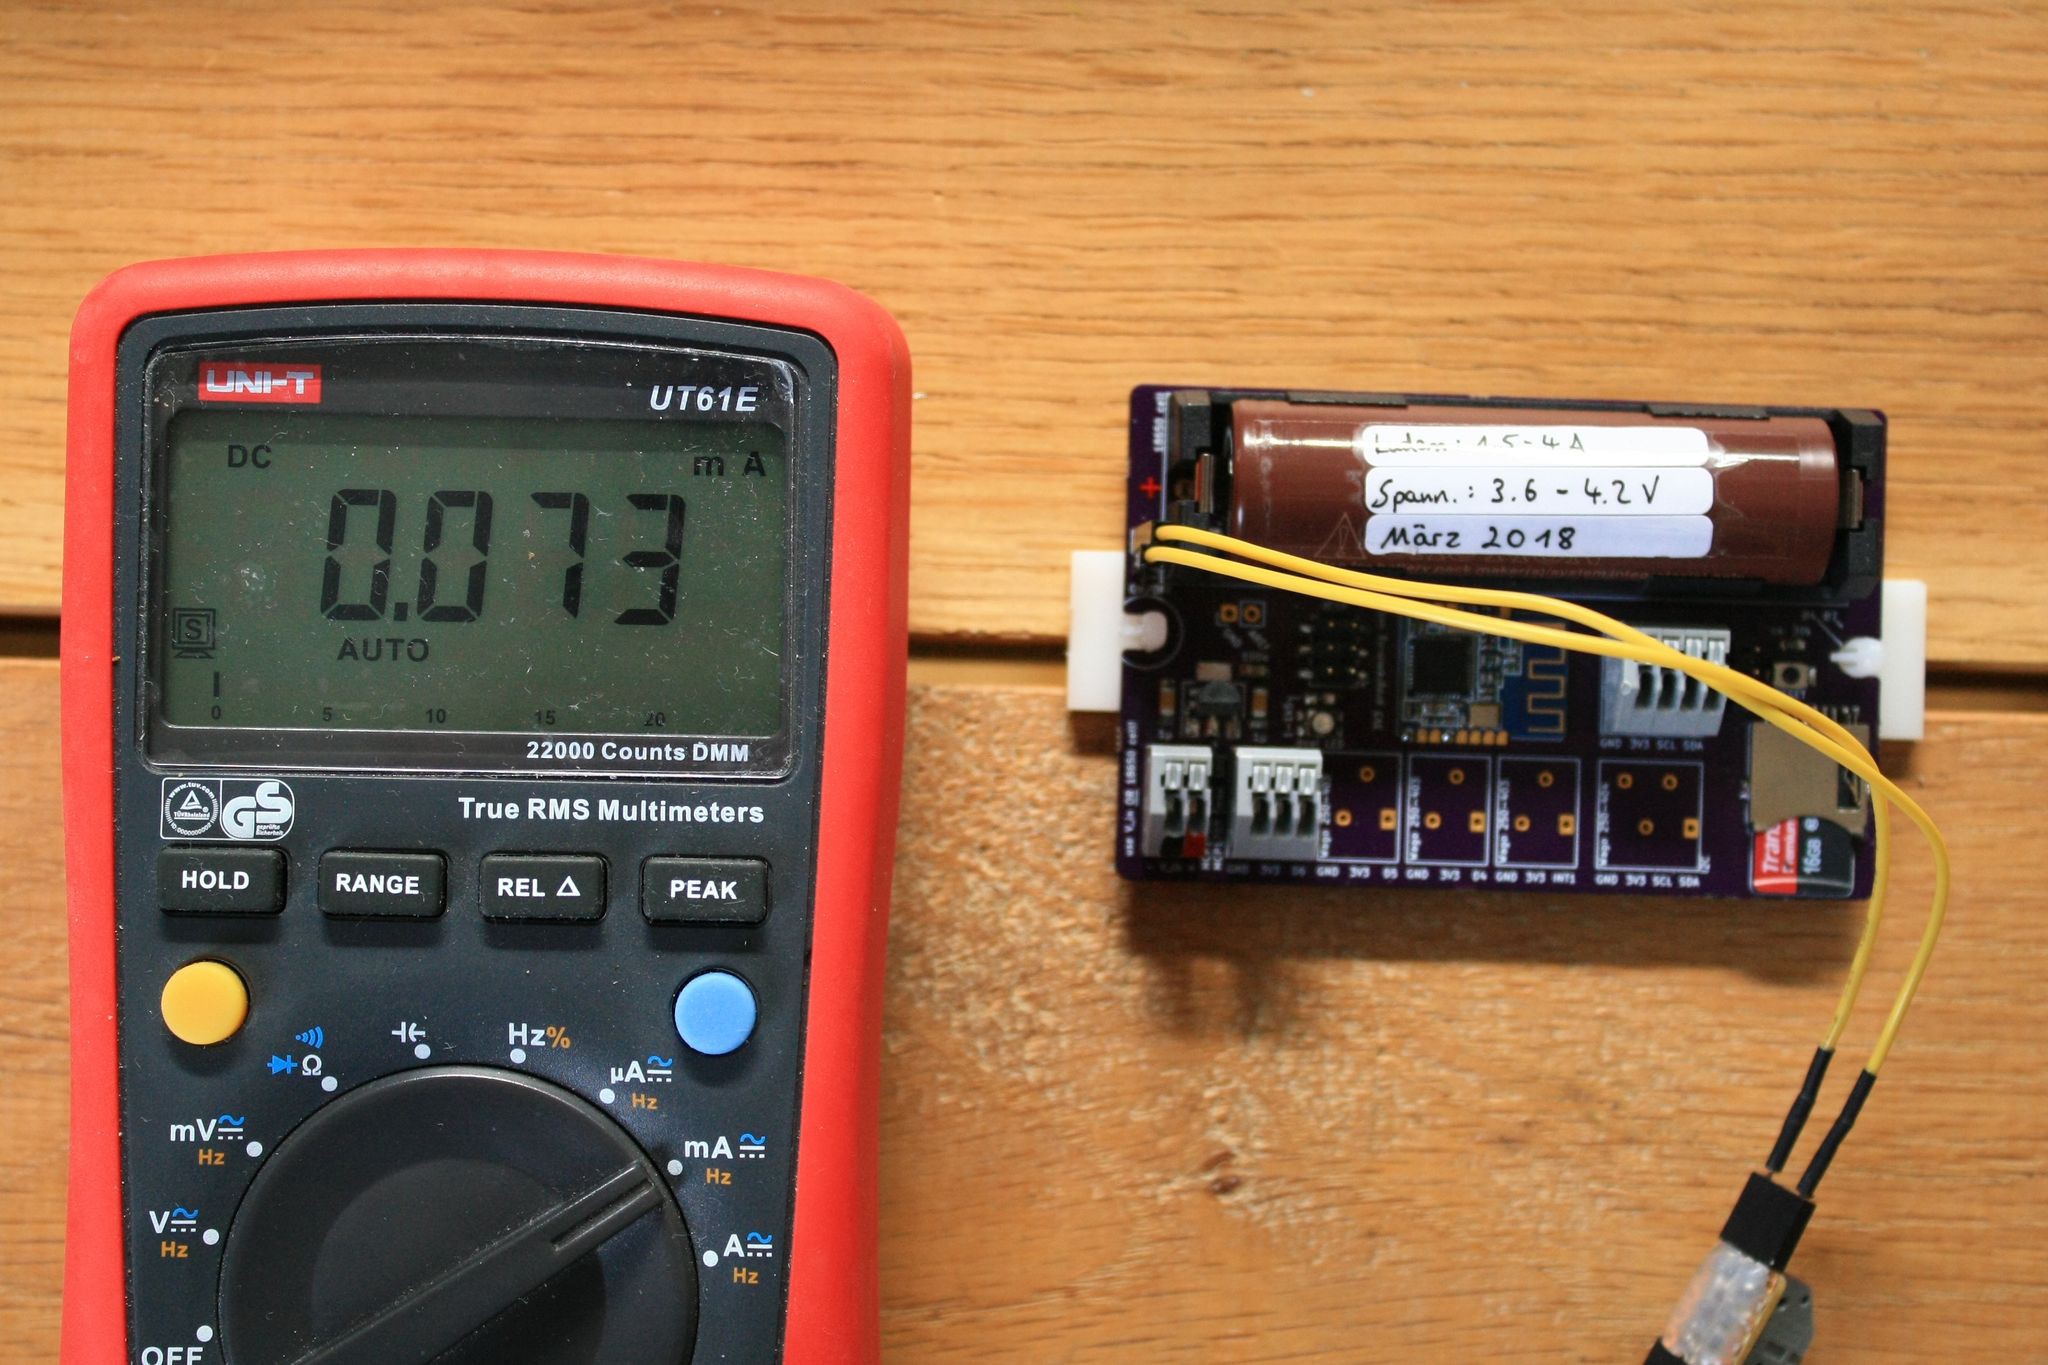
The new board layout is a success. I know that current measurements aren't the exact strength of the UT61E multimeter, but that's all I have at the moment. And in comparison to the old version I cut that current consumption (at least) by half!
The SD card used is a Transcend one with 16Gb (fairly new model) which is not switched on/off whatsoever.
The stated 73µA are in powerDown mode with BOD and ADC disabled. All peripherals are disabled as well (BLE module, DS3231).
---------- more ----------
So my next tasks are to modify the V1.1 program for the use of the:
512kBit EEPROM
BLE module
What really annoys me is the use of Digital Pin 10 (hardware pin 14, SS on the Atmega328P-Au chip) when using SPI. It has to be switched high (and that's done by the SDfat lib) to work properly, even if you use another pin for your SD select function. One of the LEDs is connected to that pin and is always on. I had to desolder it for the whole thing to work. Bummer!
Now I'll just use one LED or just occupy one of the unused digital ports for it.
Anyway, with this setup I'll get much more than one year out of one 18650 li ion cell: NICE!
Not much cleaning done so far. They'll get their proper isopropanol cleaning when fully populated!
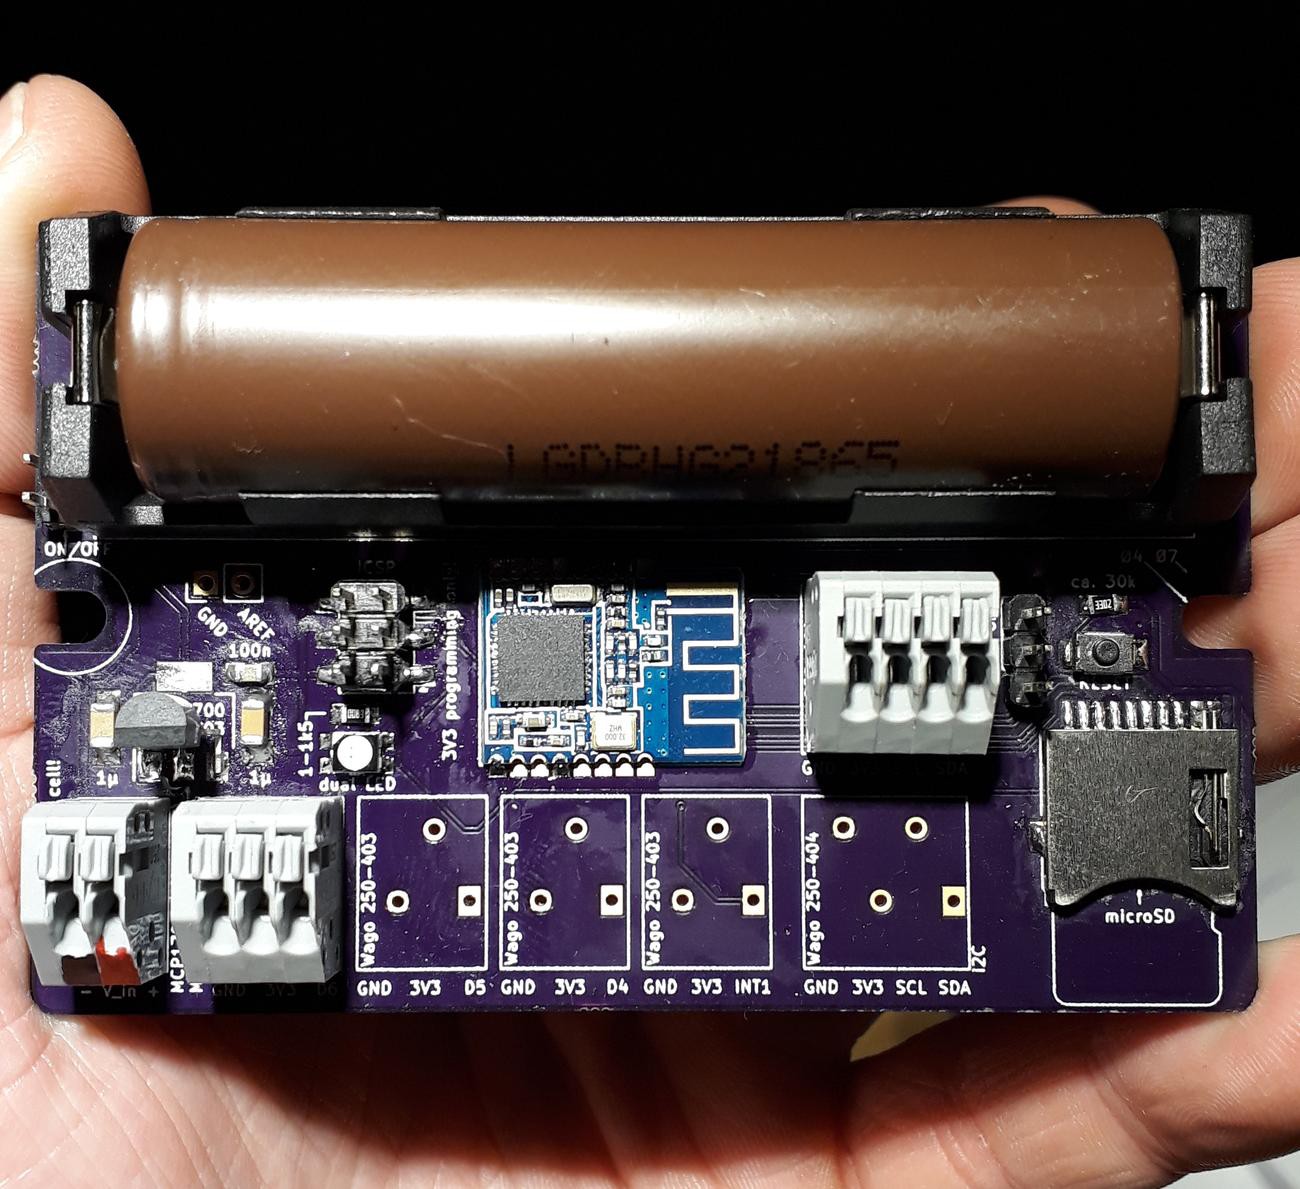
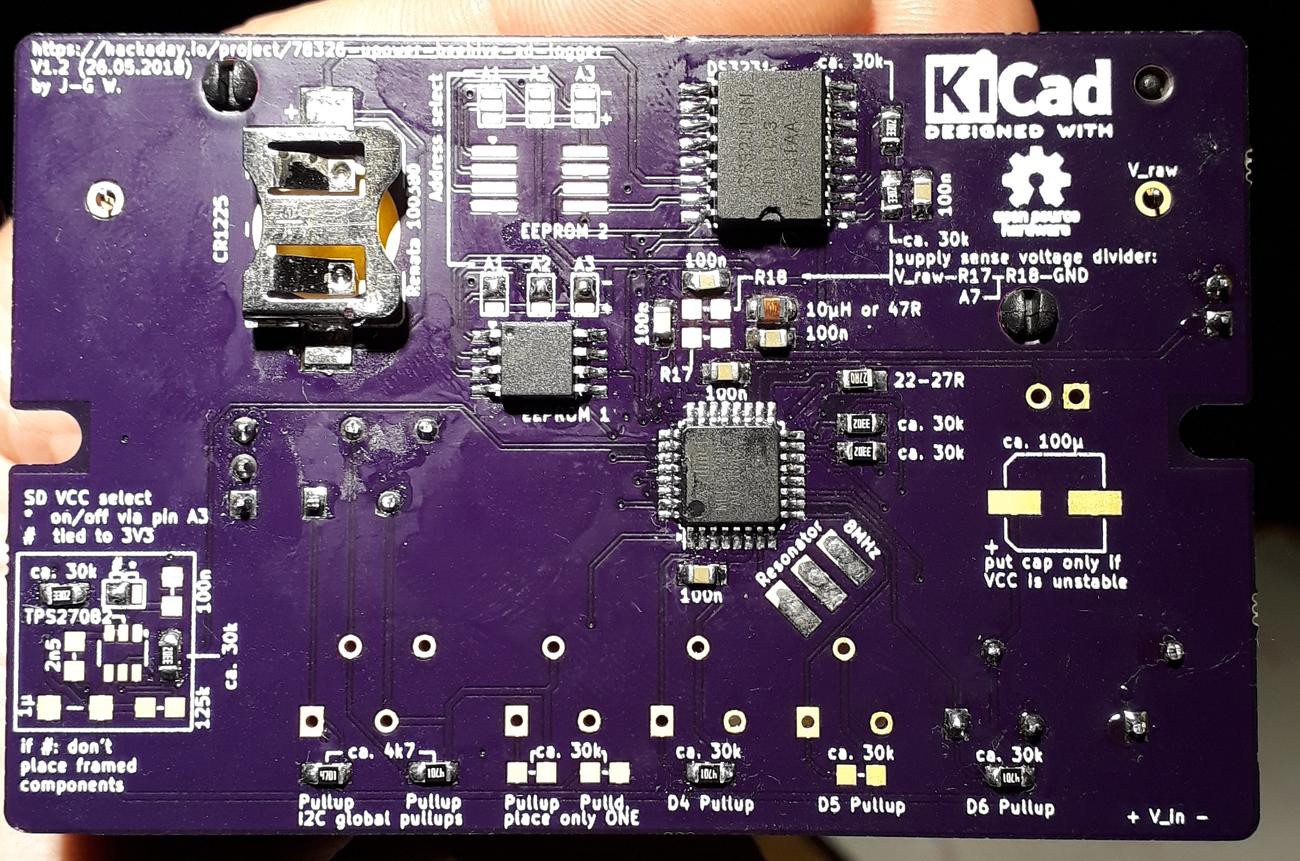
top side with 18650 cell (LG-2)bottom side
---------- more ----------
Just soldered one of the new boards and tested one, when suddenly: smoke...
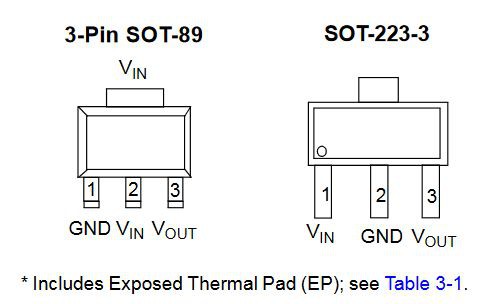
It was the MCP1703 and I thought: WTF is wrong, I checked every connection and all the footprints several times.
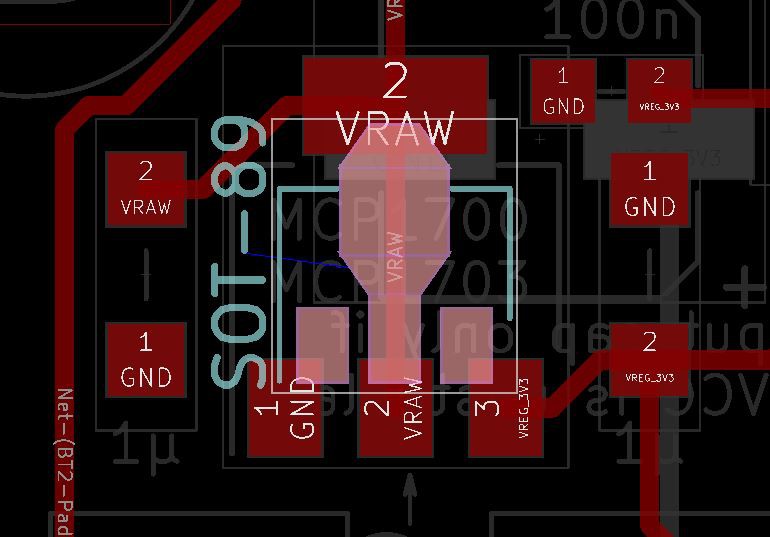
Microchip uses two different pinouts for their SOT-89 and SOT-223 models:
screenshot from datasheet - copyright by MicrochipAnd I used the wrong pinout for my landing pads... So, I have to use the SOT-89 type on my SOT-223 footprint, which will kind of work: I just hate things like this. Anyway, SOT-89 MCP's are already ordered. Everything else seems to work just fine!
The nuc hive is growing quickly trough the season. The box is nearly filled with bees, honey combs and brood combs now. As you don't take their honey/food when they're establishing their hive, there won't be any bigger intrusion the next few months except the varroa mite treatment with formic acid in late summer/fall.
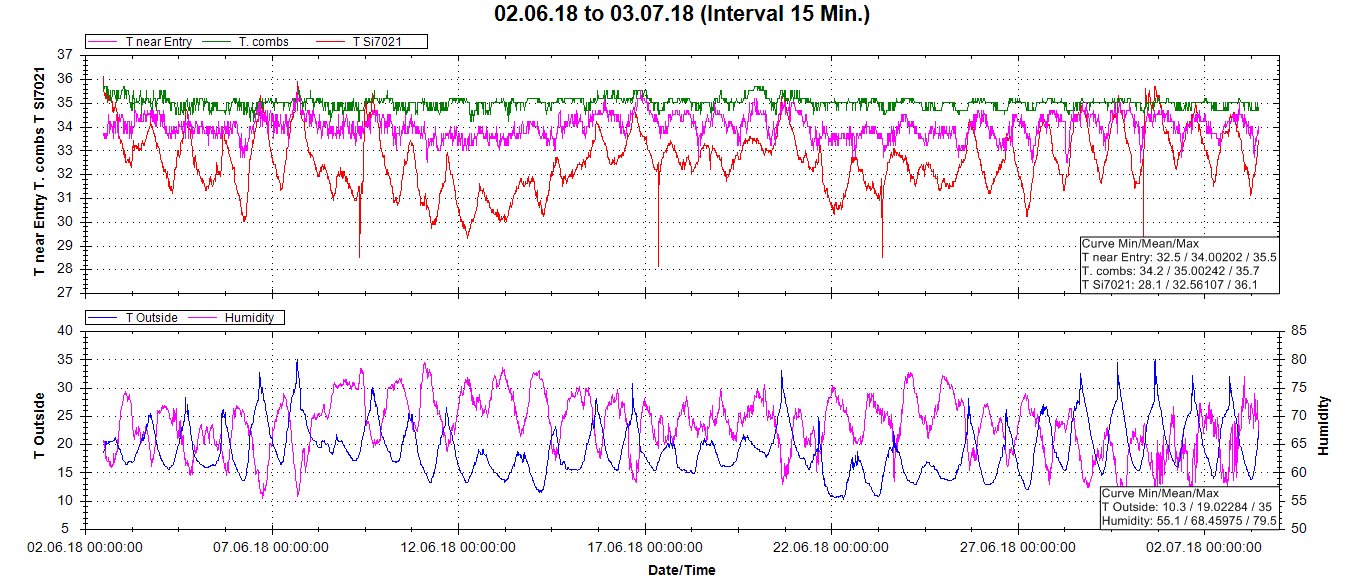
This is the last month in data:
It's been very dry and hot lately with lots of rainy/colder days in June. But as you can see the bees do not struggle to keep their hive temperature constant. Only when the outside temp. rises above 35°C (95°F) the hive temperature climbs to around 35.5°C but never reached 36°C yet. Amazing!
Pictures of the hive and bees are coming soon!
---------- more ----------
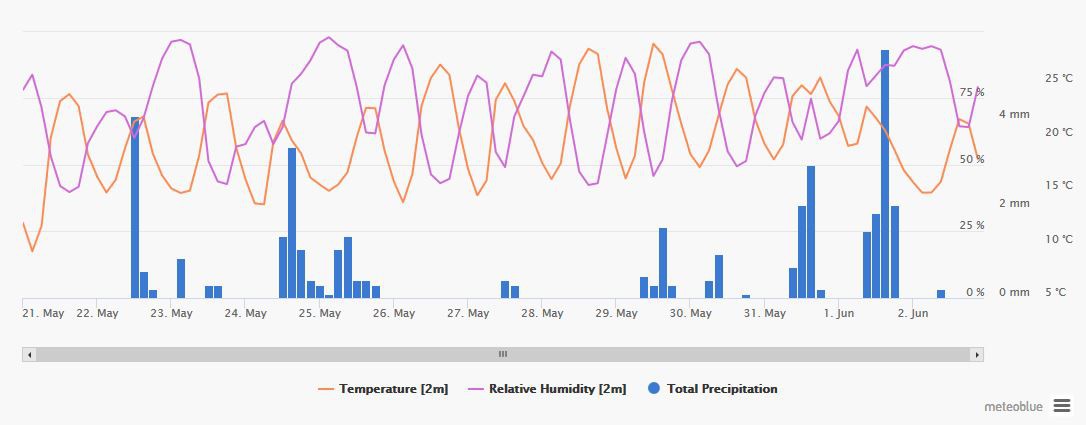
Today we checked all hives, including the nuc hives. The bees have been very busy licking out the extracted honey combs (the nuc hives didn't get those combs, only the big, "business hives"). Weather has beex really hot those last two weeks, Temperatures rising to 30°C and above. As usual in Germany you don't get the dry heat, it's always quite humid as well. You can clearly see that in the chart:
Relative humidity got up to 80% at times. As bees don't influence the airs water content directly, they circulate more air in/out of the hive which takes a lot of humidity with it.
This is the recorded data for our city, including total precipitation:
The last week was like early summer in Germany. Temperatures reached 30°C in some parts (86 degree freedom):
Log-Data for last week:
In these warmer days they have more "trouble" keeping a constant temperature but they try their best. When the outside temperature peaks to >40°C in direct sunlight, the hive temperature (on top of the combs anyway) peaks too.
I put the void sensor directly into the hive now, between two combs.
Click for a video of how quickly a wasp cuts out the best part of the bee to feed their brood (most modern browsers should play it in a new tab, size 35MB):
Wasp disposes of dead bee
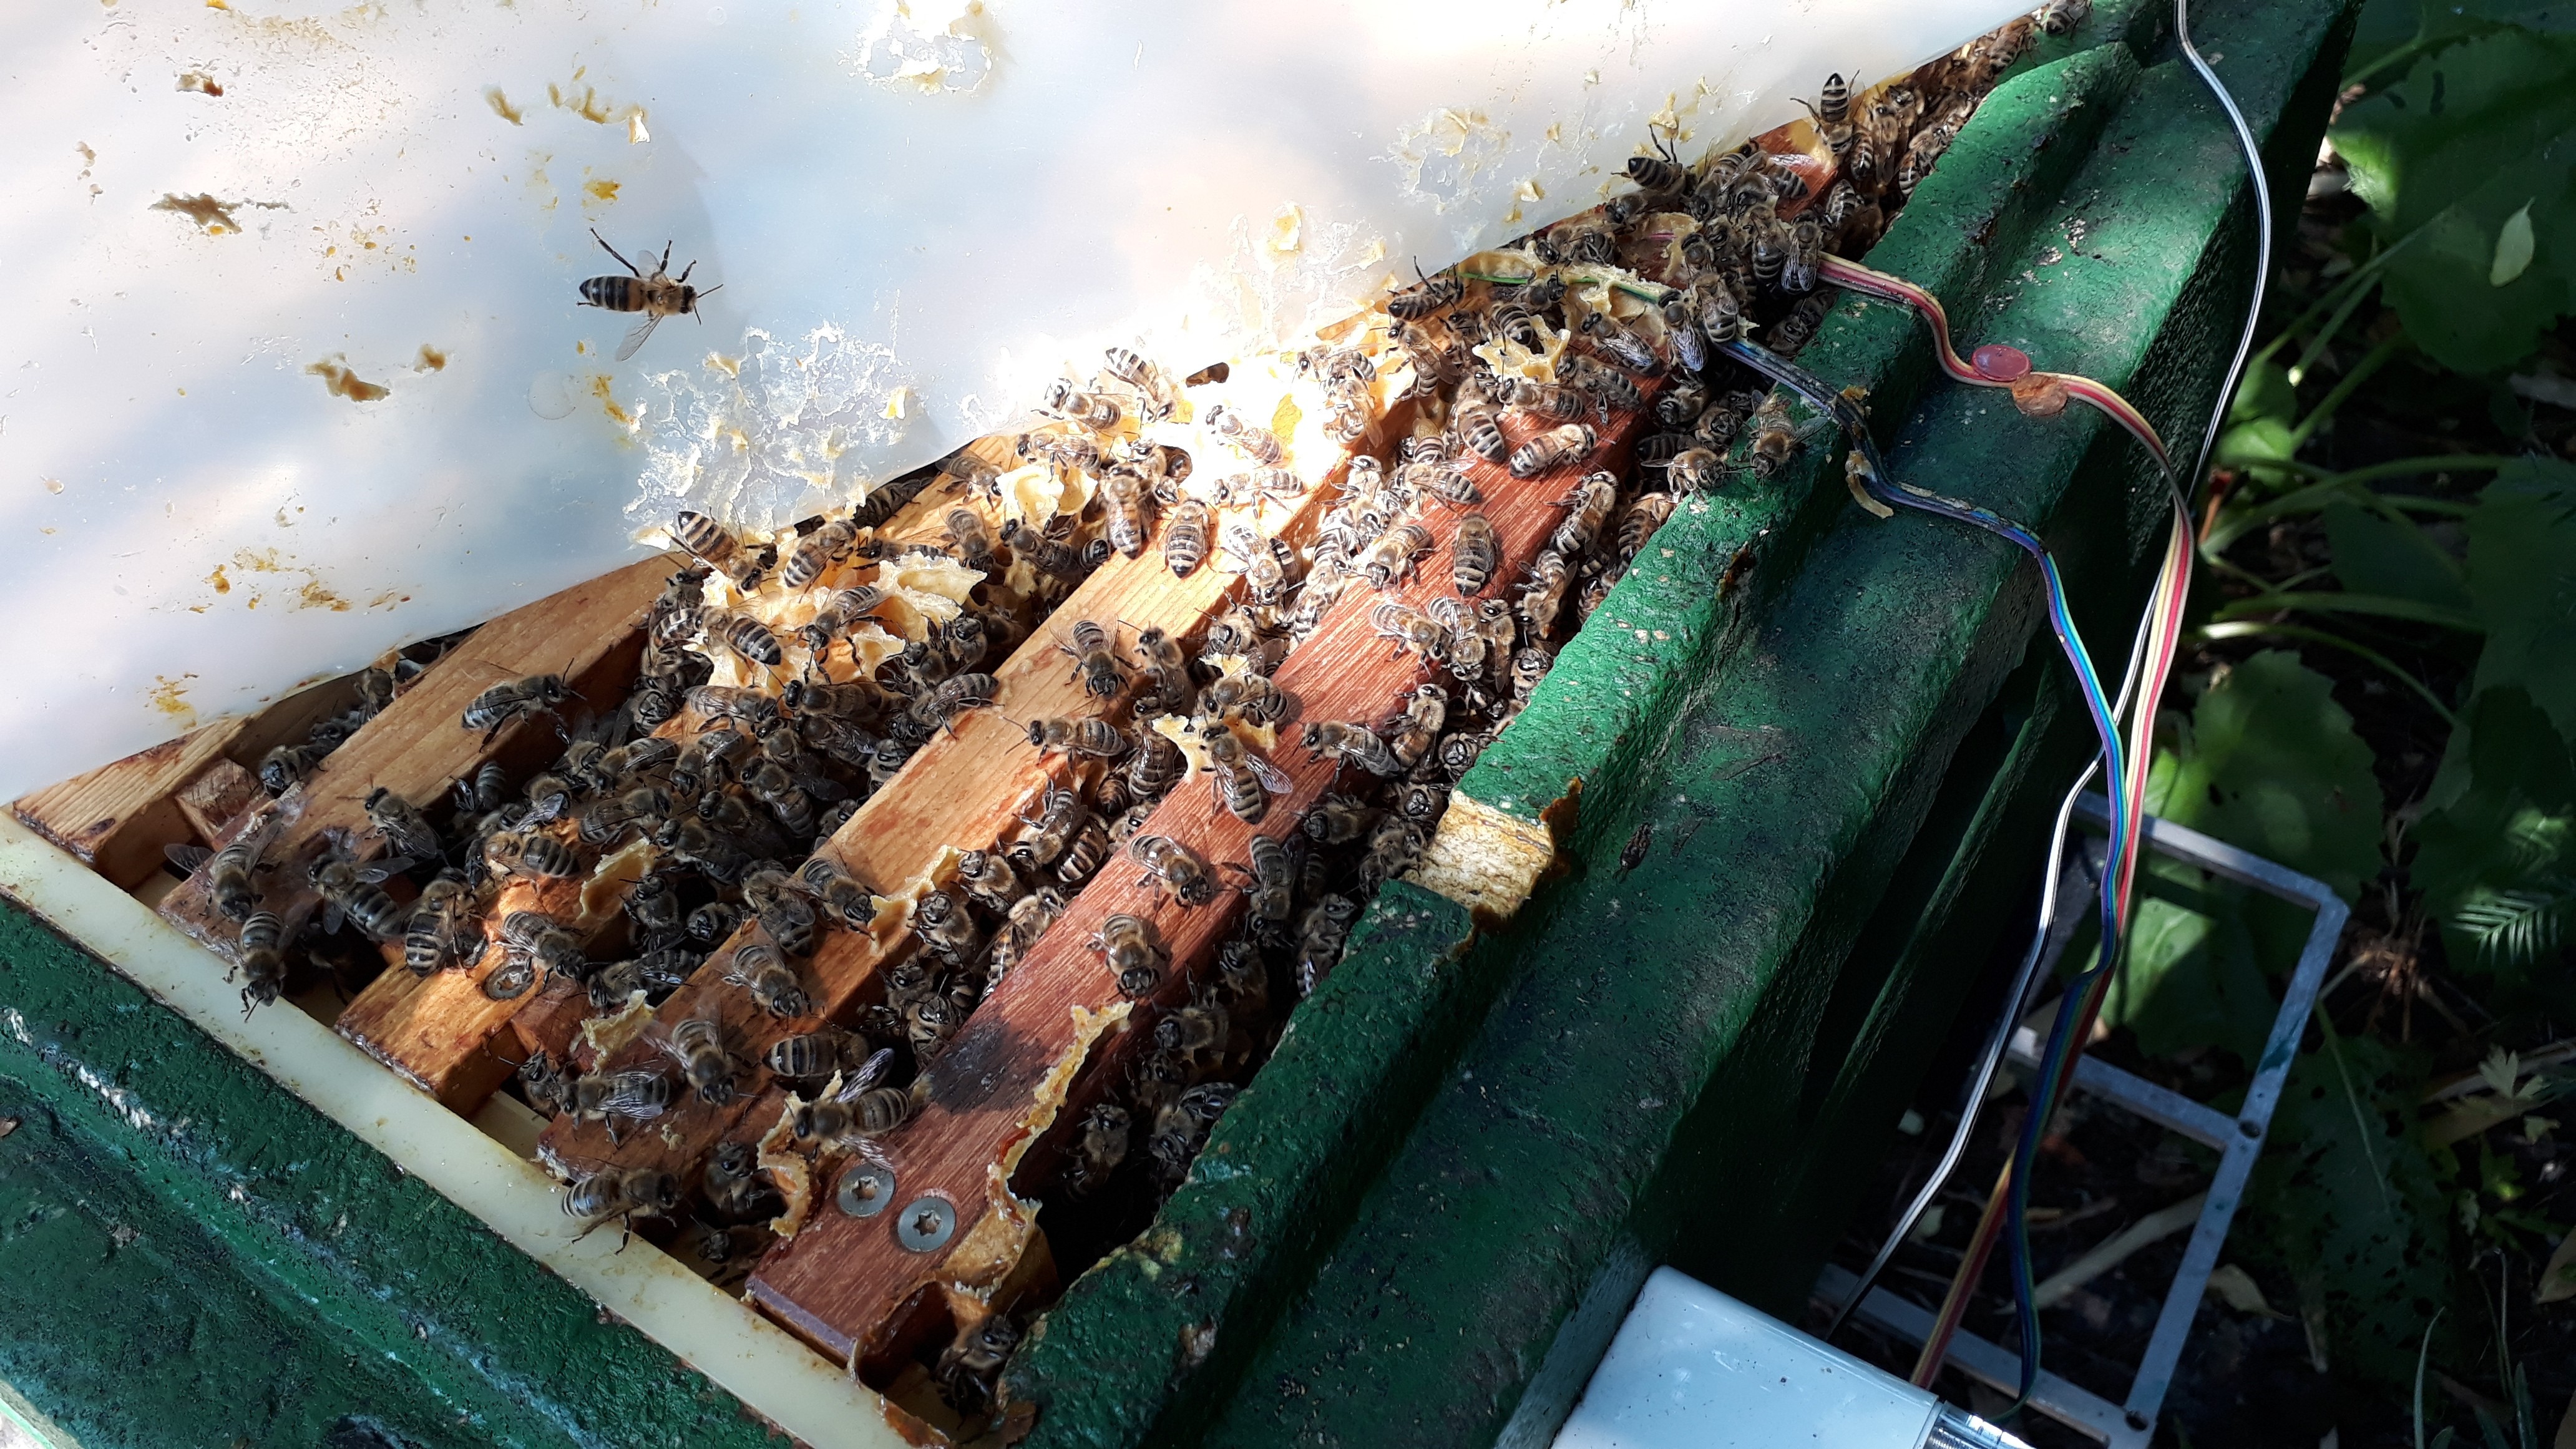
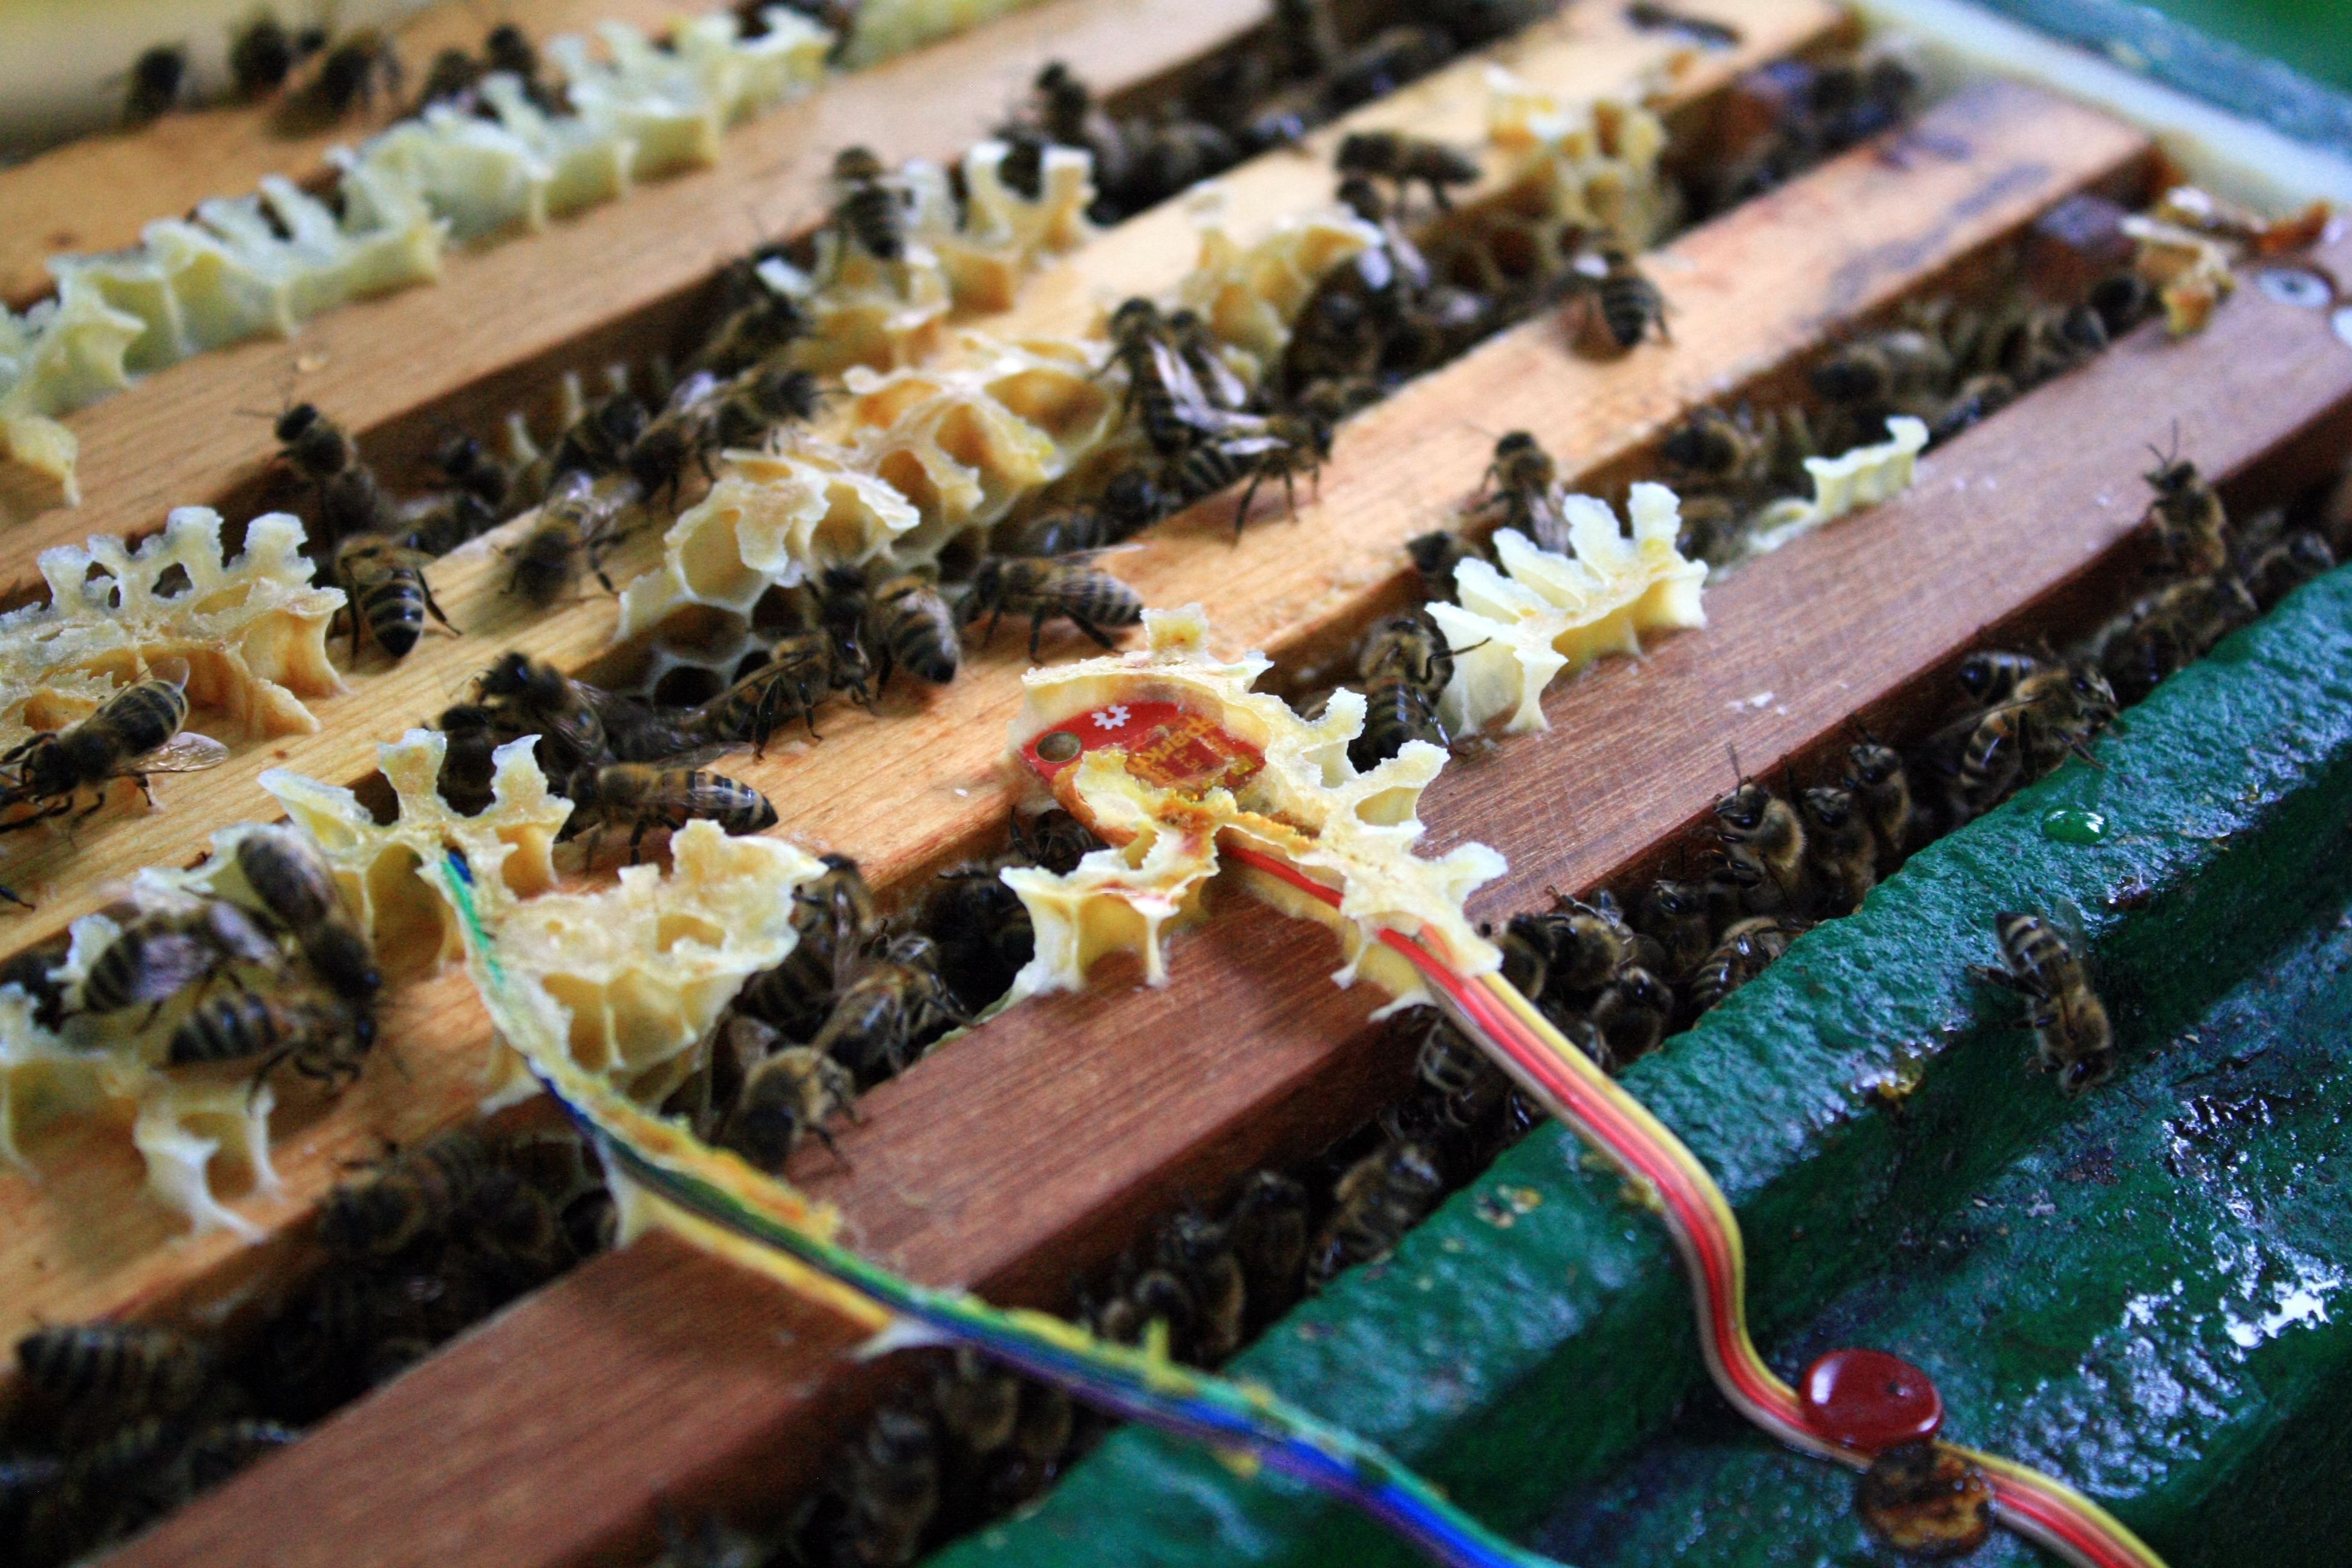
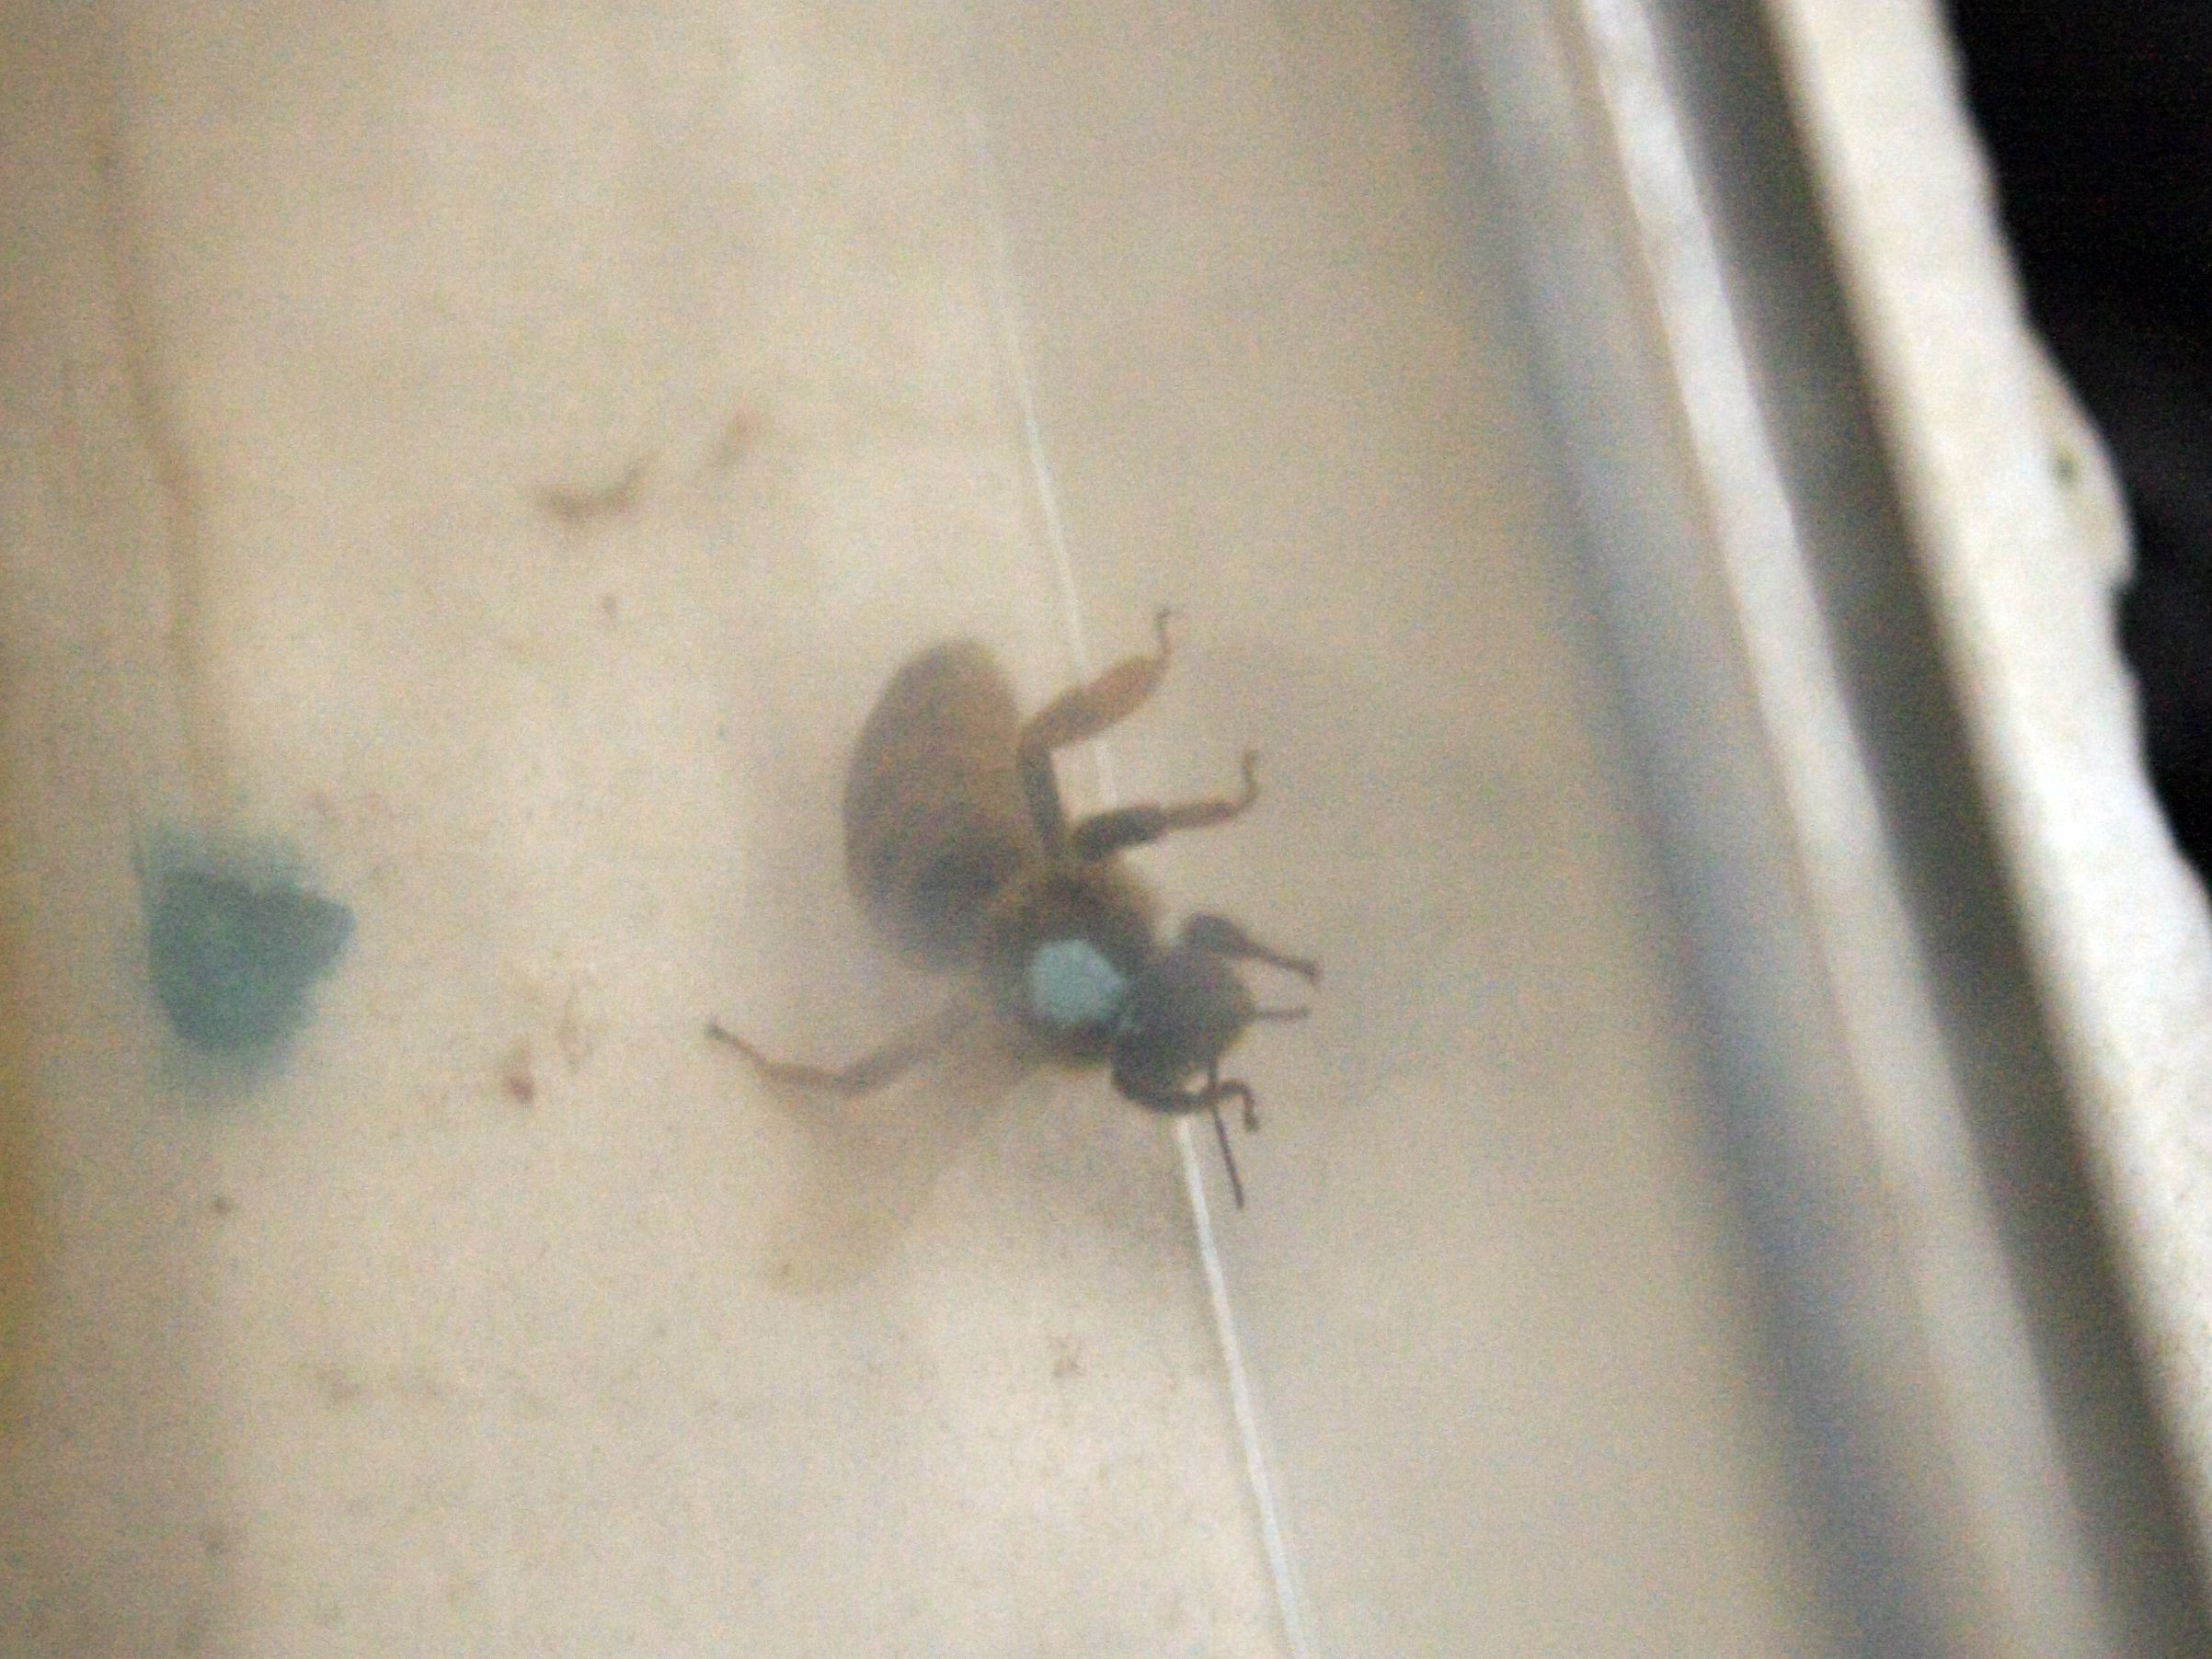
Saturday, 02.06.18 - we don't like freely dangling sensor wires...
freely dangling sensor got glued by the beescaptured new queen (from another hive) got marked with a blue dot
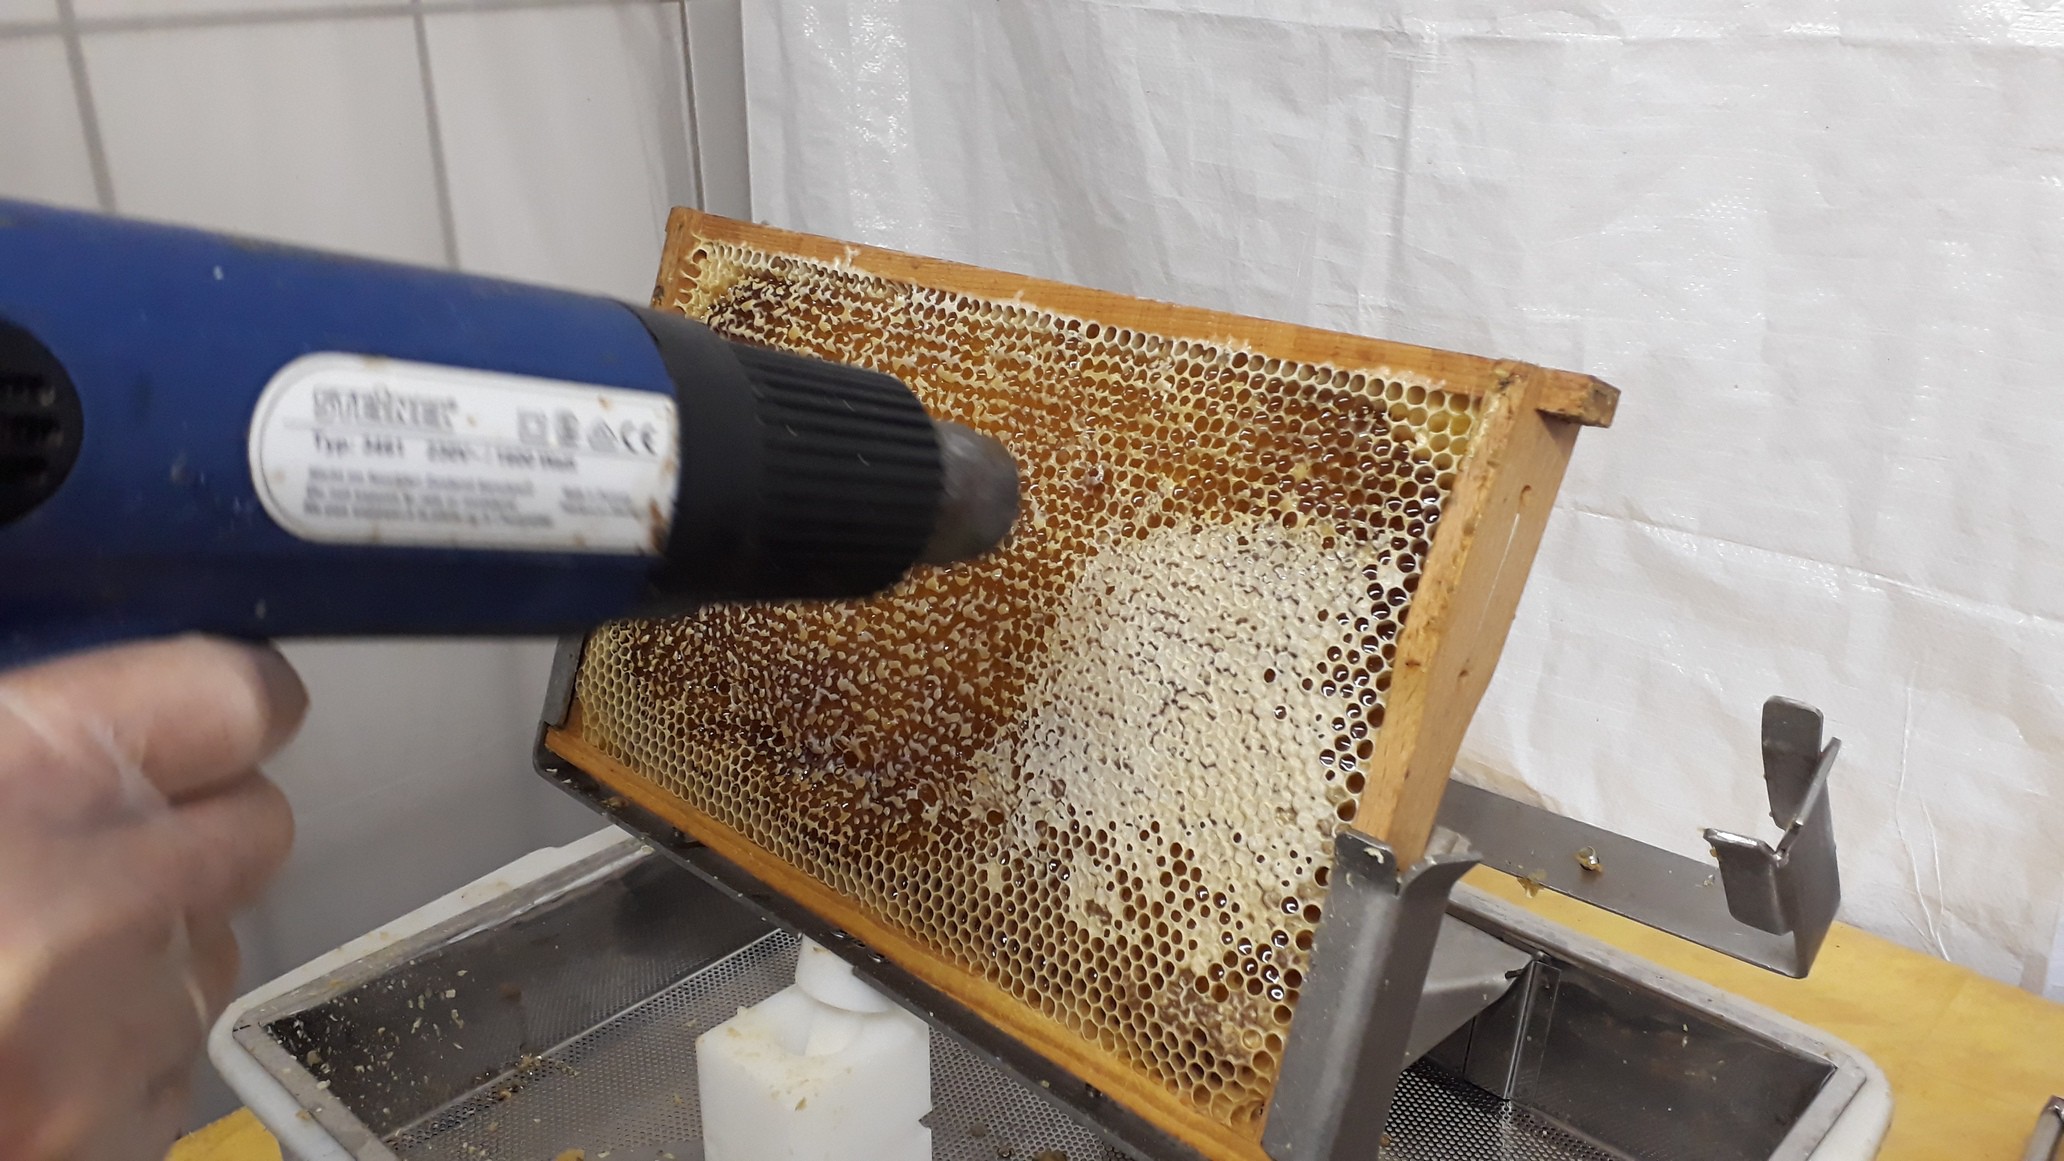
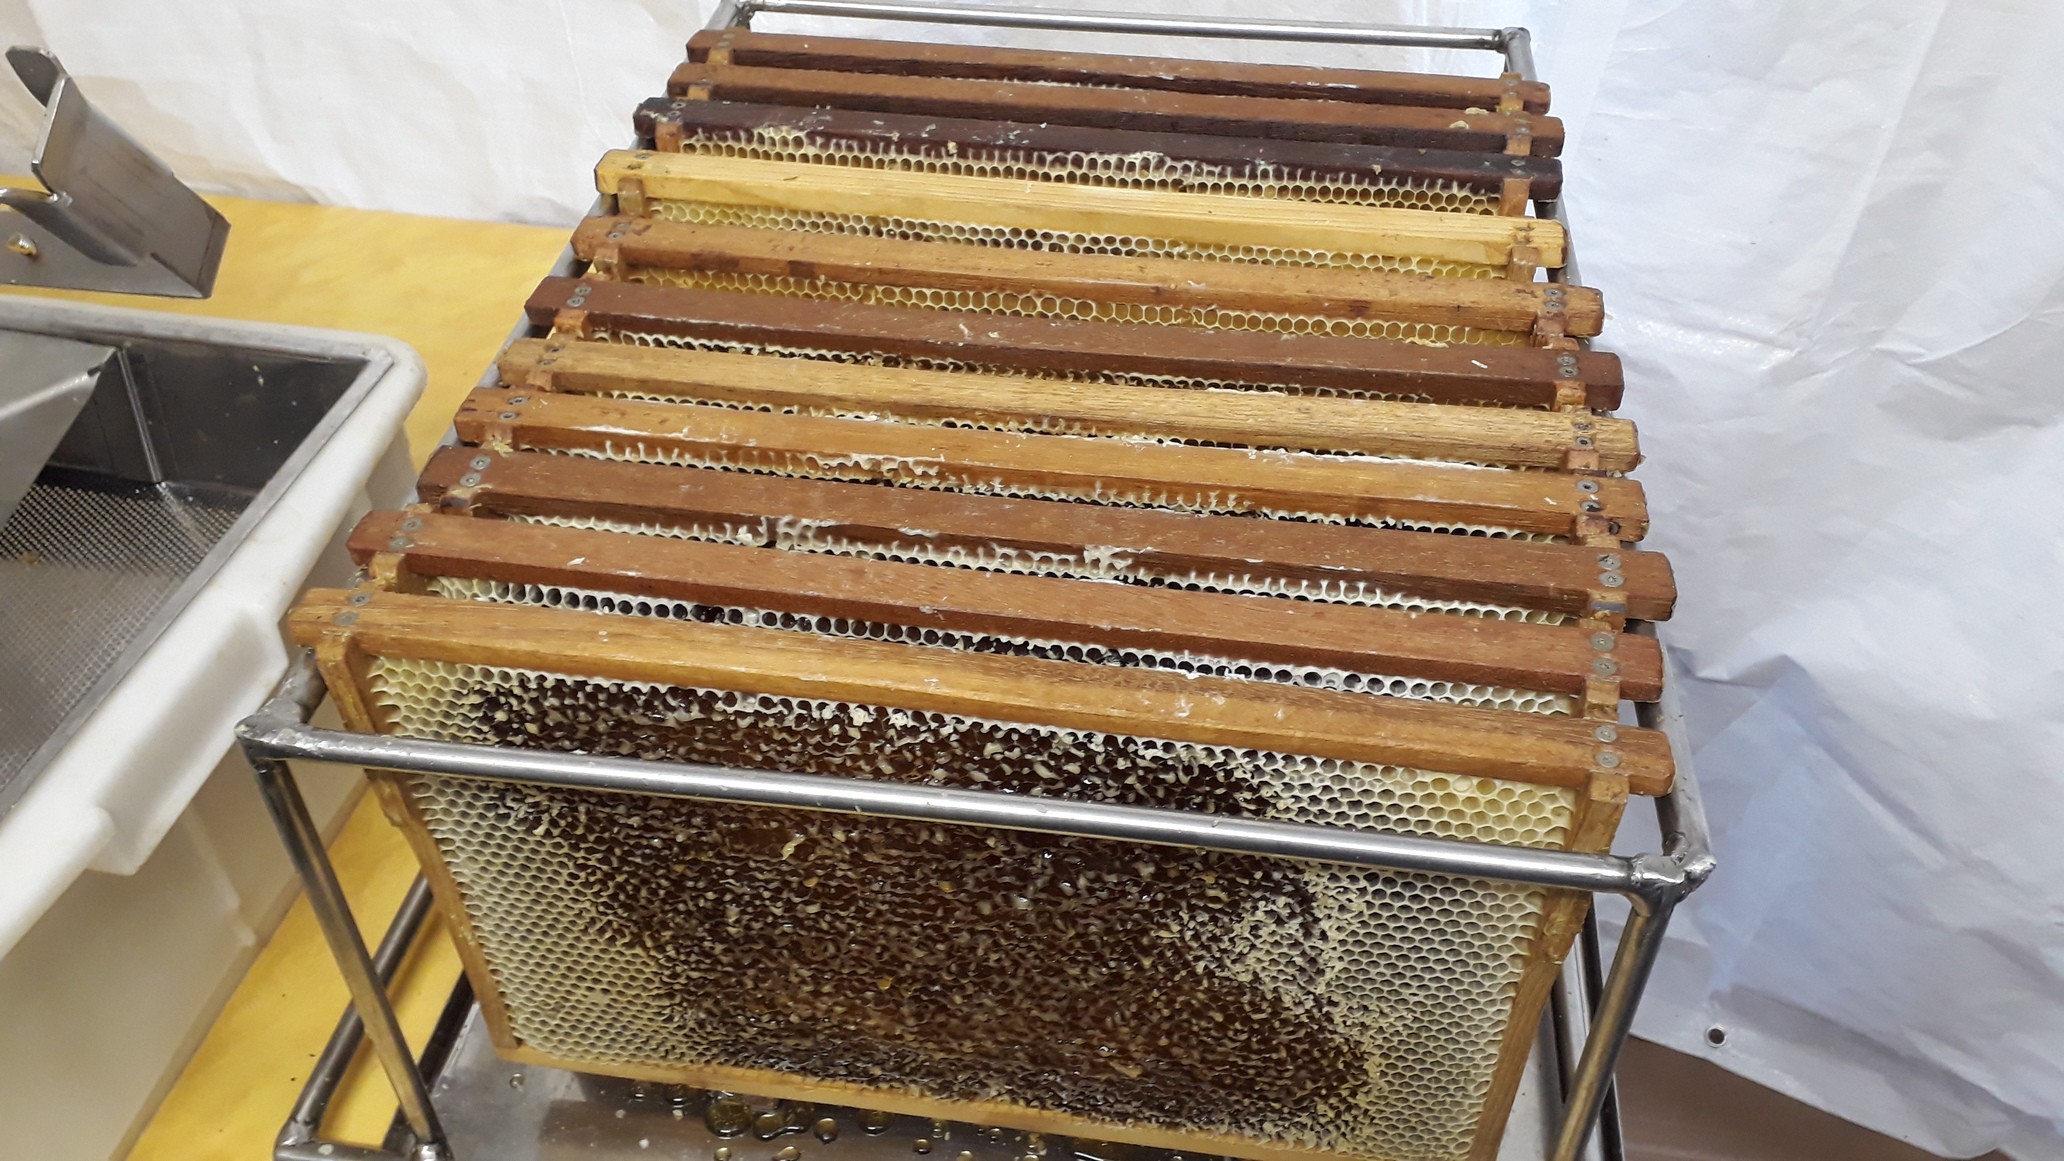
Tuesday, 29.05.18 - honey harvest!
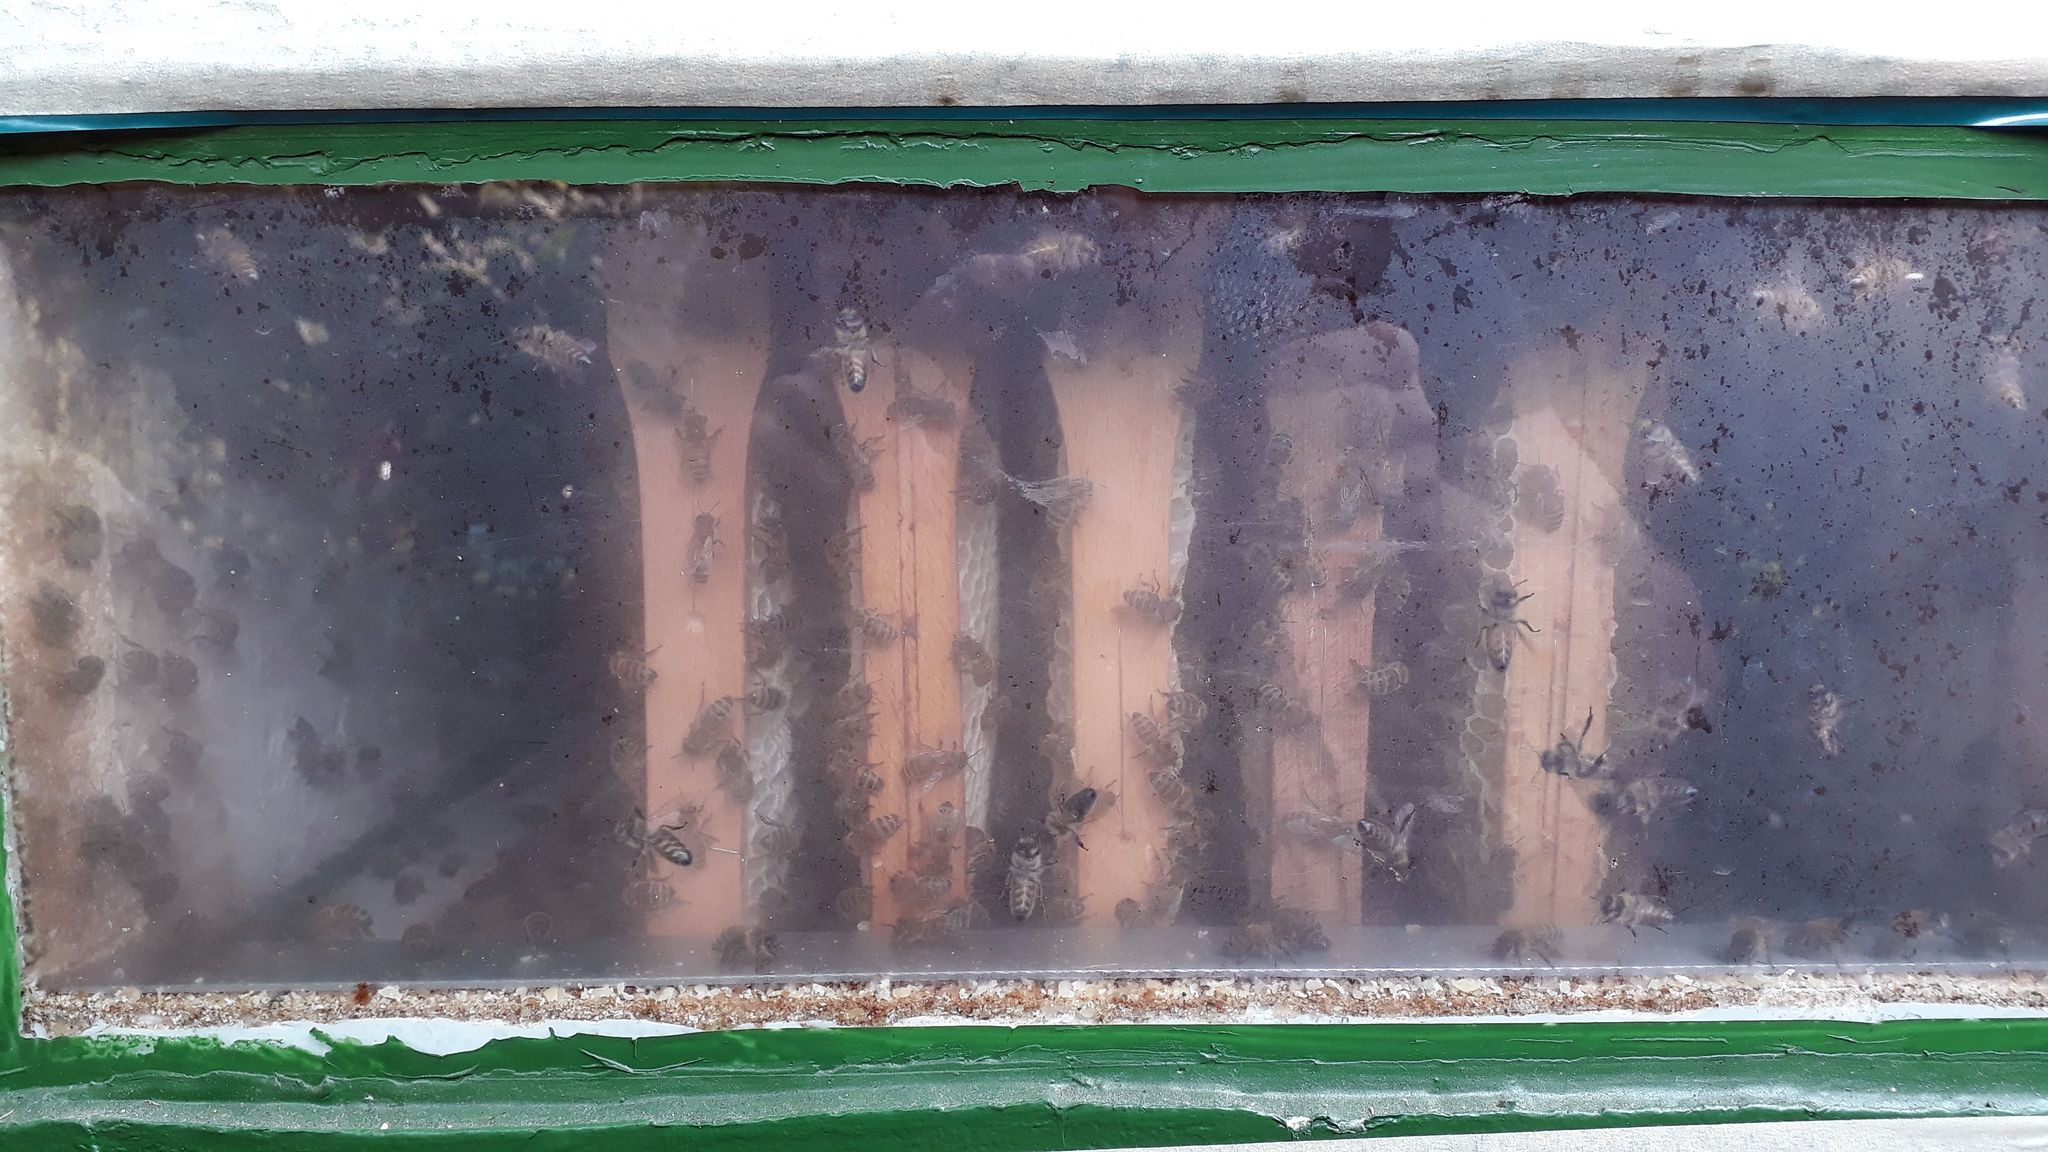
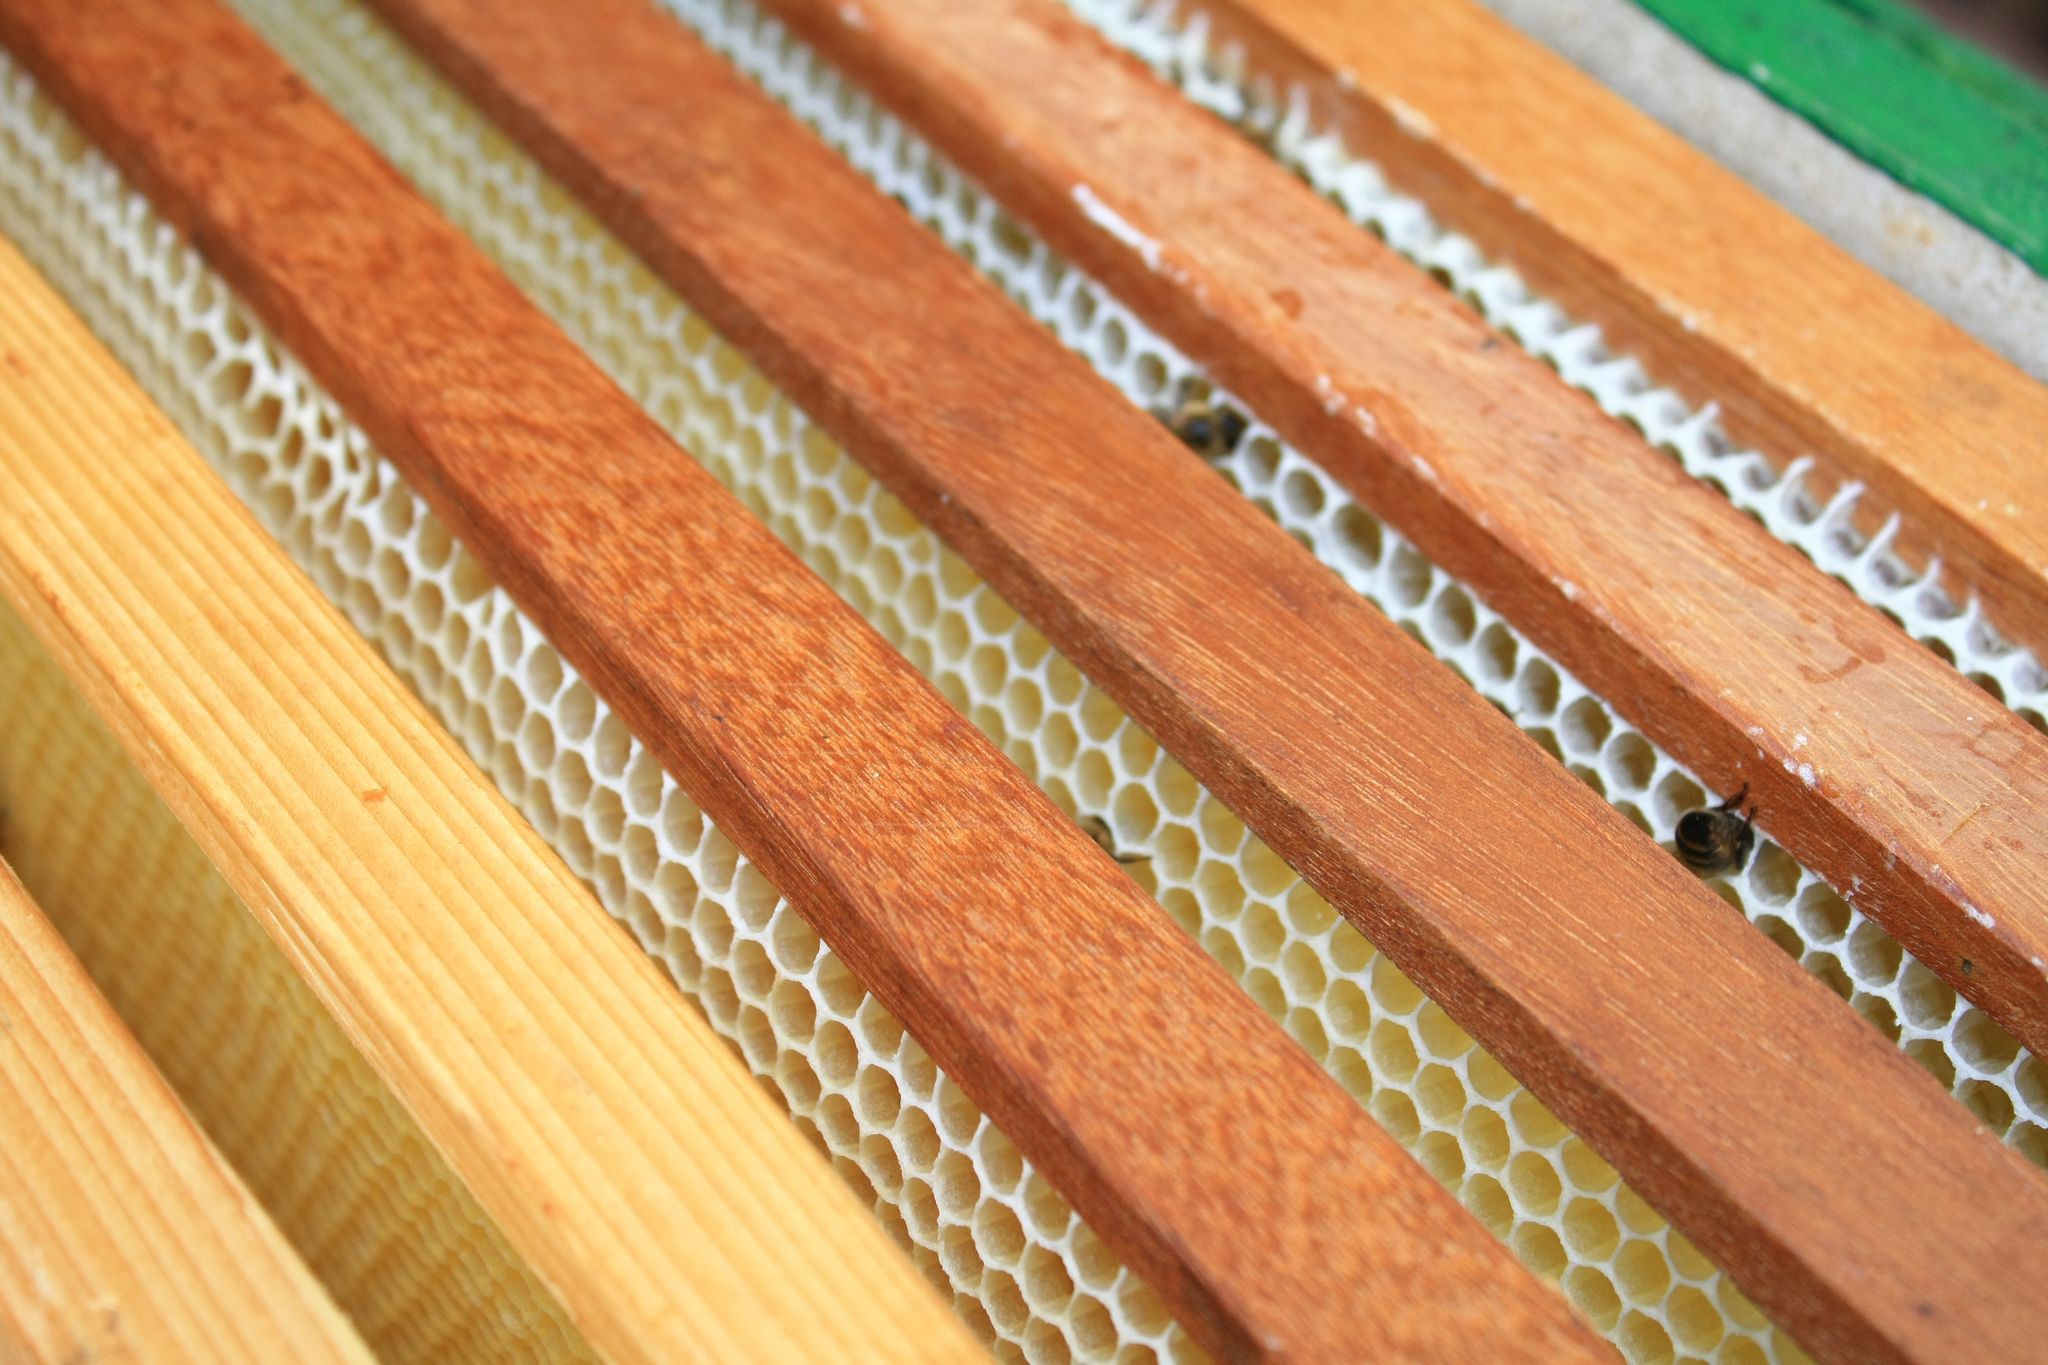
Just two pictures which show an quite interesting technique. After taking the bees honey combs out and extracting the honey, my dad puts the empty and sometimes quite mangled combs in a box with an window. The worker bees then do two things. First, they lick out all the honey from the cells which wasn't extracted. After that they repair those warped cells! I find this quite fascinating.
Btw: honey harvest was 137Kg (around 300lb) from 5 vee colonies! Impressive...
Saturday, 26.05.18
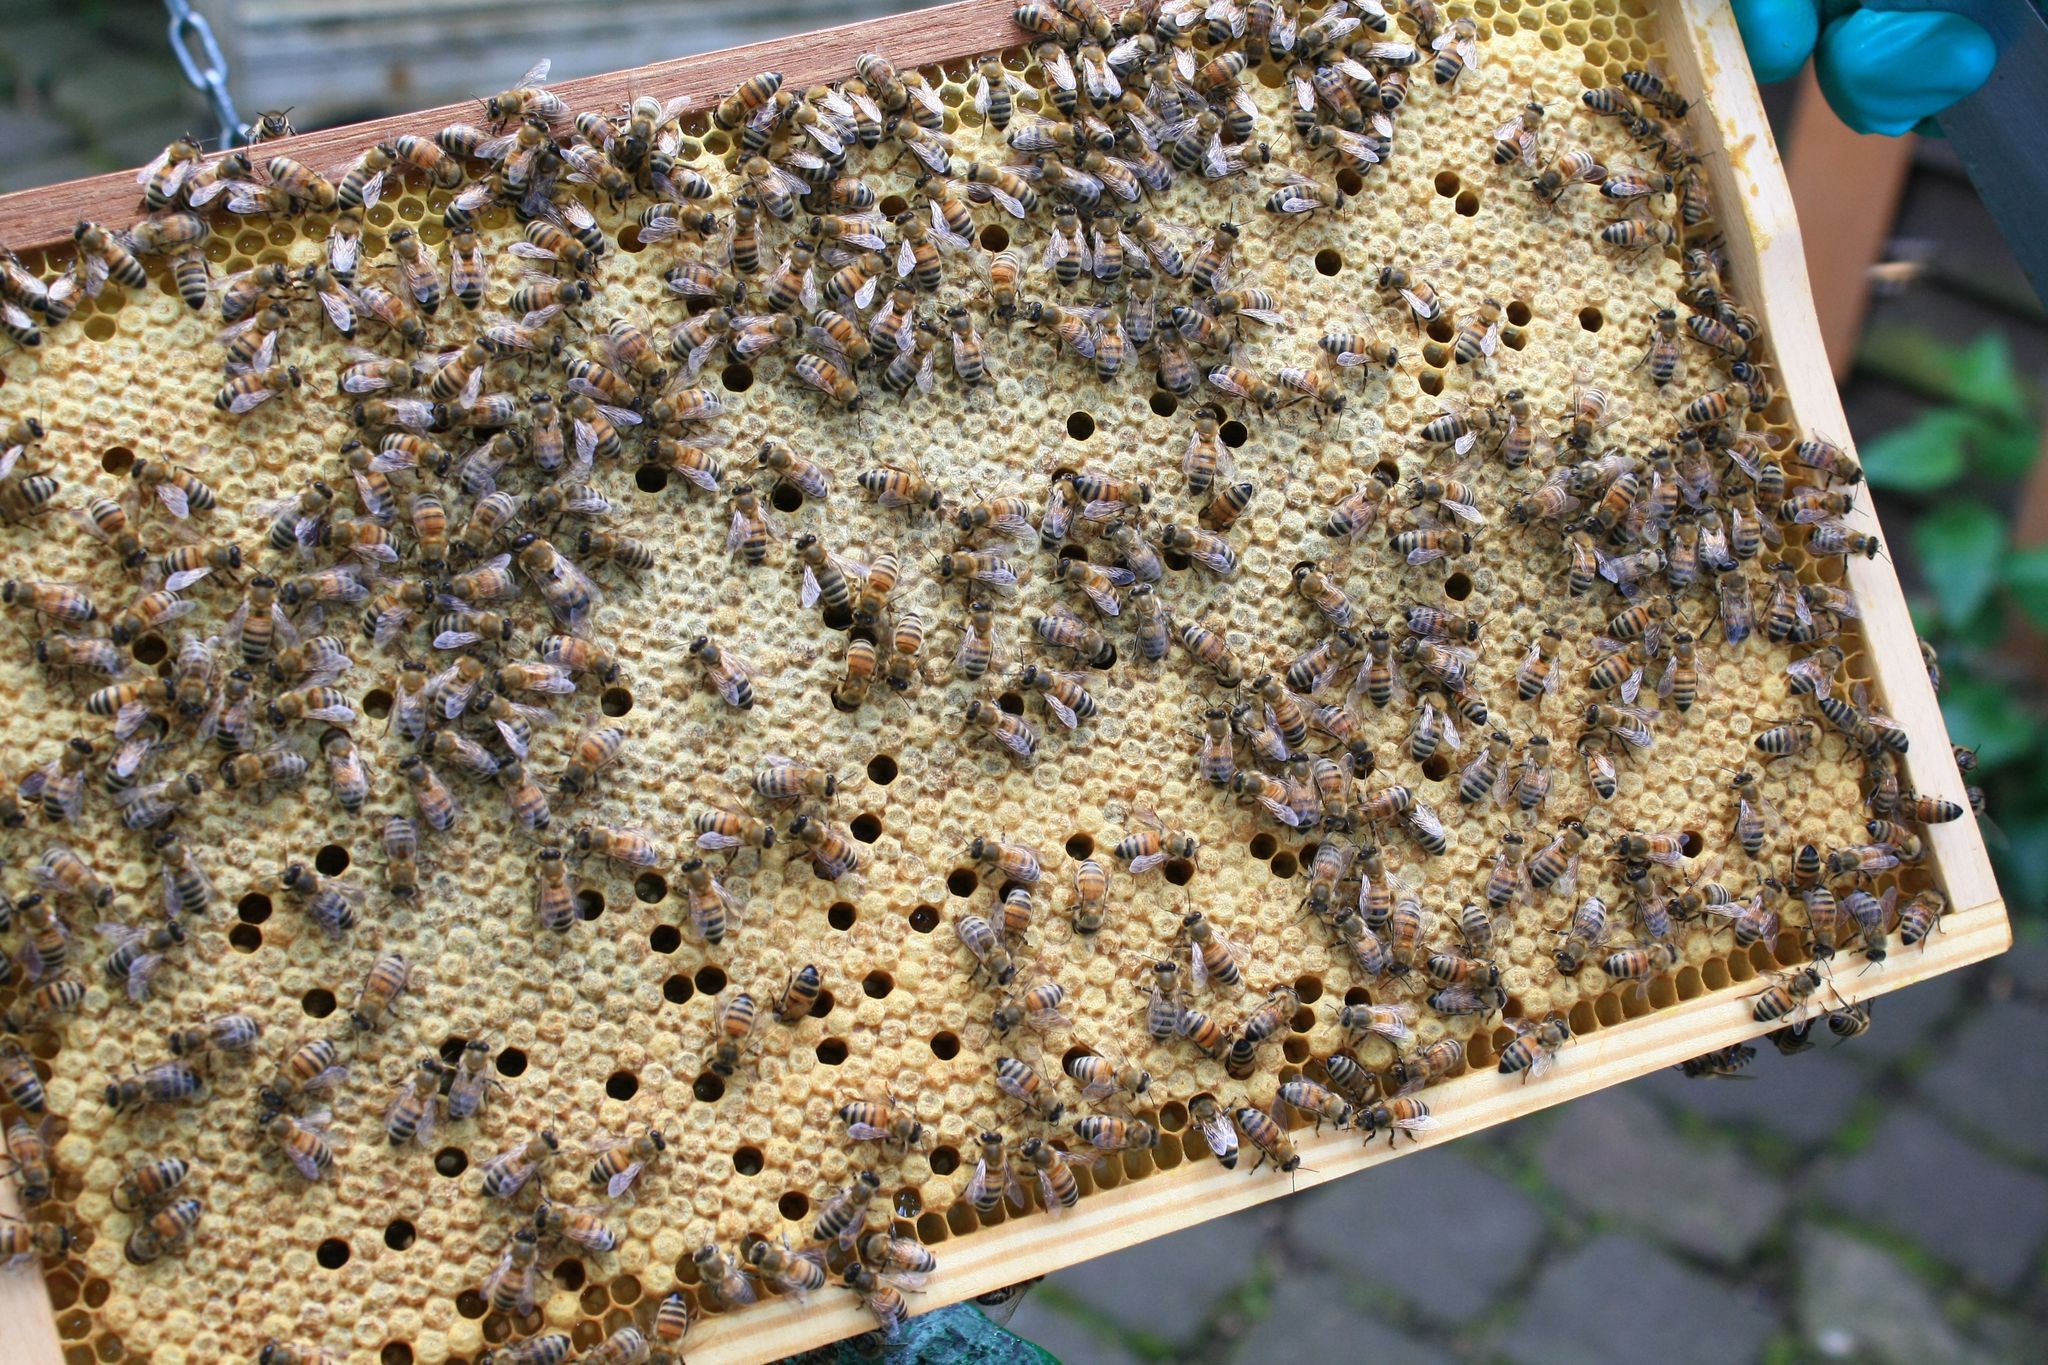
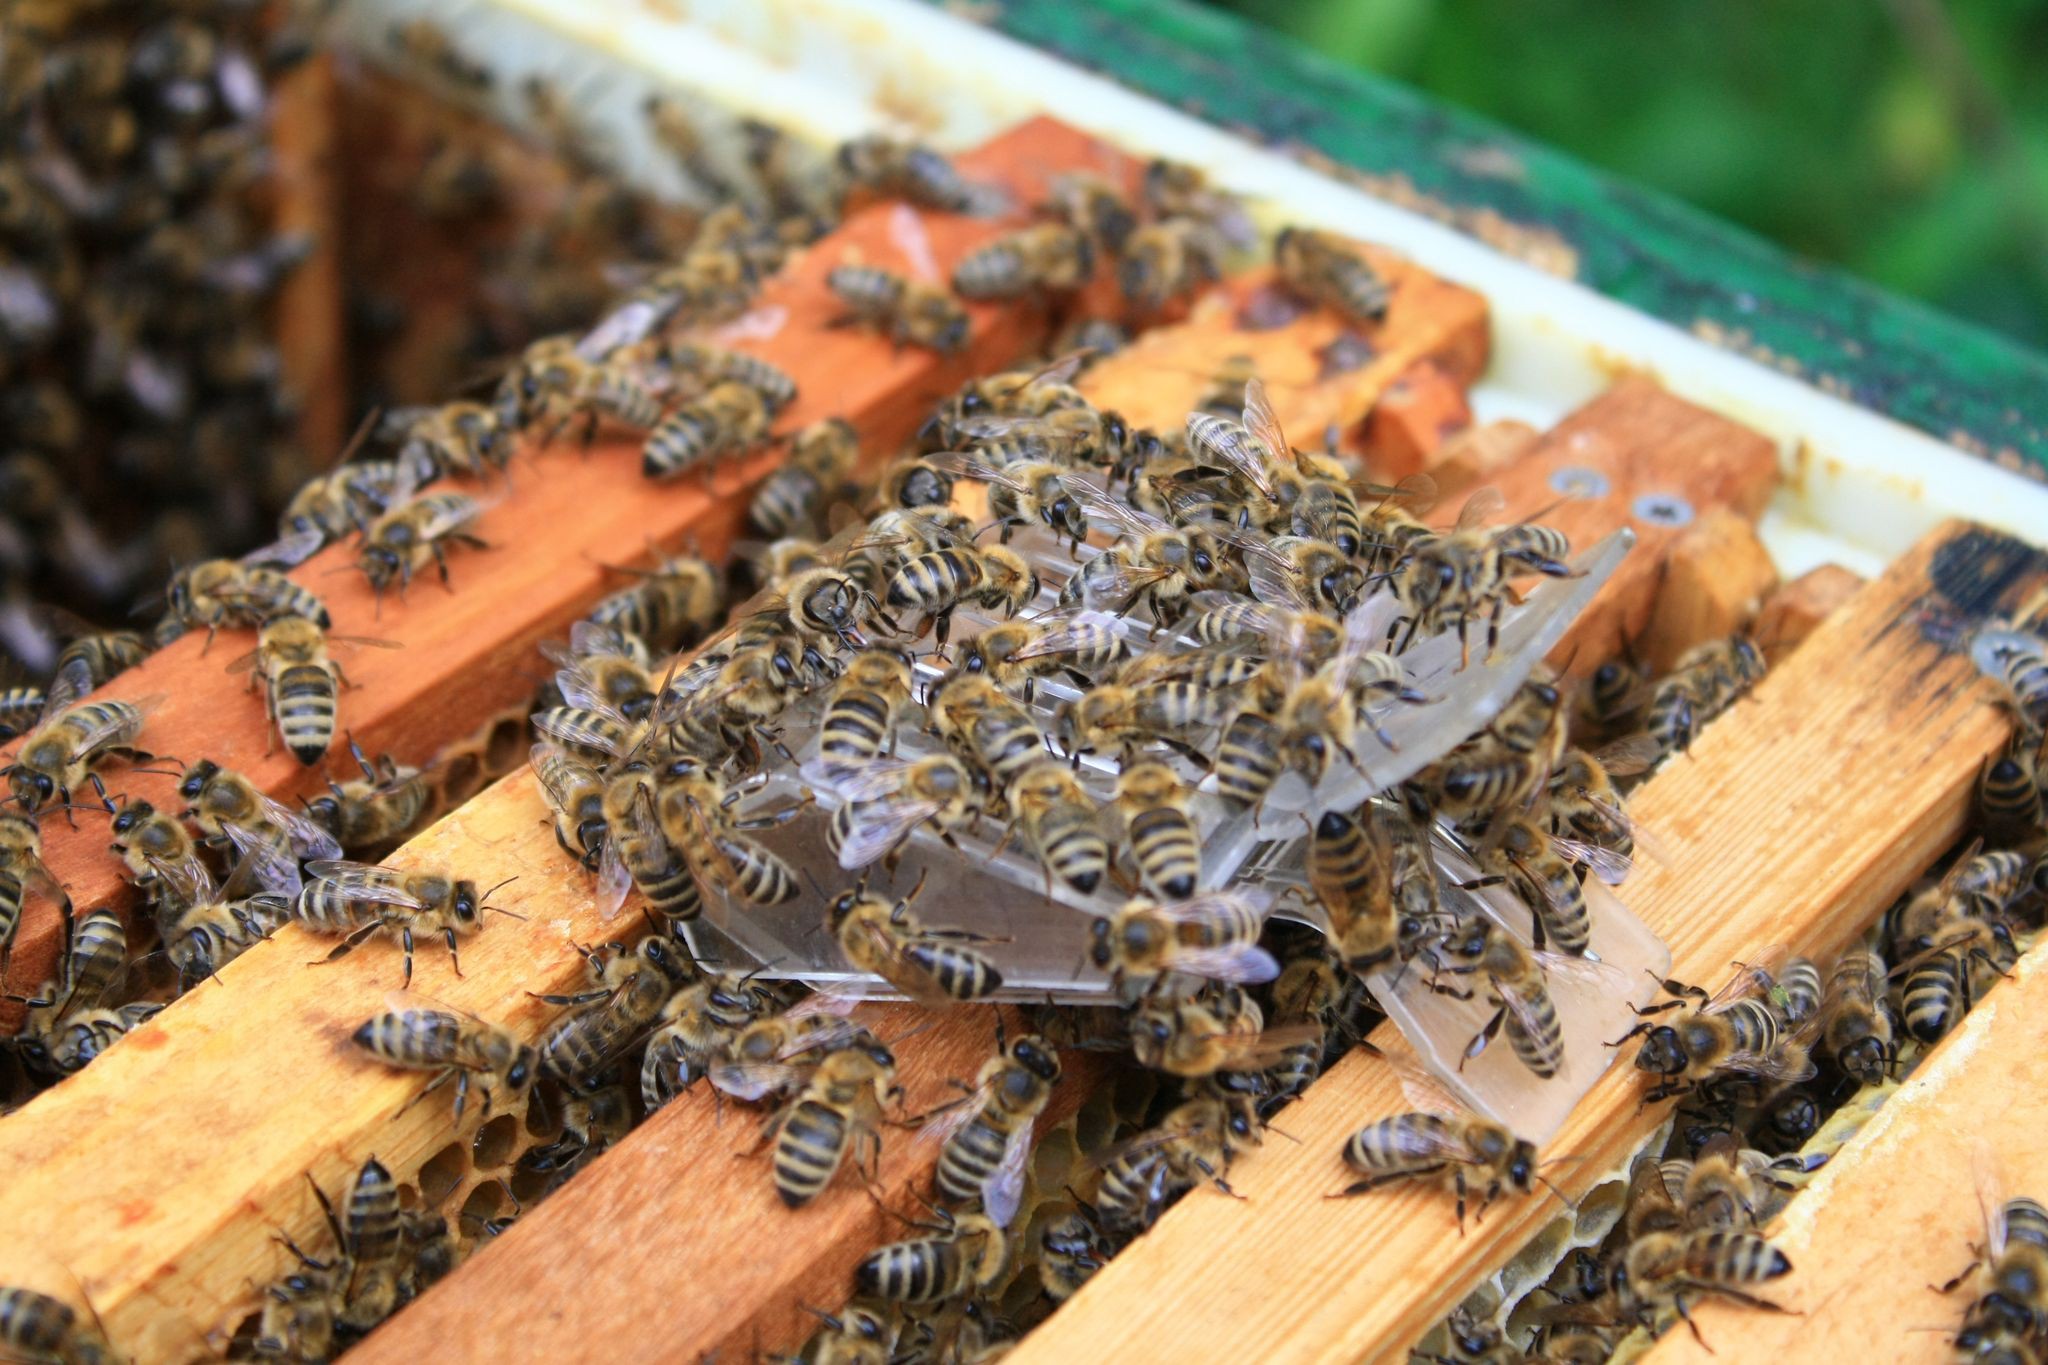
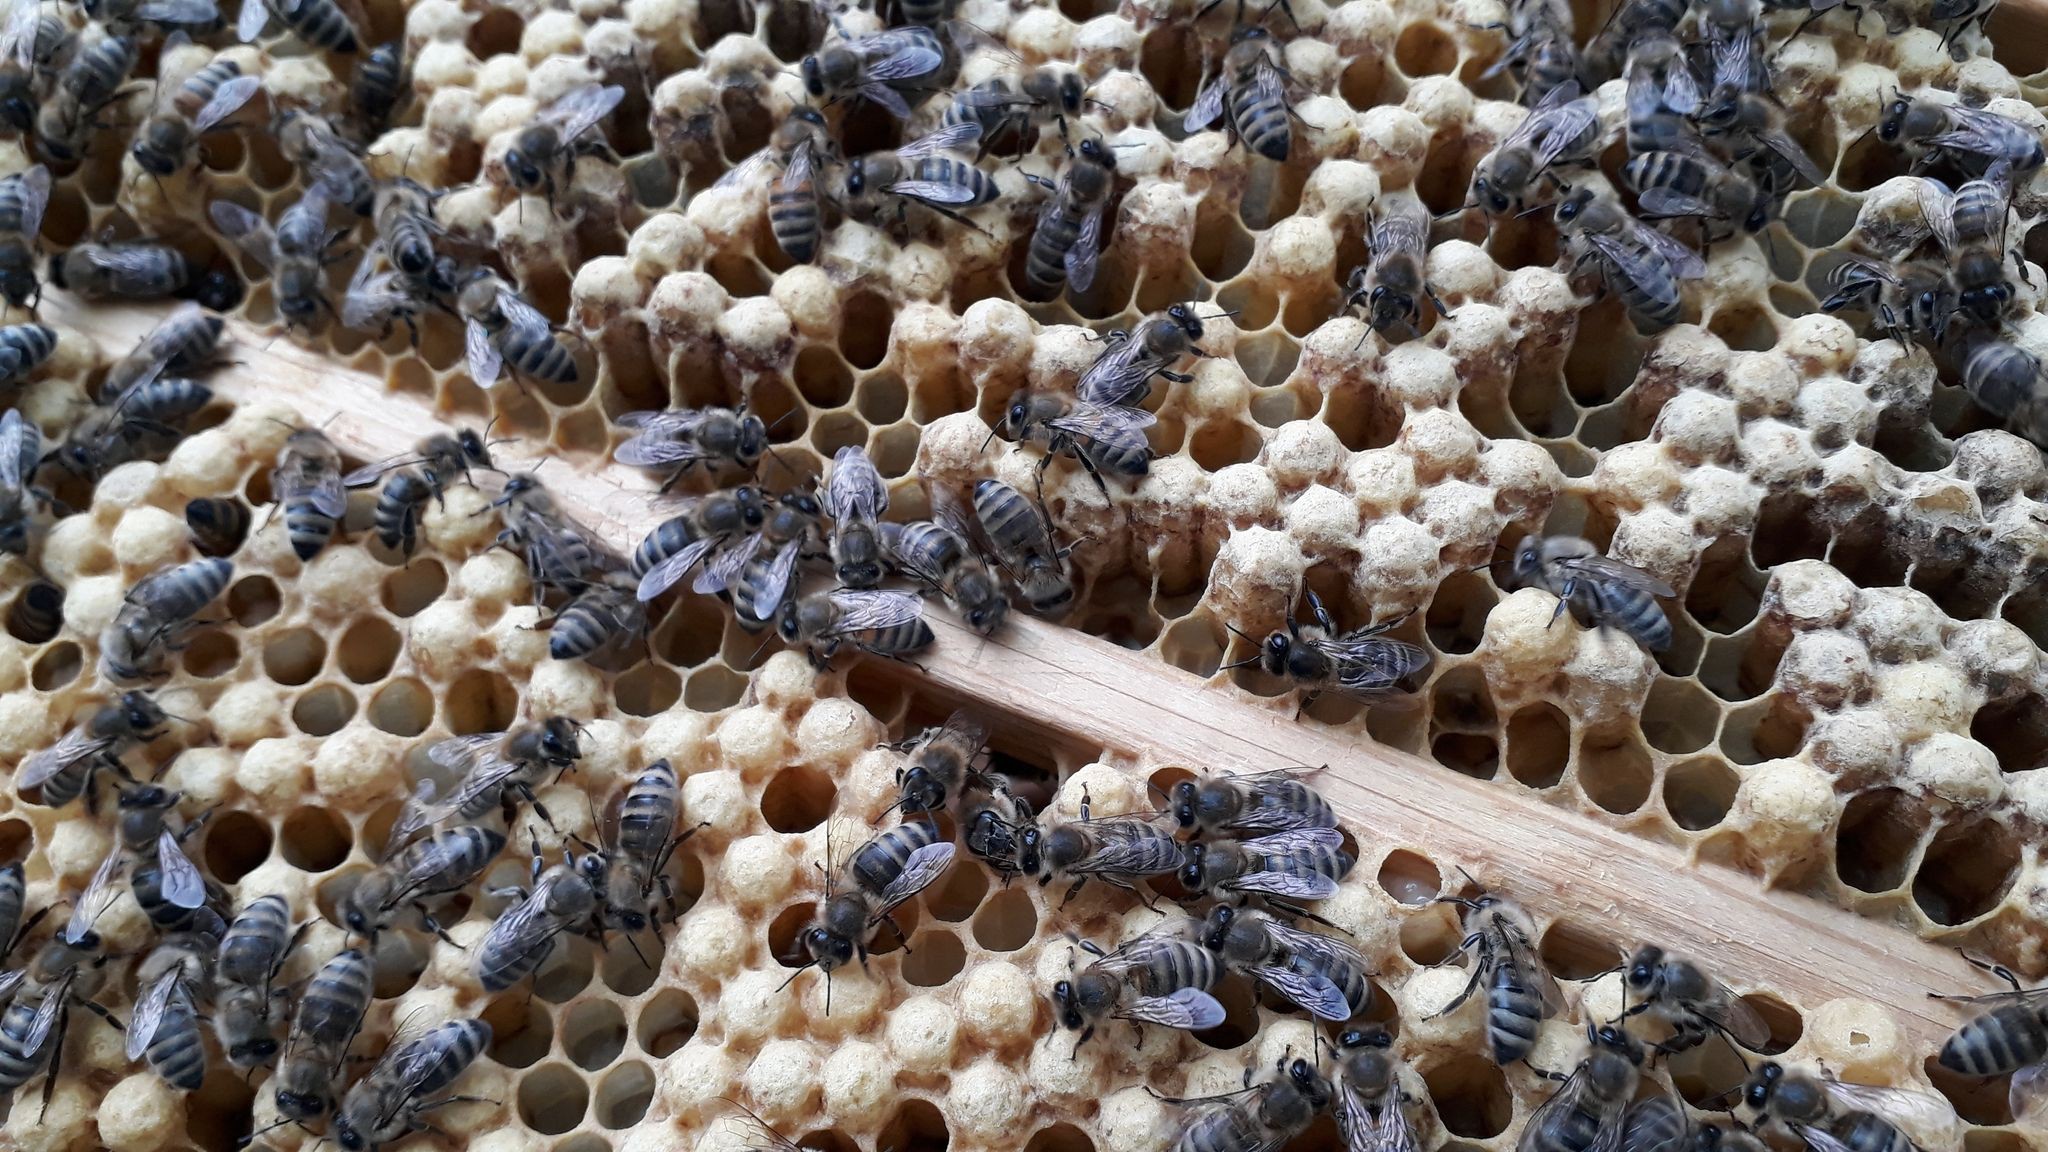
Next tuesday is the time of the first honey harvest this year. For this reason we had to check every hive a few times over the last few days. The hives are all thriving. Ten thousands of bees per hive. Amazing:
look down a bee hiveNurse bees caring for larvaegrid is put there to keep the queen from laying eggs in the honey comb frame
Friday, 11.05.18
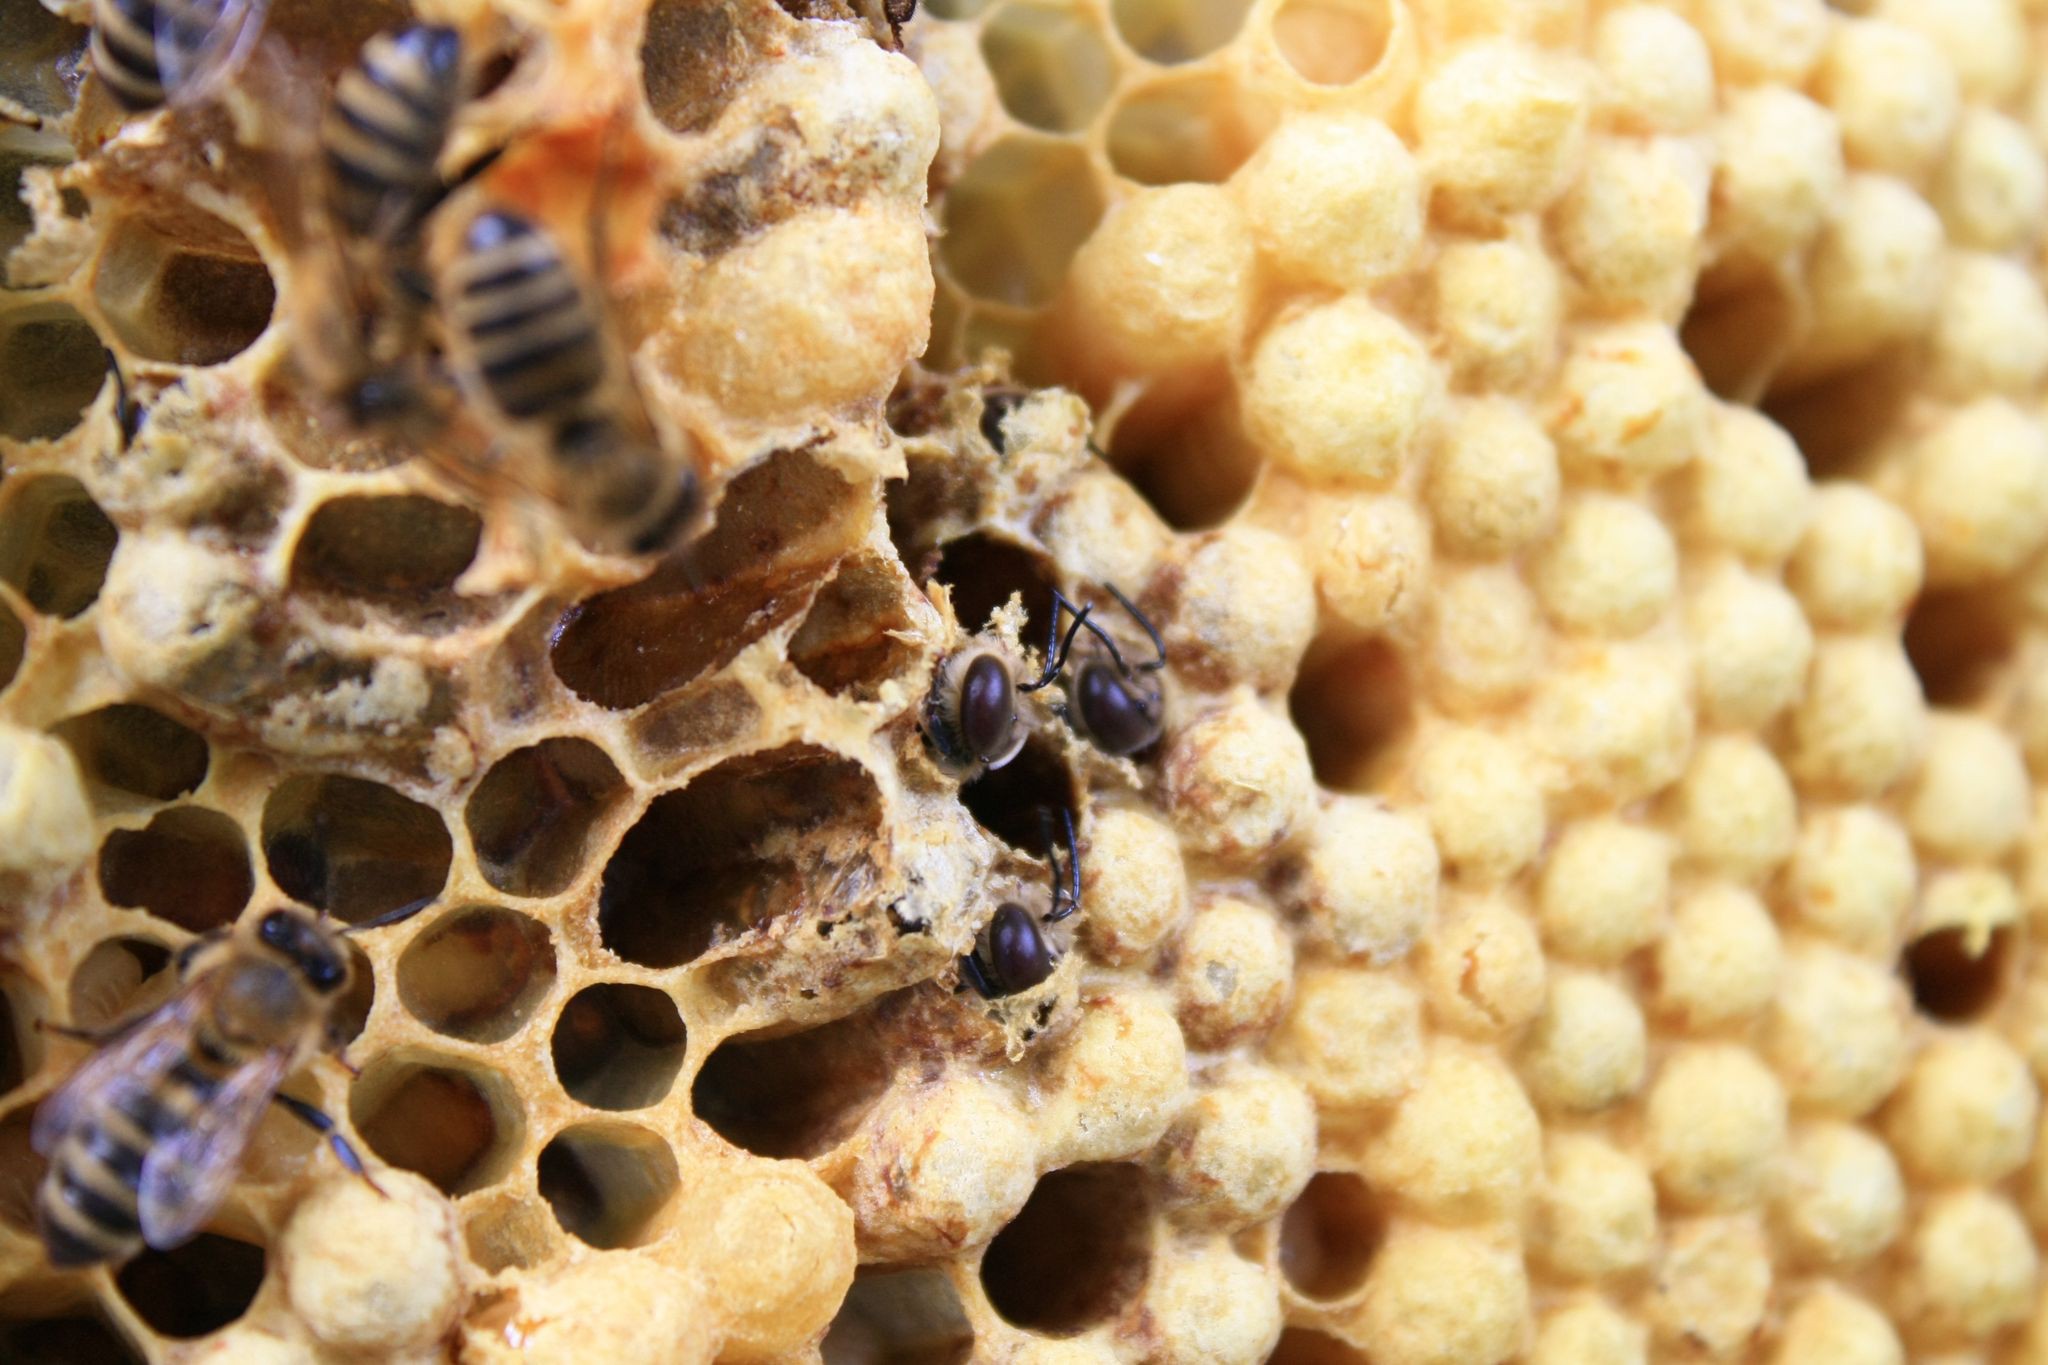
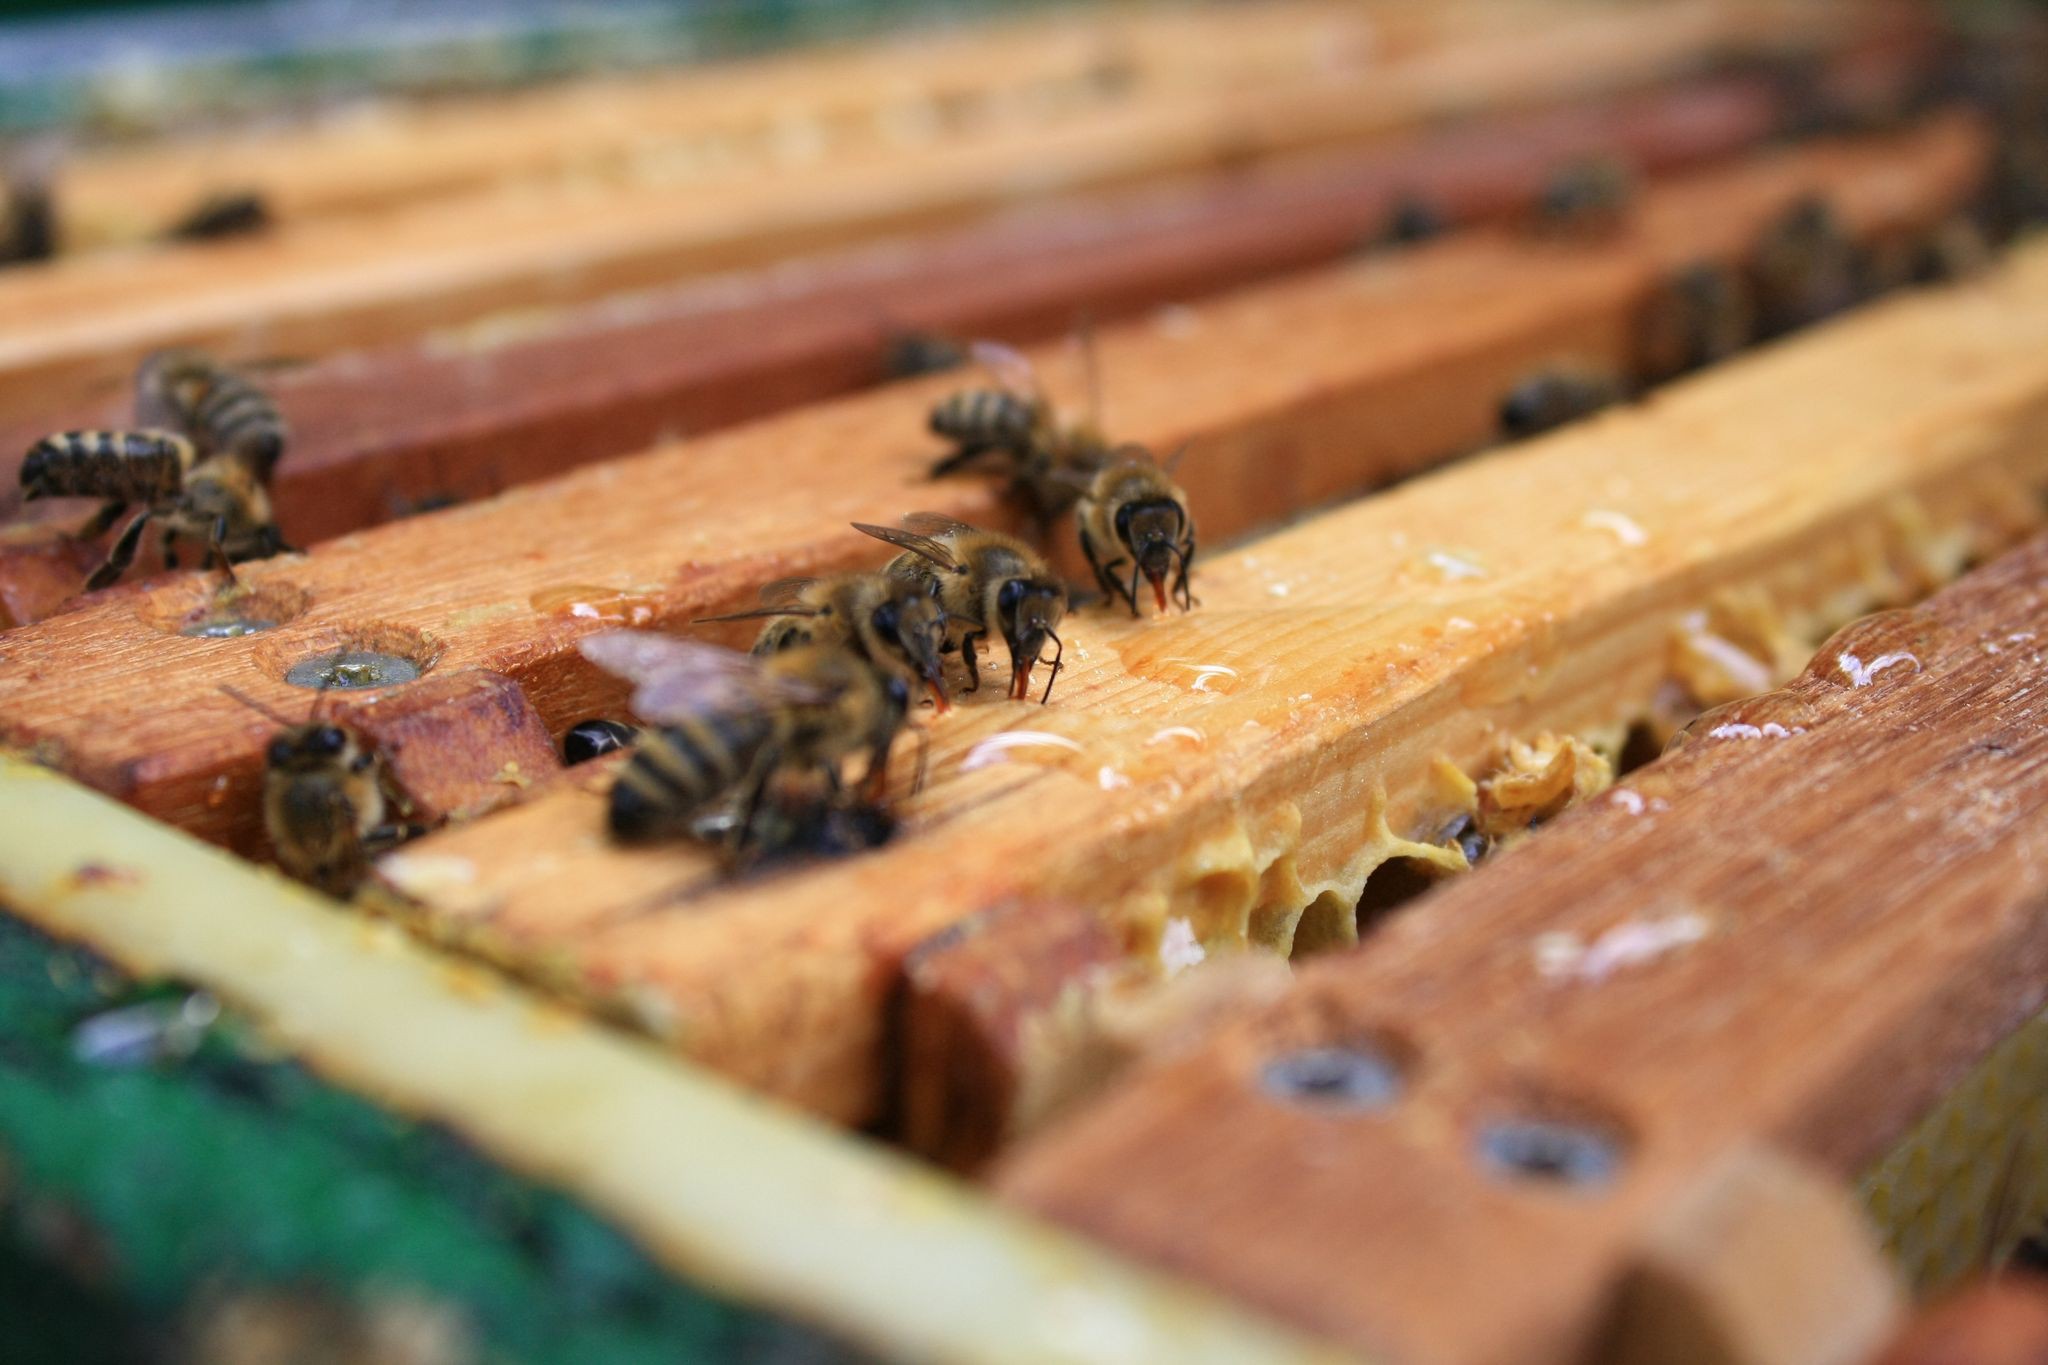
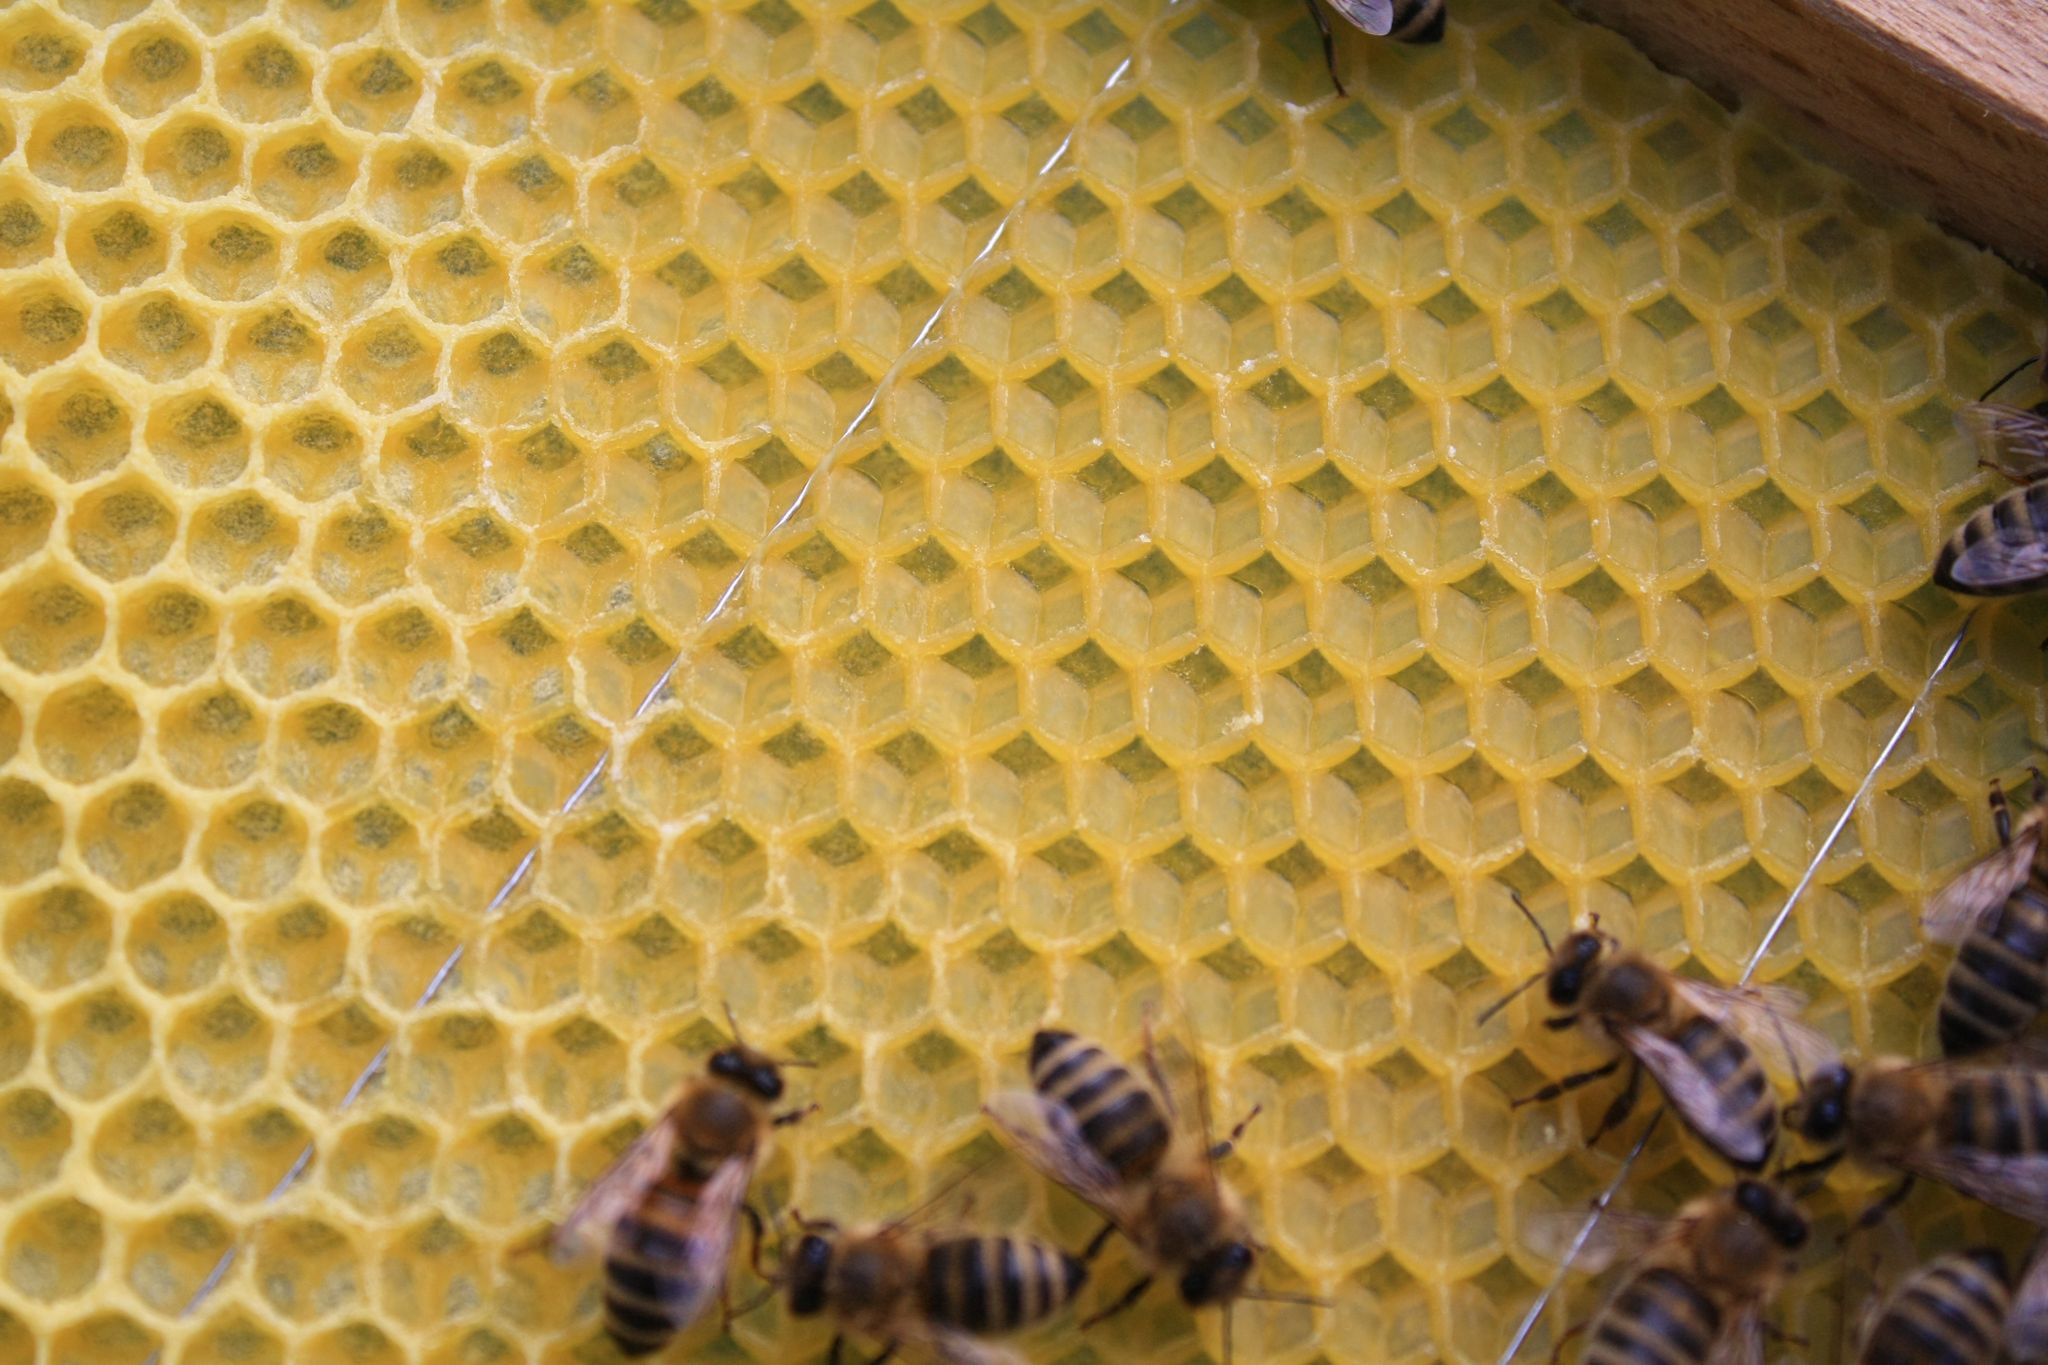
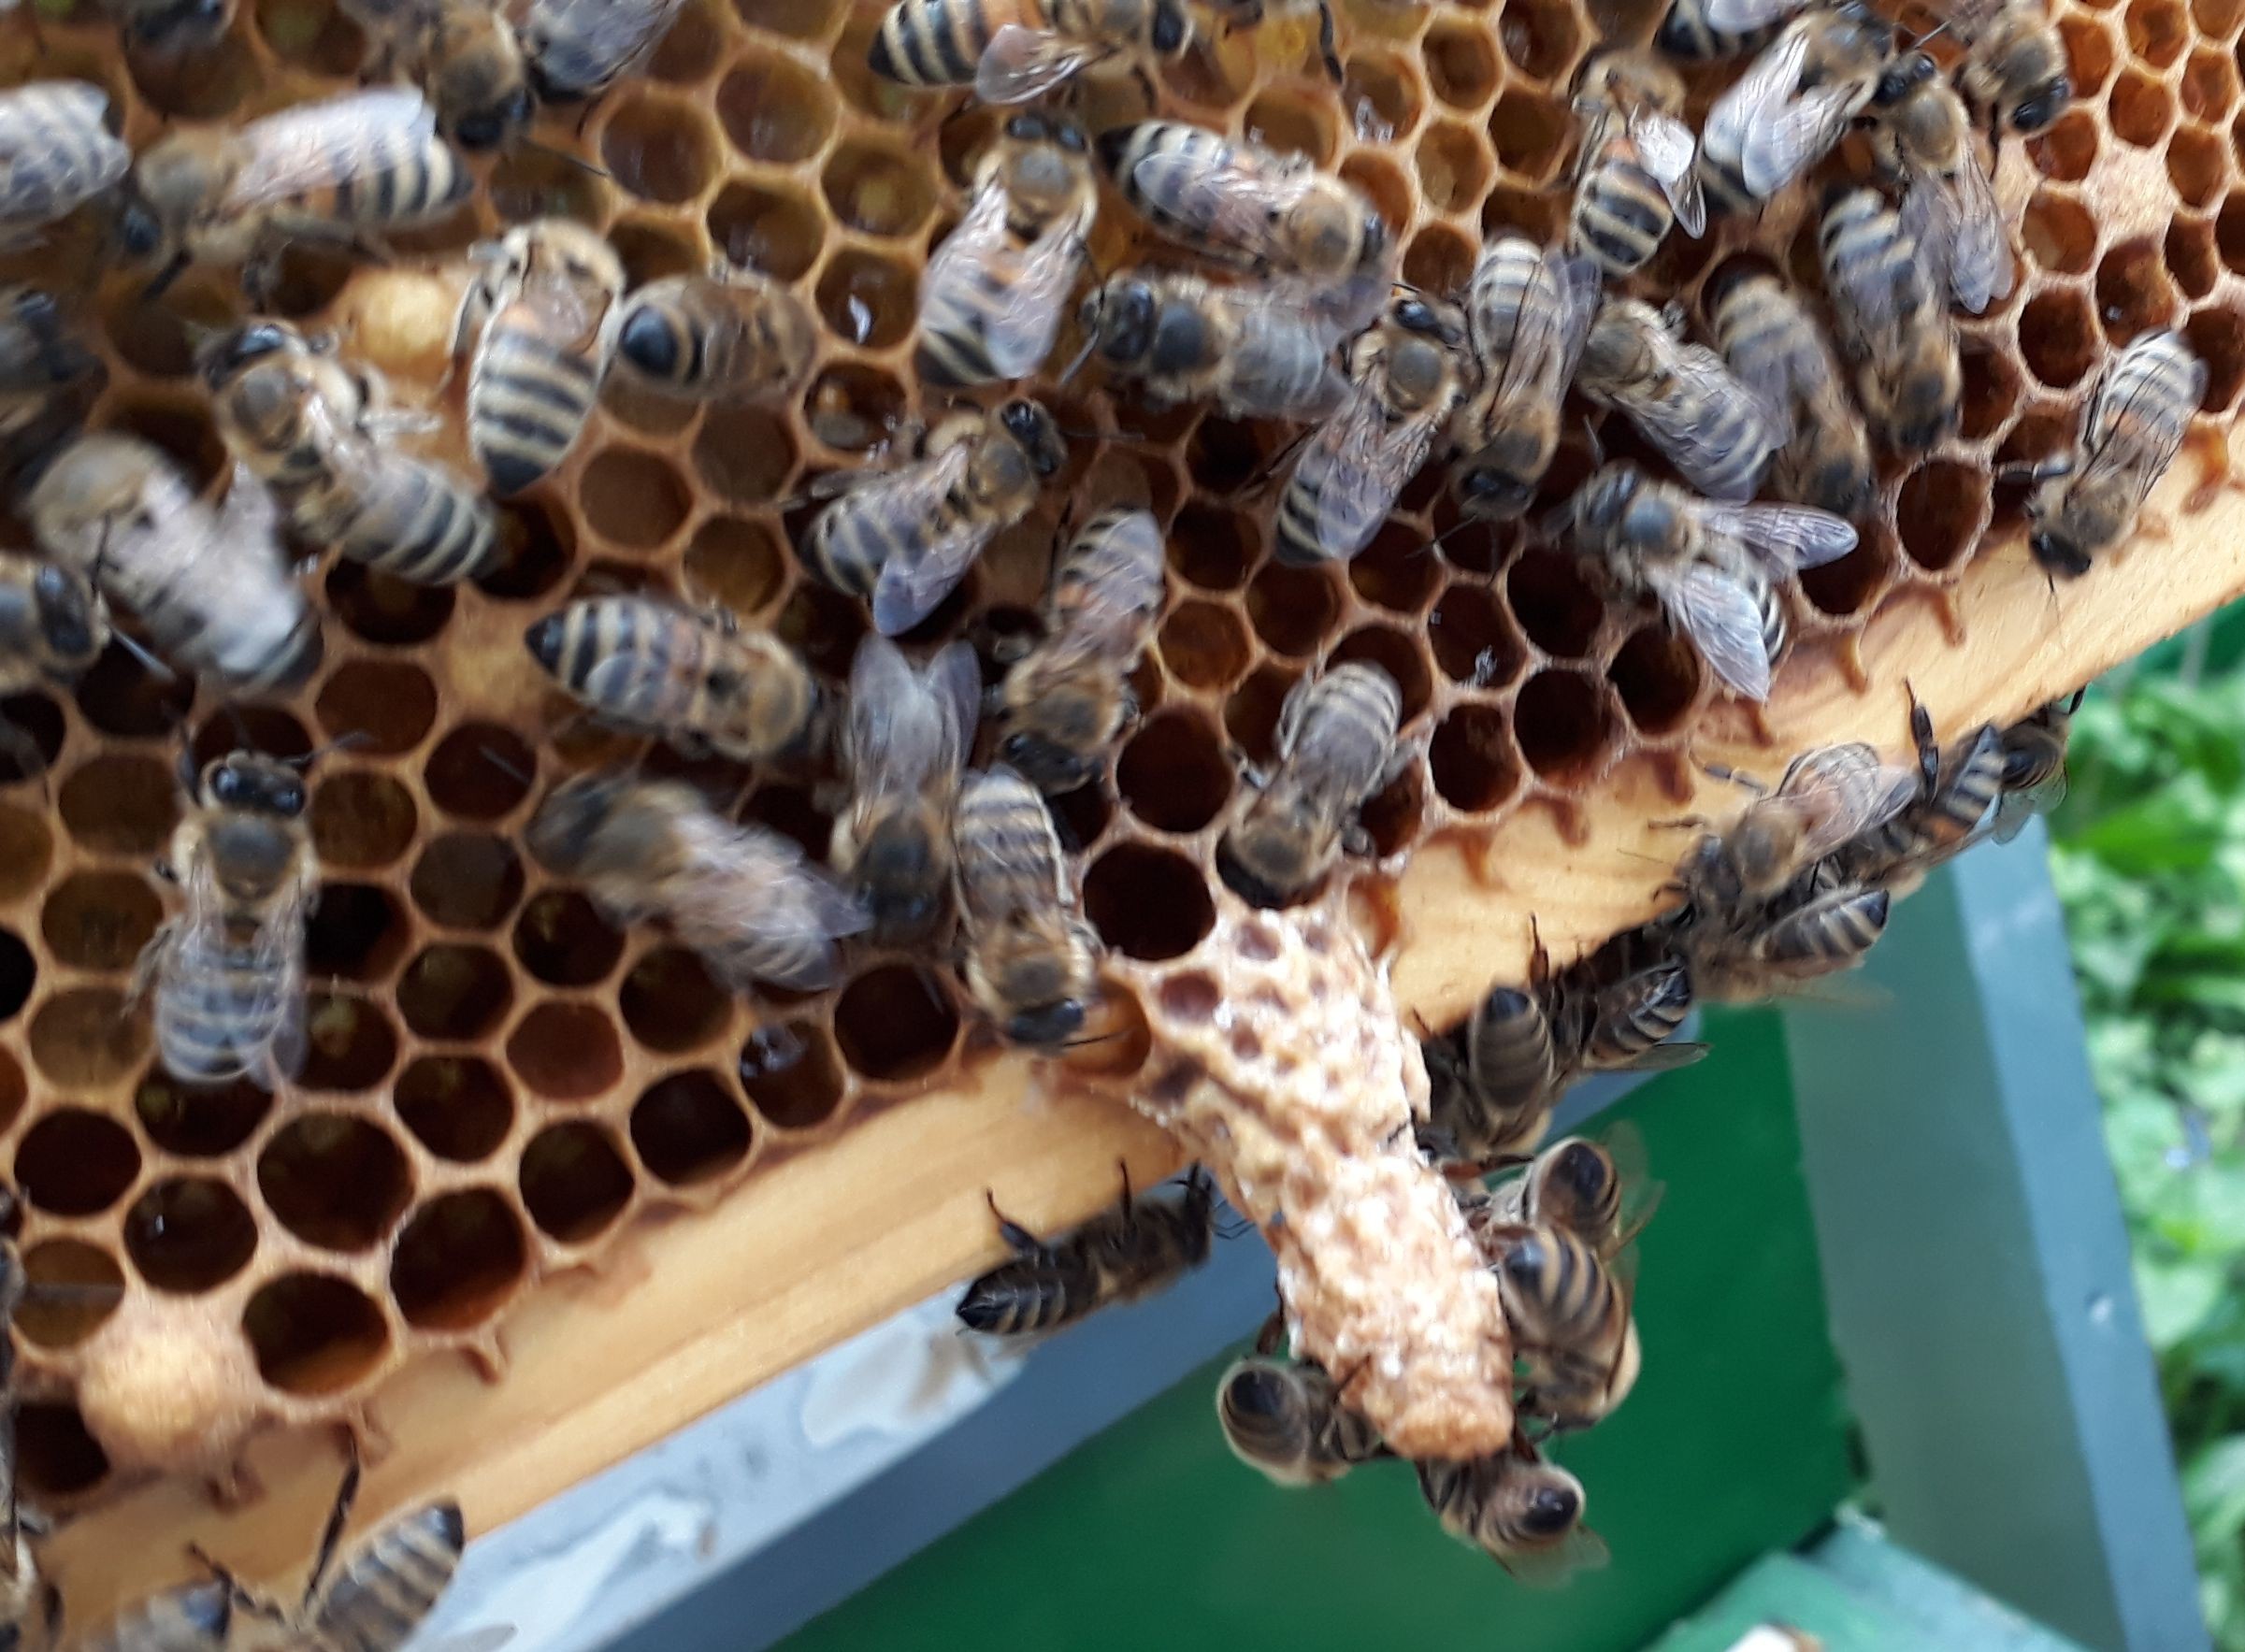
Male bees (drones) hatching/eating their way out of the cellthey find honey, they drink honey :) They have really long tonguesyou blow them with a little smoke and they instantly go back into their hive!a brood comb
You see the empty holes? They use them for two things: 1) storing honey to feed the worker bees on that comb and 2) heater bees get down there and heat the surrounding cells/brood!
pre-rolled comb structure. They gladly accept that pattern an build the comb based on ita pollen comb. Incredible dark color, nearly blackqueen captured! On every comb you pull out, you first of all look for the queen. If you find her (she's marked) you put them into this clip so you don't kill her by accident...honey combs
Update 19.05.18 - done redesigning the board. Bigger but more comfortable to use!
I did another iteration on the board design after I thought about what pissed me off the most when assembling the last (first) unit. It clearly was soldering all those connections from the cables coming in from outside!
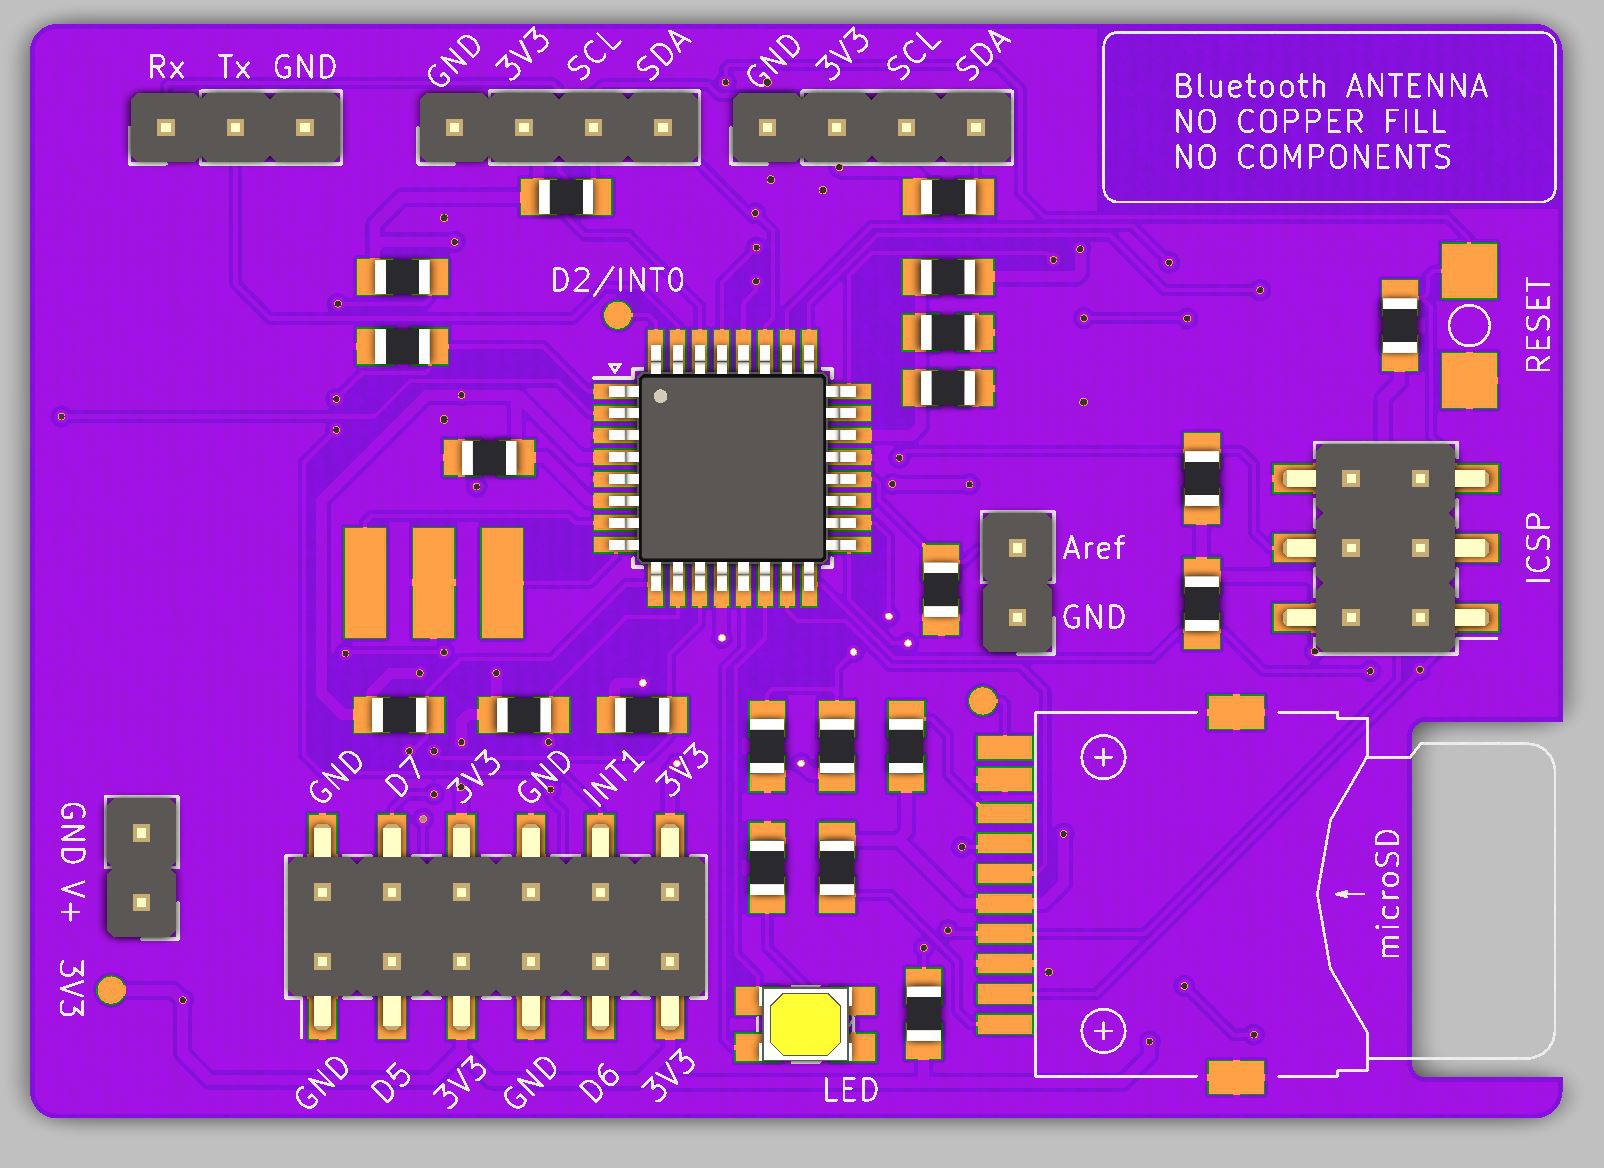
Another thing I didn't like was the batteries weren't accessible from the top. So here's the final design:
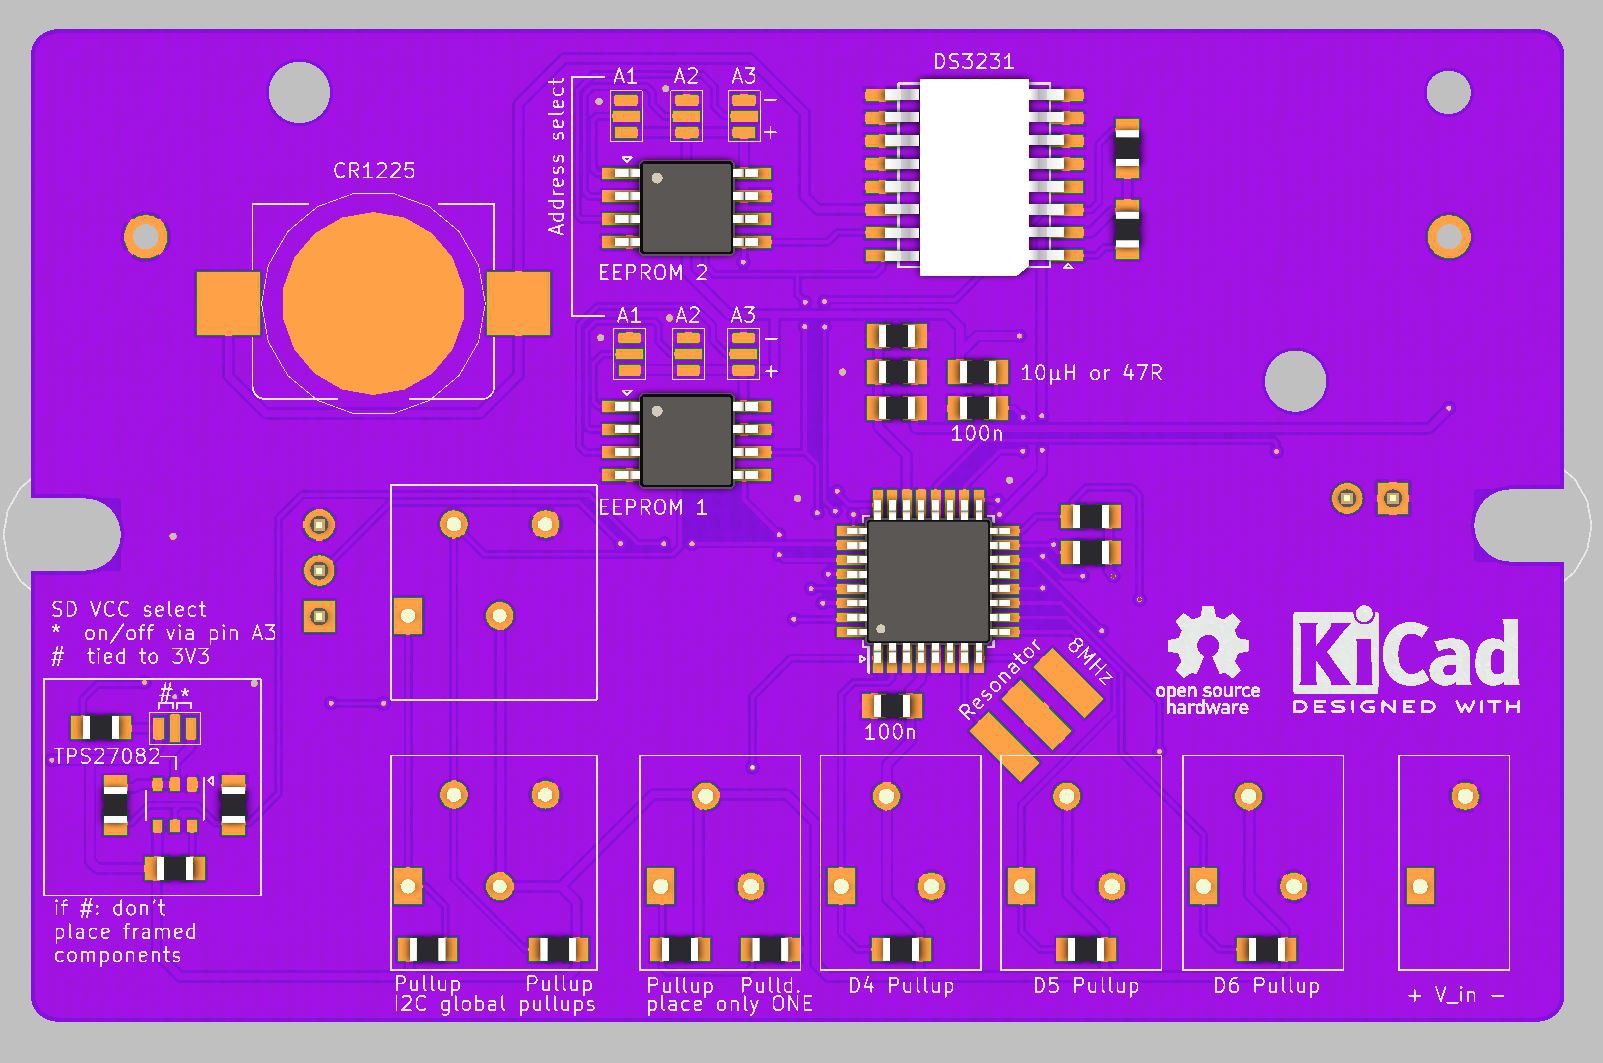
Above: I switched to Wage spring loaded clamps. These work perfect for small to medium diameter wires! No more soldering strip headers to sensor cables! Yes, they're more expensive but so is the bigger board... Now you can use external V in or one 18650 li ion cell.
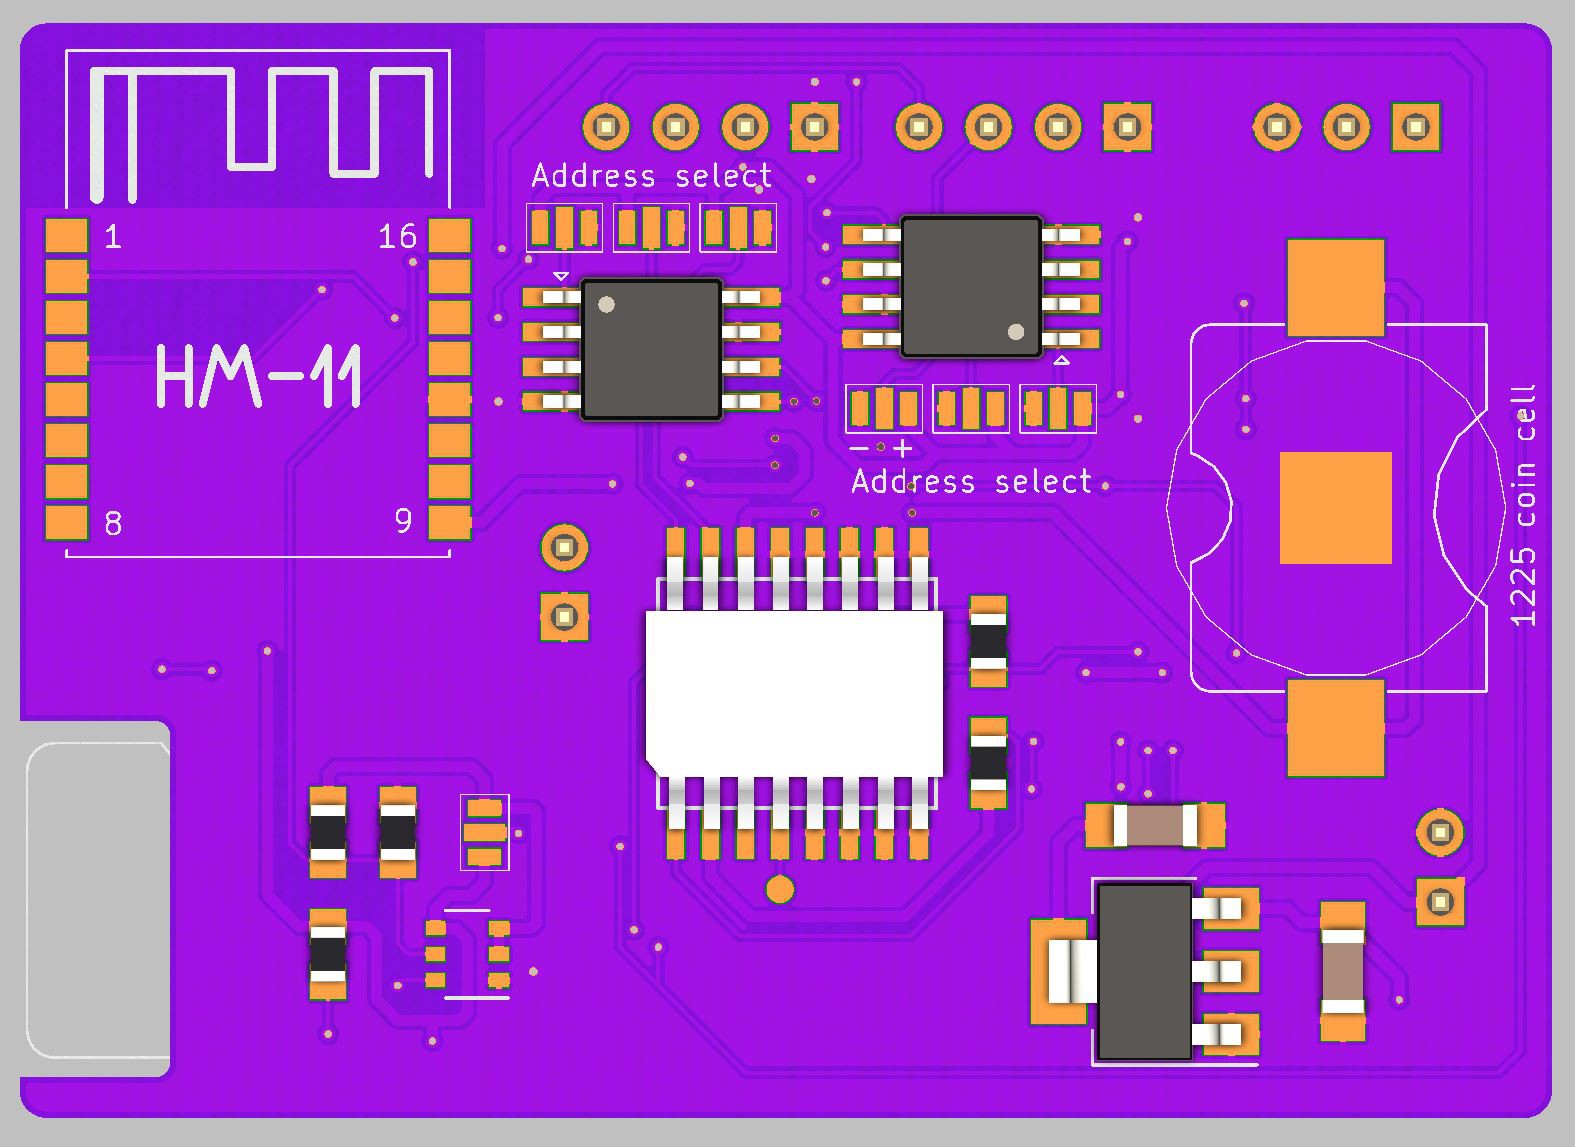
Above: back of the board. Now with two EEPROMs which have address-select solder pads so you can add more than one for additional space. You can now choose to supply your SD directly from VCC or by an TPS27082 high side switch which can be turned on/off by your microcontroller.
Update 15.05.18
I've been adding features and made a new board:
Board will be 60x40mm. I'm not yet happy with how it looks and components are placed. I guess another layouting round is due. Just to do things proper :) I mean there even is wasted space...
All features of the list below have been added anyway.
---------- more ----------
What's missing in V1.1
Hardware
proper, easily accessible µSD socket
button that can fire an interrupt (important for interaction, because the logger is sleeping most of the time = no digital pin polling)
way to get the data out without opening the watertight case
external EEPROM of 512kBit to 2Mbit = less SD writes
Software
writing all logs from EEPROM to SD with the press of a button (atm I have to wait till the EEPROM is full (and then written to SD) or I lose 6,25 hours of data)
sleeker state-machine. I mean it works but is quite confusing at times...
breaking out one interrupt pin for a button/switch (one is taken by the RTC already, the other one is used for SD select in V1.1 = waste of interrupt pin)
pressing button for 2s: BLE module activated, waiting for send command
send transfer command by phone user (via bluetooth serial app)
transfering logs line by line (already tested)
shutting down module again
transmitting power is settable by AT command
module uses less than 10mA -> pin powered!
no way to change/set data by expernal user
Conclusion
The next board will be slightly bigger and totally re-designed to fit my new needs. I want to have it ready and tested before the bad weather period comes (november...) so I've got plenty time for tests and stuff. Plan is to log not only one hive through winter...
Another idea would be to include no SD card at all and just use an EEPROM. But this would need the user to get the data off the logger every few weeks (512kbit: 16 days with 40kb logs, every 15 minutes or about a month with 1Mbit EEPROMs)...
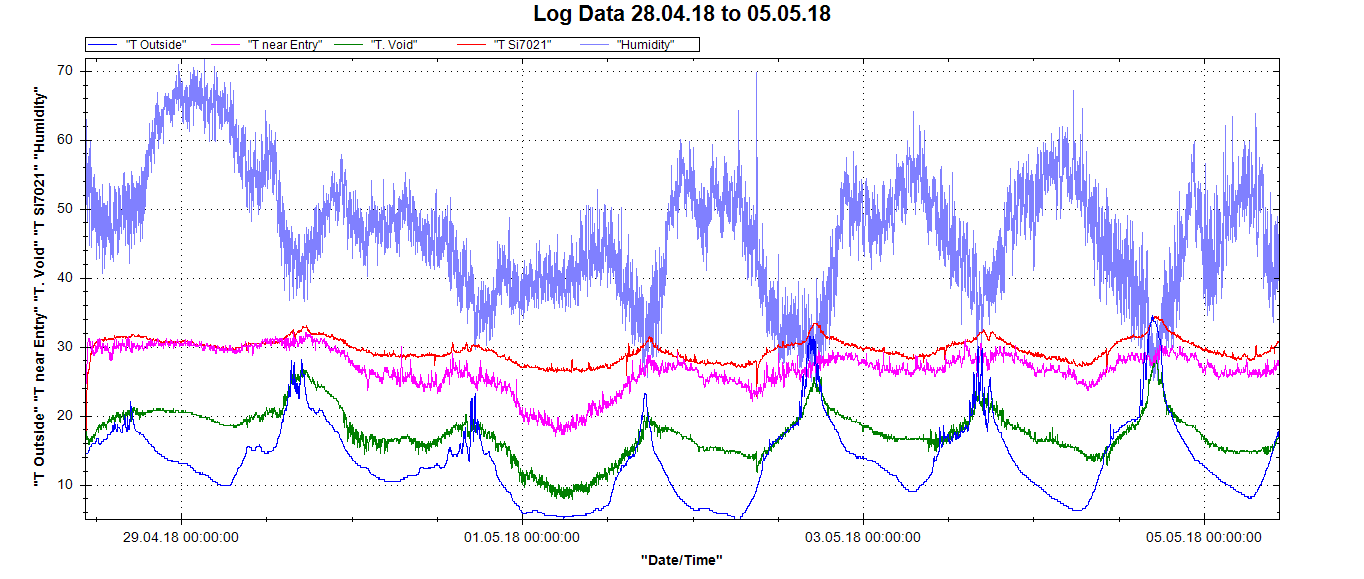
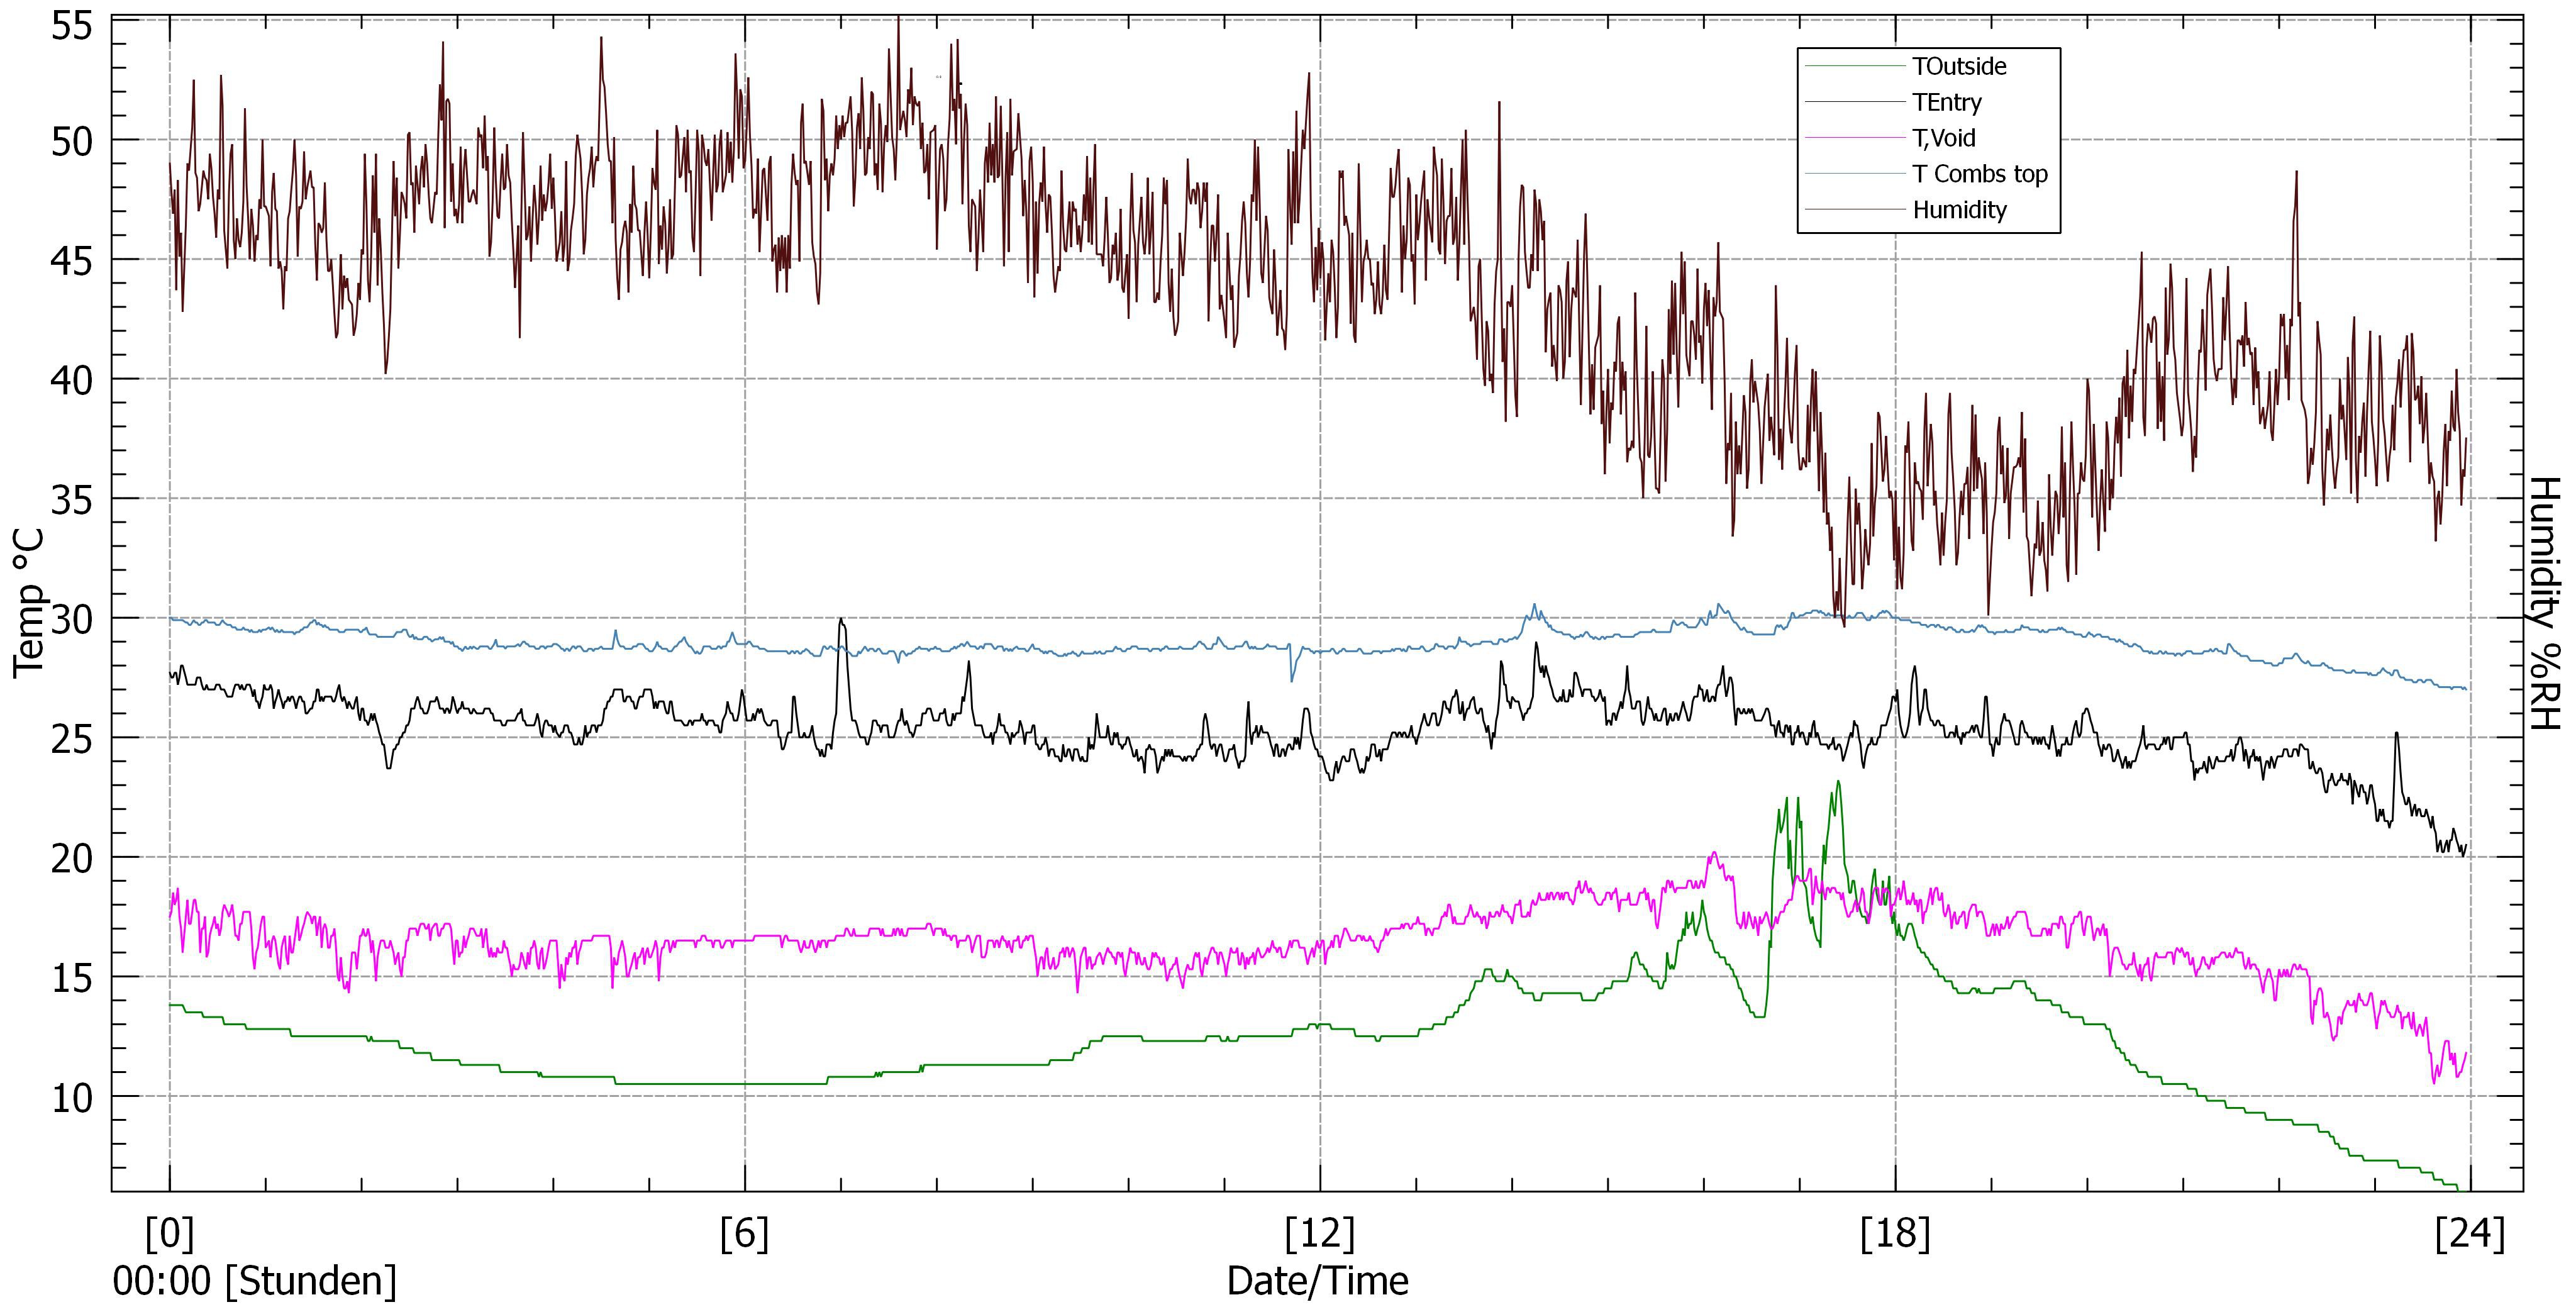
I invite you to have a look at my first week of data. We will see a lot of nice things
I am quite pleased with the results of the first week of logs. This is mainly because I logged at 1 minute intervalls instead of the planned 15 minutes... So I got 9700 data points. My poor old laptop! It keeps lagging, handling that.
Above: one week worth of data
First thing I'd like to emphasize is the connection between the outside temperature and the temperature in the void of the hive. Bees exclusively heat their brood and their honey combs. Heating huge voids is a waste of energy, thus they avoid that!
Another interesting thing is how steady the temperature above their brood combs is (red chart). The temperature near the entry is only a few degrees C lower than that. Mainly because the opening is so small at the moment.
Humidity changes in opposite to the outside temperature! When the outside temperature rises, the humidity in the hive drops. This is kind of strange, as warm air can take much more water. So the bees must do something to actively change the humidity in the hive?
Update 07.05.18: I just looked up the data for our town for that period:
My chart closely follows the official weather data. And now I know why: the hive is open on the bottom! So it kind of has to resemble the outside weather. Nice!
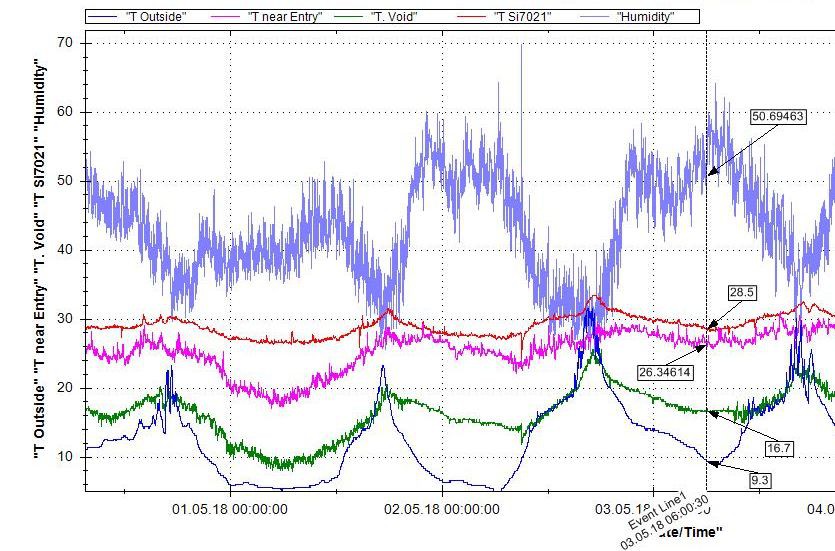
Here's a close-up of May 3rd, 2018 06:00 in the morning:
And this is the official weather data for my area:
Here's a plot (done in Kst 2) for just one day, April 30th:
Outside temperature jumps a bit around 17:00 - 18:00 because the sunlight gets through the vegetation. Temperature in the empty space inside the hive smoothens this a bit. The temperature measured on top of the brood combs is always within a range of 3°C. I really have to shove one of the sensors in between two combs!
I had @Graham Murphy 's comment stuck in my head all the time and by coincidence I stumbled upon a video by Dave jones:
This seems to be exactly the case with my flawed "design". @ the 5 minute mark he's doing excatly what I did in my circuit. The µC is connected to VCC by RST via a ~10K pullup. This alone doesn't provide enough power. But by having other IO's connected to VCC the µC starts working. Amazing stuff. Video is absolutely worth watching!!!
---------- more ----------
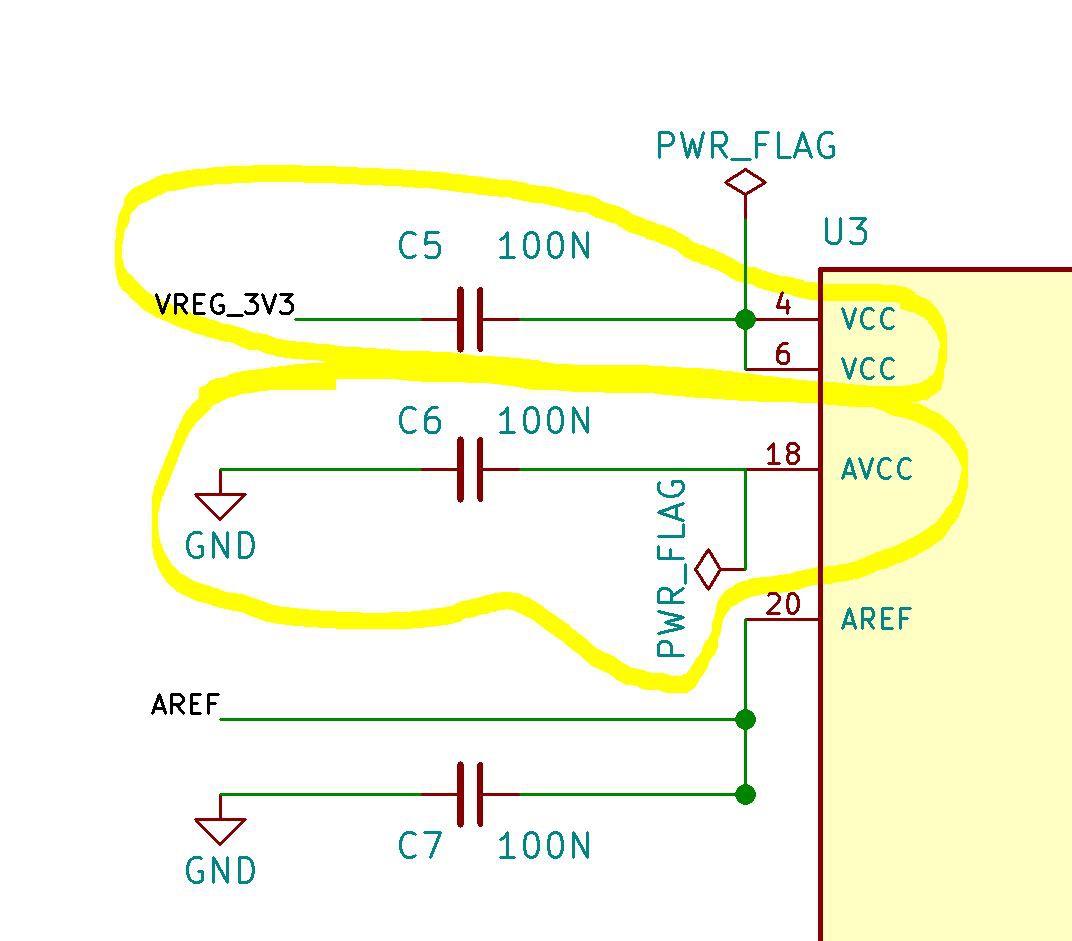
Hey guys, I need your advice!
Look, I already made the huge mistake to not connect AVCC to VCC but only to GND via cap C6. So I soldered a wire from AVCC to VCC to fix that.
BUT guess what! I did another really stupid thing. I connected both VCC pins of the Atmega328 to 3V3 with a cap in between (C5). My brain hurts now as there should be no current flowing in an DC circuit right? Why does to whole thing work after all???
My only idea is that the Atmega is able to run even if only AVCC is connected to 3V3 because it's internally connected to the other two VCC pins?!
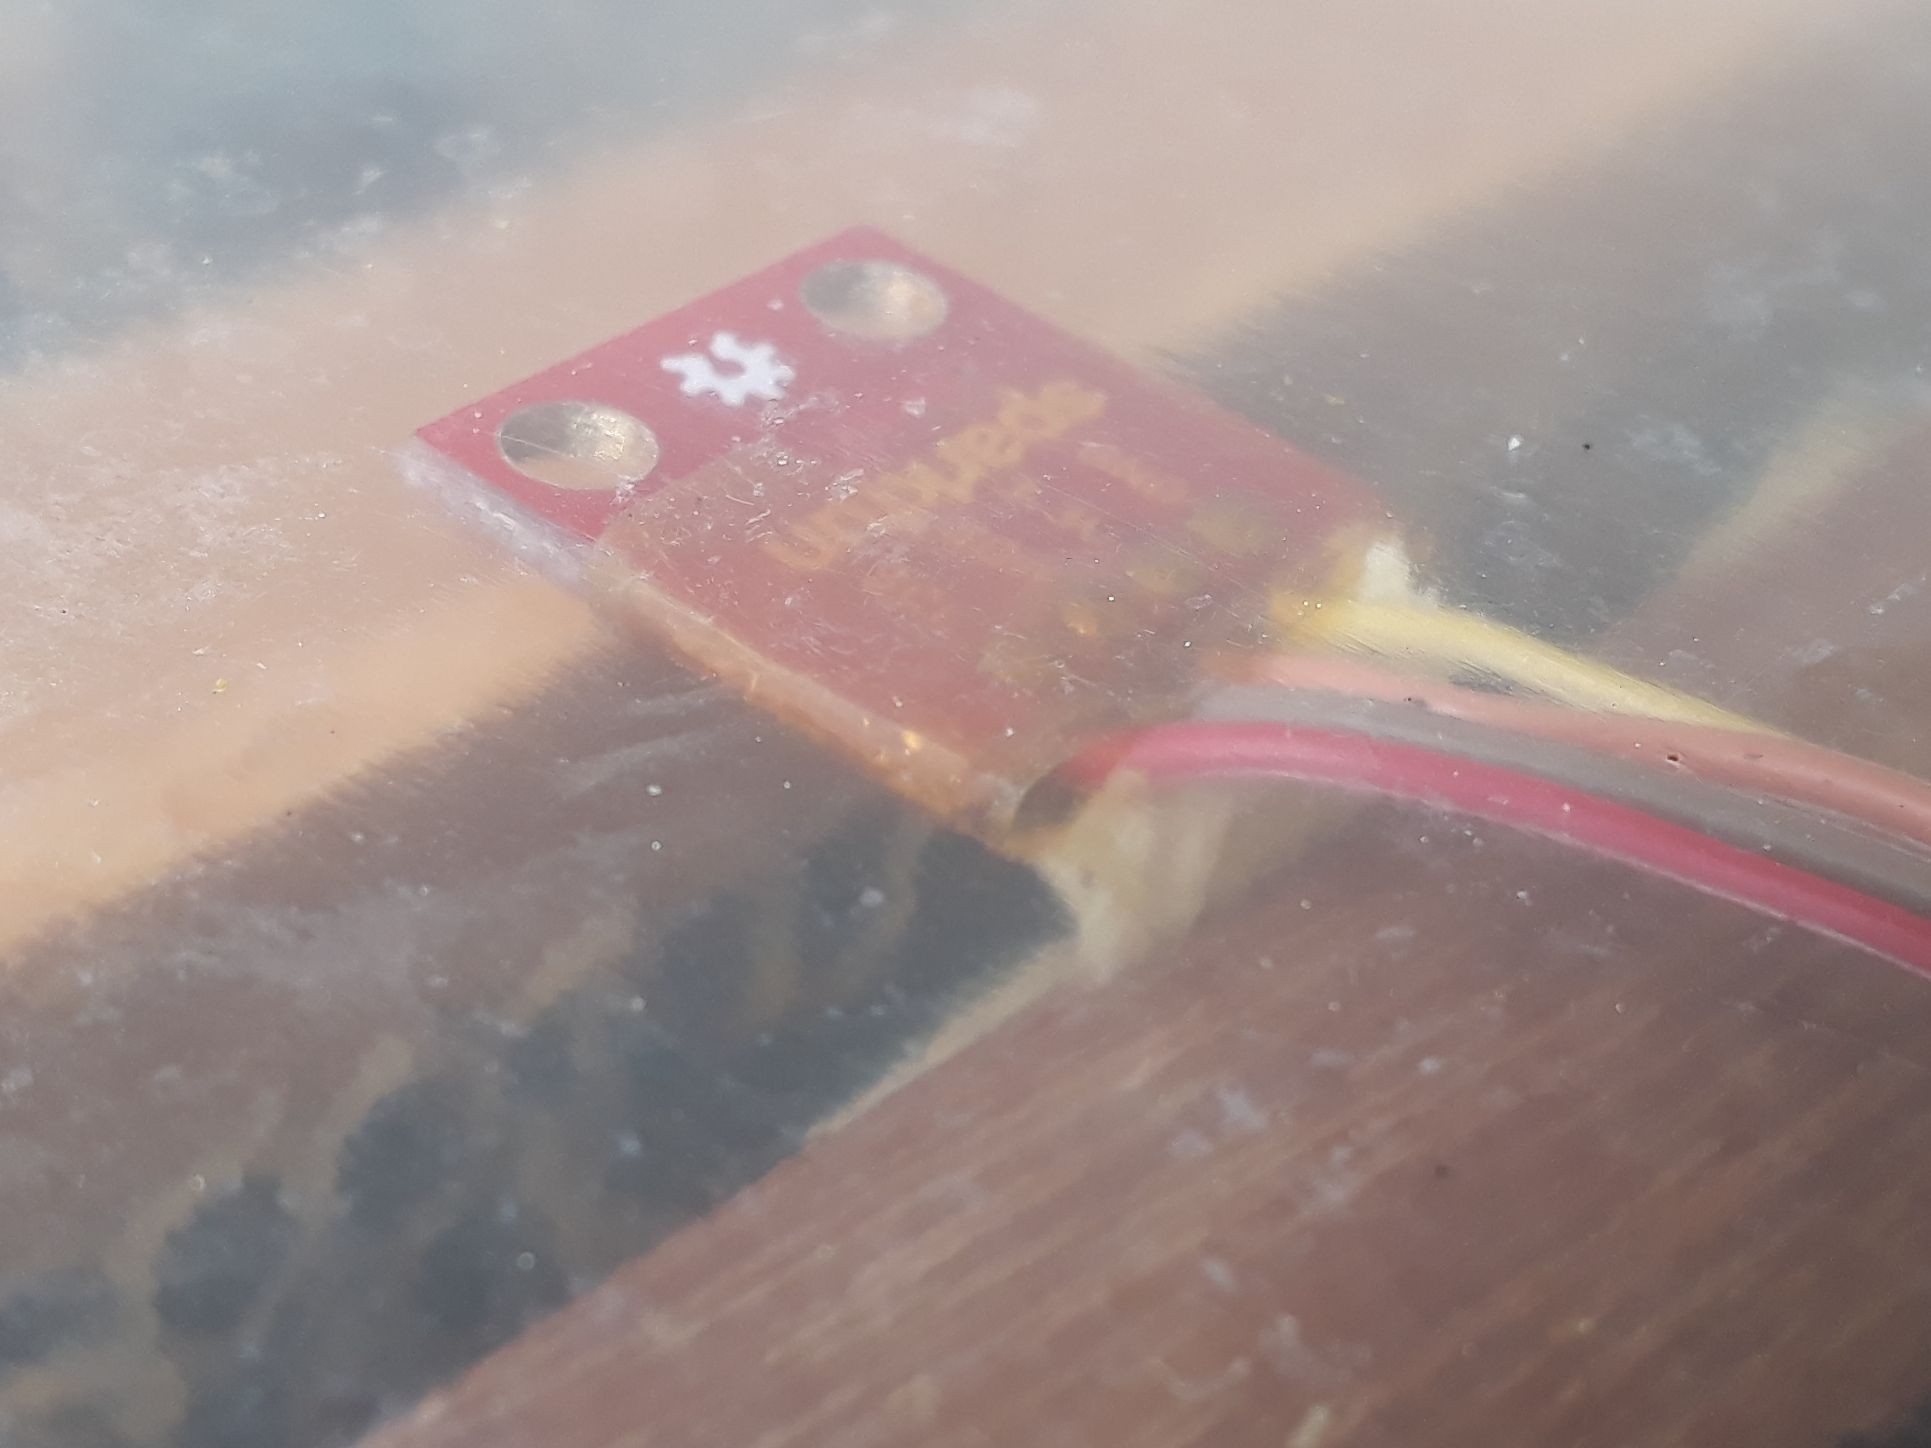
Just a quick look into the hive. Bees are doing what the do best: Glueing every void shut with wax :) They even fixed the dangling Si7021:
Everything else is in best order. Logger hasn't gone into fail-mode and is logging away... I'll replace the micro SD card next saturday to check if all the data is logged properly.
---------- more ----------
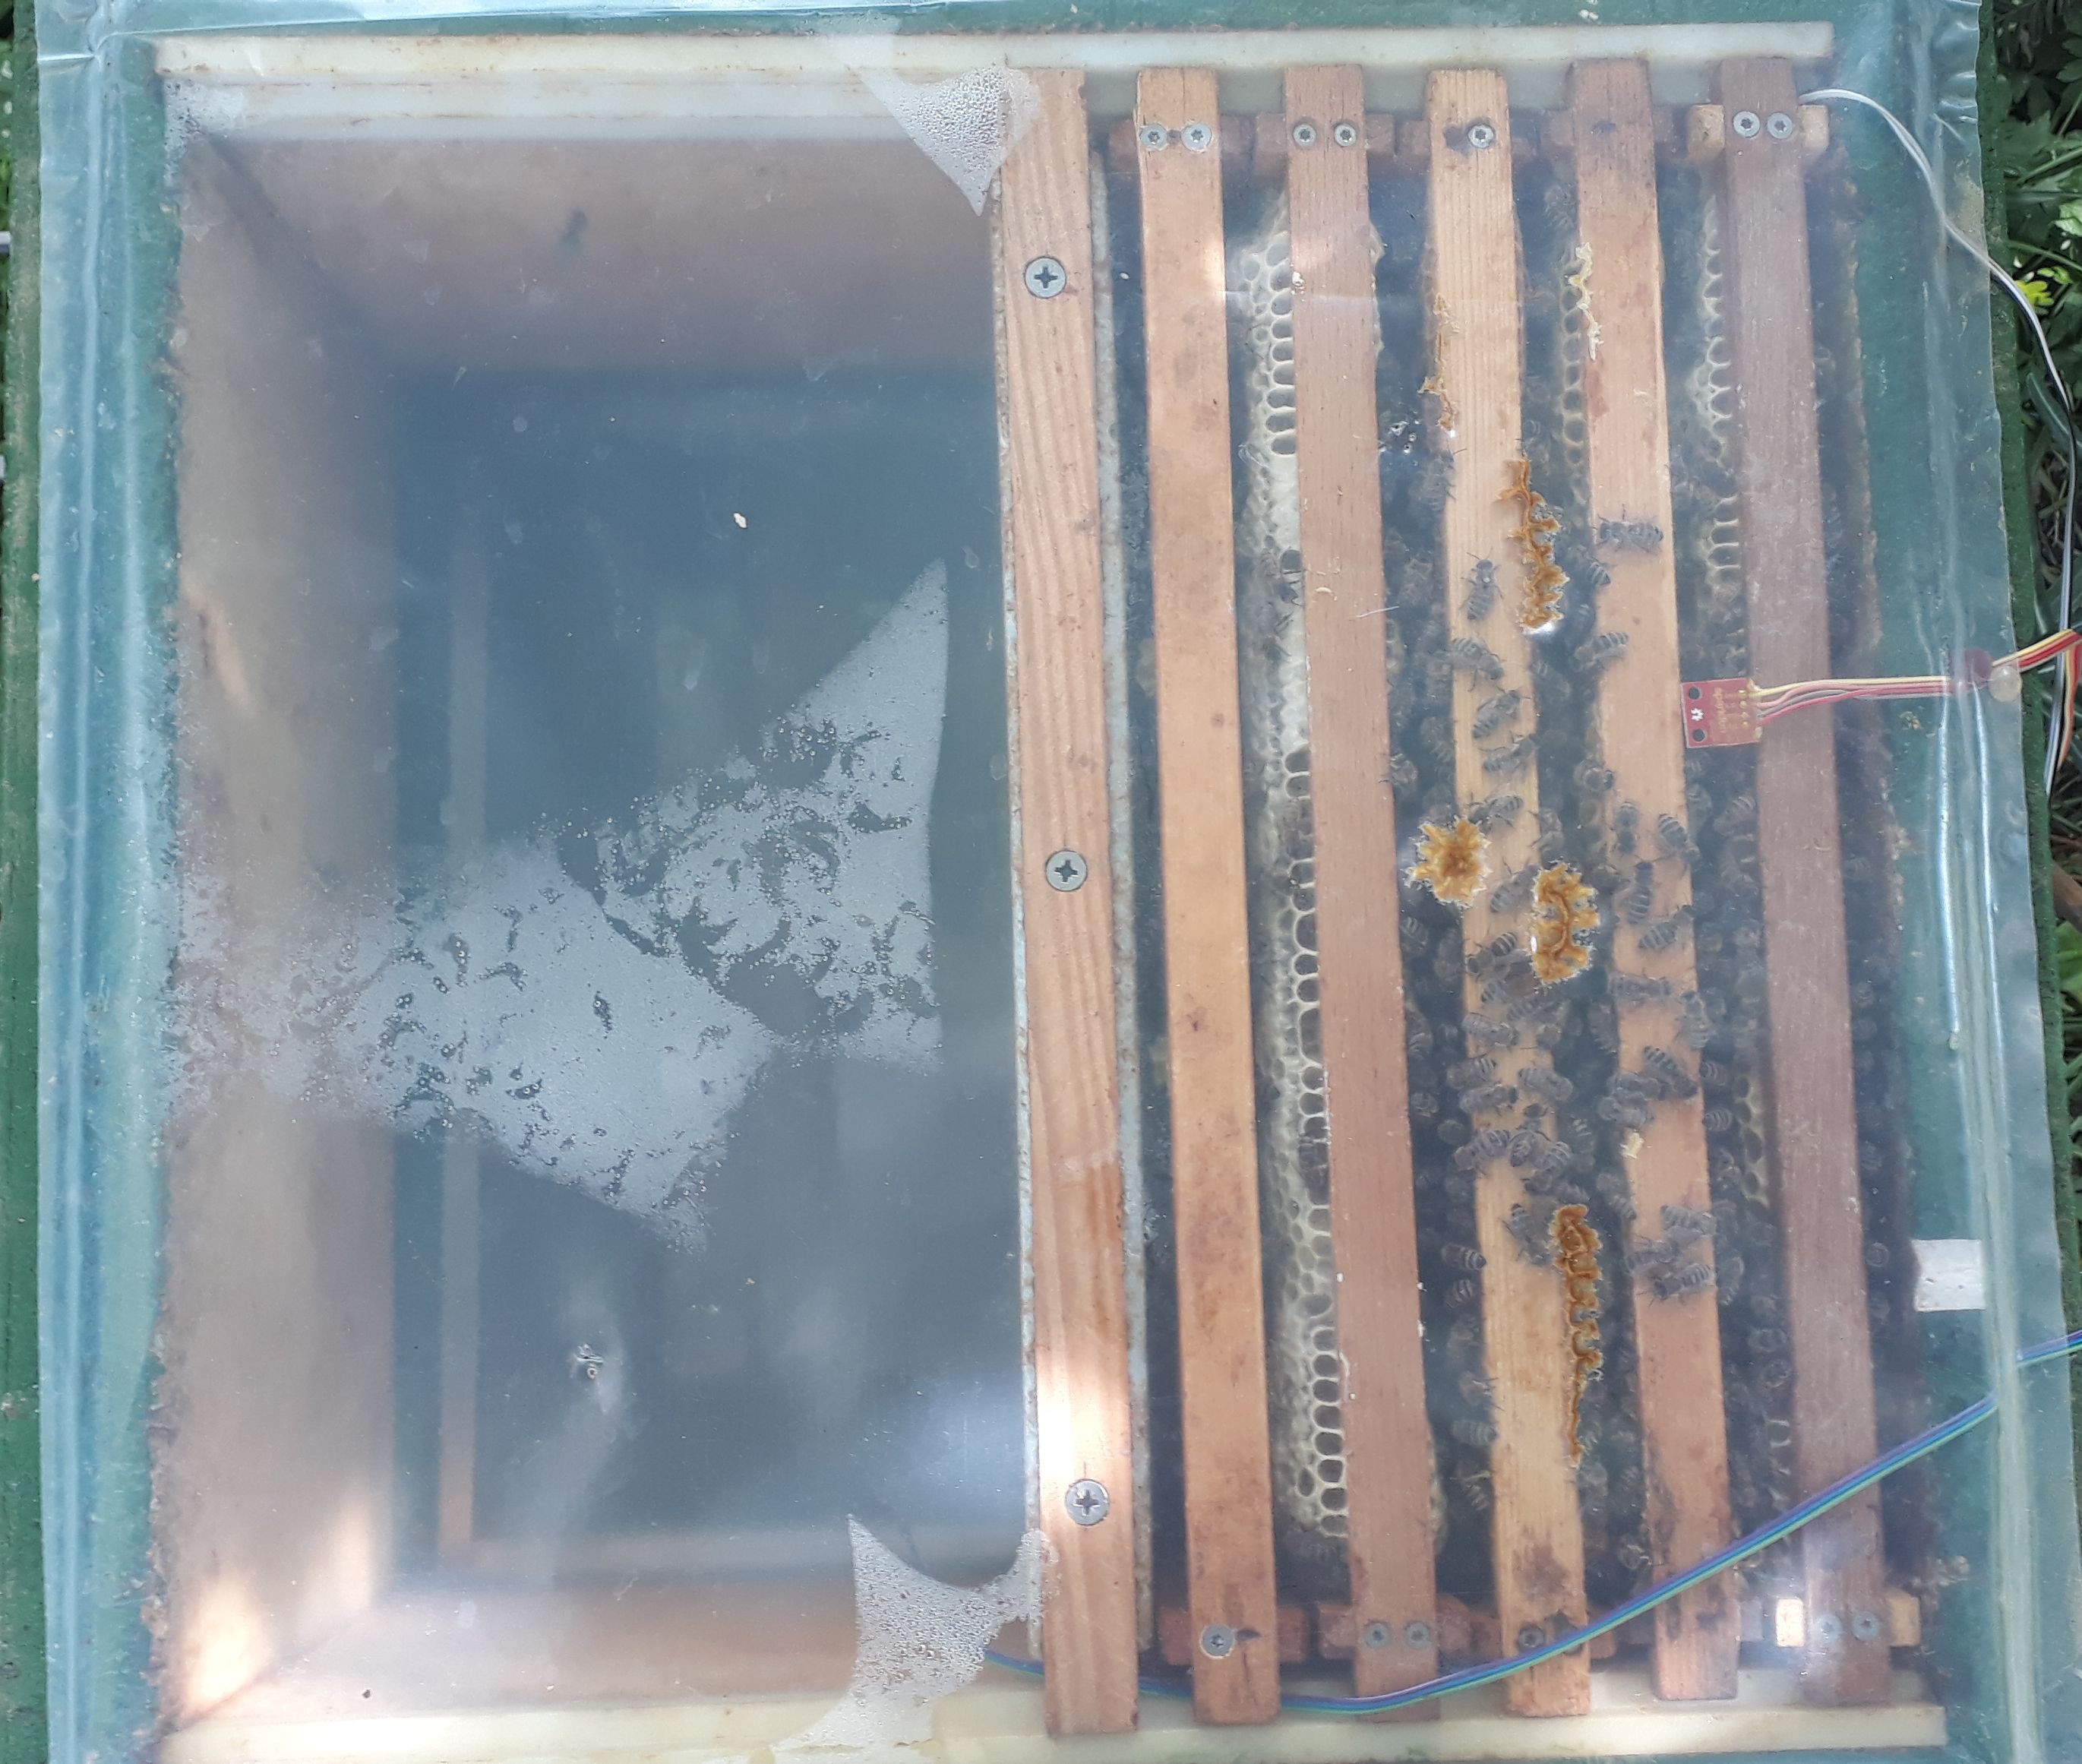
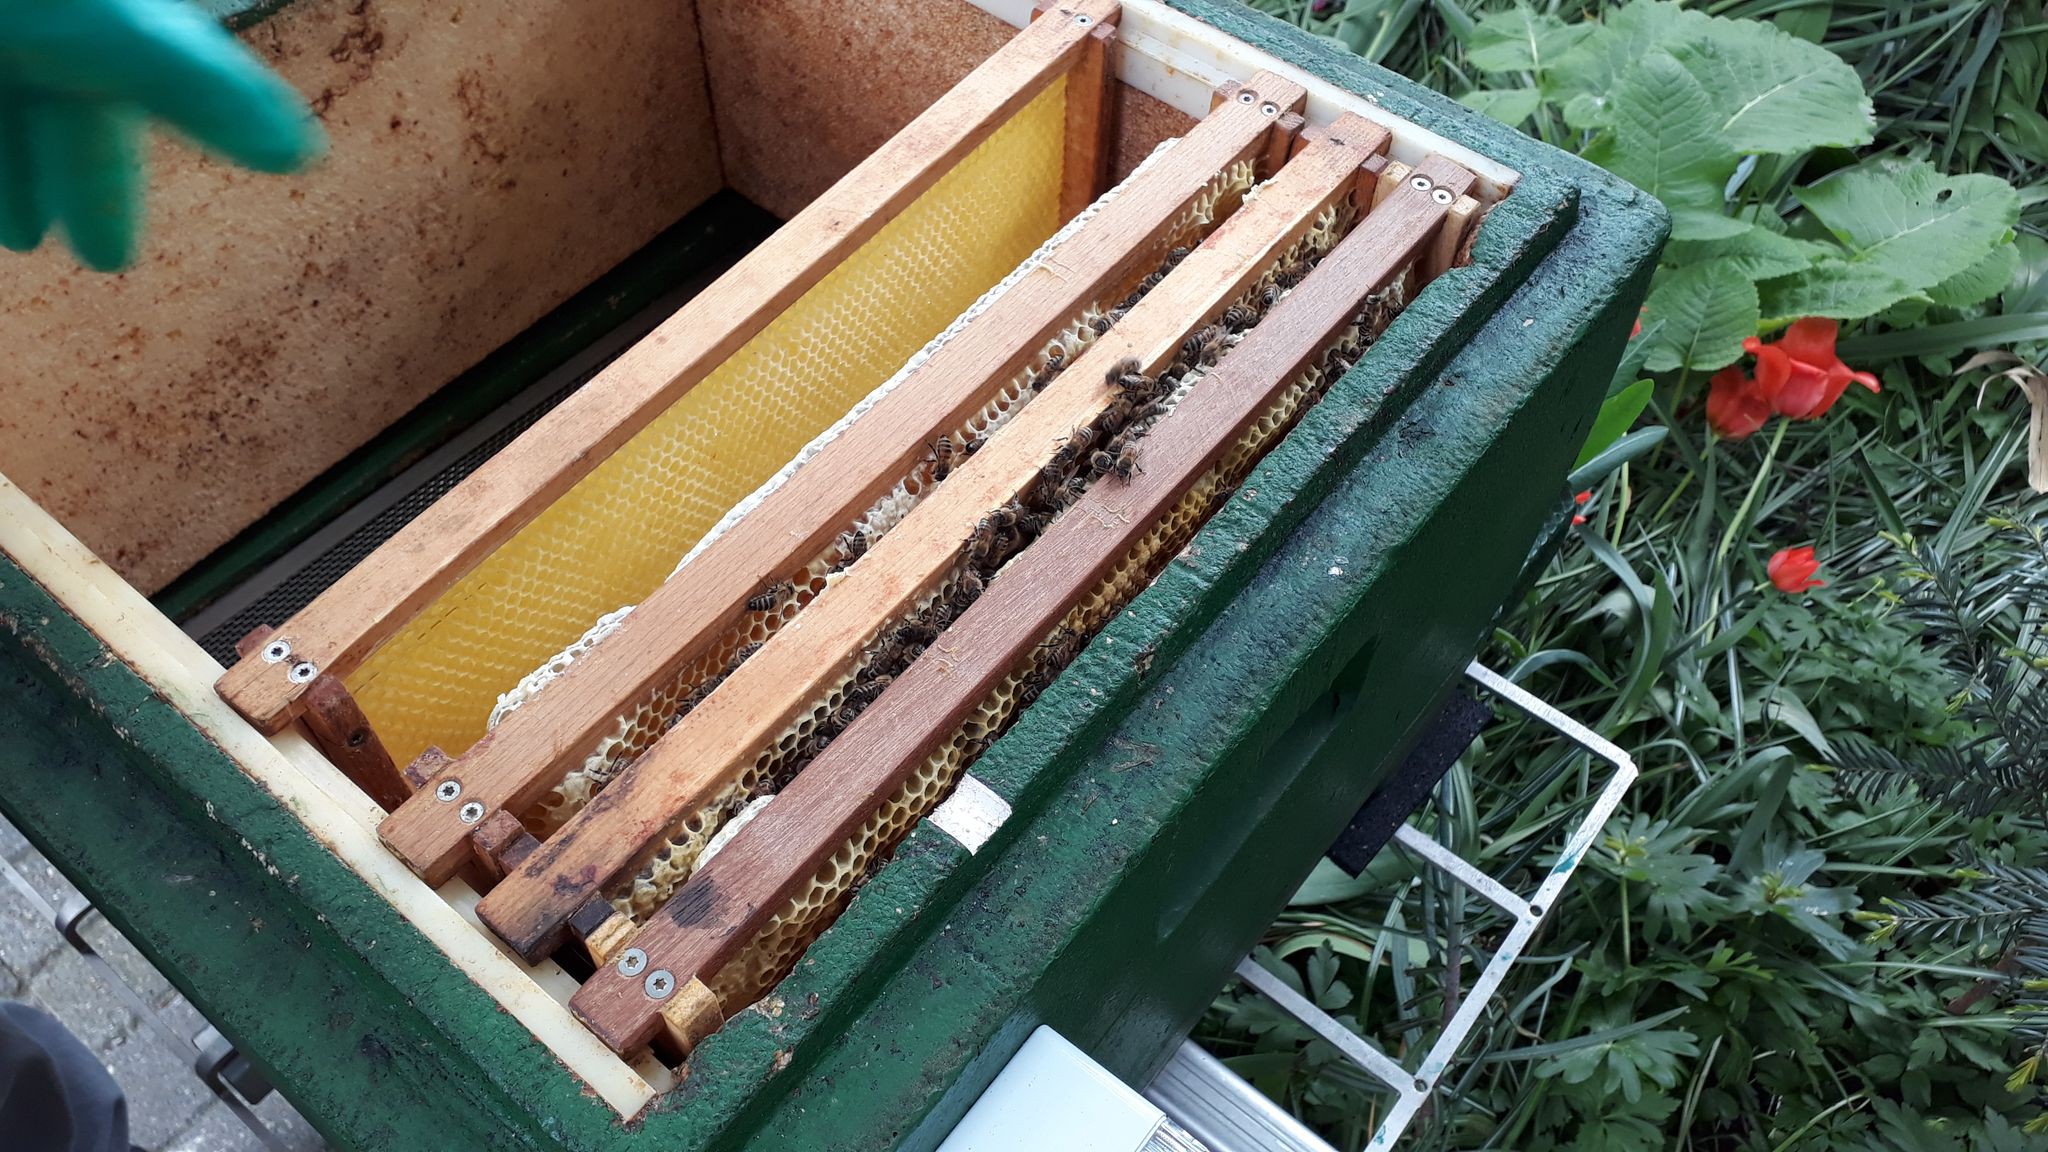
We took two (female) brood combs out of one very active and healthy hive and put them into a new box. We add one honey comb and a water comb as well:
Above: from left to right: water comb, honey comb, two brrod combs.
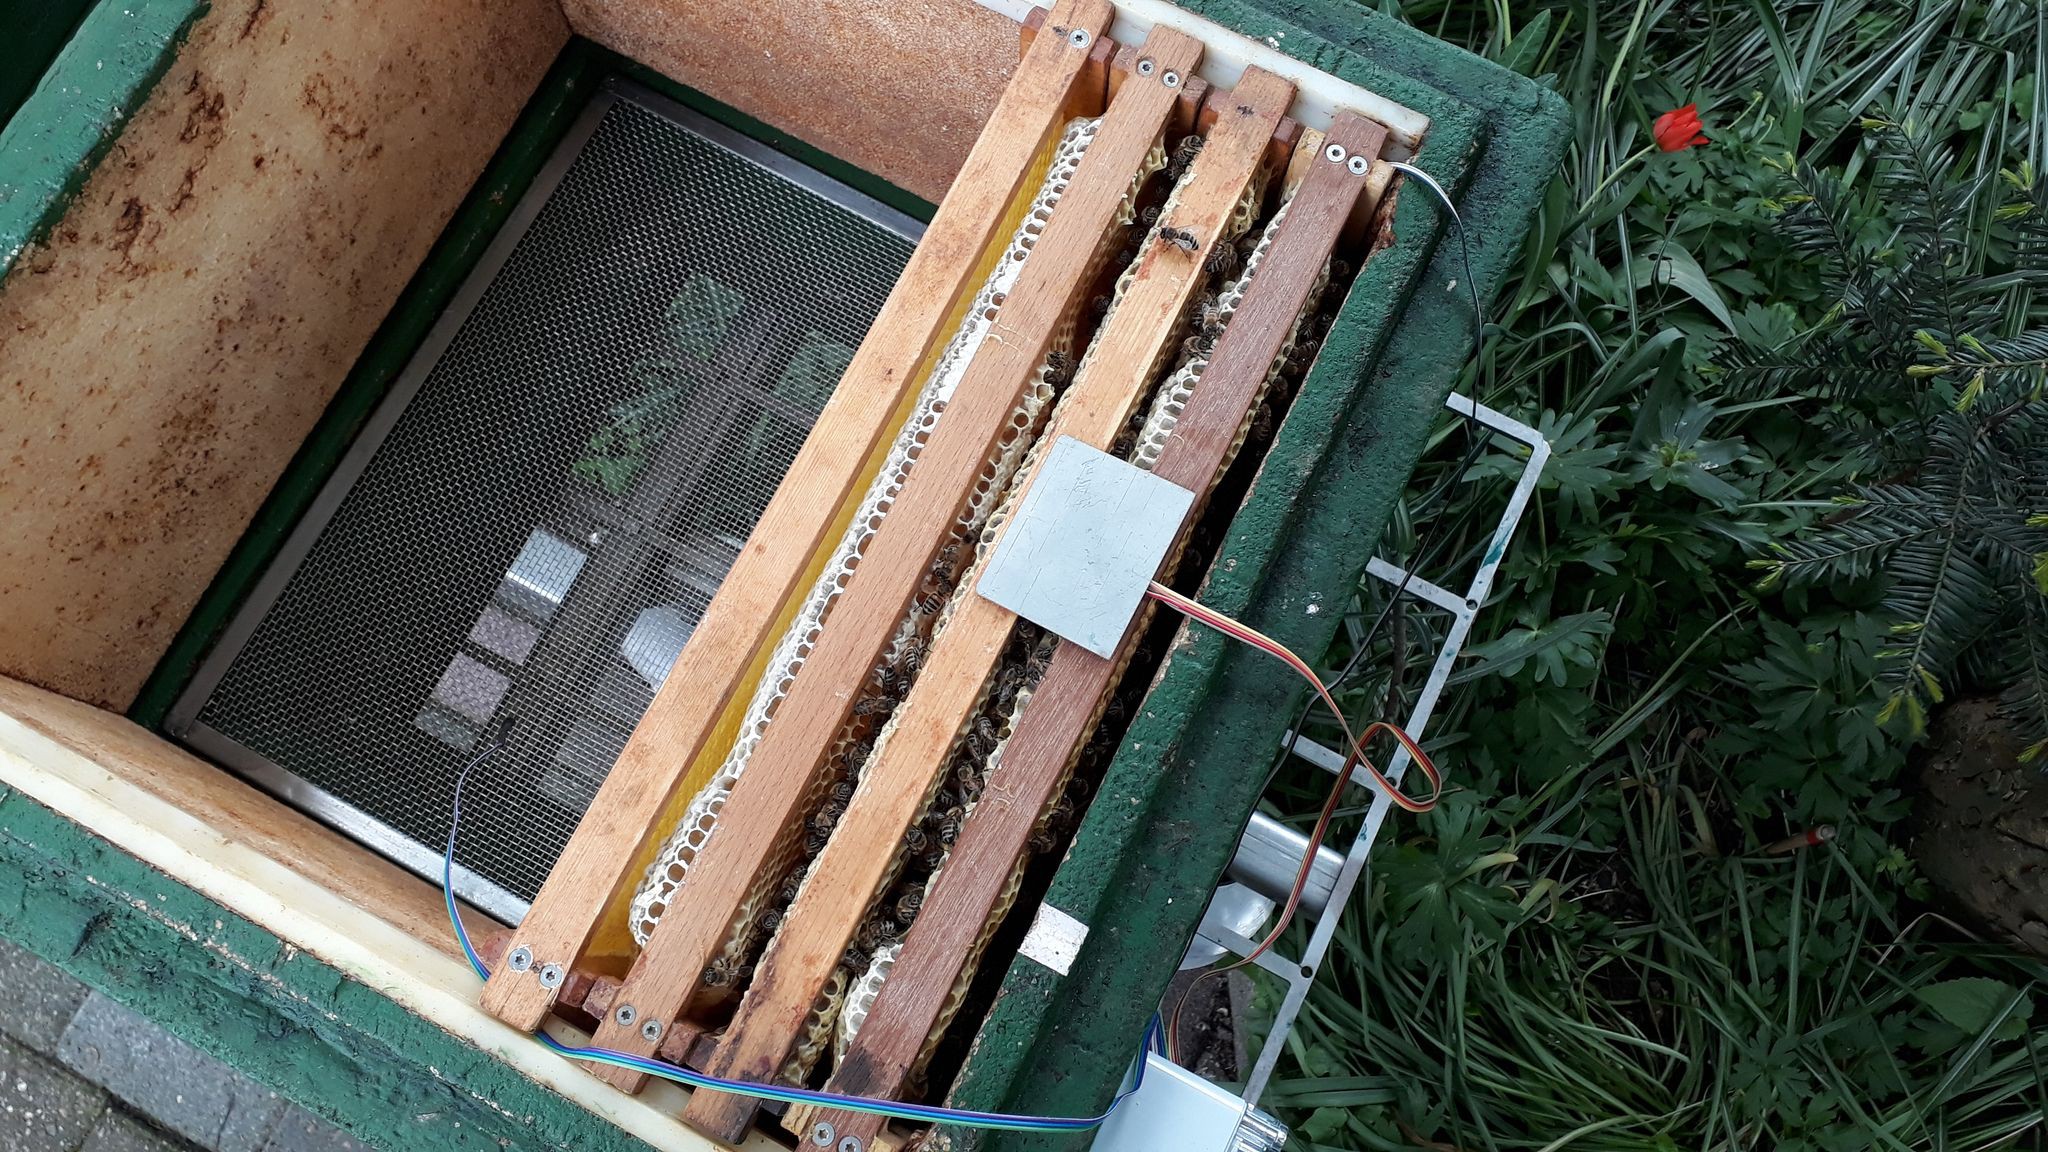
Next, the sensors are put in place:
Under the stainless plate is the Si7021 to keep the right side down. One temp. sensor is left in the void to the left, another one right beside their entrance (wire in the upper right corner).
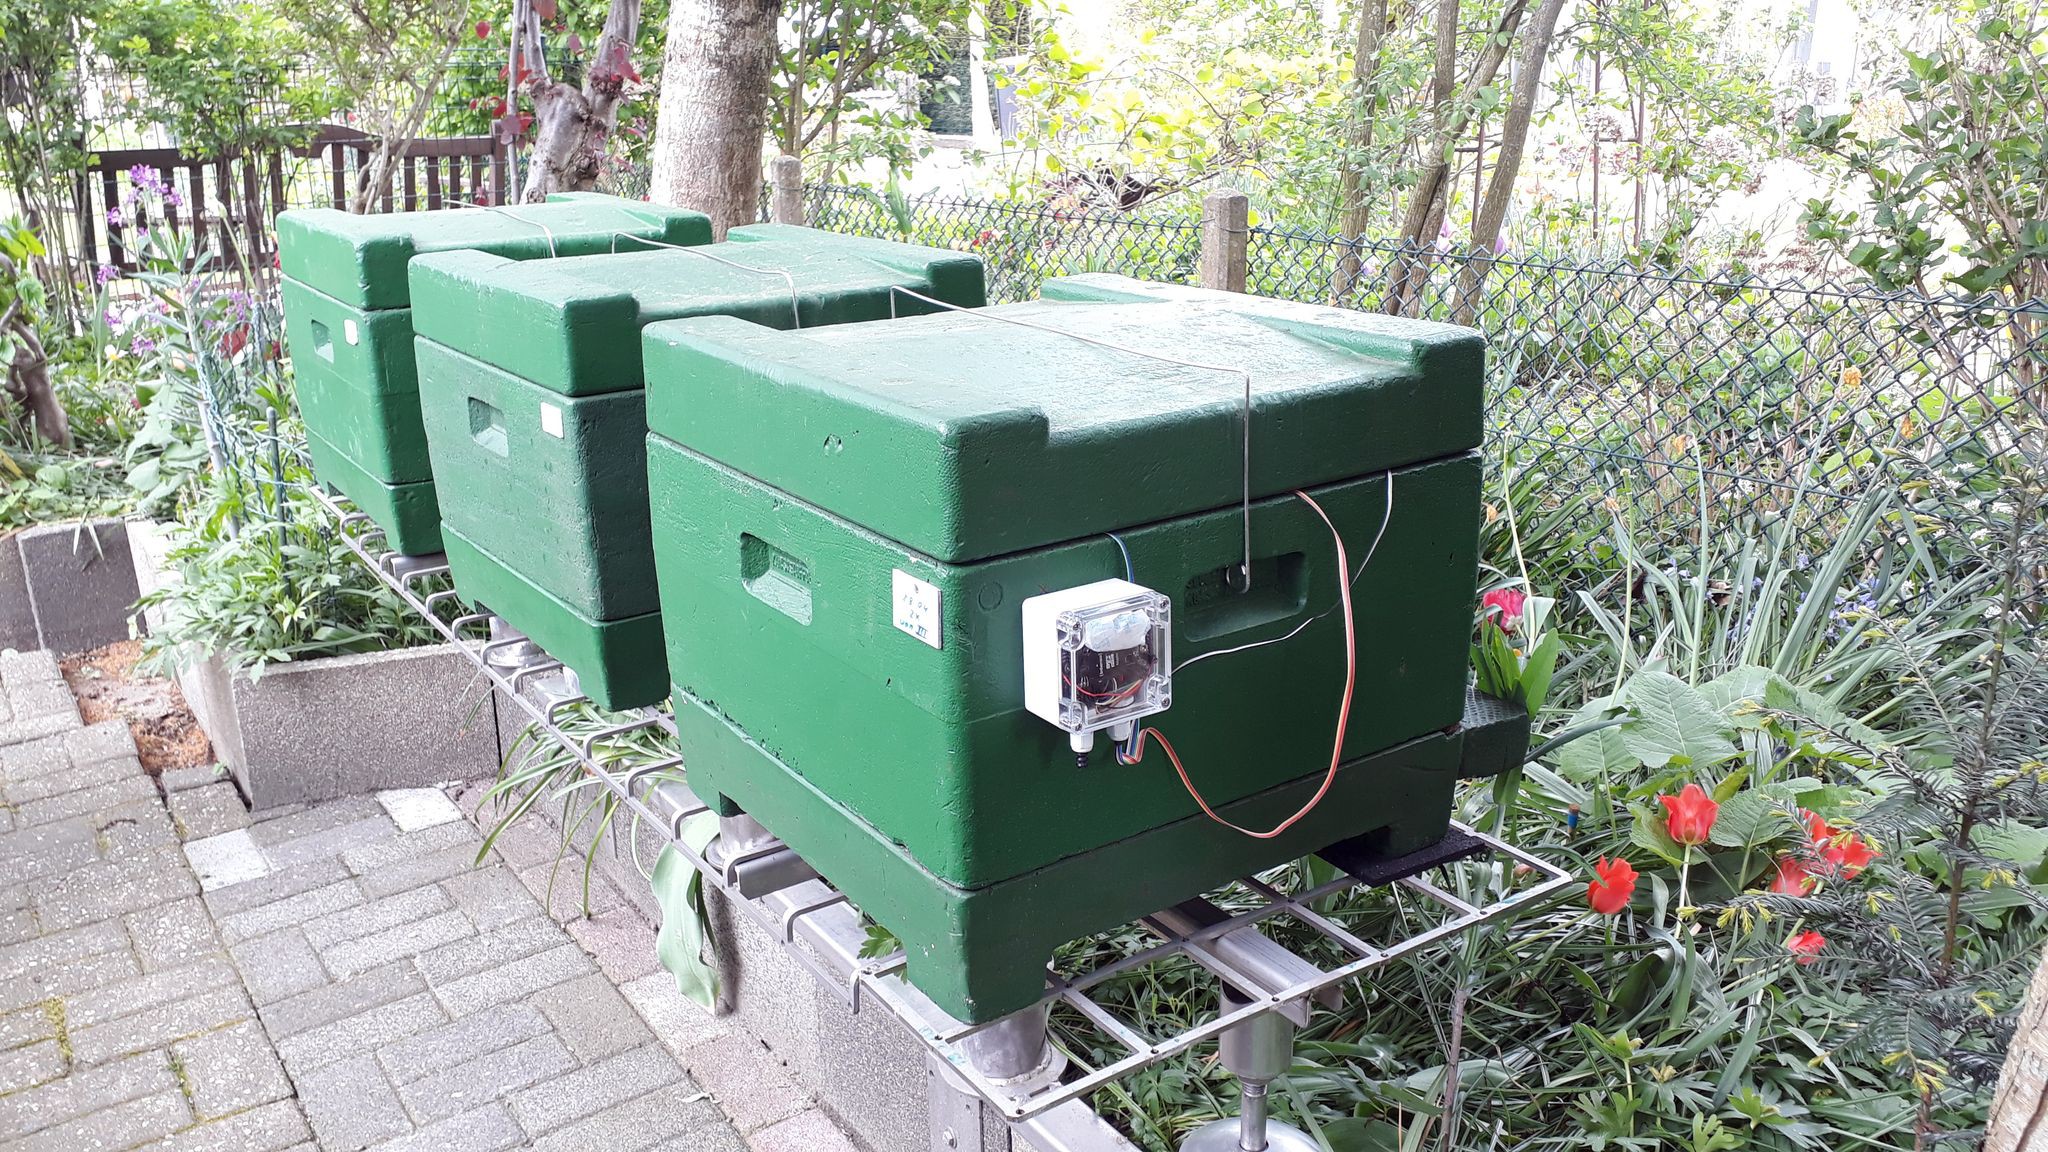
We add a piece of plastic foil on top and close the lid. The logger is powered on and the case is tightly closed with 4 screws:
The case is IP67 proof but I added a bag of silica gel to be sure no water harm the sensitive devices.
DONE!
We won't interrupt them anymore for the next few weeks now but I'll keep you up to date anyway.
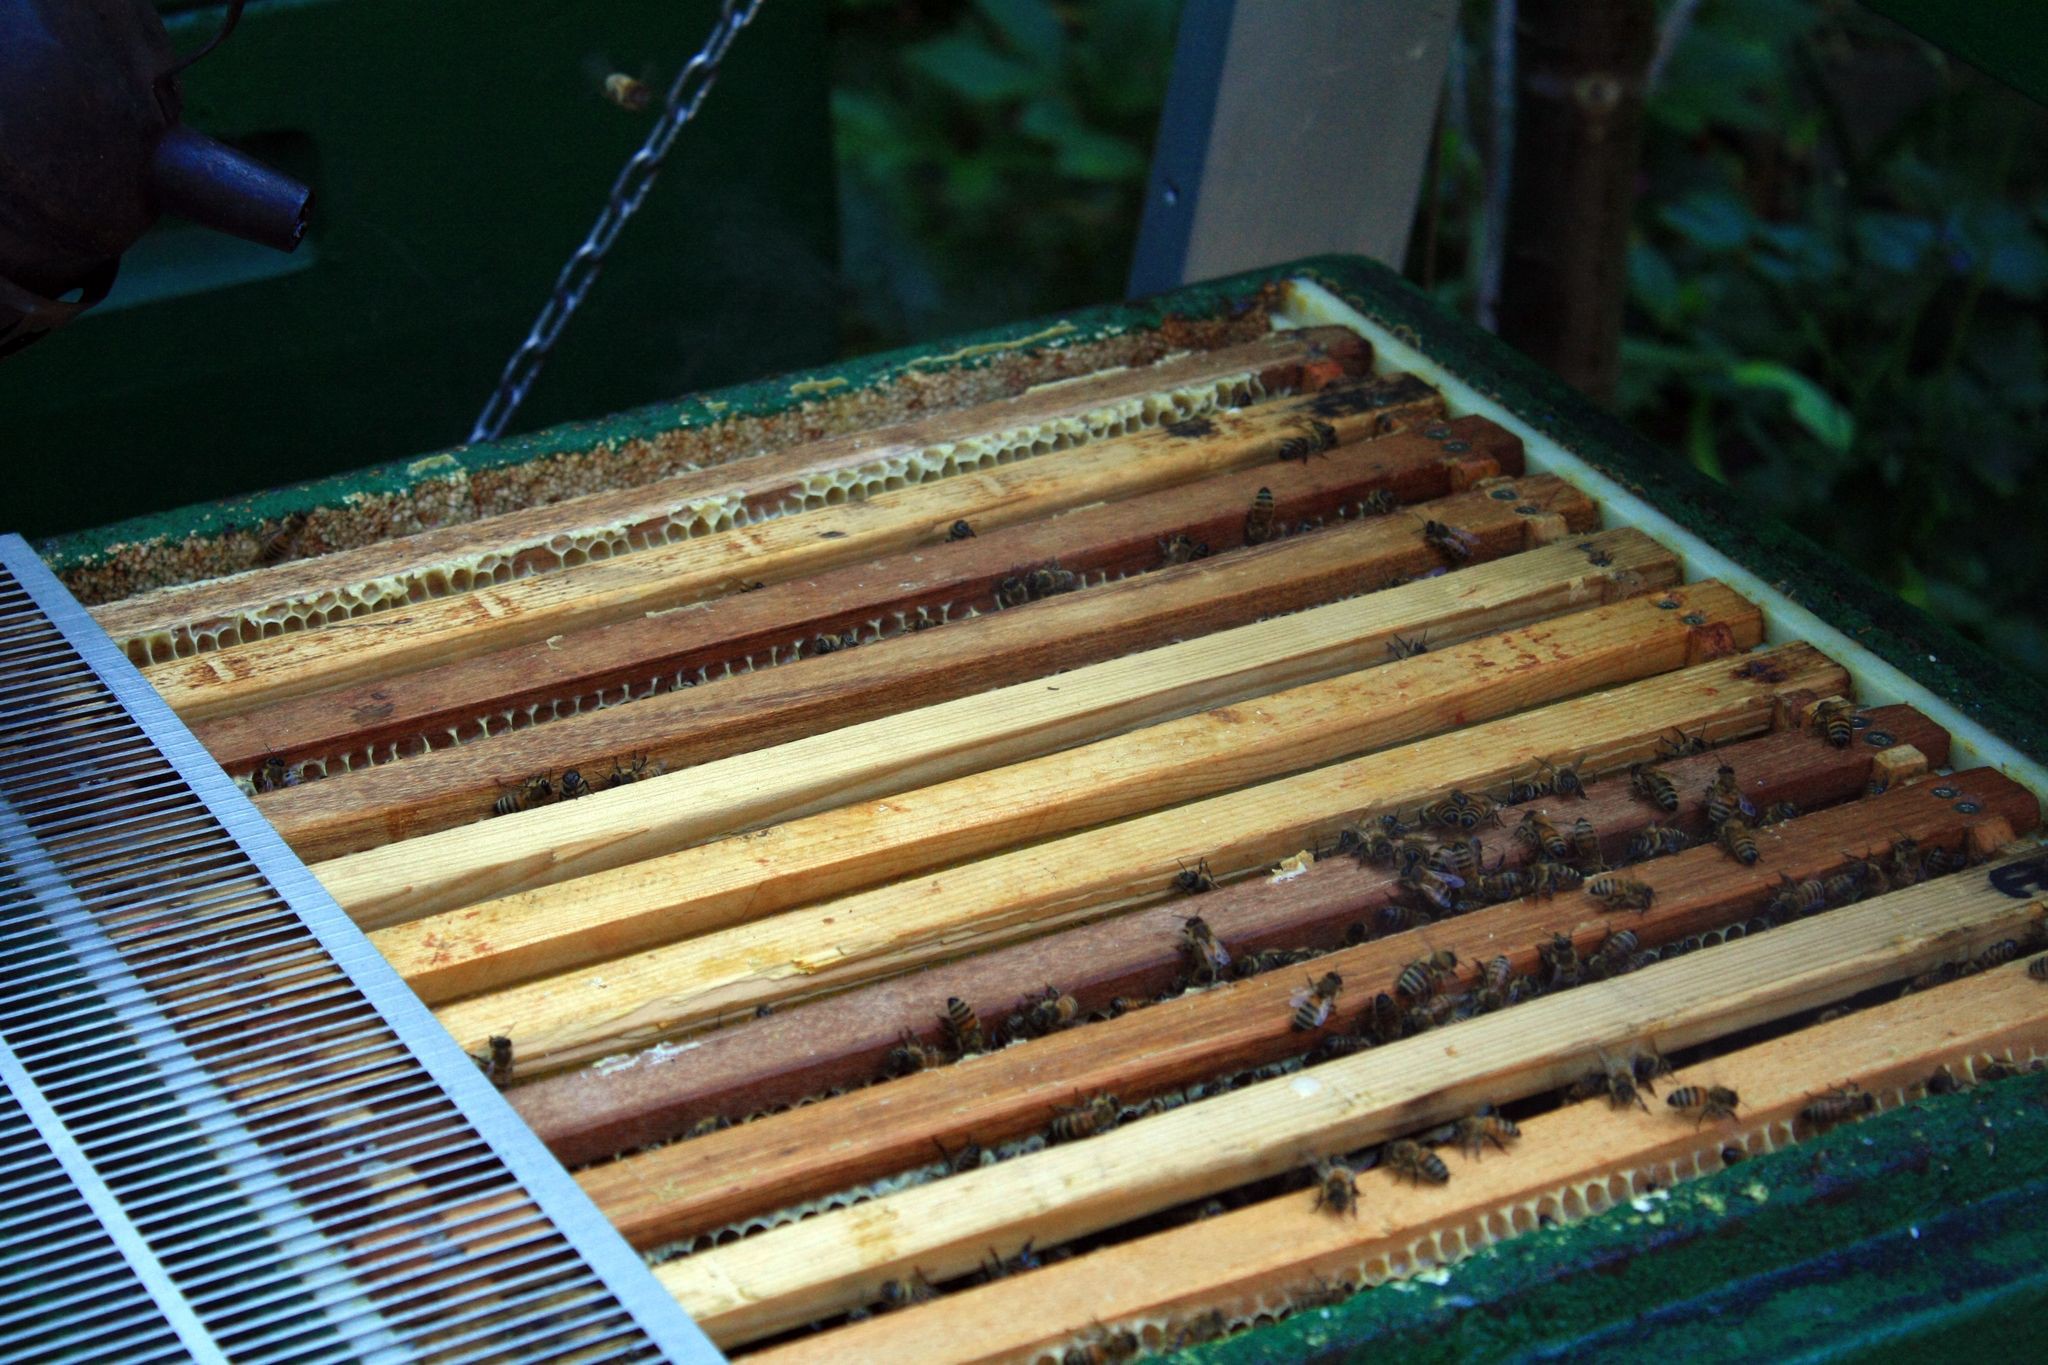
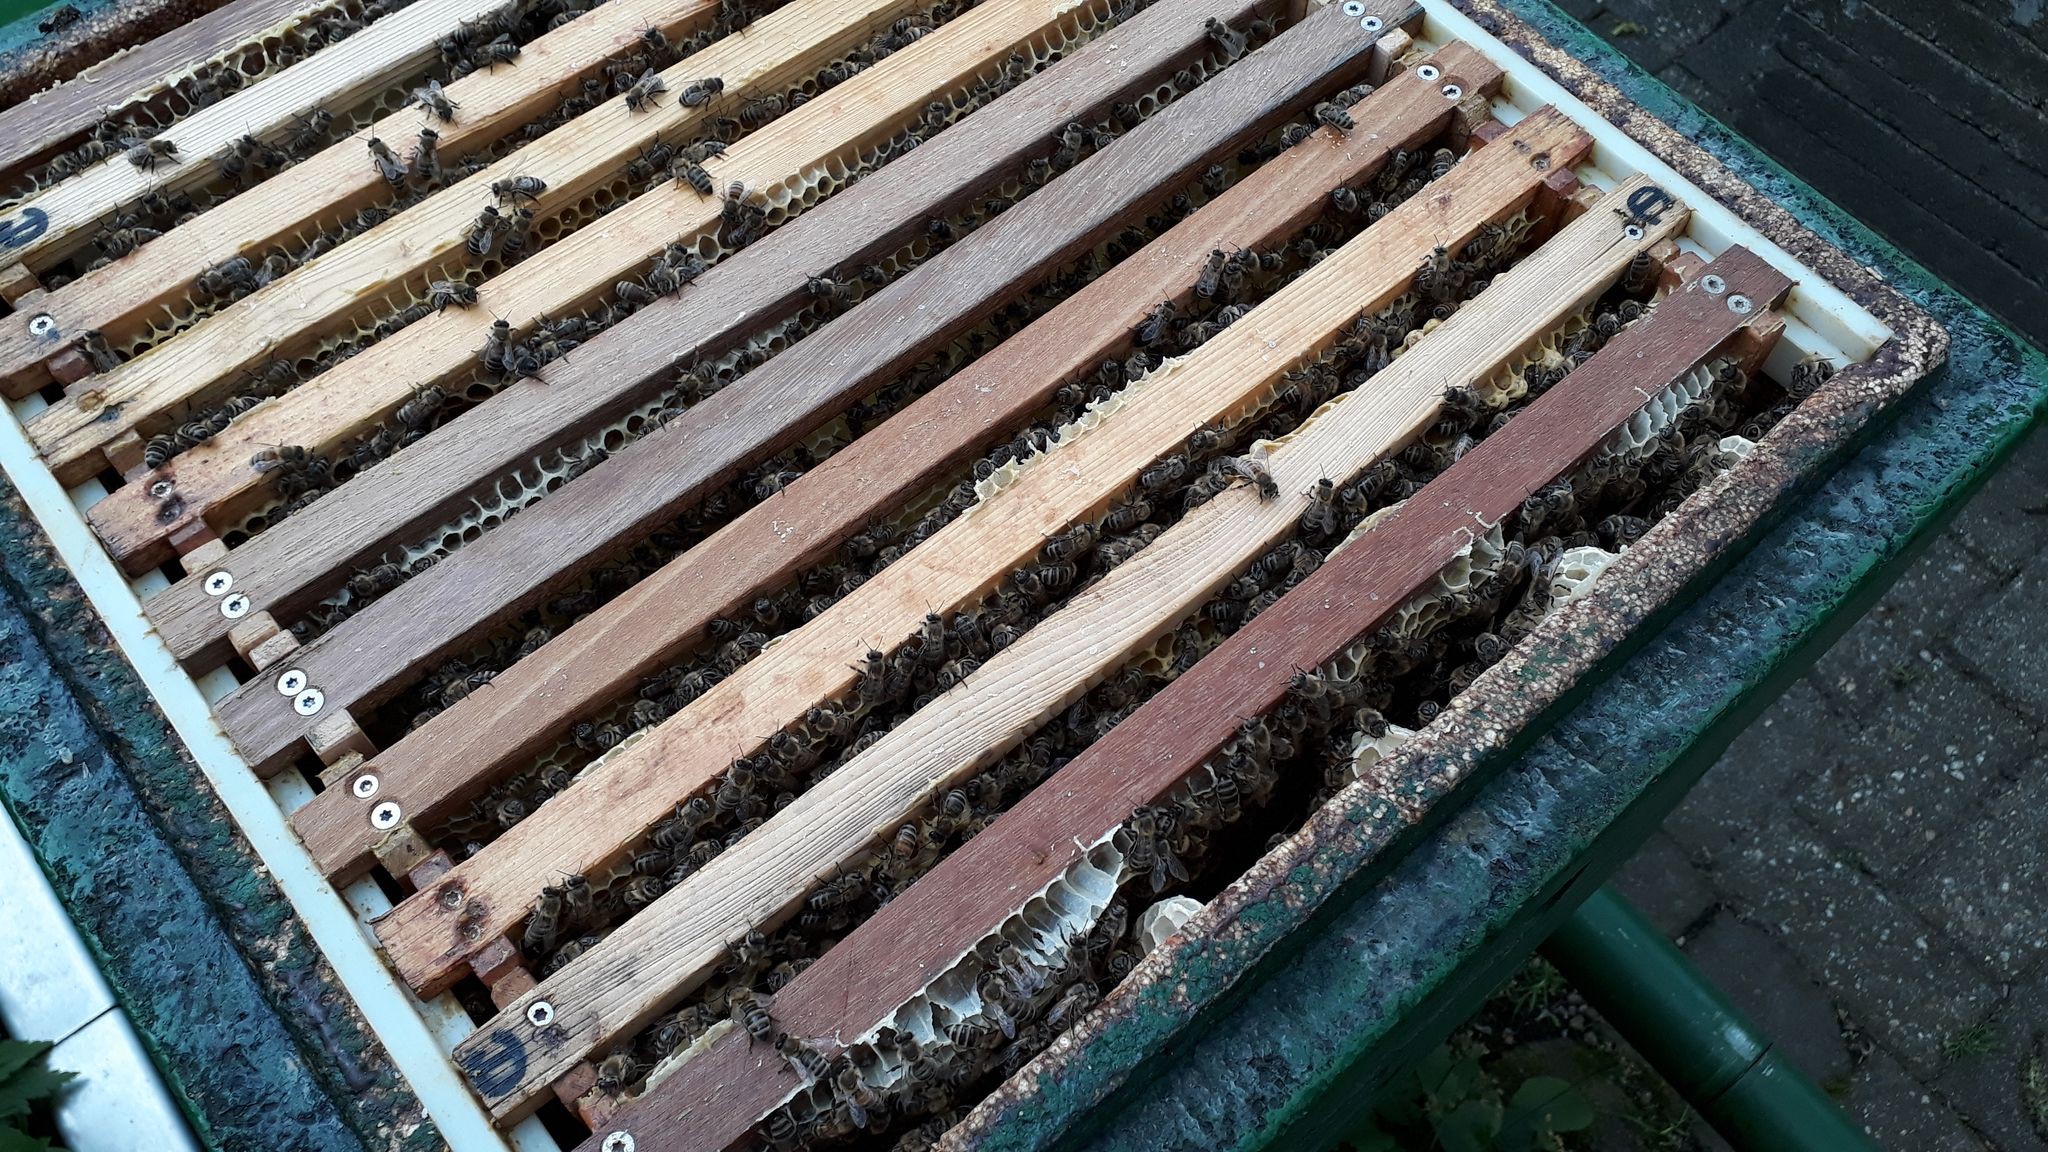
Today was a very educational day. Together with my father I checked all 7 bee hives for health.
Above: freshly opened bee hive.
You do check them by opening every hive and look for spaces left for building combs etc. One thing you have to look out for are queen cells:
If they build these, the space is getting less and they tend to swarm (get out with their new queen and half of the bees) in a few weeks. As they already have a queen we cut these cells out. Sometimes there are like 10 of these per bees nest. Then you know you have to give them extra foundations and space!
Another thing we cut out are drone or male bee cells:
The bees are brushed off back into the hive and the drone cells are completely cut out and destroyed (frozen, molten, filtered to keep the wax). This seems cruel but there is evidence that male bee cells are one of the top places to thrive for the varroa mite which is one of the biggest bee killers today.
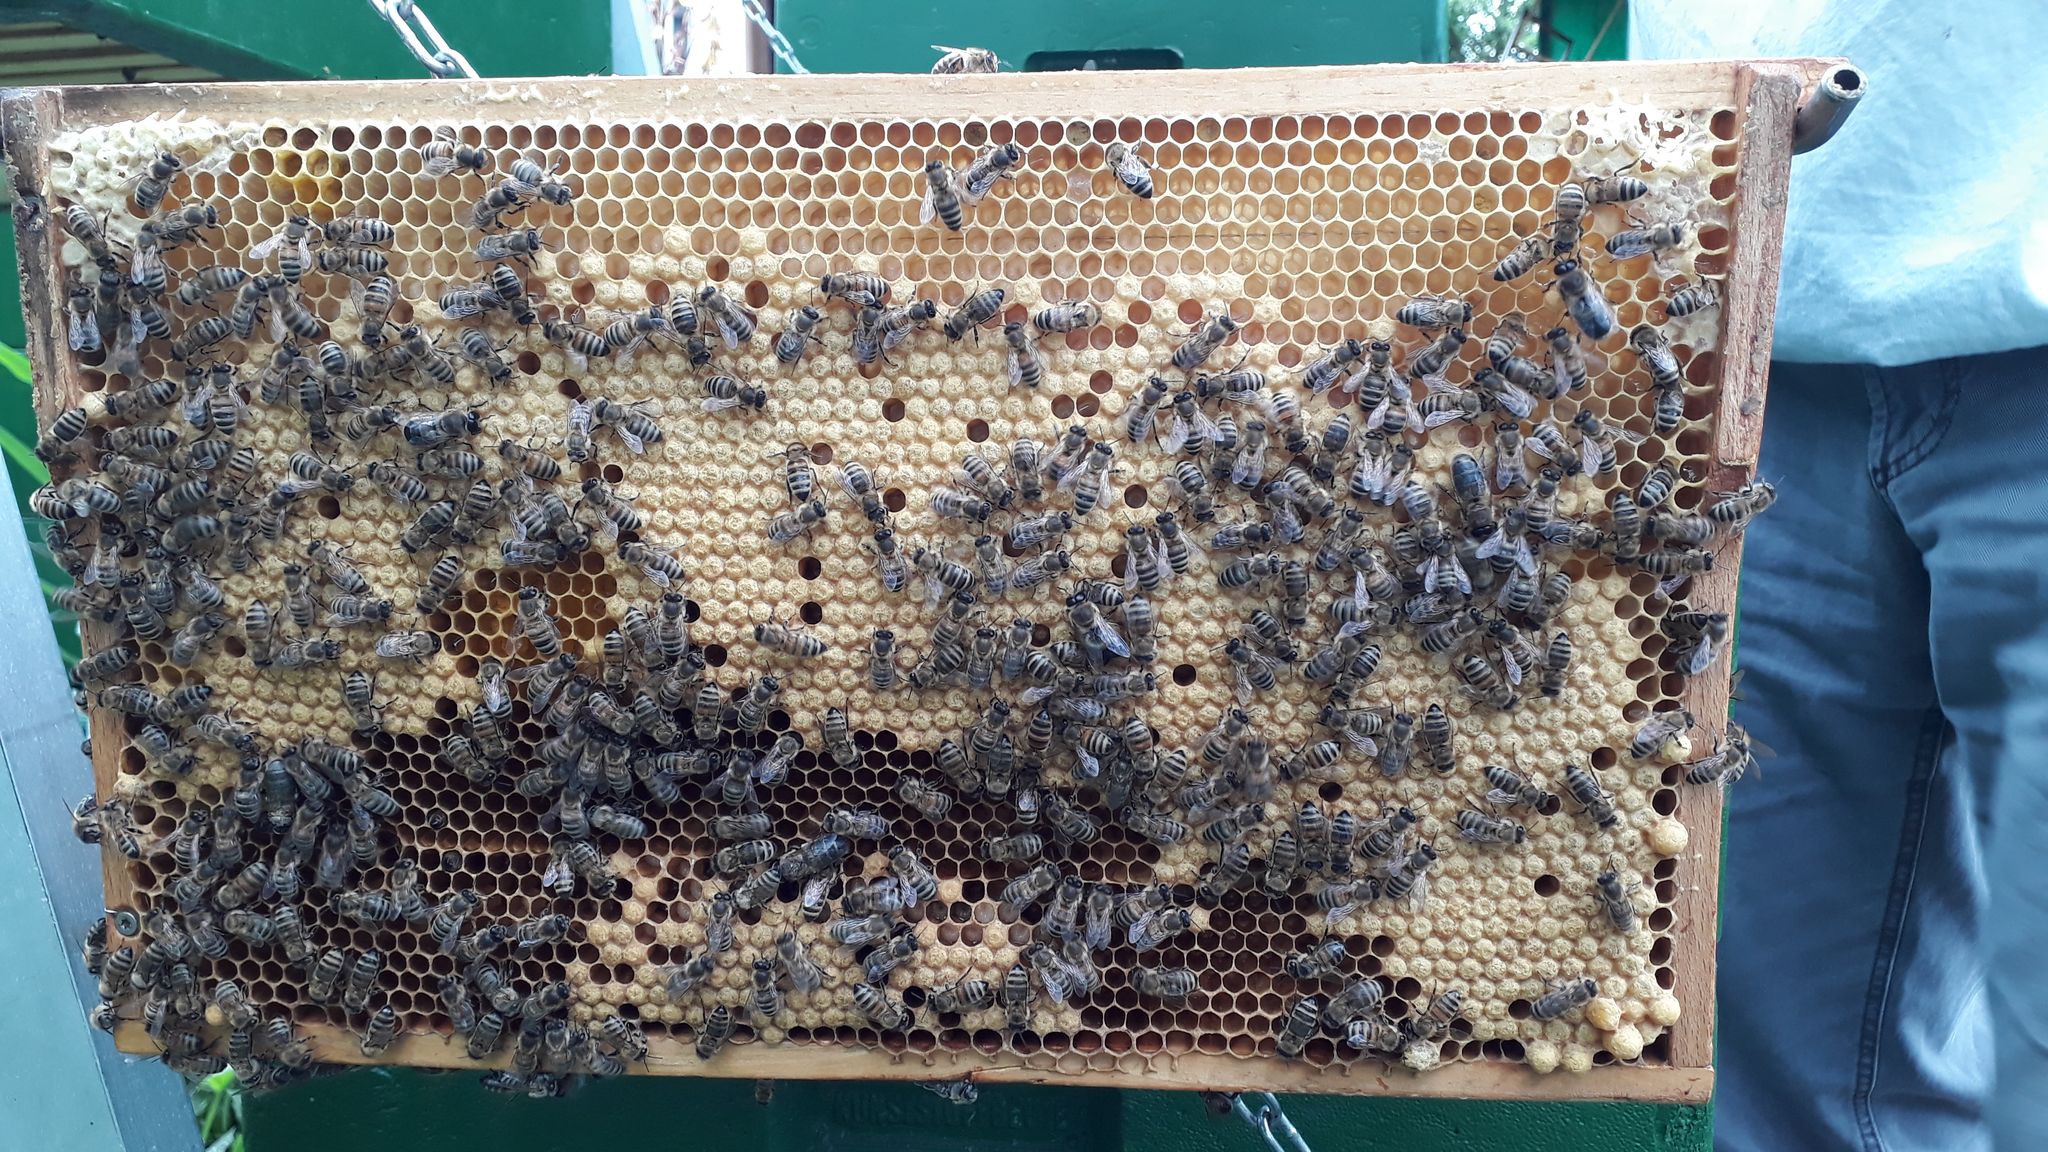
The bees get two empty foundations to build ne cells on to. These are heathy bees on a perfect brood comb:
See the difference to the male bee cells? Much flatter/smaller as male bees are much bigger. Out of these cells come female worker bees.
Above: female brood cells again.
I hope this gives you an impression of how a hive looks on the inside!
 Jan
Jan
 I just hate things like this. Anyway, SOT-89 MCP's are already ordered.