Ouch - the last update here was almost a year ago to the day.
As it turns out, injection molding is not for noobs. Many thanks for all the help I got from here, including the massively helpful final check before the mold was made. It only took me 350 revisions of the CAD model, and 30 more from others... And it took custom-made brass inserts to hold the bolts in the case. So Iearned a lot, but it can be summarised: if you consider injection molding for a hobby, don't.
But! The first 20 PiDP-11 kits went out to beta testers, and other than a slightly too-short hex spacer, no problems during the final shake-out! So here it is, the brand-new PiDP-11/70:
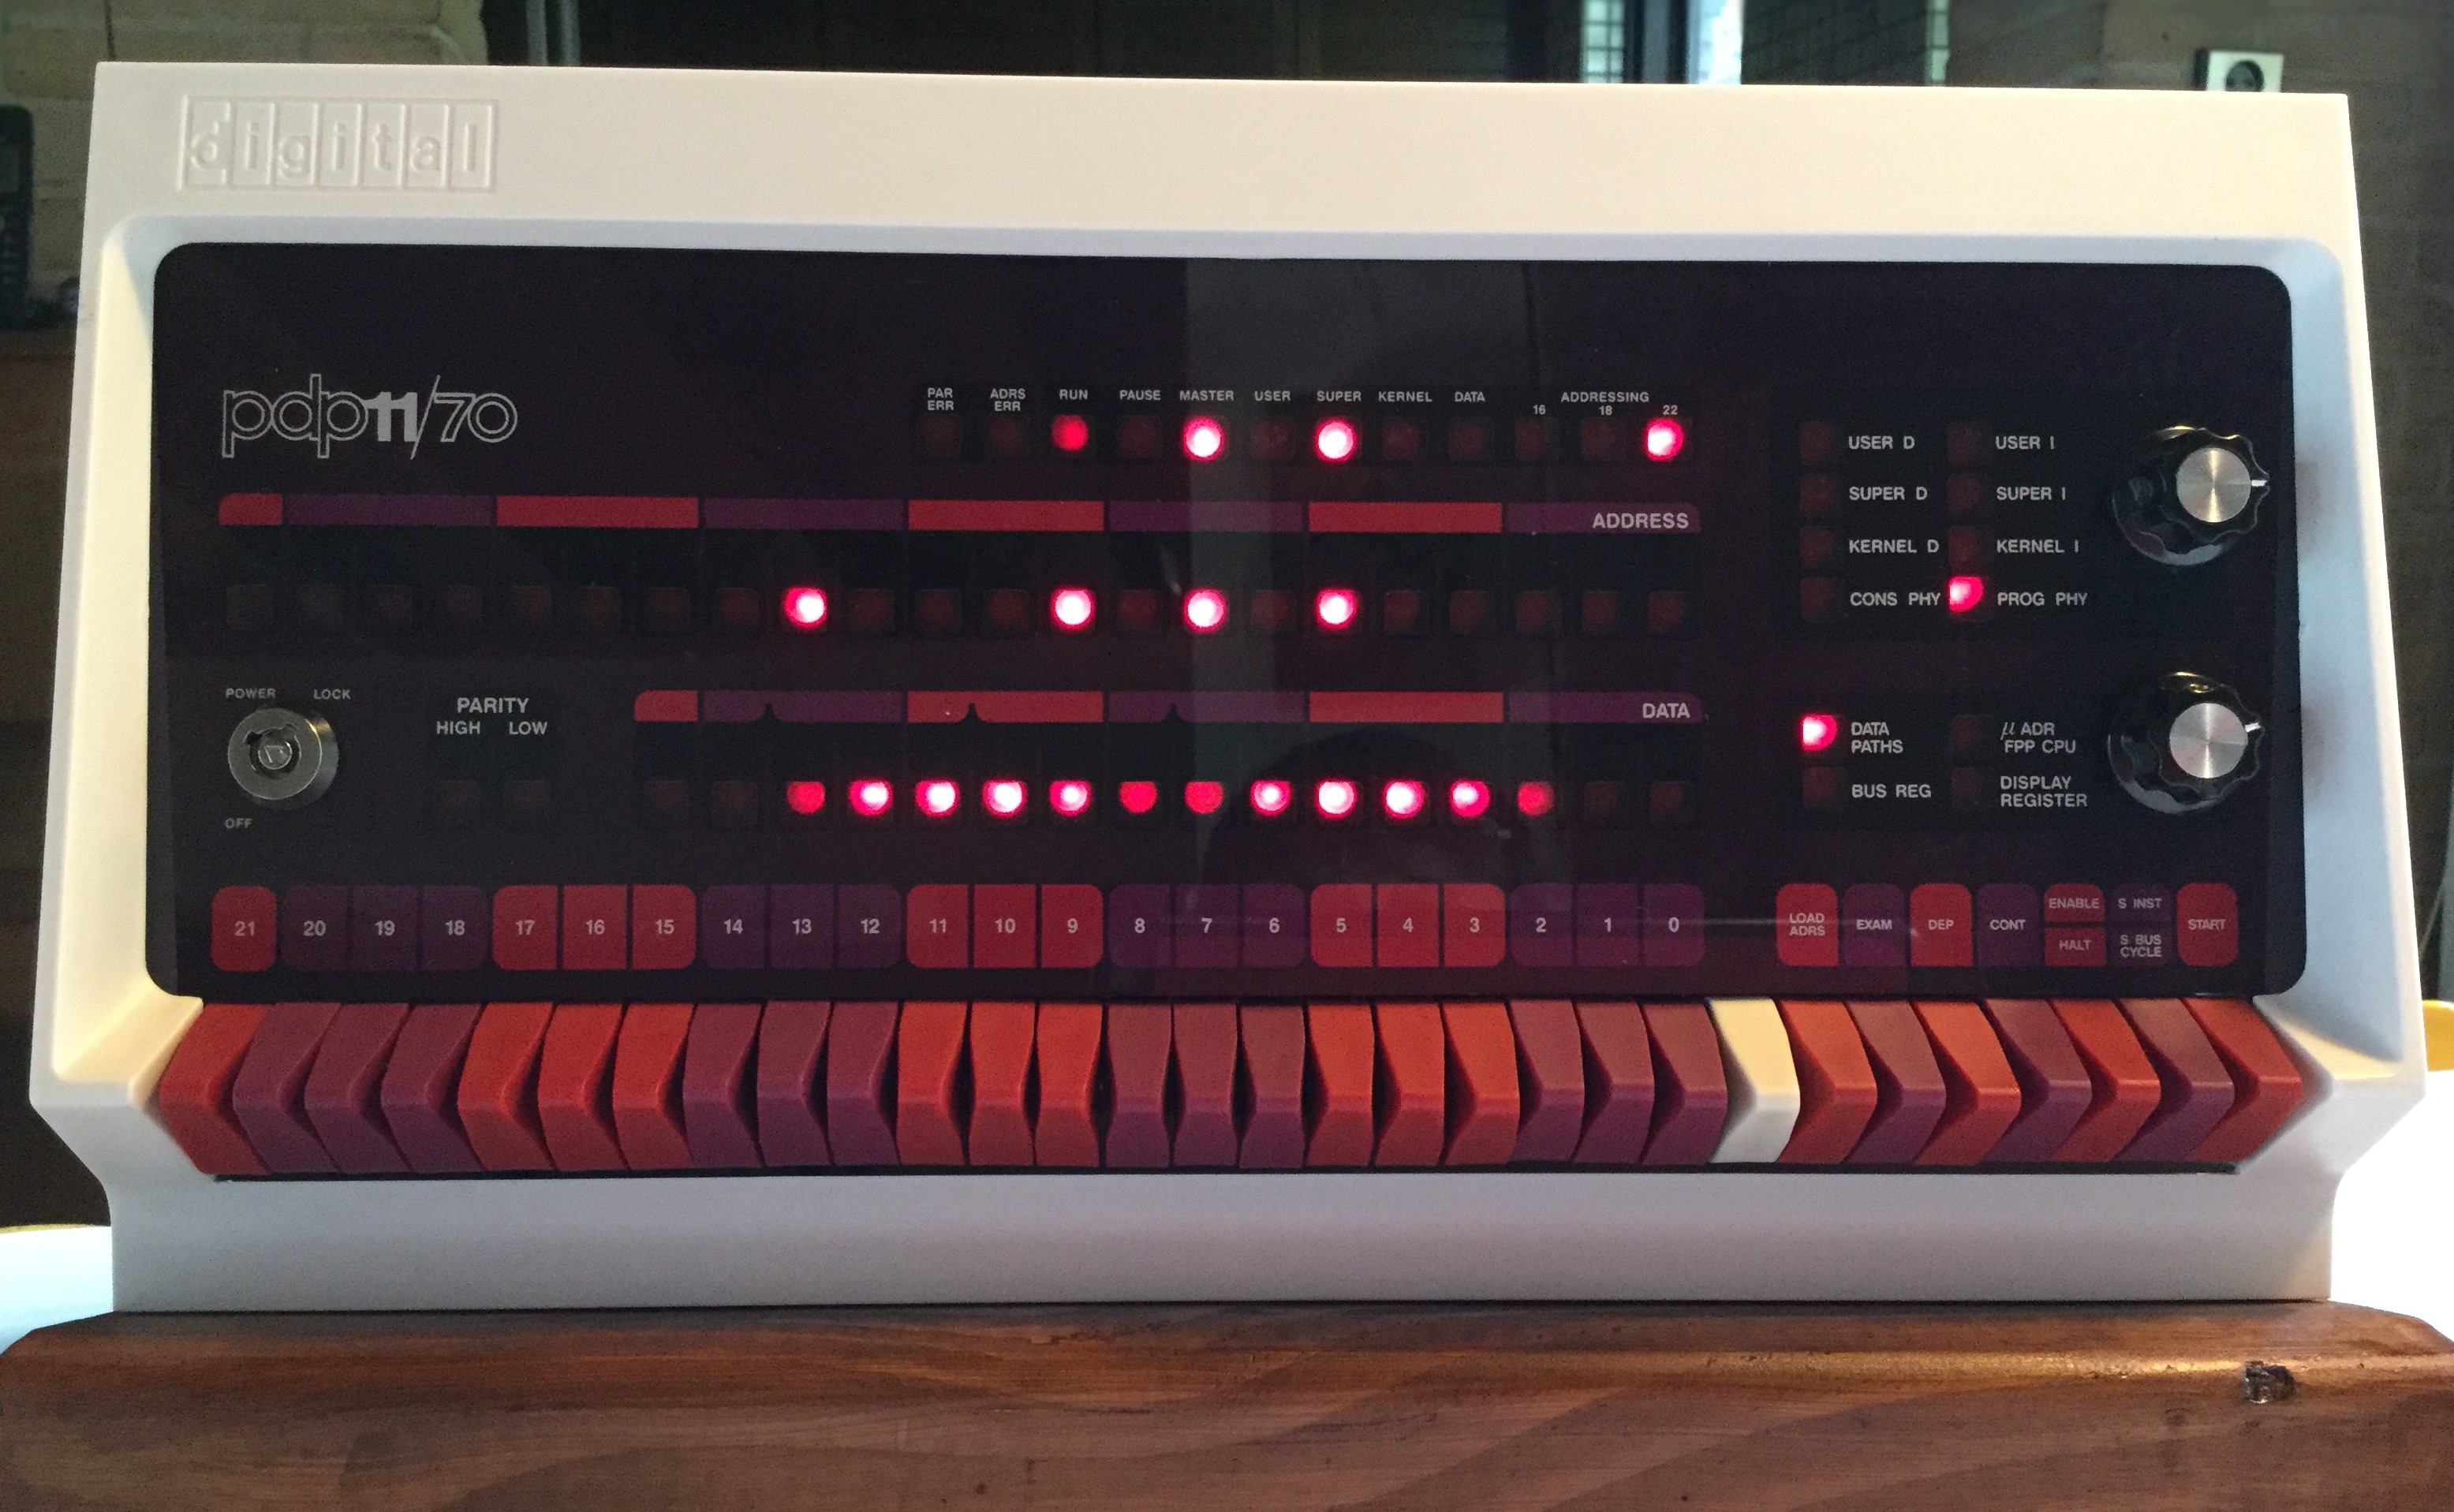
Over the last few weeks, I've made a web site for the kit, and a Google Group is live as well. Now, the focus shifts to polishing up the (currently pre-alpha) software, and kits will go out from next month. Here are the kit contents:
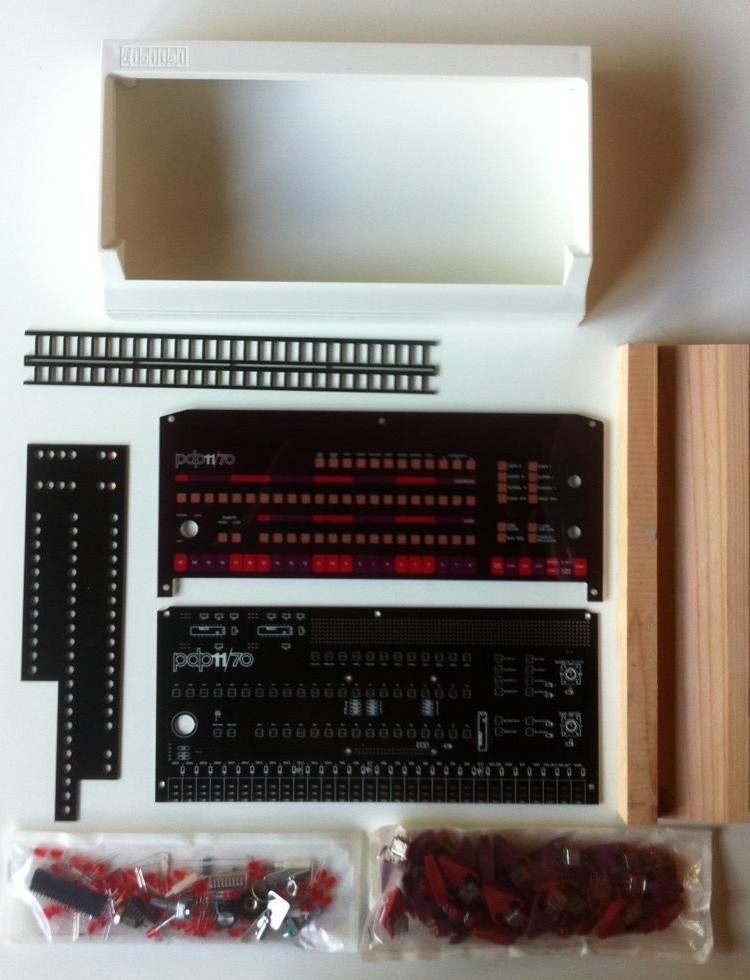
Stupidly I forgot to put the back panel of the case in the picture, but it's on my site anyway. That back panel taught me about laser cutting (press-out slots for connectors etc), and after injection molding, that is the way to go for any following project. Easy, low-cost and very precise results.
Discussions
Become a Hackaday.io Member
Create an account to leave a comment. Already have an account? Log In.
Ah, you are the PDPii guy! Excellent idea, hooking up this front panel would require something like a small microcontroller as it used multiplexing. But if you can lead the signals out of your PCB, it should be doable. The PDP2011 guy (worth googling) is doing it too for his FPGA implementation.
If you want I can send you just the front panel PCB to test things out.
Are you sure? yes | no
Yes, I am PDPii guy :)
Are you sure? yes | no
I'll probably buy one for my #PDPii ;)
Are you sure? yes | no