Close
0%
0%

nRF24L01+ network to control lights

Custom Android app to send commands over to nRF24L01+ receivers with 4-channel PWM capability to control LED strips.

Similar projects worth following
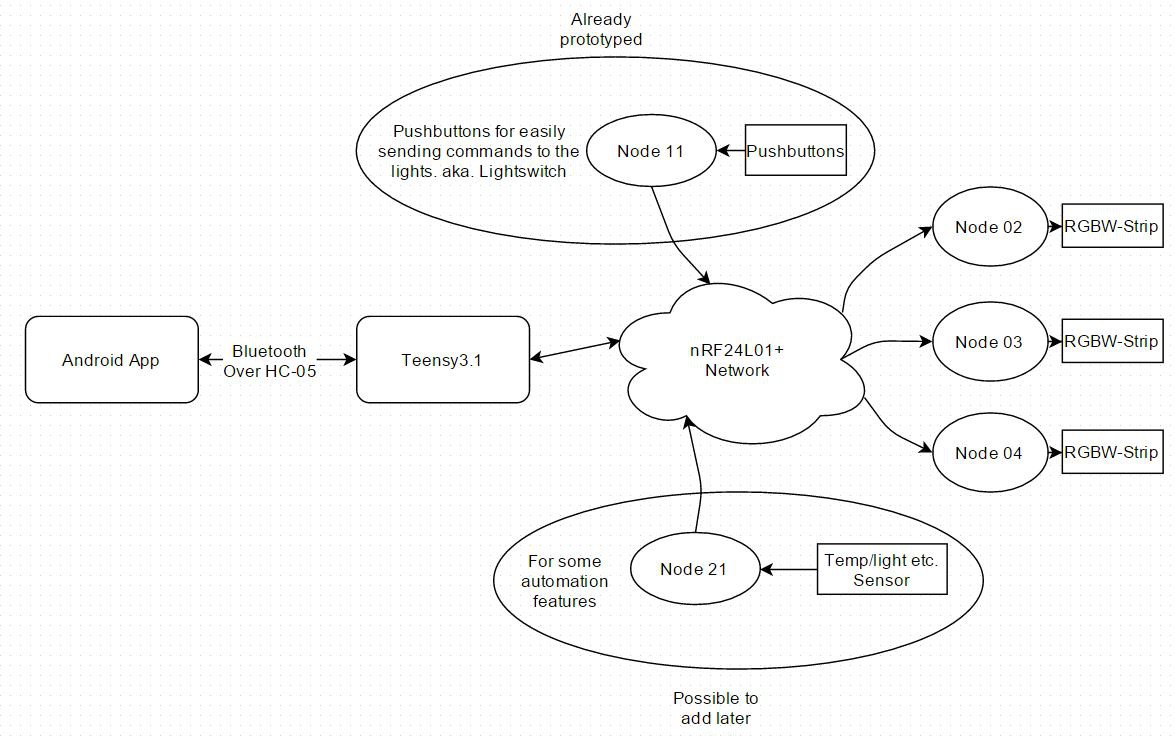
I am developing a custom app for Android to send commands over to a Raspberry Pi over bluetooth. Then the RPi sends the commands forward to a nRF24L01+ network. In the receiving end I have a custom PCB with a Atmega328P chip which controls 4 N-channel MOSFETS with PWM. So that I can control RGBW LED strips. This system can easily be expanded to a larger lighting system around the house and with the power of the Pi it's easy to automate different light scenarios.

I have been doing this project for quite a long time and this is the third and final major revision of the project.

Server

The server or the data transmitter consists of a RPi 3 with bluetooth and an nRF24L01+ radio module. (433MHz radio module coming also). Old version used a Teensy and a bluetooth module.

Receiver

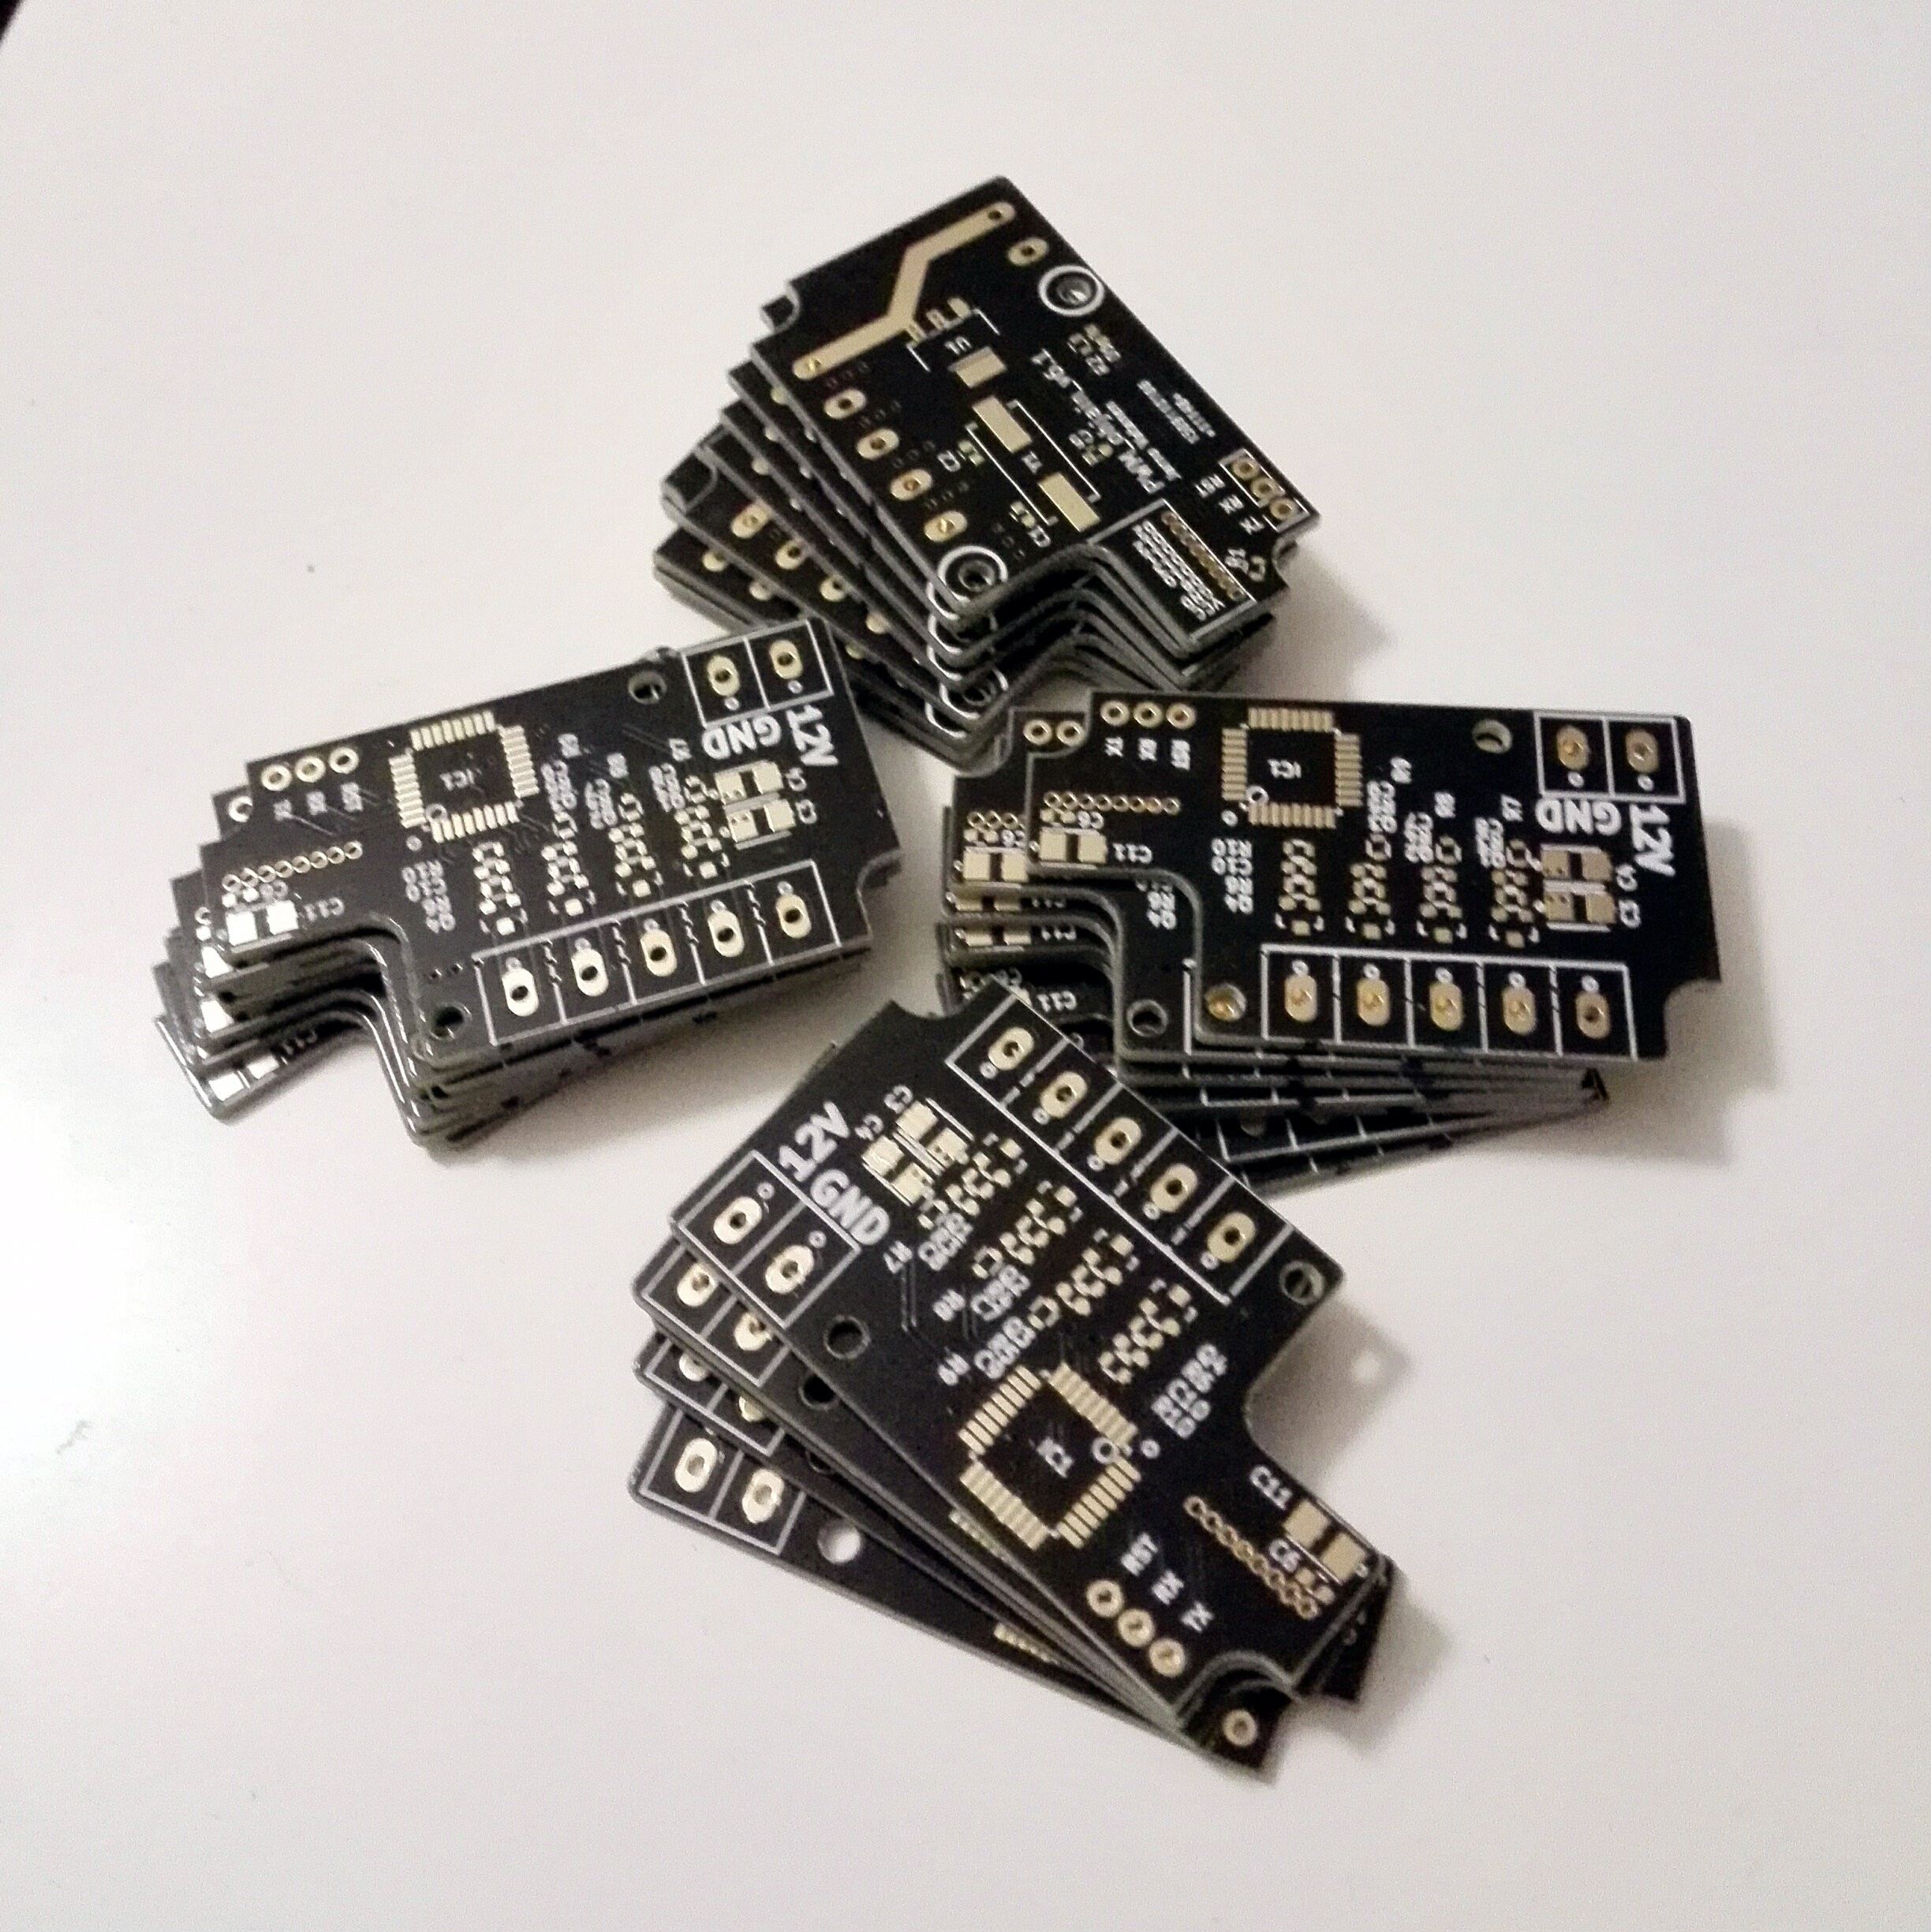
The receiver is a custom PCB with a Atmega328P chip, 4 MOSFETS and an nRF24L01+ radio module. It can control an RGBW LED strip.

Controller

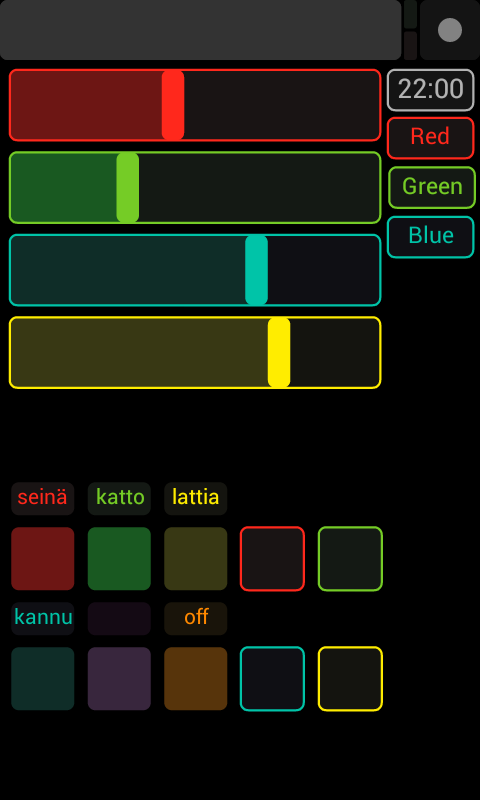
For sending commands to the server I use an Android phone. The App is still in it's early phase, but it's usable in a everyday usage. It's also possible to send commands without a phone with a "lightswitch" circuit. This way you can quickly turn off/on the lights with the separate circuit or fine tune the color through the phone App.

A working demo of the App.
  • 1 × Teensy 3.1 / 3.2 Probably works with LC also...
  • 1 × HC-05 Bluetooth module
  • 1 × nRF24L01+ radio module Can be the mini, normal or PA version.
  • 1 × Android phone with bluetooth For sending commands to the server
  • 1 × ----- Receiver Unit -----

View all 25 components

  • Server Code

    Jarno Vatanen08/10/2016 at 21:09 0 comments

    Now I got the server code up and running written in python 3. I can now use my app to send commands to the RPi and then to the nRF24 lights. In a couple of days I'll make a short video of this working and upload the code to GitHub. In future versions of the server code I'd like to add presence detection and sending data back to the phone.

    I'll also be making one more revision of the receiver PCB for easier assembly and programming. Moving all the parts to one side, removing the crystal and changing the 3pin to a 6pin programming header. Also possibly breaking out some unused pins from the atmega if there's room left.

  • Raspberry Pi 3 upgrade

    Jarno Vatanen07/27/2016 at 18:14 0 comments

    A quick update on this. I haven't had the time to develop this any further. BUT I just got myself an RPi 3 and have plans on replacing this as the server. At the moment I have got the bluetooth communication to work and I can send messages to my RPi from the phone through BT. Next step in this is to get the nRF24l01+ to work with the RPi. If I can't get it to work easily, I'll probably use an microcontroller as the middle man to send the RF24 commands. I have also plans on adding 433MHz functionality to control RF sockets around the house, already have the transmitter and receiver module.

    Another near future plan is to design the PCB for the remote controller. At the moment it's used as is from the breadboard. Actually I use it most of the time to control the lights instead of my phone app.

    Edit: Got the nRF24L01+ working on the RPi. Ran the helloworld_rx & _tx from the RF24Networking library with the RPi and used an arduino as the other. TX was a bit flaky with the RPi, with about 90% sending success. The RX worked better with a 99% receiving success. It was easier than I thought. :)

    Edit2: The problem was in my arduino module not the RPi. 100% success both ways with a different module. Now it's time to import my server side code to python for the RPi.

  • Future plans

    Jarno Vatanen01/08/2016 at 21:29 0 comments

    It's been awhile from the previous update. I have been busy doing other things, but this has also advanced a bit.

    I now have 6 receiver modules ready, which 2 of are in use, need more cases at the moment. Streamlined the programming and testing of modules. Managed to fry couple of microprocessors in the process. Android app supports the 2 receivers. "Light switch" development has gone forward, ordered some parts for making a portable remote control for the lights.

    Next I'll list some features I would like to add next...


    Android app:

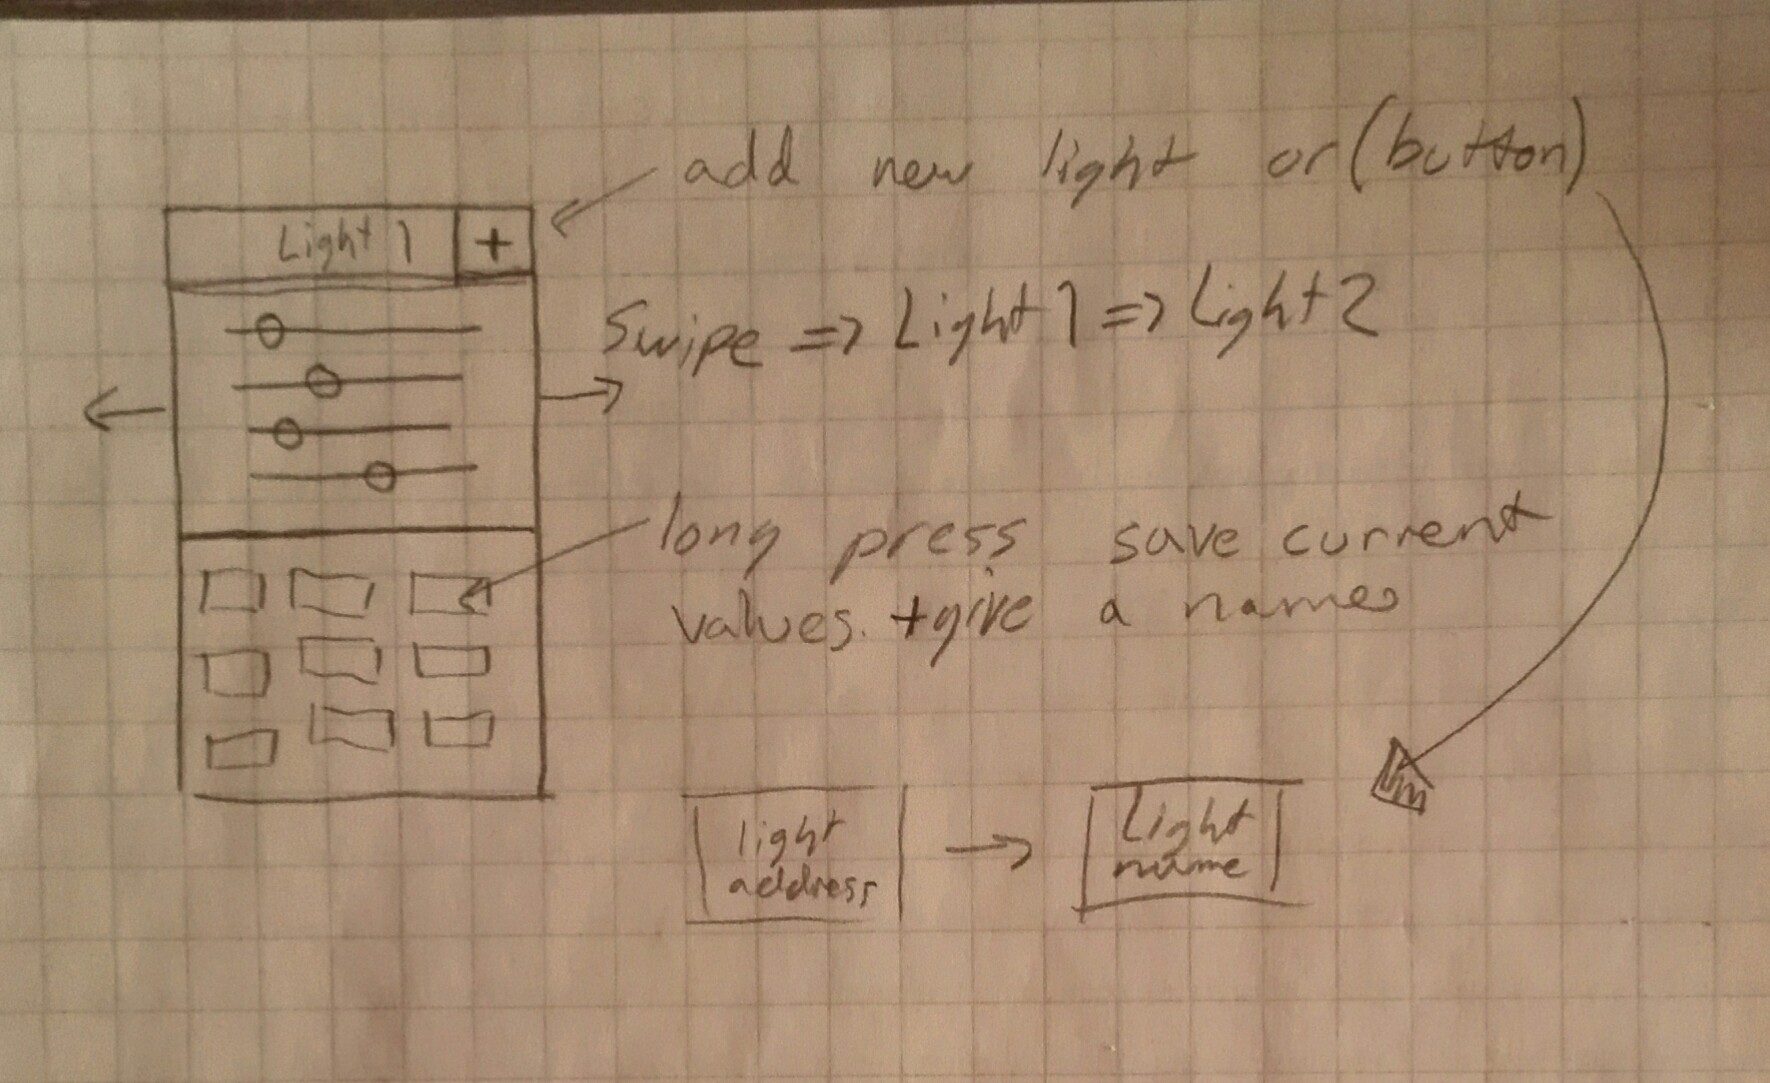
    - Button for adding a new receiver unit, It would ask for the address and you could name it for example "kitchen" + deleting them

    - You could browse through different receivers by swiping left and right

    - Save lighting "moods" to a button, for example you have a button to set all the lights for movie watching and another for working / making food.

    Sketch of the new features


    Receiver:

    - Add compatibility for 5V digital LED strips.

    - Watchdog timer for resetting it from possible lockups.


    Server:

    - Watchdog timer for resetting it from lockups.


    Remote control:

    - Get it as low power as possible

    - Long press a button to save the mood, short press to send it. One button reserved for shutting off lights


    I still really haven't figured out / thought of how to manage the communication / data with every part. If you have some ideas for features or comments of the existing ones, be free to say something about them.

  • Free PCBs

    Jarno Vatanen11/26/2015 at 17:29 0 comments

    I have a limited amount of extra receiver PCBs. If someone wants to make one of these I can send few PCBs to you, free of charge. Just send me message. You need to get in hold of the other components yourself.

  • Android source code at GitHub

    Jarno Vatanen11/21/2015 at 12:29 0 comments

    I have now added the android source code and .apk to GitHub. The App is still experimental and has some bugs, but I use it everyday to control my lights.

  • Video of the custom App

    Jarno Vatanen11/19/2015 at 19:41 0 comments

    Now I have taped a demonstration of the App.

  • A working demo of the app is done

    Jarno Vatanen11/09/2015 at 20:01 0 comments

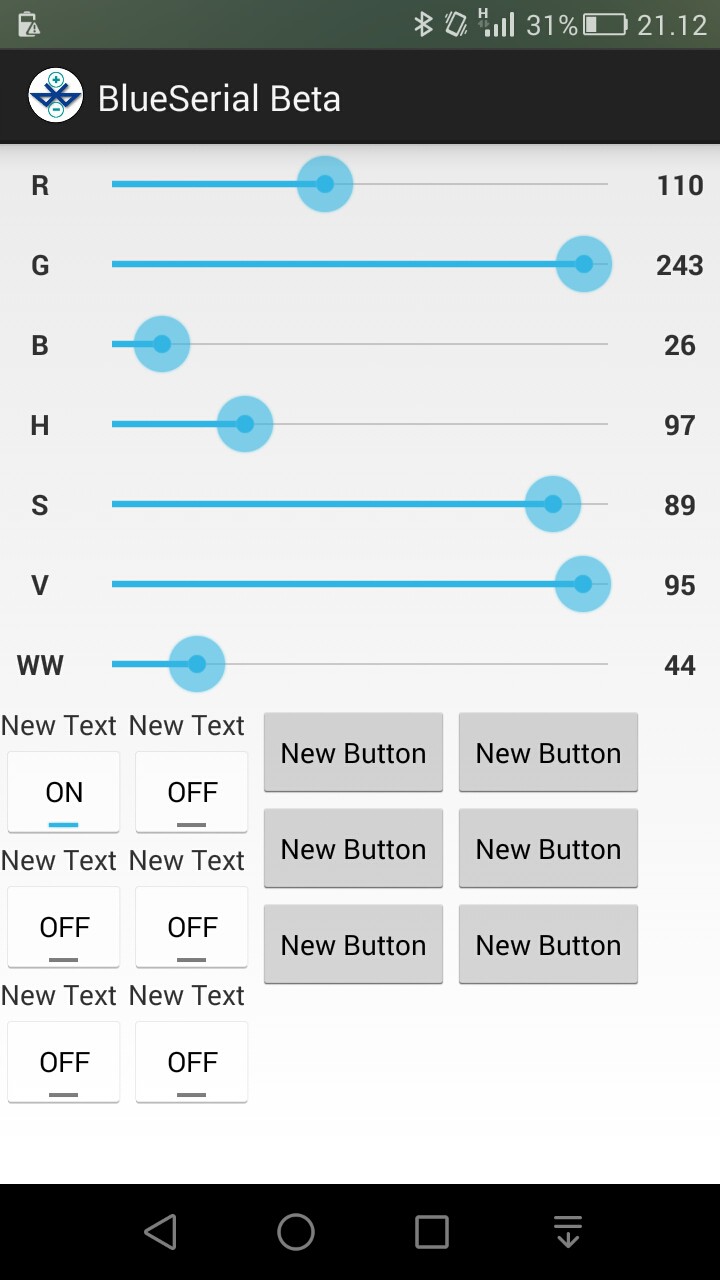
    I now have made a working demo of the app by modifying the BlueSerial app. As you can see it's a quick sketch. I first tried to program a fragment based app as I have learned from Android Programming, The Big Nerd Ranch Guide book. But I got stuck with it (Not that good at android programming), so I decided to quickly do an activity based app first. The groundwork I got from the BlueSerial app. I made a custom layout to it and then added a bit of code.

    The RGB values move correspondly if the HSV values are changed and vica versa. The WW is separate from the others, it controls the white channel for the LEDs. If the toggle button is on, the led strip changes color in real-time. Or when it's off, I can send the values using a button. The real-time updating was a bit laggy first, but then I modified the code for the server side and now it runs smoothly. I'll try to upload a video of this working sometime during this week.

    Next I'll probably assemble few more receiving units and install more lights to the system. Also I accidently broke the usb plug from the Teensy, soldered a cable straight to the board to fix it. But I'll order a few more and at the same time order a BLE module to play with.

  • Receiver unit

    Jarno Vatanen10/29/2015 at 22:31 0 comments

    I now have the KiCad files and source code for the server and receiver units in GitHub.

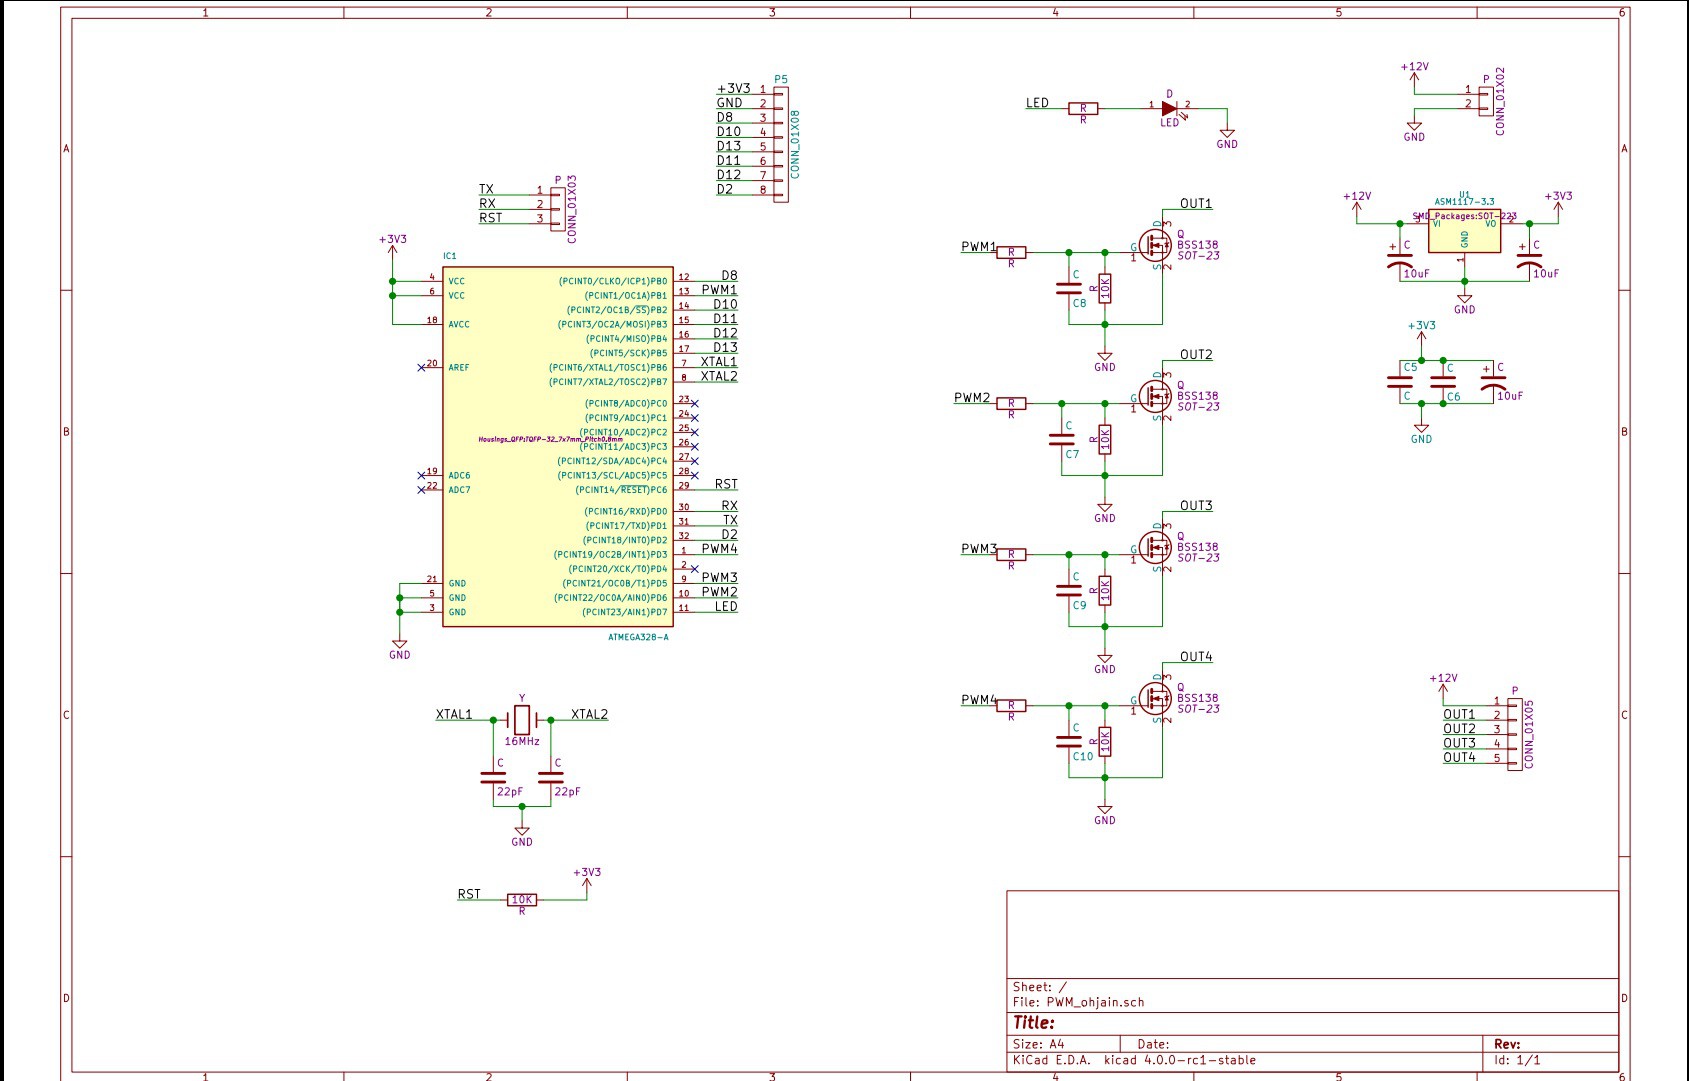
    The schematic and code for the receiver unit is pretty simple.

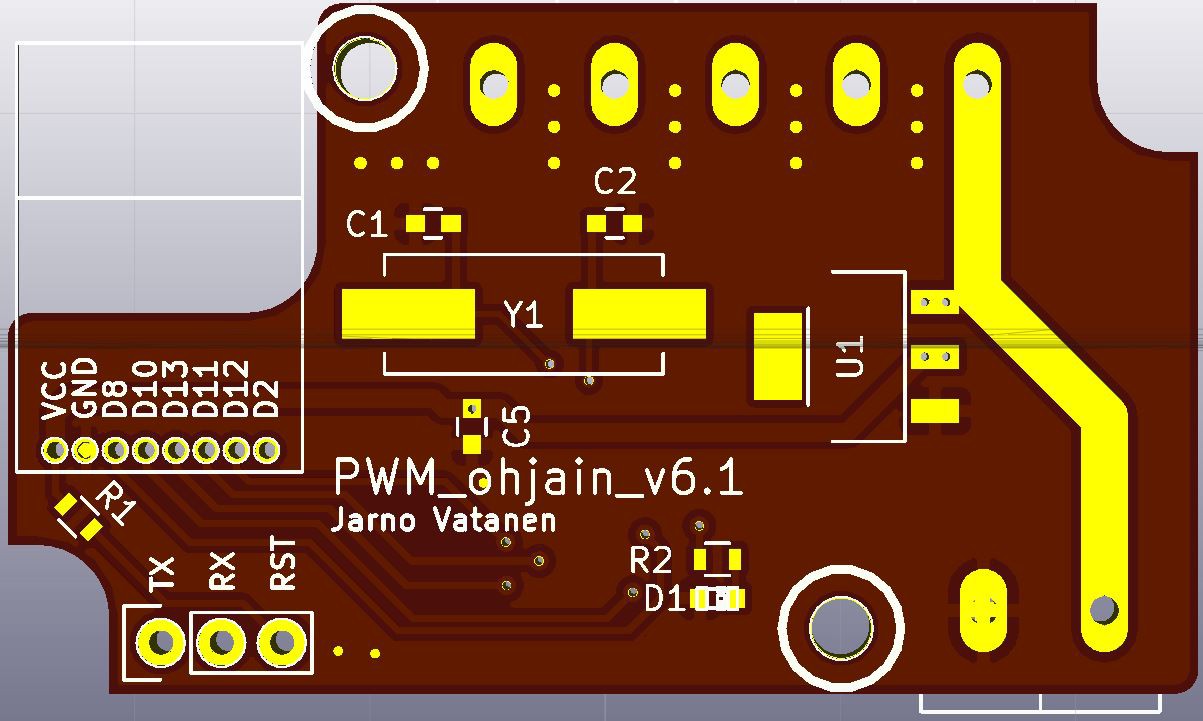
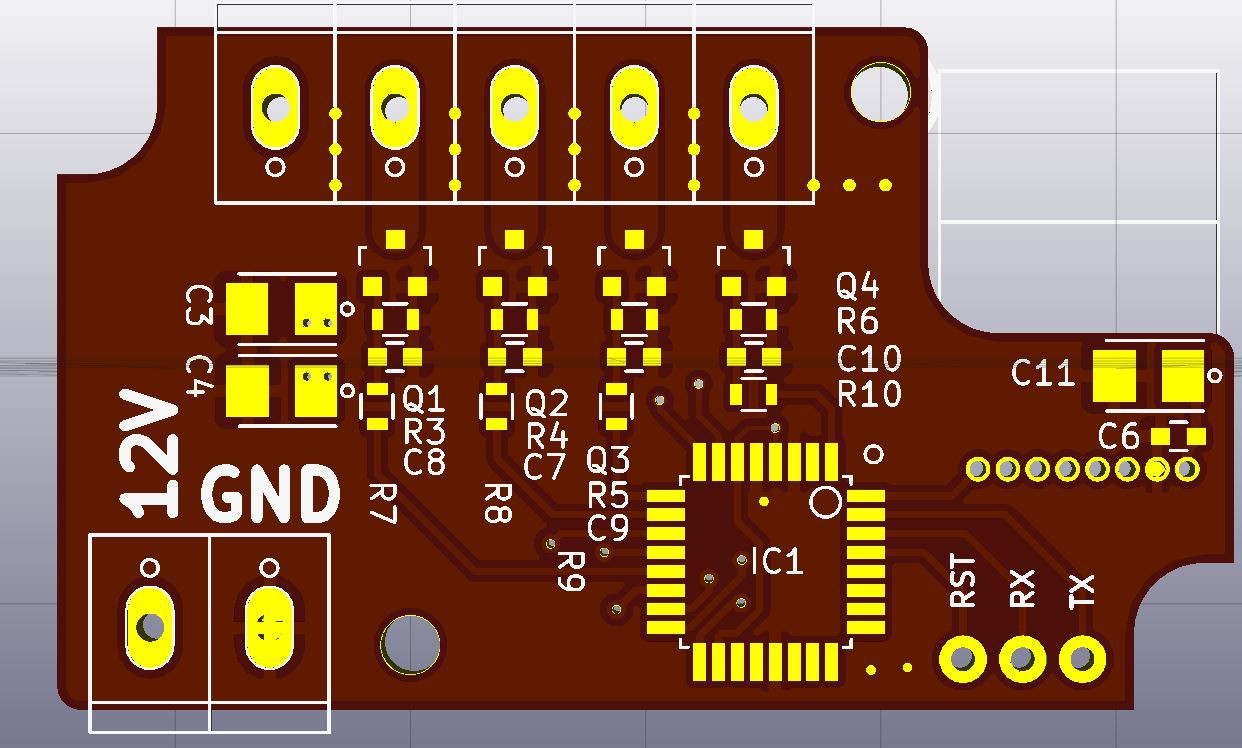
    It has an Atmega328P as the microcontroller. It is connected to nRF24L01+ radio and four N-channel MOSFETS. I used the the mini version of the radio module. It's connected with a header to the PCB for easy serviceability. I also use the same header to flash the arduino bootloader to the chip. After the bootloader is flashed I use another header with TX, RX and RST pins to program new software/debug. I power the whole board with a 3.3V regulator from the 12V line. The microcontroller is running with a 16MHz crystal so it's slightly overclocked for 3.3V, but it should run fine. The PWM channels have all the same frequency. The series resistors and C7-C10 are for a possible filter on the PWM channels. At the moment the caps are unpopulated and I have 0 ohm resistors populated. 10k resistors for pulldown.

    I designed the PCB to fit inside a Hammond 1551HFL/1551H case. The maximum size for a PCB inside those cases is 54x29mm, but my PCB is 50x29mm so it's cheaper to manufacture. I have one unit in a case with some cutouts made with a dremel for the connectors. I'll try to 3D print a case with ready cutouts. If it's successful, I'll publish the files also.

    On the software side I use the RF24 and RF24Network libraries from maniacbug. The code is short and quite well commented, so it should be self-explanatory.

  • History of the project

    Jarno Vatanen10/25/2015 at 12:59 0 comments

    I'm writing this log to show the previous versions of my system.

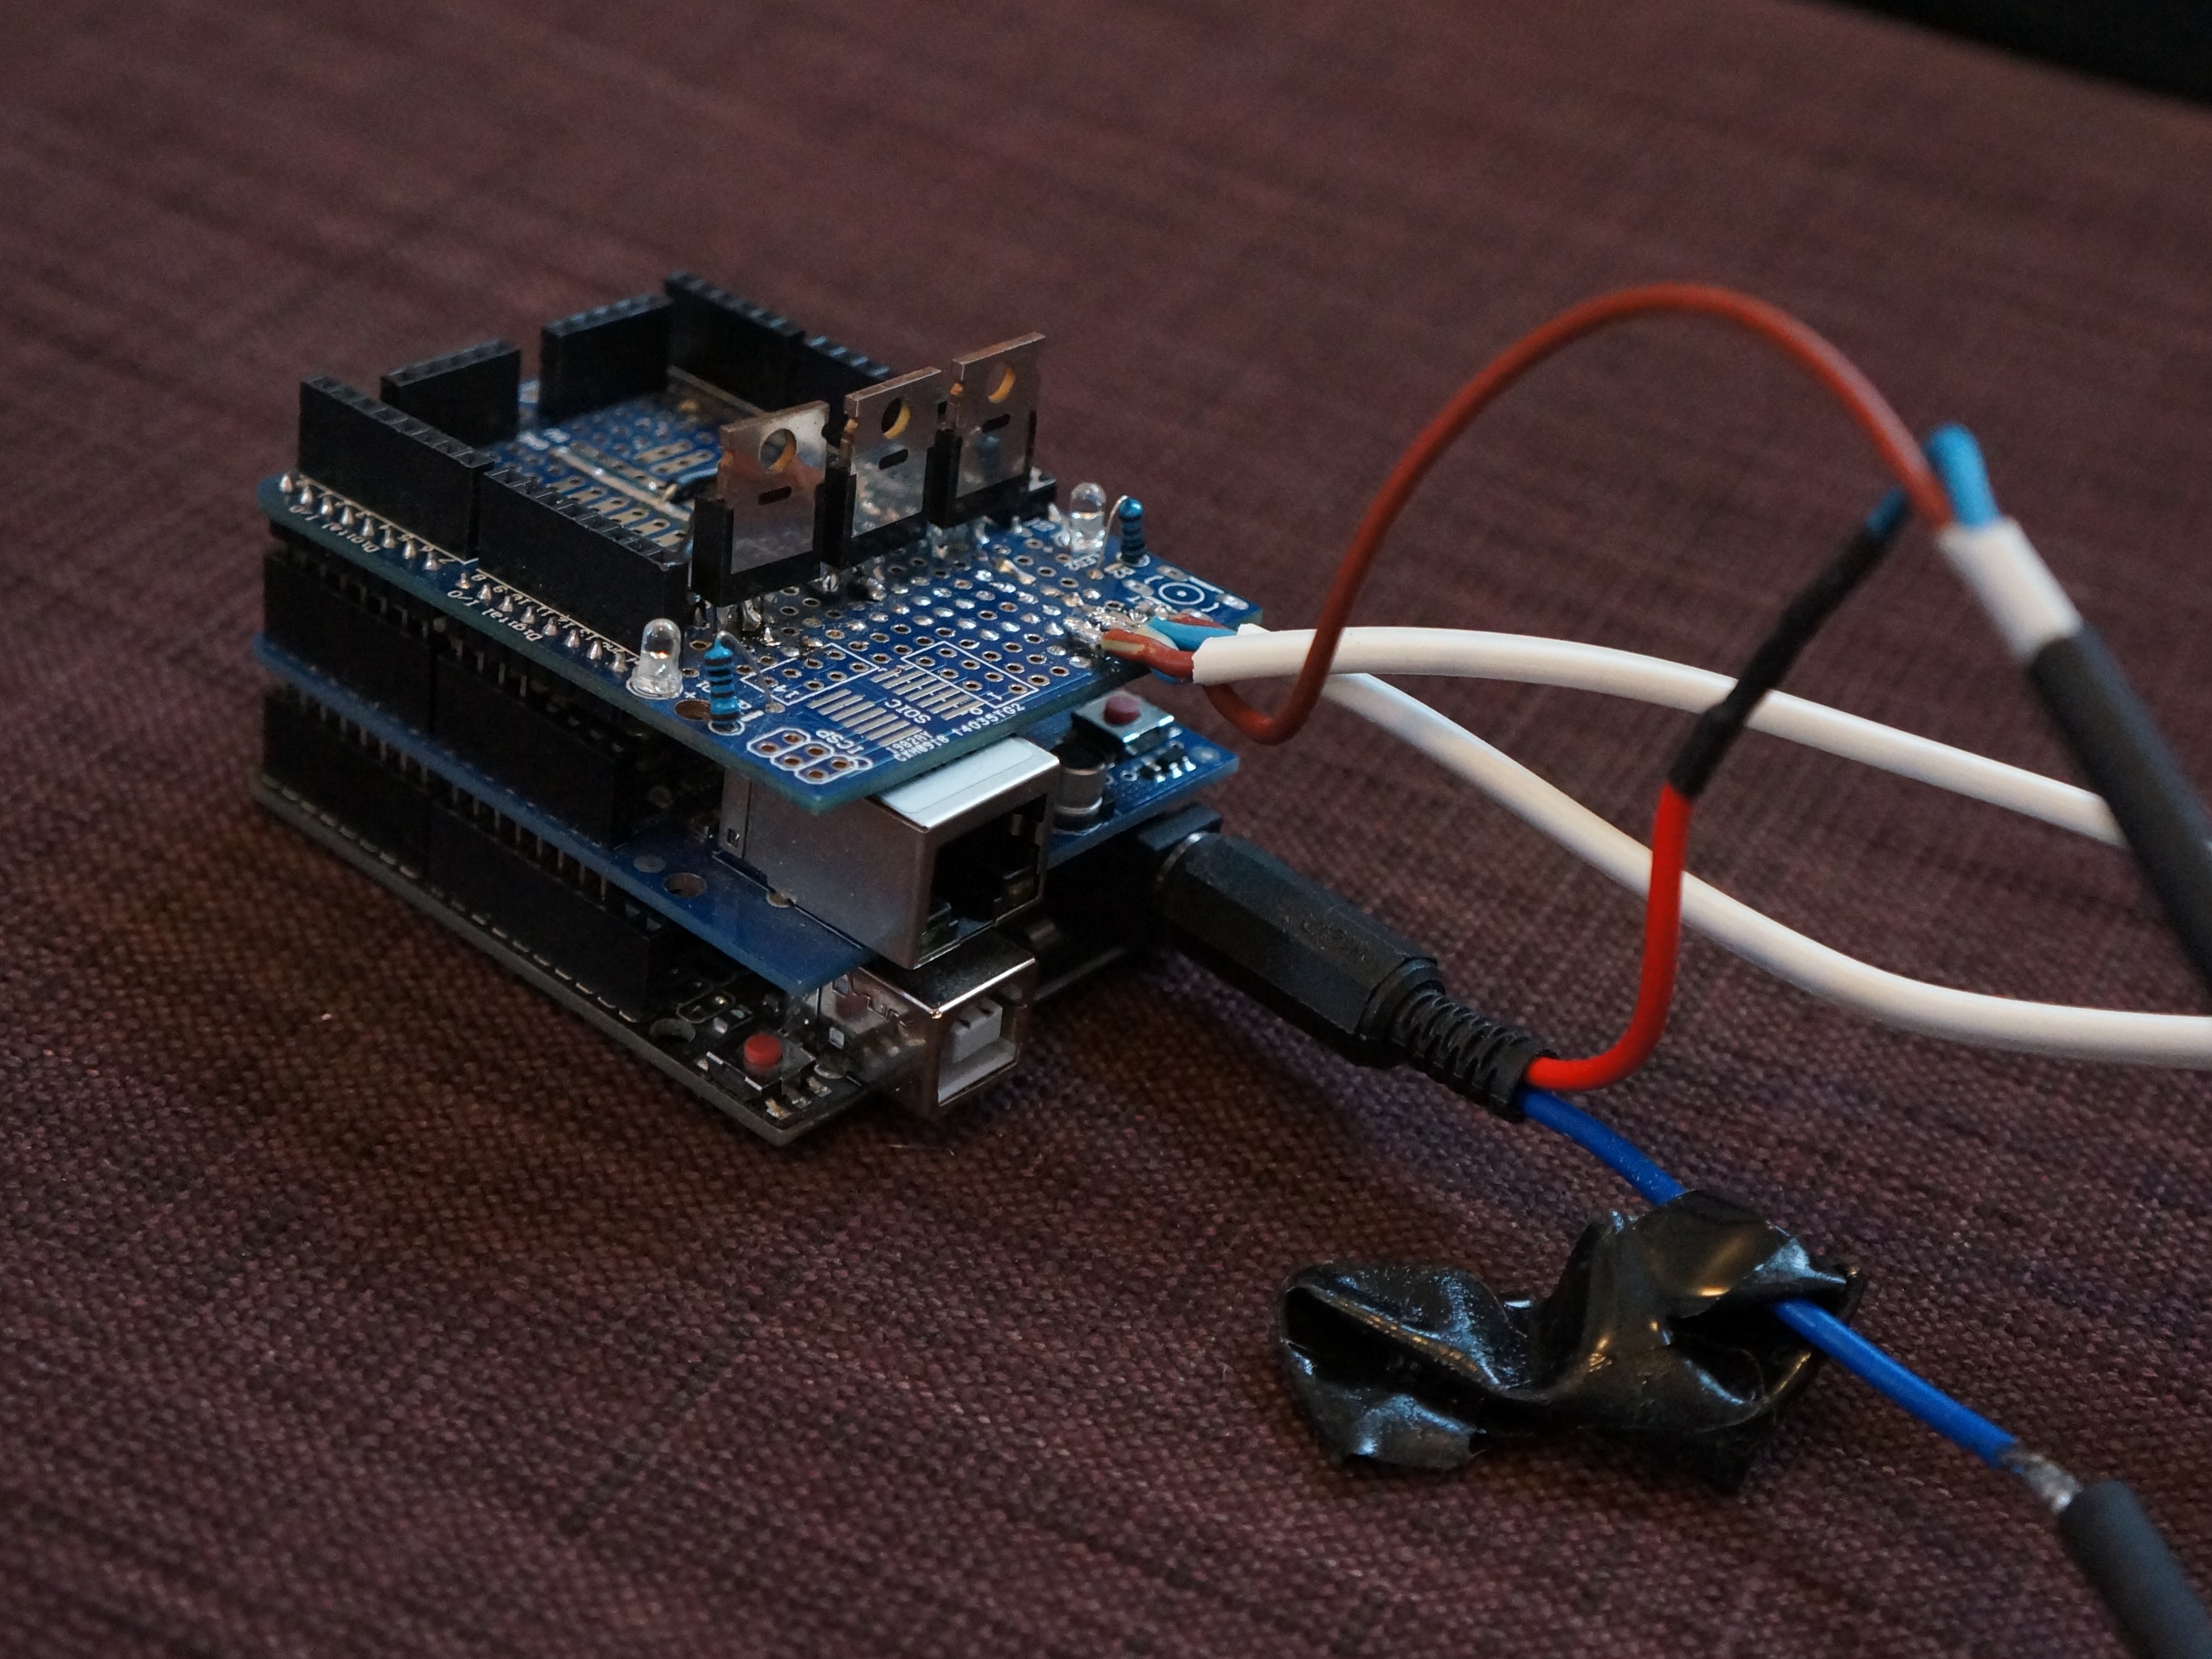
    My very first one was a Arduino stacked with a ethernet and MOSFET shield to control one RGB LED strip. On the software side I used an OSC server on the arduino and TouchOSC program on my phone to send commands. It was quite nice and really responsive, it needed to have my phone on the same wireless network as the arduino.

    First version

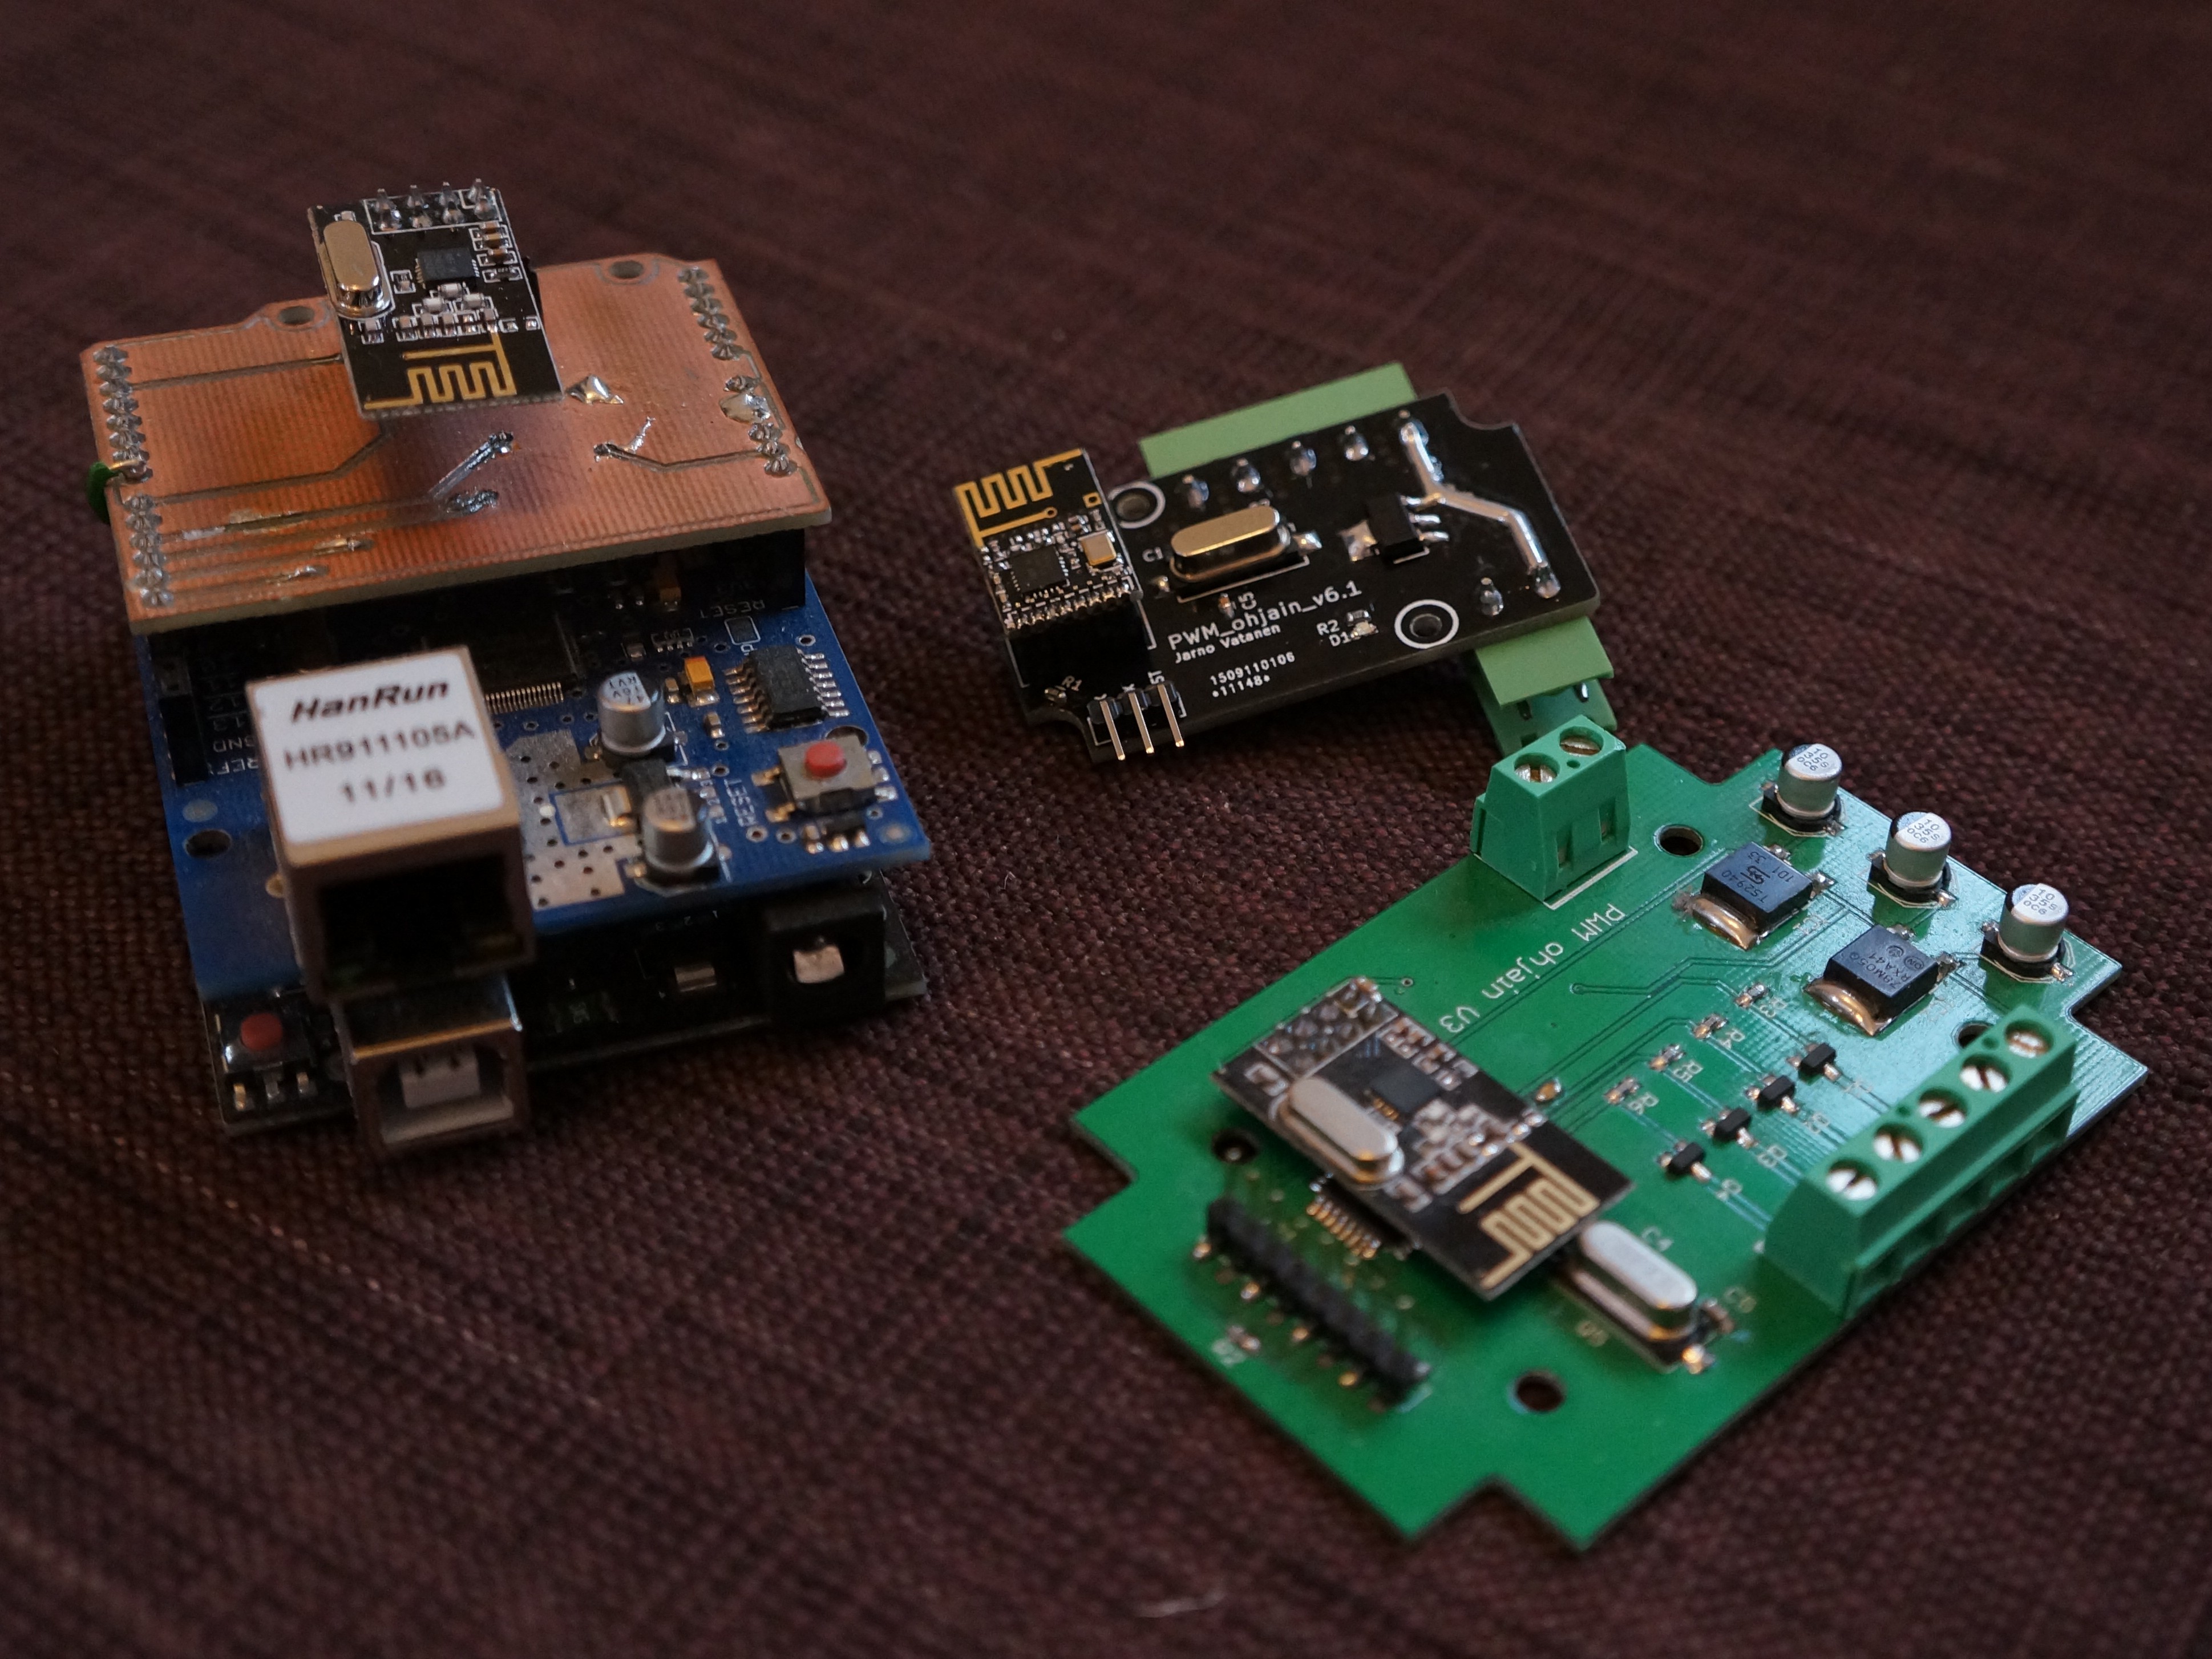
    I did the second version, because I wanted to control more than one strip. So I designed the PCB on the right side and replaced the MOSFET shield with an nRF24L01+ shield. Now I could send the wanted color to different units around the house. At the same time I also upgraded the controller to have 4 PWM channels. There's the newest receiver unit in the middle for size comparison. The new and old receiver have compatible hardware.

    On the server side I still used the OSC protocol and TouchOSC on the phone. Here's a simple layout I made for it. There were 4 sliders for RGB and brightness. Then some push buttons to send the values to different units and few toggle inputs for different operating modes.

    Sometimes this system had hangups, I don't know if they were because of a faulty receiver, some code problems or what. That's why I decided to upgrade the server microcontroller for a Teensy 3.1, instead of an Arduino. Also I wanted that the new server didn't need any external wifi network to connect to. That's why I chose the HC-05 Bluetooth module for the communication between the phone and the server.

    In the next log I'll go to the details of the receiver unit.

  • Current status of the project

    Jarno Vatanen10/22/2015 at 13:12 0 comments

    Here's a video showing how the system is working at the moment.

View all 10 project logs

Enjoy this project?

Share

Discussions

Similar Projects

Does this project spark your interest?

Become a member to follow this project and never miss any updates