 zakqwy
I got a Hackaday Jolly Wrencher badge kit from Brian at OHS18 a few weeks ago. I have built a few DIY Teensy 3.2 boards; they aren't too difficult as Paul publishes schematics, just make sure you buy the bootloader chip from him. I had a few extra NXP chips around from the last go-around, so I decided to add one to the badge.
As it stands right now, the circuit pretty well duplicates the Teensy 3.2 schematic, minus the pin headers and a few power switching components. I tapped the battery right into the 3v3 output from the LDO, so the badge shouldn't be programmed with batteries aboard.
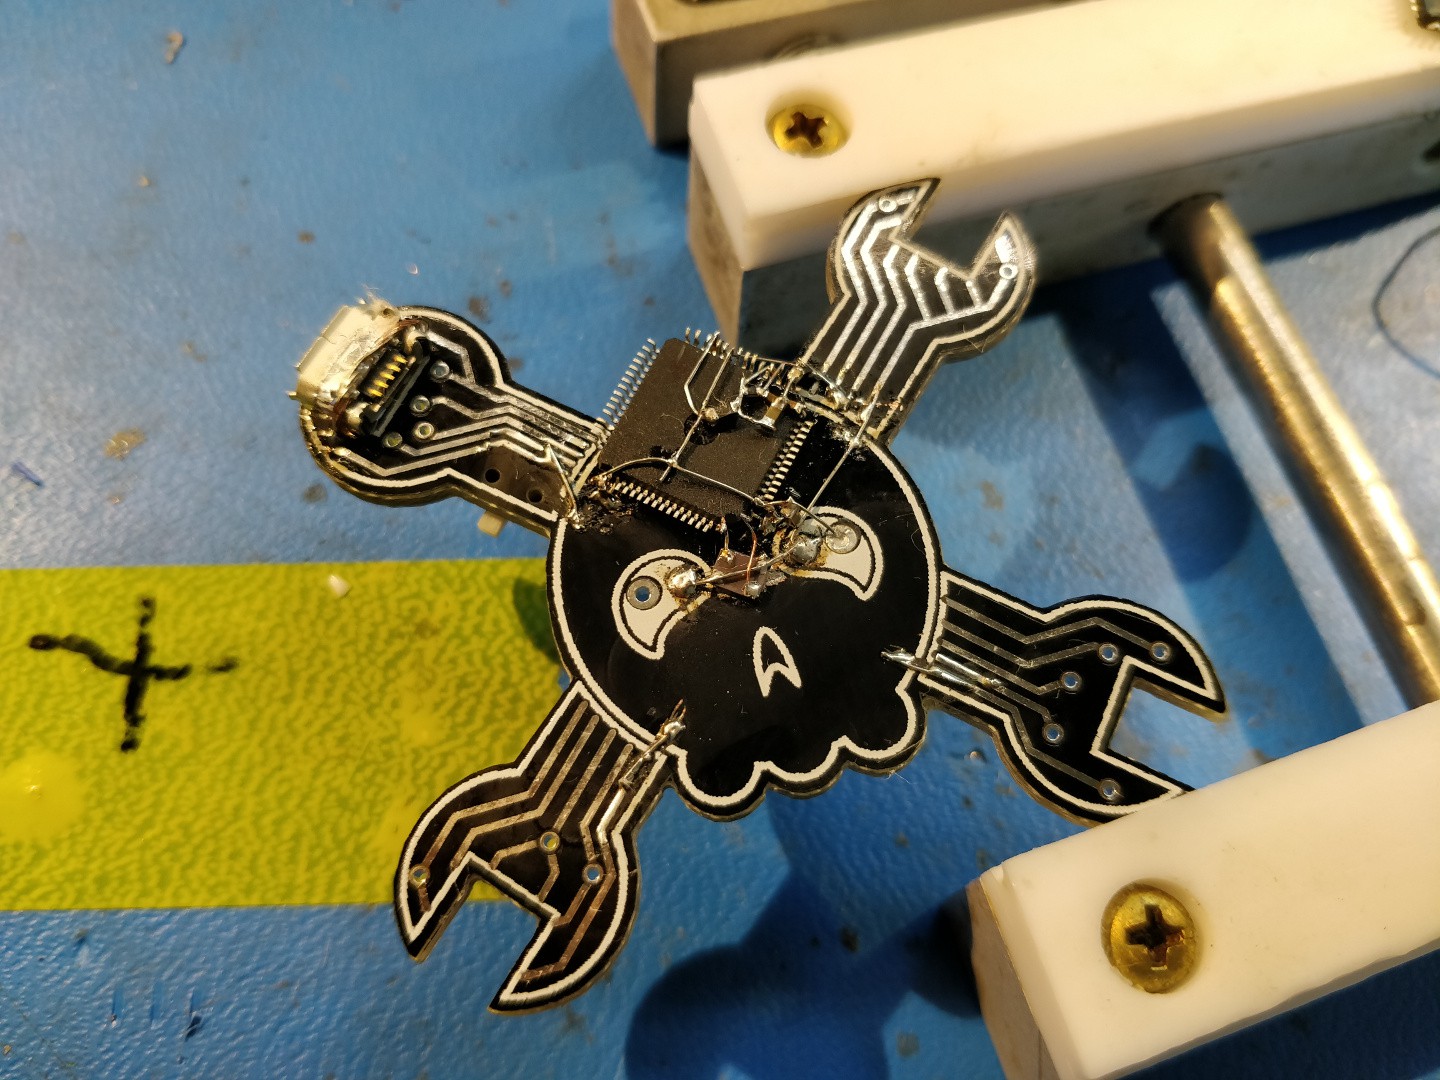
The picture above shows the first part of the build: mounting and securing the USB port, getting the power rails and oscillator on the MX20 sorted, that sort of thing. I superglued the chip upside-down and bent its required ground pins so they could be tacked onto the ground plane of the board (which, thank goodness, exists; some badges don't have ground planes).
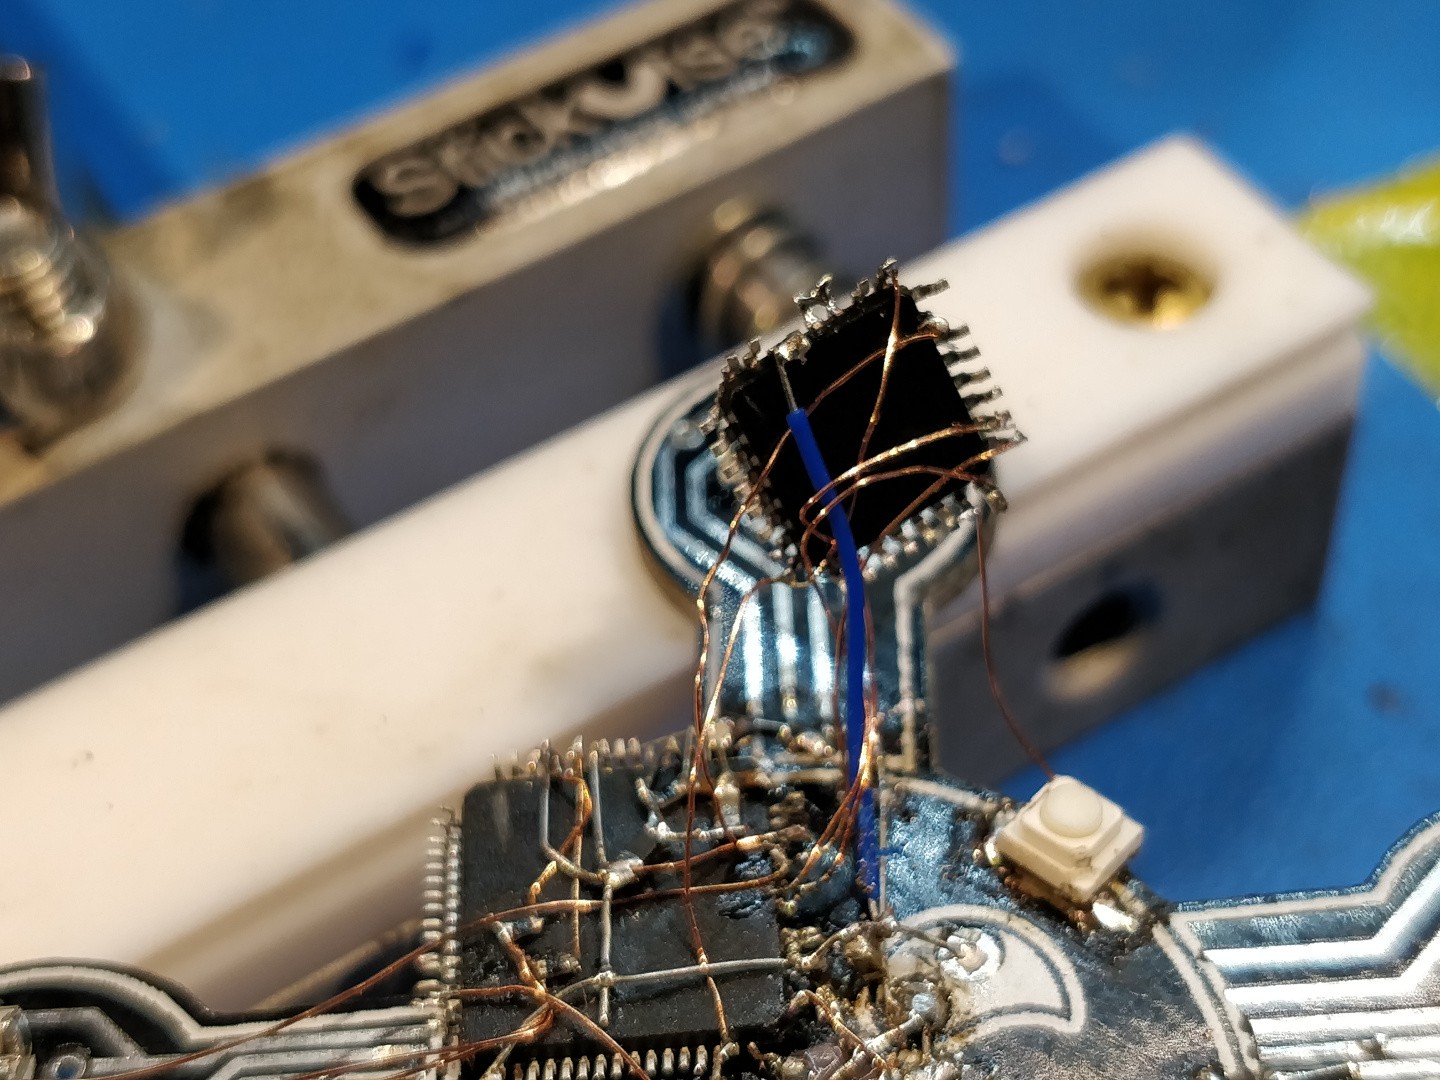
The MKL04 bootloader ran into some other complications; namely, NXP doesn't mark the bottoms of their chips with a pin 1 orientation dot, and the scratched mark I added was unsurprisingly off by 90 degrees (you can see the correct mark on the MX20 above). I wasn't able to verify this was the problem on the MKL04 without ripping it off its CA mount, and the chip didn't want to play nice after I re-oriented it. It was worth a try, but I probably nuked the chip when I tried to power it through the wrong pins. Fortunately I had a spare programmed MKL04 lying around that I swapped in and the board enumerated and programmed as expected.
More to come on this one. Right now it's a Teensy 3.2, but I have a few ideas that will actually make use of that computing horsepower. This might be a rare multi-part Weekend Novelty Project.
Discussions
Become a Hackaday.io Member
Create an account to leave a comment. Already have an account? Log In.
[Insert favourite deity] Dude! Thats hacked. XD
Very nice :-)
Are you sure? yes | no