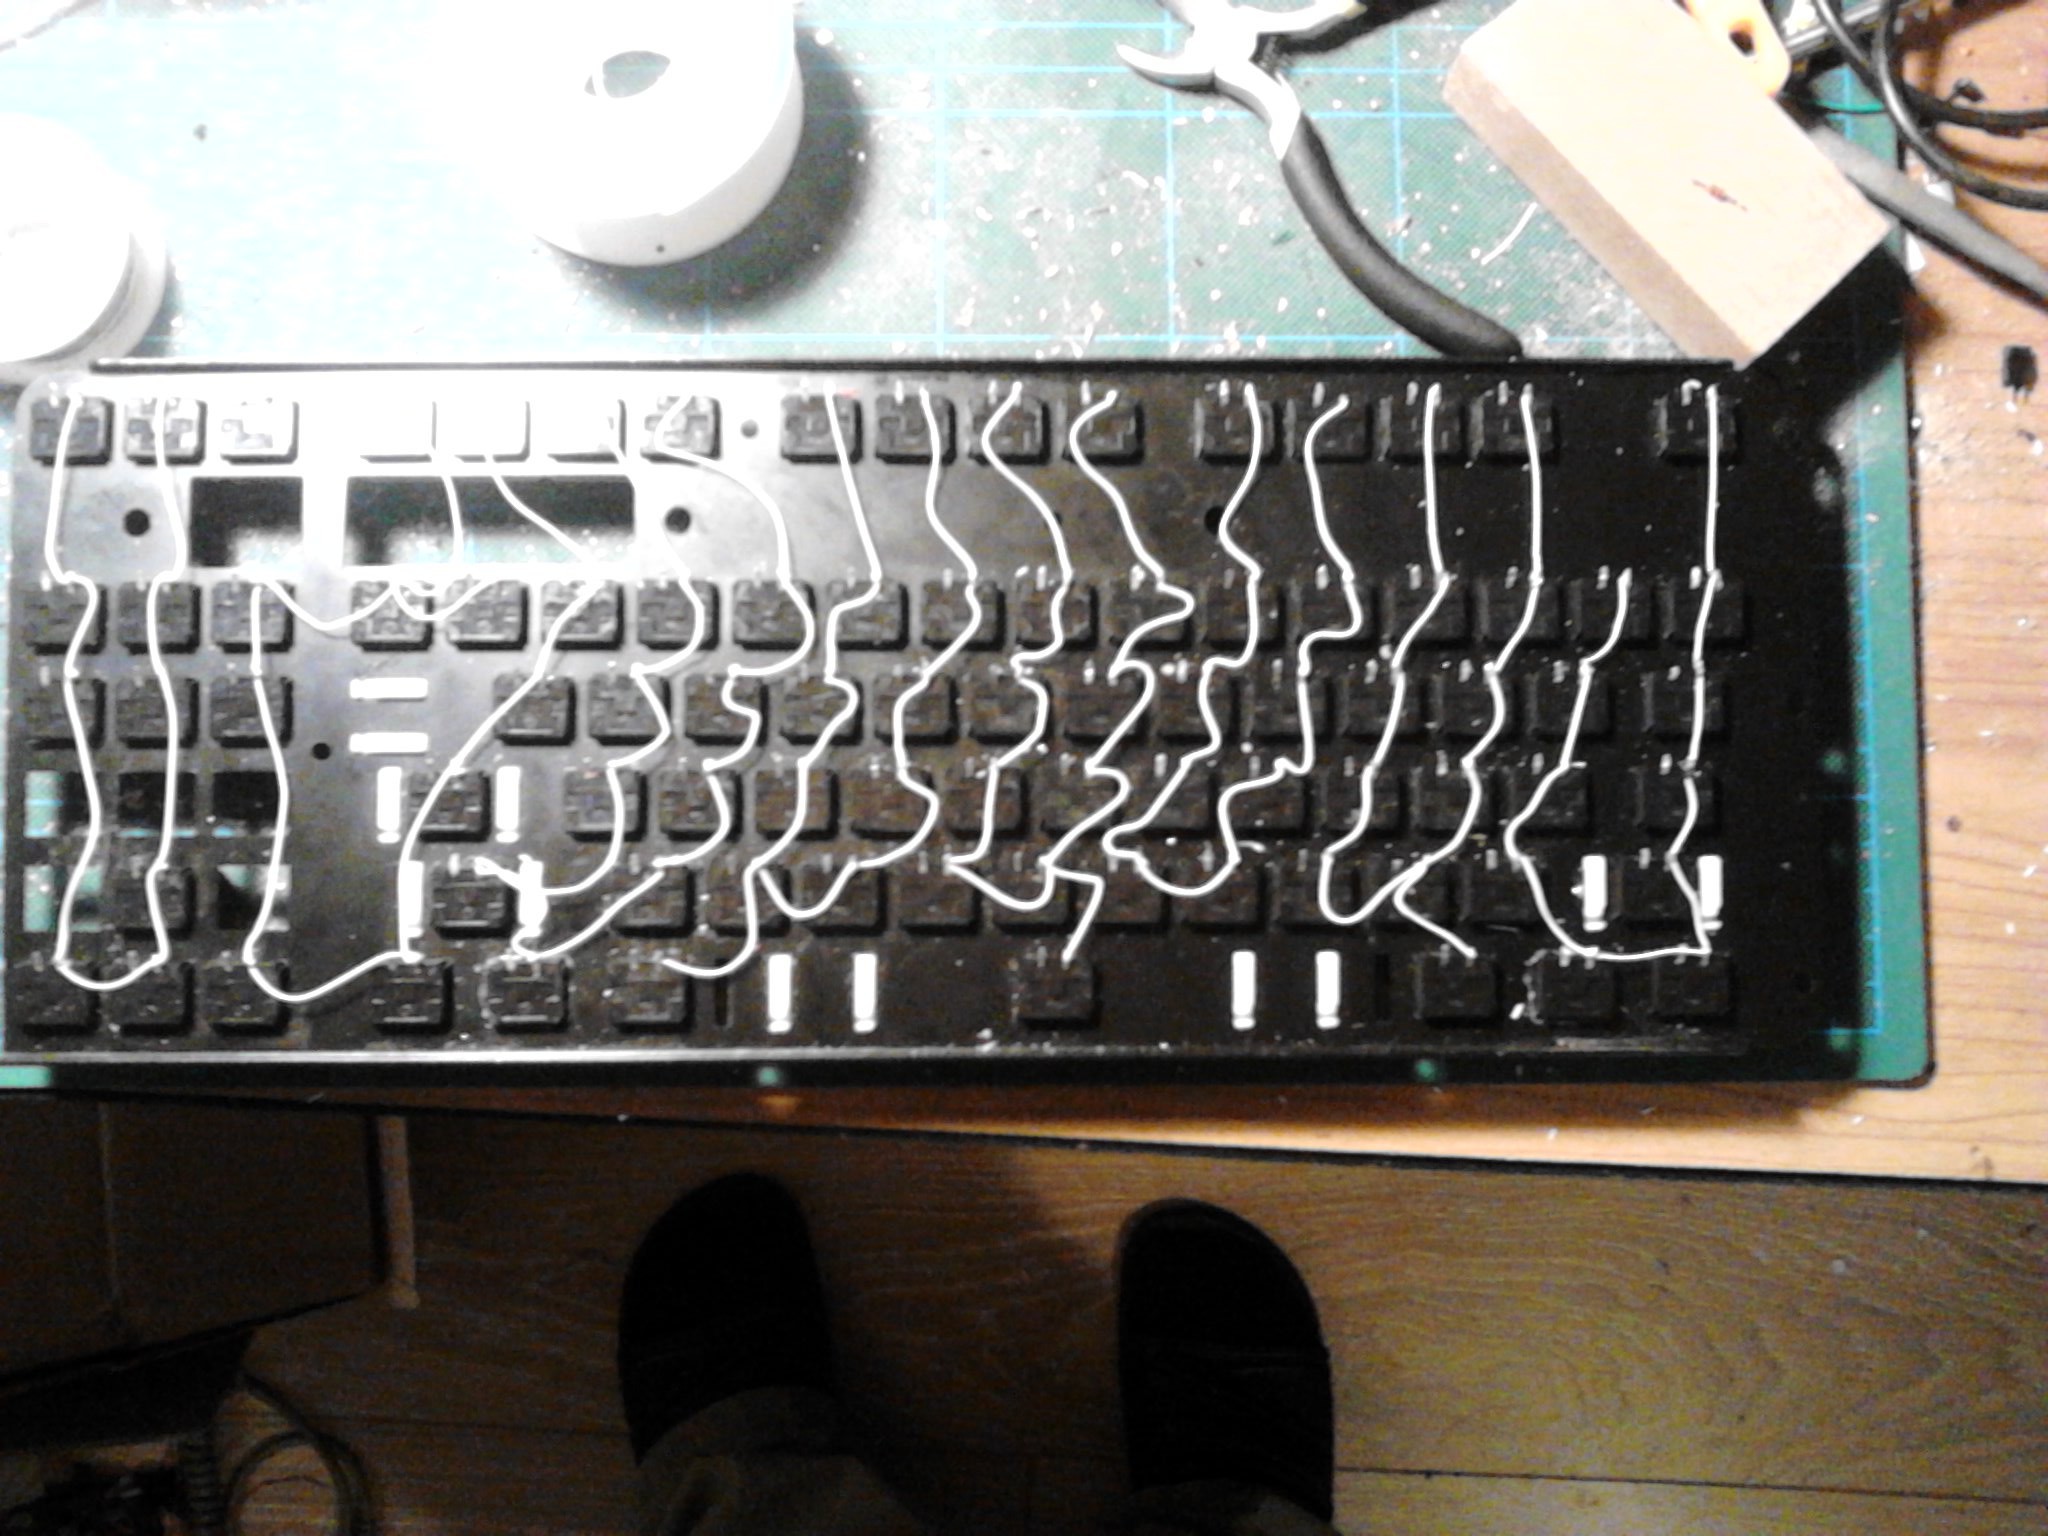
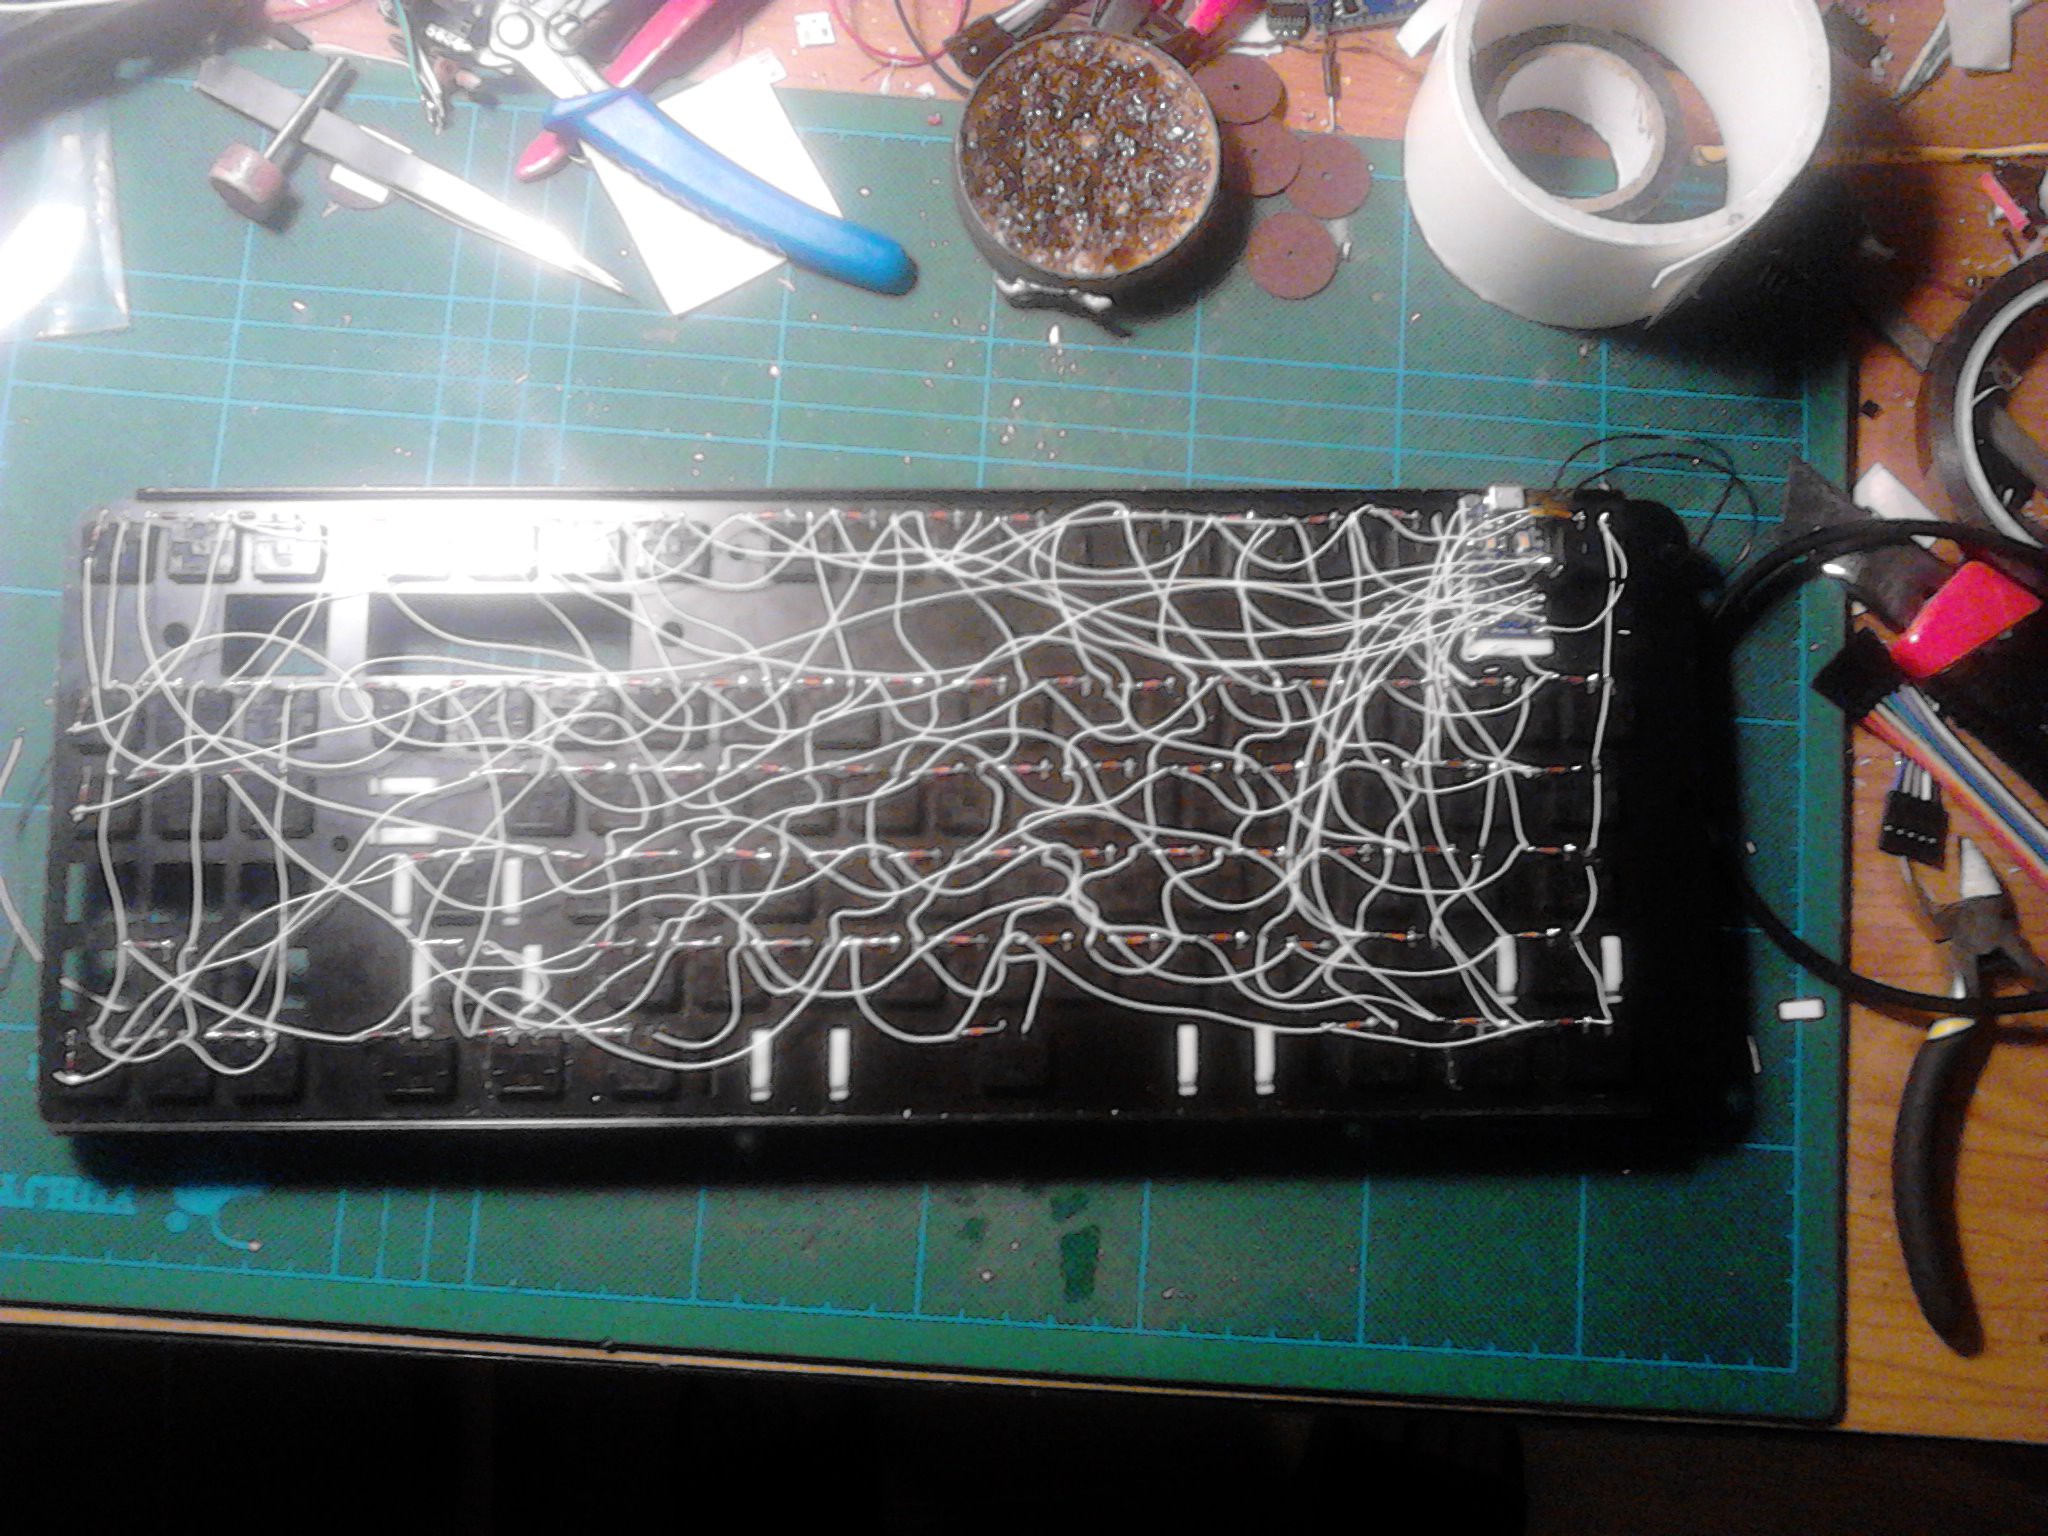
This was the most laborious step of the work. I had to solder all the keys, defined the pins for the rows and columns, and defined the key map. I started with soldering the columns:

Since I need the matrix to be as close to rectangle, as possible, to save pins, I merged pairs of columns. This way I have 8 columns with 11 rows each (except for one, that only has 10 rows).
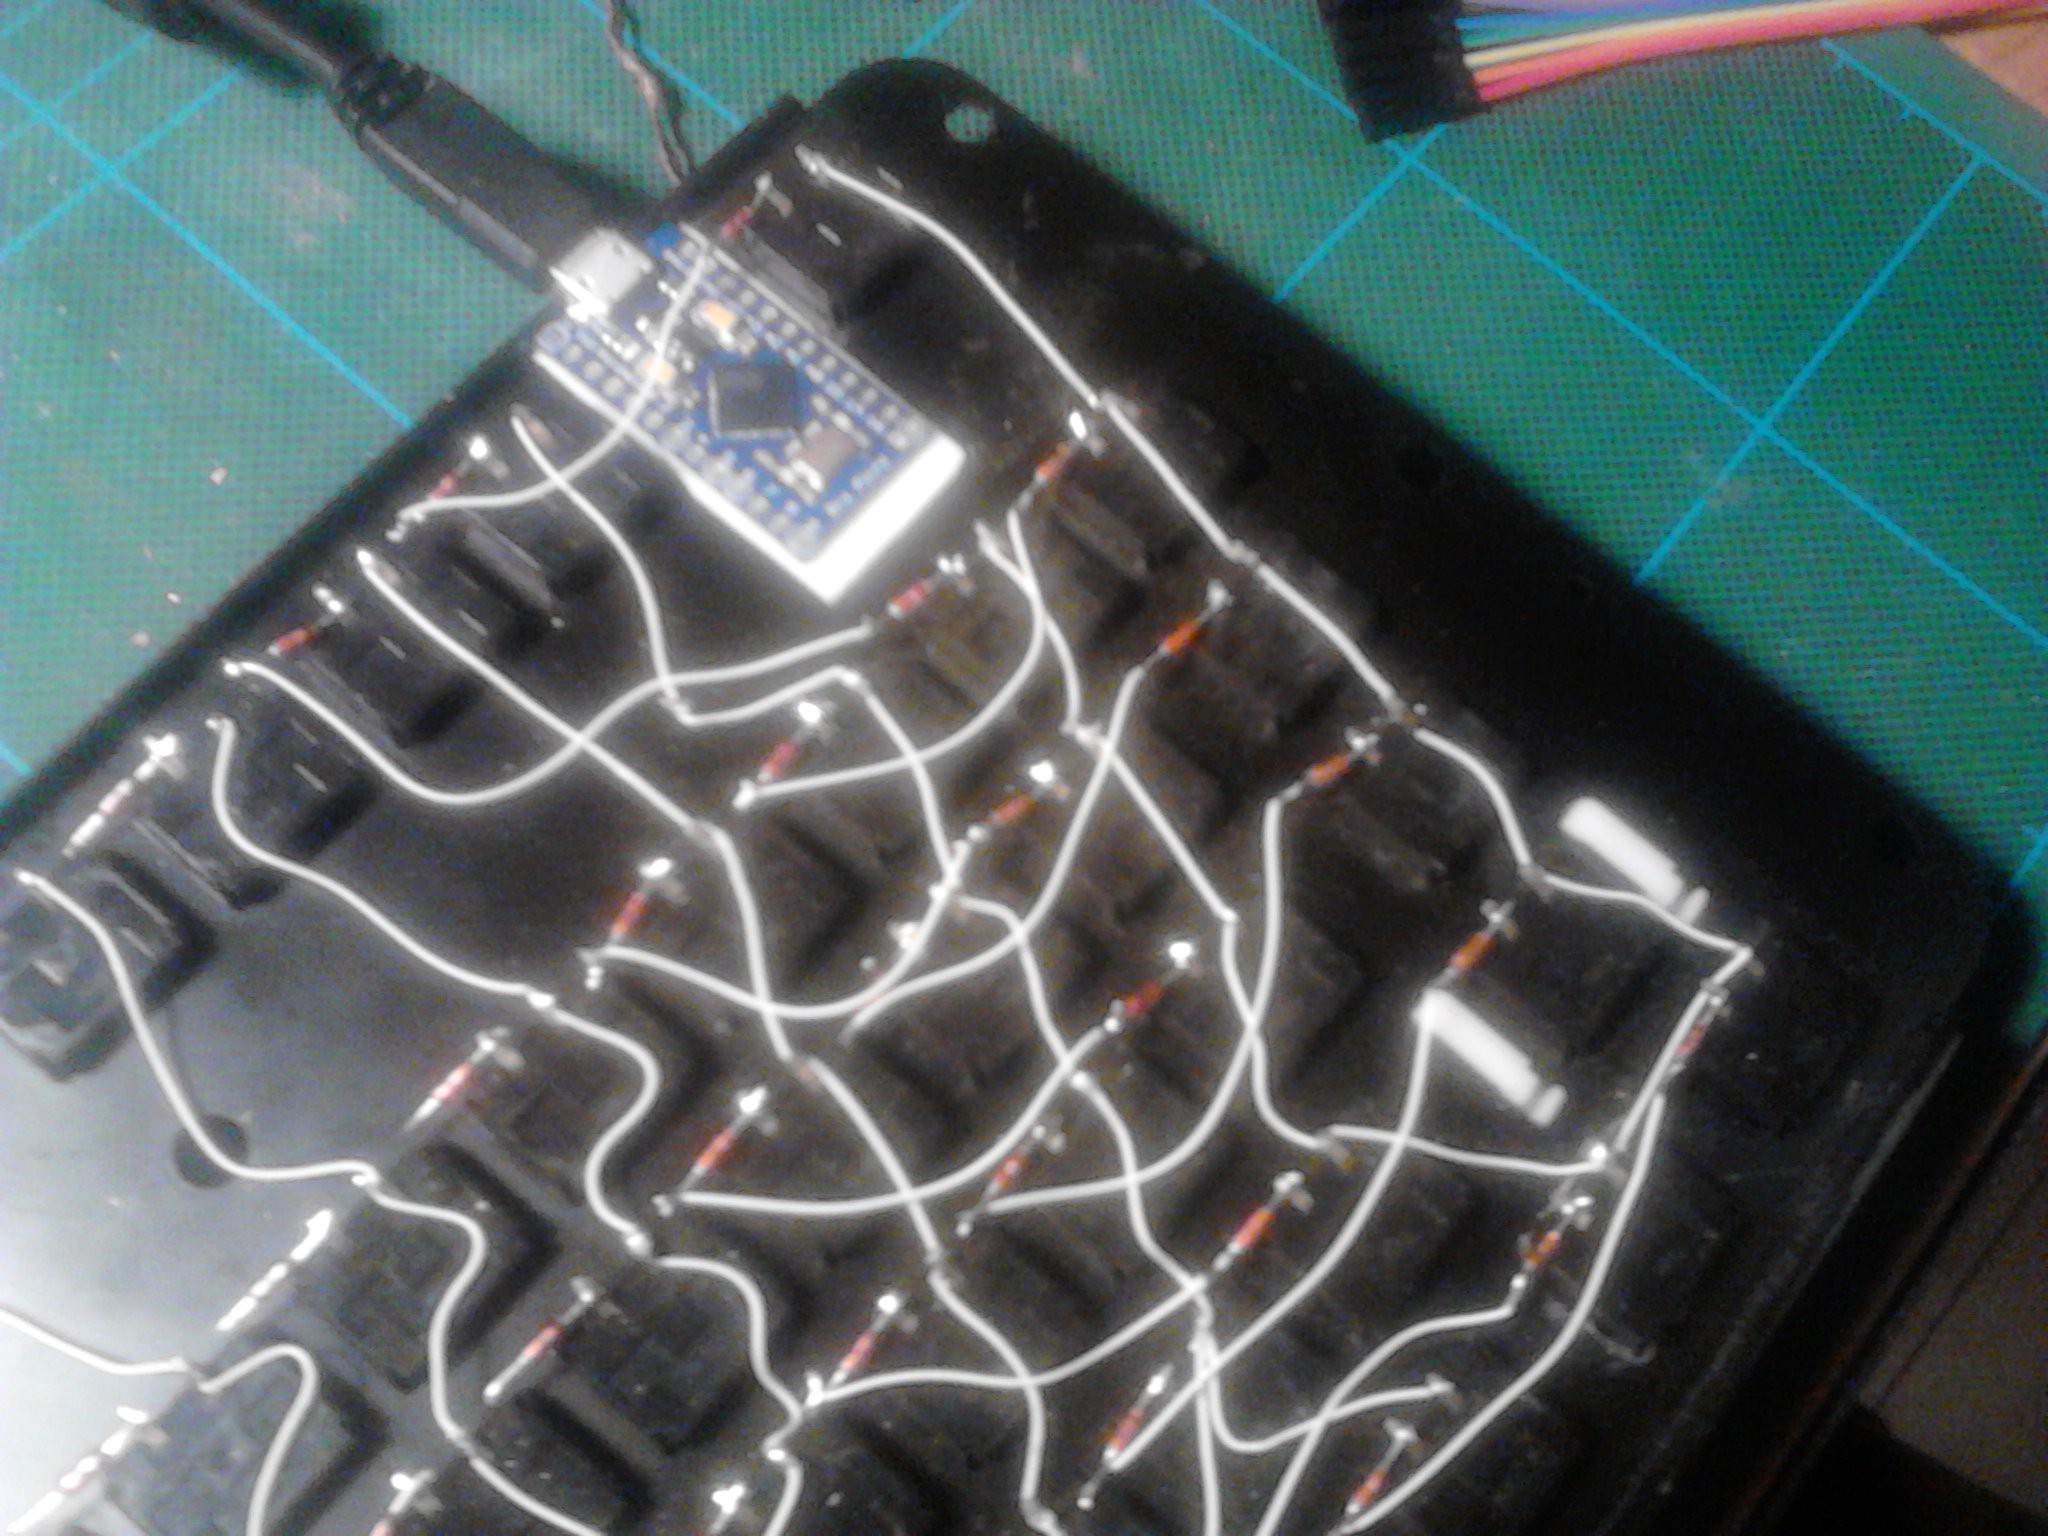
Next, I made a hole in the plate for the USB socket, and attached the microcontroller board with two-sided tape:

 Now, time for the firmware.
I copied the "onekey" example from the tmk_keyboard repository, and changed the names in the makefile and settings in config.h:
/* key matrix size */
#define MATRIX_ROWS 11
#define MATRIX_COLS 8

/* define if matrix has ghost */
//#define MATRIX_HAS_GHOST

/* Set 0 if debouncing isn't needed */
#define DEBOUNCE    5

/* key combination for command */
#define IS_COMMAND() ( \
    keyboard_report->mods == (MOD_BIT(KC_LSHIFT) | MOD_BIT(KC_RSHIFT)) \
)

/*
 * Feature disable options
 *  These options are also useful to firmware size reduction.
 */

/* disable debug print */
#define NO_DEBUG

/* disable print */
#define NO_PRINT

/* disable action features */
//#define NO_ACTION_LAYER
//#define NO_ACTION_TAPPING
#define NO_ACTION_ONESHOT
#define NO_ACTION_MACRO
#define NO_ACTION_FUNCTION
Then I modified the matrix.c file to support a little larger keyboard:
/* Column pin configuration
 * col: 8
 * pin: F4 F5 F6 F7 B1 B3 B2 B6
 */
static void  init_cols(void) {
    // Input with pull-up(DDR:0, PORT:1)
    DDRB  &= ~0b01001110;
    PORTB |=  0b01001110;

    DDRF  &= ~0b11110000;
    PORTF |=  0b11110000;
}

static matrix_row_t read_cols(void) {
    return (PINF&(1<<4) ? 0:(1<<0)) |
           (PINF&(1<<5) ? 0:(1<<1)) |
           (PINF&(1<<6) ? 0:(1<<2)) |
           (PINF&(1<<7) ? 0:(1<<3)) |
           (PINB&(1<<1) ? 0:(1<<4)) |
           (PINB&(1<<3) ? 0:(1<<5)) |
           (PINB&(1<<2) ? 0:(1<<6)) |
           (PINB&(1<<6) ? 0:(1<<7));
}

/* Row pin configuration
 * row: 11
 * pin: D3 D2 D1 D0 D4 C6 D7 E6 B4 B5 B0
 */
static void unselect_rows(void) {
    // Hi-Z(DDR:0, PORT:0) to unselect
    DDRD  &= ~0b10011111;
    PORTD &= ~0b10011111;

    DDRC  &= ~0b01000000;
    PORTC &= ~0b01000000;

    DDRE  &= ~0b01000000;
    PORTE &= ~0b01000000;

    DDRB  &= ~0b00110001;
    PORTB &= ~0b00110001;
}

static void select_row(uint8_t row) {
    // Output low(DDR:1, PORT:0) to select
    switch (row) {
        case 0:
            DDRD  |= (1<<3);
            PORTD &= ~(1<<3);
            break;
        case 1:
            DDRD  |= (1<<2);
            PORTD &= ~(1<<2);
            break;
        case 2:
            DDRD  |= (1<<1);
            PORTD &= ~(1<<1);
            break;
        case 3:
            DDRD  |= (1<<0);
            PORTD &= ~(1<<0);
            break;
        case 4:
            DDRD  |= (1<<4);
            PORTD &= ~(1<<4);
            break;
        case 5:
            DDRC  |= (1<<6);
            PORTC &= ~(1<<6);
            break;
        case 6:
            DDRD  |= (1<<7);
            PORTD &= ~(1<<7);
            break;
        case 7:
            DDRE  |= (1<<6);
            PORTE &= ~(1<<6);
            break;
        case 8:
            DDRB  |= (1<<4);
            PORTB &= ~(1<<4);
            break;
        case 9:
            DDRB  |= (1<<5);
            PORTB &= ~(1<<5);
            break;
        case 10:
            DDRB  |= (1<<0);
            PORTB &= ~(1<<0);
            break;
    }
}
Finally, with some mistakes and experimenting, I defined the key map in keymap.c:static const uint8_t PROGMEM keymaps[][MATRIX_ROWS][MATRIX_COLS] = {
{
{KC_PGUP, KC_PSCR, KC_F10, KC_F8, KC_SPC, KC_NO, KC_F2, KC_1 },
{KC_PGDN, KC_F12, KC_MINS, KC_9, KC_F6, KC_F4, KC_3, KC_Q },
{KC_HOME, KC_BSPC, KC_LBRC, KC_O, KC_7, KC_5, KC_E, KC_A },
{KC_RGHT, KC_SLCK, KC_QUOT, KC_L, KC_U, KC_T, KC_D, KC_Z },
{KC_DEL, KC_NO, KC_RSFT, KC_DOT, KC_J, KC_G, KC_C, KC_LGUI},
{KC_END, KC_BSLS, KC_RGUI, KC_RALT, KC_M, KC_B, KC_LALT, KC_LCTL},
{KC_UP, KC_RCTL, KC_SLSH, KC_COMM, KC_N, KC_V, KC_X, KC_LSFT},
{KC_DOWN, KC_ENT, KC_SCLN, KC_K, KC_H, KC_F, KC_S, KC_CAPS},
{KC_LEFT, KC_RBRC, KC_P, KC_I, KC_Y, KC_R, KC_W, KC_TAB },
{KC_BRK, KC_EQL, KC_0, KC_8, KC_6, KC_4, KC_2, KC_GRV },
{KC_INS, KC_F11, KC_F9, KC_F7, KC_F5, KC_F3, KC_F1, KC_ESC },
},
};Nothing fancy for now, just regular keyboard. Since the columns are doubled, the layout definition doesn't look very readable, but it works.Next, I will experiment with some action keys and add secondary functions to some of the keys, so that I have media keys and whatnot.
Also, I still need to make the case for this keyboard. I will get some cardboard tomorrow and start prototyping.
 deʃhipu
Discussions
Become a Hackaday.io Member
Create an account to leave a comment. Already have an account? Log In.