 Mile
MileHere in this video you can see progress I made so far. Also at the end working display can be seen.
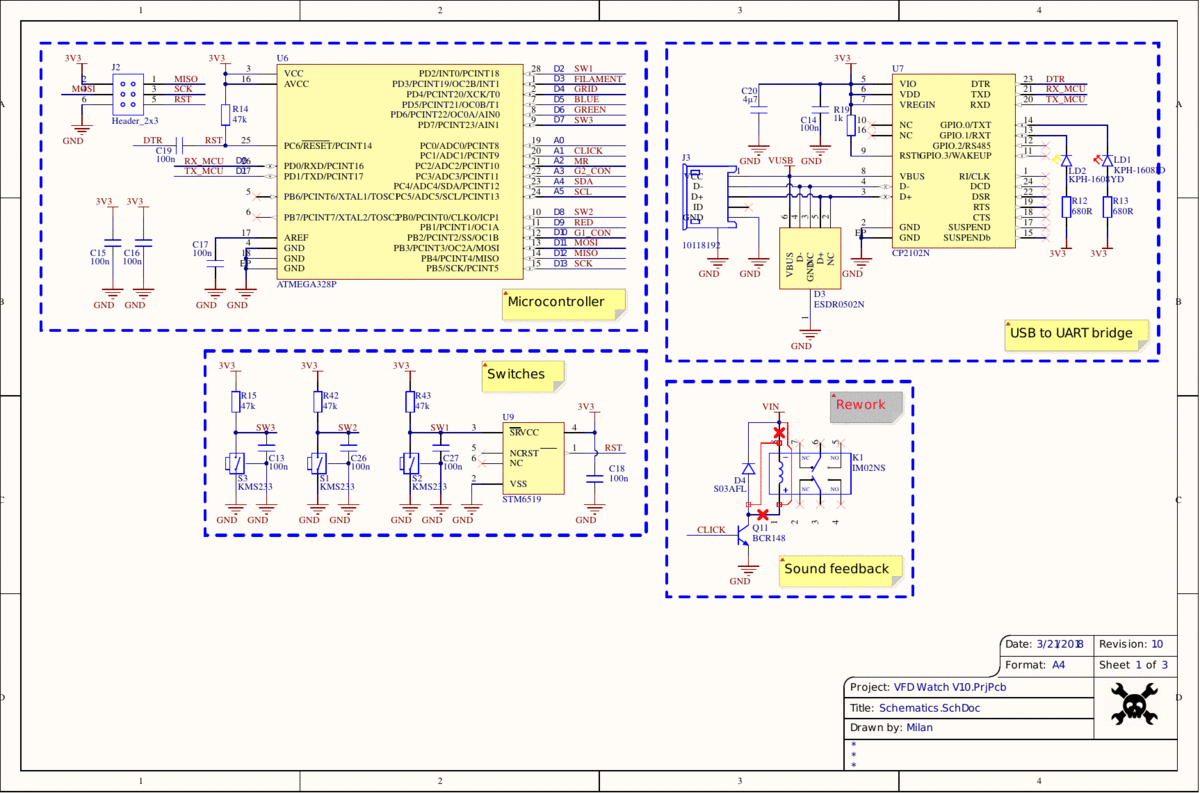
As you can see I had to cut few traces and solder jumper wires to fix stuff i messed up. Stuff I changed:
1. Fix footprint of K1 (swap pins 1 and 8 on PCB)
2. Replace push-pull drivers with NPN switches (now anodes are switched on by negative logic)
3. Boost converter (U3) is still not stocked so I had to supply 20 V from my PSU.
All changes made to the PCB are documented in the Schematics (also available in .pdf check "FILES")
Next thing to do is to test RGB leds under the tubes and replace switches on the PCB (they aren't very good) because they broke. After that I will start printing enclosure and by then hopefully battery arrives so i can test fit whole assembly.
Discussions
Become a Hackaday.io Member
Create an account to leave a comment. Already have an account? Log In.