 lion mclionhead
Human shoes are an utter disaster for lions. The single greatest idea for making human shoes fit lion paws came from
http://fellrnr.com/wiki/Modified_Nike_Free
This is the only way we can run reasonable distances without blisters, pantar fasciitis, & black clawnails. Over the years, as lion fitness improved, distances & speeds increased, & even this has run into limitations. Barepaw running is unacceptable, because of the dog manure, human waste, & rocks. Humans are nasty animals.
Another problem which has arisen is shoes are now being discontinued after only 1 production run. Like books, programming languages & blockbuster movies, they're sold more for publicity & thrown away. Finding another shoe which works as well as last year's blockbuster can take years, if ever. The only long term solution is making shoes from scratch, from easily obtainable materials.
After extreme blistering in a 19 hour race, lions experimented with slow quarter miles in $8 Walmart sandals. In the 19 hour race, shoes trapped sand & moisture from the beach track. If they just had more ventilation, the problems might have been avoided. Sandals could actually hit decent speeds, with a bit more upswing. It became clear the best chance lions have of reaching the next level is modified sandals. Sandals won't allow the maximum speeds, but they should allow the maximum distances.
Humans have since created
https://xeroshoes.com/
https://lunasandals.com/
extremely expensive versions of $8 Walmart sandals, with more straps. $40 for the Xeroshoes Genesis would be reasonable if it wasn't for another problem. The last pair of shoes wore down in only 3 months. Most of a lion's life is spent running on inner foam rather than rubber.
The Goog may actually embargo all but adsense paying commercial links, since it reveals no hacks. Of course, lions don't sew & don't want to be like the male humans who do sew.
http://www.diyfootwear.com/huarache-sandals/
A nugget of info escaped the Alphabet corporation's embargo.
https://www.youtube.com/results?search_query=Huarache+Sandals
Sandals & how to tie them. All these guys have pretty beat up feet & watching their videos conjure up foot odors. Something is a bit off when it's only being done by men. The dominant search result is https://www.youtube.com/channel/UCAq7JfGUobKA-pDDxVQ58Rw, but he's bald.
1st lion run in sandals
------------------------------------------------------------------------------------------------------------------------------------------------------------------------------------
Current bill of materials:
1mm Vibram soling sheet for the bottom, adhered with E6000:
https://www.amazon.com/gp/product/B00FE459NA/
https://www.amazon.com/Vibram-Tania-Protective-Sheet-Style/dp/B00I3LW9K2/
For the top, 2x6mm white EVA layers tacked by E6000
https://www.amazon.com/Bulk-Buy-Darice-1199-20-10-Pack/dp/B0033M2FBY/
or 10mm EVA combined with a 6mm EVA to get 16mm
https://www.amazon.com/gp/product/B082KH2CMJ/
A top layer of fake leather or suede to improve traction in rain.
https://www.amazon.com/gp/product/B0B82MYSGD/
This is fake suede, which is not to be confused with fake leather.

Fake suede

Fake leather
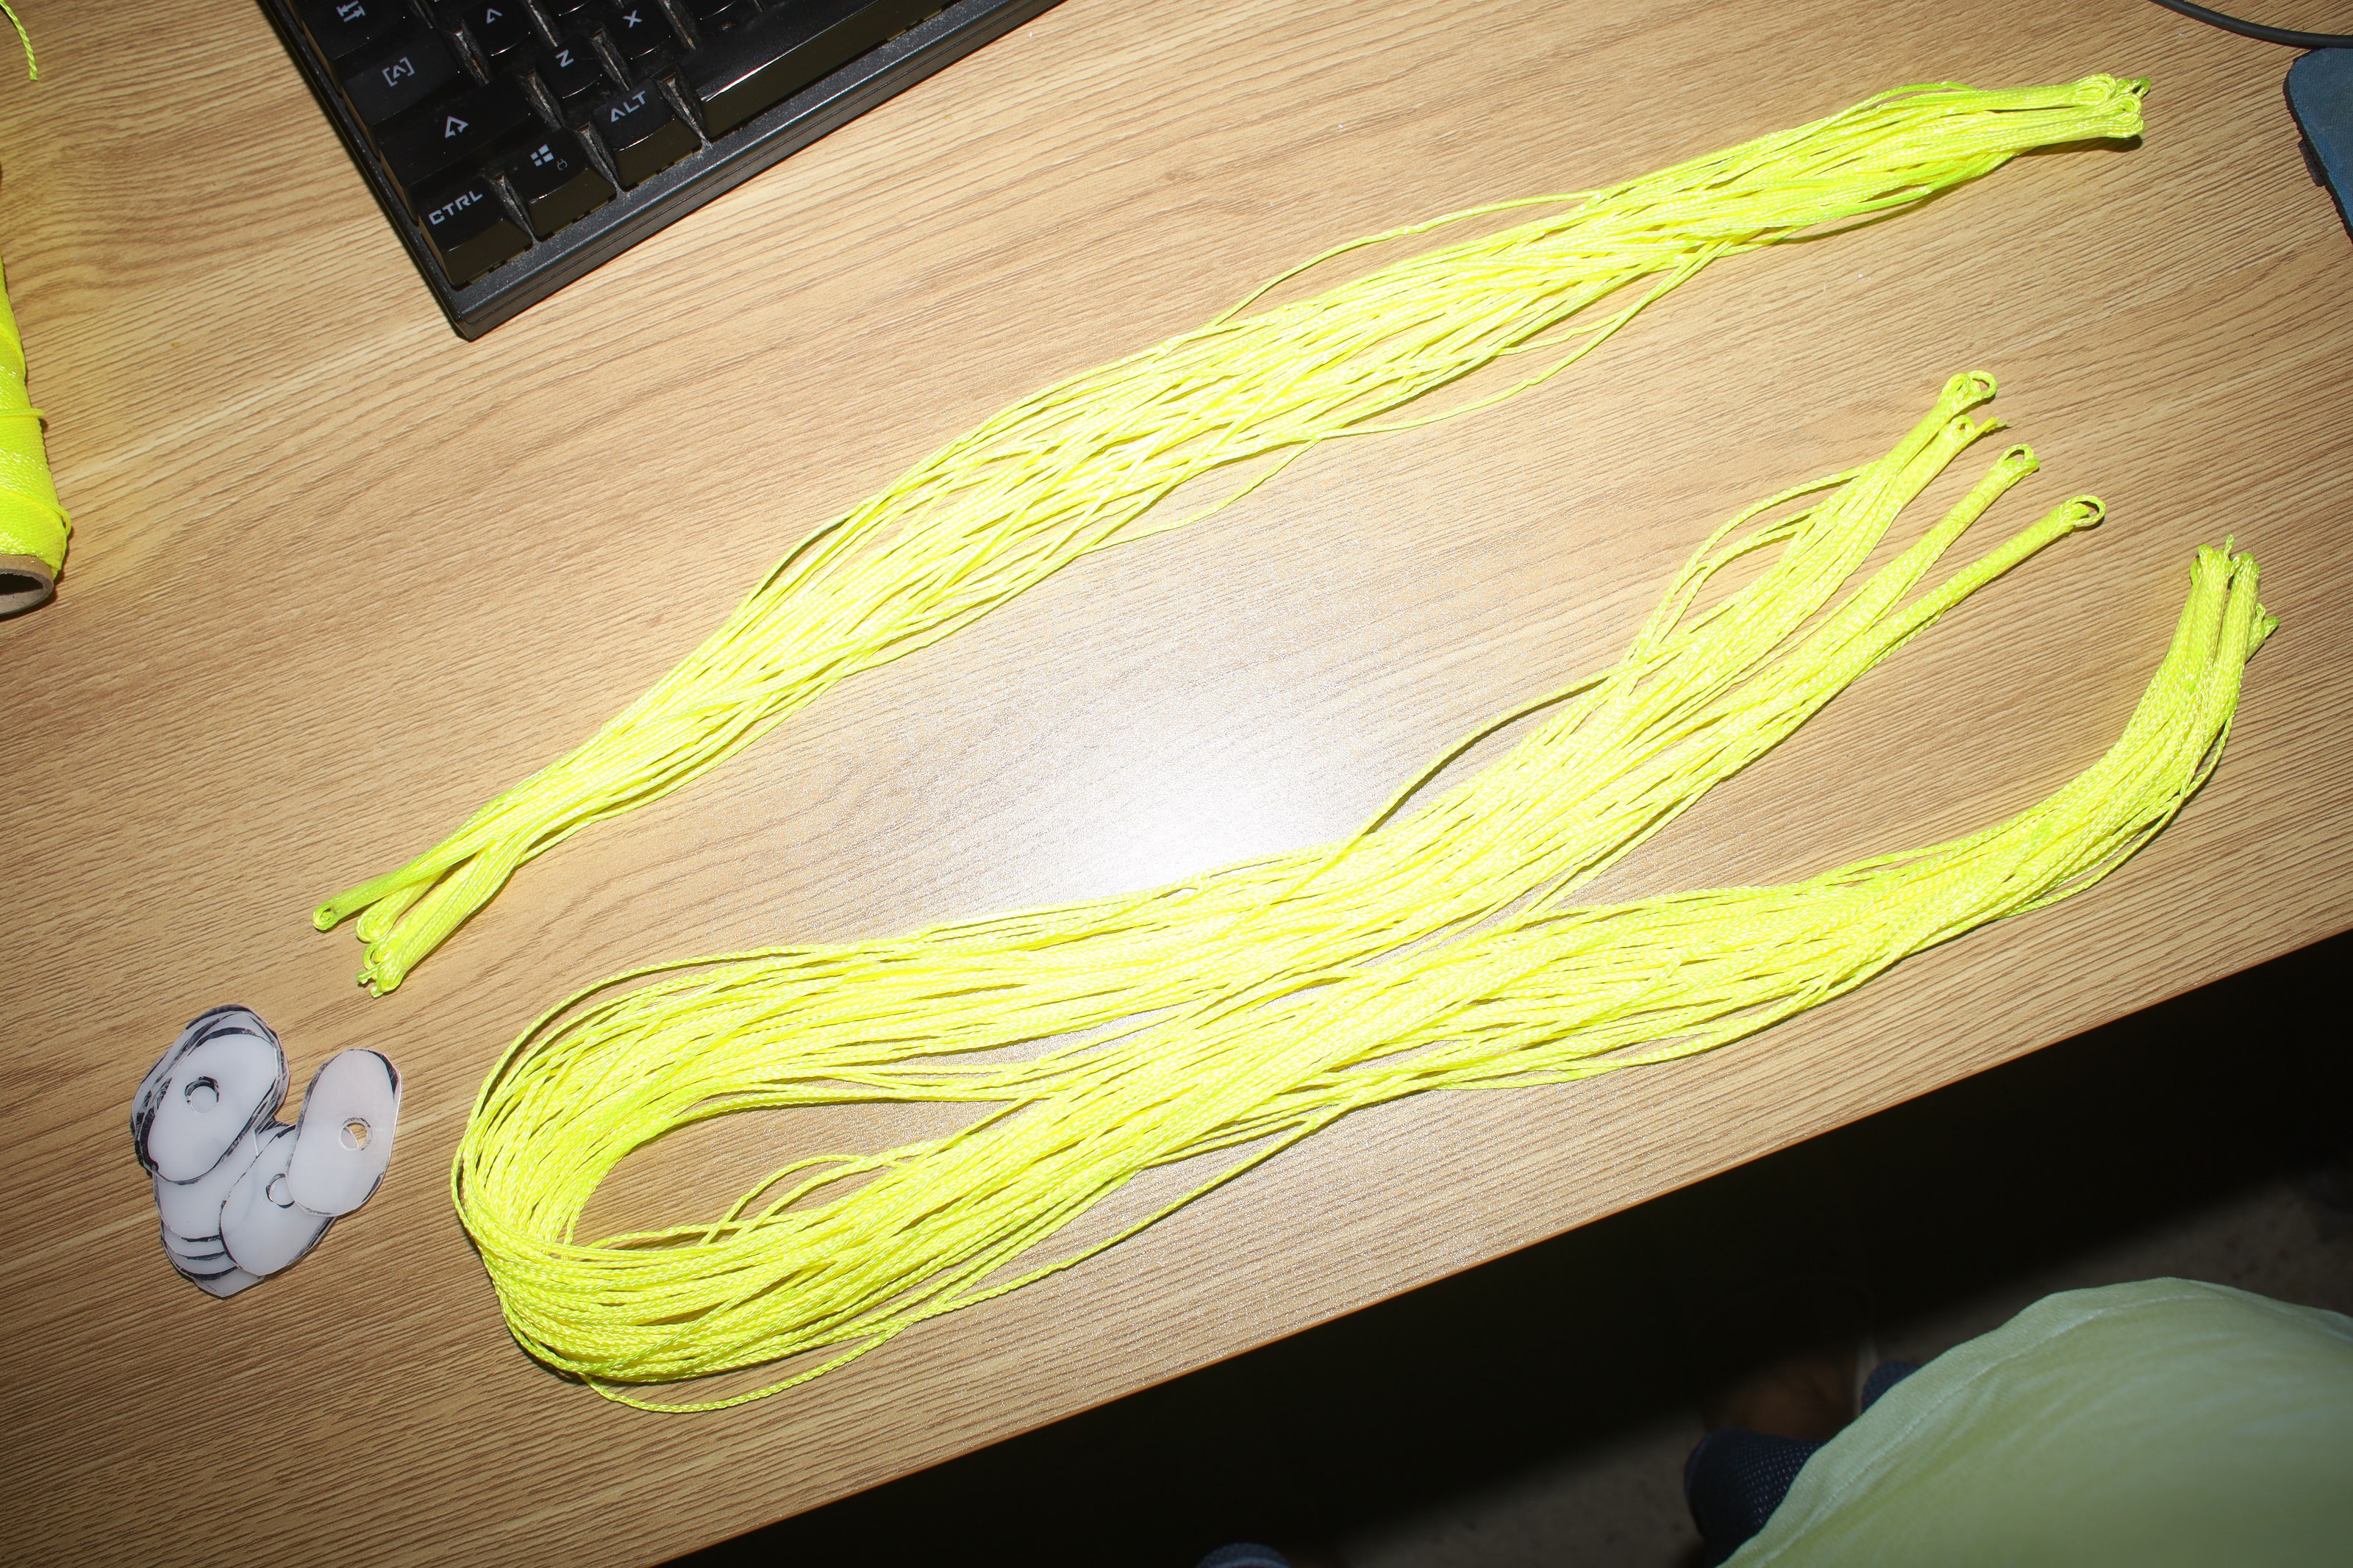
#18 yellow nylon mason line for the heel strap & toe strap.
White string is a different material that degrades over time, so yellow has been the only useful string.
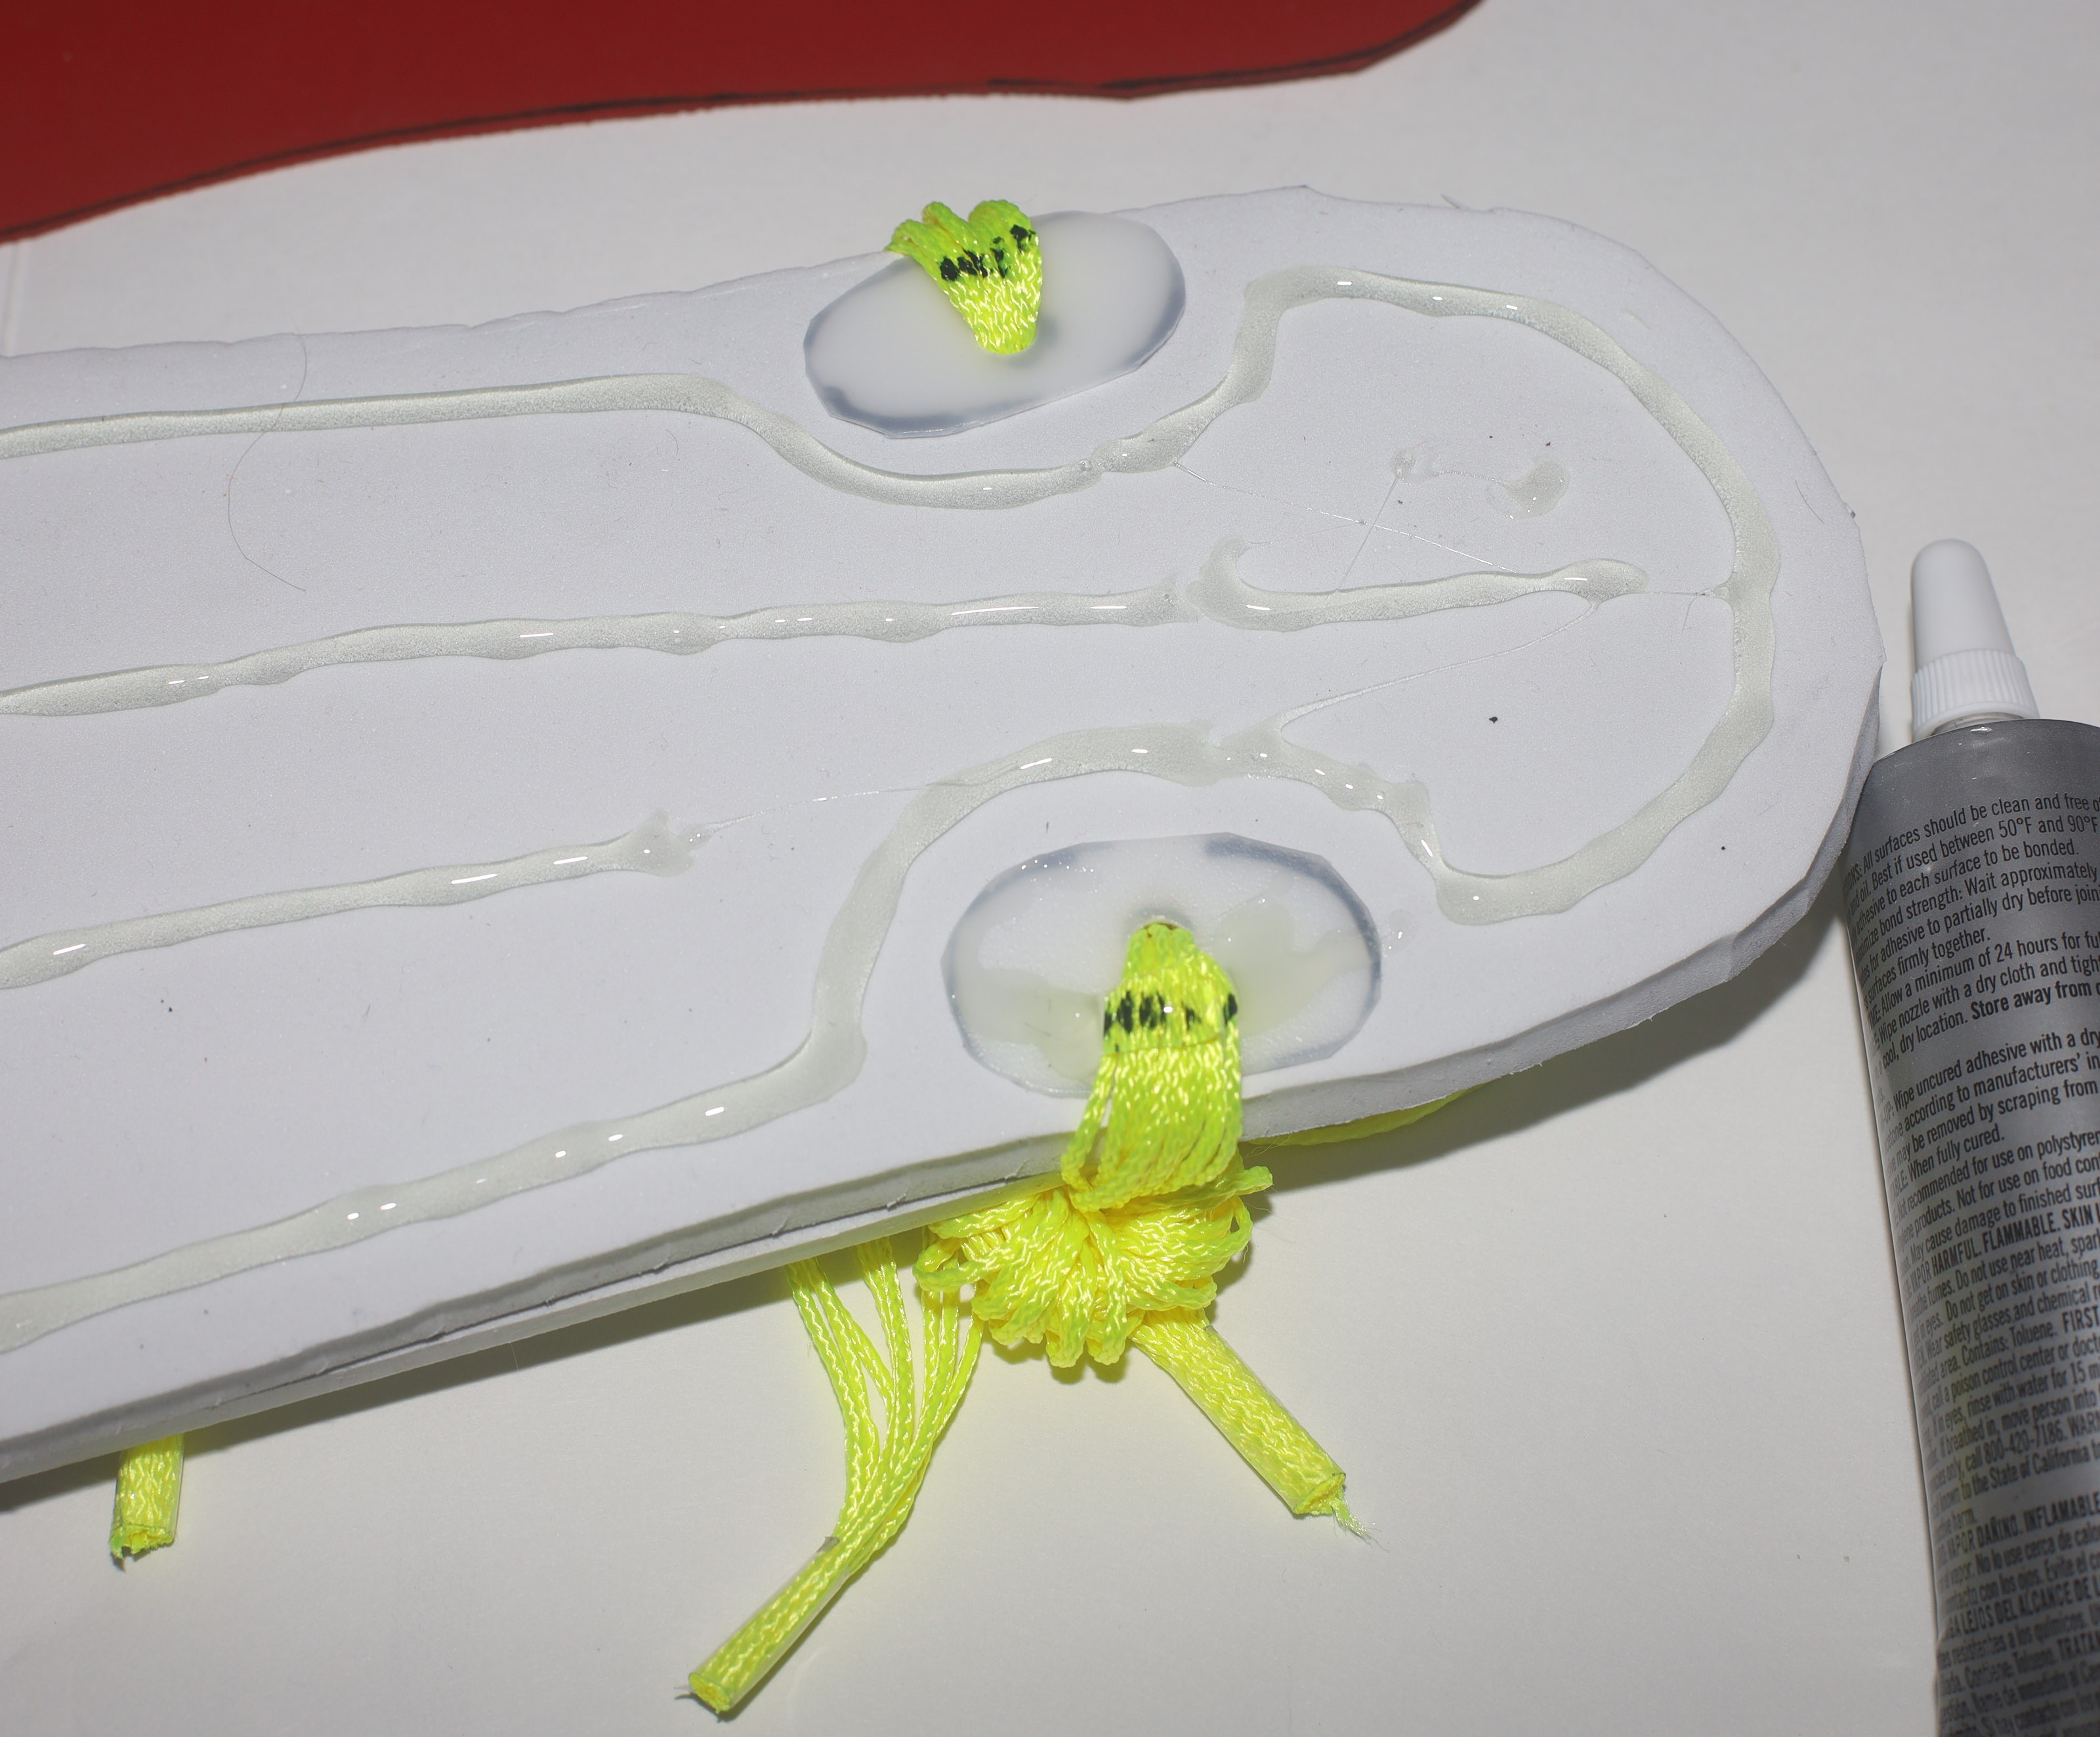
E-6000 adhesive. With the upper suede coating, it's taking 1 tube per sandal.
Hot glue for covering chafing points.
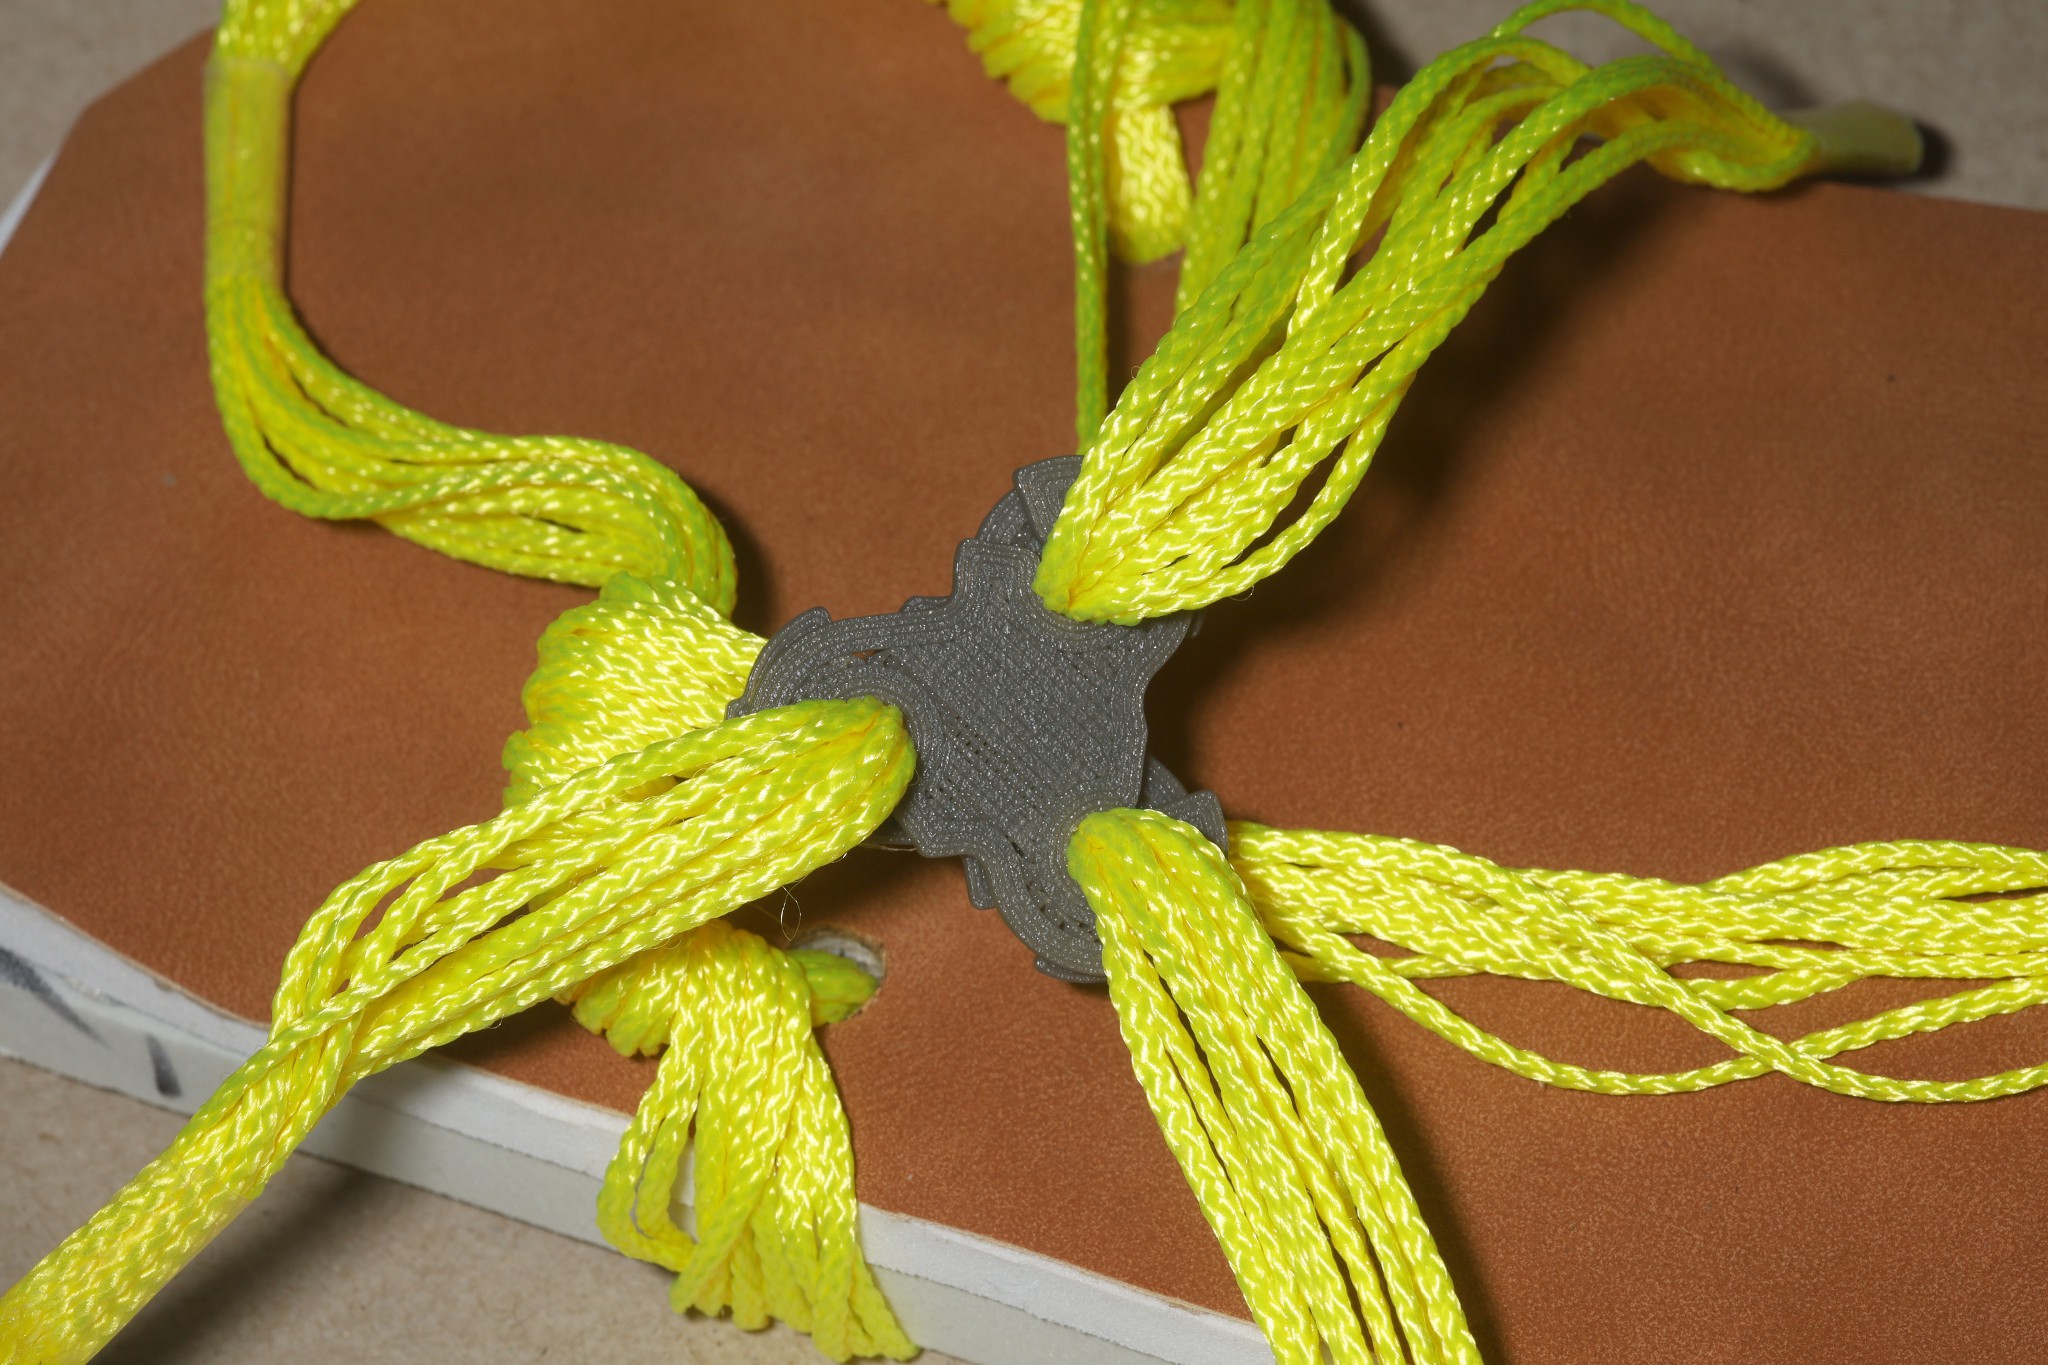
Home made cord farsteners.
https://github.com/heroineworshiper/cords
A polypropylene alcohol bottle turns into plastic reinforcement pieces.
-----------------------------------------------------------------------------------------------------
Assembly:
The toe strap uses a bundle of 10 x #18 string, 19" long.
The heel strap uses a bundle of 10 x #18 string, 35" long.
Bundles of parallel strings have proven to be the least abrasive laces.
The ends are taped with scotch tape & then cut after taping. Then the ends receive CA glue to keep the strings in place.
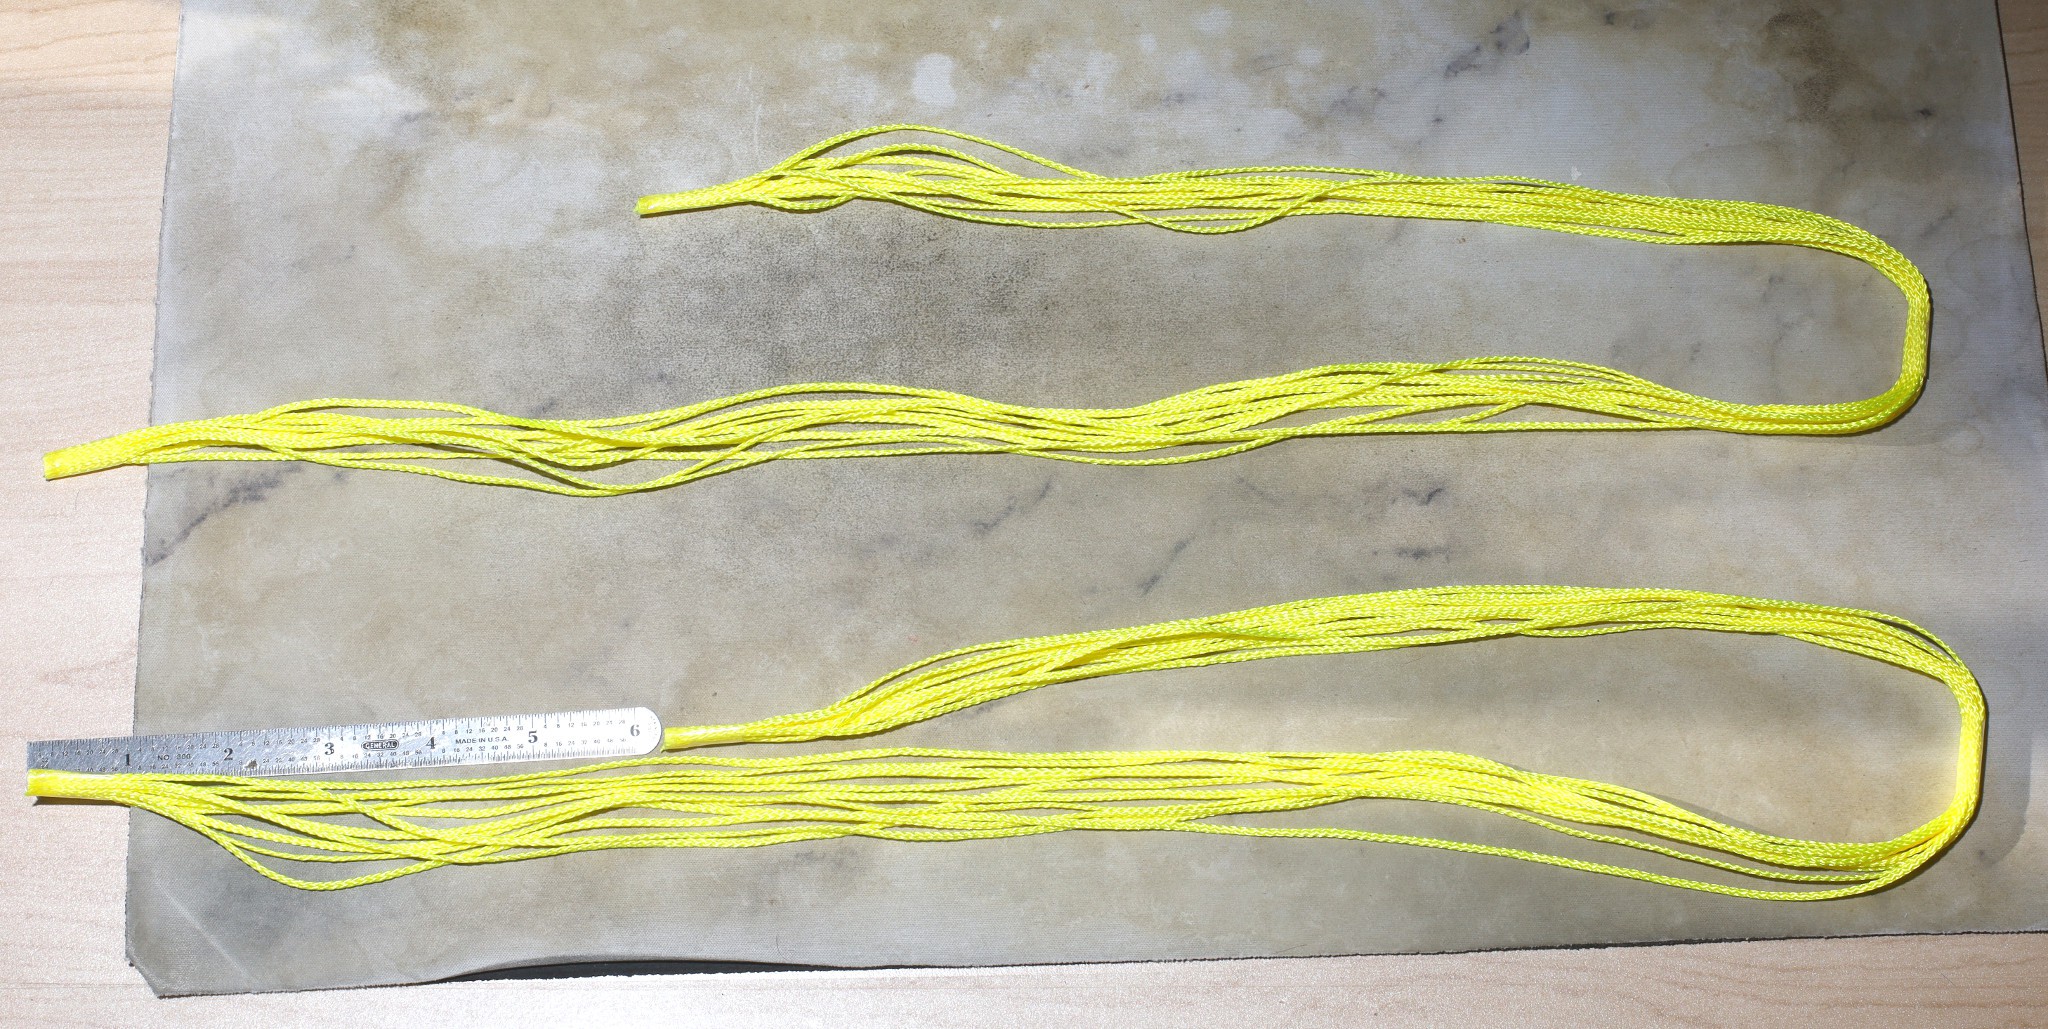
The long pieces of string need a midpoint marked with scotch. The midpoint is 6" closer to 1 end than the other.
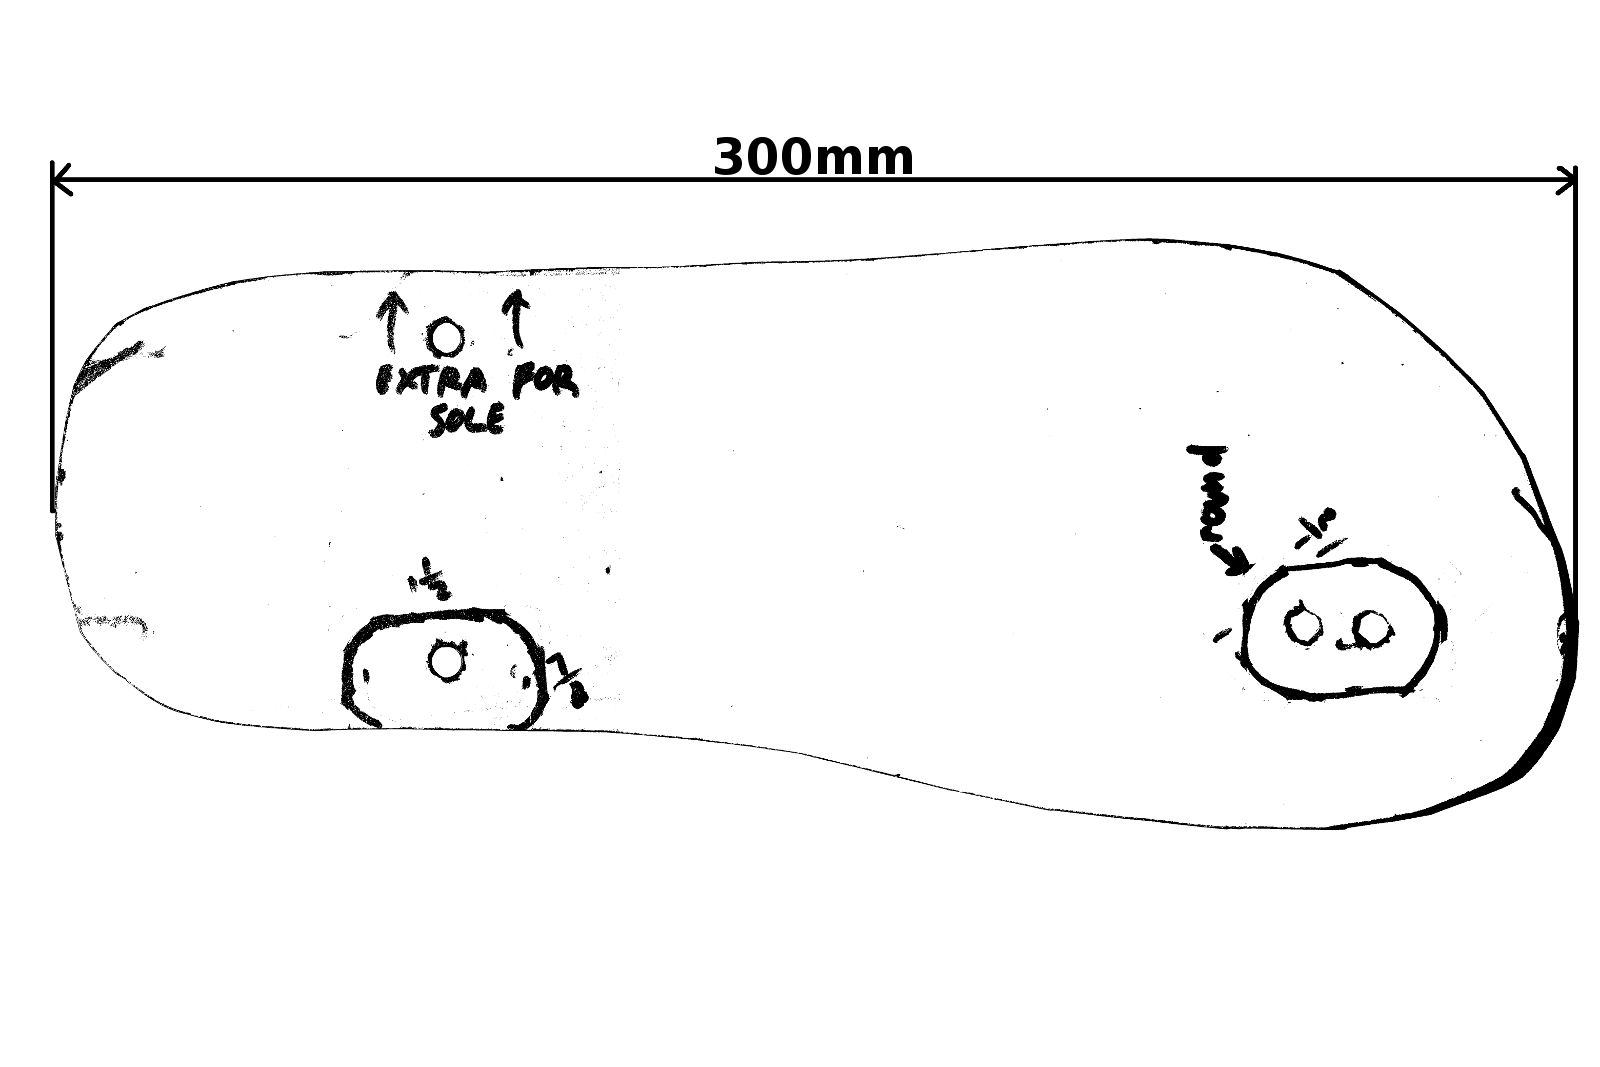
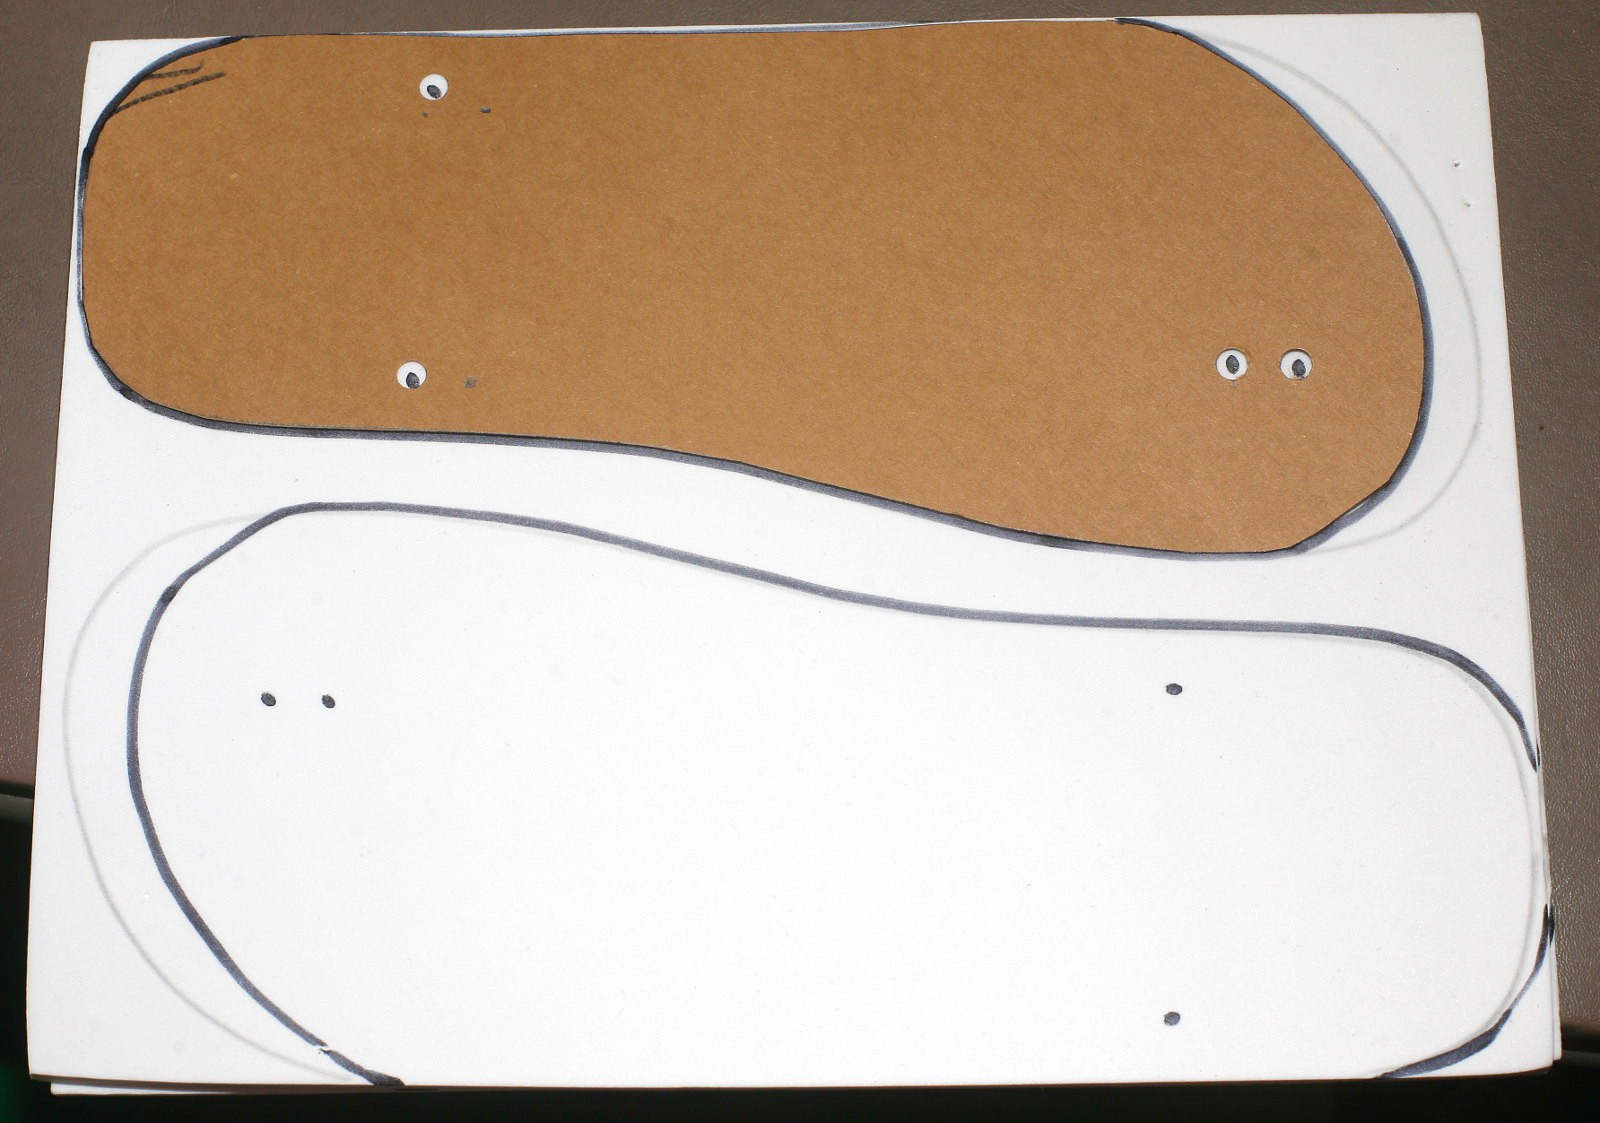
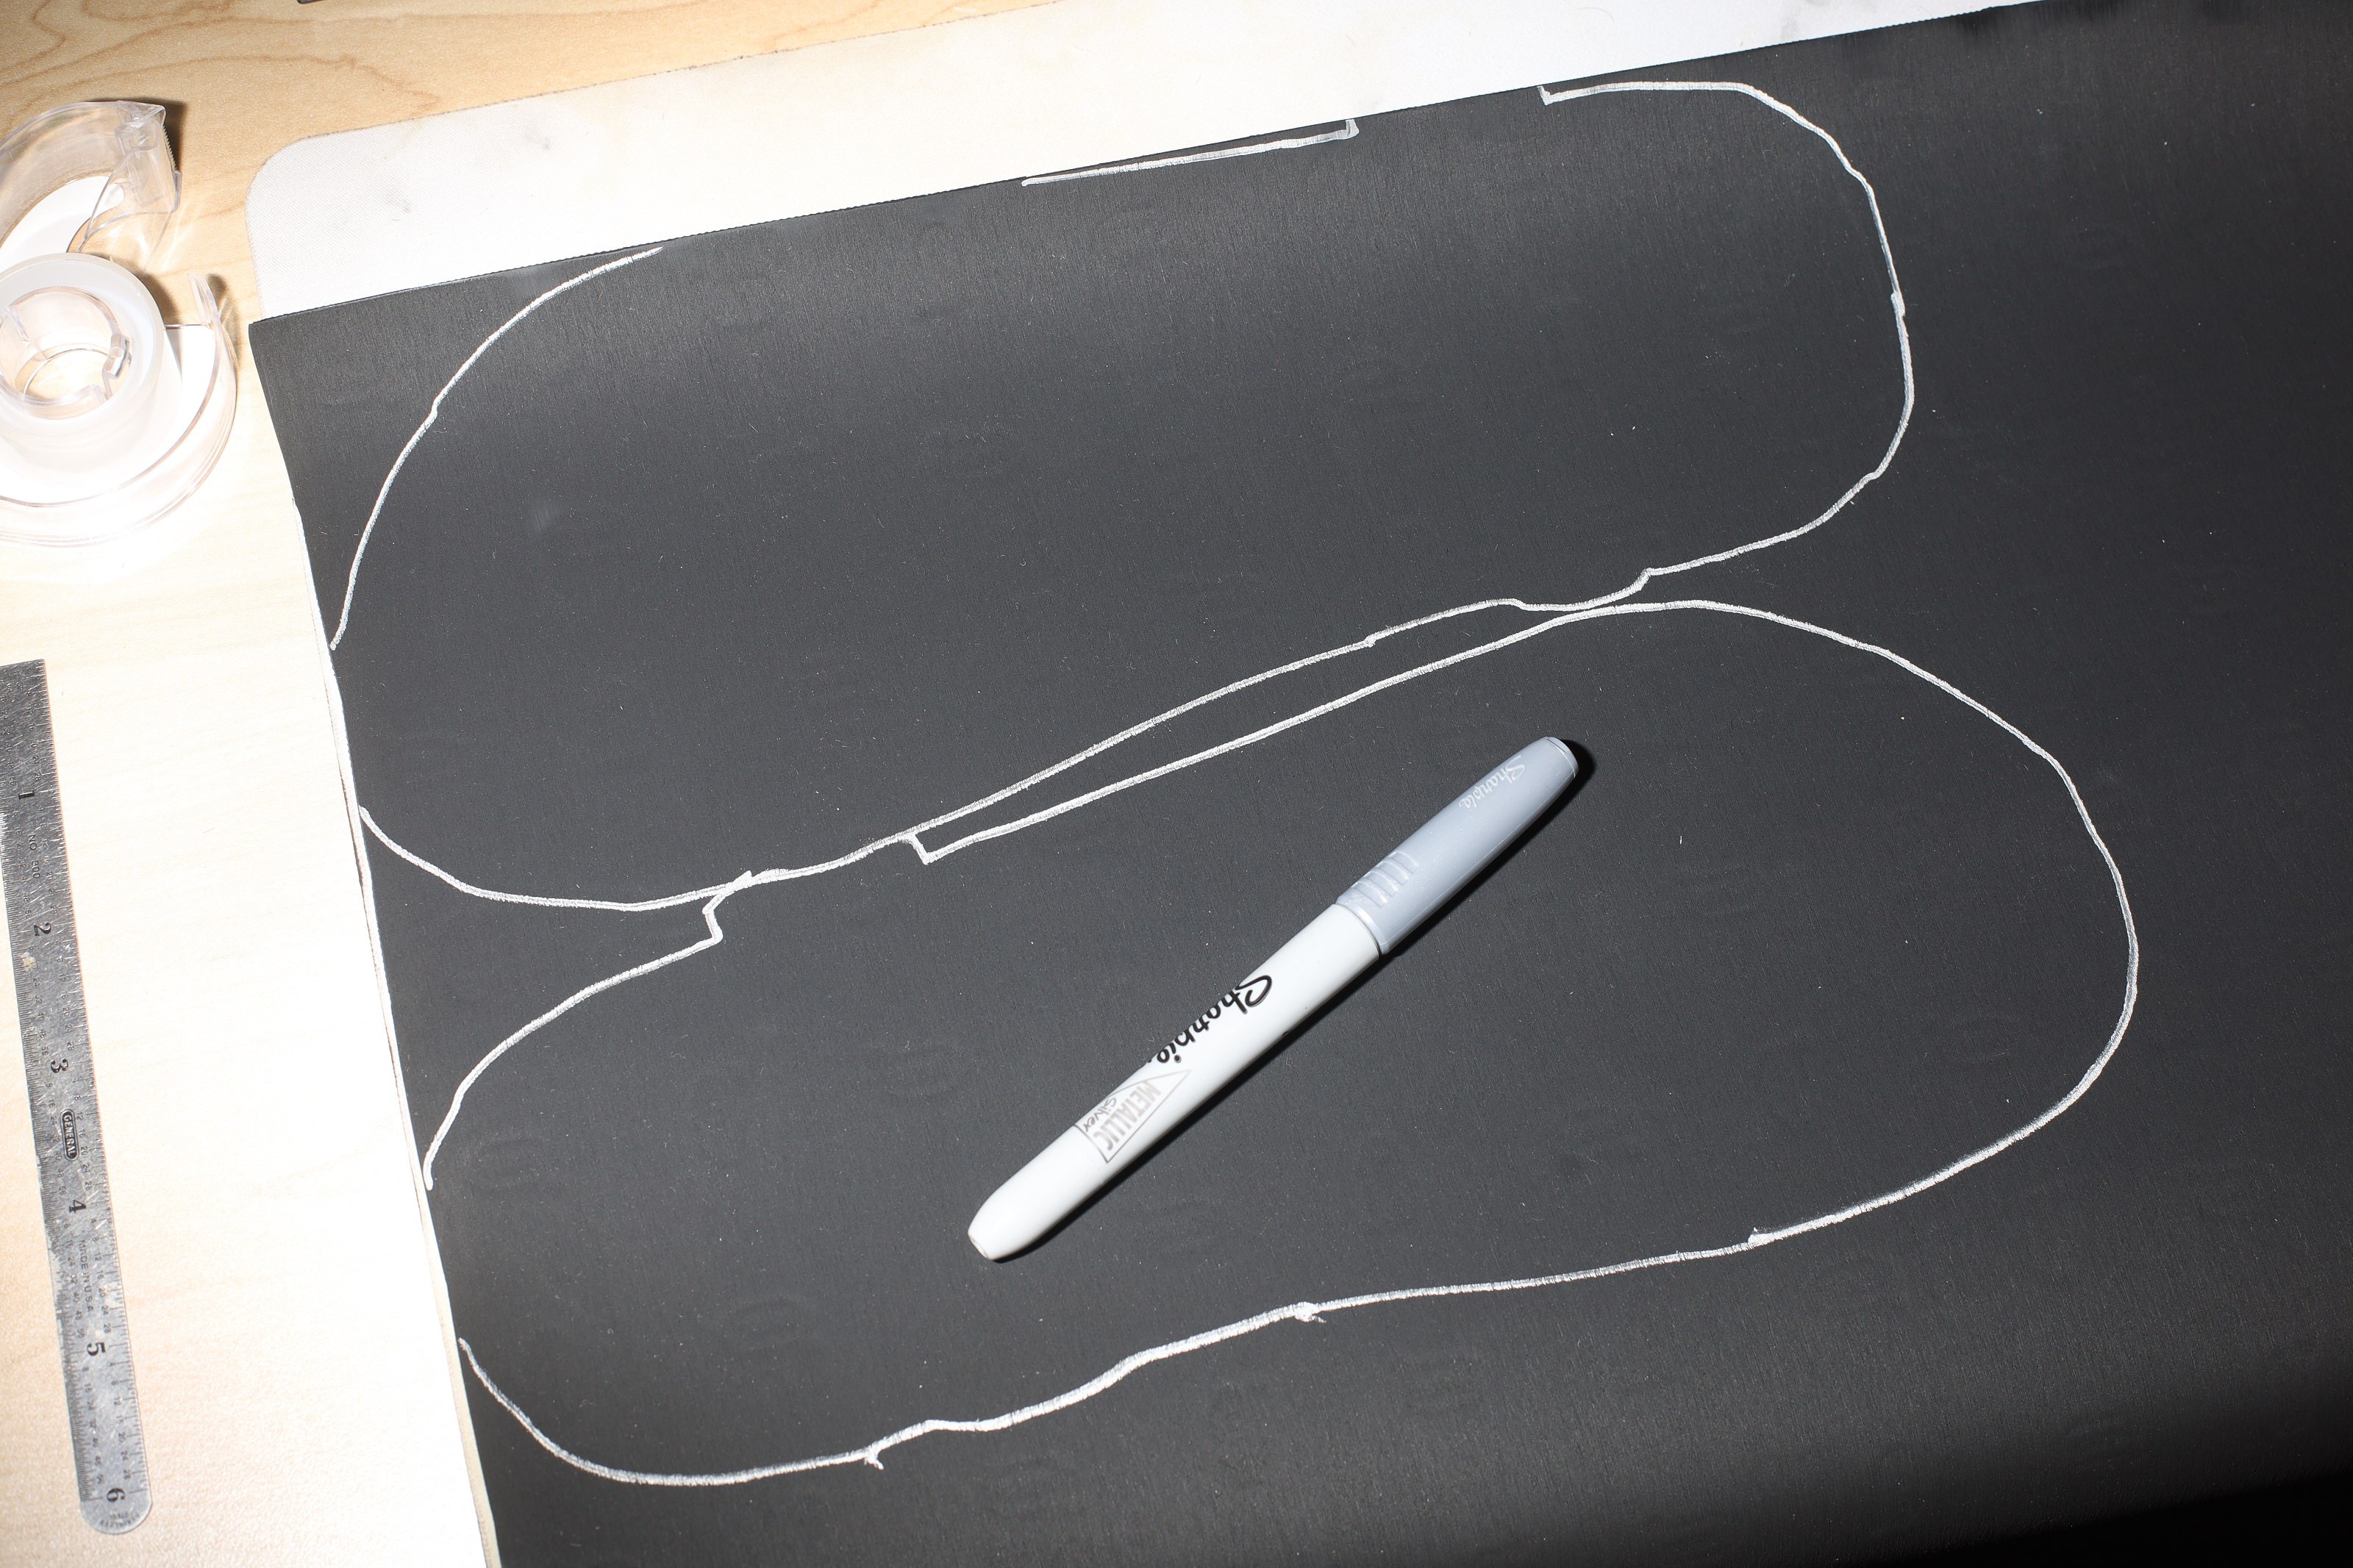
There is a template which when printed to scale provides the dimensions of plastic reinforcement pieces & the sole.
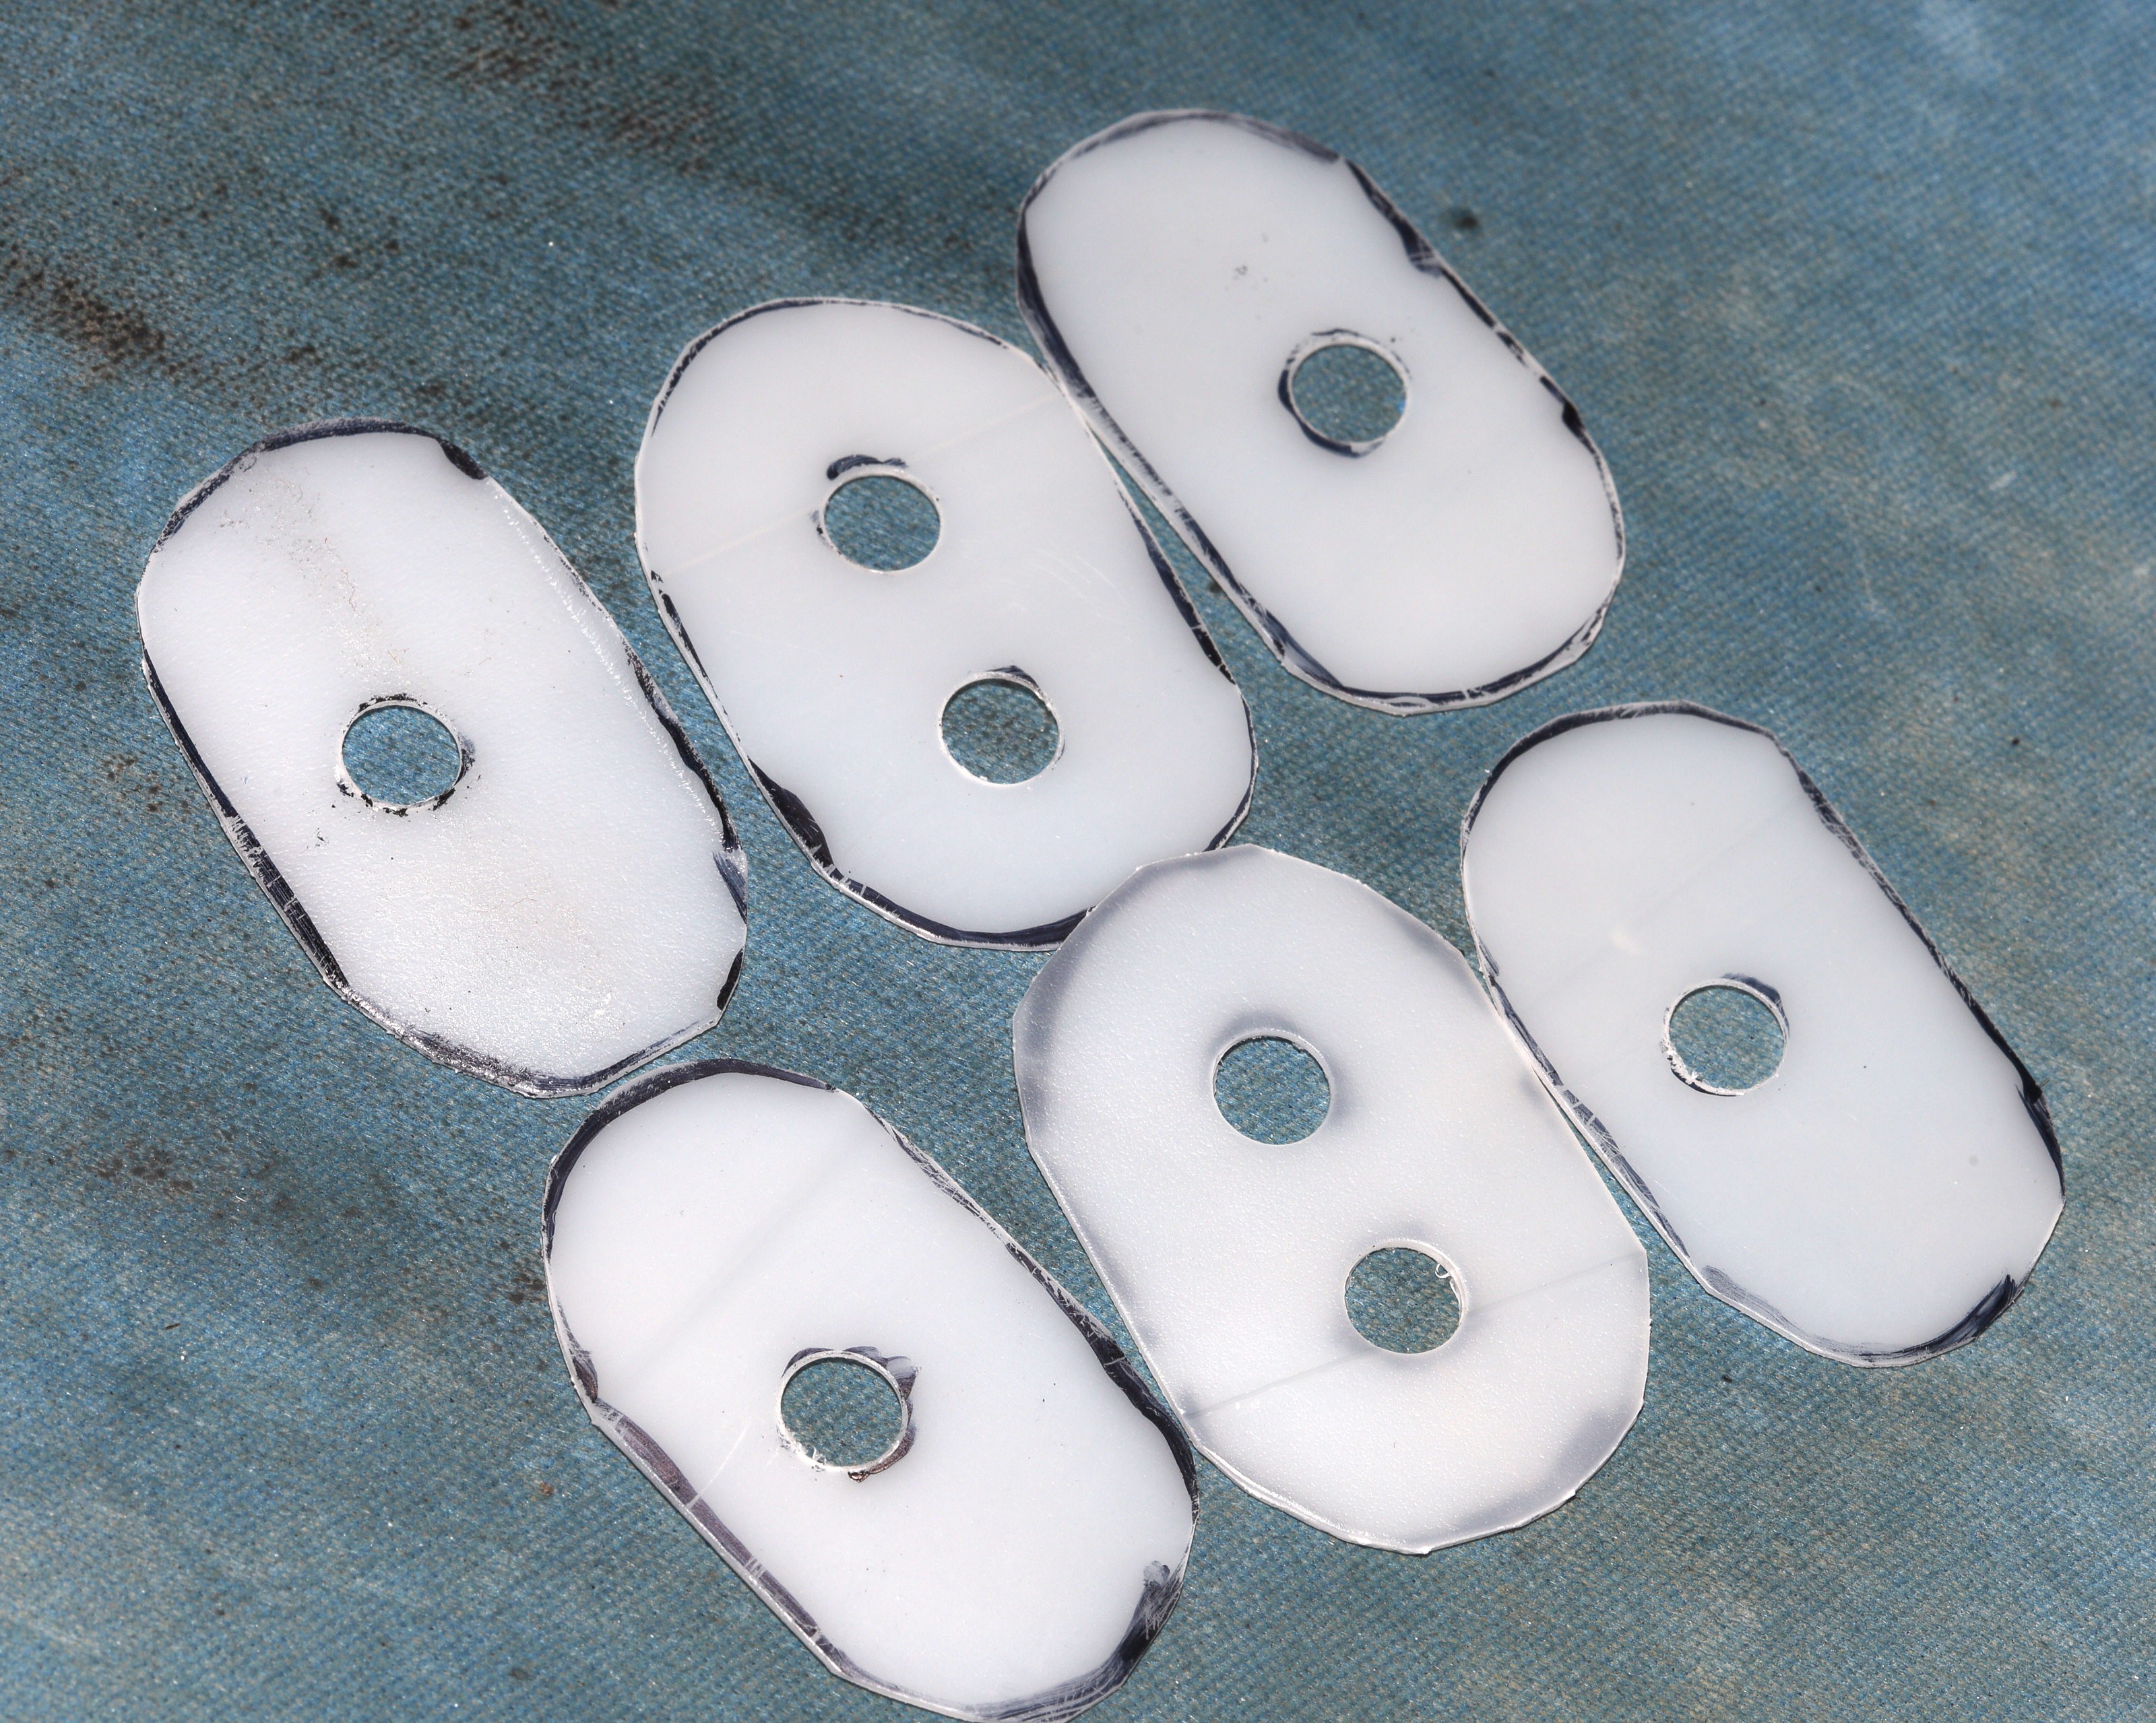
Polypropylene from old alcohol bottles becomes plastic reinforcement pieces.

The plastic is heated, then hole punched when it's soft.
The pattern is drawn on EVA. The EVA is cut with scissors. It can also be cut with a soldering iron or hot wire & lots of ventilation. Sandals have always been made of 2 layers of EVA. For speed, use 2 x 6mm sheets. For immunity to rocks use a 10mm + 6mm sheet.
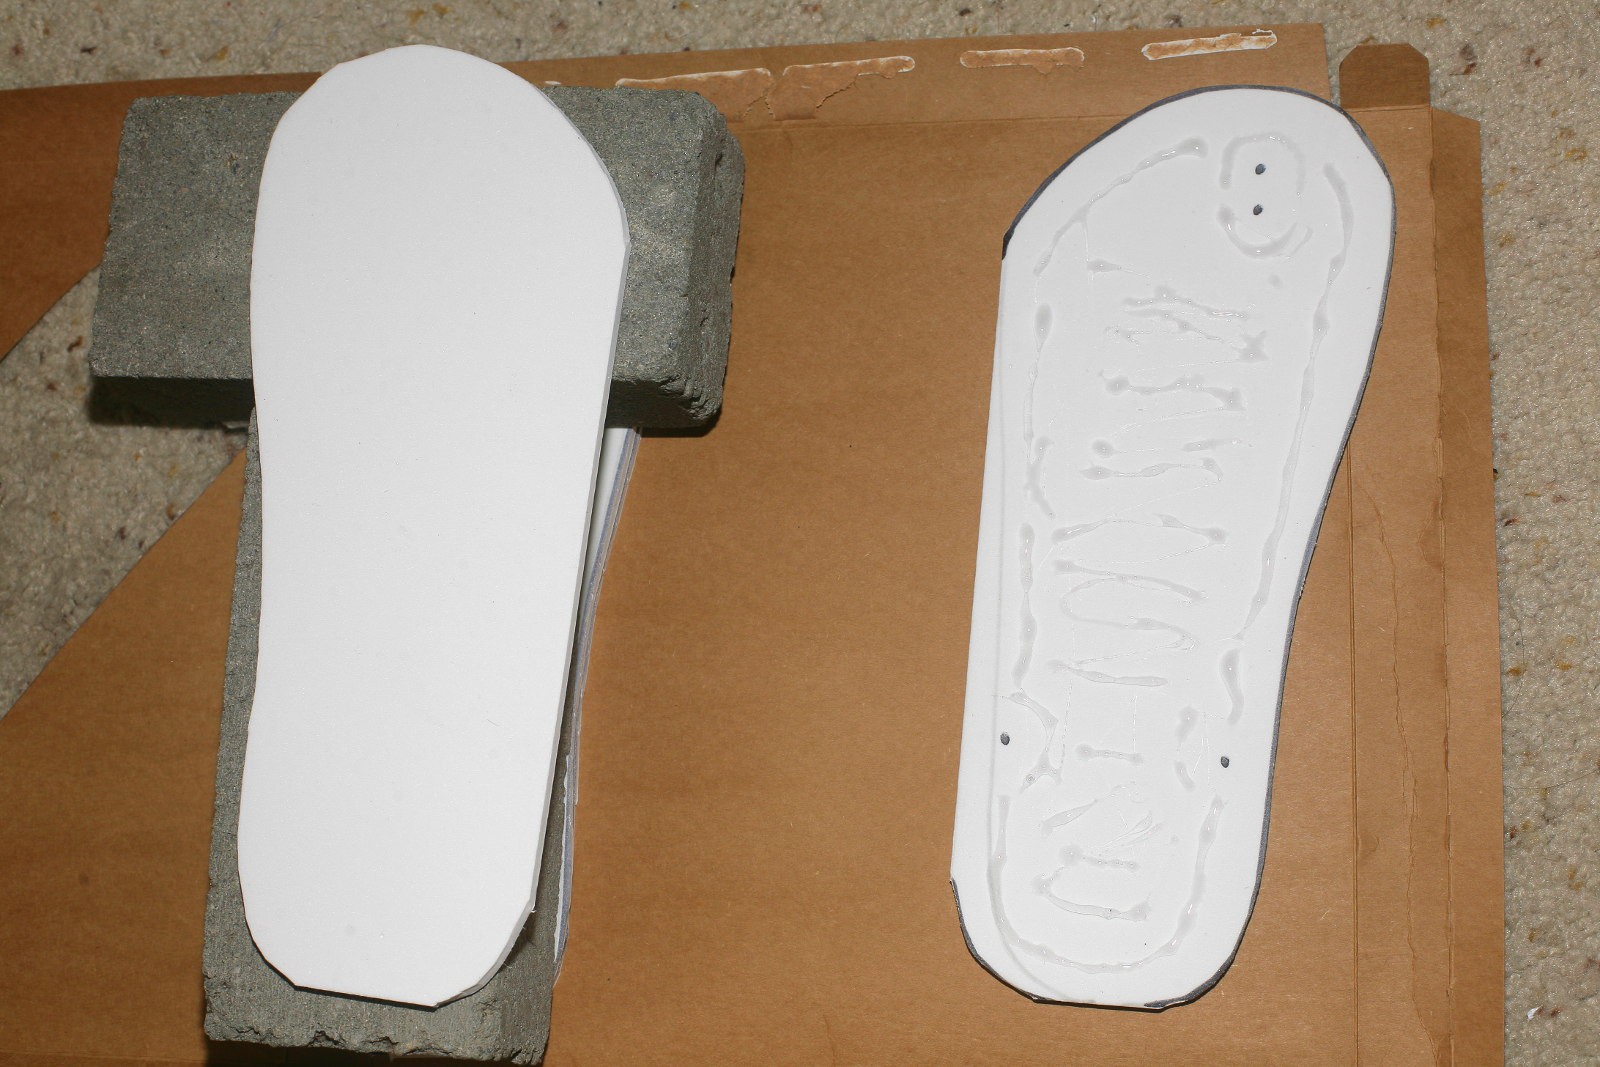
E6000 is applied to 1 layer of EVA & 2 layers are glued together. The glue goes around the hole positions.
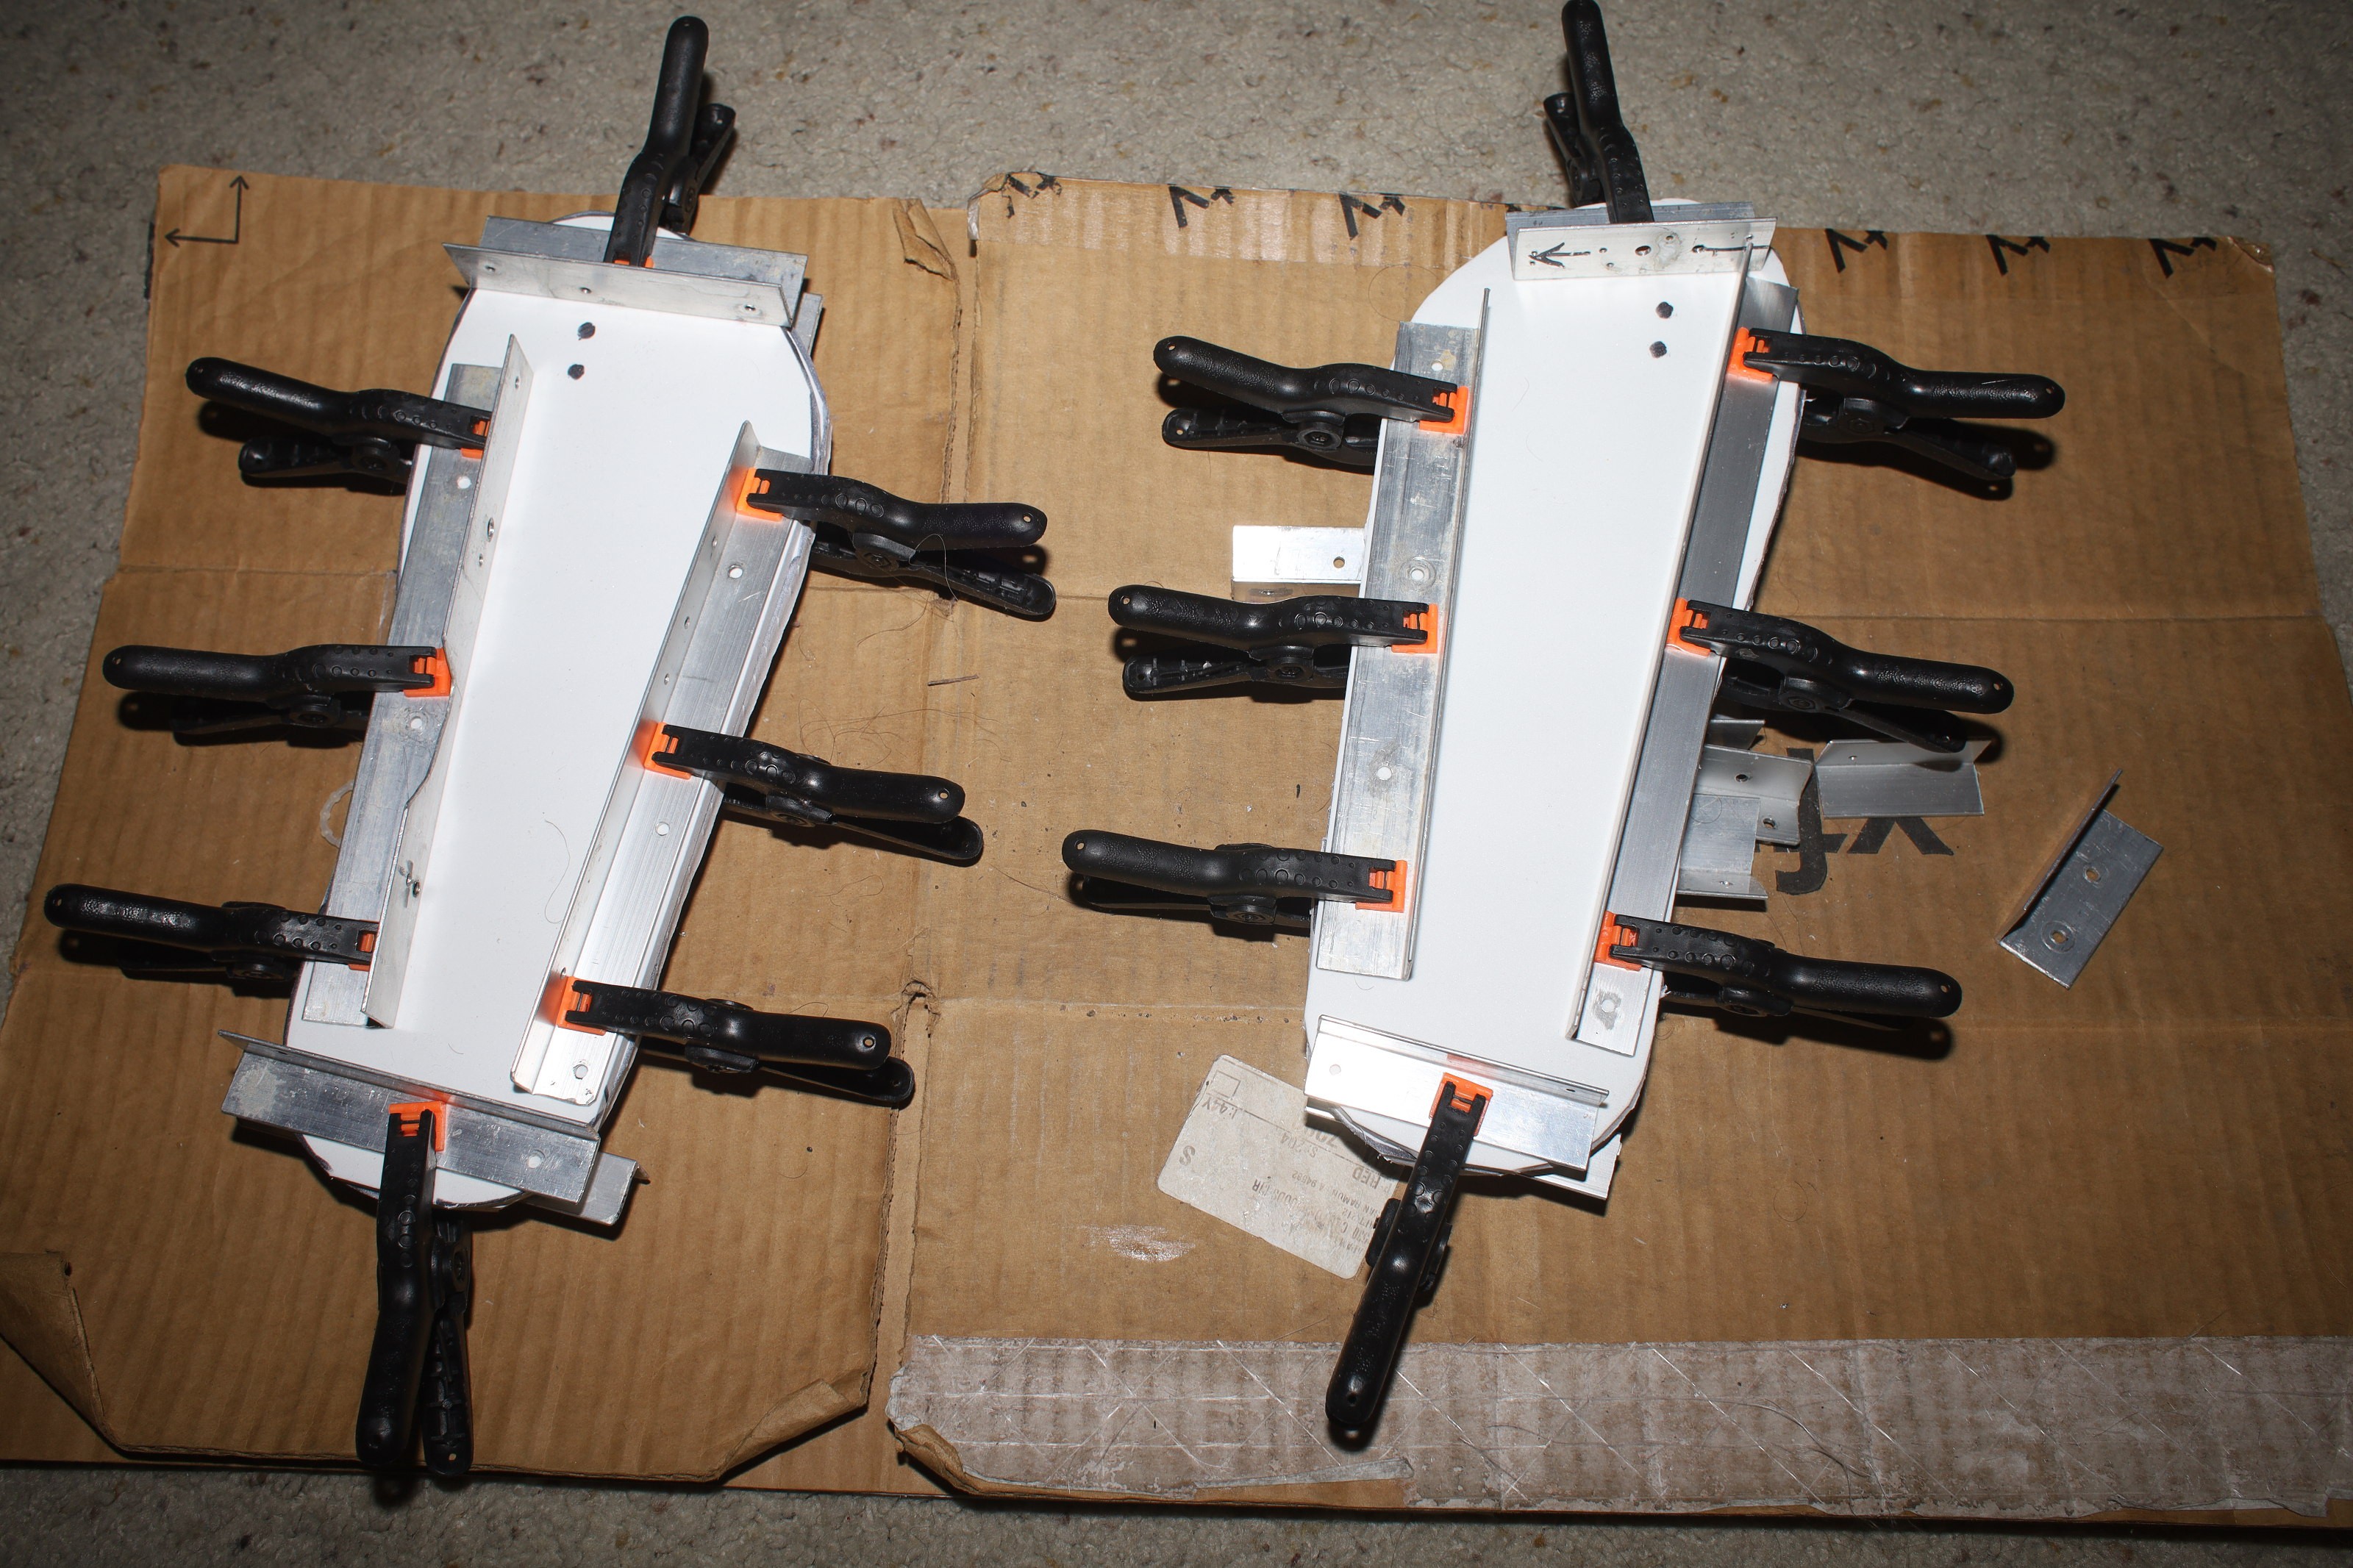
2 layers of EVA are clamped around the edges until the glue cures.
For improved durability & grip in rain, a layer of fake leather should be glued on with E6000 before burning holes. The leather should be roughly cut before gluing & more precisely cut after gluing. The adhesive should be on the outside rather than in the middle. This has to be clamped down the same as the foam was. Do not use spray adhesive since that will create creases & then blisters.
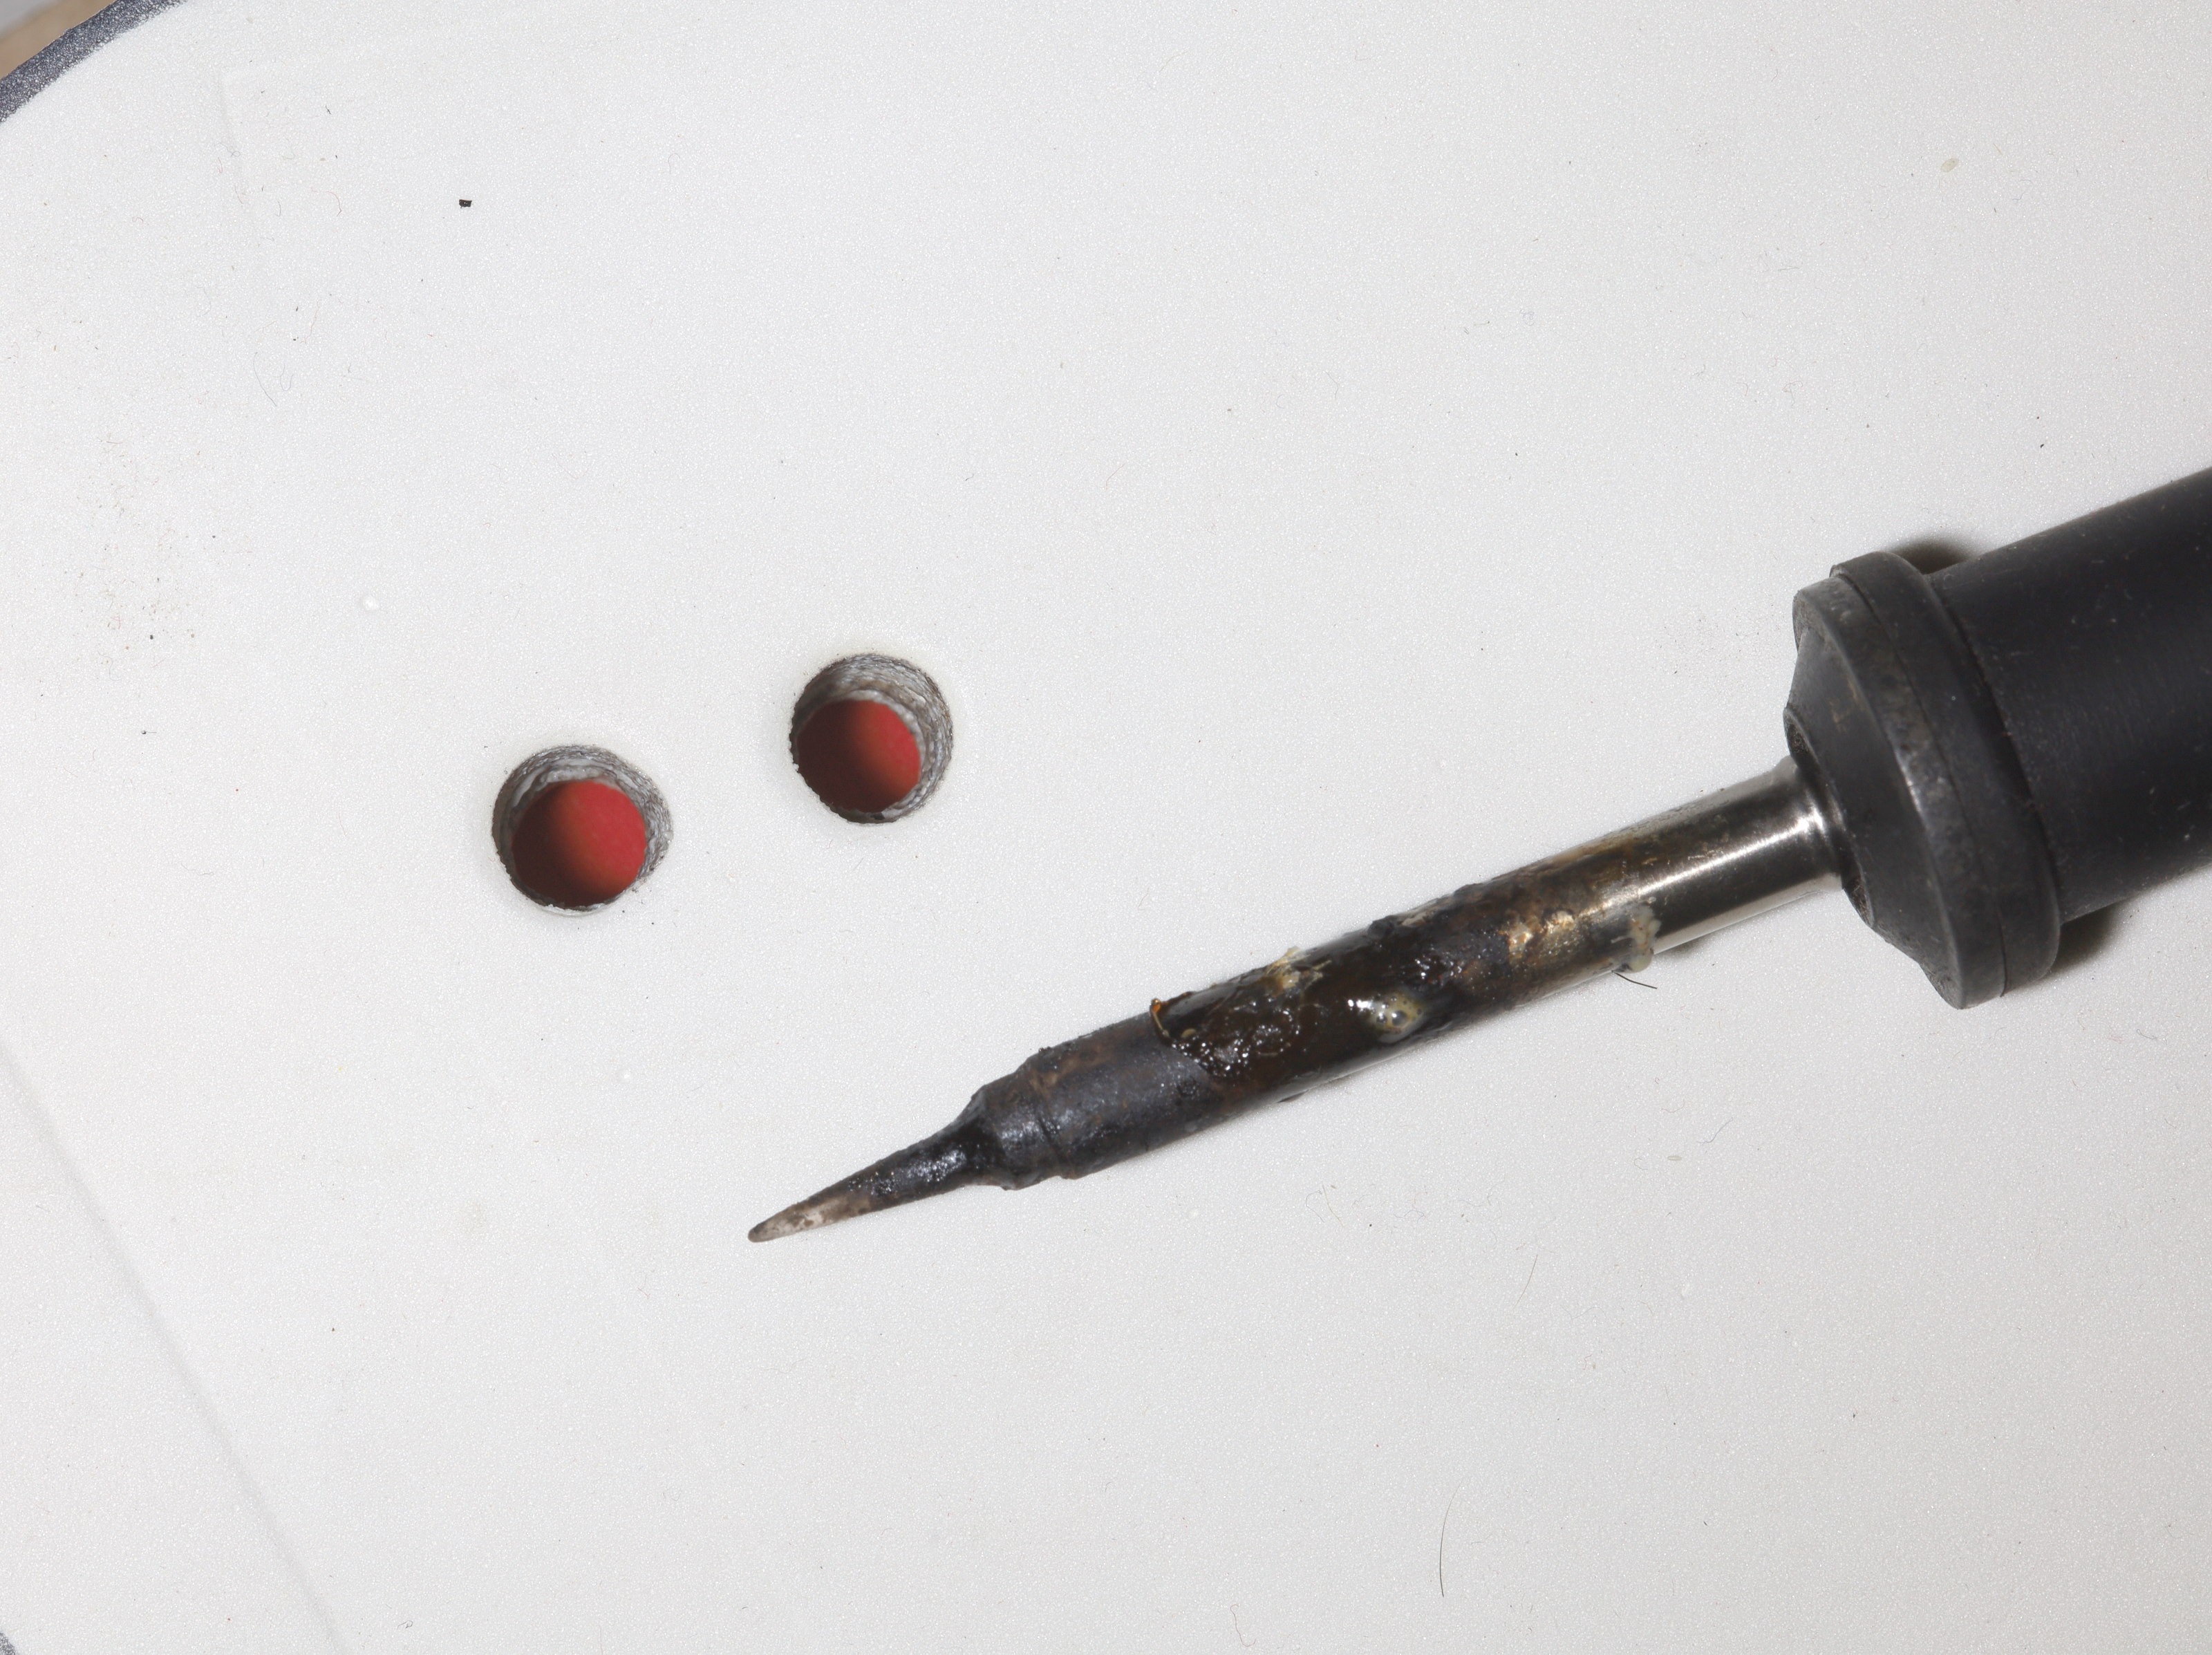
Holes are melted with the full diameter of a T-12 soldering iron. The trick is using lots of ventilation & pulling the tip out without it getting stuck. It's easier to melt partway into both sides.
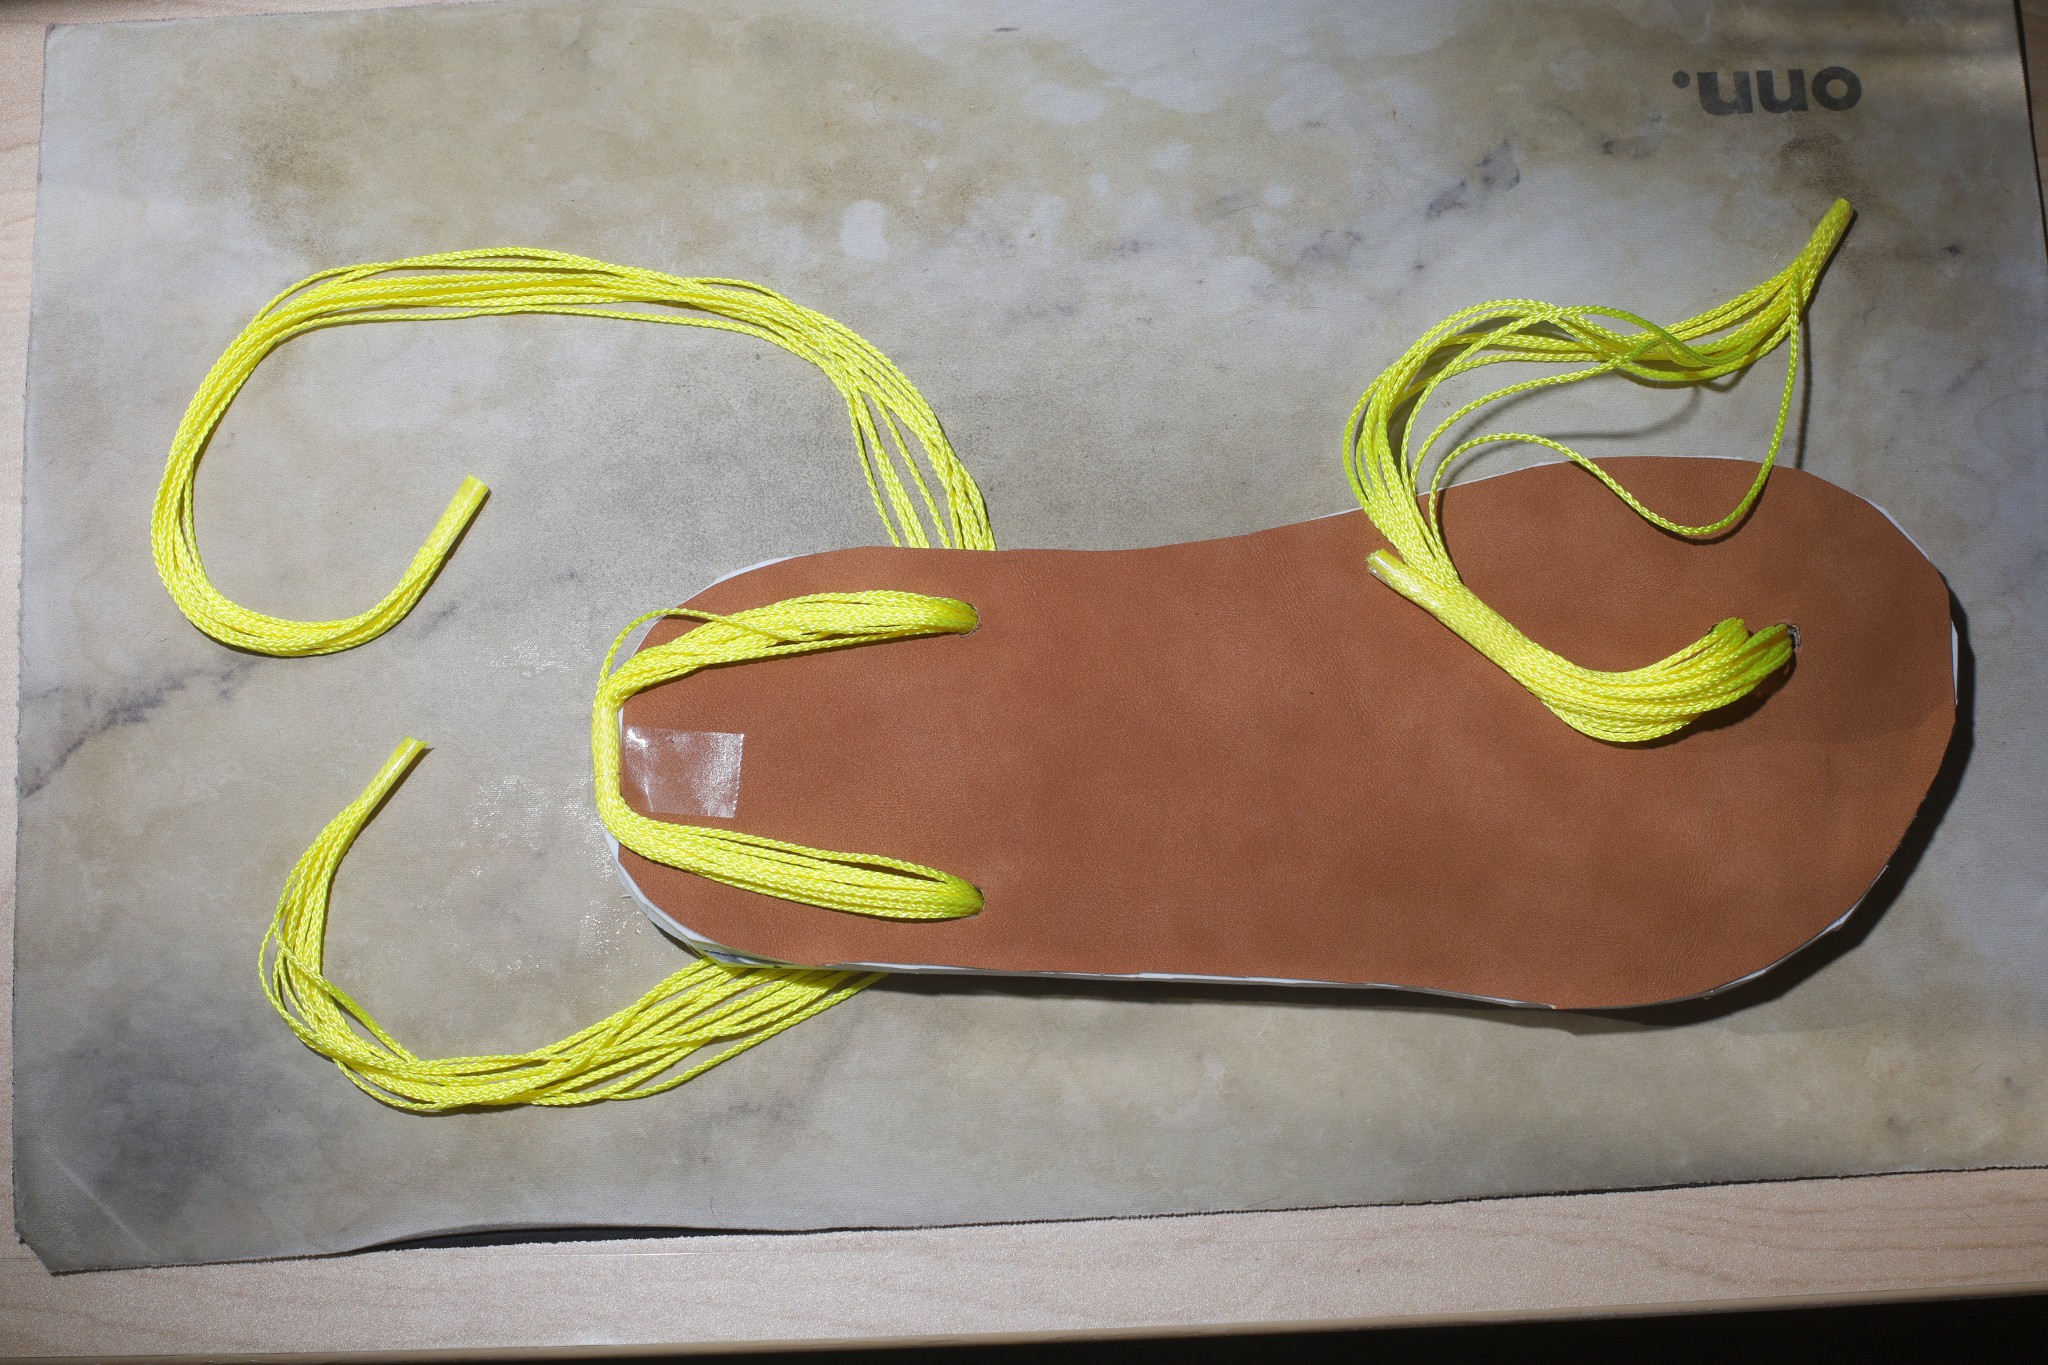
The strings are installed. The previously marked midpoint of the long string is temporarily taped down to the midpoint of the rear end to aid fabrication. The short side of the rear string goes on the outside of the paw.
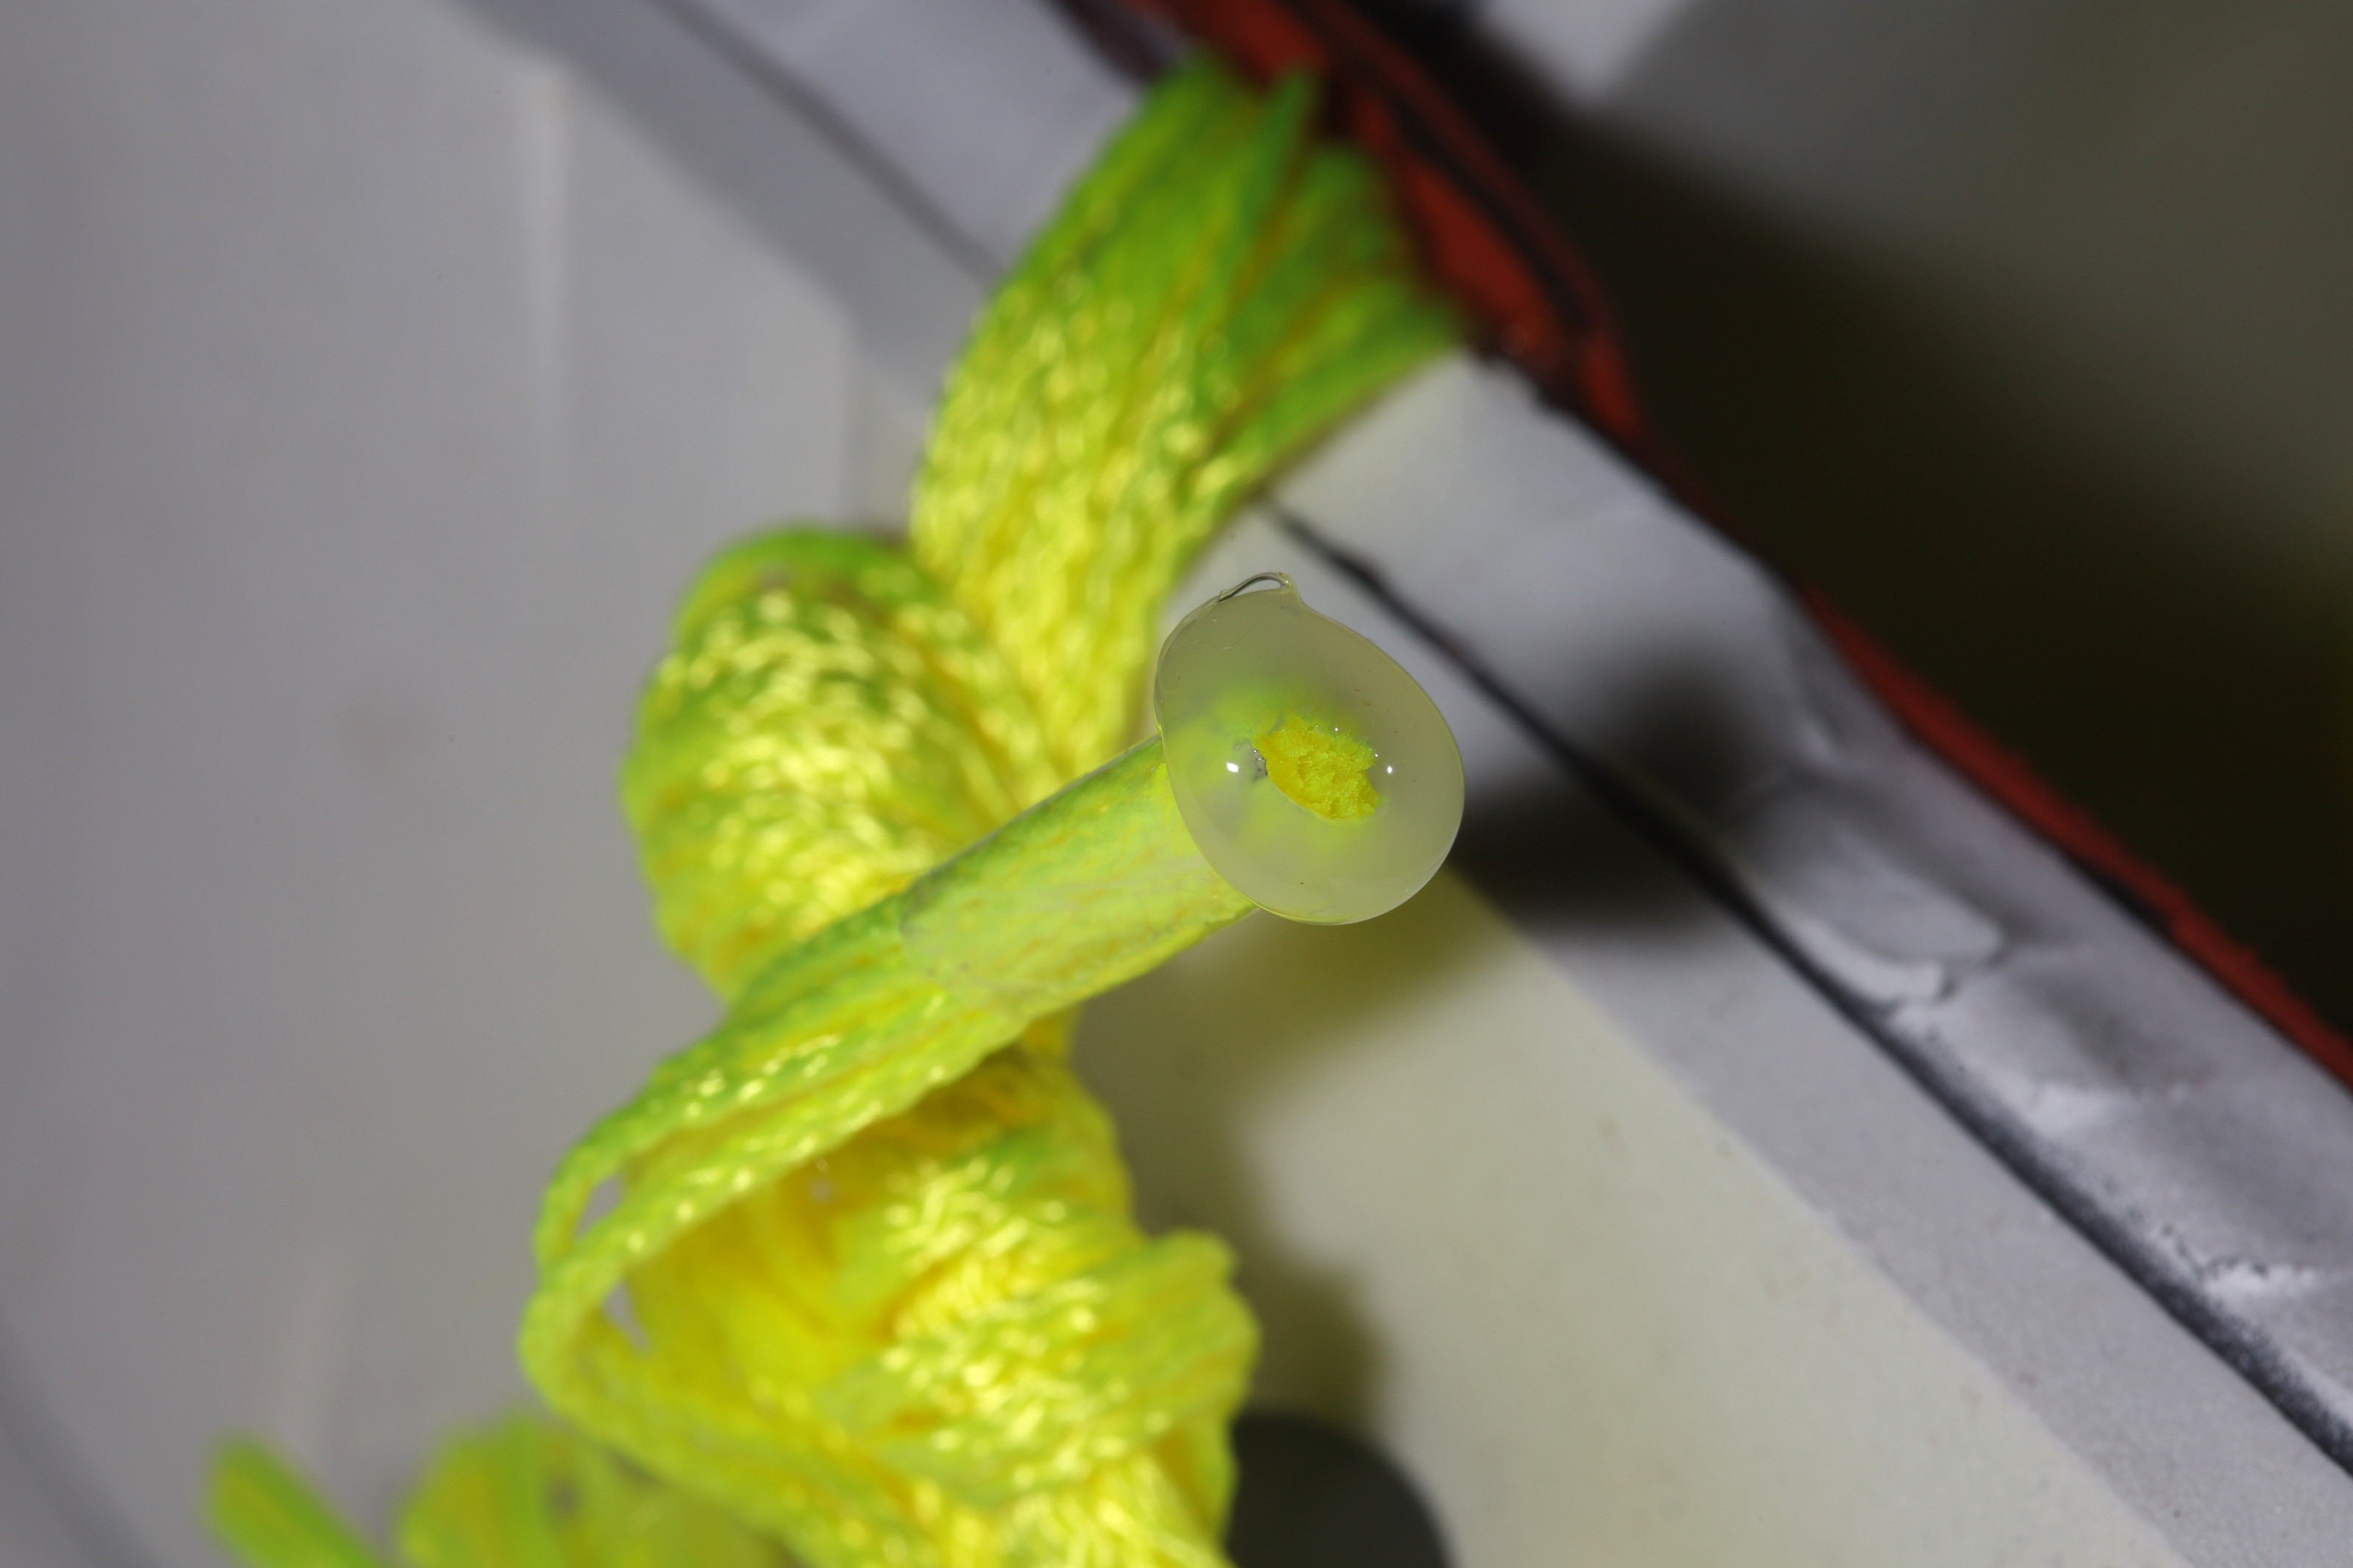
 The thong receives a plastic reinforcer before installation.
The thong is extended based on the size of the paw & scotched into a loop.

Then the rear string receives plastic reinforcers before it's finished.
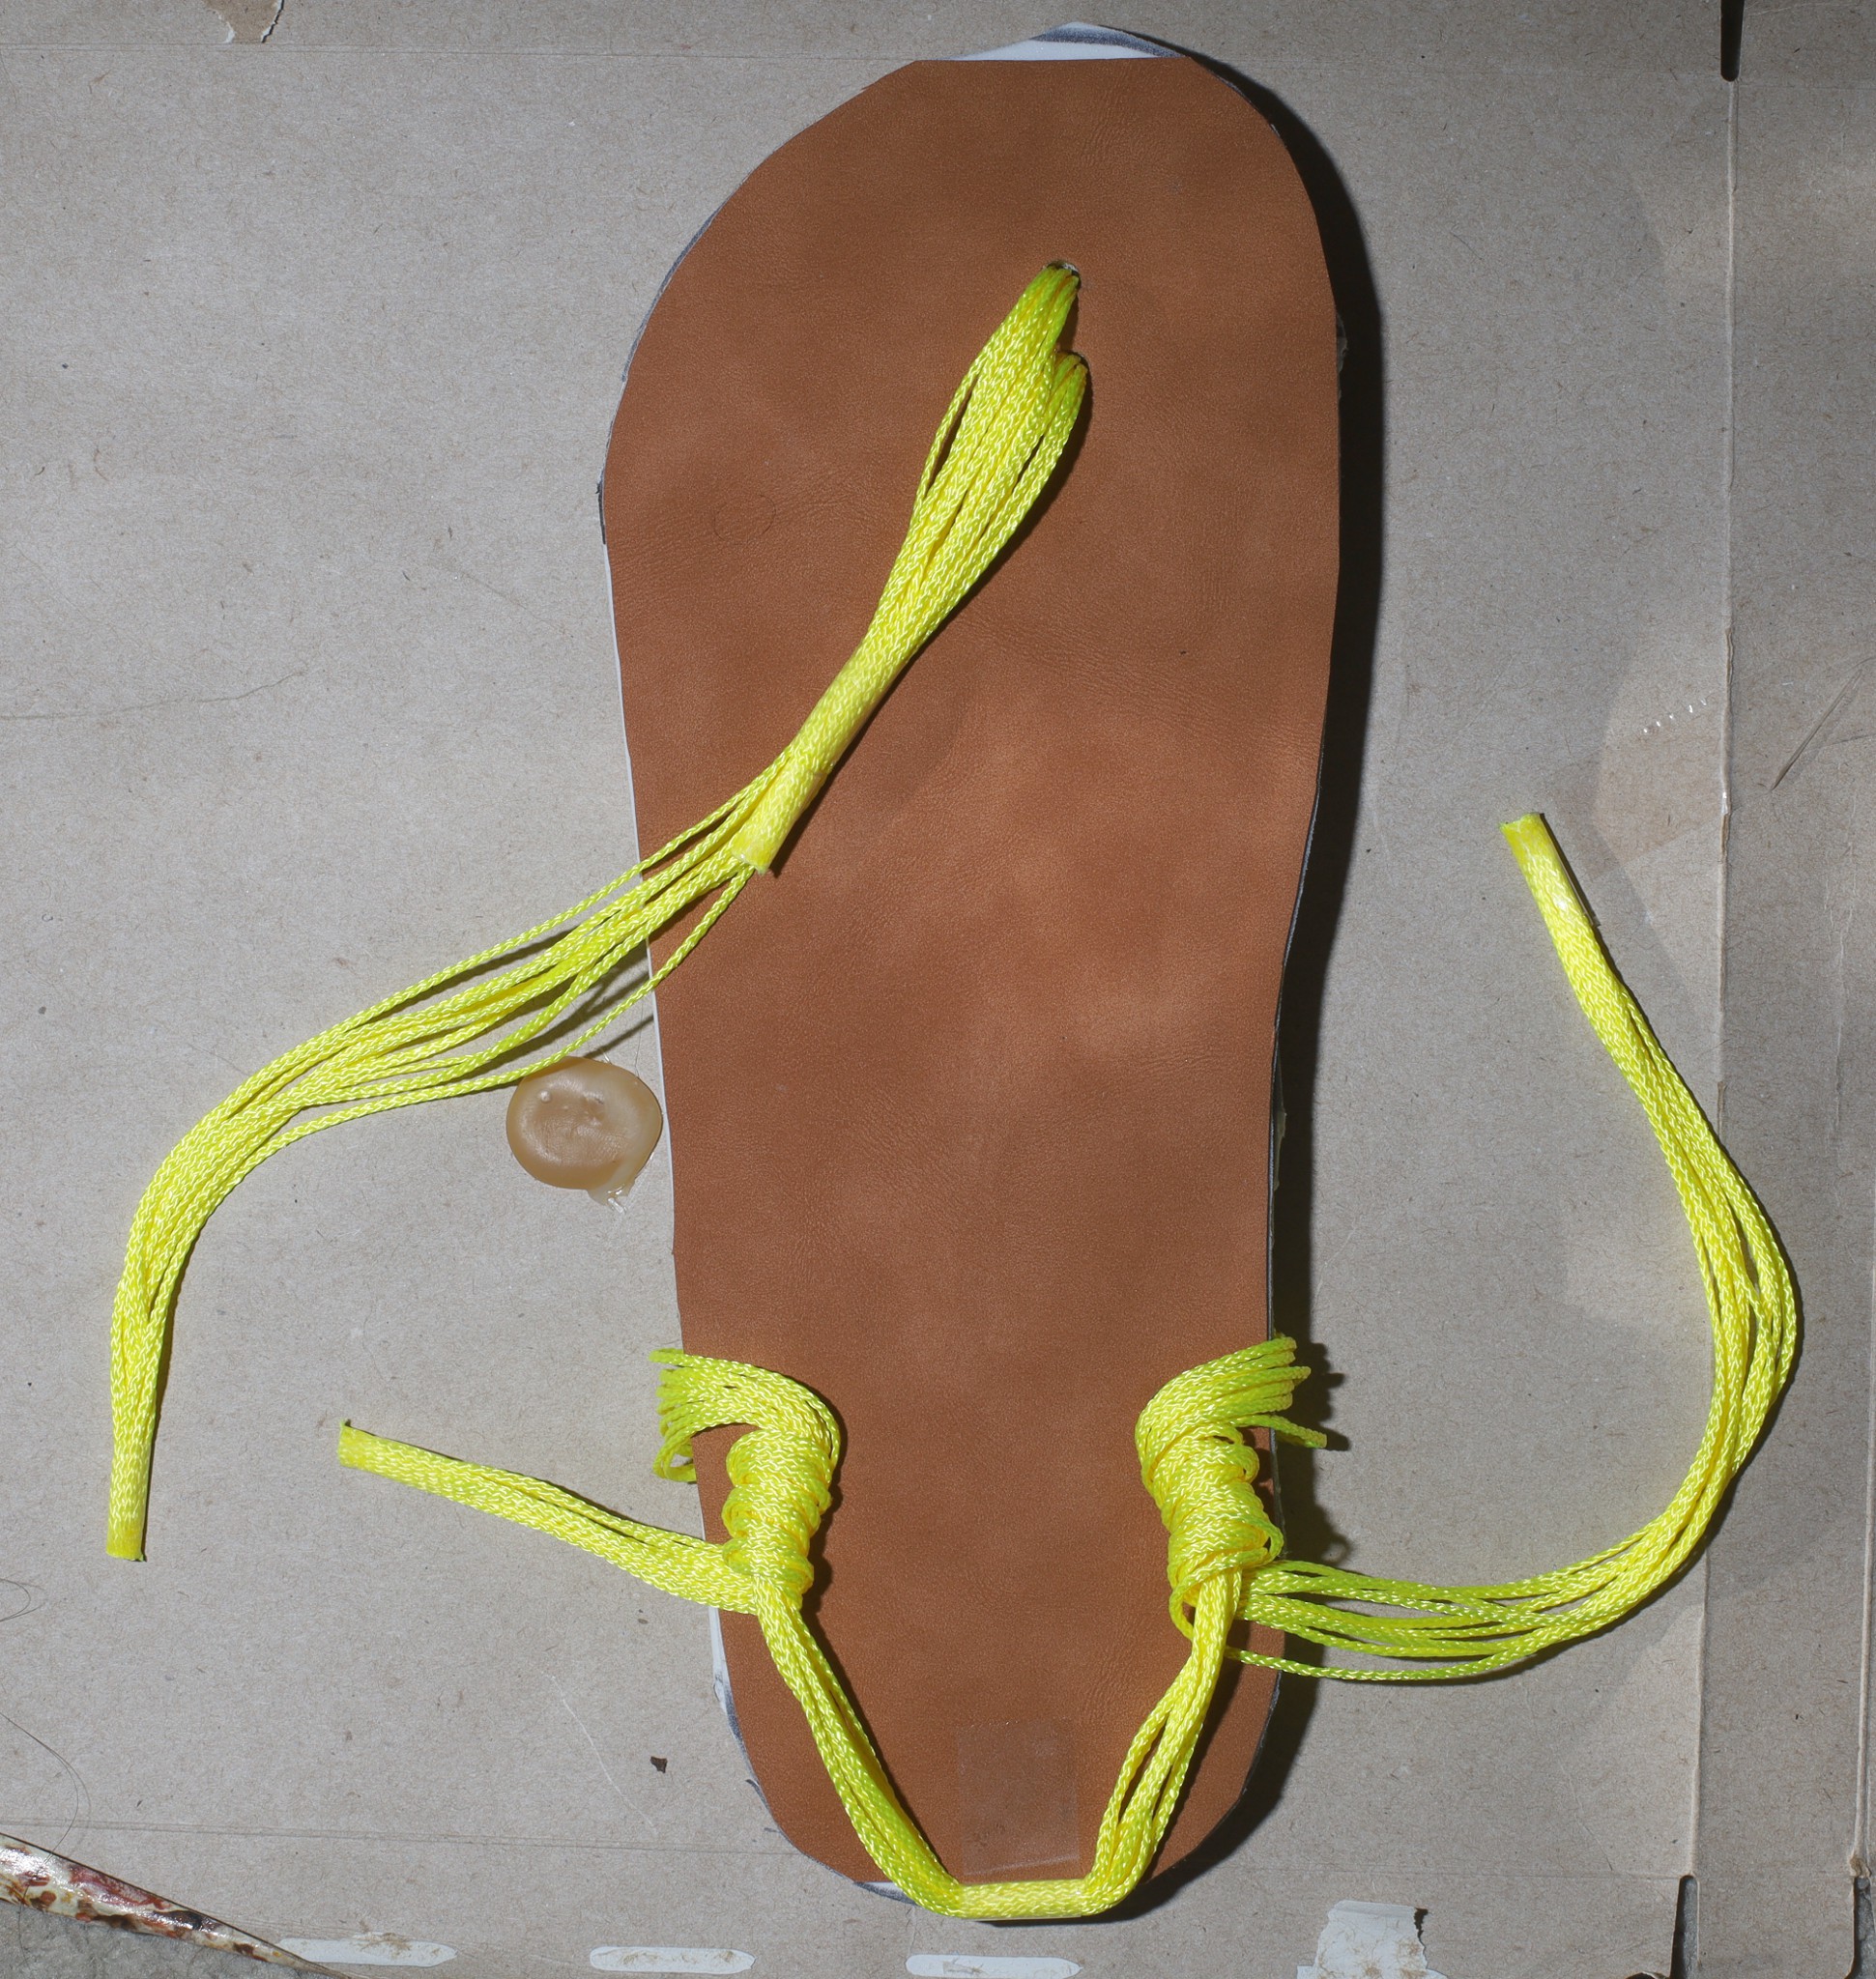
Then the rear string is turned around itself 3 times.
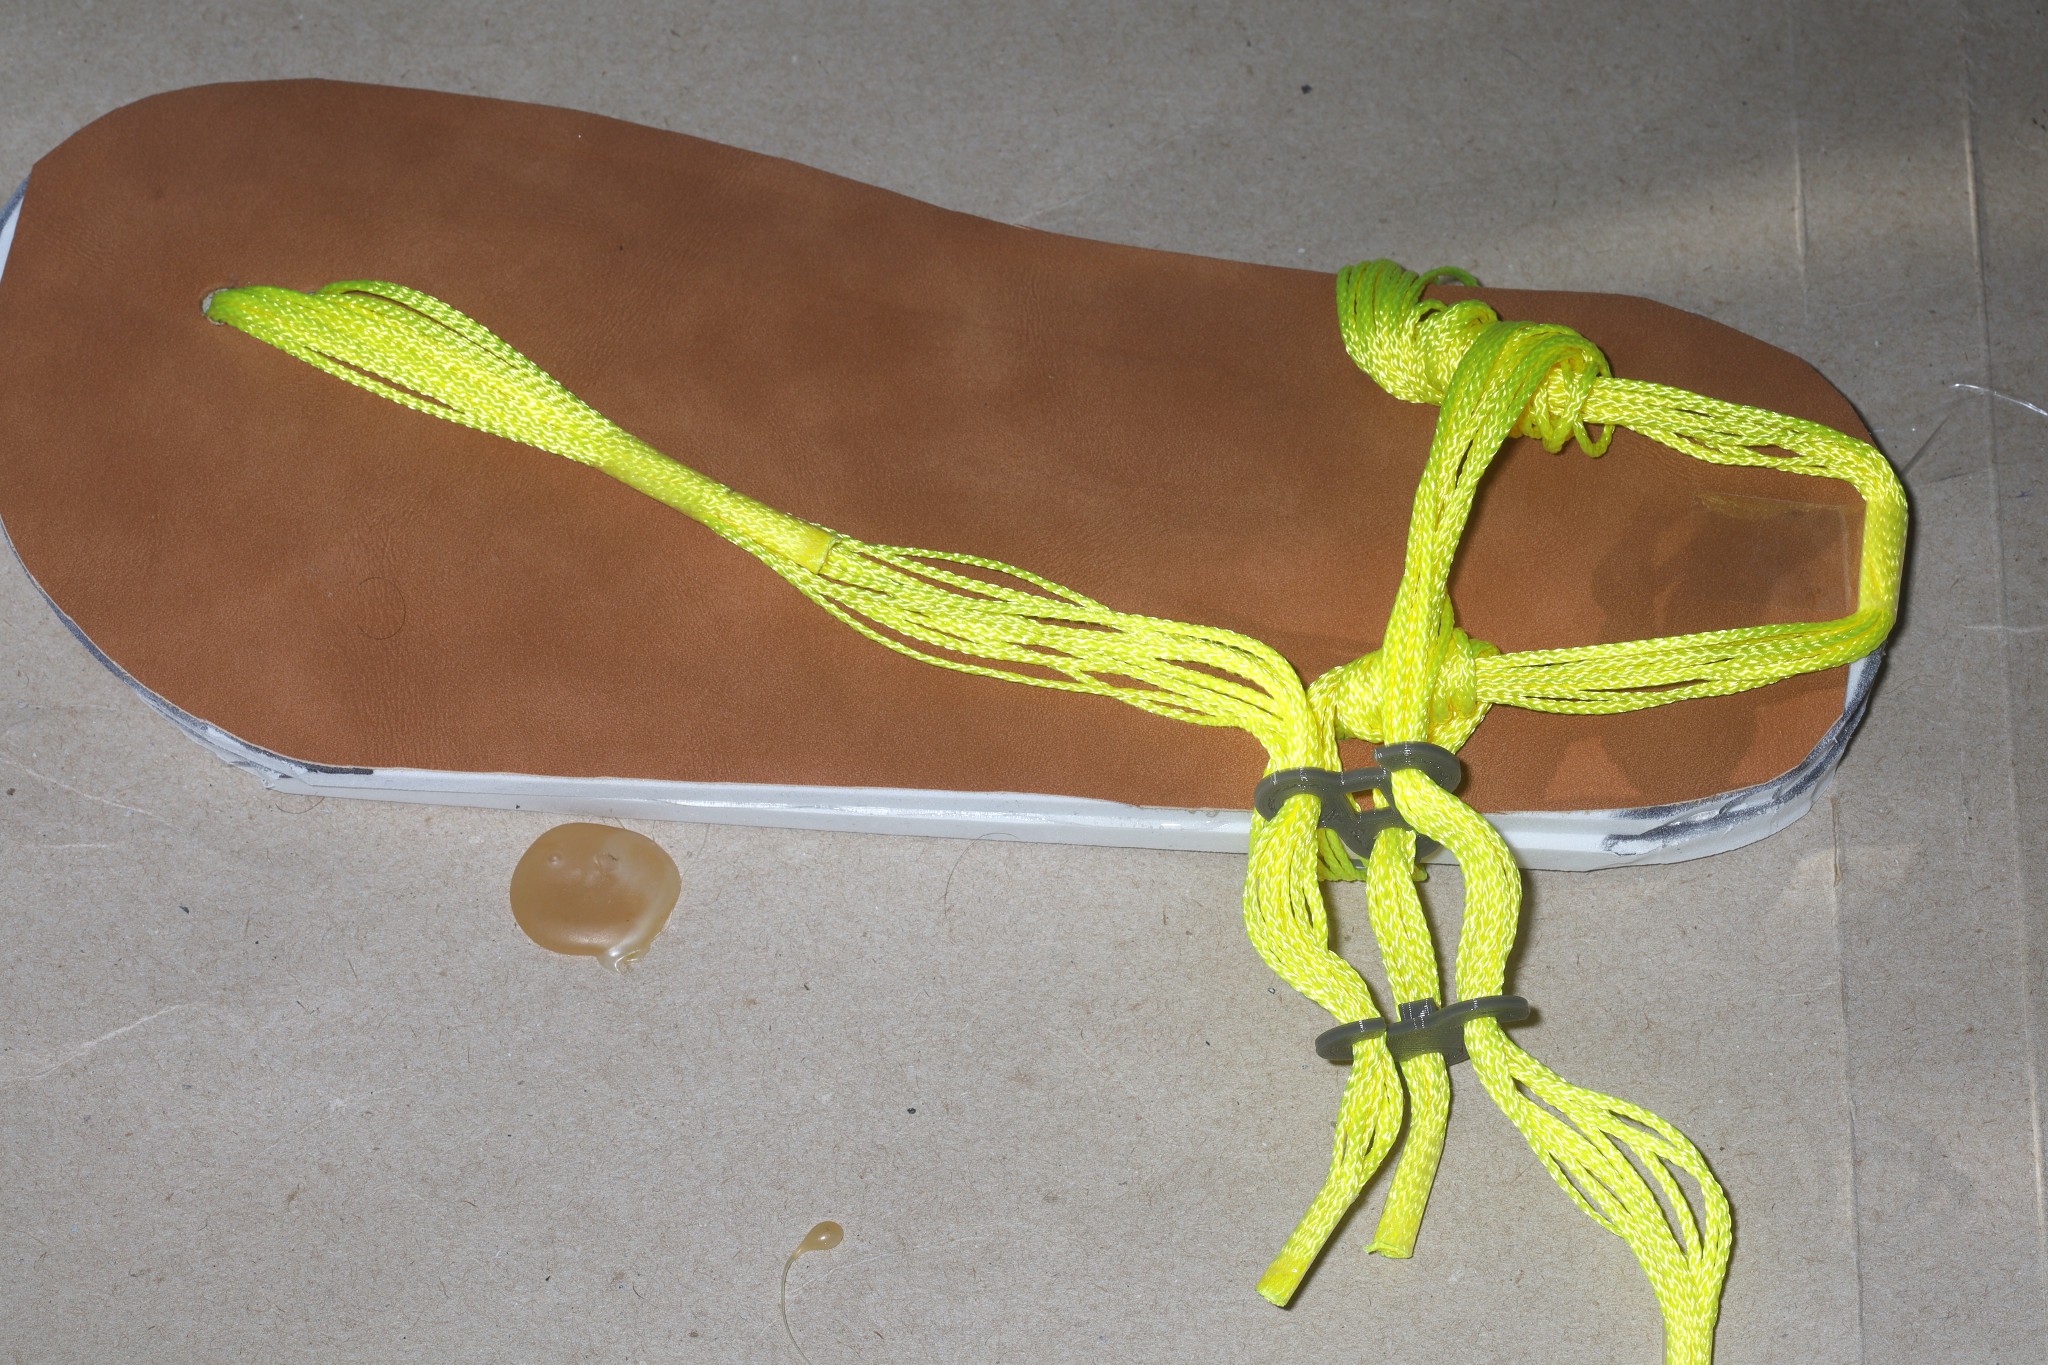
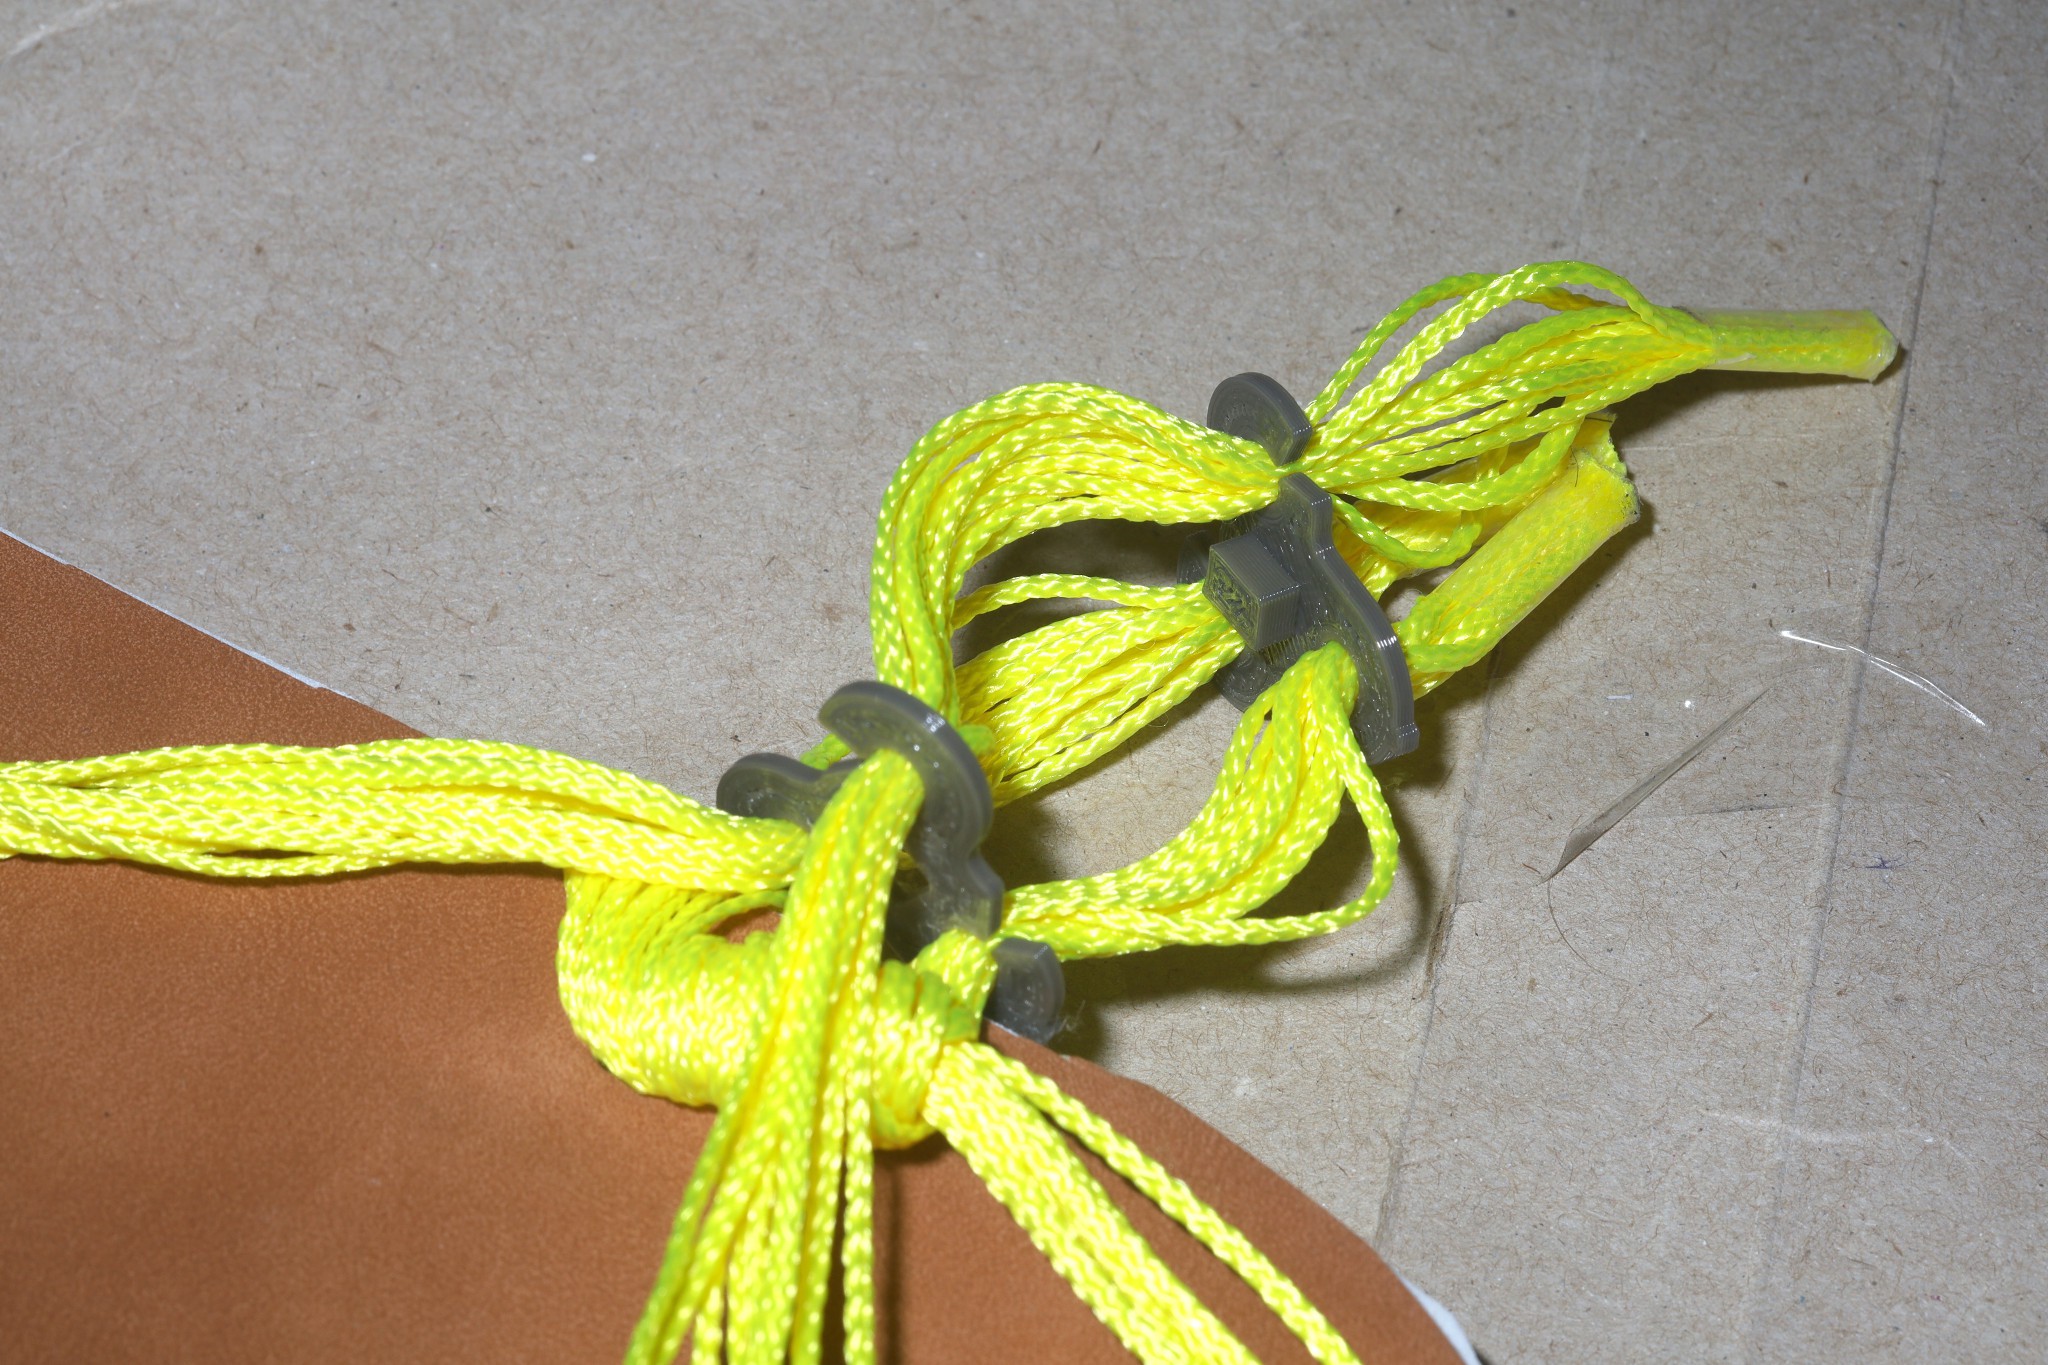
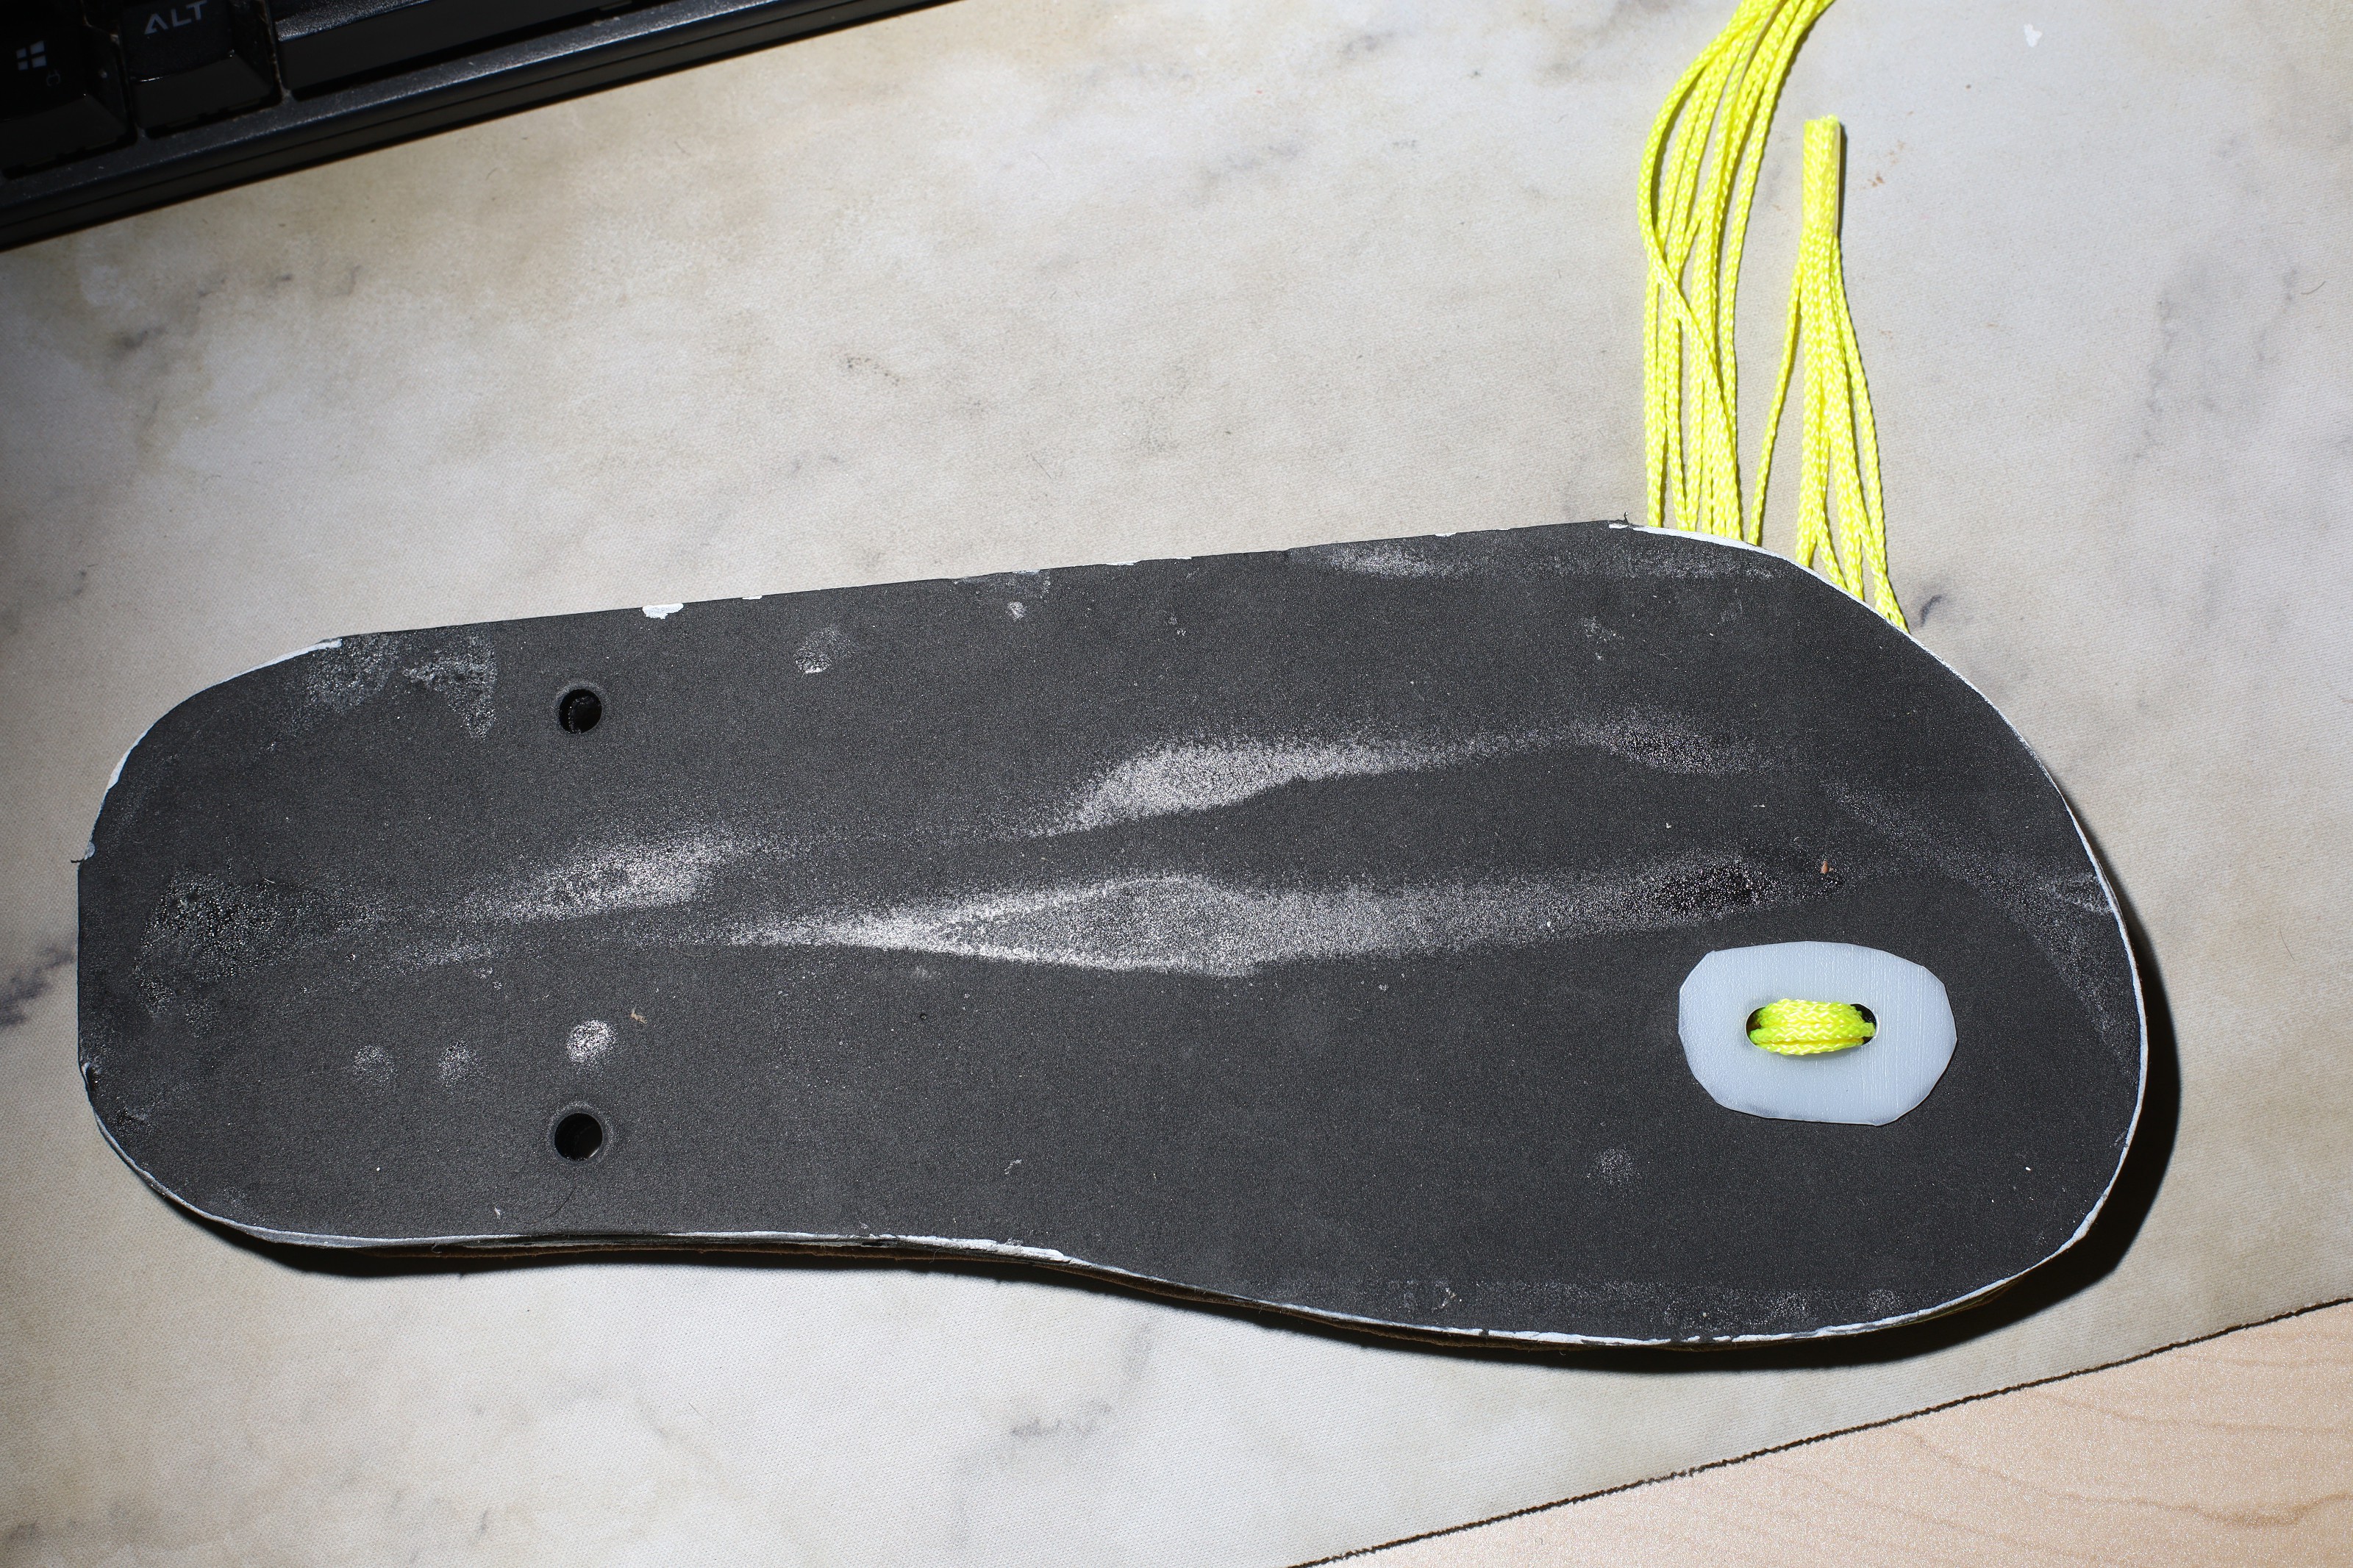
The 3 way cord locks are installed with the bed side facing out. Since all the strings have the same diameter, the cord lock has no particular rotation. The 2 pieces snap together but can be removed by pressing the center button. They provide a static pressure which is just enough to keep the string in place but loose enough to adjust the string.
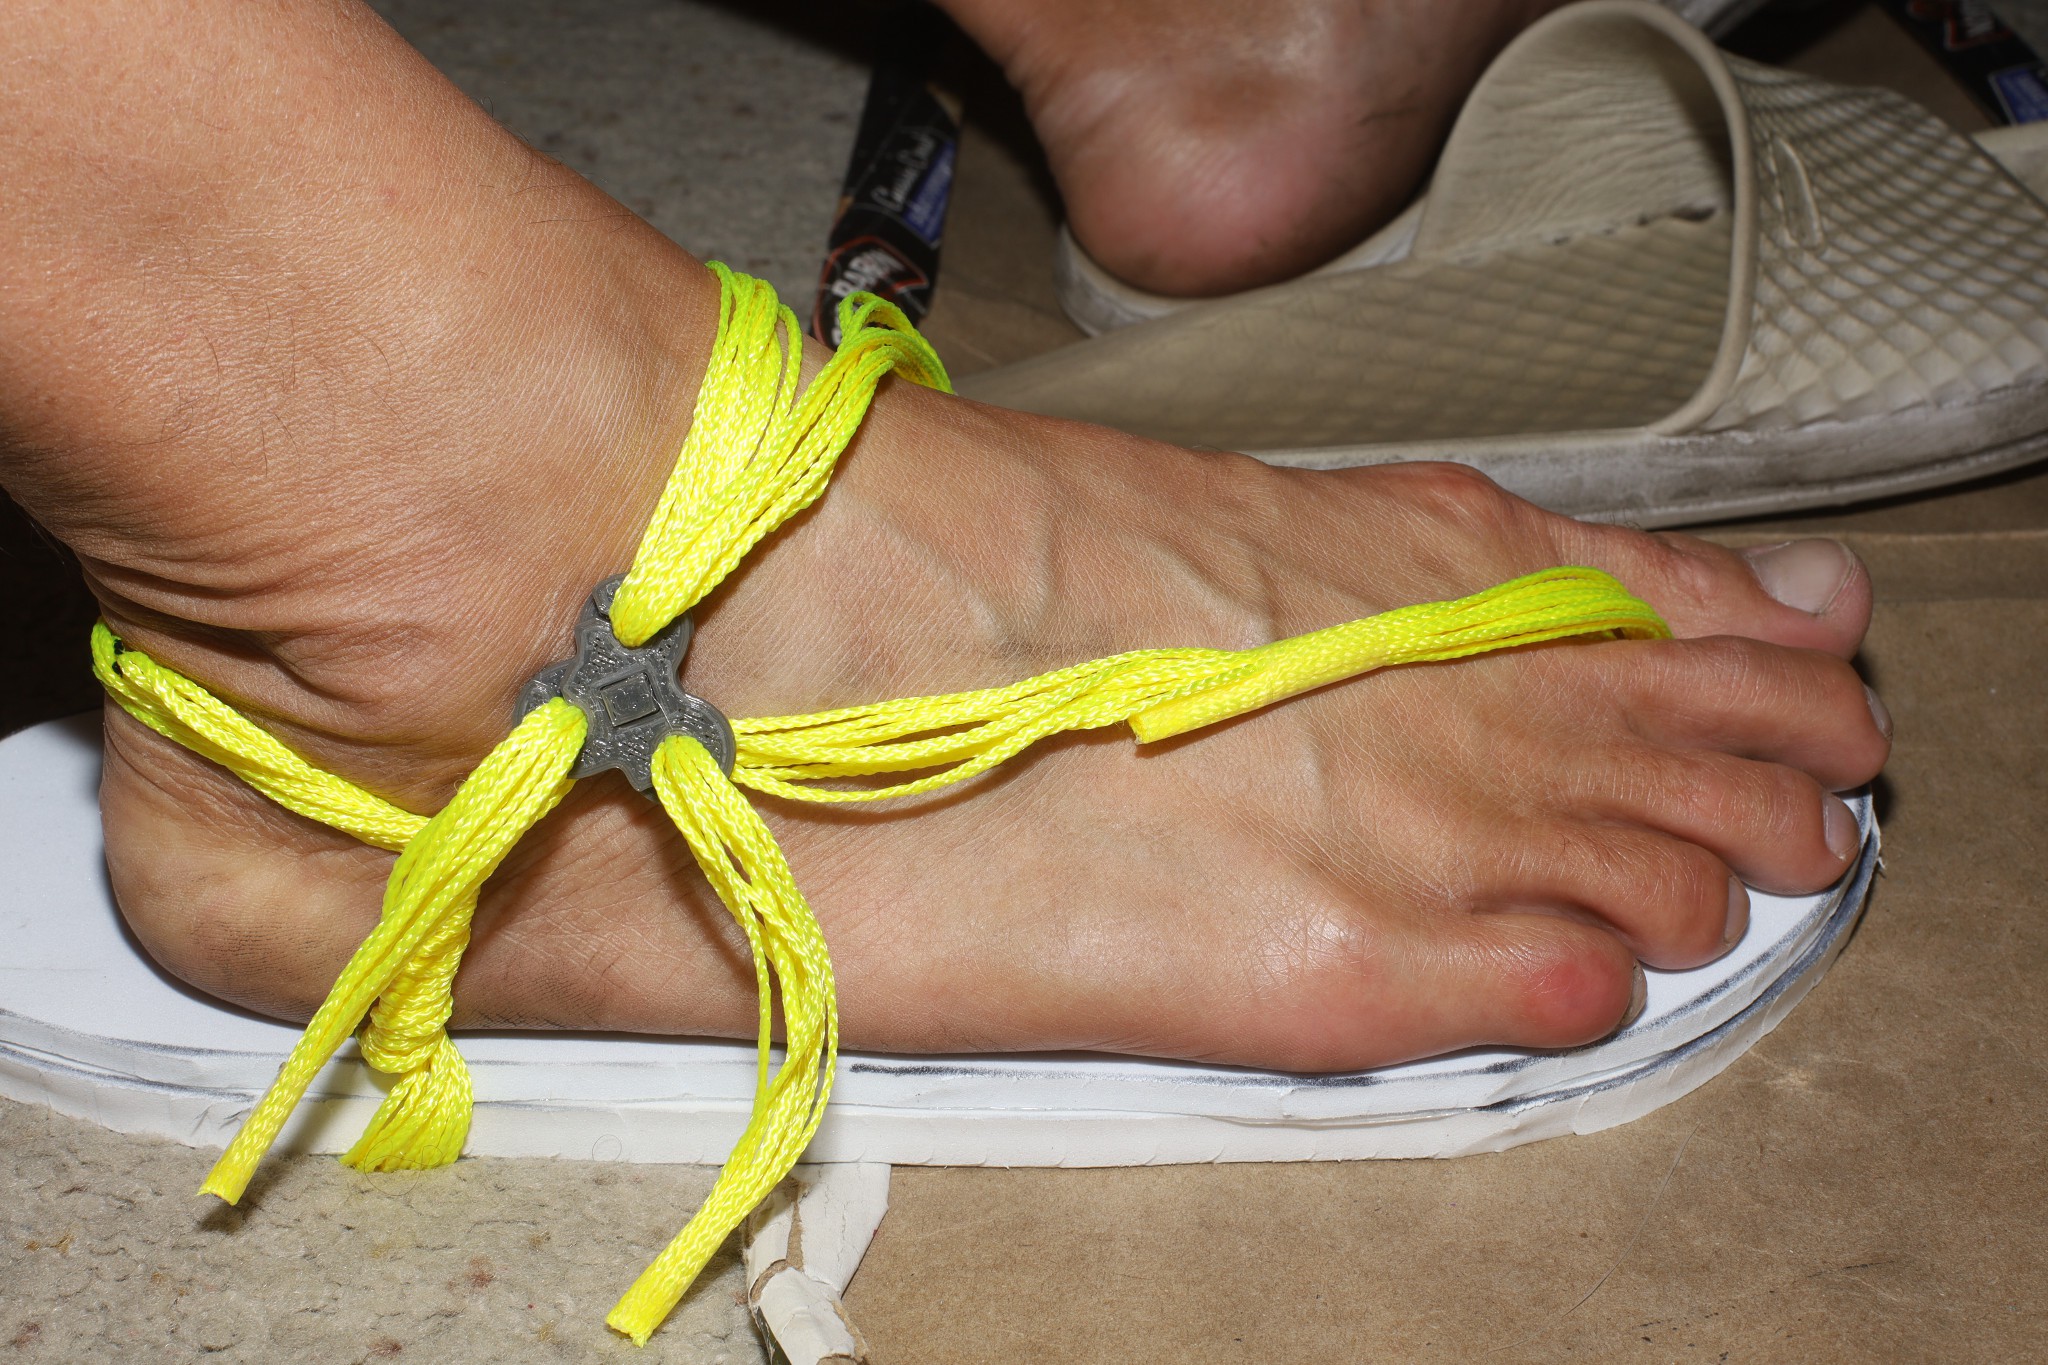
Then the temporary rear scotch is removed & all the laces are tightened. The cord lock should as low on the outside as possible to avoid chafing.
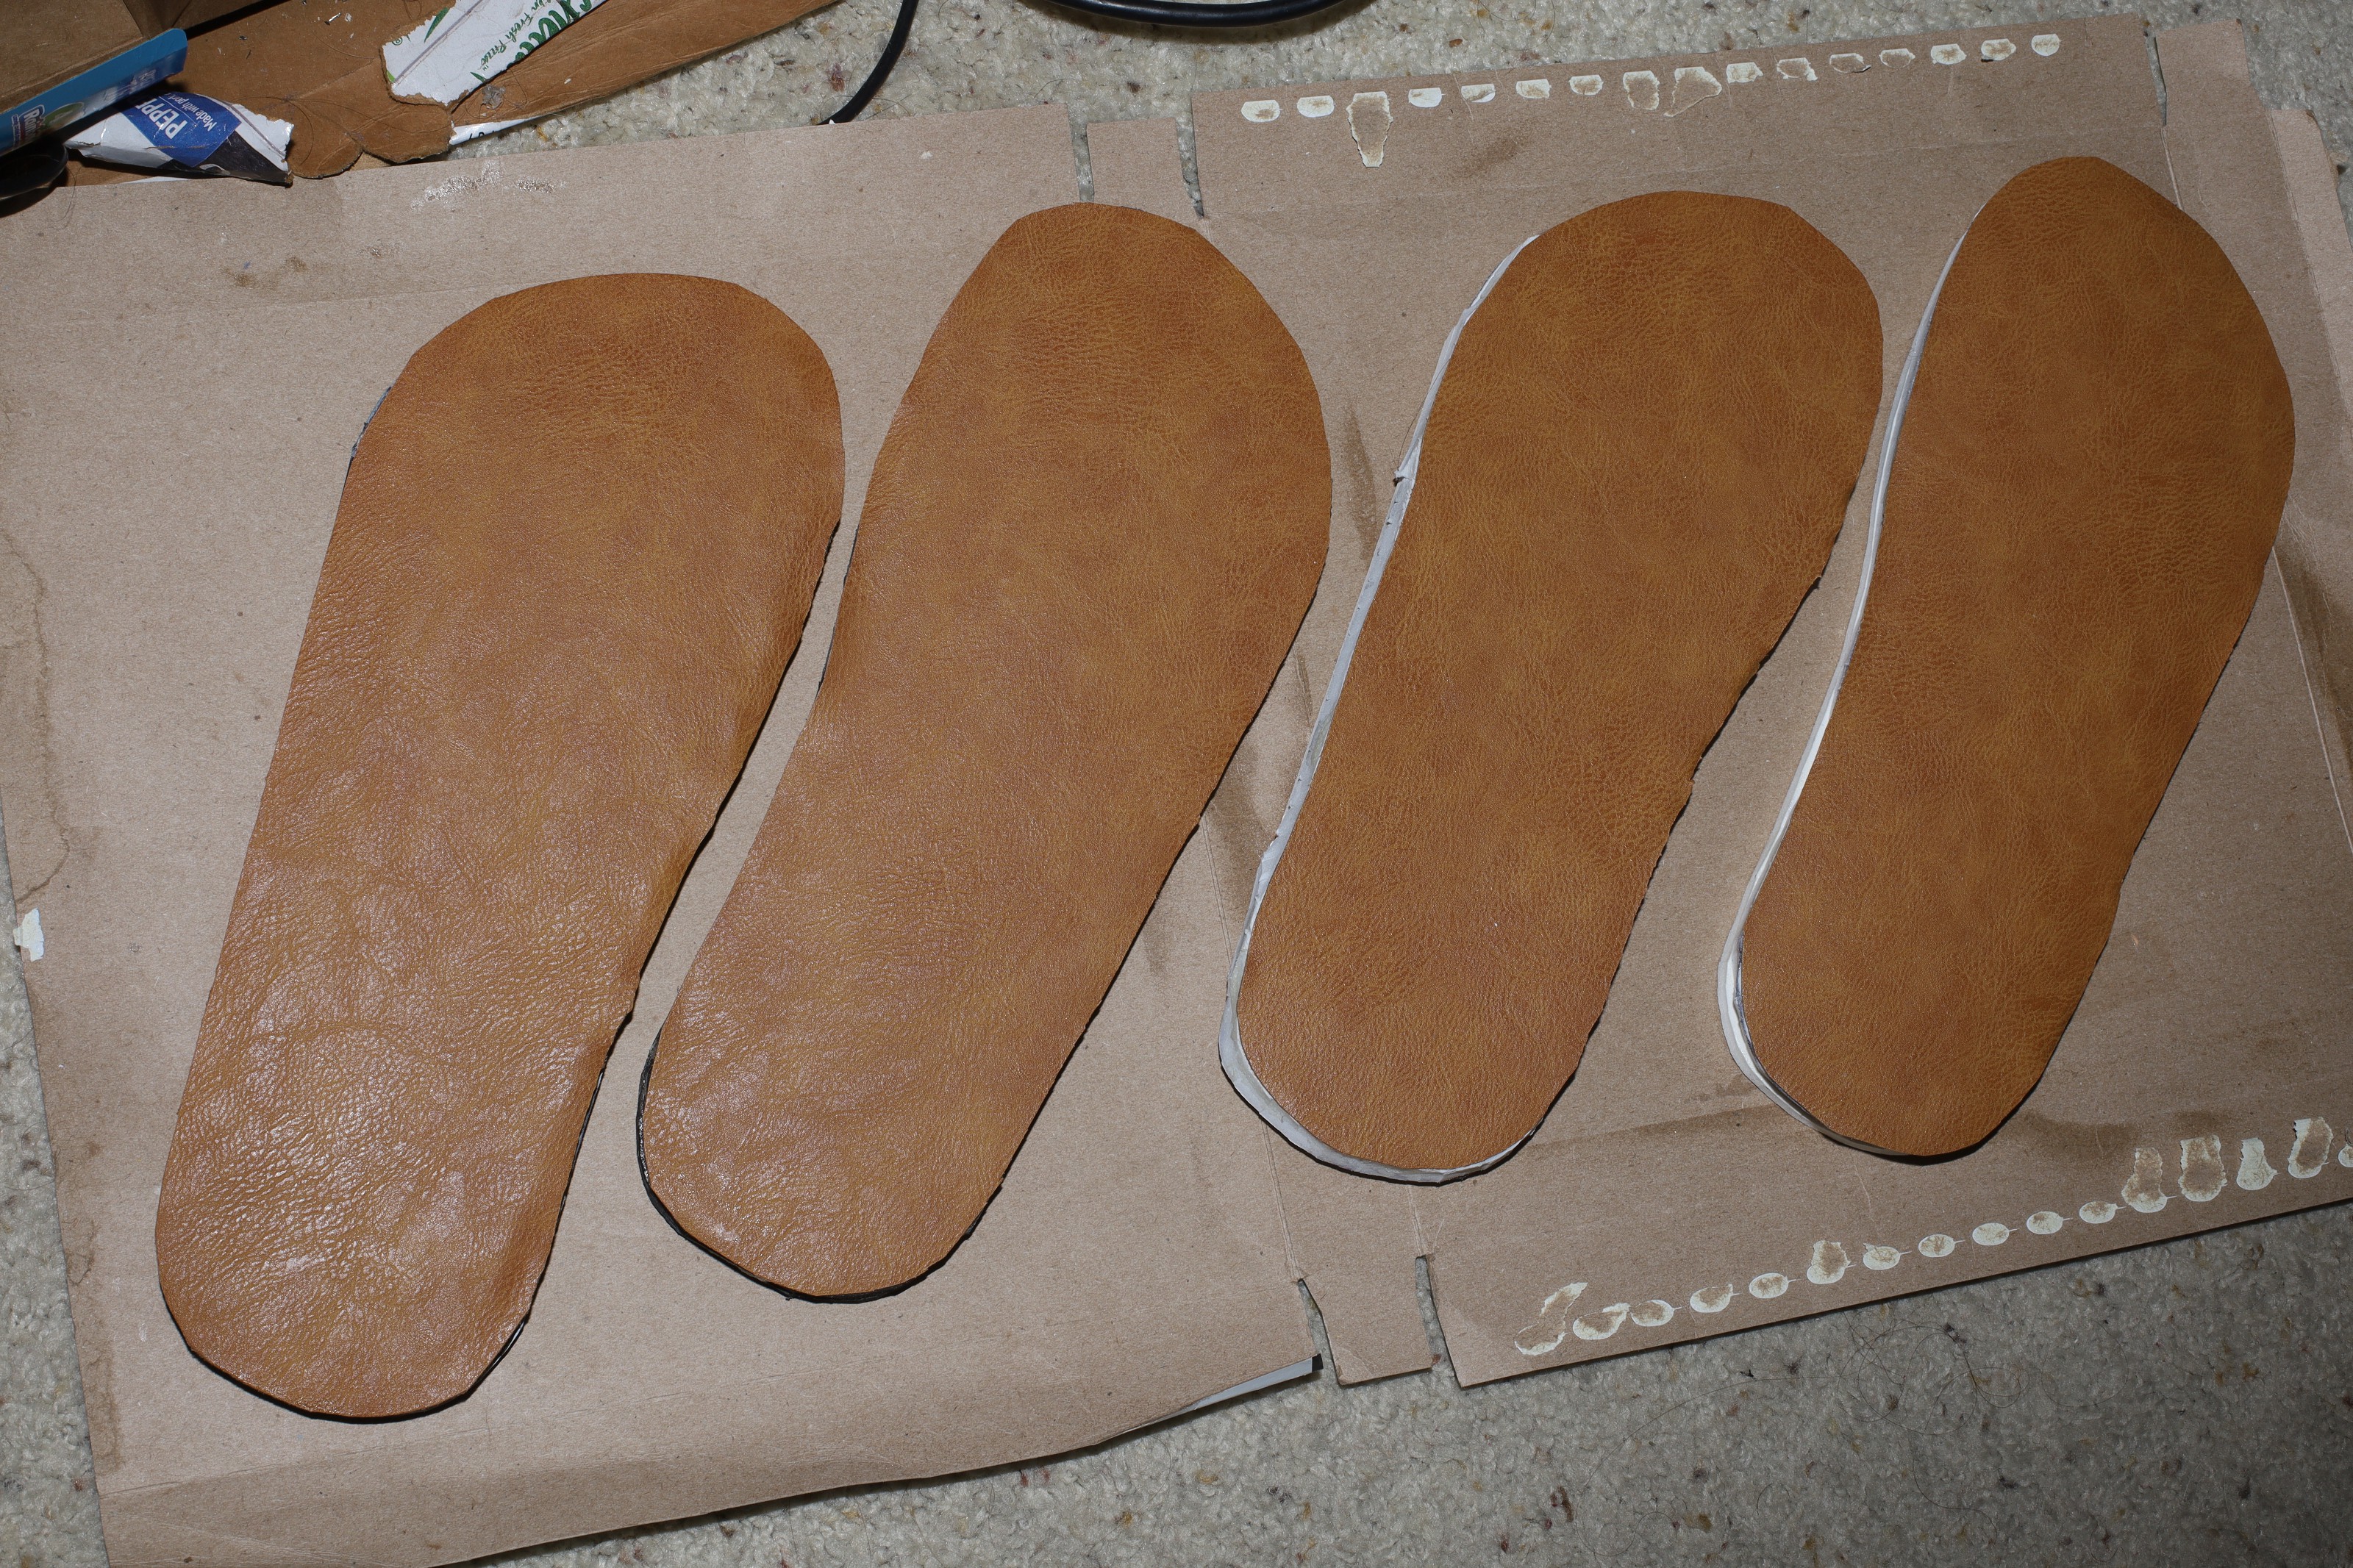
Soling has to be roughly cut based on the final EVA size rather than the template. It has to be 1/8" wider around the outside string hole, to prevent sideways expansion of the foam from pressing the string directly on pavement. It will be more precisely cut after gluing.

Finally, E6000 is applied for the sole.
The outer ankle string must be glued. The outer string is pulled sideways by the thong, so this tries to keep it centered.
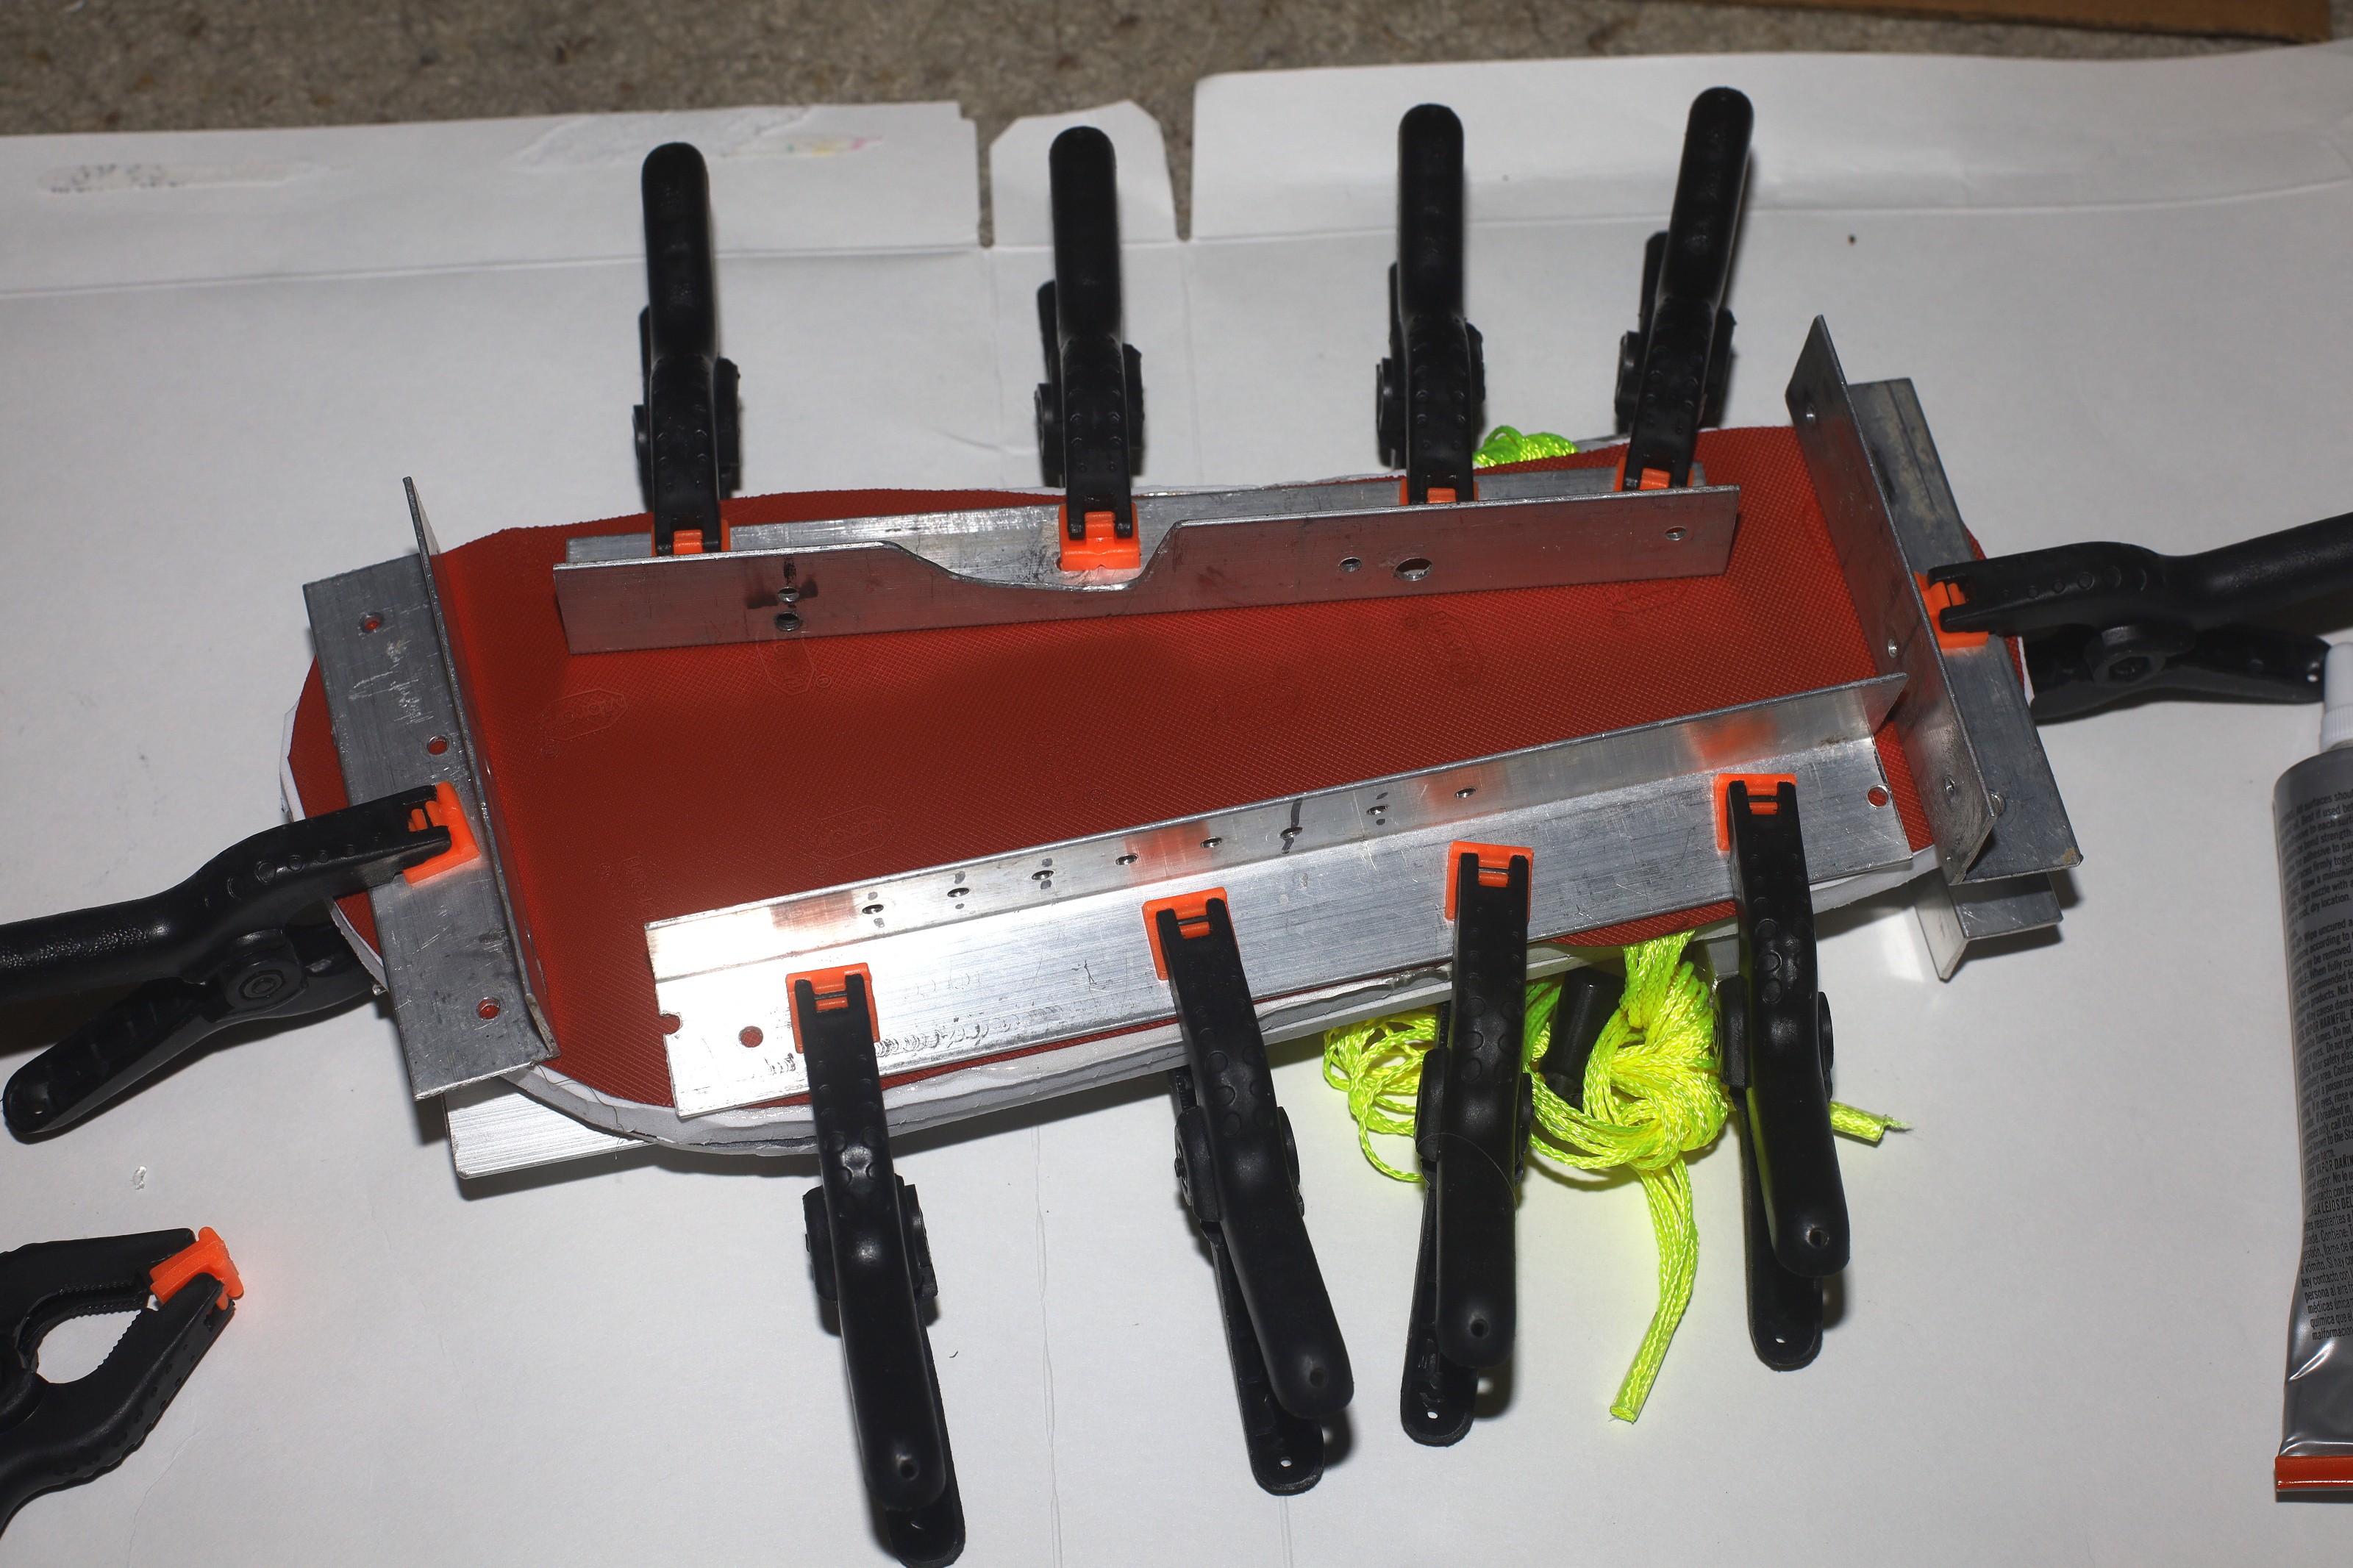
The sole is clamped around the edges. 2 more clamps are required than the EVA, in order to bond around the ankle string.
Finally, a bead of hot glue over the string ends prevents chafing.
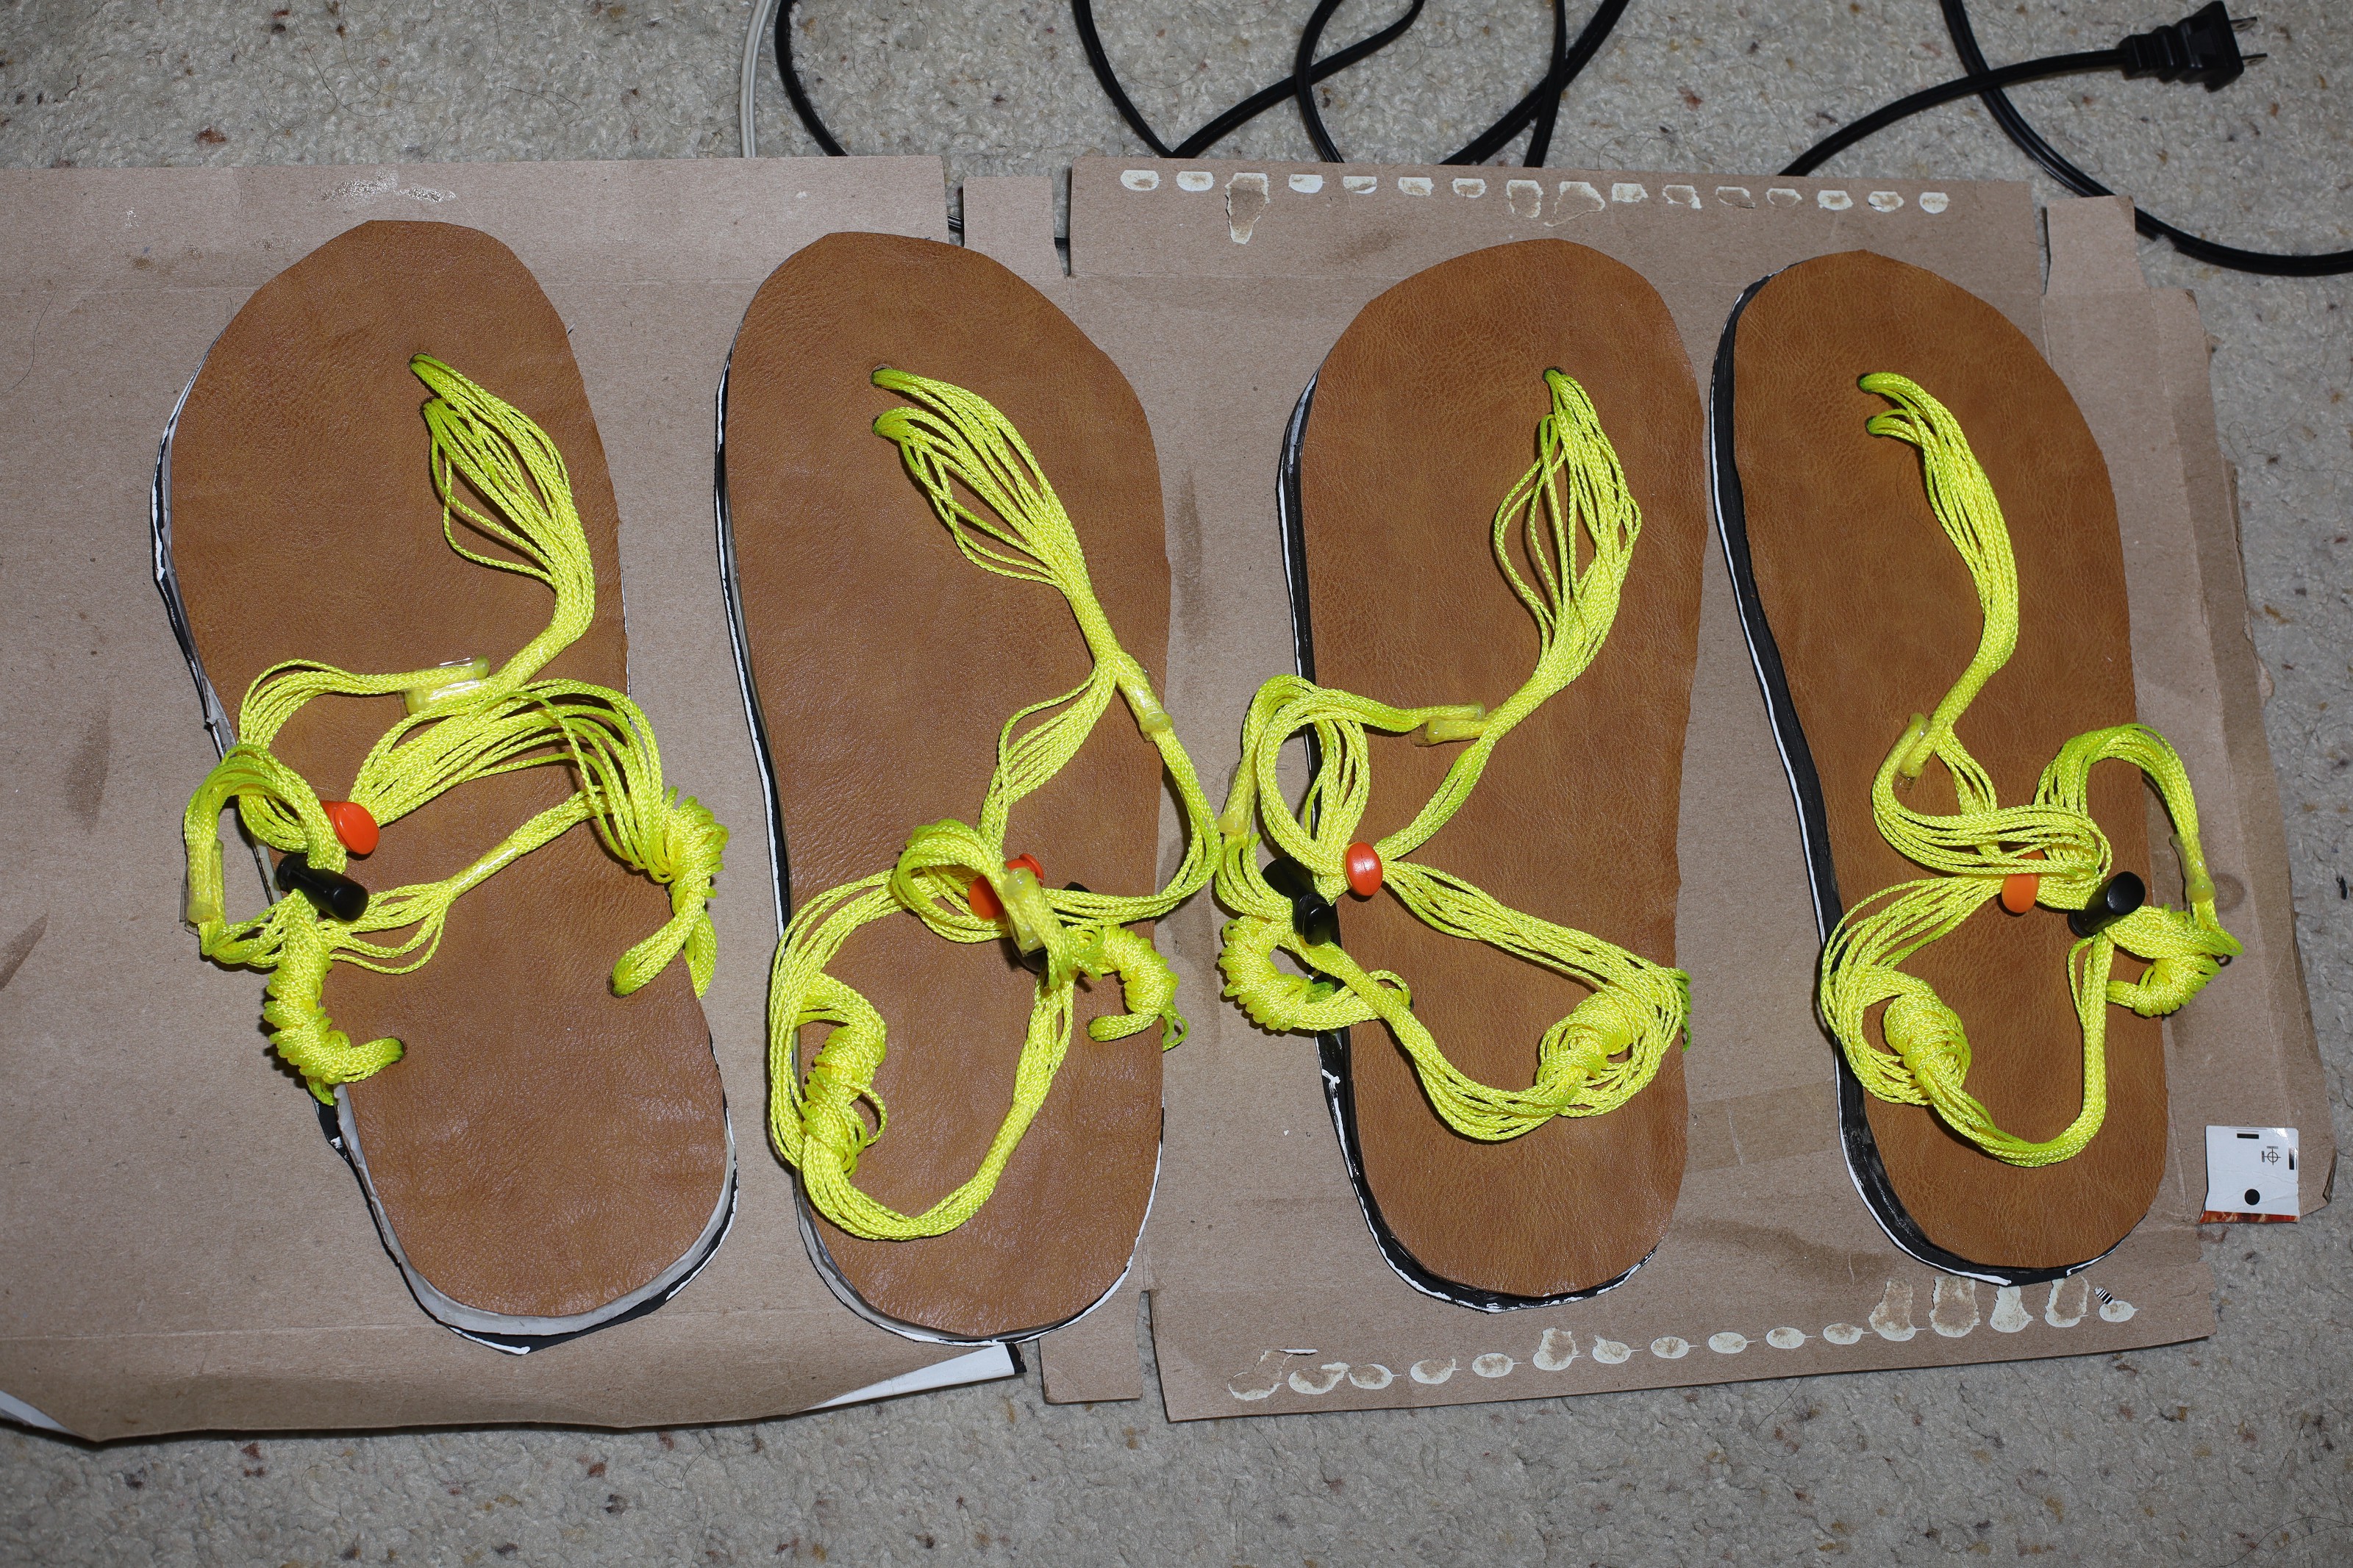

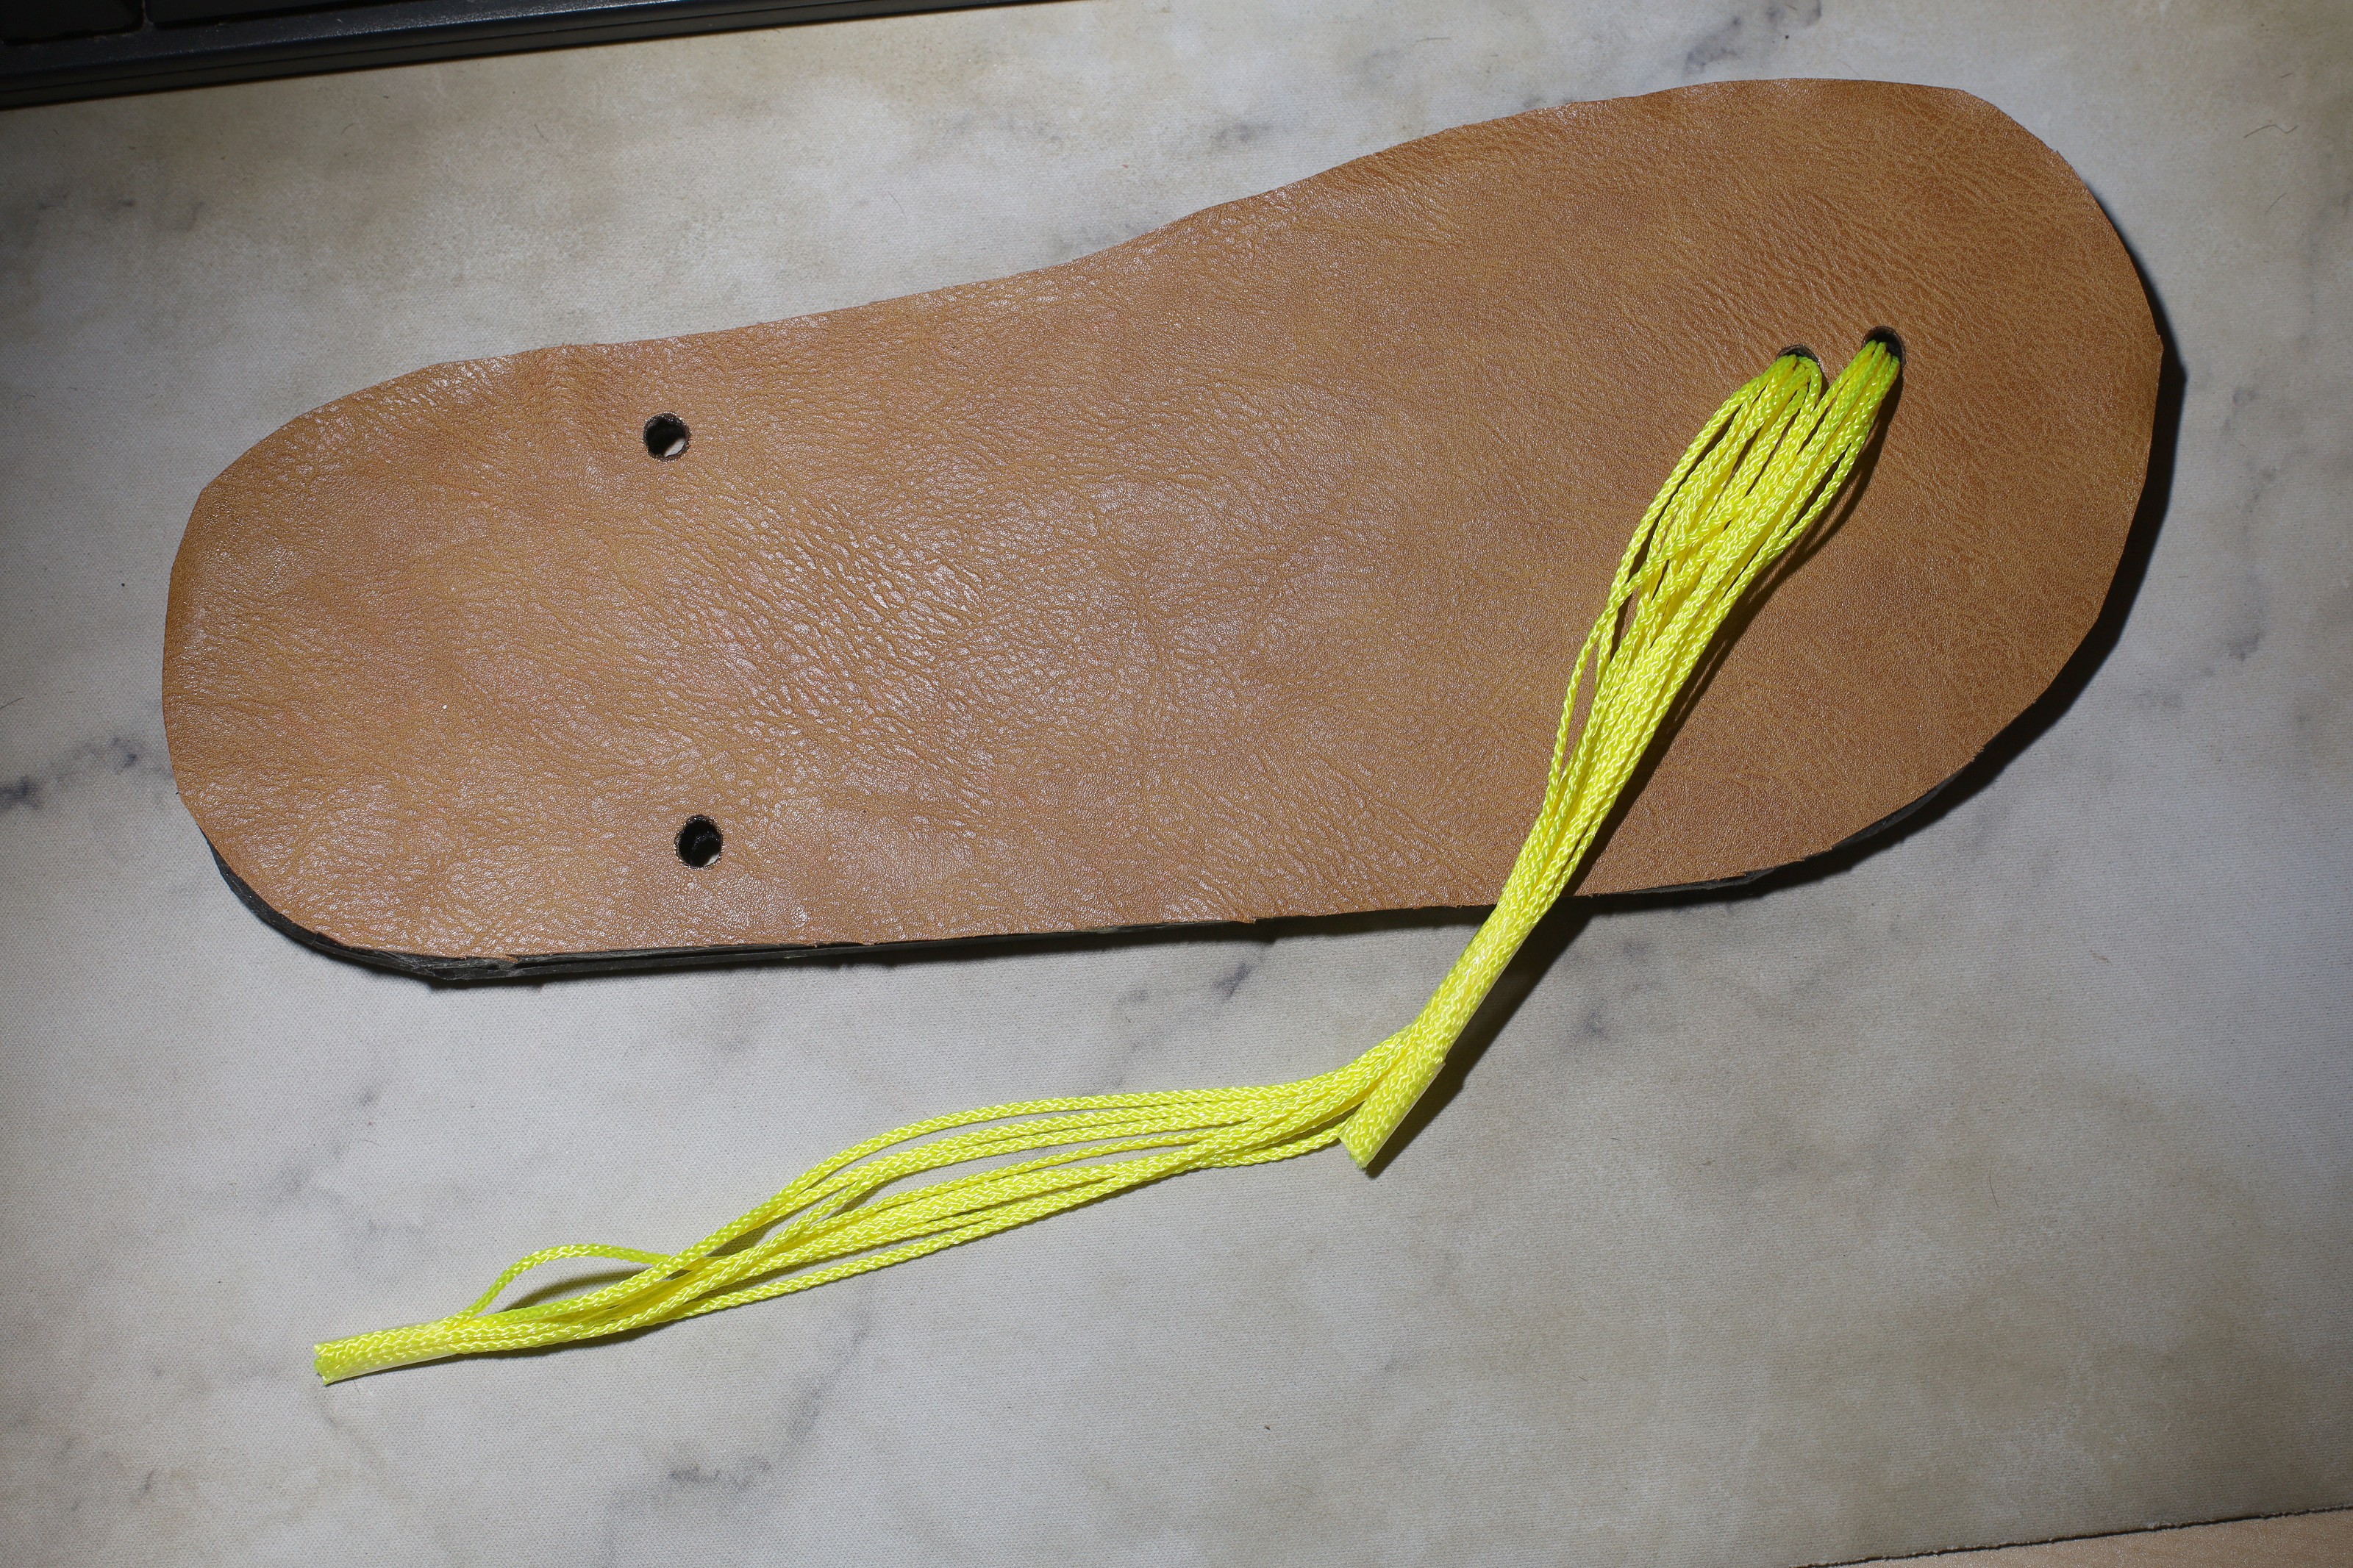
Excess laces must not be cut off. They should be taped into loops. The laces shrink over time. Excess soling on the insides of the paws must be cut off.
During the breaking in phase, lace will be shifted in & out of the inner rear hole to adjust how far forward or backward the paw sits. Excess soling material has to be cut from the inside to prevent it from rubbing on the calves.
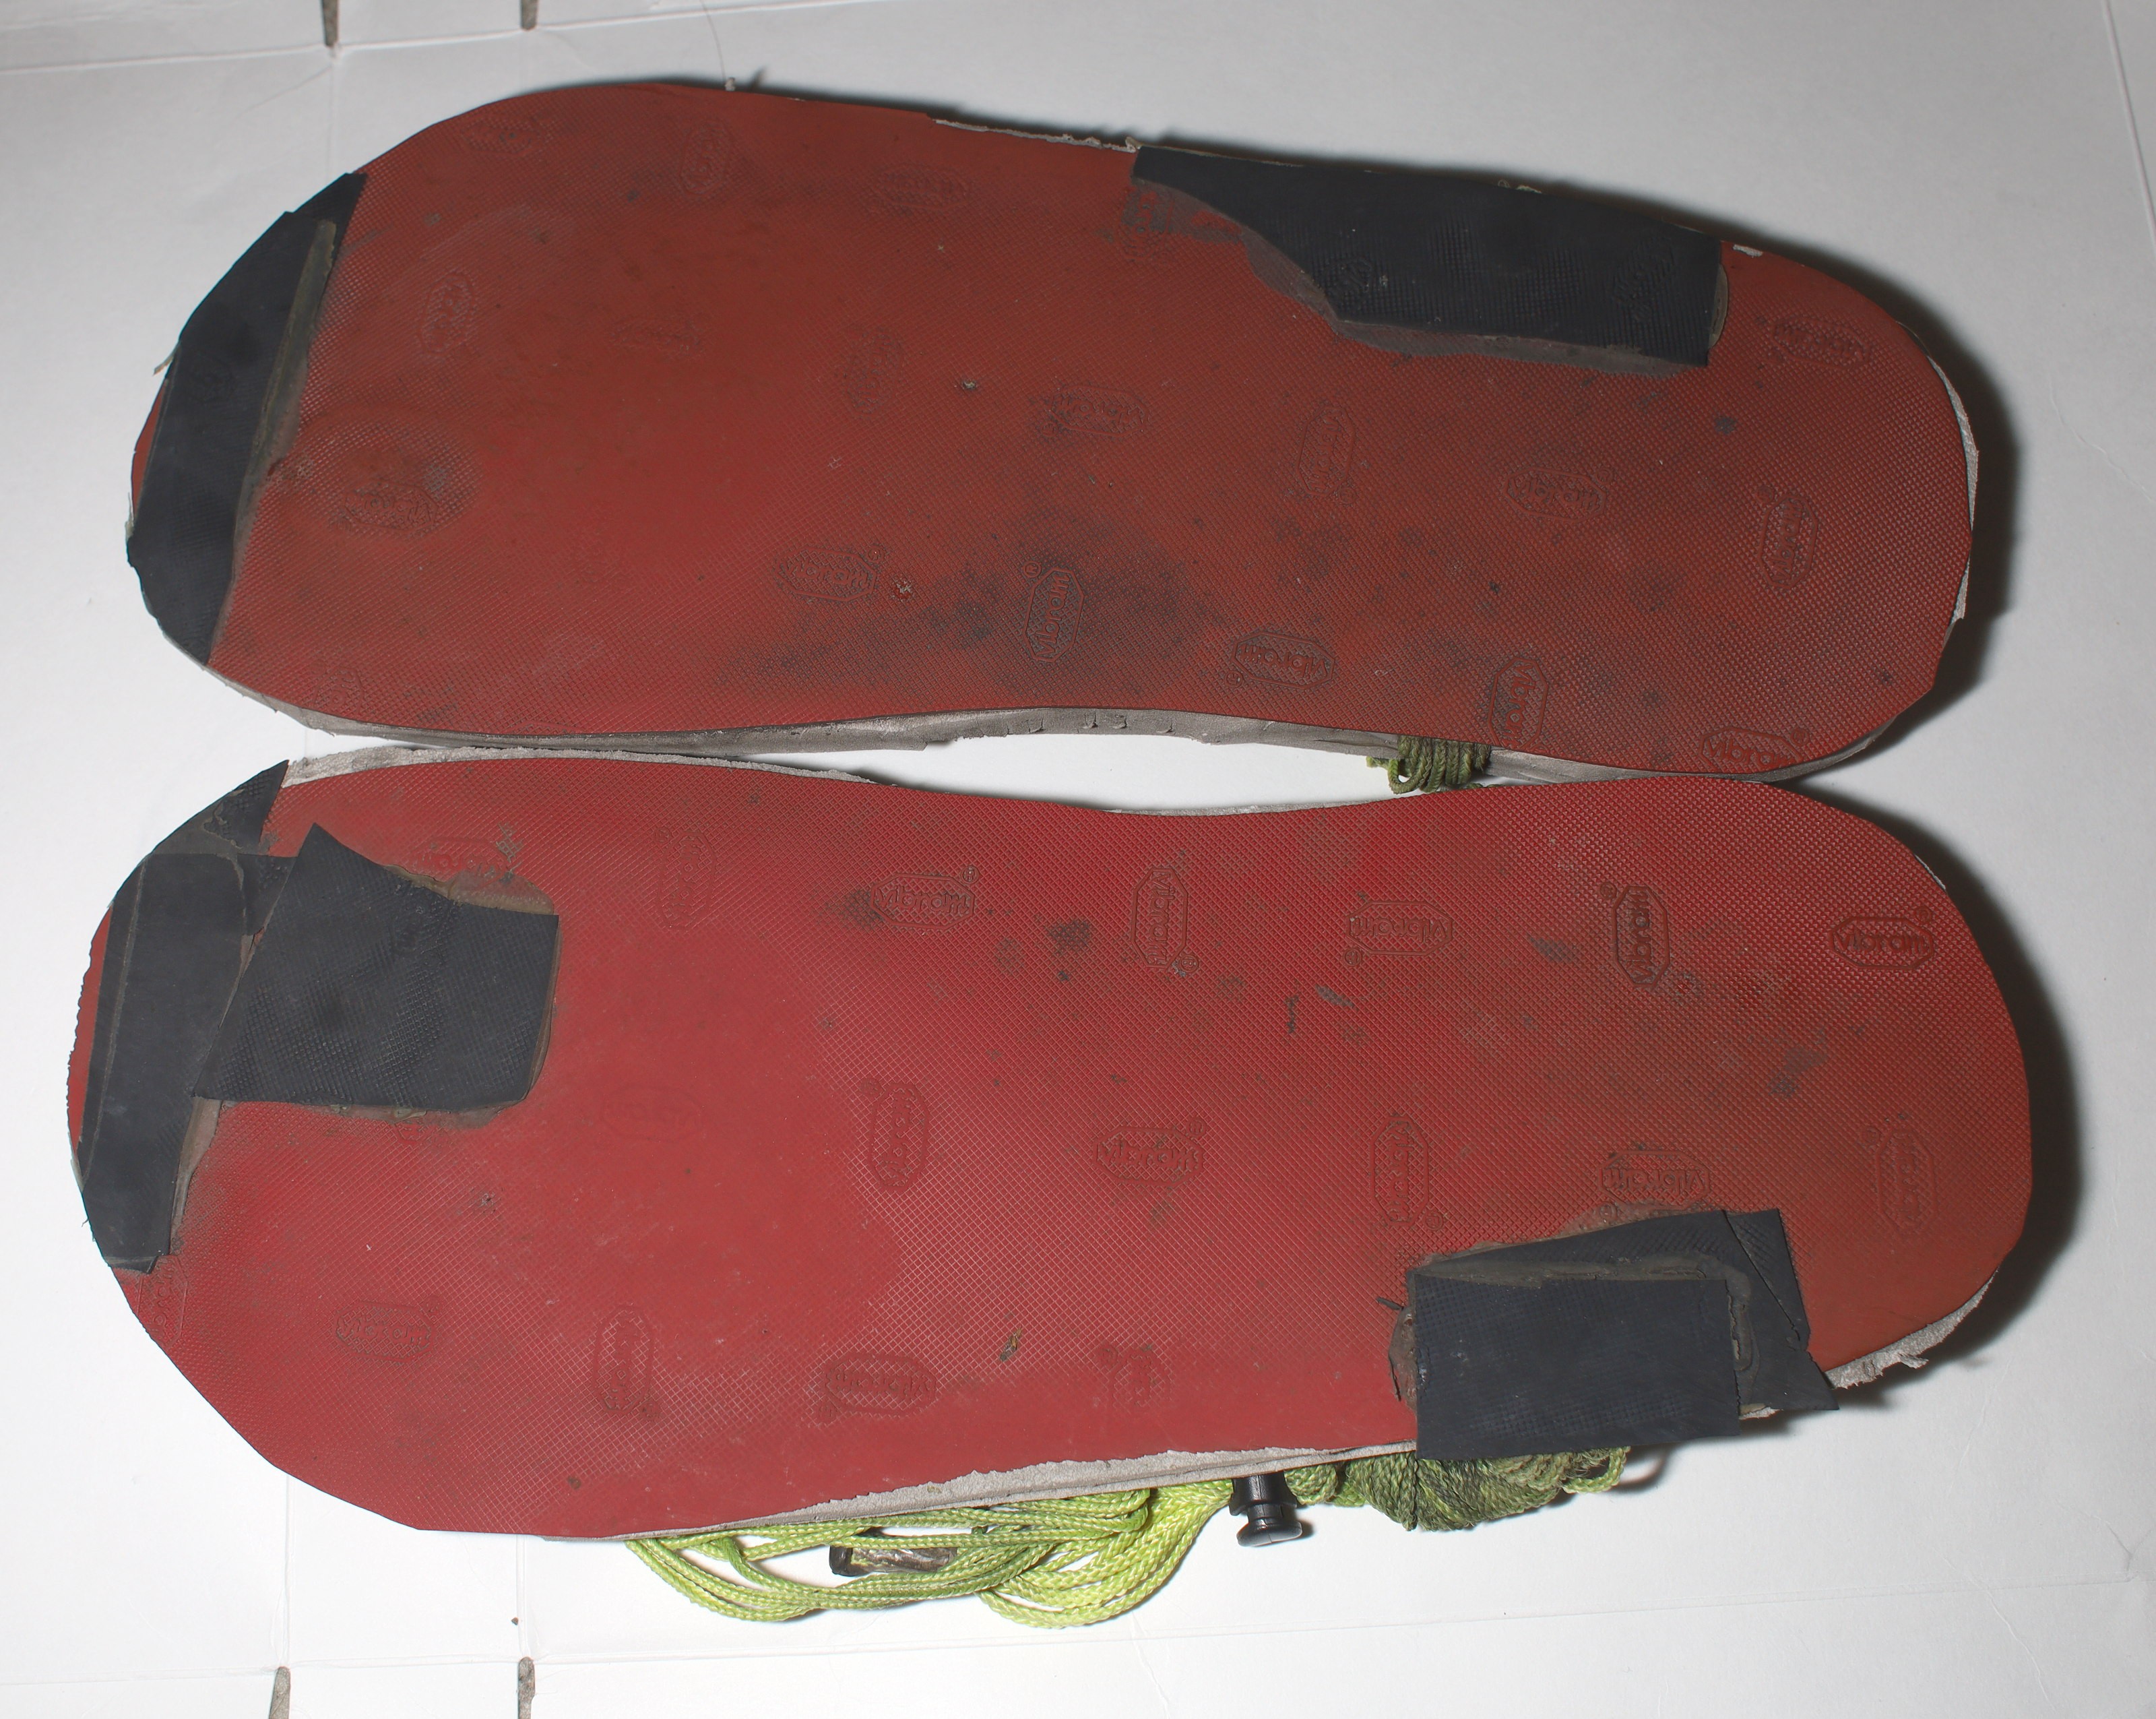
Extra soling material will have to be later glued on the bottom, where it experiences the most wear.