 Grégory Paul
0%
0%
Elite Dangerous Headtracker
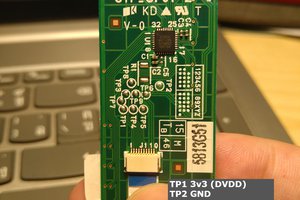
Headtracker built with a Teensy 2.0 and an Adafruit 9-DOF IMU Breakout
Based on work from WebKris & Michael Baker
Become a Hackaday.io member
Already have an account? Log in.
Just one more thing
To make the experience fit your profile, pick a username and tell us what interests you.
Pick an awesome username
hackaday.io/
Your profile's URL: hackaday.io/username. Max 25 alphanumeric characters.
Pick a few interests
Projects that share your interests
People that share your interests


 TinLethax
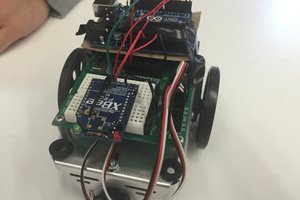
 andrew.powell
 Magnetoceptia
 Benjamin Brink
Hi Folks,
I finally built and got it working. Am able to visualized the data. Similar with the link https://www.pololu.com/product/2468#lightbox-picture0J3722.
I used Teensy2.0 and Pololu miniIMU-9 v3 and utilize the following sketch(program) MiniIMU9AHSR/or Pololu_Open_IMU. (included calibrate)
My only problem is that I couldn't get OpenTrack to recognize the data. I have tried to set it,
as a USB type, Serial, Keyboard+Mouse+Joystick and Serial Keyboard+Mouse+Joystick. Could this be the Teensy2.0 issue?