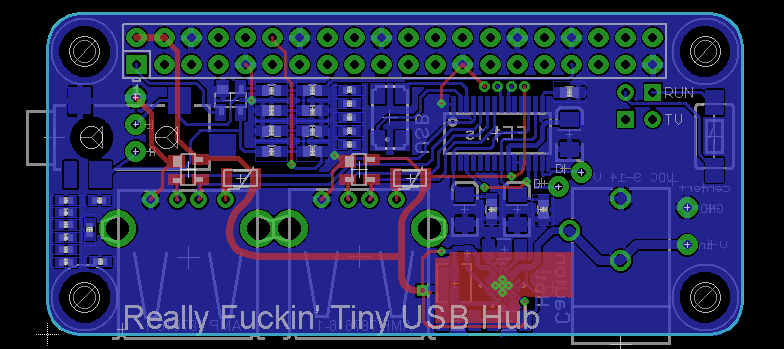
The boards are already off to OSHPark. Here's what I'm looking at:

This is probably the smallest and most compact PCB I've ever designed. It's composed of three sections: the USB hub, the Audio output, and Power supply.
The USB hub

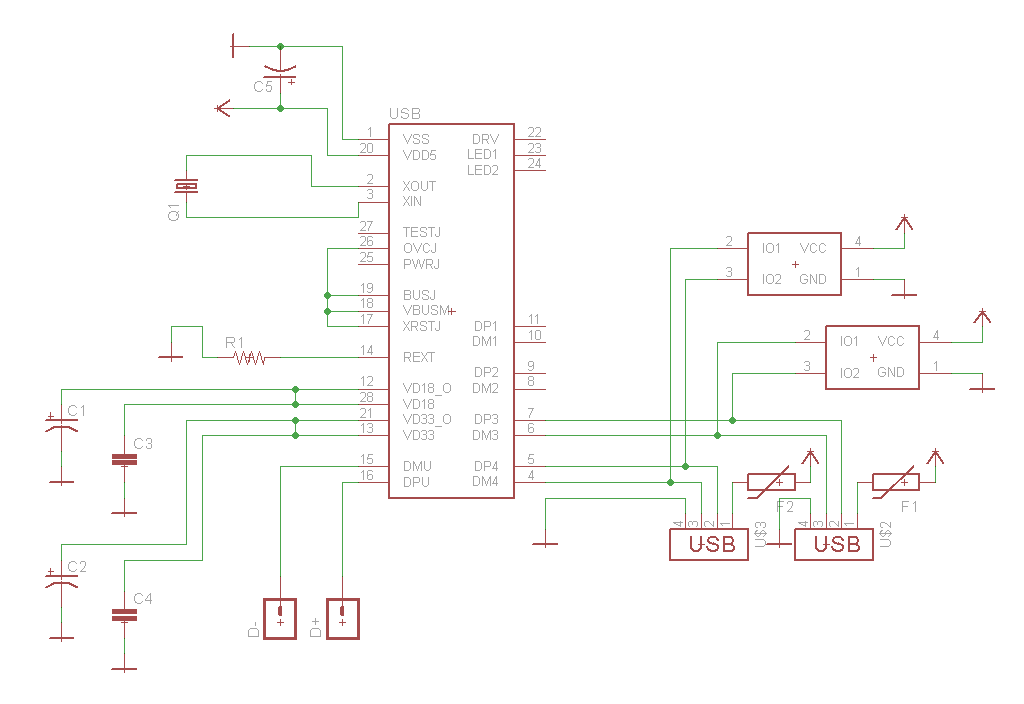
Everyone needs to build their own USB hub! It's the zeitgeist of the Raspberry Pi Zero. This hub is built around the FE1.1s 4-port USB 2.0 hub controller. This chip doesn't require pullups, pulldowns, extra power regulators, and operates at full speed (12MHz). I have 10 chips coming to me via eBay and China.
I broke out two USB ports in this four-port hub. Because I envision this project being used in a few projects where space is at a premium, I've also added solder pads for the power, ground, D+ and D- of a third USB port. An Edimax WiFi module can easily be added with some wire, solder, and hot glue.
The upstream port connects to the Pi through solder pads. The D+ and D- pins of the OTG port are available on the back of the Pi Zero, labeled as PP22 and PP23. This is more solder and hot glue; this board is intended to stack tightly against the Pi Zero - there shouldn't be any issue of the wires pulling out.
Protection of the USB ports is done through ESD diodes and a polyfuse. This isn't a completely protected port, but it's better than nothing.
Audio Output

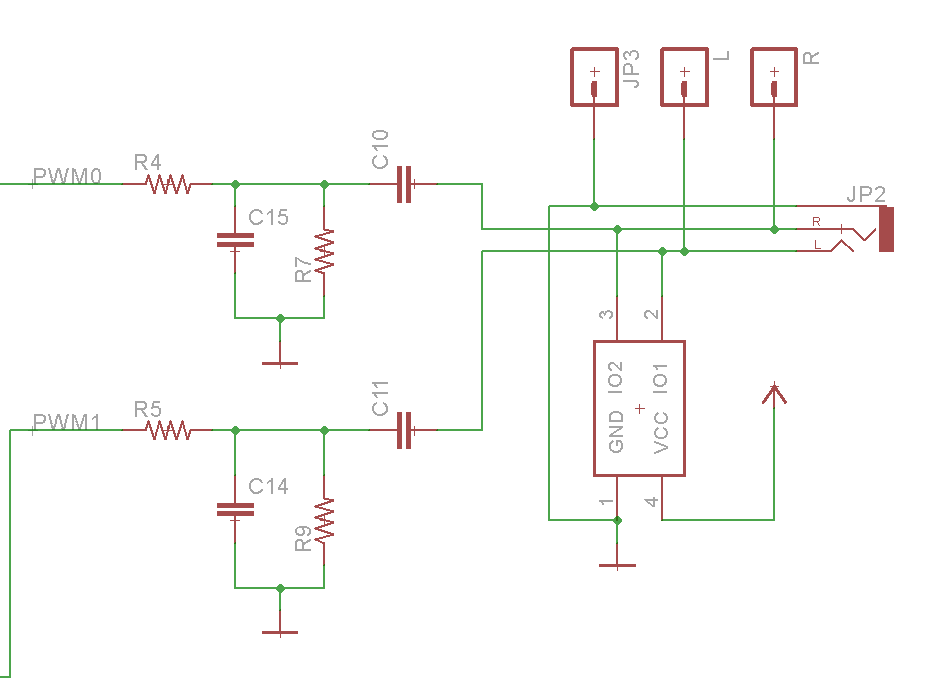
The Pi Zero doesn't come with audio output. Because the Pi can play audio through it's PWM peripherals, adding audio doesn't take up that much space. The instructions are given by lady ada, and implemented with standard value parts.
The same part number for ESD diodes as used in the USB ports is used here in the audio port. Output is though a 3.5 mm jack, or if this project will find its way into something that requires even less space, solder pads for left, right, and ground.
Power Supply

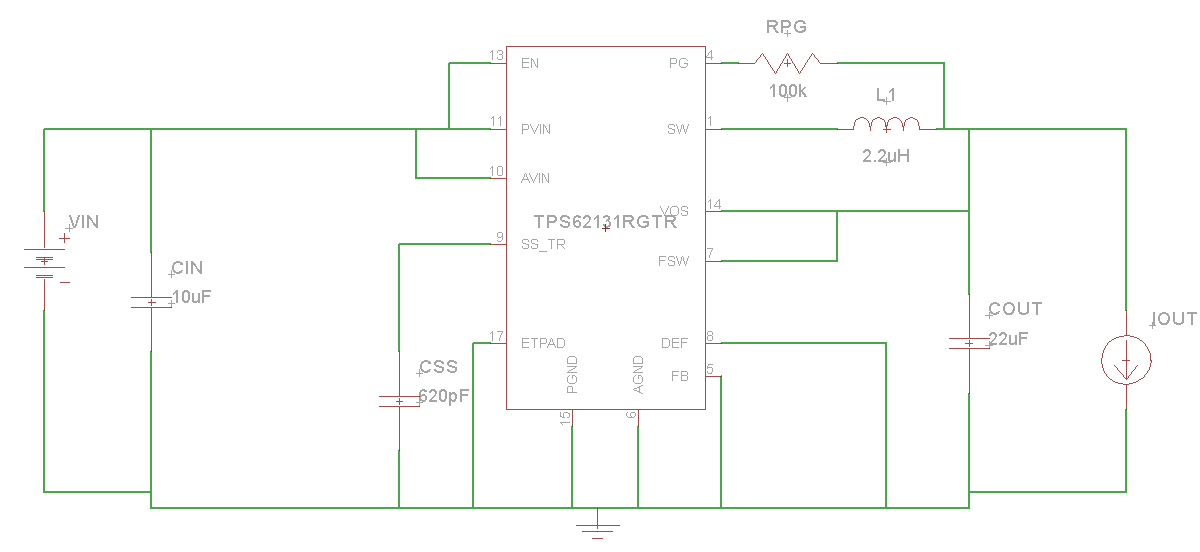
Although it takes up the smallest area on the board, the power supply has had the largest consideration of anything in this project. Instead of a microUSB port, I'll be powering this project through a wall wart, delivering 12VDC. This 12VDC is also broken out to solder pads, as a lot of cheap TFT displays exclusively use 12VDC
The design for the power supply is able to accept anything between 9 and 14V, delivering 2A at 5V. This is a high performance power regulator, and for this project I'm using TI's TPS62141. Design was generated by TI's WEBENCH software. This power supply is overkill, and there are other parts in the family that would be better suited for less powerful builds.
Actually Building it
the boards are off at OSH park, and in two weeks I'll be gone for a month. This is going to take a while to put together. If the first one works, I'll make about three or five of these things. I can see this being useful for a few projects, at least.
Files are available in the github, improvements in layout and design will be made.
 Benchoff
Discussions
Become a Hackaday.io Member
Create an account to leave a comment. Already have an account? Log In.