Build Montage
Printing the Helmet
The helmet model was designed by drumguy560 on the Replica Prop Forums. I did a lot of digging and although this model has been around a while, it still seems to be the community favorite for 3D printing. It also has some excellent detail in the mouth area. I'm reposting the files here (with permission) so that you don't have to deal with downloading them from 4shared.
Its not really obvious where the smaller pieces go, so I also included a Blender file of the fully assembled helmet, so you can see how it all fits together.
I printed it with MatterHackers' pro series red PLA and standard series gold PLA. I like the way the gold looks right now. Its semi-translucent, so you can see the infill pattern (picture doesn't really capture this). Red pieces were printed on an Ultimaker 2 at 0.1 mm layers, and the gold ones were done on a WASP 40 70 at 0.2 mm layers. I estimate the total print time at about 120 hours. It took so long because of the fine layers, which really weren't necessary. Also, there was a ton of support material since none of these things had good printing surfaces.


I would like to paint everything with Rustoleum eventually, but my company has kind of hijacked this project in order to show off the capabilities of 3D printing, so it will remain unpainted for now.
Most of it is held together with superglue, however there was not really a good surface for this between the top and middle red pieces. I ended up using a soldering iron on low heat to weld them together on the inside.
The default scaling is a little small, in my opinion. I printed it at 100% and I can't get it on without removing the jaw. I do not have a large head. Once inside, though, its pretty roomy. I take this as incentive to add servos for the jaw and faceplate.
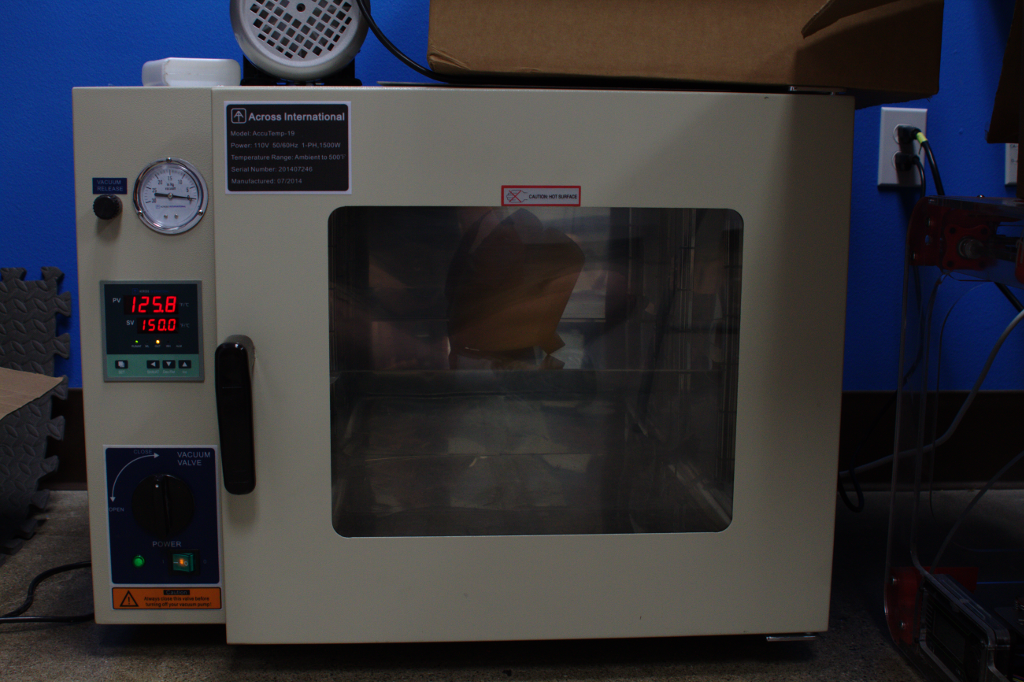
The faceplate does not fit on perfectly around the top. I suspect that the WASP was not really calibrated well. I used our temperature controlled vacuum oven to warm it up just past the glass transition temperature of PLA (65 C). Then I bent it into shape and used tape to hold it in place as it cooled off. It fits perfectly now.
Motorizing the faceplate
This was really harder than it should have been. I know that a lot of people have done this before, so I searched and looked at a lot of different approaches. I wasn't really satisfied with the existing designs people had published, and the good ones people seem to keep to themselves. In the end I decided to come up with my own thing based on a 4 bar linkage. This would let me get the precise motion I wanted.
Going into this, I knew roughly where I wanted the arms to go. I decided to put the motor under the center thing on the forehead, like this guy did. This is a good spot for keeping the front arms hidden. The helmet has two slots along the top which were obviously intended for the faceplate mechanism. The back arms could go through there. I cut these out using a Dremel. I always like to take advantage of the natural features of the prop. This makes it more realistic. I have found that when artists design things like this, they usually have some idea of how the thing would actually work, even if they don't flesh it out fully.
Motors and Arms and Stuff
The motor is a standard HiTec hobby servo that I got out of the garage. I designed this thing to hold it, along with the arm on the other side. The joints are 623ZZ ball bearing and M3 screws.
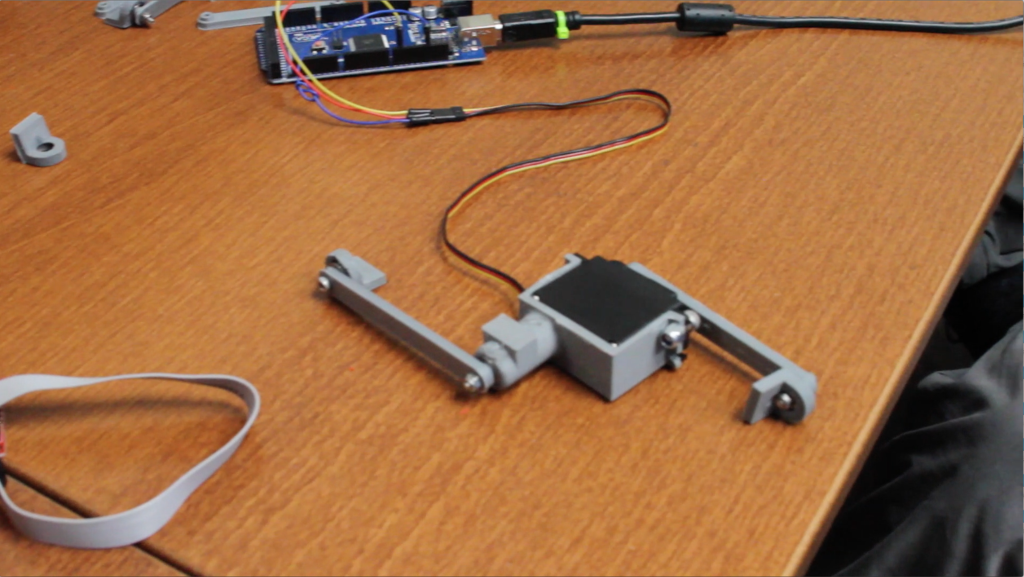
These are the back arms, which fit underneath the slots in the helmet.
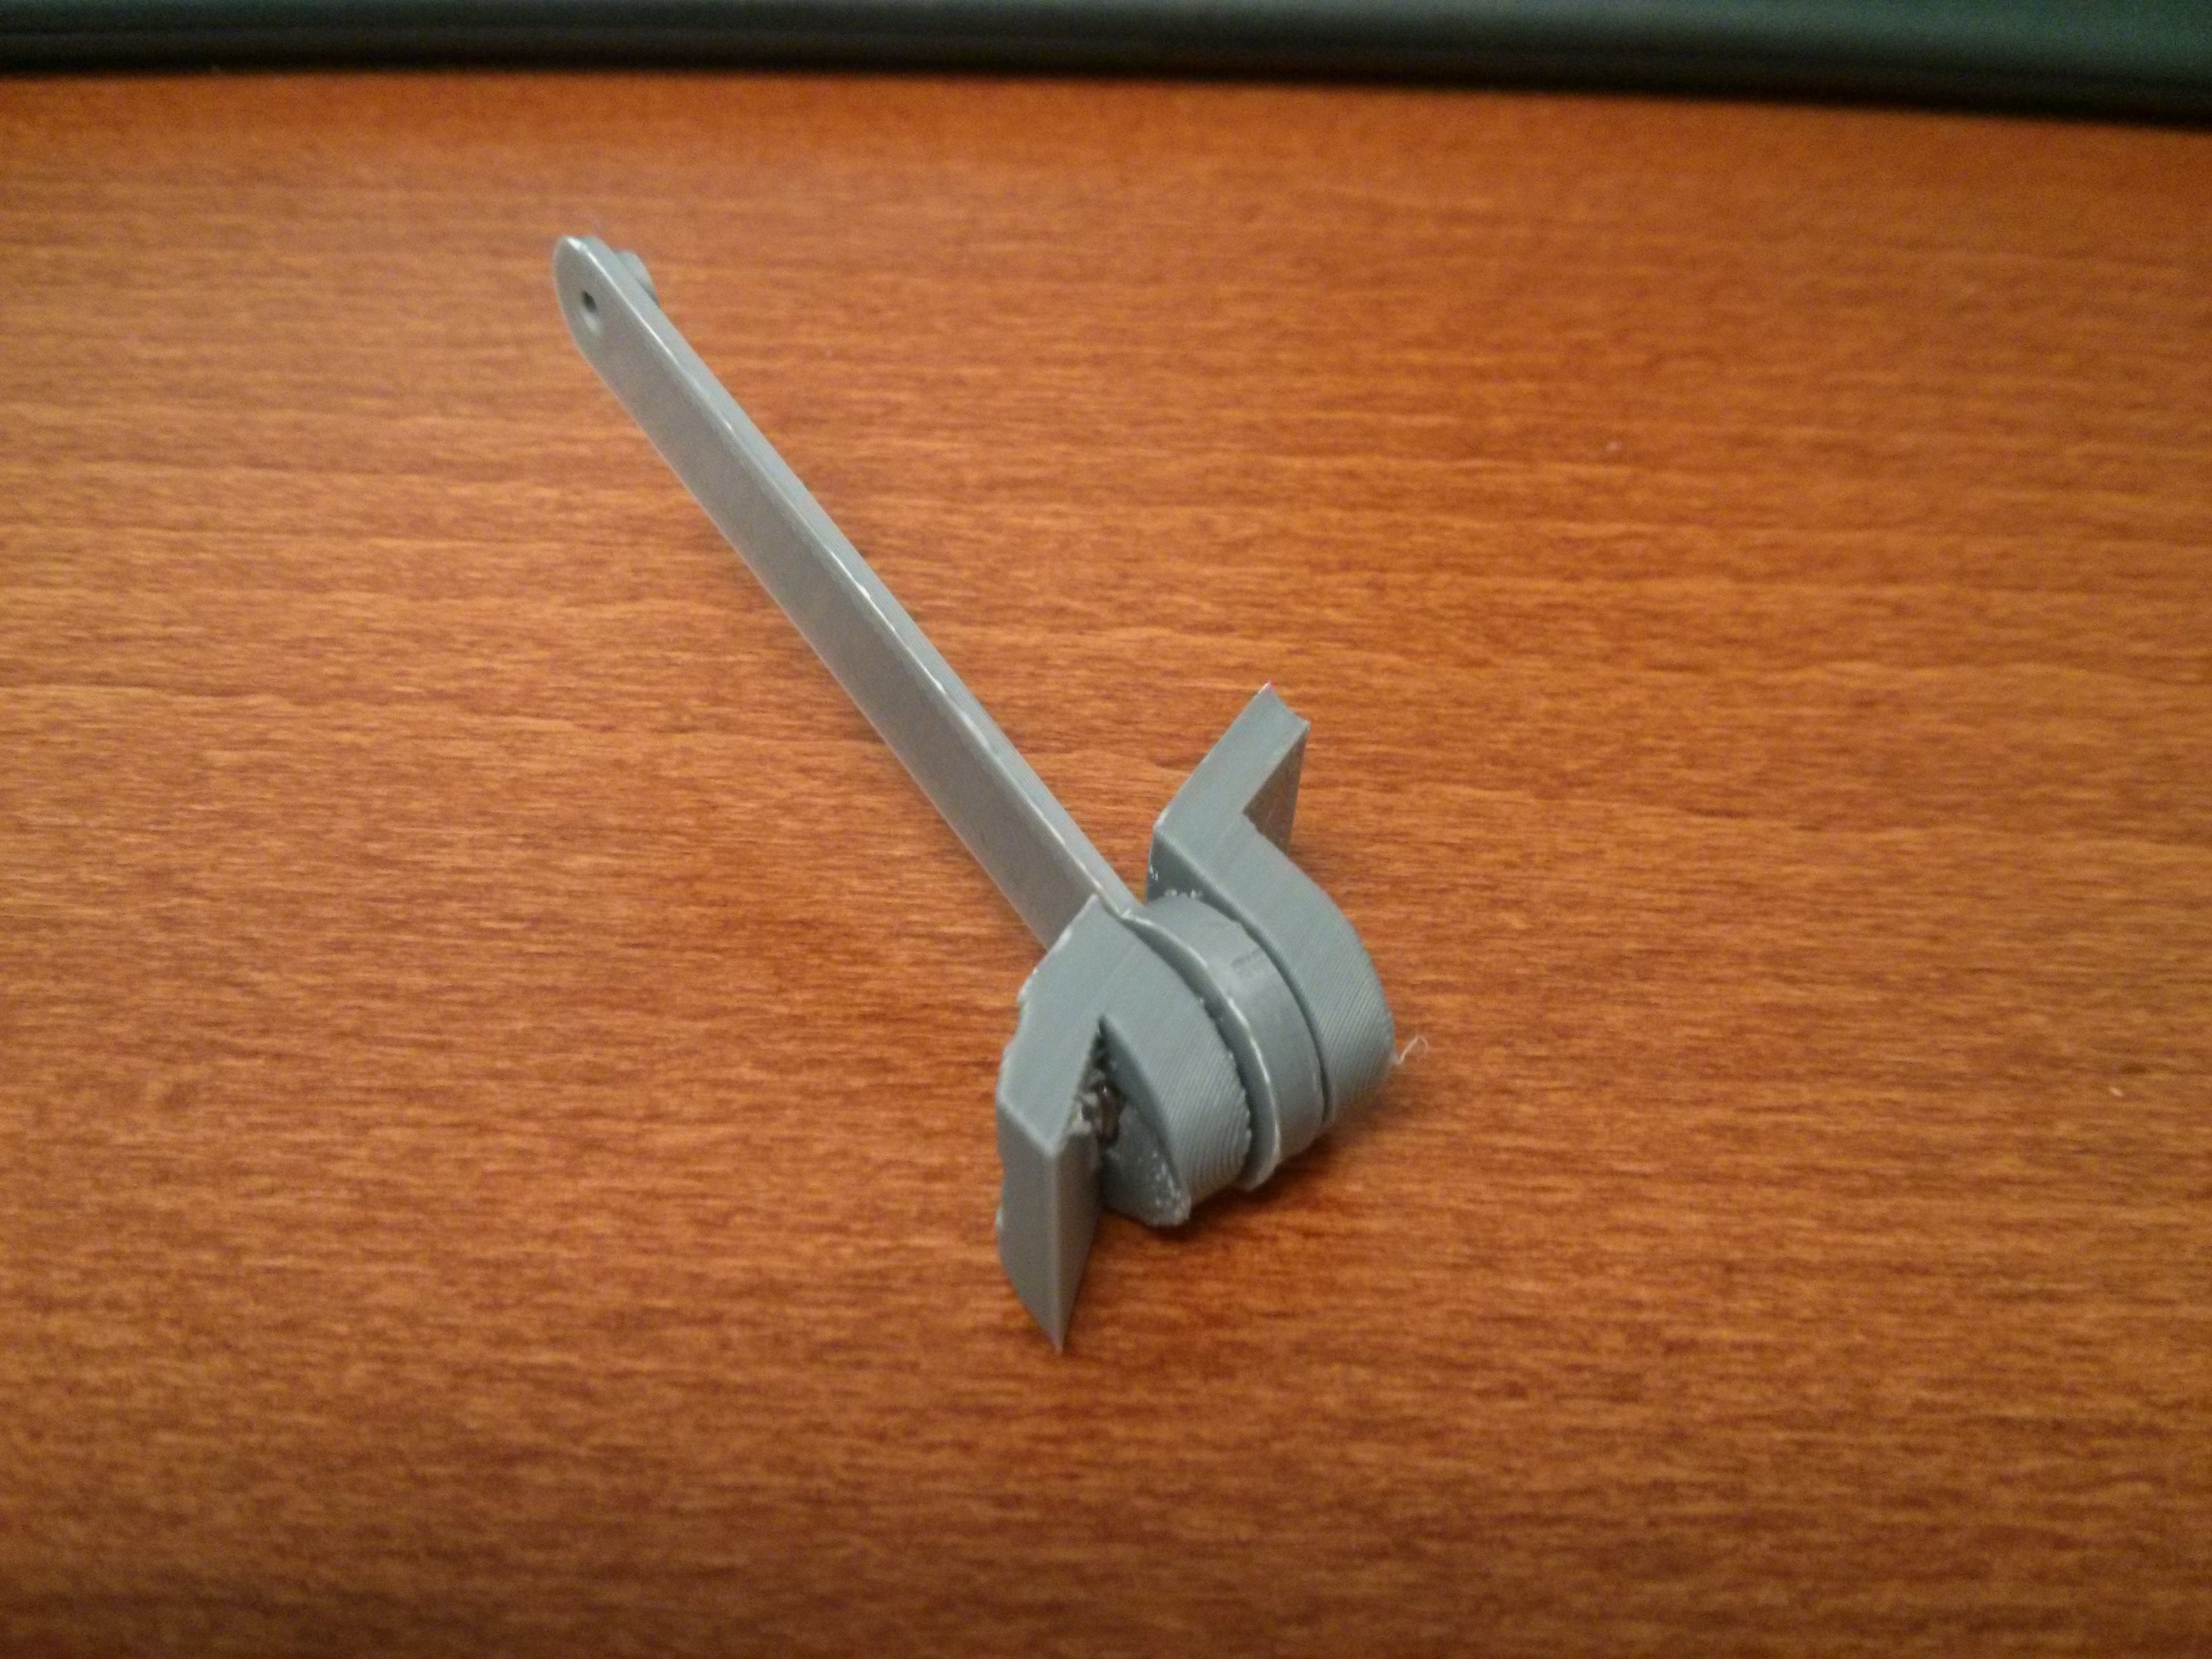
I knew it would take a couple of iterations to get the lengths of the arms right, and the positions of all the joints, so I temporarily fitted everything together with hot glue. What I did not realize is that hot glue and PLA stick to each other REALLY WELL (this is because the hot glue partially melts the PLA).
4 Bar Linkage
Through extensive research (watching the movie a lot) I determined that the faceplate should move out a little bit first, then flip up and back. The trick to getting the proper motion is to figure out the correct lengths of the arms and the correct positions of the joints.
I took pictures of the helmet with the faceplate in 3 different positions; closed, open, and halfway open. Then I brought the images into GIMP and overlayed them on top of each other. This was the result:
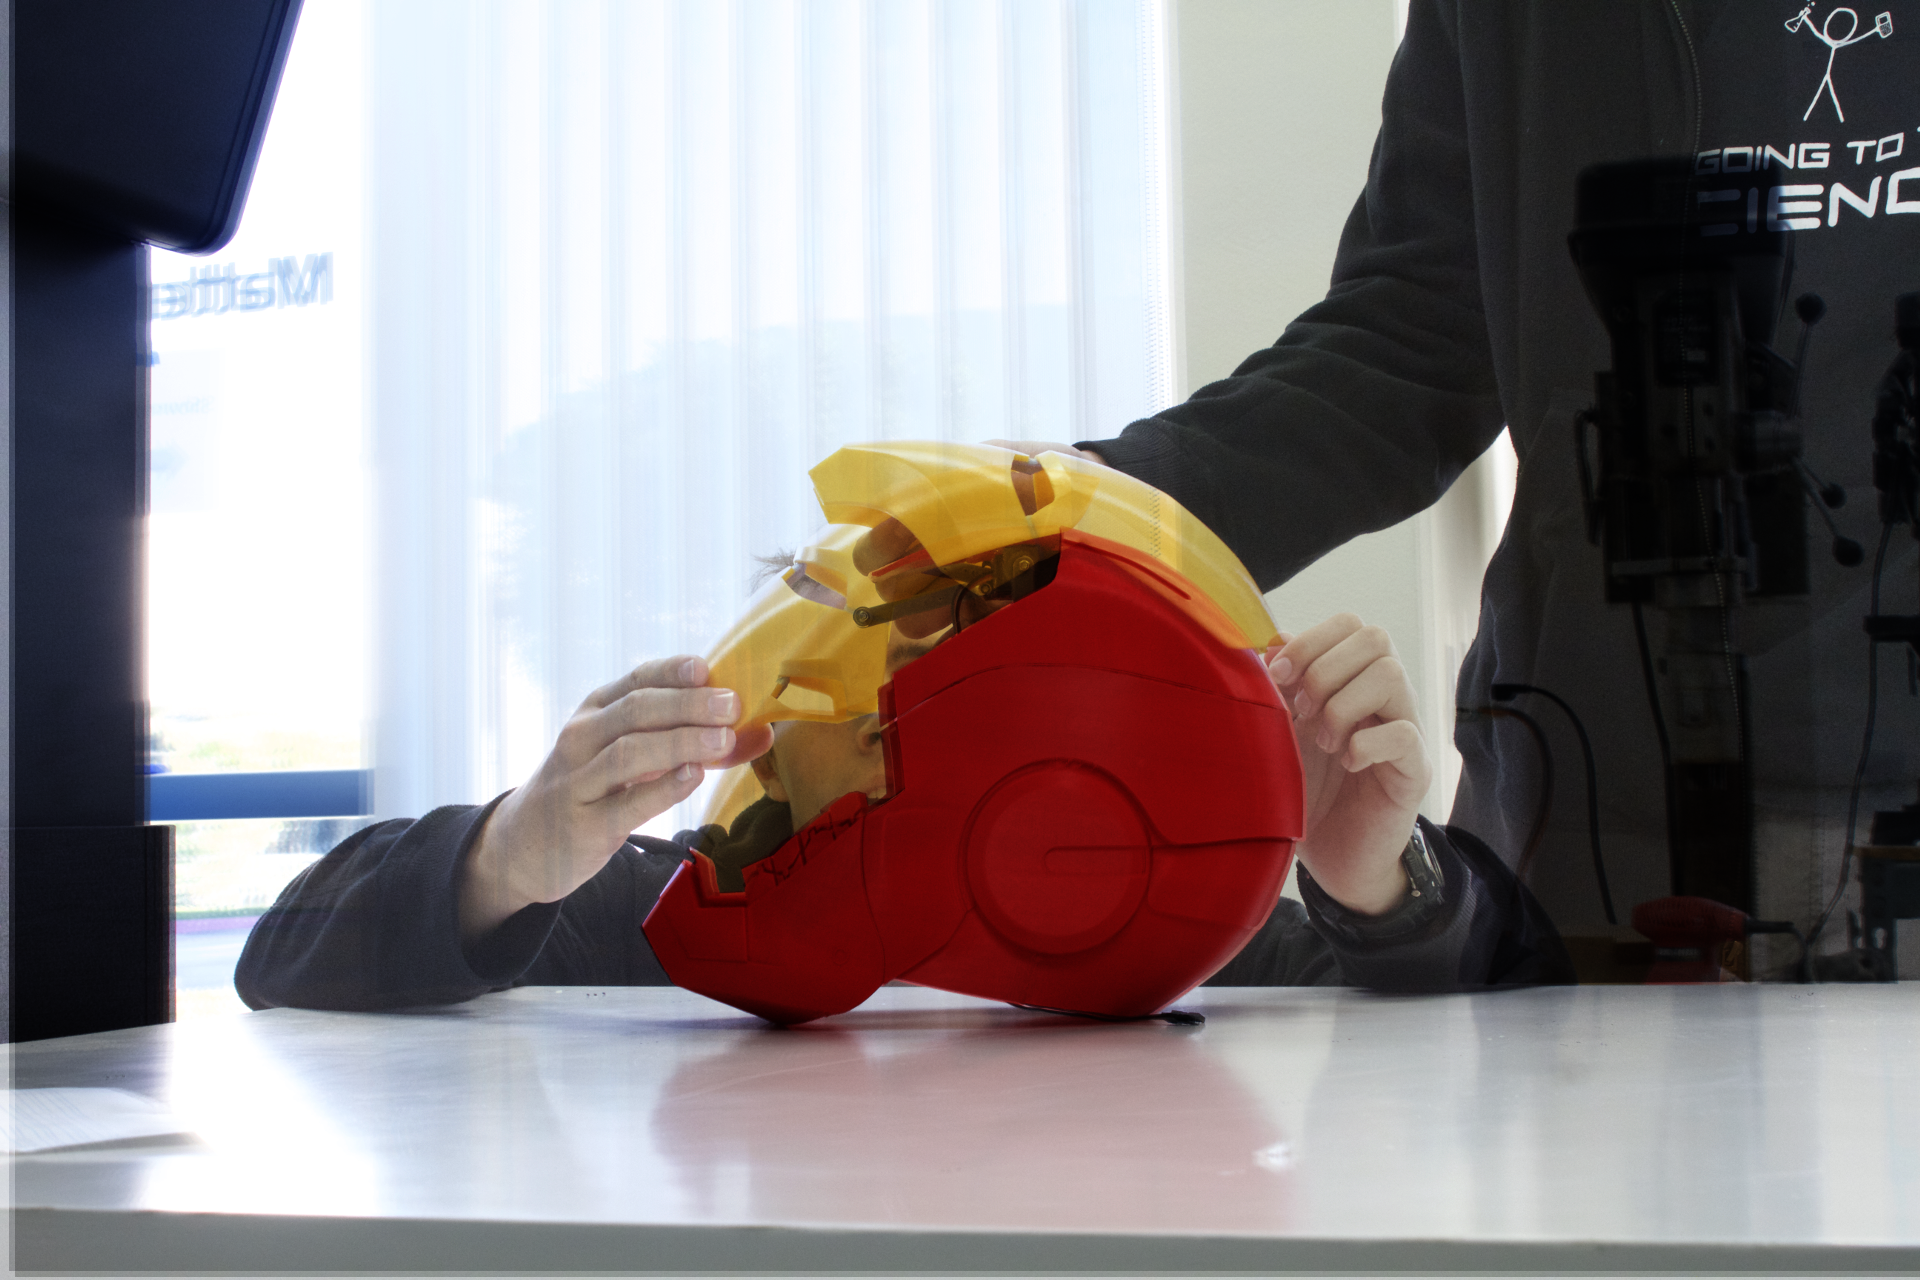
In SolidWorks, I traced over the composite image and marked where the joints would be in all three positions. This fully defined the arcs and gave me the length of the arms and the centerpoints. It also helped that I had already set up the front arm (since I knew where the motor would be and where it had to connect to the face).
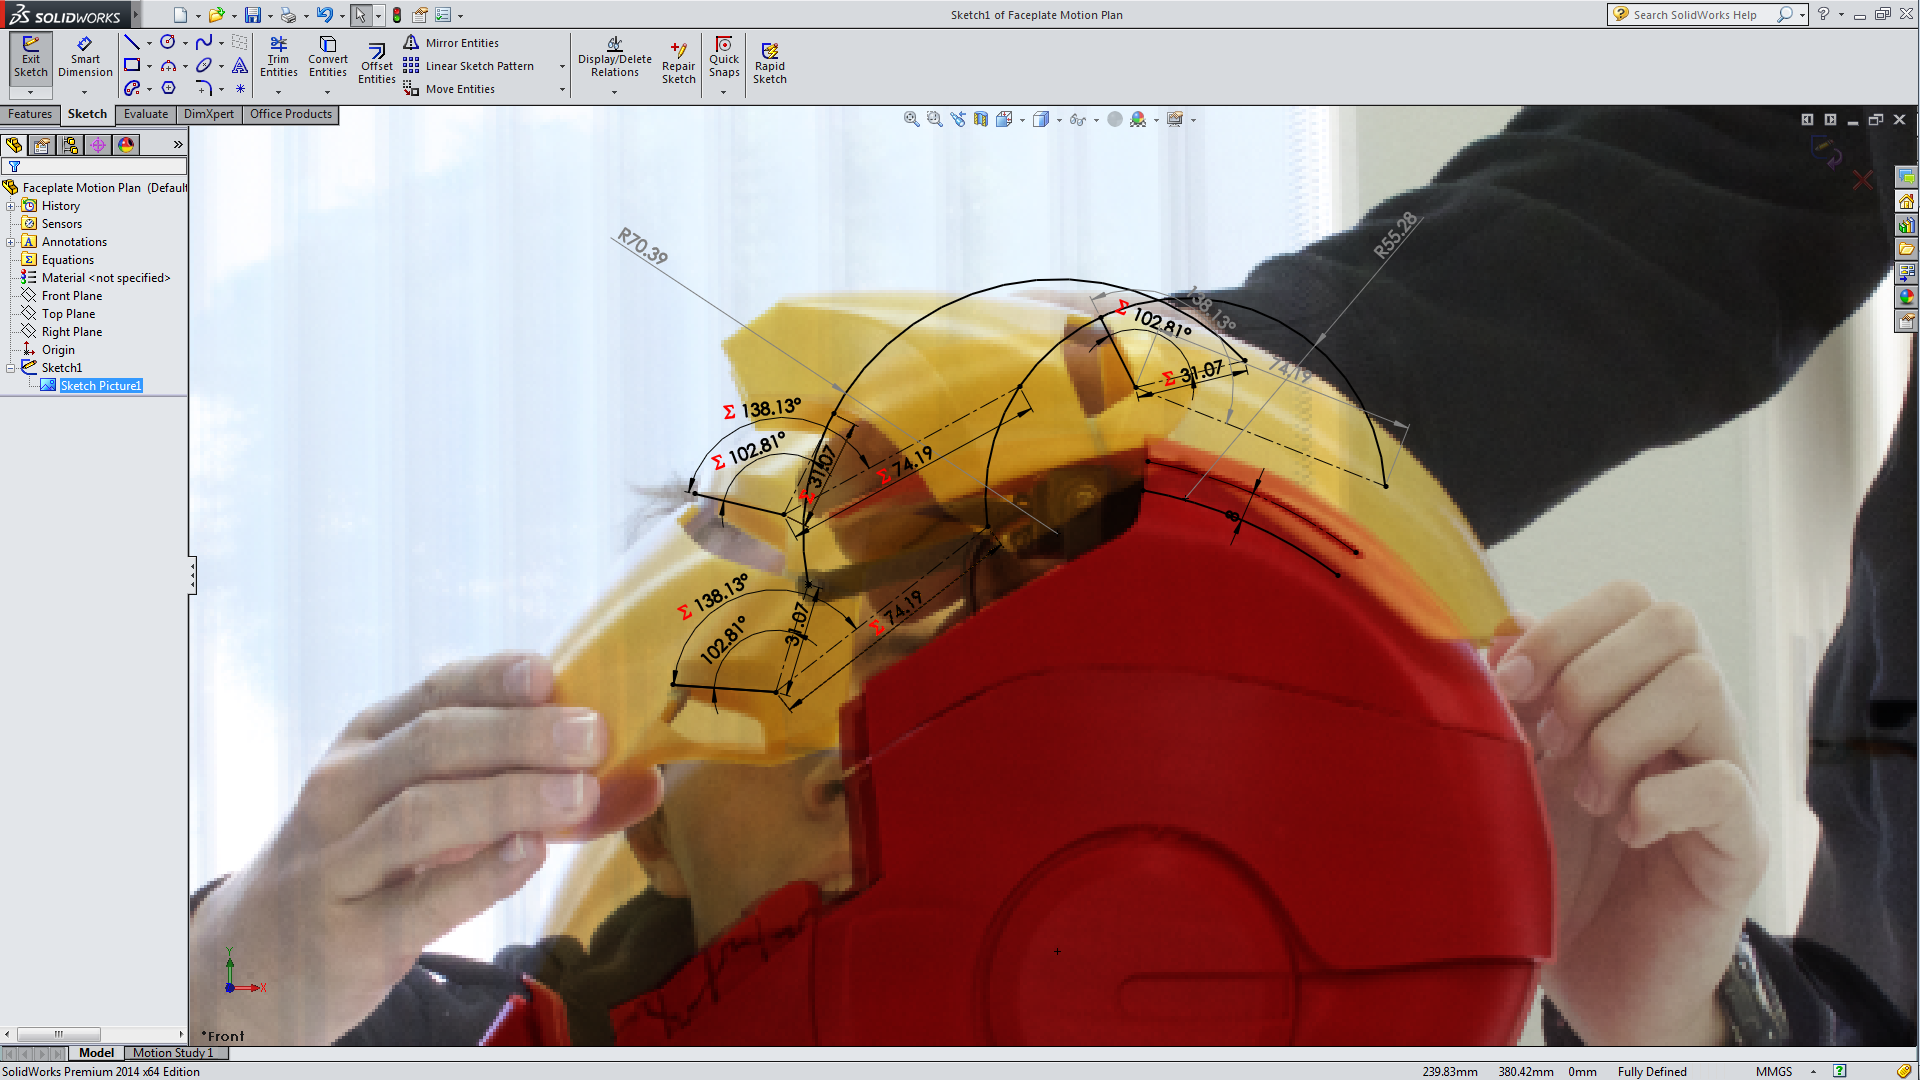
I refined it a little more and came up with the following dimensions for the 4 bars:
| Helmet (g) | 32.31 mm |
| Face (h) | 72.31 mm |
| Front Arm (a) | 70.28 mm |
| Back Arm (b) | 63.12 mm |
Putting it all together
This is the end result. Everything is hot glued in place inside the helmet.
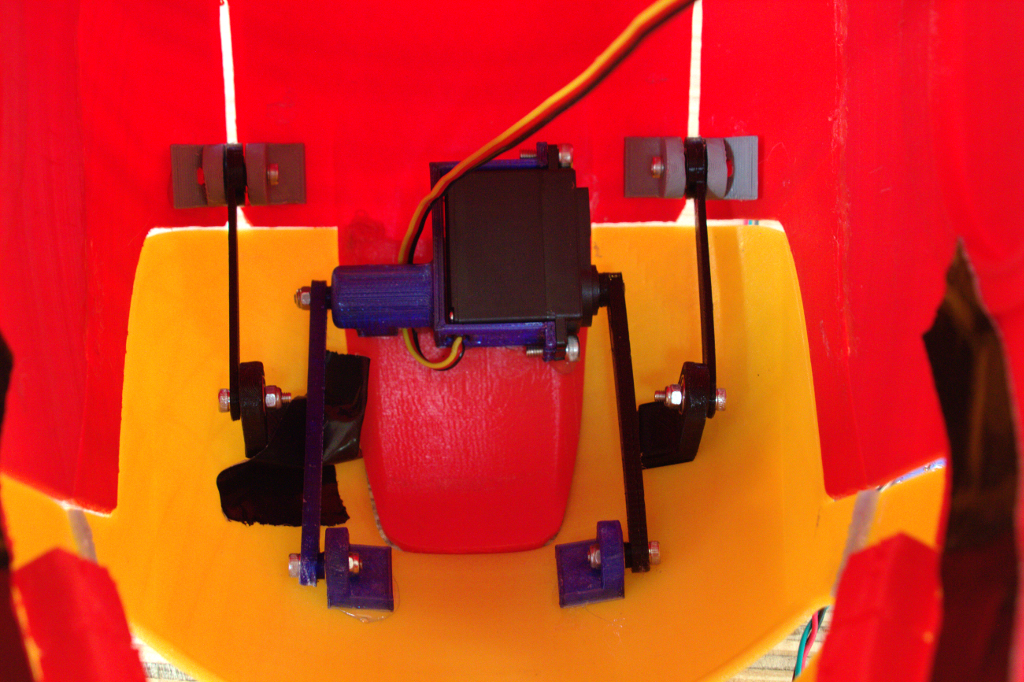
The part was motor is glued to was kind of flimsy, because the vent is right there. So I took a Craftypen and added some extra material around there to reinforce it. You can also see the chamfers on the front of the slots to help guide the arms in.
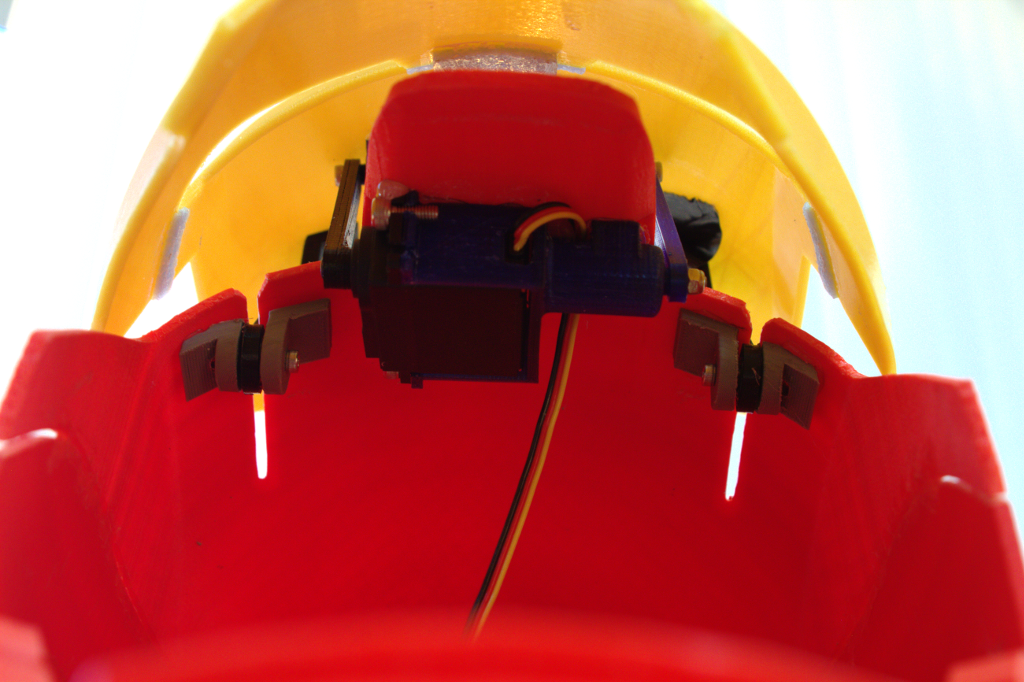
It has trouble opening sometimes. This is due to the Grashof condition. The front arms will try to go one way, but the back arms will try to go the other way and it will get stuck. This was fixed by adding some weight to the front of the face (a bolt), so it would tend to tilt in the right direction.
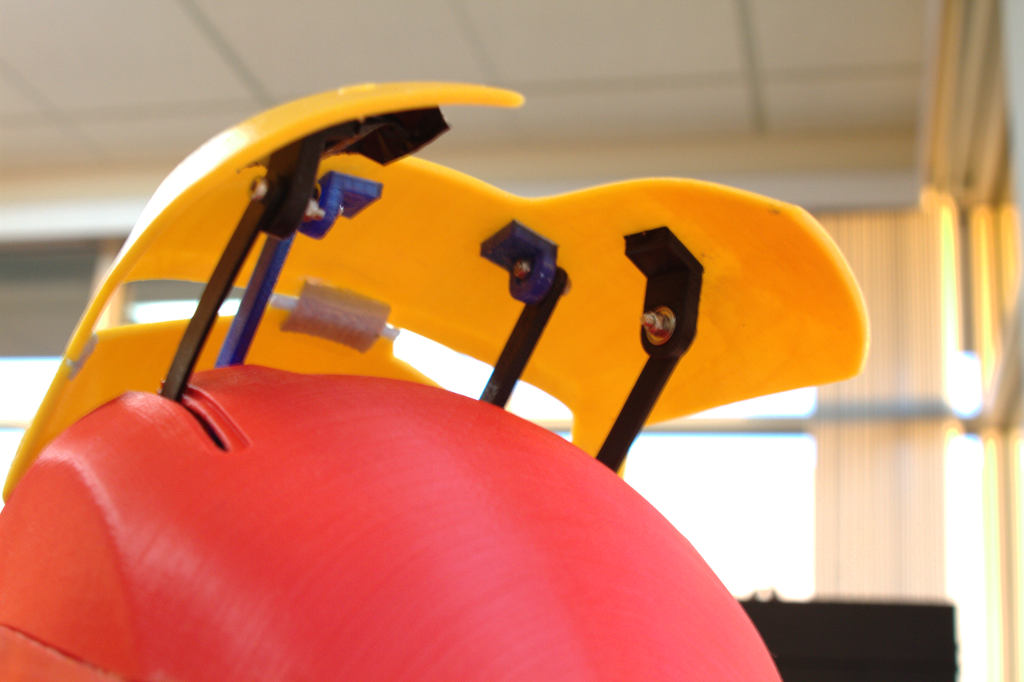
The front arms are what prevents it from going back further. I could improve this by adding a bend to them, so they don't hit the top.
Electronics and Code
The setup I have right now is mostly just for testing. Its just an Arduino Mega 2560, with a toggle switch and a 5V PSU. For practical use, I'll need something more compact and permanent.
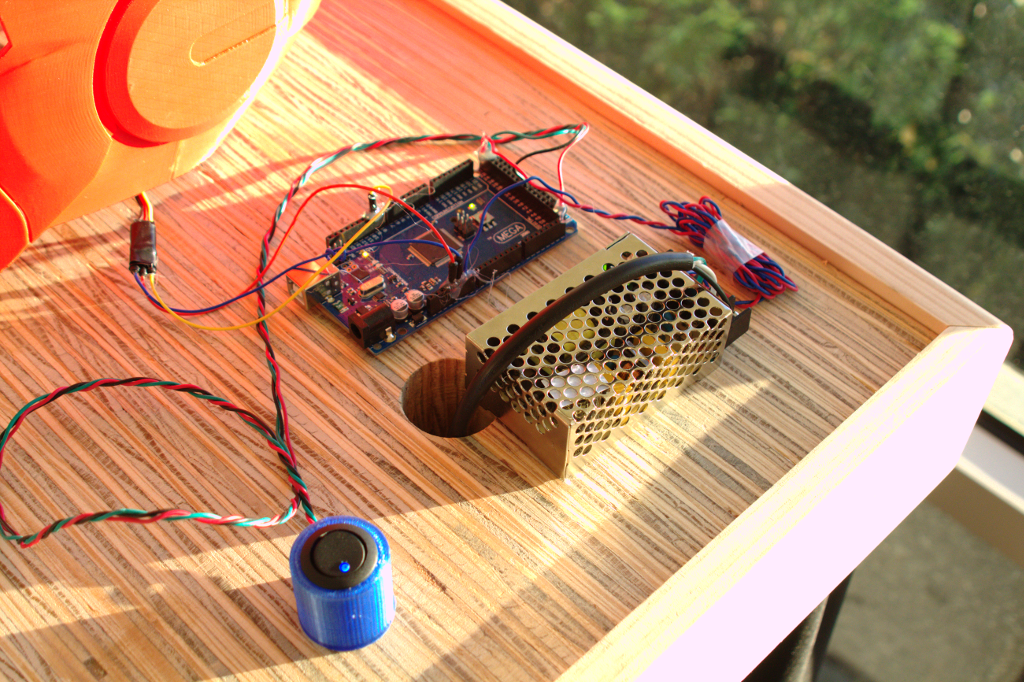
This is the Arduino code for use with the toggle switch:
#include <Servo.h>

Servo faceServo;

void setup() {
  faceServo.attach(9);  // Servo PWM     - Pin 9
  pinMode(40,INPUT);    // Toggle Switch - Pin 40
}

void loop() {
  if (digitalRead(40)) {
    faceServo.write(45);
  } else {
    faceServo.write(180);
  }
}
And this is another sketch that lets you set the servo angle over the serial port:#include <Servo.h>
Servo faceServo;
int command = 0;
int angle = 0;
void setup() {
faceServo.attach(9); // Servo PWM - Pin 9
Serial.begin(9600);
}
void loop() {
if (Serial.available()) {
angle = Serial.parseInt();
if (angle <= 180 and angle >= 0) {
faceServo.write(angle);
Serial.println("Moving");
} else {
Serial.println("ERROR");
}
}
}Things I would do for Version 2
- PET instead of PLA. More flexible, more durable, and doesn't melt on a hot day. W
- Larger. The default scaling is a little too small. I have to remove the jaw to get it on my head, and even then its a tight squeeze. I do not have a big head.
- Folding parts in back, like this guy did, would make it a lot easier to get on and off.
- Move one set of arms to side temple area instead of the forehead. I would have to redesign everything in order to do this, and the arms wouldn't be as hidden, but it would solve a lot of problems it has with the motion. It also would fit better with the original artist's intentions (there is a bolt right there).
 Tyler Anderson