shlonkin
-
Great news and a big design change
03/30/2016 at 12:29 • 0 commentsThis project won the Pi Zero contest! I still don't have a Pi Zero, but the reward from the contest is going straight back into this project. I used some of the gift card money to buy a teensy3.2 with the audio+SD adapter board.
I've been really conflicted about using the Teensy+audio board because it feels like cheating. I actually breadboarded the audio circuitry and was in the process of debugging the audio input and frequency detection code for Arduino. Then I won the contest, discovered the audio board for the teensy and decided to change everything. Even though the arduino solution is vastly more complex, requires a lot more work, and gives much worse results, there is something more satisfying about designing and making it myself.
But anyway, this gives me a big step forward and I eagerly await the package. In the meantime, here is a list of the changes. They will be reflected in the description and parts list as well.
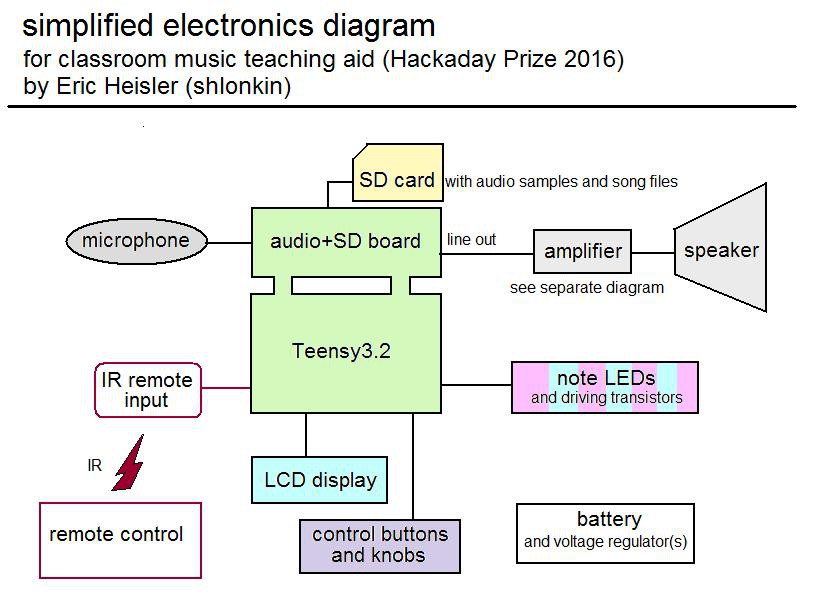
- A Teensy3.2 with audio adapter board will be in control rather than a Pi Zero or Arduino.
- The audio board will handle microphone input, output, and SD card connection.
- Frequency detection will be done using the Teensy's FFT capabilities.
- The notes will be painted blue or red and a simpler illumination method will be used, such as lighting up the note name or just some simple LEDs mounted on the notes. I need to try some things and see what looks best.
Here is a simple diagram of the electronics
![]()
Now I'm off to delve into the teensy audio library to learn how to program this thing.
-
Hackaday Prize time! Health and motivation returns
03/15/2016 at 13:02 • 0 commentsI'm getting excited about the Hackaday Prize and I hope that generates the motivation I need to really get this project moving. i have recovered from various diseases and in about one week the school year will end at my kindergarten and I'll have a little time for projects.
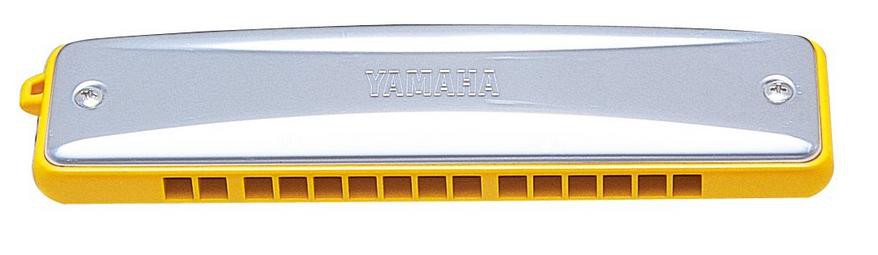
I brought home my harmonica, a Yamaha YH-15SN, and am trying to record decent samples of it. I've also been working on the software and poking around in my parts bins to gather pieces. I can't wait to pull out the breadboard and get prototyping.
![]()
-
No Pi, but I'll keep going
03/01/2016 at 12:55 • 0 commentsI didn't win a Pi Zero. I don't know if I'll be able to get one, but I'll keep working on this project. I was going to build this thing anyway.
It's too late to work on it tonight. I've been busy for a while trying to catch up after that week of influenza misery, so I haven't made a lot of progress, but I did write a chunk of the code(for audio input, frequency detection and recording). It's not fully tested yet, so I shouldn't post it here till I get it working well.
-
I got a virus. My body is currently broken.
02/22/2016 at 12:33 • 0 commentsJust when I was getting some good momentum on this project, Influenza B invaded my body and turned me into a miserable lump in bed for the last few days. I'm hoping I can get back to life and projecting soon.
Some things I had on the workbench for this week:
- breadboards. Get each bit of hardware working on a breadboard with an arduino(Since I haven't won a Pi Zero yet)
- sample recording. I wanted to bring home my harmonica and record some samples, but I've been banned from the school until I'm healthy.
- gathering code resources. I have lots of arduino code ready to use, but not a line of code for the Pi. I need to change that.
Also, Thank you to those who gave me some input on the lighting from the last log. I think I'm going to go with a very different approach. Most of the note space will just be painted red or blue. The light will be the note names or a large dot in the middle of the note. I think it would be just as effective and a lot simpler. Also, the painted colors will be much easier to see than the colored plastic with the light off.
-
LEDs, wood and plastic
02/19/2016 at 03:45 • 5 commentsI decided to step away from the computer today and work on some hardware. Before I commit to a design I want to try out my ideas to see if they work as well as imagined, so today I went to the workshop and gathered some scraps of wood and plastic to try building one of the illuminated notes.
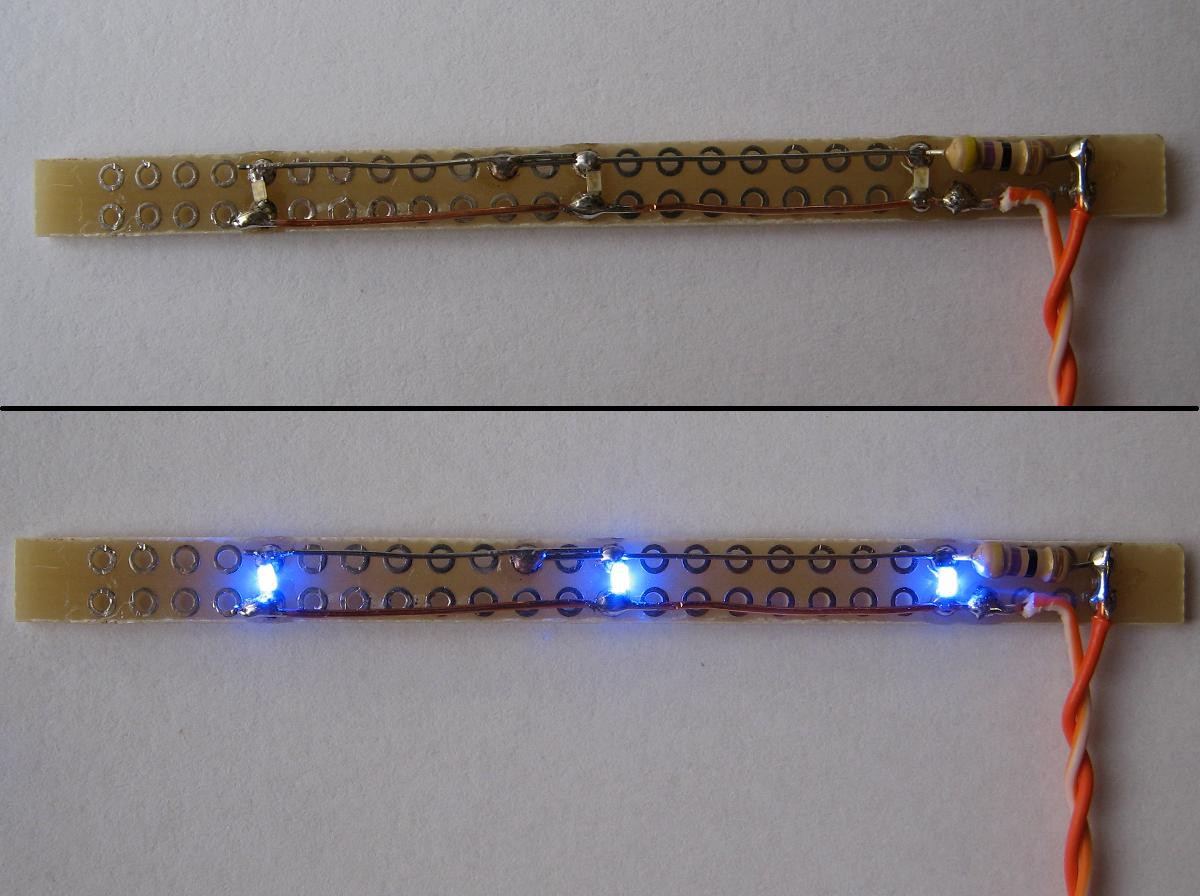
I had some blue plastic, but the only blue LEDs I had were these tiny surface mount ones. With tweezers and a steady hand I managed to solder them to a strip of protoboard.
![]()
Looking at the result I think I could do away with the board and just hot glue some bare copper wire onto a strip of wood or something. Then the LEDs could be soldered to the wire. That would be a huge effort saver when I make one of these for each note.
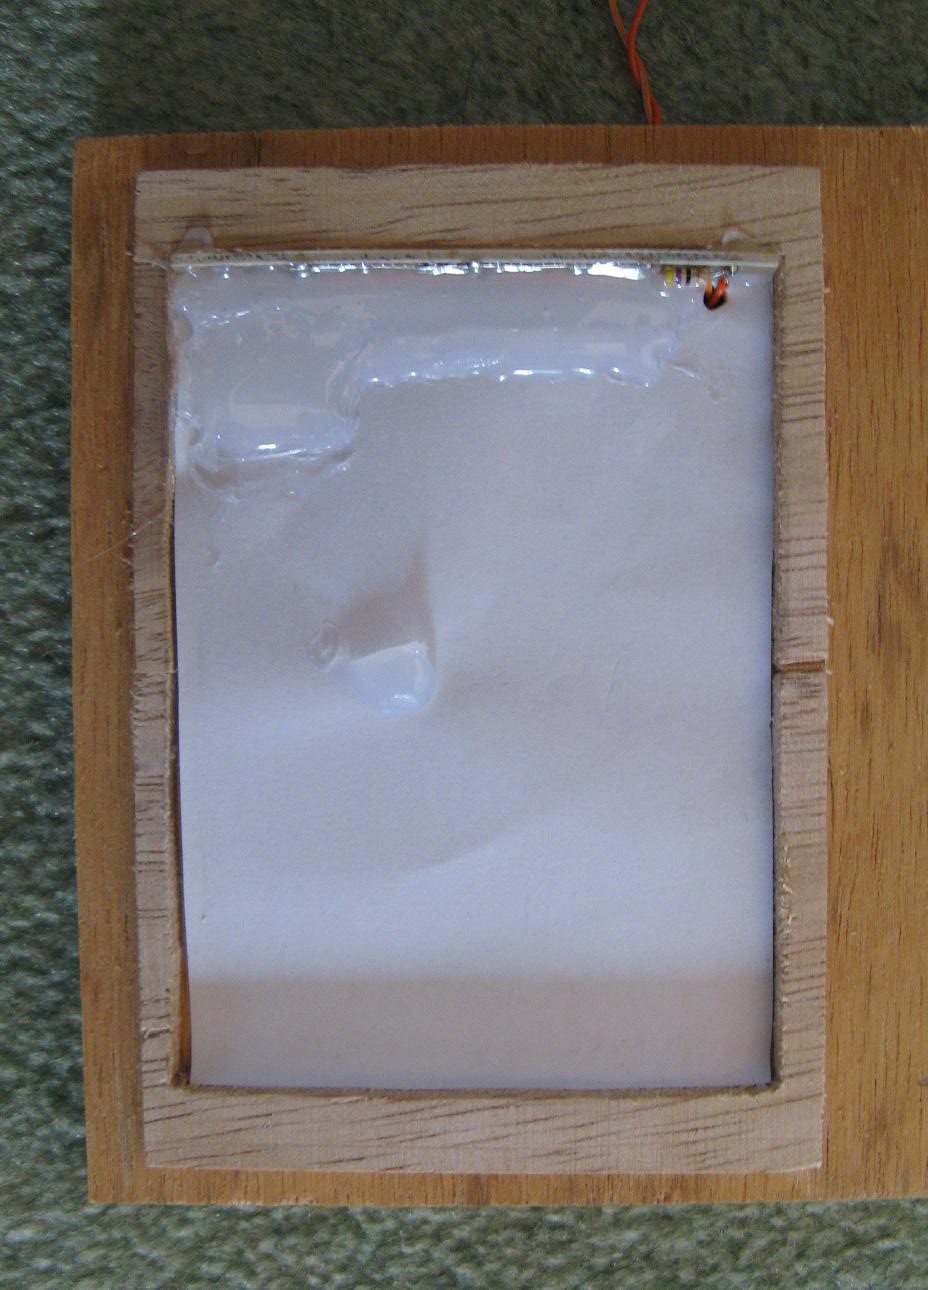
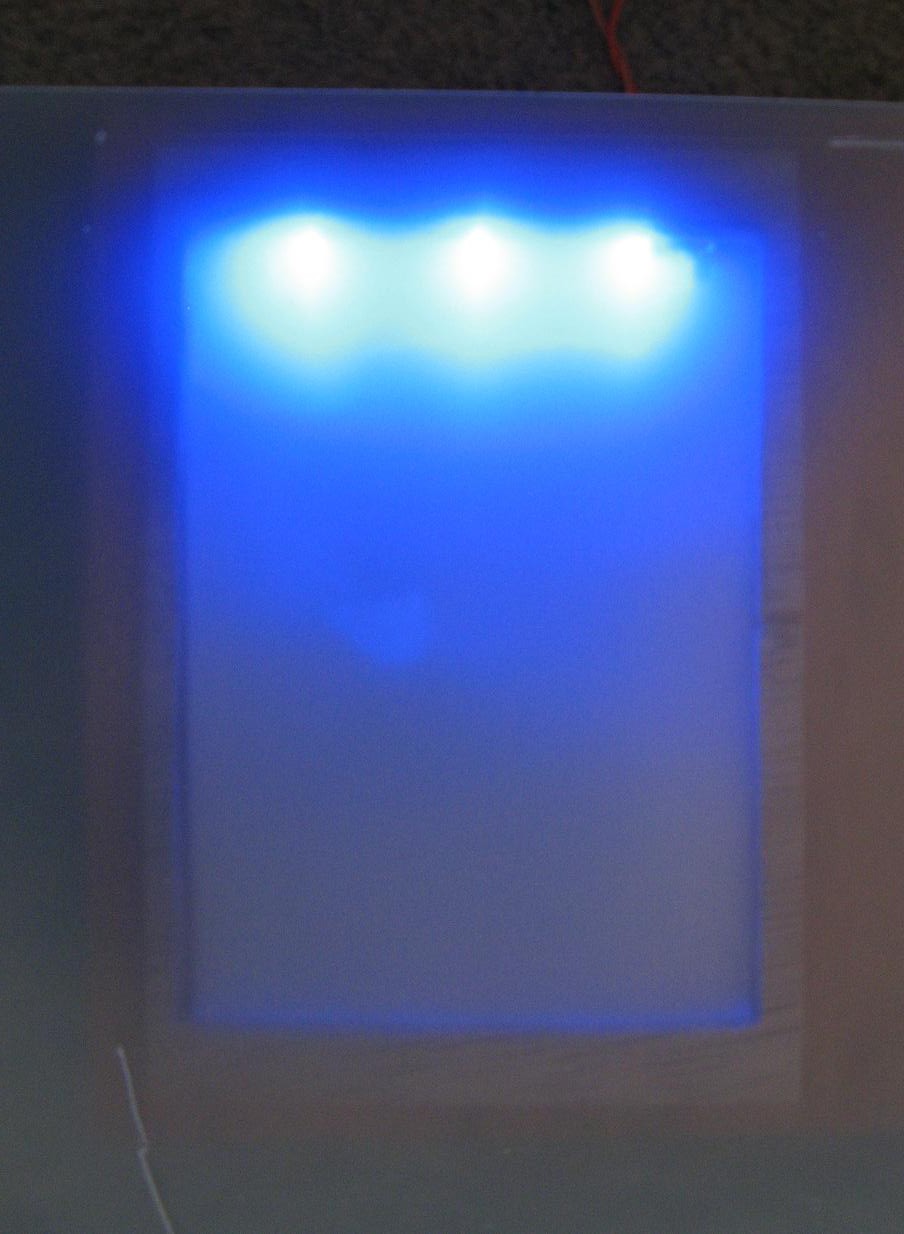
Next I cut some wood scraps, drilled a hole and glued things together. At first I wasn't pleased with the light diffusion, so I squirted in a bunch of hot glue to help a little. I was just experimenting here, so it is not pretty.
![]()
Then I placed a piece of plastic on top and turned it on. I am still not happy with the amount of diffusion, but I'm not sure how to improve it. Then again, it may be just fine. I'll play around with some other ideas. Let me know if you have a good idea.
![]()
As usual, I may be over-thinking this. There is probably a much easier, more elegant way to do this. But I'm out of time for today, so I'll try again tomorrow.
-
Audio input
02/18/2016 at 01:18 • 0 commentsThe second challenge to take on is audio input. Once again Adafruit covered a relevant topic in their video 7, analog input. As mentioned in the video, the Pi Zero has no ADC( no analog inputs) and the amplified signal from an microphone cannot take advantage of the easy RC ADC technique they talked about.
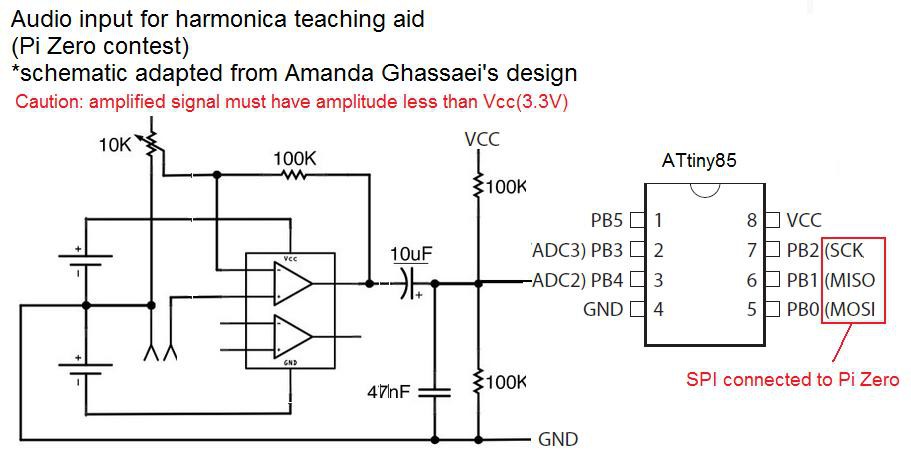
In the video they used an ADC chip, MCP3008, but I'm going to take it a step further. I'm going to use an ATtiny85 to do the analog to digital conversion, frequency detection, and sample buffering for recording. Since the Pi Zero doesn't use a real time OS, I don't know how well it would work for things like frequency detection and sampling at a reliable rate. It might be fine, I don't know. Anyway, communication will be via SPI.
There are several examples of audio input for Arduino. With very slight modification they can be used for an ATtiny85. One that I particularly like is Amanda Ghassaei's instructable which covers both audio input and frequency detection. I'll be using her technique and I've borrowed and modified one of her schematics. I hope she doesn't mind.
![]()
Now I need to find the time to sit down and code it up. Let me know if you see any glaring faults in this approach. I've never worked with audio input before, so I could be missing something important.
-
Audio output
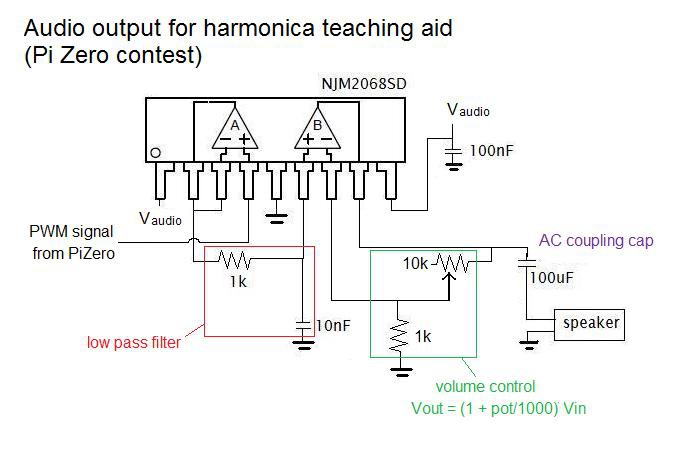
02/17/2016 at 01:25 • 0 commentsThe first aspect I'll consider is the audio output. How convenient that Adafruit recently made that video about audio output. I'll be using the simple filtered PWM technique that was outlined in the video. I'll amplify it using a salvaged audio amplifier chip and potentiometer volume control. The circuit will look something like this:
![]()
These basic harmonicas are relatively simple instruments to work with because they are single-note(at a time), fixed intensity instruments with no complex harmonics.
There are various ways I could play audio samples. A resource minimizing approach would be using a short sample of one note, looping for duration, and shifting sample frequency for pitch. An effort minimizing approach would be recording long samples of each note and just playing the desired sample for the desired duration. I will most likely choose the second method because it will be easier to code and I'll have plenty of storage space on the SD card.
As for playing songs, That's just a matter of making a list of what notes to play, including silent "notes" in between, and for how long. The tempo could be set by varying the "how long" part.
Why not just use a standard format like MIDI? Because I'm using custom audio samples and it is such a simple task.
Note:
Until I get my hands on a Pi, I'll be testing the hardware with an Arduino. Something as simple as playing an audio sample from an SD card using PWM is well within Arduino capabilities. I even have it all coded up from a previous project, Educational keyboard toy.
Classroom music teaching aid
An interactive device for helping a kindergarten class learn to play harmonica.