-
How to Engrave With Cricut Maker (Full Guide)
01/13/2025 at 18:10 • 0 commentsCricut Maker is a crafting machine mainly used for cutting various materials and making craft projects. But did you know we can engrave with it? This blog will help you discover how to engrave with Cricut Maker. The engraving tip allows you to add personalized text, draw decorative flourishes and embellishments, or inscribe your favorite quotes for ornamental pieces on different materials. You can engrave and personalize jewelry, leather metals, etc.
![Learn How to Engrave with Cricut maker Machine]()
Creating engraving projects is easy and fun. They leave a lasting impression, whether you gift or keep your engraved creation. The engraving tip is compatible with Cricut Maker and Maker 3.
How to Engrave With Cricut Machine: 3 Easy Steps
Here is the complete procedure for starting engraving with your crafting machine, such as essential tips on selecting the right materials, adjusting settings, and ensuring safety for a successful project.
Step 1: Creating a Design in the Cricut Application
Before using the machine, you need to create a design in the Cricut Design Space application. After creating a design, you can command your machine to engrave. So, let us see how to make a design with the help of software.
- The first step is to create a template. Open the Cricut Design Space to create a template. You can also use the Shapes section available in the app.
- Afterward, select Create or import an SVG file for your design, then click the green Upload button.
- Once your design and elements are ready, select Layers and then click Attach.
- Next, you must select the Make It button in the Design Space app.
- Your design is visible on the preview screen. You can move it around and ensure it aligns with the material.
- At last, with the design selected from the Line Type menu, select Engrave.
Step 2: Setting up Your Cricut Maker Machine
After preparing your design, the next step involves preparing the crafting machine for engraving. Here are some steps to follow:
- The first step involves switching on the cutting machine.
- Then, connect the machine to your computer using Bluetooth or USB.
- Now, you need to load the Engraving Tip into Clamp B of your machine.
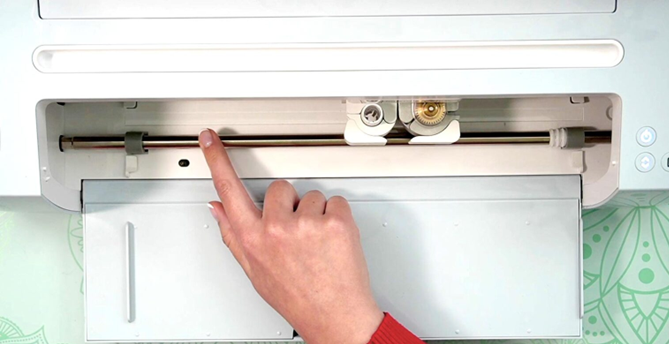
- Move the four-star roll wheels to the right side of the machine. Most of this is preferred so they do not have to review the material.
![Engraving tips and tricks for beginners]()
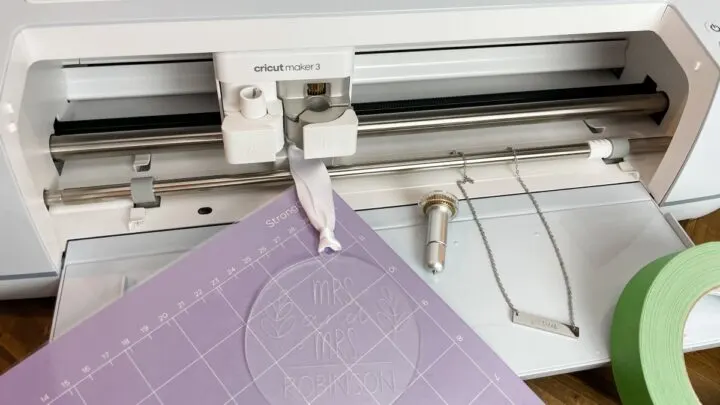
Step 3: Start Engraving on the Material
In the last engraving step, you need to load the material into your cutting machine so it can engrave it. It is better to use a StrongGrip mat for engraving. The steps are as follows:
- Materials come with a protective film, which you will need to remove.
- The protective film is not visible easily. So, most people need to remember to remove it.
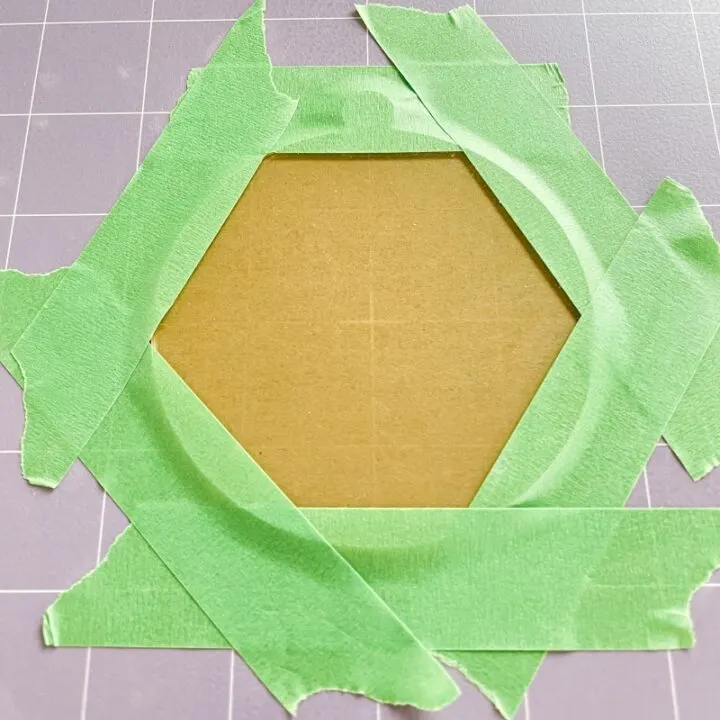
- When you are done with this, place your material on the machine mat. One tip is to use different blank shapes, which you can properly arrange with the help of grid lines.
- After placing your material on the mat, apply masking tape to the edge area beside the part of an area that needs to be engraved.
![how to Engrave Wood with Cricut maker]()
- Further, the material is loaded into the machine for engraving.
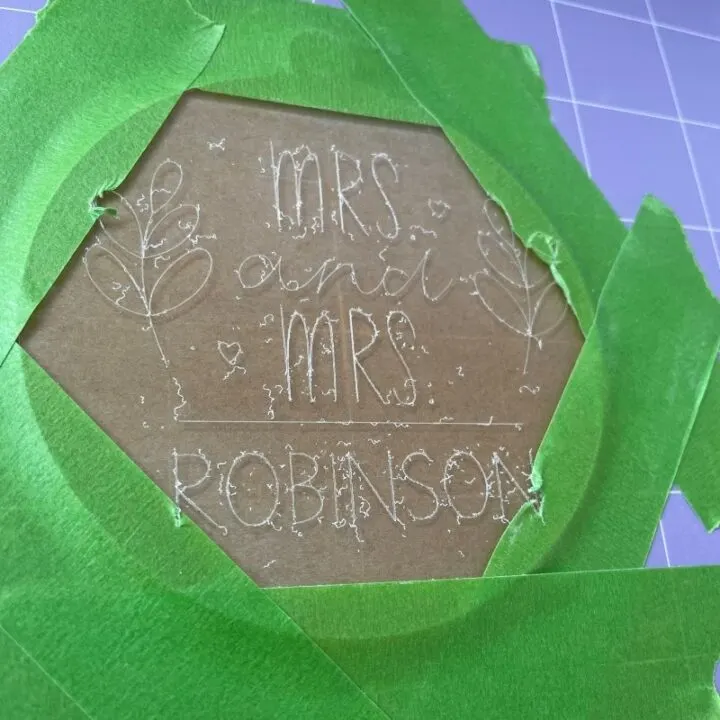
- Next, just press the Go button on the machine, and it will automatically start working.
- After engraving, you need to remove the material from the machine.
![How to engrave metal with Cricut maker]()
- Remove the tape and an engraved piece from your mat.
What Materials Can Be Engraved With Cricut Maker?
You can easily learn how to engrave with Cricut Maker by following the simple instructions above. The Cricut Maker can engrave up to 2.4mm thick materials. You can engrave various materials using engraving tips, including acrylic, leather, foil, glitter, cardstock, aluminum, and other metals. The crafting machine is compatible with the Design Space app. If you do not see the material settings for some items to engrave, you can only use different settings...
Read more » -
How to Setup Cricut Maker: Getting Started for First Project!
08/17/2024 at 13:00 • 0 commentsIf you wonder how to setup Cricut Maker, you need to follow this tutorial! In this guide, I will teach you the complete Cricut machine setup in 4 simplified steps. Although you can use this post to set up any model, I will use the Cricut Maker machine in this blog.
The Cricut setup can be daunting in the beginning, but you don’t have to worry. I have been crafting using Cricut for many years, and I am capable of teaching you how to do it. However, in this blog, I will only discuss the procedure of setting up Cricut Maker.
Let’s start with the basic steps to download Cricut, connect it to a Windows computer, and finally set up the machine. Let’s delve into it.
Step 1: Check System Requirements
Are you using a Windows PC? Well, you can’t use it without knowing the system requirements. This is a must before you learn how to set up Cricut Maker. Since the setup will be done on the Windows system, let’s see what we need to run the software on it.
Please take note of the following system requirements:
- Operating System: Windows 10 or later (64-bit)
- RAM: Minimum 4 GB
- Disk Space: At least 2 GB free
- CPU: Intel Dual Core or equivalent AMD processor
- Display: Minimum screen resolution of 1024px x 768px
- Connection: A USB port or Bluetooth connection is required.
Step 2: Download & Install Cricut Software
In order to learn how to set up Cricut Maker, you have to download Cricut Design Space software on your PC. Since all the setup steps are to be done on the app, you must download it beforehand.
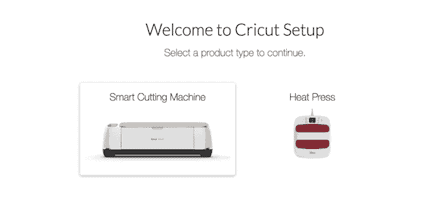
- On your PC, open your browser and enter this URL: cricut.com/setup.
- After that, you will need to choose the product type: Cutting Machine.
![]()
- Then, accept Cricut’s Terms of Use and click on the Download button. Now, your Cricut software will start downloading.
- Once downloaded, you have to go to the Downloads folder and open it.
- Just double-click on the downloaded file and begin the installation.
- Finally, you will have your Cricut software downloaded to your PC.
Step 3: How to Set up Cricut Maker
Finally, I will walk you through the steps to set up a Cricut machine stepwise. Make sure you have downloaded the Cricut software on your PC and checked its compatibility.
- Launch the Design Space app on a Windows PC and click on Product Setup.
- Now, you should create your Cricut account.
- Once done, you have to select a Smart Cutting Machine.
![]()
- Next, click on the Cricut Maker machine.
- After that, you need to follow the screen’s prompts for further setup.
Once you complete the above steps, you will need to connect your Cricut to your PC. I have explained this separately in the next step for your convenience. Please follow the steps carefully.
Step 4: Connect Cricut to PC Using Bluetooth
To complete the Cricut setup, you must connect it to your PC. Then, you will be able to use your machine.
Here’s how to connect Cricut cutting machine to a PC wirelessly:
- Take your power cable out and plug it into your PC and machine.
- After that, press the power button located on the top of the machine.
- Once you have powered on your machine, go to your PC.
- On your Windows desktop, press the Windows logo icon + I keys to enter Settings.
- On the following screen, choose Devices.
- Now, enable Bluetooth and select Add Bluetooth or other device.
- Next, you will see a pop-up asking you to add a device. Choose the Bluetooth option.
- Wait for a while and pair your machine with your PC.
- Once it is found, select it and pair the machine with the PC.
Kudos to you😍! You have learned how to set up Cricut Maker on your Windows computer. From checking system requirements to connecting Cricut to a PC, it might not be as daunting as it seemed to be. Good luck with your first project; now you are all set to create your first project on Cricut.
FAQs
... Read more » -
How to Use a Cricut Explore 3: Easy Tutorial for Beginners
08/06/2024 at 13:08 • 0 commentsLearning how to use a Cricut Explore 3 is important in order to complete any project with this machine. The Cricut Explore 3 is a versatile cutting and crafting tool that can cut more than 100 materials, like paper, cardstock, vinyl, iron-on, fabric, leather, wood, and many more. With the help of these materials, you can work on a variety of craft projects. If you do not know how to use this machine, read this blog to learn everything you need to know.
To use this Cricut machine, you need to do certain things. You will have to connect your machine to a computer and download the Cricut Design Space app. This app will help you manage your projects and make the most of your machine. So, let’s start with the tools and supplies you will need for your project.
Tools and Materials for Using Your Cricut Explore 3
Before learning how to use a Cricut Explore 3, you should know about the supplies you will need for your DIY project. What supplies you will need depends on the project you are working on. Here, we are going to talk about using a Cricut machine to cut material to make a beautiful butterfly. You will need the following supplies on your machine:
- Cricut cutting machine: It is important as we are going to use it to cut the material for this project.
- Cricut Design Space: You need a phone or computer to download this app and create or upload a design.
- Power adapter: This is essential as it gets the machine connected to a power source.
- USB cable: It will help you connect the machine to your device. However, you can also use a Bluetooth connection.
- Material: This supply will be used to cut designs on your machine.
- Scraper tool: It will help you to stick the infusible ink to your project.
- Mat: You will need the mat to put the material on it so that you can get a smooth cut.
- Weeding tool: You will need a weeding tool to remove the design from your material.
How to Use a Cricut Explore 3 for Making a Project?
Once you know about all the supplies you will need for your project, you can move towards working on it. So, these are the steps you have to follow:
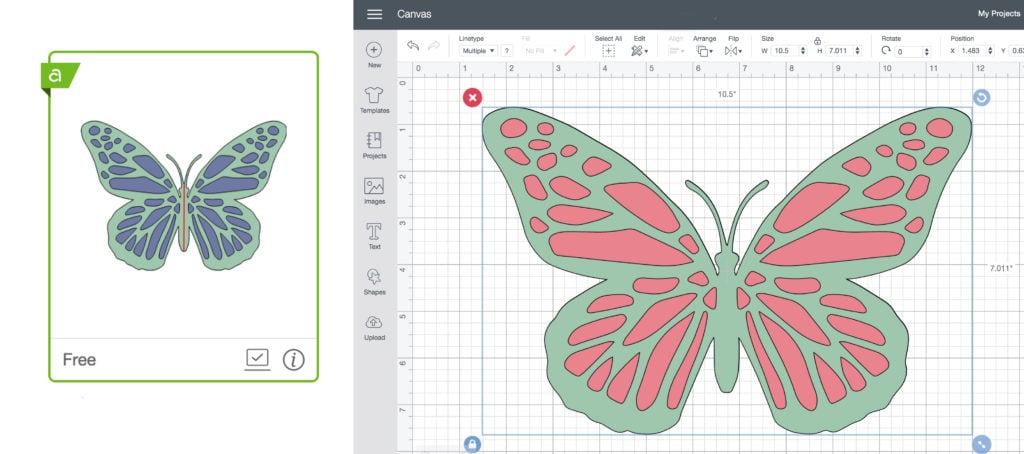
Step 1: Create a Design in Cricut Software
![]()
The first step is to create a design on the Cricut Design Space app. It offers many features that you can use to make your design. The first option you have is you can pick any design from the thousands of options you have. The other option is to create your own design by clicking on the New Project section on Canvas. You have one more option: you can choose any design from your computer and upload it to the software. After that, you can use that image for your project. Once your design is ready, you can move on to the next step.
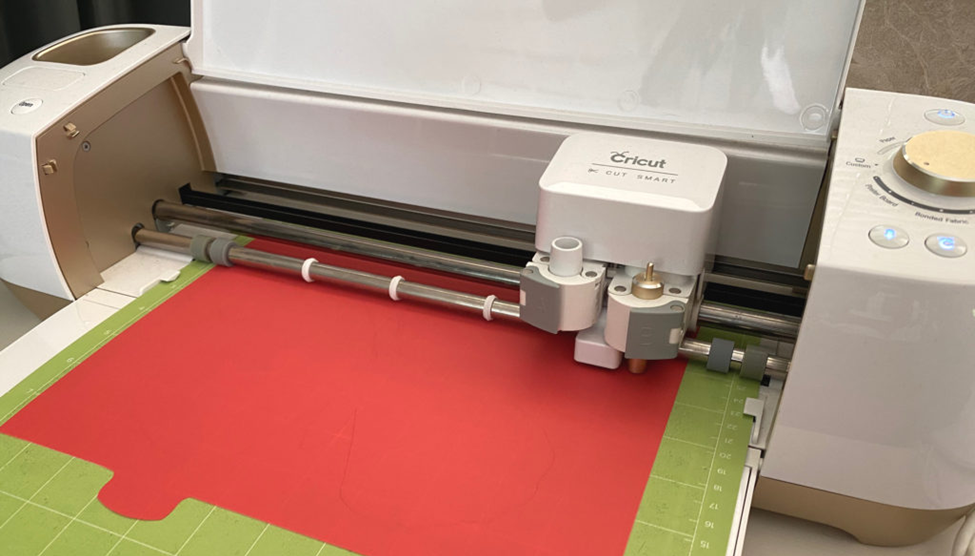
Step 2: Load Your Material
![]()
When you have selected a design, and then load the material on your machine. To do this, you must take the material and put it on the cutting mat. Next, place the mat inside your machine and press the Load button on the machine.
Step 3: Select the Material
When learning how to use a Cricut Explore 3, the next step is to select your material on the Design Space app. Afterward, go to the app and select the material you will use to cut on your machine.
Step 4: Cut Your Design on Your Cricut Machine
Once you have selected the material on the app, you can cut the design. To do so, you will need to click on Make It. The machine will cut the design in the exact shape that you have selected on the Cricut software.
Step 5: Unload Your Material and Reveal Butterflies
![]()
Once the material is cut, you have to unload it and remove it from the Explore machine. Then, you have to weed the design from the material. You can use a weeding tool for that. When the design is out, you have to glue it to the canvas, and your beautiful butterfly is ready to beautify your room.
Conclusion
In short, I am sure you have learned ...
Read more »


 Lutetium
 Alain Mauer
 royrussell
 Nicola Wrachien