[2 April 2023]
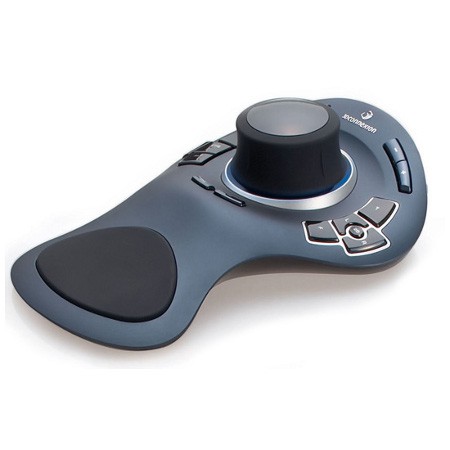
So I was researching into input devices, and I had an idea: what if there was a way to use the SpaceExplorer I have in a shelf as a 2D mouse? Hear me out here!
The main reason it was in a shelf was because I didn't want to have to keep swapping my hand between the keyboard and the mouse, and 3 devices takes up quite a bit of space (but that's mainly because a full sized keyboard is already quite large).
I've considered getting a trackball mouse to further reduce the amount of deskspace needed, but mainly so that I didn't actually need a desk surface to use the mouse accurately. Unfortunately, none that I could find had enough programmable buttons, and I only need 4 (+2 for left / right click).
The SpaceExplorer I have very much looks like an earlier iteration of the SpaceMouse Pro. I'm not really sure why 3DConnexion dropped support when the inputs are electrically identical.


The idea is simple:
- Move the cylinder X/Y like a TrackPoint to move the cursor
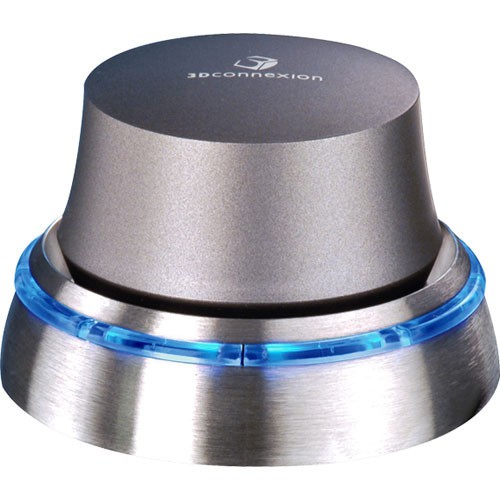
- Tilt the cylinder in one of 8 directions to send an event (a bit like the SpaceTraveller but not using 8 physical buttons). East/West will be the left or right clicks and up / down would be for scrolling, leaving 4 user programmable "buttons".
- The 'Fit' key on the SpaceExplorer toggles between mouse and spacemouse mode. The reason the "2D" button isn't used for this is because it's much harder to press with the thumb, and unreachable if the SpaceExplorer is on the right side of the keyboard.
[4 April: Morning]
Ok, so I've been digging though the forums for clues and I've got part of a solution, and have learned some things about the undocumented XML along the way. I've got cursor X/Y and scrolling working nicely, but I haven't yet been able to get mouseclick events or macros on the cylinder.
So first, navigate to
%appdata%\3Dconnexion\3DxWare\Cfg
There should be a Global.xml file. I edited it to make it look like:
<?xml version="1.0" encoding="UTF-8" standalone="no"?>
<Global Default="false" xmlns="" CfgFormatVersion="1.3" ThisFileVersion="2.0">
    <CfgProperties>
        <ID>ID_Global_Cfg</ID>
        <Name>STR_GLOBALCFG</Name>
        <InheritsFromID>ID_Base_Cfg</InheritsFromID>
    </CfgProperties>
    <Settings>
        <InstallerAutoCheckForUpdates>true</InstallerAutoCheckForUpdates>
        <LastAutoCheckForUpdates>3-4-2023</LastAutoCheckForUpdates>
    </Settings>
    <ButtonActions>
        <ButtonAction Type="Driver_Other">
            <ID>Driver_Desktop_ToggleGrab</ID>
            <Name>STR_DRIVER_DESKTOP_TOGGLEGRAB</Name>
            <Image>
                <Source>[driver_images:Driver_Desktop_ToggleGrab.png]</Source>
            </Image>
        </ButtonAction>
    </ButtonActions>
    <Devices>
        <Device>
            <ID>ID_Standard_3D_Mouse</ID>
            <ButtonBank>
                <Button>
                    <Input>
                        <ActionID>V3DK_FIT</ActionID>
                    </Input>
                    <Output>
                        <ActionID>Driver_Desktop_ToggleGrab</ActionID>
                    </Output>
                </Button>
            </ButtonBank>
        </Device>
    </Devices>
</Global>
Driver_Desktop_ToggleGrab is a specific action that changes the Desktop.xml file (that you have to create), specifically toggling:
<Grab>Hard</Grab>
<Grab>None</Grab>
In "Hard" mode, the driver will lock onto using this .xml file everywhere and never let it go. However, if it's on "None", the driver acts as usual, selecting the .xml that relates to the application currently in focus.
The names for mapped buttons (eg V3DK_FIT) can be found in
Program Files\3Dconnexion\3DxWare\3DxWinCore64\Cfg\Base.xml
You can use the driver software to change the button map in some random program, look in the same folder as Global.xml / Desktop.xml and you'd get something like "HIDButton_13", which you can then look up in Base.xml, such as:
...
<ButtonID>HIDButton_13</ButtonID>
<V3DKID>V3DK_1</V3DKID>
...
Anyway, next was to create Desktop.xml in the same folder as Global.xml
<?xml version="1.0" encoding="UTF-8"?><AppCfg Default="false" xmlns="" CfgFormatVersion="1.3" ThisFileVersion="1.10">
    <AppInfo>
        <Signature>
            <Name>STR_DESKTOP</Name>
        </Signature>
        <Options/>
    </AppInfo>
    <CfgProperties>
        <ID>ID_Desktop_Cfg</ID>
        <Name>STR_DESKTOP</Name>
        <InheritsFromID>ID_Desktop_Cfg</InheritsFromID>
        <Grab>Hard</Grab>
    </CfgProperties>
    <Settings>
        <ResponseCurve>2.6</ResponseCurve>
    </Settings>
    <MacroTable>
        <MacroEntry>
            <ID>Snipaste</ID>
            <Sequence>
                <KeyPress>E3</KeyPress>
                <KeyPress>35</KeyPress>
                <KeyRelease>35</KeyRelease>
                <KeyRelease>E3</KeyRelease>
            </Sequence>
        </MacroEntry>
    </MacroTable>
    <Devices>
        <Device>
            <Name>Standard 3D Mouse</Name>
            <ID>ID_Standard_3D_Mouse</ID>
            <AxisFilter>None</AxisFilter>
            <CurrentButtonBank>Default</CurrentButtonBank>
            <CurrentAxisBank>Default</CurrentAxisBank>
            <AxisBank Default="true">
                <Name>STR_DEFAULT_BANK</Name>
                <ID>Default</ID>
                <Axis>
                    <Enabled>true</Enabled>
                    <Input>
                        <ActionID>HIDMultiAxis_X</ActionID>
                        <Min>-512</Min>
                        <Max>511</Max>
                    </Input>
                    <Output>
                        <ActionID>HIDMouse_X</ActionID>
                        <Scale>6.0000</Scale>
                    </Output>
                </Axis>
                <Axis>
                    <Enabled>true</Enabled>
                    <Input>
                        <ActionID>HIDMultiAxis_Y</ActionID>
                        <Min>-512</Min>
                        <Max>511</Max>
                    </Input>
                    <Output>
                        <ActionID>HIDMouse_Y</ActionID>
                        <Scale>6.0000</Scale>
                    </Output>
                </Axis>
                <Axis>
                    <Enabled>true</Enabled>
                    <Input>
                        <ActionID>HIDMultiAxis_Rz</ActionID>
                        <Min>-512</Min>
                        <Max>511</Max>
                        <Deadband>32</Deadband>
                    </Input>
                    <Output>
                        <ActionID>HIDMouse_Wheel</ActionID>
                        <Scale>6.0000</Scale>
                        <Reversed>true</Reversed>
                    </Output>
                </Axis>
            </AxisBank>
            <ButtonBank Default="true">
                <Name>STR_DEFAULT_BUTTONBANK</Name>
                <ID>Default</ID>
                <Button>
                    <Input>
                        <ActionID>V3DK_FRONT</ActionID>
                    </Input>
                    <Output>
                        <ActionID>HIDMouse_Left</ActionID>
                    </Output>
                </Button>
            </ButtonBank>
        </Device>
    </Devices>
</AppCfg>
It seems that <ResponseCurve> is something closer to a binary 0->max at 1.0. The balance here is to make it low enough to feel like the cursor is moving fast enough, but high enough so that you still have precise and controllable, small movements. I usually tweak this alongisde <Scale>. There's also an overall scale:
<Settings>
    ...
    <OverallScale>1.0</OverallScale>
    ...
</Settings>
In the above Desktop.xml, I actually settled on rotating the cylinder like a traditional knob (aka centre axis) to scroll up and down. I'm already liking this the most compared to a scroll wheel. I've applied a deadband to reduce accidental scrolling, which has worked quite well.
Following this, in my Fusion360.xml file, I actually set <Deadband>8</Deadband> for all axes except HIDMultiAxis_X and HIDMultiAxis_Y to make controlling the 6DoF view much easier.
The XML files use a table found on page 90 of this PDF of HID Usages for keyboard events. I haven't found how to get mouse events to work, but I did find the below code for keyboard buttons... allegedly. I tried a right arrow one and it stayed on until I resigned into Windows (restart not necessary).
...
    <Output>
        <ActionID>KB_Keystroke</ActionID>
        <RepeatStyle>PressAndHold</RepeatStyle>
            <KeyStroke>
                <Key>4F</Key>
            </KeyStroke>
    </Output>
</Axis>
The specific forum page is here.
I must say, scrolling code with the cylinder makes me feel like a high tech hacker.
[4 April: Evening] So I finally asked on the forum (which is somewhat inescapable because there's no documentation) and I implemented a suggestion to use a mouse modifier key. I learned that:
- The modifier doesn't seem to activate unless there's at least some movement. I tried the following, unsuccessfully:
- Scale 0 (or anything under 0.001).
- Using HIDMultiAxis_Ry for the output ActionID (to circumvent the mouse moving during clicks).
- Manually counteracting the mouse movement.
- It seems that the deadband is checked after scaling, so even a value of 1 doesn't work predictably unless the scale is approx 0.1, thus changing the sensitivity from too sensitive to somewhat insensitive.
- The deadband is necessary for both left and right clicks to work on the same axis.
- The axis disactivates on 0, thus you can't have an active range of 20 - 511 for example, unless you want the left click always on.
Despite its issues, the code below (added to Desktop.xml) is a great proof of concept of the idea.
<Axis>
    <Enabled>true</Enabled>
    <Input>
            <ActionID>HIDMultiAxis_Ry</ActionID>
            <Min>0</Min>
            <Max>511</Max>
            <Deadband>1</Deadband>
    </Input>
    <Output>
            <ActionID>HIDMouse_Y</ActionID>
            <Scale>0.0800</Scale>
            <Modifiers>
                <Modifier>LeftMouse</Modifier>
            </Modifiers>
    </Output>
</Axis>
<Axis>
     <Enabled>true</Enabled>
     <Input>
            <ActionID>HIDMultiAxis_Ry</ActionID>
            <Min>-512</Min>
            <Max>0</Max>
            <Deadband>1</Deadband>
     </Input>
     <Output>
            <ActionID>HIDMouse_Y</ActionID>
            <Scale>0.0800</Scale>
            <Modifiers>
                <Modifier>RightMouse</Modifier>
            </Modifiers>
     </Output>
</Axis>
<Axis>
    <Enabled>true</Enabled>
    <Input>
            <ActionID>HIDMultiAxis_Rx</ActionID>
            <Min>-512</Min>
            <Max>0</Max>
            <Deadband>1</Deadband>
    </Input>
    <Output>
            <ActionID>HIDMouse_Y</ActionID>
            <Scale>0.0800</Scale>
            <Modifiers>
                <Modifier>MiddleMouse</Modifier>
            </Modifiers>
    </Output>
</Axis>
I've chosen to have the cursor move slightly in the Y direction as it has less click / selection issues than X.
[13 Sep] Future logs about my 2D SpaceExplorer attempts can be found here.
 kelvinA
Discussions
Become a Hackaday.io Member
Create an account to leave a comment. Already have an account? Log In.