 Stephen Chasey
A vending machine for birds that rewards them with food when they drop something in a hole. Electronics and enclosure materials cost <100 USD/EUR. I've designed a PCB and PVC pipe enclosure and dispenser (described below). The circuit is not complex, but I think a custom PCB makes it easier for people who are not electronics hobbyists to build this.
This project is a continuation of the analog Vending Machine For Birds. I wanted to make a device that could be more useful to researchers, which meant monitoring, logging and control. For this version I also adjusted the dispenser design to dispense unshelled peanuts to avoid feeding pigeons while still attracting corvids.
There were two main inspirations for me to start and document this project
- Hans Forsberg - designed his own machine and was the first person I learned of that had birds (magpies) bringing items to deposit on thier own
- Josh Klein - makes his Crowbox designs freely available and supports people who want to build it
I would like to thank PCBWay for helping me get the PCB made.
MAIN FEATURES
- portable
- saves power until a warm body is present
- battery or mains powered
- one moving part
- accessible components and materials
- rodents can't break in and get the food
- remote monitoring, logging and control
- cheap to build
- customizable
HOW IT WORKS
States
- Standby - No PIR trigger in the last 30 secs (IR LEDs are off)
- Sensors On - PIR was triggered in the last 30 secs (IR LEDs are on)
- Dispensing - Dispenser motor is on
Modes
- Normal - Dispenses on deposit
- Timer - Dispenses every x minutes AND dispenses on deposit
- Calibration - Disables dispenser so you can adjust the sensitivity of the deposit and dispenser sensors
Other Features
- Manual Dispense - you can manually trigger dispensing a peanut
- Powerbank Keep-Alive - When using a USB powerbank, in case your microcontroller ot SBC does not draw enough power to keep the powerbank on you can use this mode to sink ~200mA for x sesconds every y seconds.
Event Sequence
- PIR sensor sees a warm body move
- PIR triggers input on SBC or microcontroller
- SBC/MC turns on sensor IR LEDs for 30 secs after last PIR trigger
- When something is dropped in the deposit hole, the deposit sensor sees it
- The deposit side output of the dual op amp goes high and triggers input on SBC/MC
- SBC/MC turns on the vibration dispenser motor - it times out after 10 secs
- When something is dispensed, the dispense sensor sees it
- The dispense side of the dual op amp goes high and triggers input on SBC/MC
- SBC/MC stops the dispenser motor
When timed dispense is triggered or manual dispense is used, it sends a signal to turn on the sensor IR LEDs and triggers the motor controller to start the vibration dispenser. When something is dispensed, the motor stops.
FAILURE MODES
- Deposit sensor jammed Sensor will not trigger a dispense event until it is unjammed.
- Dispense sensor jammed Vending machine will not dispense until the sensor is unjammed.
- Peanut hopper jammed or empty Dispense motor will stop after ~10 seconds.
ELECTRONICS, SENSORS, AND POWER
The main board and sensors are analog, using a couple transistors, a diode, a couple pots and an LM358 dual op amp. The sensors are all made using IR phototransistors and IR LEDs. The PCB has headers broken out so you can monitor and control it with a microcontroller or SBC. It runs on 5VDC, consuming up to 800mA when sensors are on and the dispenser is running.
You can use pretty much any microcontroller or SBC. Preferably one that can use a camera module. I prototyped this on a RaspberryPi Zero W V1.1 with a 160-degree wide-angle camera. Together this consumes about 180mA. The main board and sensors use <5mA when idle, ~210mA when the sensors are on, and ~500 when the dispenser is running (this will depend on the motor you use)
PCB, BOM AND GERBERS
Kicad Files (Github): https://github.com/src1138/VMFB Gerbers, PCB and BOM (PCBWay): https://www.pcbway.com/project/shareproject/Vending_Machine_for_Birds_11f2a4da.html
Current Version is Rev. 1 Ver. 1.
Schematic

PCB Front

PCB Back
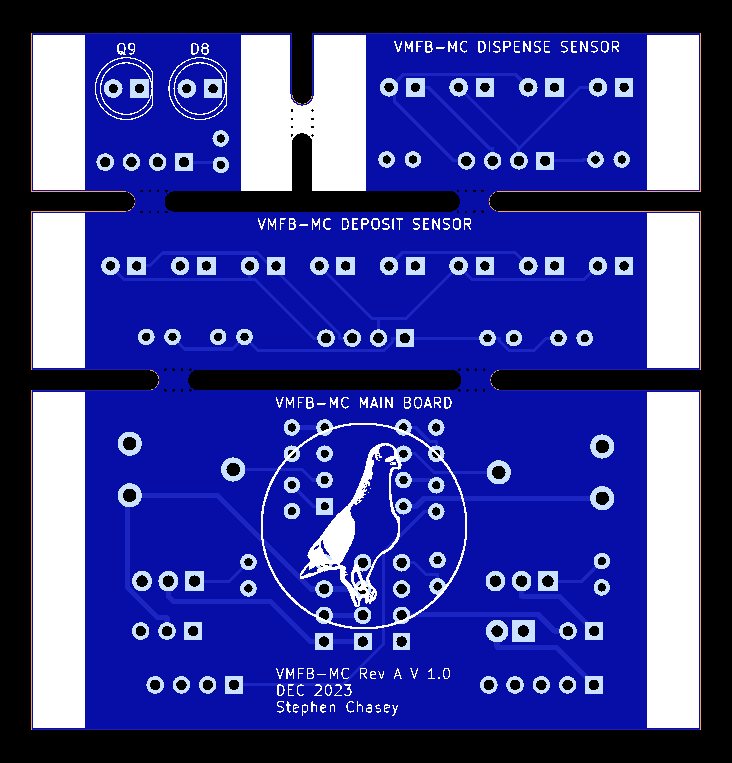
Board Dimensions: 65x68mm
The BOM is available in the Kicad files. You will also need an SBC or microcontroller to control it.
CRITICAL COMPONENTS
This project uses commodity components, and you can confidently use alternatives with similar specs. There are a few points to keep in mind.
- For the phototransistors, they should have a photocurrent of around 10mA. If they have a lower photocurrent, you should replace the 10K resistors on the non-inverting op amp imputs with a higher value. For instance, if your phototransistors have a photocurrent of ~1mA, use a 100K resistor intead.
- I used a Raspberry Pi Zero W v1.1 to control the vending machine. The shell and python files are available in the github repo with the Kicad files.
MONITORING
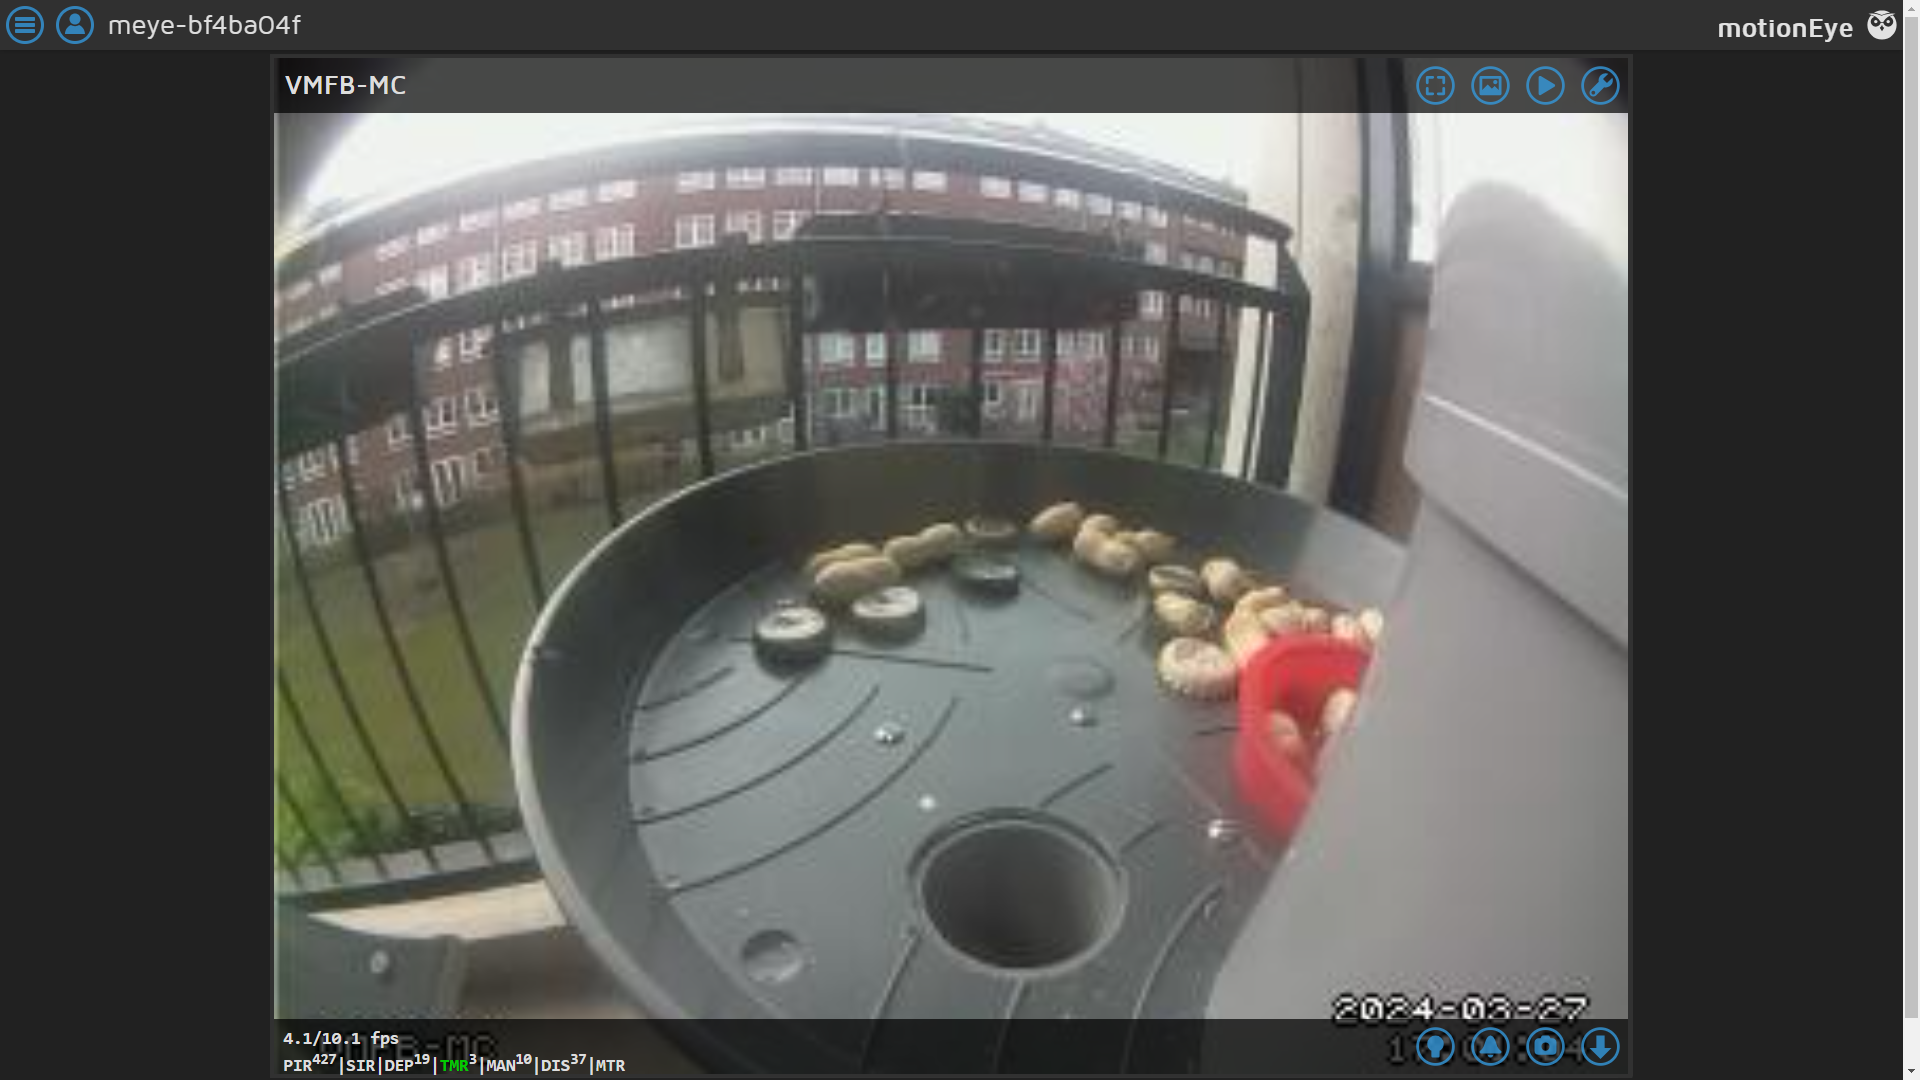
I have been using a Raspberry Pi Zero W with a wide-angle camera module running MotionEyeOS with my vending machine just to record videos with motion detection. Now I am using the GPIO pins to monitor and log events, trigger video recording based on sensor status, show status information on a video overlay, and enable manual record/stop for vide and dispensing of a peanut via the web interface. The python and shell scripts for this are on GitHub: https://github.com/src1138/VMFB-MC/tree/main/motioneye_scripts
DISPENSER
Dispenser: one-layer vibration platform made from 3mm PVC sheet and M3 brass standoffs. I used a small ~3VDC motor attached to the dispenser with brass standoffs and 3mm screws to attach the sensors. The one peeking through the bottom next to the debridging arm is the empty sensor. The one looking across the opening on the bottom is the dispense sensor.
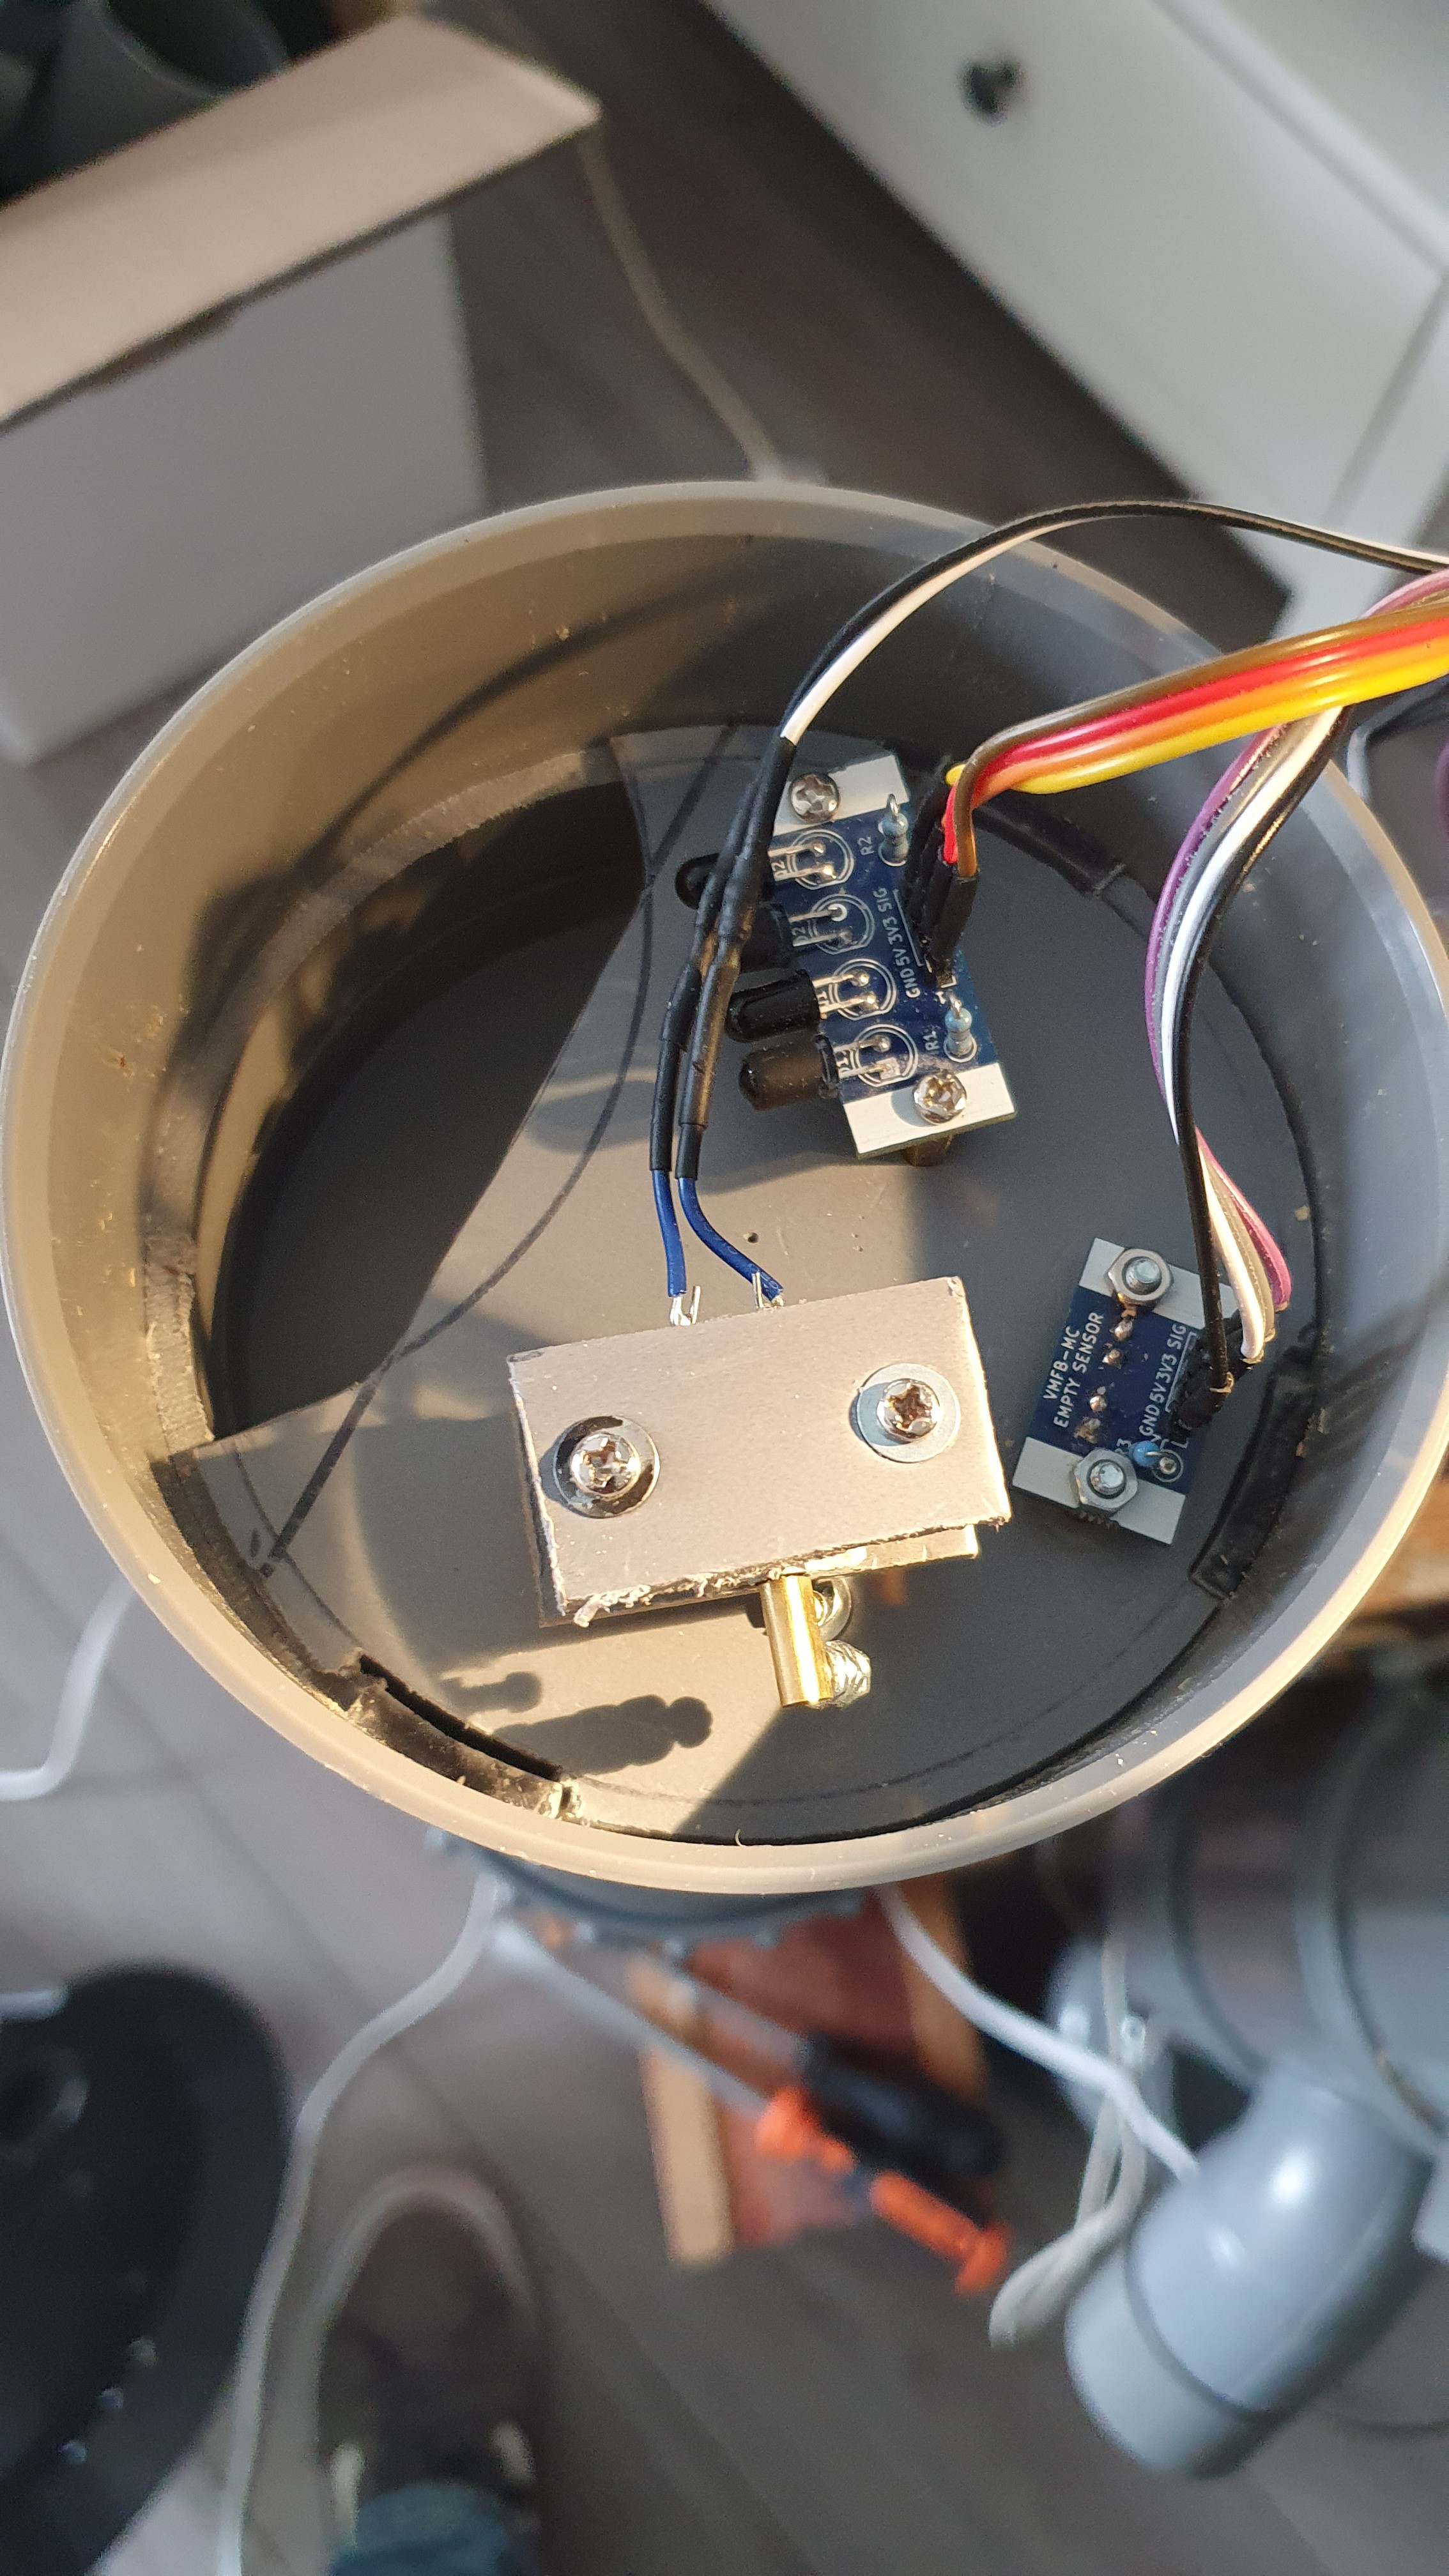
The dispenser typically dispenses a peanut or two within 3 seconds. Since it is a vibration dispenser, the enclosure should be level and mounted securely to insure relaible dispensing.
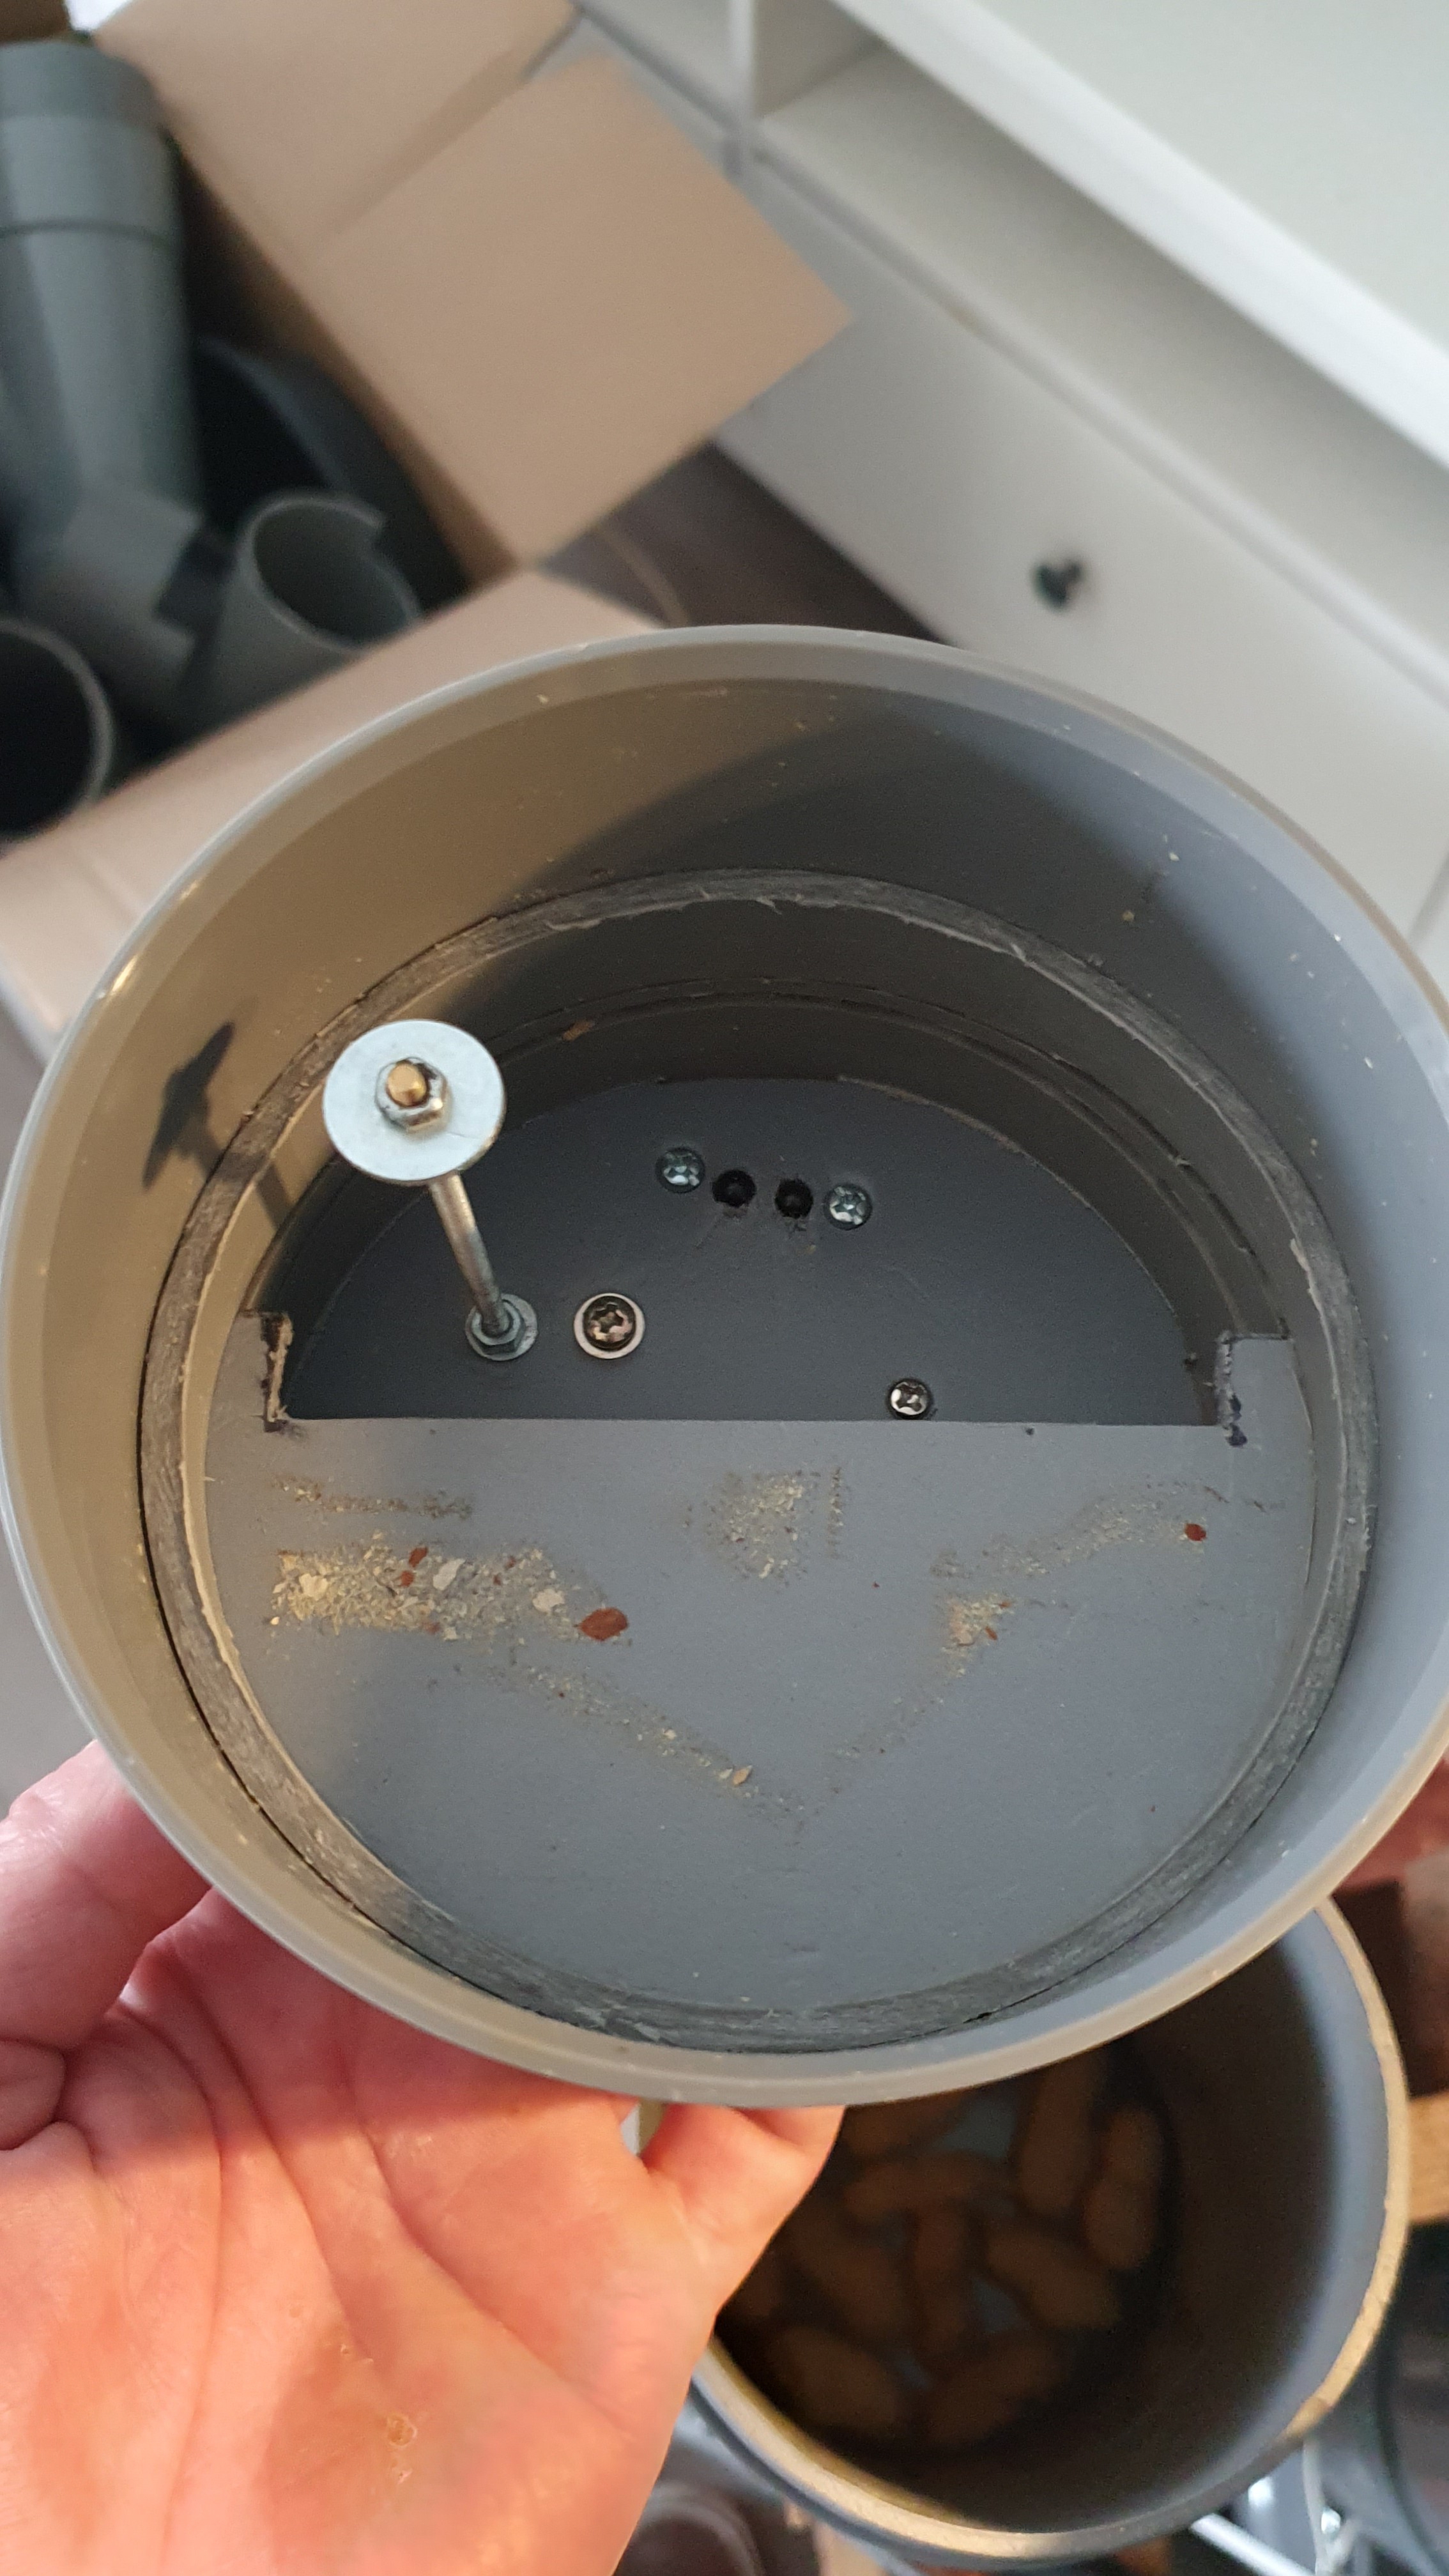
Here are some detail pics of the PVC pipe-based container and dispenser in a previous iteration of thie project. I cut away part of the coupler that holds it together to better show the assemblly.
Hopper and Dispenser | Top screw end cap removed | Top baffle and 5mm pipe slice removed |
| Lower baffle and 10mm pipe slice removed | coupling and 18mm pipe slice removed | dispenser assembly side view |
The dispenser drops peanuts into a funnel leading to the dispense chute. There is about 10cm between the two, making it difficult for rodents small enough to get into the machine to get to the food. A little mineral oil in the dispense chute won't harm the birds and will make it extra difficult for rats, mice and squirrels. PVC is tough enough to keep larger rodents from gnawing or breaking thier way in.
PVC ENCLOSURE
The PVC enclosure contains the battery, electronics and sensors, dispenser, peanuts, and deposited items. The platform is a 35cm plastic tray for a plant pot, attached to the deposit chute with 3 90-degree brackets, six M4 bolts and two hose clamps.
I used bits of electrical or duct tape to make the PVC pipes and joints fit securely tight. This way it is easy to disassemble/modify/repair. If you place it out in the open, it's a good idea to wrap upward-facing joints with tape to prevent water ingress during heavy rains.
FEED
I used peanuts in the shell to attract birds to the area and in the vending machine. If you live in an area with lots of pigeons, using peanuts in the shell will not attract them as much since they can't eat them (can't get the shell off) and you have a better chance of attracting corvids. Large-kibble dry cat and dog food also works.
BIRD CONDITIONING
Along with learning and having some fun, the goal is to get a birds to bring something, drop it in a hole, and get a reward. Birds need some conditioning for this, so there are a few phases to progress though to help them figure this out.
Conditioning Stages
0 - Small amount of food in the area you will mount the vending machine to attract birds (~1 week)
1 - Food Provided, Timed Dispense, Deposit Provided (1-2 weeks)
2 - No Food Provided, Timed Dispense, Deposit Provided (2-3 weeks)
3 - No Food Provided, No Timed Dispense, Deposit Provided on the Platform (3-4 weeks)
4 - No Food Provided, No Timed Dispense, Deposit Provided Near The Platform (TBD)
5 - No Food Provided, No Timed Dispense, No Deposit Provided (GOAL!
Time estimates are based on my own experience over the past year or so, but Phase 3 duration is a guess. As of July 2023 I have not yet seen a bird deposit an item I didn't provide. Unfortunately I had to take my machine down in May due to some new HOA regulations prohibiting feeding the birds in my neighborhood. In March 2024 I modified the dispenser to work with unshelled peanuts and used the microcontroller-dependent version of this project (VMFB-MC) to make a new vending machine that would not attract pigeons.
Discussions
Become a Hackaday.io Member
Create an account to leave a comment. Already have an account? Log In.