So if you've seen damn near anything I've done for the last 18 months then you've seen examples of using Reverse Mount LEDs and also manually mounting LEDs upside down.
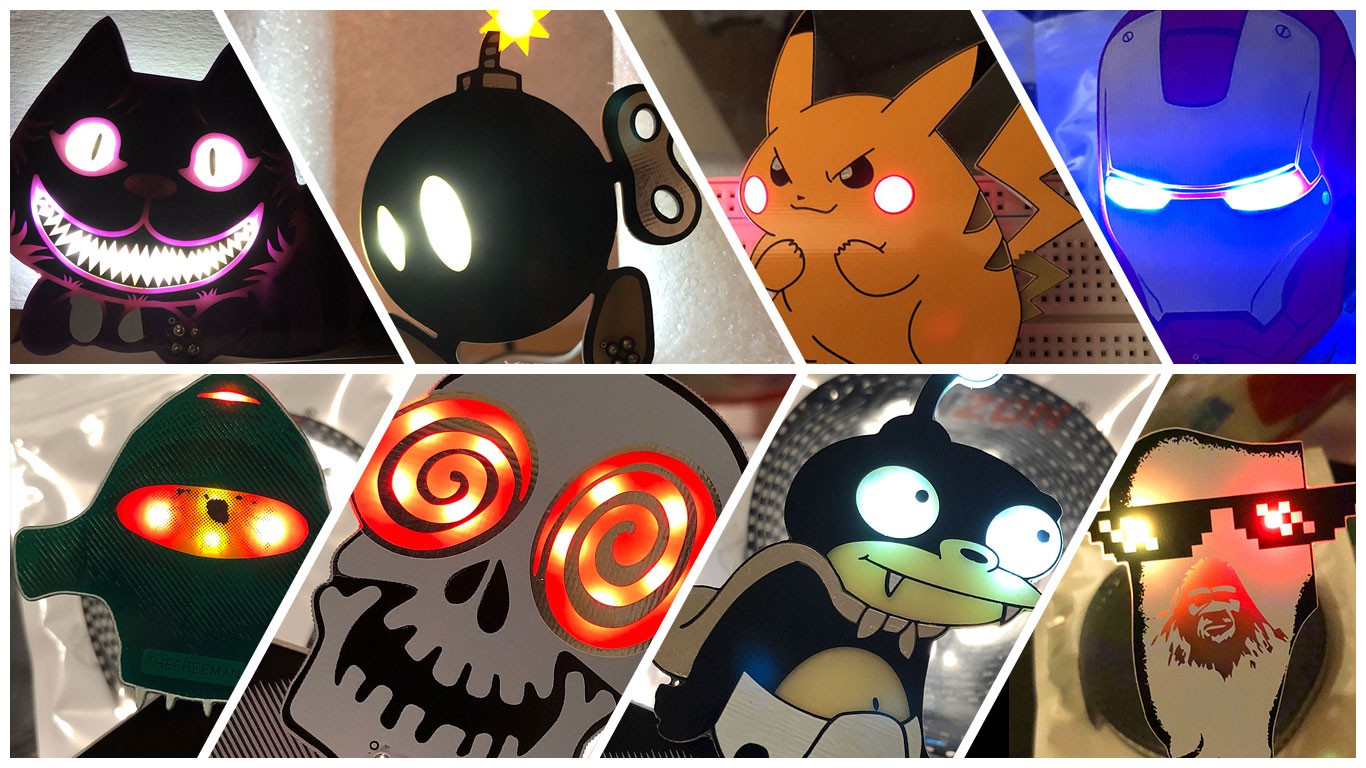
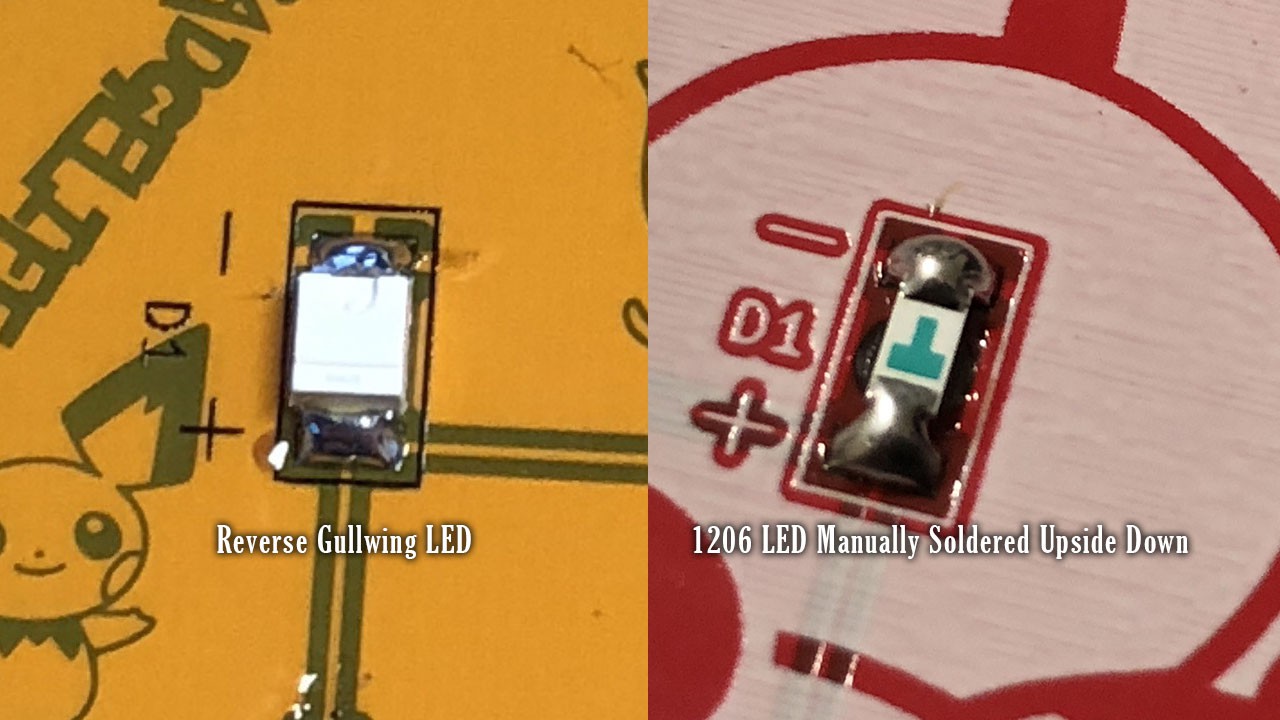
I like shining LEDs through PCBs, it's a great lighting effect and it isn't as harsh a light as you get from having the LEDs on the top side of the board. However there are a handful of draw backs to using them.
Reverse Gullwing LEDs:
- They're expensive.
- "Reverse Gullwing" LEDs are just expensive. Even quantities of 1,000s RGB Reverse Gullwing LEDs are over $0.40/ea as compared to $0.02-0.04 you typically see with a comparable size LED.
- They're exceedingly rare.
- This point is pretty obvious based on the price but there are only about 3 manufactures that make LEDs in this package and only 1 of them makes the RGB variant.
- Minimal light propagation
- If you're putting an LED directly onto the PCB that it's shining through then you only get a circle that is about 9mm in diameter. This varies based on the color, voltage, resistor used etc but in general it's only 9mm and it takes a crap load of LEDs to cover a relatively small area. This only exacerbates the first issue.
Reverse Mounting Normal LEDs:
- Not Pick n' Place Friendly
- Soldering LEDs Upside Down on purpose involves a lot of manual labor and is not solder paste or Pick n' Place friendly, this means it's a solution that does not scale well at all.
- Same Light Propagation Problem as Reverse Gullwing LEDs
So between these two solutions there is the classic "Cheap, Fast, Good, pick two" dilemma. Reverse Gullwings are Expensive, but fast and good. Manually soldering LEDs upside down is Cheap, Slow, but also Good. Now let's look at another solution: Side View LEDs.
Side View LEDs
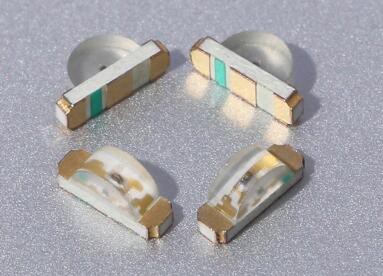
Side View LEDs are exactly what the name says. They're LEDs that instead of shining up or down they shine at a right angle. Side View LEDs are cheap, pick n' place friendly, and you can get them in every standard LED color including UV and RGB. My initial interest in Side View LEDs came from wanting to use the UV variant on some projects to get that eerie glow you get when UV light is shined onto FR4.

This is an effect I still intend to use on future projects but I also saw the possibility that I could use Side View LEDs in place of Reverse Mounted LEDs. Unfortunately it isn't as simple as just replacing one foot print for another. Side View LEDs were not designed to be used for this purpose, they're designed to, well, shine light at an angle and are typically used as indicator lights in most consumer applications, think something along the lines of status indicator lights on a Laptop. As such there is a tremendous amount of light bleed that you have to control.
The other major issue with using Side View LEDs is that the light that does shine below them isn't as bright as using a Reverse Gullwing or a typical LED mounted upside down. Due to their vary nature the light they output isn't in a circle it's more like a 1/2 Circle or a very wide cone so you have to rethink your designs to take advantage of that as well.
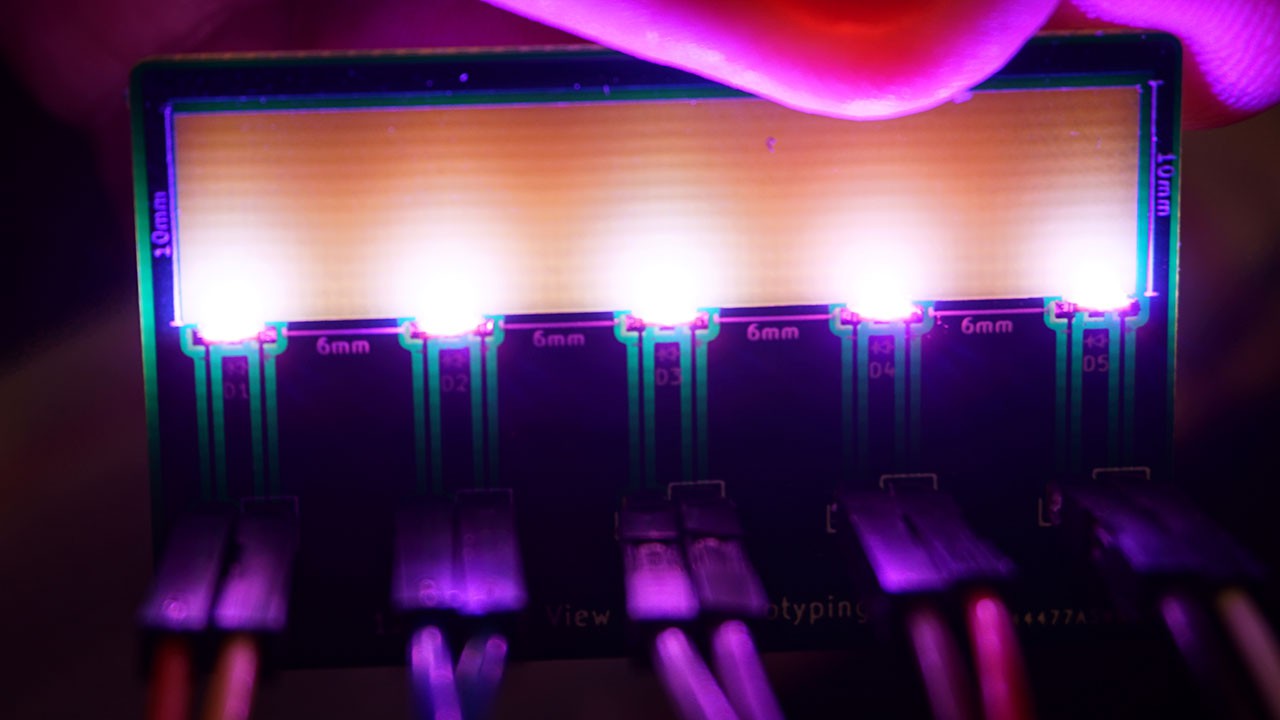
I designed a simple prototyping board so that I could get measurements and figure out how to best work with these LEDs before I put them in a project. I am very glad I did this because despite having seen other examples of Side View LEDs being fantastic drop in solution for back lighting PCBs I instead found it had its own draw backs.
- Uneven Lighting
- So this is similar to the light propagation problem before but not exactly the same. To my surprise the part of the light that actually shines on/through the board isn't nearly as much as I expected. As a result the light looks rather dim and uneven. I can handle uneven but dim is a no go
- Intense amounts of light bleed
- I expected light bleed to be an issue but this is a whole other level. These LEDs can be really damn bright and nothing is more distracting than having a LED shining directly at you in the corner of your peripheral vision. This is just a waste.
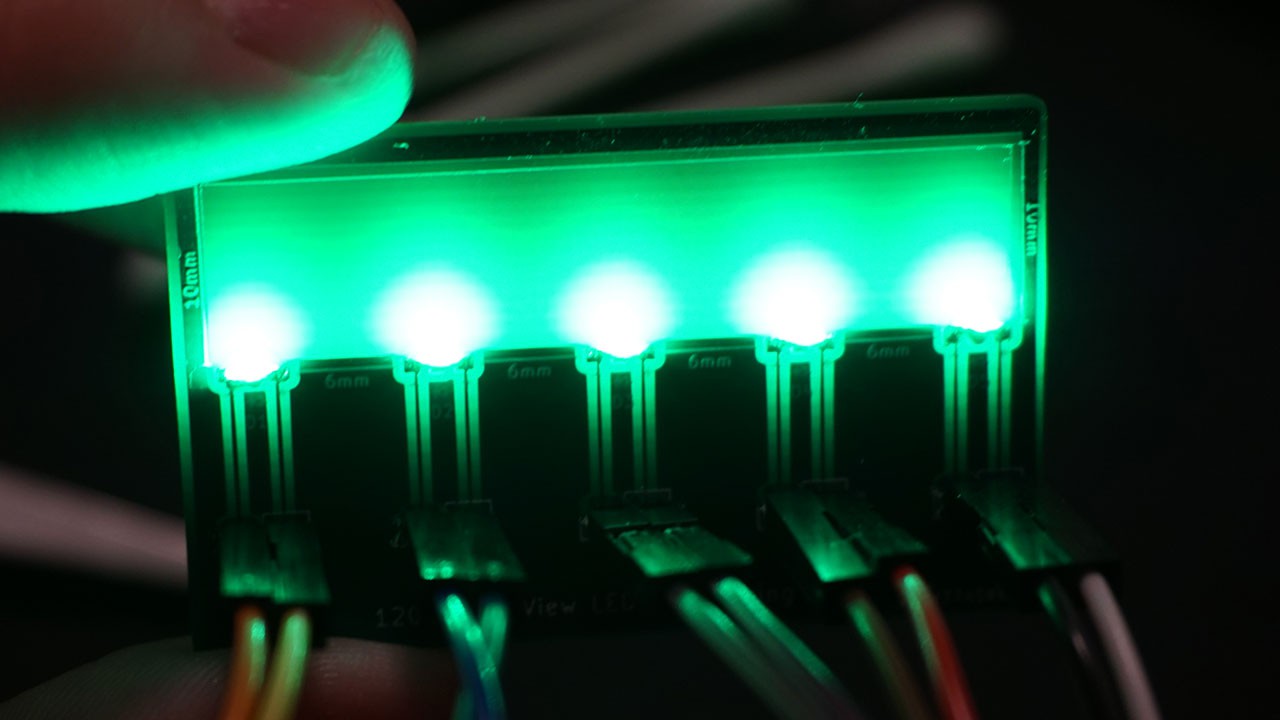
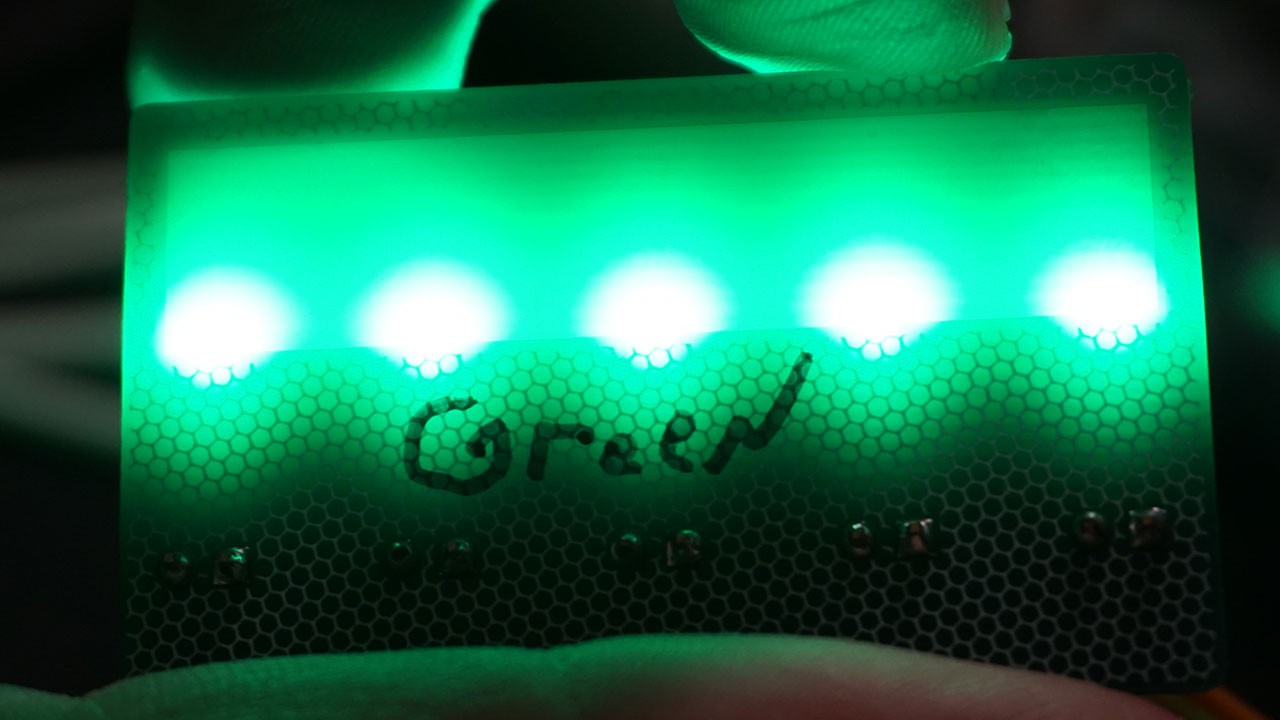
I used a Sony A5100 Mirrorless Camera to take these pictures, my iPhone X that I use for most of my photos blows out the light too much and makes it look brighter and more distributed than it actually is. My A5100 still makes it look better than it really does but it's the best I could do.
So, how can we salvage this? Simple: Hot Glue.
To control the light, make it spread out evenly, and to dramatically reduce the light bleed we need the light to have a medium to travel through so I chose Clear Hot Glue. Hypothetically you could use Epoxy too but Hot Glue is cheap, readily available in large quantities and can be easily removed if need be.
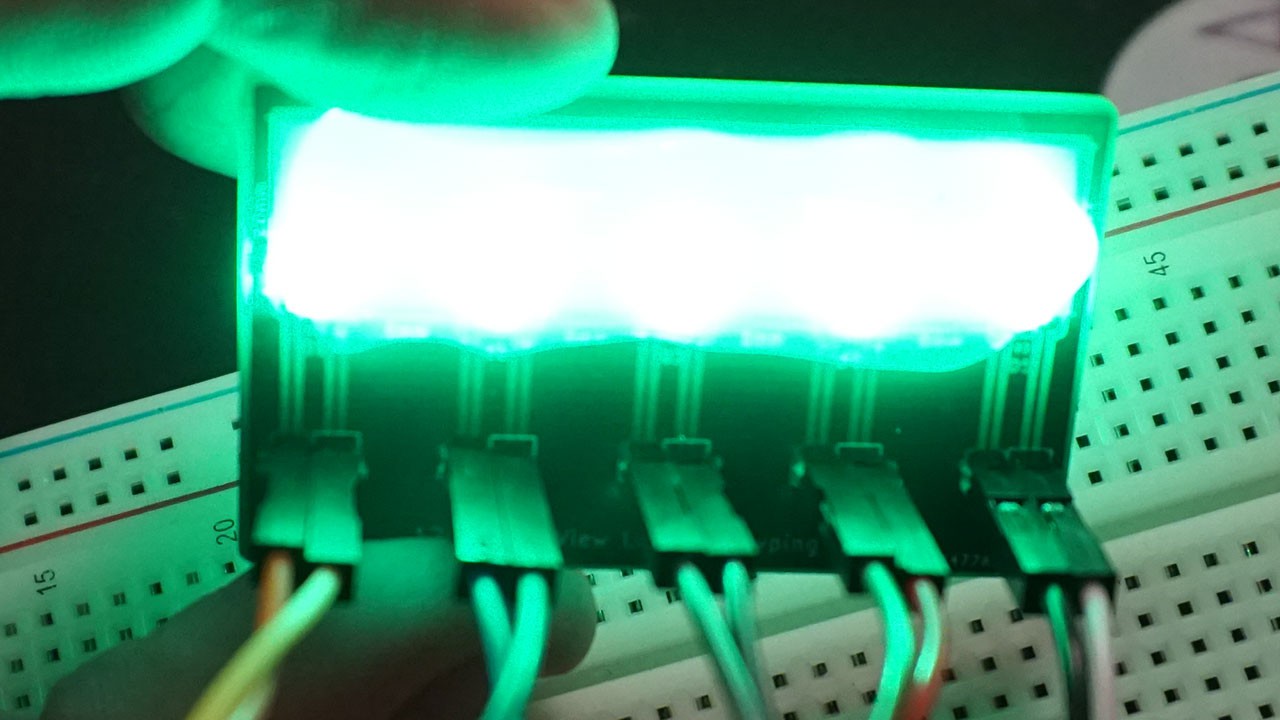
This solution worked even better than I had expected. In some cases I was able to reduce the number of LEDs from 5 to just 2 while still covering the same area and getting an acceptable brightness level. This doesn't even take into full account of positioning the LEDs in different directions. As long as the LED shines into hot glue there won't be remotely as much light bleed and it will be distributed fairly evenly.
Below you'll see a lot of examples of this technique in action. Unfortunately my Glue Gun has been used mostly with Black Glue Sticks so my results were hampered a little by black and gray artifacts that wouldn't normally be there. Even with these artifacts using Side View LEDs with some sort of additional medium can yield very impressive results.
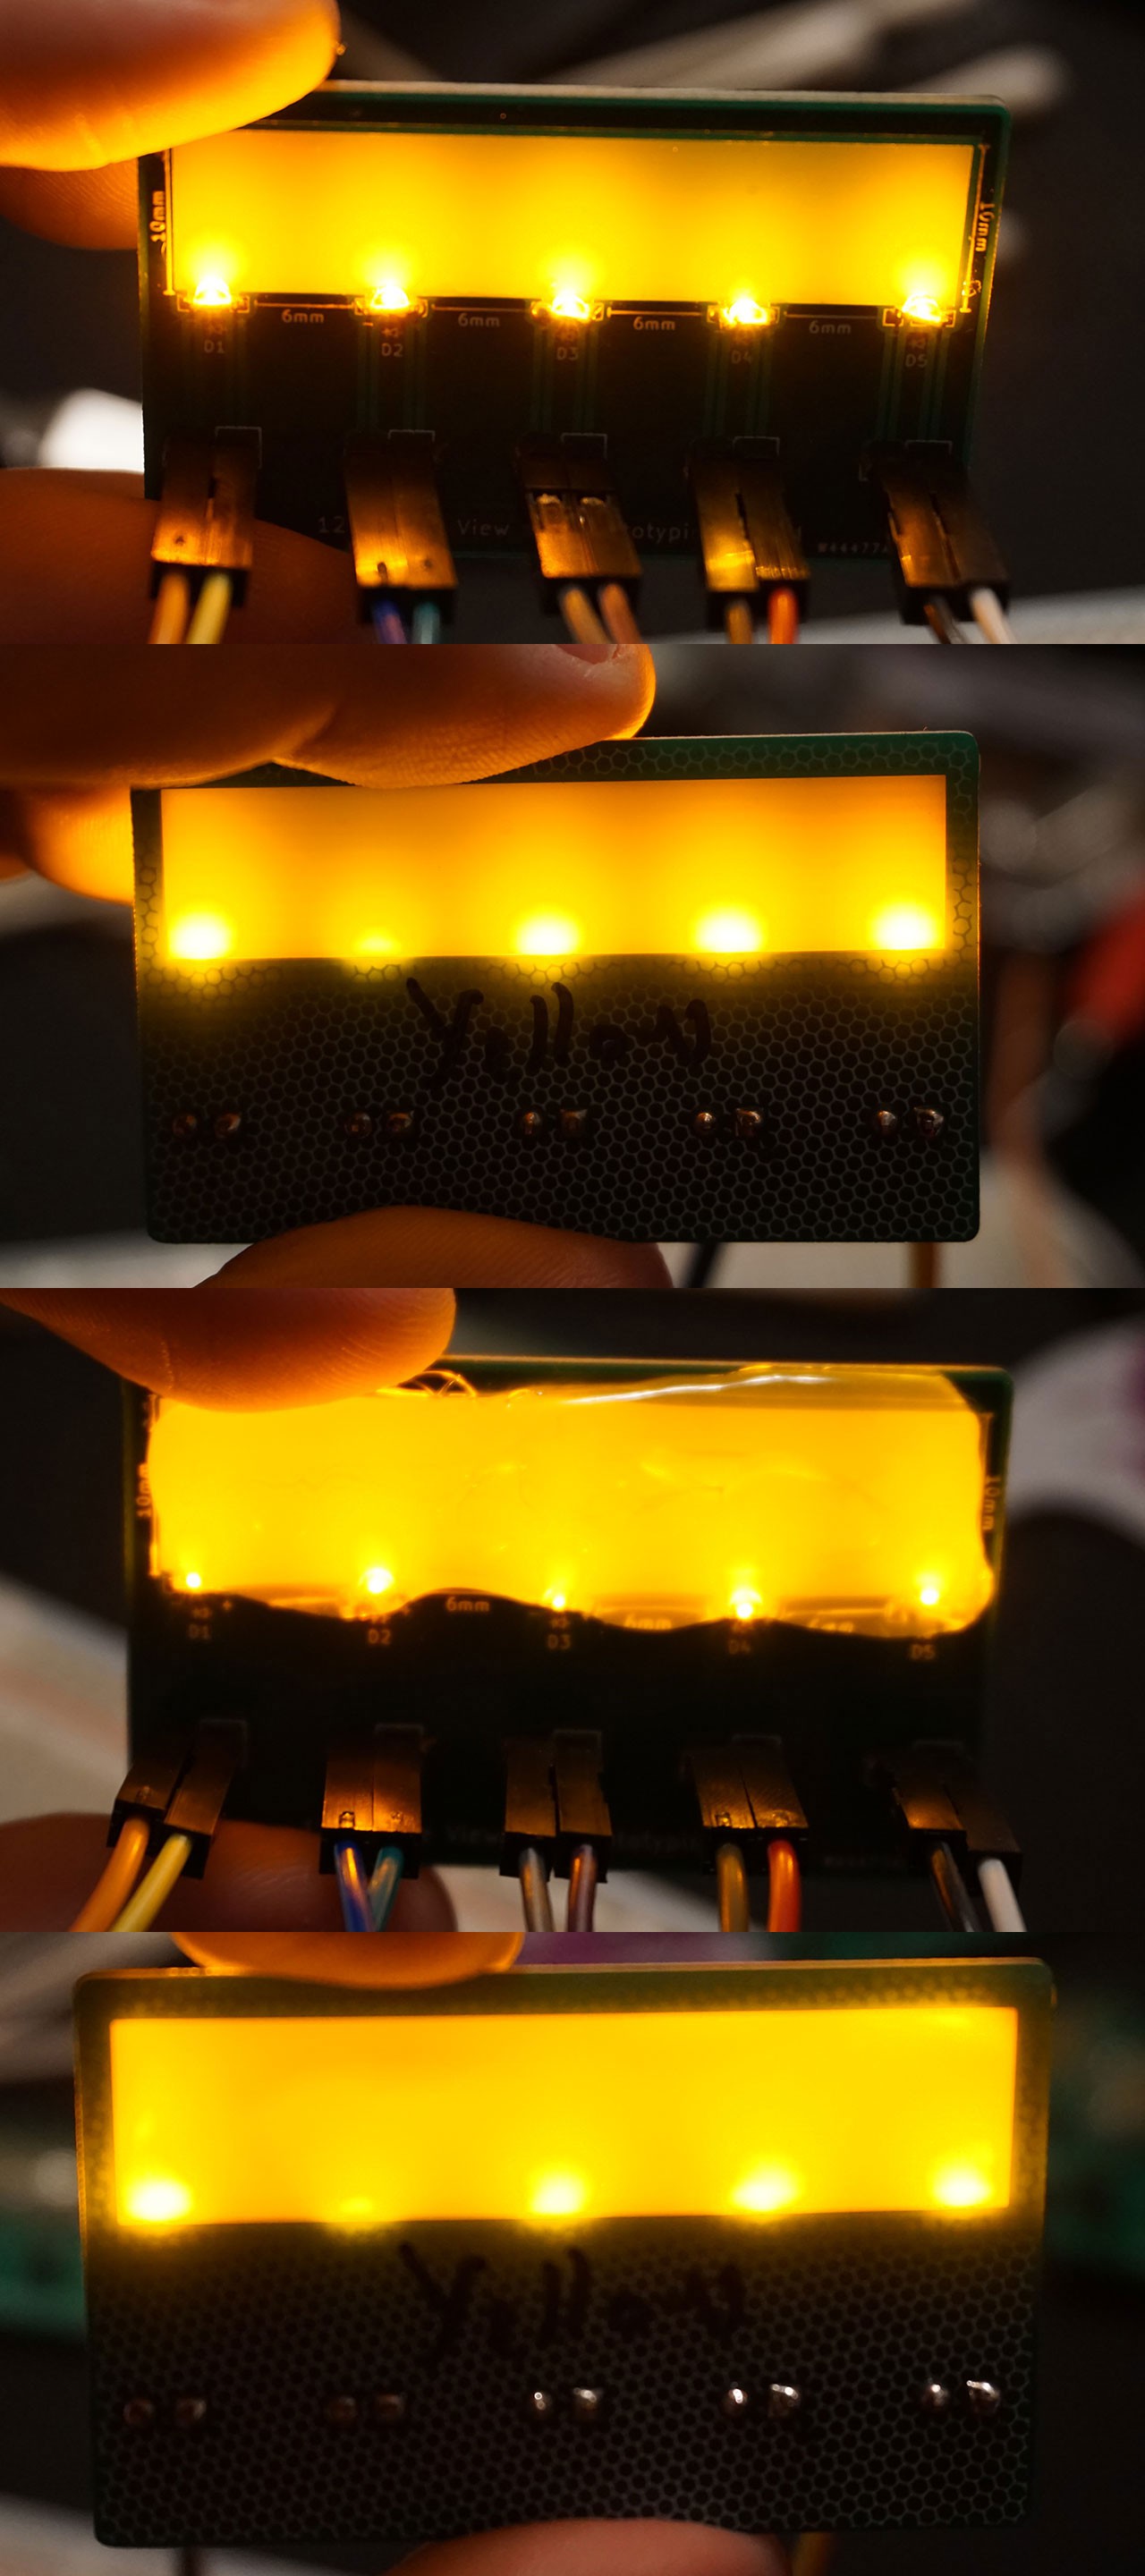
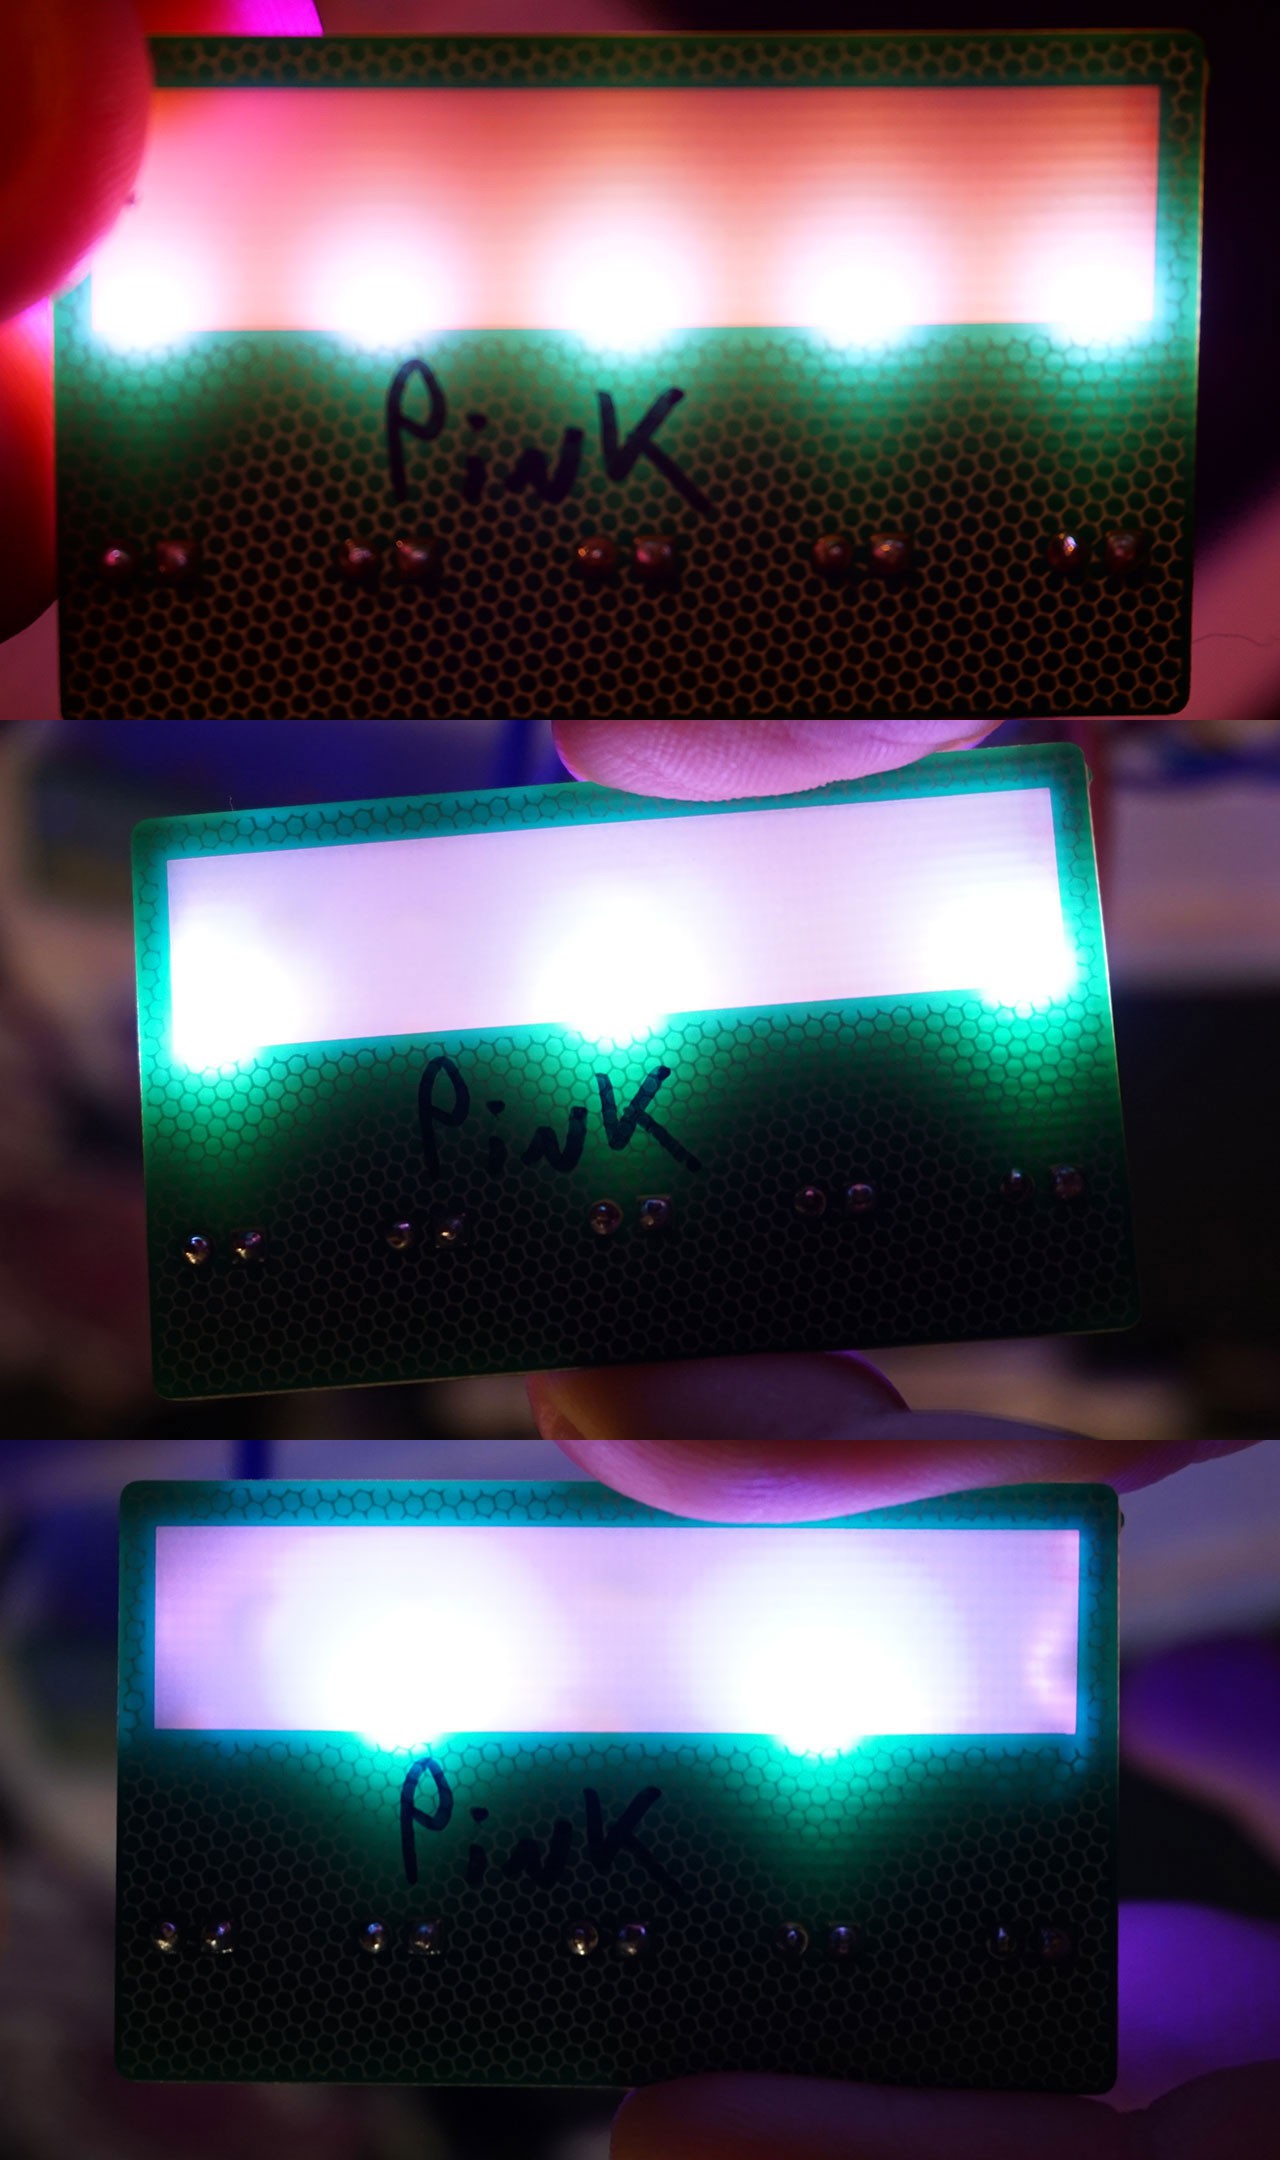
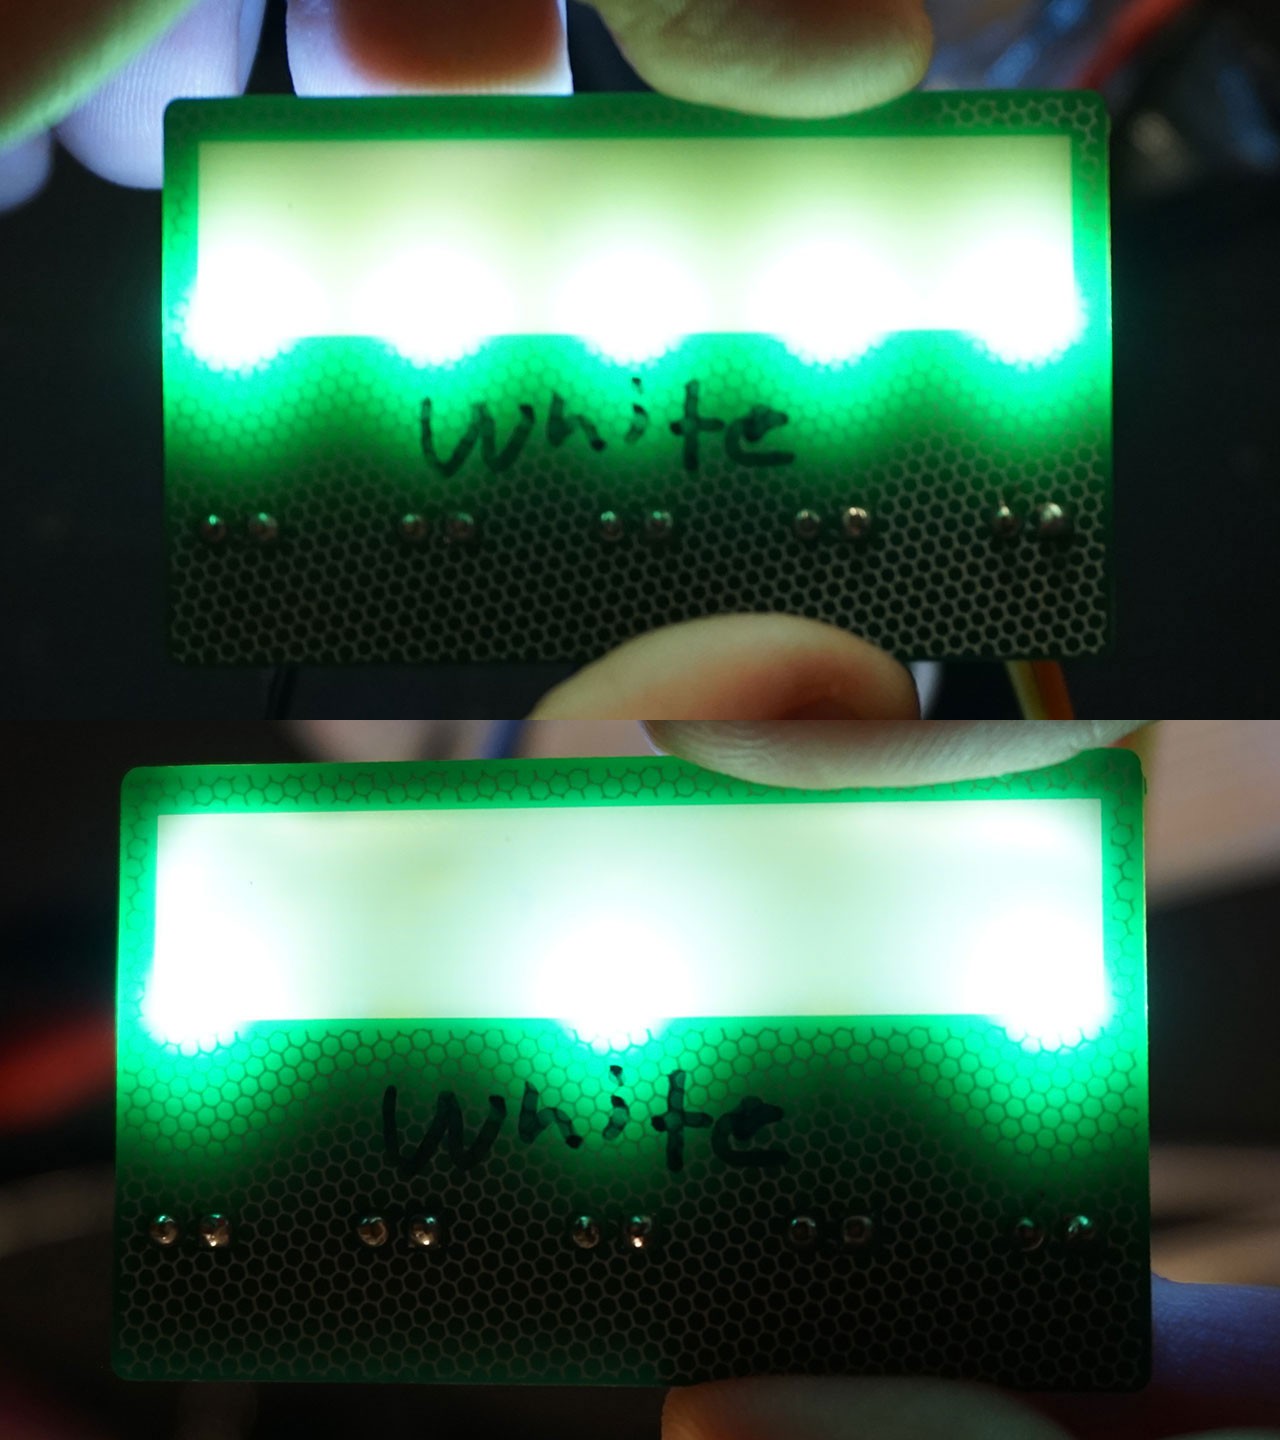
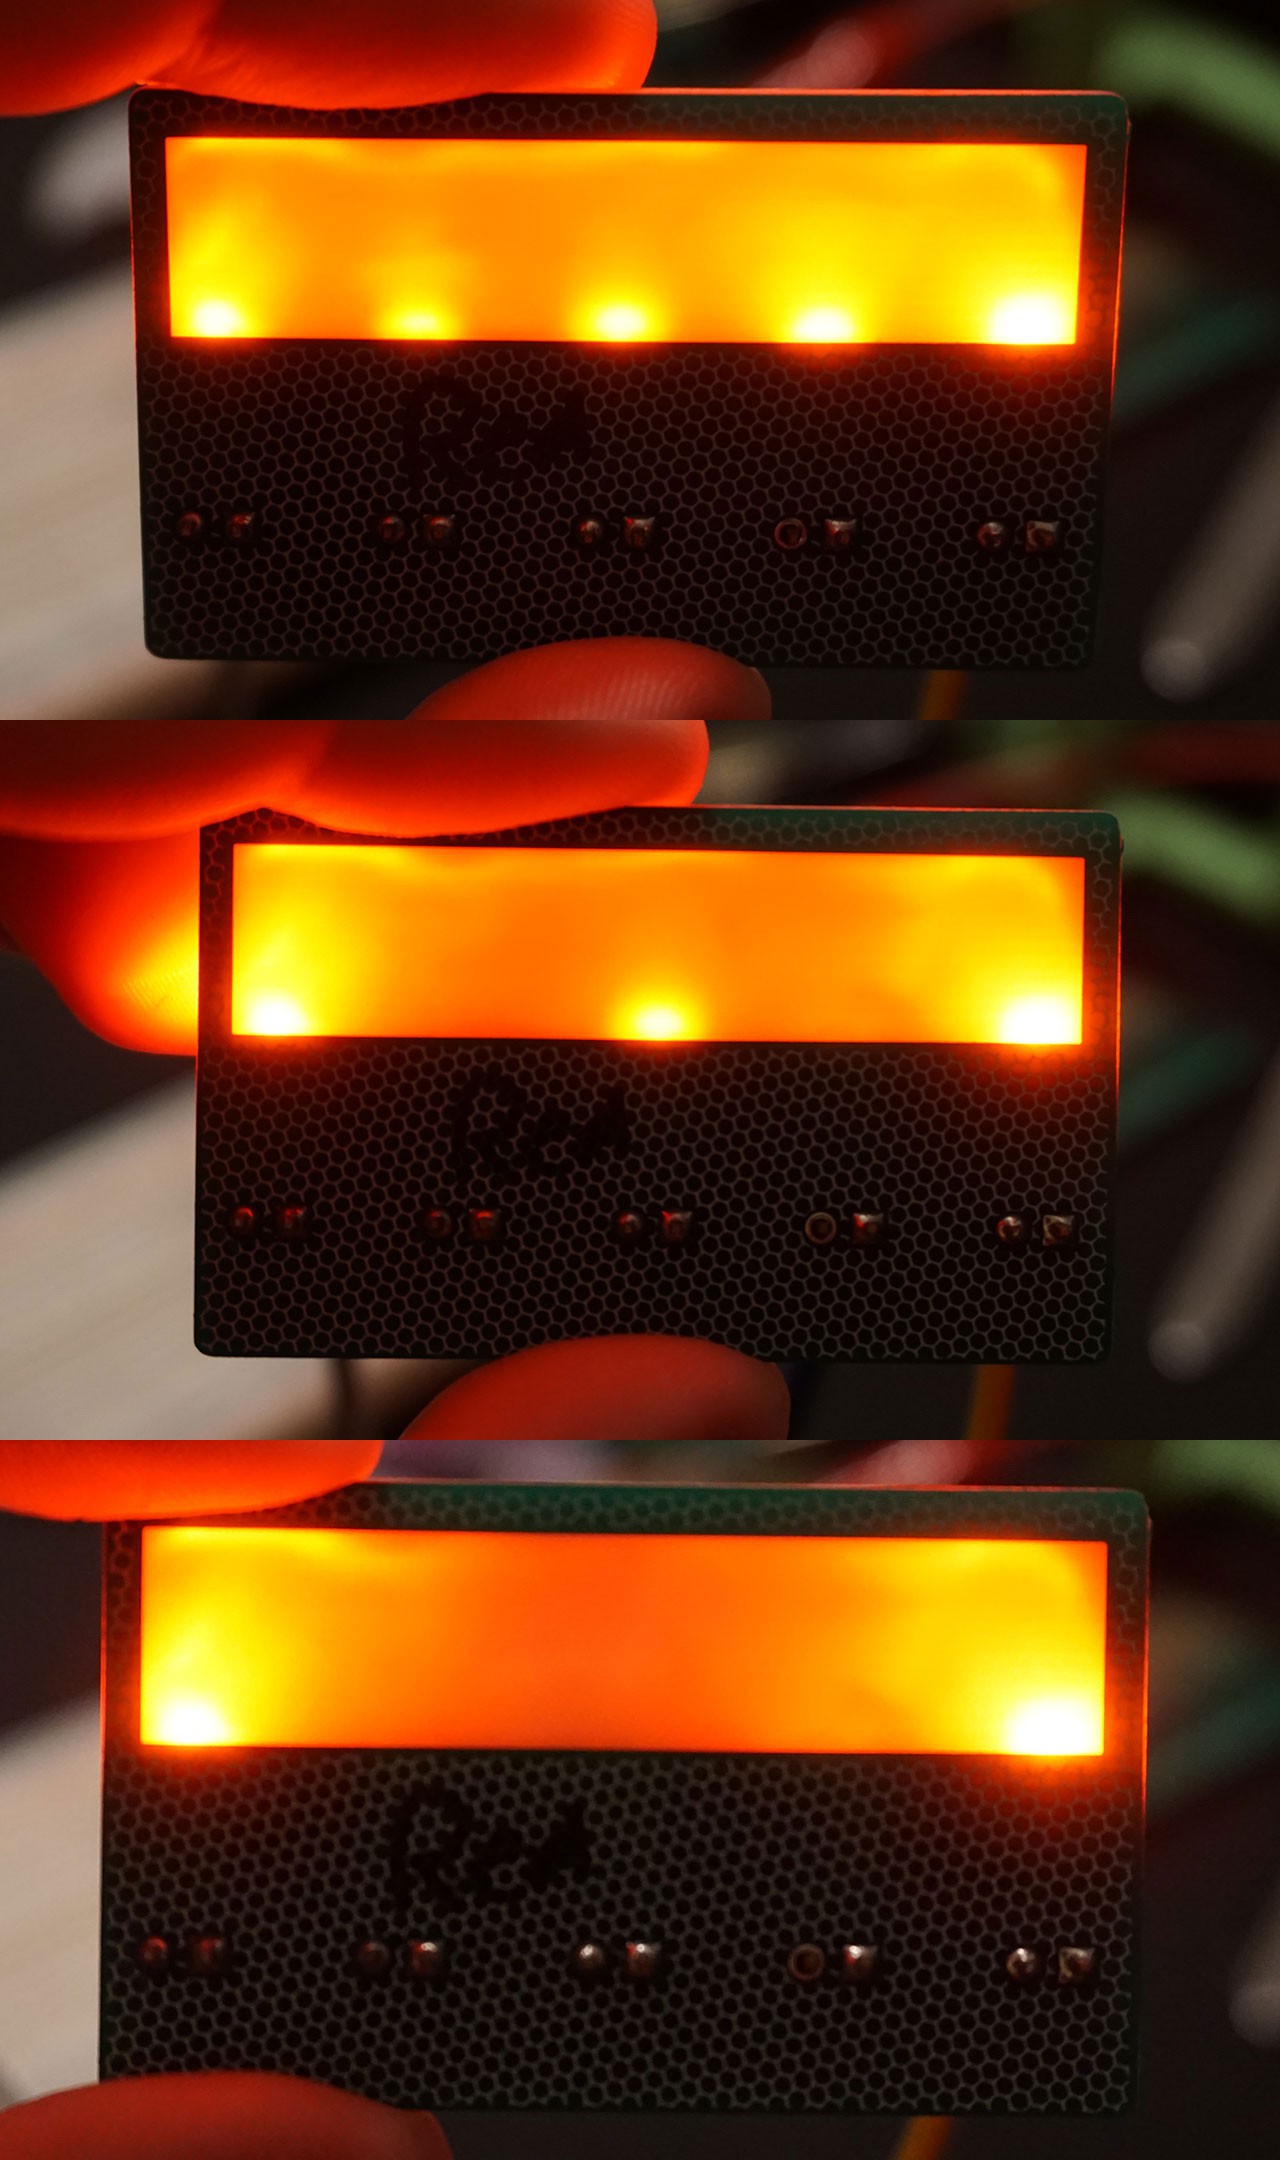
Of course this technique isn't perfect and it's still a fair amount of work after assembling the board but I think the results justifies the extra steps. I'm looking forward to seeing future results and additional iterations on this technique, especially after a little more practice applying the hot glue itself.
 TwinkleTwinkie
Discussions
Become a Hackaday.io Member
Create an account to leave a comment. Already have an account? Log In.
1) Hot glue
2) Different color LEDs
3) ???
4) Dan Flavin. (e.g. https://www.nga.gov/features/slideshows/dan-flavin-a-retrospective.html)
Are you sure? yes | no
I've wondered about 3D printing directly on a PCB. Would it stick? If it works you could do some cool things with the diffuser.
Are you sure? yes | no
You just got Benchoff'd ! https://hackaday.com/2019/04/17/the-science-of-reverse-mounted-leds/ :-)
Are you sure? yes | no
Awesome, the look so cool
Are you sure? yes | no
Hah, awesome. I solved the same problem with my side-mount LEDs with hot glue the same way:
https://hackaday.io/project/27580/log/160408-hot-glue
Are you sure? yes | no