 helge
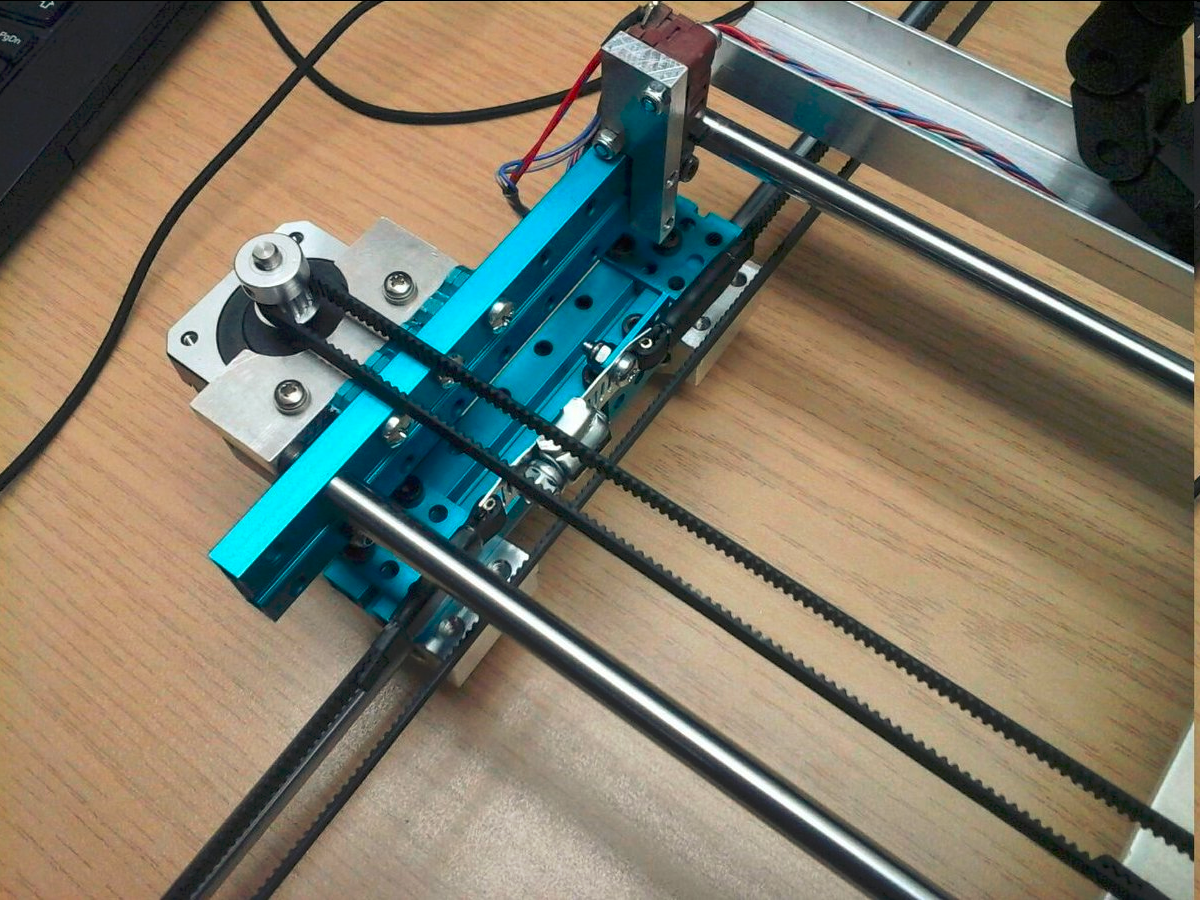
helgeA couple of years back I bought "MakeBlock" parts from the XY Plotter v1.0 kit for a low price that reflected the hot mess this construction was in its early conception.
Here begins my journey which can be summarized as: I rebuilt an XY Plotter with most of the parts, machined my own bits and pieces and then time had other plans for me. And so this thing has been sitting around for another 3 years ... because the belt tensioners were missing.
Concept
The better isn't just the enemy of the good, and I've had many better ideas along the years, none of which ever materialized. So, it needed dealing with:
You're looking at a hose clamp, a spade connector and adhesive-coated heat shrink tube.
The version I settles on looks like this:

Breakdown
The hose clamp is what tied it together, really. I did digest some inspiration from [adamfilip] who built a tensioner from guitar tuners
The tuner has a worm drive to create rotary motion and a toothed pulley to get back to linear belt movement. Consequently, one could attach the belt directly to the worm wheel, then unroll the wheel and replace it with a perforated metal band. You want the ones that have punched holes, not the embossed threads.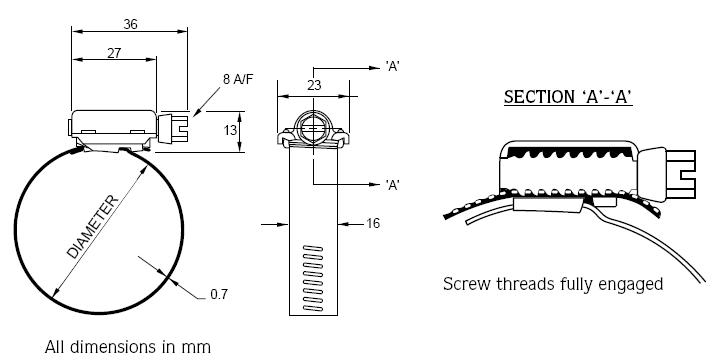 The proof-of-principle build I made was more about figuring out how to attach the belt to the clamp strips than about the tensioning or mounting. The hose clamp has a strip attached to the formed housing which becomes the fixed end.
Build process (first shot, consider modifications mentioned later):
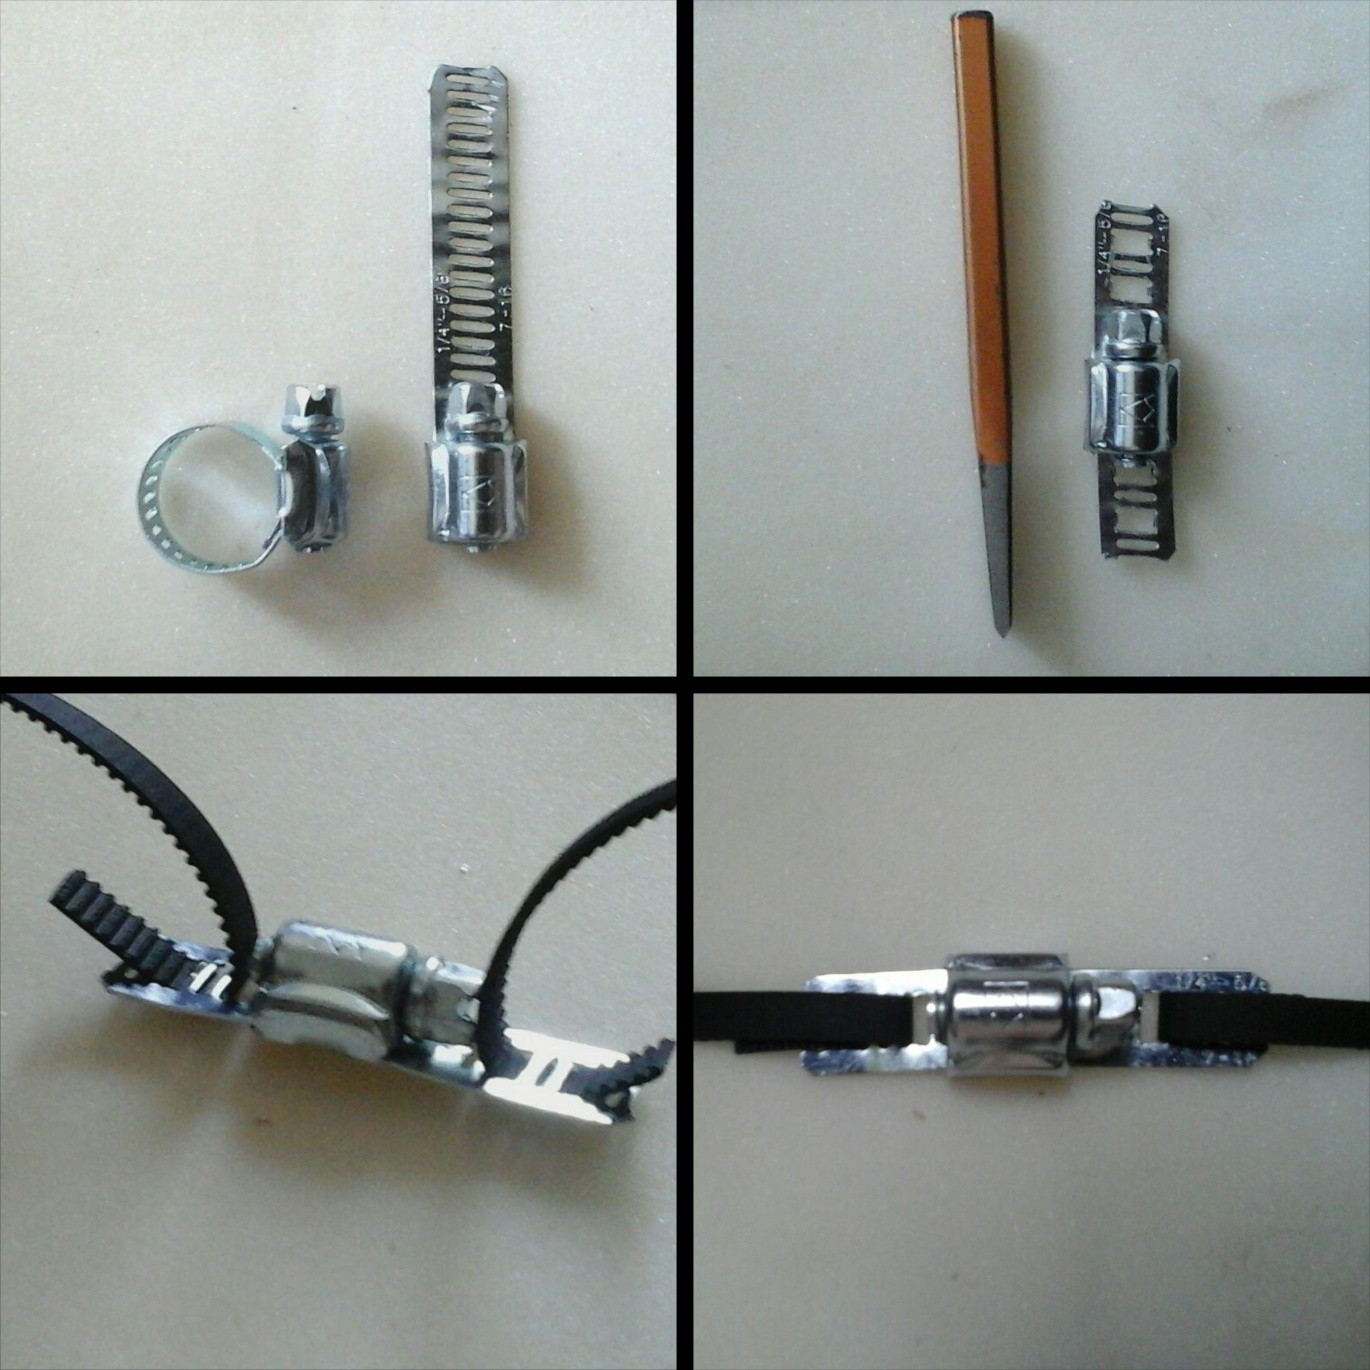
- unroll the hose clamp - for me this was a 1/4-5/8" size one,
- figure out how long the fixed end needs to be to attach the belt,
- cut with metal snips,
- Remove bridges. I used a Cr-V steel chisel held at 10-15° to score the two sides, then snapped the weakened bridges with a screw driver.
- File the corners with a square needle file,
- insert belt protection elements (see later),
- attach belts.
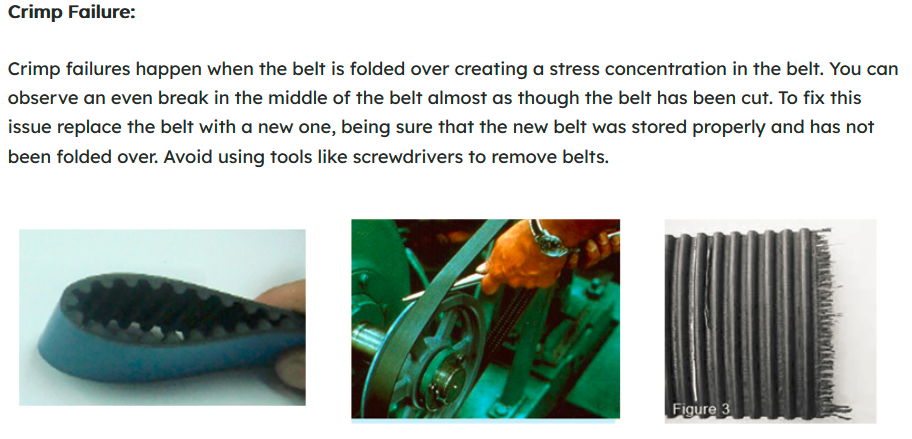
Seen every now and then in beginner solutions, the belt is pulled over a sharp edge. While cheap GT2 belts should come with aramide fibers, it's generally a bad idea to abuse them this way. Other belt types can be glass fiber-reinforced and really don't like minimum bend radius violations.
https://blog.misumiusa.com/timing-belt-maintenance-and-belt-failure/
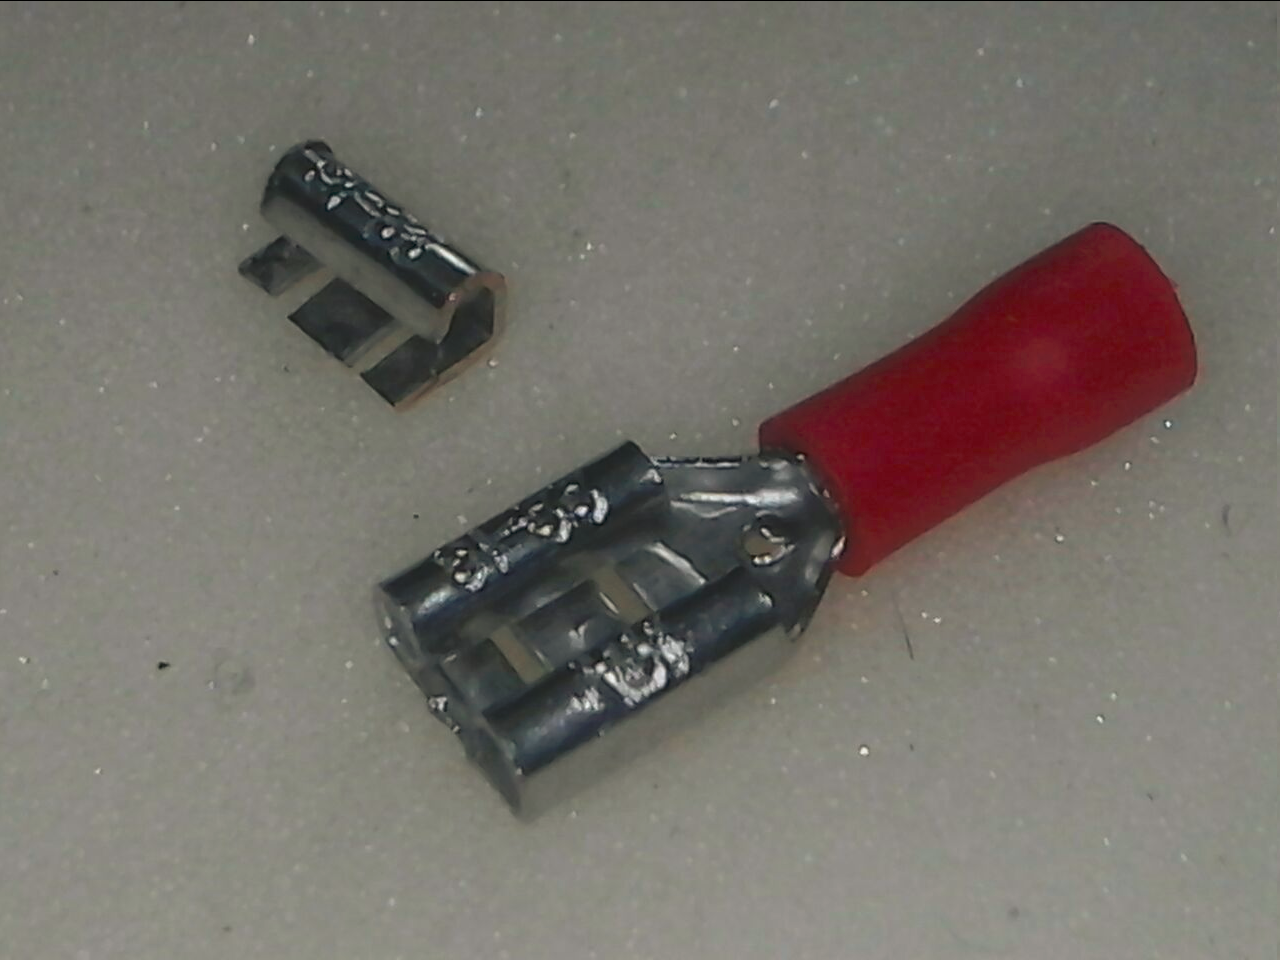
If available, slotted spring pins can be inserted into the slot and rested against the sharp edge to roll the belt over with at 1.5-2mm radius. I ended up cutting spade connectors into pieces and filing them to the desired height:
 They can also be wedged open and crimped shut to lock them in place. Here they're inserted into the parallelogram-shaped slots and pushed to the sides where they are squeezed (without crushing) with pliers to stay put:
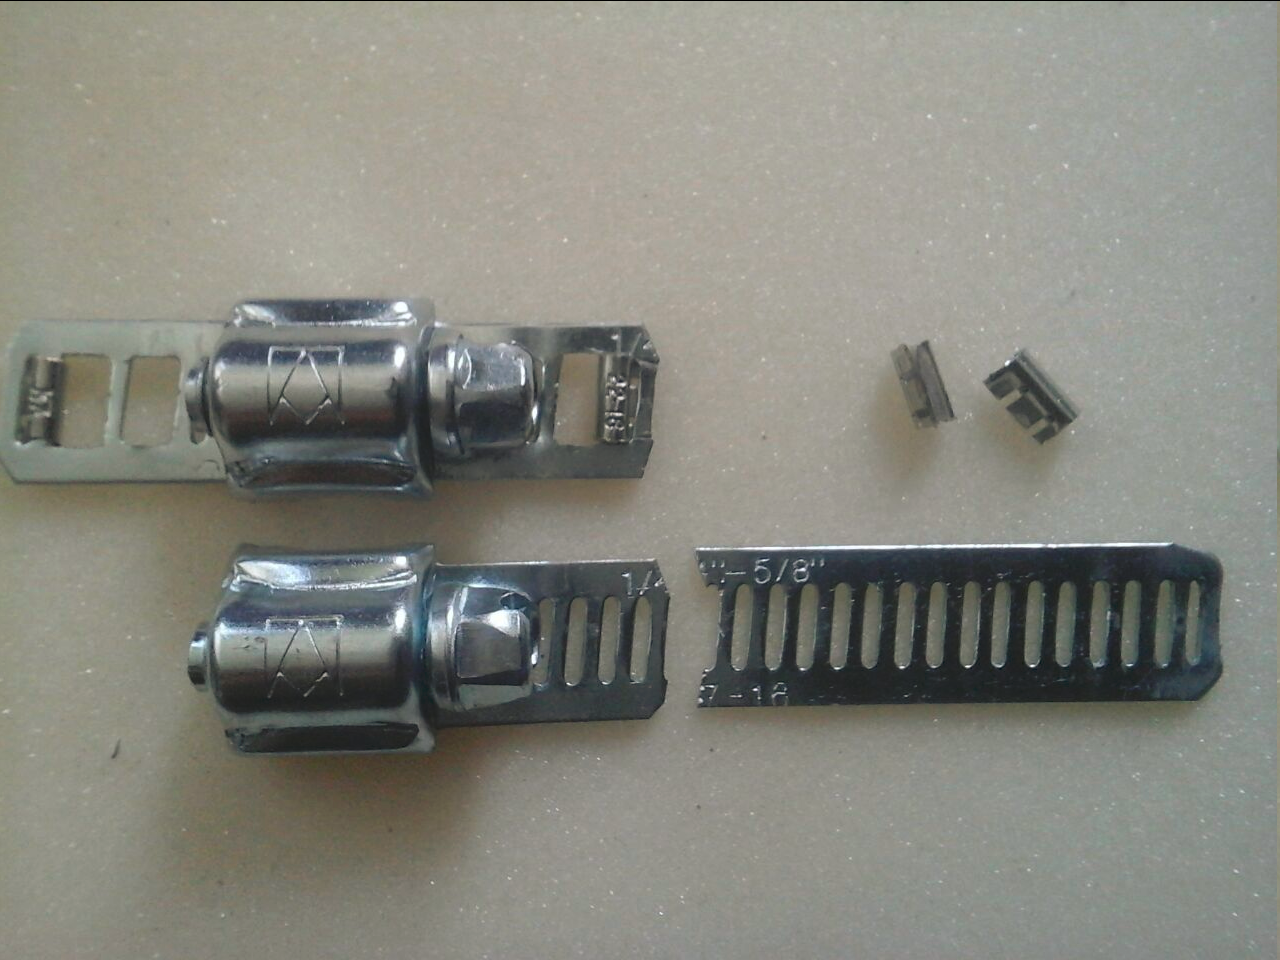
Attaching Belt Ends
I ended up using two layers of heat shrink - thin heat shrink tube to get the belt to where it needs to be and to do a test fit. It doesn't have adhesive and even in unshrunk condition it holds well enough to set the belt length reliably. The actual clamping would have been done with a steel crimp ferrule for belts, but I didn't order them in time. You might also get away with thin walled copper or brass tube which can be squished and annealed with a gas torch in preparation for crimping. Either way, I'm giving hot-melt coated heat shrink tubing a try, as it was available and can be trimmed with a scalpel.
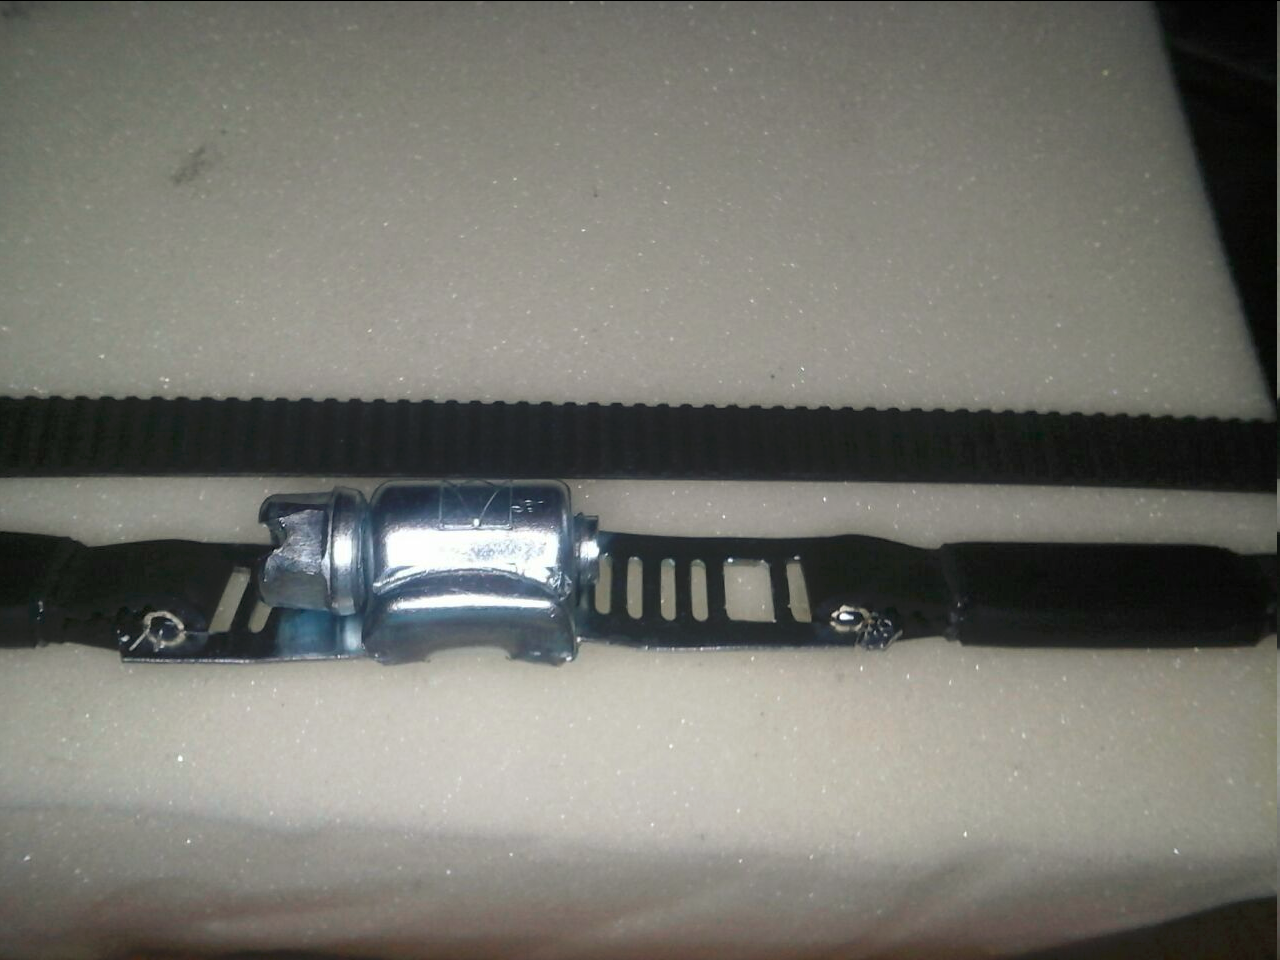
Below you can see how the heat shrink terminations worked out. The belt ends were pinched with needle nose pliers to allow the heat shrink to set in a fully closed shape.
Mounting
The final challenge is where to put the mounting bolt. At first I tried to be smart and put the hole in the fixed end in front of the screw, but that required the screw head to clear by ~1cm and made the whole tensioner extra long. Shown above is the revised version where the bolt head is right next to the belt attachment on the strip-only end.
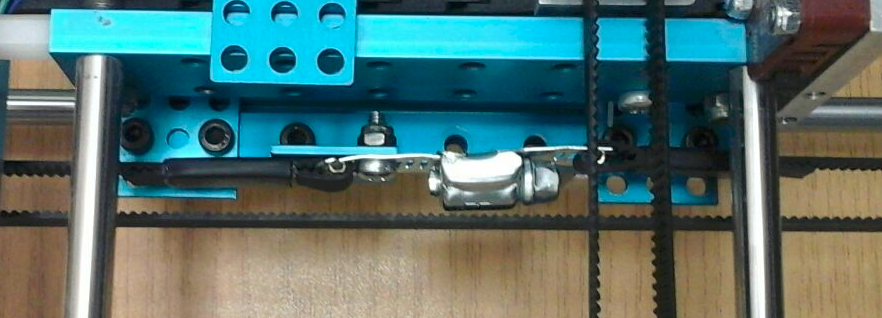
And that's the finished product in place:
I'll see how this solution holds up over time. I've outfitted three belts with it, and that makes it a lesser issue compared to the other deficits and missing bits there are, until it again becomes an issue.
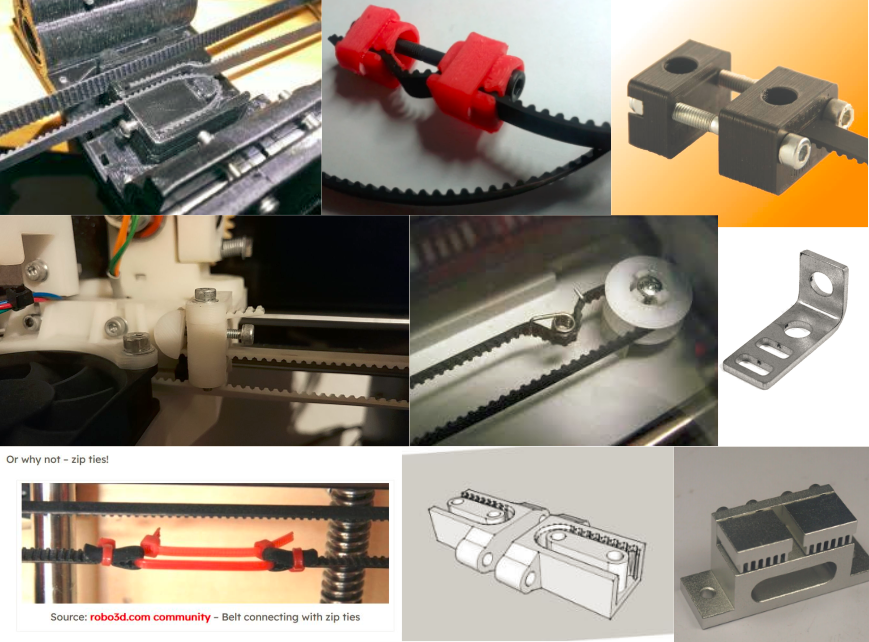
Alternatives
If I had a 3D printer right now, I might just use this one, albeit with a modification to make it be two hermaphroditic halves, each contributing one belt contact arc.
https://www.thingiverse.com/thing:797932
 There are also some designs around there, that only press against the belt with a spherical nut, point loading the belt in the center, or designs that need two bolts to be tightend equally to avoid tilting the belt.
 There are some designs out there that are ok.. but then again there are some that don't perform tensioning, create poor belt retention by flexing to tilt the belt or open up to let it slip.
see http://diyprojects.eu/gallery-of-timing-belt-clamp-ideas-for-linear-motion/
 Whatever you pick, it's worth to imagine how something would yield or break to anticipate where its shortcomings are.
Further Reading
There's a lot of good technical information out there on how to properly dimension and tension belts. Your mileage may vary depending on how proper the bearing seats and structural elements in your printer or plotter are implemented.
 https://www.sdp-si.com/PDFS/Technical-Section-Timing.pdf
 https://blog.misumiusa.com/timing-belt-maintenance-and-belt-failure/
Discussions
Become a Hackaday.io Member
Create an account to leave a comment. Already have an account? Log In.
YES! that's awesome! Totally using this solution.
Are you sure? yes | no