-
How to Download Cricut App on Computer? (Complete Tutorial)
06/09/2025 at 10:41 • 0 commentsIn this step-by-step guide, we will show you ‘how to download Cricut app on computer‘, whether you’re using Windows or Mac. Cricut Design Space is the essential software needed to design and connect to your Cricut machine. It allows users to create and personalize various projects, from greeting cards to home decor.
Although Cricut Design Space is also available for mobile users, many users still prefer the convenience and ease of working on a computer. It is also free to use, with additional features available through a paid subscription called Cricut Access.
Basic System Requirements for Using Cricut Design Space
Before downloading Cricut Design Space, ensure that your computer meets the system requirements.
Windows
- Windows 10 (version 1909 or later) or newer.
- 2GB RAM or more
- 2GB of available disk space
- Internet connection for downloading and using Design Space
Mac
- macOS 10.14 or later
- 2GB RAM or more
- 2GB of available disk space
- Internet connection for downloading Design Space
How to Download Cricut App on Computer?
In this section, you will learn how to download the Cricut app on Windows and Mac, with step-by-step instructions for downloading the appropriate version for your operating system.
So let’s get started!
For Windows
- First, open your web browser and go to the official Design Space download page: cricut.com/setup.
- After that,you will be asked to enter your machine model.
- Enter your machine model in the search box.
- On the page, you will see the option to download Cricut Design Space for Windows.
- Click on the “Download for Windows” button to initiate the download process.
![]()
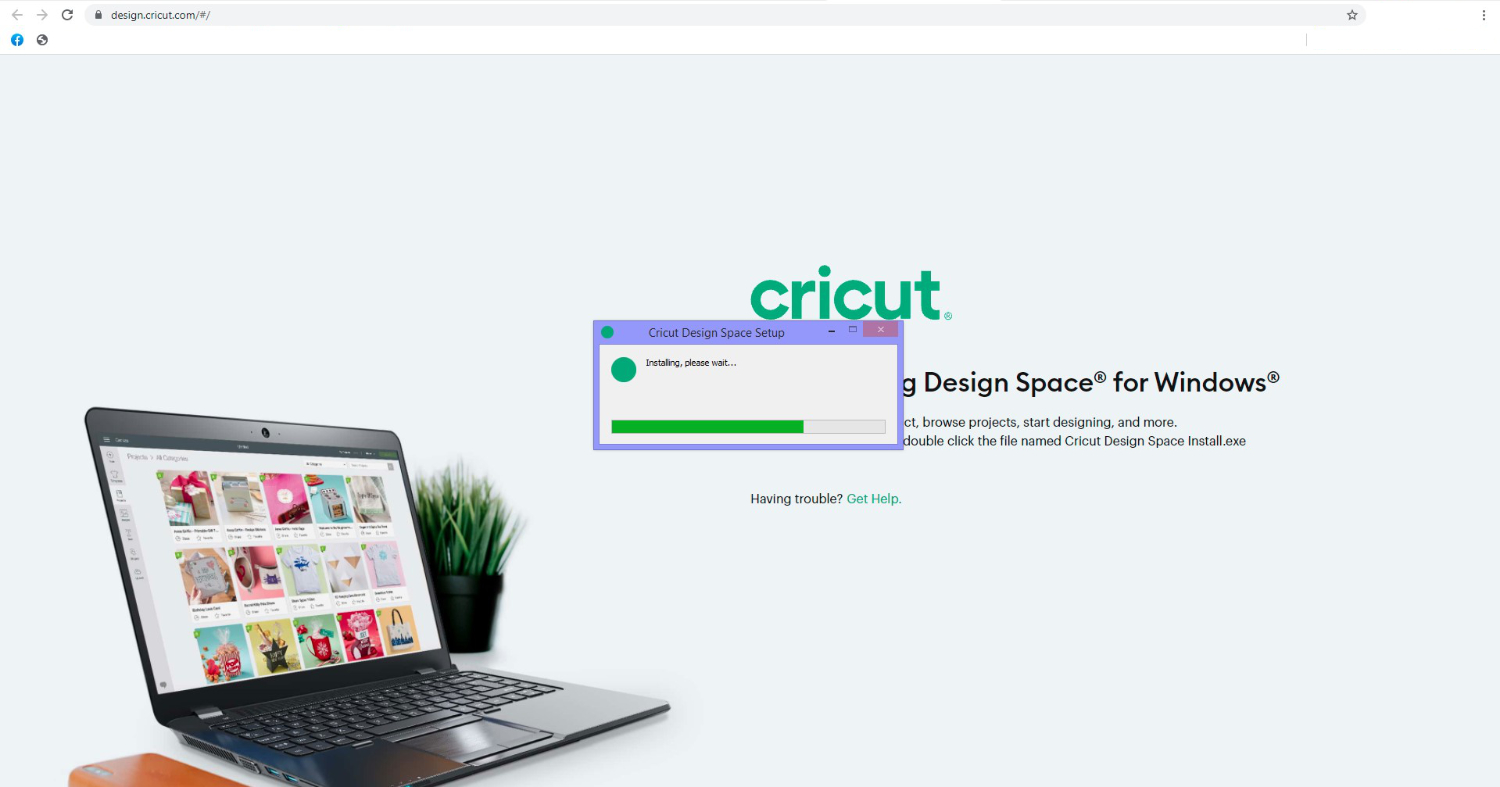
- The installer file will begin downloading.
![]()
- After downloading, double-click the file in your Downloads folder to open the installer.
- Follow the on-screen prompts to install Cricut Design Space. The process will only take a few minutes.
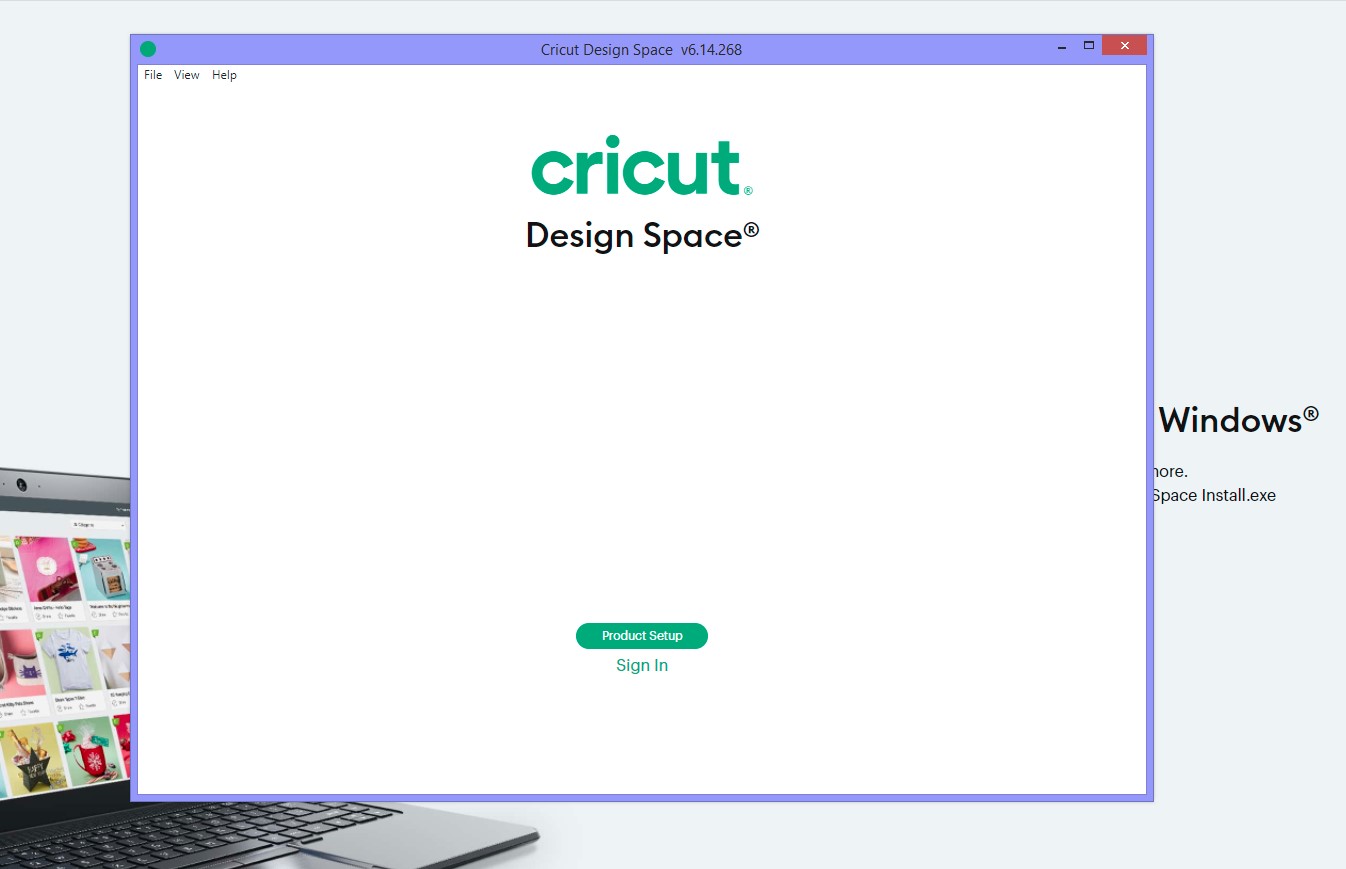
- After the installation is complete, open the software on your desktop.
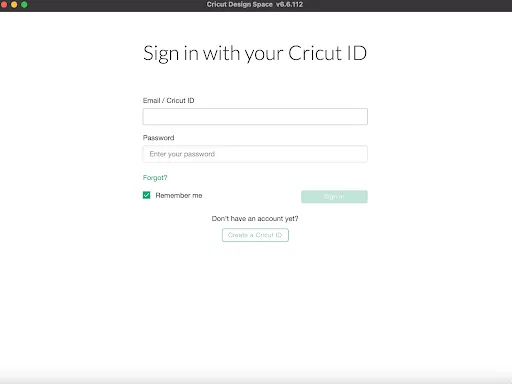
- Sign in with your Cricut account or create one if you don’t already have one.
![]()
- If you’re new to Cricut Design Space and haven’t created an account, choose ‘Create a Cricut ID.’
- You’ll be prompted to enter your first and last name, country, and email address.
- Fill out the form, ensuring all the information is correct before submission.
- Once you have successfully logged in, you can begin creating designs and cutting with your machine.
For Mac
- Go to the Design Space download page at https://cricut.com/setup/.
- On the page, you will see the option to download Design Space for macOS.
- Click on the “Download for Mac” button.
- Select the checkbox agreeing with the Privacy Policy’s terms and conditions.
- The installer file will begin downloading.
- Once the file has been downloaded, open the .dmg file.
- Drag the Cricut Design Space icon to your Applications folder to complete the installation.
- Open the Applications folder and double-click Design Space to launch the app.
- Once Design Space opens, log in using your Cricut ID or create a new account if you’re a new user.
- After logging in, you’ll be ready to start designing and cutting with Design Space on your Mac.
Set Up a Cricut Machine
After installing Design Space, it’s time to set up your machine and start designing!
- Ensure your machine is powered on and ready for connection.
- Go to the Menu and select Machine Setup.
- Choose your machine model from the list.
- Use a USB cable or Bluetooth to connect your machine to your computer.
- Design Space will ask you to perform a test cut to ensure your machine is properly calibrated and the blade works properly.
- Once your machine setup is finished, you can explore a variety of designs by creating them, choosing materials, and sending projects to your machine.
Troubleshooting Tips...
Read more -
How to Fix Cricut Calibration Not Working? (Easy Steps)
05/29/2025 at 11:29 • 0 commentsI still remember the panic in my chest when my Cricut Maker made that off-cut. I’d spent days designing custom stickers and cupcake toppers for my niece’s birthday party. I printed them on glossy vinyl sheets and loaded my crafting machine. Everything was going great until I hit “Print Then Cut.” Suddenly, the cuts were completely misaligned. Some shapes were misaligned, others were chopped in half. I knew something wasn’t right.
I thought, it’s time to calibrate. I went into Design Space, Settings, Calibration, and chose “Print Then Cut.” I followed every prompt exactly, printed the test sheet, and selected the best-aligned line.
It still didn’t work and failed repeatedly. Don’t worry, though, Learn “How to fix the Cricut calibration not working“. If you’re here because of this problem, you’re not alone, and you’re in the right place. Let’s fix it together and save yourself time!
What to Do When Cricut Calibration Isn’t Working
Calibration involves more than just following software steps; factors like paper type, lighting conditions, and printer settings significantly affect its accuracy. Here’s what many tutorials don’t tell you:
1. Use the Right Paper
Calibration sheets should be printed on matte white paper. Glossy paper reflects light and can confuse Cricut’s sensor, causing misreads.
2. Control the Lighting
Avoid overhead lights, direct sunlight, or shadows during calibration. Glare can cause your Cricut to misread the black lines on the test sheet. Use soft, indirect lighting, or try calibrating with controlled desk lighting at night.
3. Clean the Sensor
The little black sensor on your Cricut (located under the housing unit) can get dusty or smudged. Wipe it gently with a microfiber cloth before calibration.
4. Check Printer Settings
- Make sure you’re printing at the actual size or 100%.
- Avoid options like “Fit to Page,” as they shrink the image and throw off alignment.
- Using the same printer ensures consistent results.
5. Reboot and Retry
Sometimes, Design Space or your machine needs a clean slate. You can perform a hard reset by switching off your machine, unplugging it for a minute, and restarting your computer.
6. Try a Different Printer
If the issues persist, try printing the calibration sheet from a different printer. If it works, the problem may be with your primary printer.
How to Recalibrate Properly: Quick and Easy Steps
Let’s learn why Cricut calibration not working with the help of the following steps:
Open Settings on Cricut Design Space
Step 1: Open the Cricut Design Space software on your device.
Step 2: Ensure your machine is powered on and connected to your system with a USB or Bluetooth connection.
Step 3: Then, go to Menu and select Settings.
Step 4: Within Settings, choose “Machines” and then “Machine Calibration.”
Step 5: After that, choose your specific Cricut Machine Model.
Step 6: Select the appropriate calibration type (e.g., Print Then Cut, Knife Blade).
Step 7: Next, select “Print Then Cut” from the options.
Step 8: Cricut Design Space will guide you through printing a calibration sheet.
Place Sheet on Mat
Step 1: Place the printed sheet onto your StandardGrip (green) mat as instructed by Design Space (usually the top left corner, but it might be different for some machines).
Step 2: Follow the prompts in Cricut Design Space, including selecting your machine in the dropdown menu, loading the mat, and pressing “Go.”
Step 3: The Cricut machine begins by scanning the printed sheet for calibration markings, which are small squares printed on the...
Read more -
How to Change Blade in Cricut: A Complete Guide for Beginners
05/14/2025 at 11:28 • 0 commentsHow to change blade in Cricut with ease? This is one of the most frequently asked questions by numerous Cricut users. Don't worry; we have got you covered. The process is really simple! Open the clamp and insert your new blade. This guide provides step-by-step instructions covering the entire process of changing the blade.
Cricut machine blades need to be replaced because they wear down with use, especially when cutting thicker or tougher materials. If you're cutting with it quite often, you may need to adjust it every six weeks.
However, the exact time and frequency of blade changes depend on the machine's usage. If you use a different variety of materials every day, your blade is likely to be damaged faster than that of the casual crafter.
Note: Whether you have Explore, Maker, Joy Xtra, or Venture, the process of changing the blades is almost the same for all.
How Often Should You Change Your Cricut Blade?
I have listed down some of the tips that will help you remember when to change your blade:
- If you're cutting with the same blade regularly for more than two months while using more pressure, you'll likely experience mediocre results with your blade.
- Once you start facing difficulty while weeding your material, it's high time to change the blade.
- Once you've removed the old blade, avoid placing it back into the machine. In this case, the dull blade will ruin your cutting material, so it's necessary to replace the old one.
- If your blade is dragging while performing intricate cuts, then it's time to change your blade.
- The rotating blade, used for fabric and other soft materials, can get nicks, leading to skipped cuts and the need for replacement.
How to Clean Your Cricut Blade Before Replacement?
Before changing the blade, clean the existing one to see if it resolves the issue. To clean your blade, follow the instructions listed below:
- Crush a piece of aluminum foil into a ball.
- With the machine's housing, press the lever down about halfway.
- Dip your blade into vinegar and press it into the foil ball 20-30 times. This will help dislodge any debris or residue from the blade.
- After cleaning, carefully inspect the blade for any signs of damage, such as small bends, nicks, or chips. If you see such things, it's time to replace it with a new Cricut blade.
But if everything goes well, perform a test cut to check the sharpness of the blade.
Important: Exercise caution when cleaning or changing the blades to prevent injury, as they are sharp enough to cause harm.
Changing Deep Cut, Bonded Fabric, & Fine-Point Blades in Cricut
Please note that deep-cut, bonded fabric, and fine-point blades all utilize the same housing.
If you want to save some dollars, simply buy the new blades and swap them while cutting for different materials, because buying the whole blade housing will cost you five times more than buying just the blade.
Therefore, you should not touch your housing unless it has severe damage, as it is designed to last the lifetime of the machine.
Now it's time to learn how to change blade in Cricut easily.
Step 1: Locate Clamp B on your Maker/ Explore machine and open it. If you're using an older model, you need to unscrew the arms that hold the machine in place.
![]()
Step 2: Gently remove the blade housing from the machine.
![]()
Step 3: Push the plunger on top of the housing and carefully pull out the old blade. You can also use your tweezers or nose pliers to grab the end of the blade.
![]()
Step 4: Take the new blade from its packaging and remove the protective cover.
Step 5: Grab the end of your new blade with the pliers and depress the plunger on the blade housing again.
Step 6: Insert the new blade into the housing so that the sharp side of the blade is facing outward.
Step 7: The magnet in the housing will hold the new blade in place.
Step 8: Release the plunger, and you're ready to try out your new blade.
Step 9: Place the blade housing back into Clamp B and close...
Read more -
How to Connect Cricut to iPhone? (Complete Tutorial)
05/05/2025 at 12:05 • 0 commentsThis is one of the frequent questions asked by Cricut users with iOS software on their respective devices. In the following section of this blog, you will definitely find out ‘how to connect Cricut to iPhone‘. You will also learn about the reasons for any connectivity issues and the solutions to resolve them.
If you have a Cricut machine, you need a device to process your cuts or designs. Cricut allows you to connect your machine to any device. It is user-friendly, which enables users to experience ease when creating professional or personalized crafts.
Before you dive into the complete guide to connecting your machine to your iPhone, you must know what supplies you will require to download or install Cricut Design Space and how many ways you can connect the machine.
System Requirements to Download Design Space
To download and use the Cricut Design Space app on your iPhone, your device must meet the following requirements:
- Operating System: The Design Space app requires iOS 15.0 or later.
- Software Update: Ensure your iPhone is updated to the latest compatible version of iOS to avoid issues with the app.
- App Store: It is available for both iPad and iPhone. You can download the app from the App Store.
Download Cricut Design Space on Your iPhone
Before you connect your machine to your iPhone, you need to install the Cricut Design Space app. This app contains various tools, images, text, and ready-to-use projects that can easily run on an iOS system. Let’s begin with the installation process.
- First, you need to open the App Store on your iOS device.
- After that, type the Cricut Design Space app in the search bar.
- Click Get, and install the app on your device.
- If prompted, verify the download using the iTunes password.
- Now, just wait for a while till the installation gets completed.
- Once it is successfully installed, the app will appear on your display.
- Click on it to open it.
- Now, you will be presented with the Cricut Machine Setup option.
- You can choose any of them by simply tapping on the X icon.
- Open the Design Space app and then sign in with your credentials.
- Now, you can begin creating new designs on the app.
Once you have successfully installed the Design Space app, you can connect your mobile device to your crafting machine via Bluetooth or a USB cable.
How to Connect Cricut to iPhone: Simple Steps
You can choose either of the following methods to connect your iPhone via Bluetooth or a USB cable.
Method 1: Through Bluetooth
If you want to connect your iPhone via Bluetooth, follow these steps:
- In the beginning, go to the Settings icon.
- After that, you have to turn on Bluetooth.
- Please wait for a while and let it search for nearby devices.
- Within a short time, you’ll see the name of your machine model in the list.
- Click on the Cricut machine model that shows up on your screen.
- Your machine will automatically connect to your iPhone.
Method 2: Using a USB Cable
If you wish to connect your iPhone to the machine using a USB cable, check out the following steps:
- Power on your machine to start the connection process.
- You’ll have a USB cable, along with your cutting machine.
- Now, connect one end of the cable to your iPhone and the other end to the machine.
- Then, you have to return to the Cricut Design Space app and go to New Product setup during the connecting process.
- Your machine will display as connected throughout the setup process.
Congratulations! You have successfully connected your Cricut machine to your iPhone.
What to Do If You Can’t Connect Your iPhone to Cricut?
If you encounter any issues pairing your machine, we have explained the errors...
Read more -
How to Connect Cricut via Bluetooth? (Full Guide!)
03/17/2025 at 12:17 • 0 commentsLearn ‘how to connect Cricut via Bluetooth’. In order to setup any Cricut machine on your phone or computer, laptop it is essential to connect the device to your machine. You can choose either a phone or a computer for this. If you have a desktop, it must be either a Windows or Mac. An Android or iOS device is required for mobile devices. Once you have one of these things, you can connect it to your machine with Bluetooth. After successfully connecting, you can proceed with the rest of the setup and start working on your projects. So, without any further delay, let’s start with the connection process.
How to Connect Cricut via Bluetooth on Mac System?
A Mac computer is an excellent computer for using the Design Space app on it. The computer is compatible with the app, and you can easily download it. You just have to make sure that you are using a macOS 11 or later version of the operating system on your computer. These are the steps for downloading the app on your MacBook.
- First, turn on your computer. To do so, connect it to an electric socket with the help of a power adapter, and after that, press and hold the power key.
- Keep in mind that the distance between the computer and your machine should be less than 10-15 feet.
- Now, open the Apple menu on the computer and go to the System preferences.
![]()
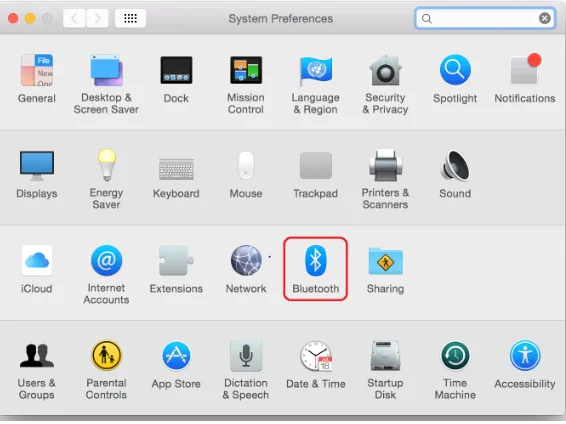
- After that, you have to go to Bluetooth settings and turn it on.
![]()
- Once you turn on Bluetooth on your computer, you will see that all the devices that are available to be connected to your computer appear on the list. You have to click on your machine, and you will be able to connect them.
- Now, the connection between your machine and the computer has been established.
- To confirm the connectivity on your computer, go to the app and open New Product Setup. You will see there that they are connected.
How to Connect Cricut via Bluetooth on a Windows?
A Windows commuter is equally good to use with a crafting machine. To work on a Windows PC, you need to connect it to a machine with the help of Bluetooth. Below are the steps to follow:
- Turn on the machine and keep it closer to your computer, within 10-15 feet.
- Then, open the Start menu on the computer, go to Settings, and click the Devices option.
![]()
![]()
- Next, open the Bluetooth on the computer and turn it on.
- After that, click on Add Bluetooth or other device.
![]()
- Now, choose the Bluetooth option and wait until the computer detects the machine.
- Upon seeing the machine, you have to click on it, and it will connect.
- Once you connect the machine, you can make sure of it by going to the Design Space app.
How to Connect Cricut via Bluetooth on an Android Device?
Instead of a computer, a phone can also be a good option for connecting it to a crafting machine. To connect your Android device to a machine, you have to follow these steps:
- Start by powering the machine and keeping it within 10-14 feet.
- Then, go to your phone’s Settings and then open Bluetooth.
- If the Bluetooth on the phone is off, you will have to turn it on.
- Once you turn on the Bluetooth, you have to search for the machine, and you will have to tap on it upon seeing that.
- Very soon, the phone will connect to your machine via Bluetooth.
- In the last step, you can continue with the steps to set up your machine on an Android phone.
How to Connect Cricut via Bluetooth on iPhone?
An iPhone is also good for working on a machine. You can connect the phone to your machine via Bluetooth and make projects however you want. The steps you have to follow for that are in the section below:
- Just like you with any other device, start by giving the machine a power supply so that you can turn it on by pressing the power button.
- Once the machine is on, it is going to connect to your phone.
- Now, go to your phone’s settings and turn on Bluetooth.
![]()
- Then, search for your machine, and you will see it appear on your screen.
- When it appears, you need to tap on it, and it will...
-
How to Use Cricut Explore Air 2: Create DIY Projects at Home
02/24/2025 at 15:26 • 0 commentsAre you excited to express your creativity with the Cricut Explore Air 2 machine? This flexible cutting machine can make your crafting dreams come true. It cuts over 100+ various materials, like paper, cardboard, vinyl, and even leather.
Whether you’re a pro crafter or a beginner, this machine is perfect for bringing your ideas to life. This stepwise guide will walk you through ‘how to use Cricut Explore Air 2‘, download the Design Space app, and create your first project.
So, get ready to venture on a crafting adventure and discover the joy of DIY projects. Let’s dive in and explore the world of Cricut!
Downloading Cricut Design Space on Your Computer
The first thing to use the machine is to download the Cricut Design Space software. To download it, navigate to design.cricut.com from your Windows or Mac. If you already have a Cricut account, log in to the app after downloading it.
![Cricut Design Space software for windows]()
If you want to download the software on your mobile device, either Android or iPhone, go to their Play Store/App Store and look for the app in the search bar. It will be a square icon with Cricut written at the center.
NOTE: You must have an account beforehand to use the app. If you don’t have one, you should create one on the sign-up page. Also, you don’t need a Bluetooth adapter to use the machine, as it comes with built-in Bluetooth. The earlier Explore series, such as the Explore One, required a Bluetooth adapter.
Connecting Cricut Machine to Your Computer With USB
Although you can use your machine wirelessly, let’s examine how to use it through USB.
Step 1: First, place it on a clean and flat surface with 10-15 inches of space behind and front to let the cutting machine move freely.
Step 2: After that, you must plug in your Explore cutting machine.
Step 3: And then attach the USB cable and power adapter.
Step 4: Next, you need to turn on your Explore machine and your computer.
Step 5: Open the Cricut Design Space software discussed in the previous section and log in using your credentials.
Step 6: Within the app, select the Menu icon visible at the top and choose New Machine Setup. This will guide you through the installation, the first project you will make, and a greeting card.
Now, you are almost ready to use the machine. The next section will examine how to make a project on your machine. So, let’s get into that.
How to Use Cricut Explore Air 2: Creating Your First Project
Now, let us walk through a project that can be made with the materials that came with the box of your machine. If this is your first project, don’t worry—it will be easy!
Step 1: From the “Cricut New Machine Setup,” you will see a design on your screen. If you don’t find it, head over to cricut.com/setup. Then, find the Menu on the top side and click “New Machine Setup.”
Step 2: Prepare all the materials that came with the machine, such as cardstock, mat, paper, and pen. Remove the plastic film from your machine and keep it aside for future use.
Step 3: Afterward, you need to load the cardstock on the machine mat. The textured side should be facing up and lined up on the machine mat vertically. Make sure to line it up on the upper side, right below the Cricut logo.
Step 4: In the next step, you must insert your cutting mat into your Explore machine. Ensure that you load the machine mat as per the guidelines. You also need to take care that it is pressed against the roller while you press the “load/unload” buttons, which are located at the top of your cutting machine. The icon looks like a set of double arrows.
![how to use Cricut Explore Air 2]()
Step 5: Now, you need to insert the pen in clamp A. To do that, you need to remove the cap and place it tip-down until the arrow on the...
Read more -
How to Connect Cricut Explore Air 2 Bluetooth to Computer?
09/02/2024 at 12:46 • 0 commentsIn this post, I will explain how to connect Cricut Explore Air 2 Bluetooth. Whether you are a Windows or Mac user, this blog will help you connect your machine and device easily.
When I got my crafting machine for the first time, I was a little overwhelmed, as I didn’t know how to connect it to my computer. But one of my friends, John, who is a professional crafter, helped me with this. Since then, I have been setting up my machine without anyone’s support. Now, I want to help you in the same way, as this is a beginner-friendly blog specially curated for novice crafters.
In this blog, I will explain how to connect your machine to the computer of your choice. Before that, I will also explain the system requirements for both Windows and Mac. Let’s start!
System Requirements for Connecting Cricut to Your Computer
Before you learn how to connect Cricut Explore Air 2 Bluetooth, you must review the system specs. This is very important before you set up your machine.
For Windows
- Supported Operating System: macOS 11 or later
- Display Resolution: 1024px x 768px
- Internet: Minimum 2 - 3 Mbps Download & 1 - 2 Mbps Upload
- RAM: 4 GB
- CPU: 1.83 GHz
- Hard Disk Space: 2 GB required at least
- Connection Type: wireless Bluetooth or wired USB
- Offline Feature: Yes, it is available for Mac
For macOS
- Supported Operating System: macOS 11 or later
- CPU: 1.83 GHz
- Hard Disk Space: 2 GB required at least
- RAM: 4 GB
- Internet: Minimum 2 - 3 Mbps Download & 1 - 2 Mbps Upload
- Offline Feature: Available for Mac
- Connection Type: wireless Bluetooth or wired USB
- Display Resolution: 1024px x 768px
How to Connect Cricut Explore Air 2 Bluetooth to Windows?
I will show you how to establish a connection between your machine and Windows PC. Although the following steps can be used for another Cricut model, here I am specifically explaining it for the Explore model. Let’s take a look at the below steps:
- Ensure you have placed your machine at a distance of 10 to 15 feet from your computer.
- After that, open the Settings.
![]()
- To open settings, click on the Windows logo icon located in the taskbar and search for Settings app.
- On the settings window, head to the Devices option.
![]()
- Next, confirm whether the Bluetooth is on.
- Now, select Add Bluetooth or other device.
![]()
- By clicking on the above option, you will see the next pop-up screen.
- On the pop-up screen, select the Bluetooth option.
- Then, wait for a moment and see if your PC detects any nearby machine.
- After some time, you will see that your PC detects your machine and confirms that it is your machine model.
- If you found your model, select the machine from the given list of detected devices.
- Afterward, your machine is now connected to your Windows PC.
How to Connect Cricut Explore Air 2 Bluetooth to MacBook?
On a MacBook, you can connect the machine using Bluetooth wirelessly. After this connection, you can set up your machine with your Mac and start using it. Let’s have a look at the following steps to connect:
- Ensure the proper gap between your machine and computer.
- Then, turn these devices on.
- Once done, you will need to go to the Apple menu.
- After that, select the System Preferences.
![]()
- Next, you have to select your Bluetooth app from the System Preferences.
- Now, you need to turn on the Bluetooth.
- Afterward, wait for a moment and see if your Mac detects your machine.
- Once detected, you will need to tap the Pair button to connect it.
- Finally, your crafting machine is paired now.
Final Words
In this blog, I have explained how to connect Cricut Explore Air 2 Bluetooth on Windows PC and Mac. Following the above methods will help you connect your machine easily to your system via Bluetooth. Although I could connect my machine via a USB cable, I prefer a wireless connection. With a wireless connection, you don’t need to manage those tedious wires or cords.
FAQs
Question 1: Why is Cricut Explore Air 2 not connecting...
Read more -
8 Unique Cricut Gift Ideas: Perfect Projects for Any Occasion
07/22/2024 at 12:59 • 0 commentsAre you looking for some unique Cricut gift ideas? If so, you are in the right place! Here are the best projects you must try to gift someone on their special occasion. These gifts are handmade creations that I created using my smart Cricut machines. Since I have won all the Cricut cutting machines, I have used different types of tools at my convenience. However, you can use a machine you already have.
Being a professional Cricut crafter, I have to make many projects with my Cricut machine to show the theme to my online buddies like you. In this blog, I have covered all the gift ideas you must try once if you are a beginner and just getting started. Without any further ado, let’s get started now!
1. Spice Jars
![]()
Does anyone in your family love cooking? This is going to be one of the best Cricut gift ideas. These glass-made jars with labels and text can make it easier for them to find suitable ingredients. They can significantly help them by saving them time finding a particular spice as soon as possible. Now, personalize all the jars using your Cricut machine and Cricut Design Space, where you can choose a different font style to make them look more attractive.
2. Makeup Bag
![]()
There are different ways to create a personalized cosmetic bag, and they are the perfect Cricut gift ideas for anyone who is into beauty and wellness. However, I made this customized bag at my sister’s request. She wanted it for her use as she is a makeup artist and has to carry many makeup-related items. Also, you can use iron-on material with any blank you sewed for or bought from the market. Don’t forget to add the texts that remind them of you.
3. Doormat
![]()
Want to make something for your sweet home? Here is the doormat that I believe is one of the fantastic Cricut gift ideas you must try this year. Since I have made one for myself and one of my best friends, Julie, I made this using my Cricut Maker machine. I was looking for something like this, which I couldn’t find on the market, so I decided to make one myself using my Cricut machine.
4. Flower Mug
![]()
Do you want to add flower magic to your simple mug? You can use your Cricut machine to do it. It is easier than you think and looks beautiful. Not only this, but you can also add the name or initial to make the ultimate Cricut gift ideas. I used permanent vinyl to add these flowers to my mug. Doesn’t it look so beautiful? I found it excellent; give it a shot now!
5. Fox Pillow
![]()
Here is one of the standard pillows I gifted to my cousin’s sister. She loved it when she received it. I used my trusty Cricut Maker machine to make this effective way to bring personality and some adorable decorations you have never seen before. So, what are you waiting for? Give it a shot now!
6. Sleep Mask and Slippers
![]()
Thanks, Cricut—it helped me decide on the best Cricut gift ideas, which were not easy to find in a shop. With Cricut, we can create our design and add it to our daily used stuff like sleep masks and slippers. The text-based design is the easiest beginner can easily create on Cricut software. All they need to do is use the Cricut Design Space app and add the texts using the font style of their own choice.
7. Coffee Mug
![]()
I gifted this mug to my dad last week. It was neither his birthday nor any special occasion; I just wanted to make him feel special by expressing my gratitude. All credit goes to Cricut, and I used beautiful fonts from Cricut Design Space. Making it was really fun, as most of the Cricut software resources are free.
FAQs
Question 1: What birthday Cricut gift ideas can I try?
Answer: If you are looking for Cricut birthday gift ideas, then you should try the following ideas that I have made myself:
- Personalized baking set
- Handprint craft
- Shrink dink wine charms
- Initial leather keychains
- Rainbow glitter tumblers
- Personalized Stationery
- Mom’s shirt with kids’ names
- Mom keychain
- Personalized...
-
How to Connect Cricut to MacBook: A Complete Guide
04/20/2024 at 10:47 • 0 commentsDo you want to connect your Cricut machine to your MacBook? If yes, then this blog will help you understand the connection between Cricut and Macbook. It’s not only about you; almost everyone who is starting with a Cricut machine finds the setup procedure difficult. Therefore, be with me and learn how to connect Cricut to MacBook here.
Before that, you need to understand that Cricut Design Space is an intuitive Cricut software that you need to set up on your device to connect your Cricut product. To get this software, you need to download and install it on your device. Then, you will be ready to set up your Cricut machine for a MacBook.
What Do You Need to Get Started?
To get started with the Cricut connection to MacBook, you need to keep a few things in mind. Look at the steps below to learn the necessary requirements.
- Your macOS version should be the latest, macOS 11 or later.
- Your device should have USB or Bluetooth connectivity.
- Ensure that your PC has a RAM of 4GB and 2GB free disk space.
- Also, ensure that your screen display is at least 1024 x 768.
- You should have an internet connection.
Now, you are ready to start the Cricut setup on your MacBook. Let’s check the steps.
How to Connect Cricut to MacBook?
As you know, Cricut machines are compatible with Windows and Mac computers; you can set it up easily on any of your devices. Here, you’ll learn how to connect it to a Mac device. Look at the steps below.
Step 1: Connect Cricut to a MacBook via Bluetooth
Your first step should be to connect your Cricut to a MacBook using a suitable method. I’m choosing the Bluetooth connection method, which is the best wireless connection.
- Initially, turn on your Cricut machine and connect it to the power outlet.
- Then, hit the power button to make it ready for pairing.
- After that, ensure that your Cricut and MacBook are 10-15 feet apart from each other.
- Now, head to the Apple menu and select the System Preferences option.
![System Preferences]()
- In the following step, search for the Bluetooth option on that page.
![How to setup my Cricut Maker]()
- When you see the Bluetooth option, turn it on.
- Next, pick your Cricut model from the list of available options.
- Enter “0000” if the screen asks you to enter a PIN.
- In the last step, select the Pair option to start the pairing process.
Finally, your pairing process will be finished. You have learned one step towards how to connect Cricut to MacBook.
Step 2: Download Cricut Design Space
In the second step of connecting Cricut to a MacBook, you need to download and install the Cricut Design app on your device. Look at the steps given below to install the Cricut software.
- To start, navigate to Cricut’s official website on an internet browser.
- Then, search for the Cricut Design Space and hit the Download button when you see it.
![Downloading Cricut Design Space App]()
- Also, agree to the terms and conditions and the privacy policy before going ahead.
- After that, let the download process start, and you may notice slight changes on the screen.
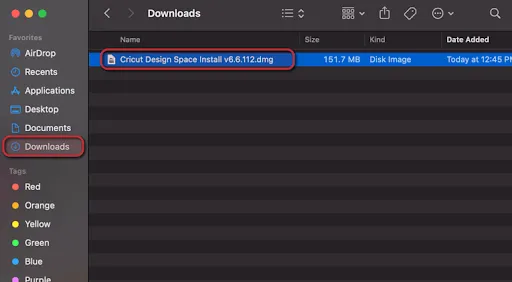
- Let the software download, and once the download is over, search the folder in the Downloads folder.
![Download & Install Cricut Design Space App on Windows & Mac]()
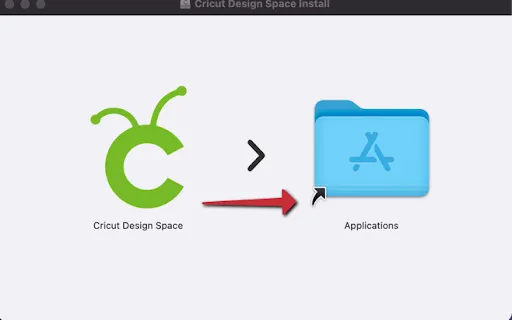
- To start the installation, drag your .dmg file to your Applications folder.
![Download & Install Cricut Design Spaxe]()
- By doing this, you will add your Cricut Design app under the Applications folder with an icon.
- Now, open your app and sign in to your Cricut account.
![Sign in to Cricut App]()
- Next, if you are a first-time user, create a new Cricut ID.
Finally, you have learned how to install Cricut Design Space and how to connect Cricut to MacBook. Now, you can start project-making with your amazing Cricut machine.
FAQs
How Do I Setup Cricut Machine on My Phone?
To set up a Cricut product on a phone, follow these steps.
- Initially, head to the Play Store/App Store on your...
-
How to Connect Cricut to MacBook: A Step-by-Step Guide
04/06/2024 at 11:05 • 0 commentsGetting started with a brand-new Cricut machine can be overwhelming, especially for beginners. So, I’m here to help you with its connection. Take a deep breath, and let me teach you how to connect Cricut to MacBook. It’s going to be interesting, and after reading this blog, you won’t need anyone’s help to set up a connection between your devices.
As a MacBook user, you may often find yourself in trouble due to different connection and setup methods, but not anymore! In this guide, I will explain the steps, particularly for MacBook users, to help them out with a Cricut connection. Here we go!
What Is a Cricut Design Space?
It’s the key to a Cricut machine’s setup. If you’re an existing user, you might know about it. But, if you don’t, I’ll tell you here. Basically, it is a design software by Cricut. This software has many features that allow you to design anything. For instance, you can use different fonts, designs, templates, etc, to design your project.
To get started with the Cricut Design app, you’ll need to download and install it. I’ll share with you the procedure to get this versatile software on your Mac system. Well, you can get this software on any device, but as this guide emphasizes the Mac system, you can only learn about Mac. After installing this design software, you can connect Cricut to MacBook.
How to Download Cricut Design Space on MacBook?
You know how important it is to download and install the Cricut software on your MacBook system. Check the steps below to learn how to install it on your Mac.
- Navigate to design.cricut.com on an internet browser.
- Now, accept the Cricut Terms and Conditions and Privacy Policy to proceed.
- Then, hit the Download option to get the app.
- After that, select a location to save your Cricut software file.
- Next, let the download process start and end.
- Once the download is complete, head to the Downloads location.
- In the next step, you’ll get an icon for Cricut Design Space.
- Then, drag that icon to the Applications folder to start the installation.
- Next, your Cricut Design Space will be added under the Applications folder.
- Thereafter, move to that folder and launch your application.
- To open the app, you may need to select an option, select the Open option.
- Now, sign in or log in to your Cricut ID and password.
- Finally, you can enjoy your Cricut software and create projects.
That’s it for installing the Cricut account on your MacBook. If you’re a new user, create a new Cricut account and then sign in to your Cricut account.
Connect Cricut to MacBook: 2 Different Methods
Here, all your questions will be answered. I’ll tell you all the steps involved in connecting a Cricut machine to a MacBook.
Method 1: With a USB Cable
If you want a wired connection, you can choose a USB connection. As this connection method is conventional, you can use it to connect your devices when your device doesn’t support a Bluetooth connection. Let’s see the steps below to learn how to connect Cricut to computer with USB.
- In the first step, connect your USB cable to your Mac’s USB port.
- Now, connect another end to the Cricut machine.
- After that, power on both devices by connecting them with a power supply.
- Next, when your devices are ON, you’ll see the lights blinking.
- Finally, you’ll see that your devices are connected to a USB.
That’s it to connect Cricut to MacBook via USB connection. If you don’t want to use a USB connection, go for a wireless connection like Bluetooth.
Method 2: Via a Bluetooth Connection
If you want to go for a wireless connection, you can select the Bluetooth option. Let’s see the steps here to learn how to connect Cricut to MacBook via Bluetooth.
- To start, power on your Cricut machine and then...
-
Cricut Explore Air 2 Wireless Setup on a Computer and Mobile
03/21/2024 at 11:13 • 0 commentsHey, are you looking for a guide to setting up your Cricut machine? However, Cricut already has plenty of models in its lineup. So, which Cricut machine am I talking about?Well, this is going to be all about the Cricut Explore Air 2 wireless setup. The setup will be done wirelessly using Bluetooth. Since a Bluetooth connection might be a little tricky for beginners, I will show you how to connect your Cricut Explore Air 2 to Windows or Mac wirelessly via Bluetooth.
I have done it for many Cricut machines, such as Cricut Maker, Explore, and Joy. But today, I am setting up my friend’s machine. She wanted to enter the world of crafting, so she had to do it herself, but for some reason, she could not do so. I took this chance to explain to you all the steps of setting up the machine. Let’s start!
How to Connect Cricut Explore Air 2 via Bluetooth to Computer?
Let’s establish the connection here! Connection is very important for our Cricut Explore Air 2 wireless setup. The wireless connection will be a breeze with the following steps:
Windows
- You should first place the Cricut machine within 10 to 15 feet of your computer.
- Then, you will need to move to the Start menu > Settings (Gear icon).
- After that, you need to go to the Devices option.
- Now, turn on Bluetooth and hit Add Bluetooth or other device.
- Next, select Bluetooth and wait until it shows your Cricut model.
- Also, select the machine from the available list.
- Here, your machine will be paired.
- You can also start setting up your machine.
Mac
- The first step is the same as for the Windows computer.
- Navigate to your Apple menu and select System Preferences.
- Now, you have to find the Bluetooth option.
- Verify whether the Bluetooth is turned on.
- Then, let your Mac find your Cricut machine.
- Select the machine model found by your Mac and begin pairing.
- Finally, you have paired your machine successfully.
iOS
- Again, the first step is the same as that for Mac or Windows.
- Now, go to the Settings and turn on the Bluetooth.
- Now, choose your Cricut model from the list.
- Now, you have paired your Cricut Explore machine with your iOS device (iPhone or iPad).
Android
- Once you have placed your machine at a recommended distance, you need to go to Settings.
- Now, you have to turn your Bluetooth on.
- Then, select your machine model from the available list.
- Here, it is paired now.
Cricut Explore Air 2 Wireless Setup on a Computer
Below, I will share the methods for wirelessly setting up your Cricut machine. The following steps will be helpful for both Mac and Windows users.
- To setup your machine, you have to visit cricut.com/setup on any browser that you use.
- Then, proceed to the next page and click on the check box to download the Cricut Design app.
- However, everything will be shown on the screen; you just have to follow the prompts to set it up.
- Next, you will be required to register your machine using sign-in with your Cricut ID.
- Afterward, choose the machine on the upcoming screen.
- Now, you have to plug your machine into your computer using your power cord.
- You can skip to the next step since you have already connected via Bluetooth.
- Also, your Design Space will be updated; wait and let it update.
- Once it is updated, you have to register your machine by entering the details. You should also try the free Cricut Access Membership trial.
- Finally, you have to follow the prompts to perform a test cut or complete your first project.
Cricut Explore Air 2 Wireless Setup on a Mobile
Many users want to use their mobile phones to operate or setup the Cricut machine. Don’t worry; I’ve got you covered below! Below, I have explained how to setup Cricut Explore Air 2 for mobile devices, suitable for both iOS and Android...
Read more -
How to Use Design Space for Cricut: Beginner’s Guide
02/29/2024 at 11:35 • 0 commentsMy daughter loves reading, and I appreciate her hobby as it helps her collect information. To honor her hobby, I will give her a customized bookmark that I made. It will be a symbol of love and appreciation for taking her hobby so seriously and still valuing it. I have created numerous DIY crafts for a long time, and this blog will teach you all how to use Design Space for Cricut.
Cricut Design Space is an easy-to-use and easy-to-learn design software that allows crafters to give their ideas the proper form. The Cricut app provides tons of images, text fonts, and ready-to-use projects for free. Besides, this software is compatible with all the Cricut cutting machines & Heat Presses.
If you have recently downloaded the Cricut app and want to make your first project, check out the information in the section below.
Step 1: Create a Bookmark Design on the Cricut App
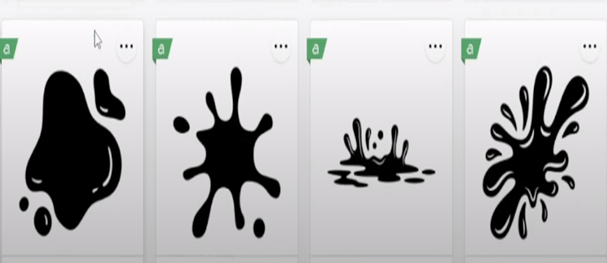
Let’s start the process of how to use Design Space for Cricut by making a customized bookmark by going to the Shapes tool and choosing a square. After selecting the shape, change its dimensions, and it will get into a proper bookmark shape. Next, press the Images and type Splash inside the search section, and a gallery of those designs will appear. Select any design from the library and tick the Add to Canvas option.
![Cricut Design Space download]()
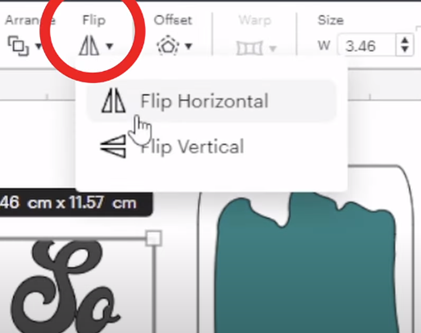
Now, resize the design and place it on the bookmark design. After that, press the Text option and write the text inside the box. Then, change the text size, color, font, and style and set it inside the bookmark. To cover the gap between the letters and words, select Weld and place them closer to each other. After covering up the spaces, go to the Flip tool and tick the Flip Horizontal option.
![Cricut Design Space]()
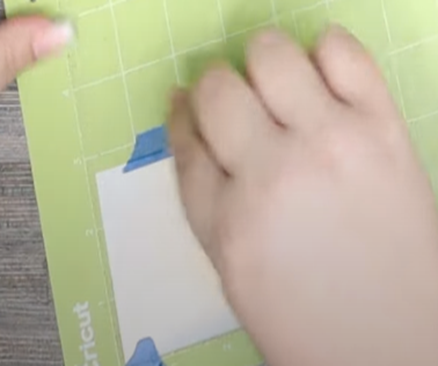
Step 2: Stick the Material on Your Cricut Cutting Mat
In this step of how to use Design Space for Cricut, remove the plastic cover from the vinyl and place the material on the cutting mat. Cover all the sides of the material with painter’s tape so that the material doesn’t slip from its place.
![Cricut Design Space]()
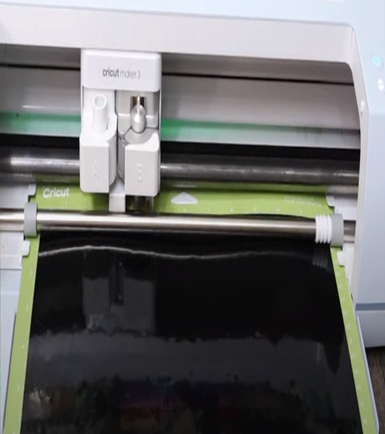
Afterward, move your Cricut Brayer tool upward and downward to settle the material in its place. Now, turn on your crafting machine and load your Cricut cutting mat into the cut-die machine. When the cutting process is complete, stick HTV on the same mat and turn on the Cricut machine again.
![makeing designs]()
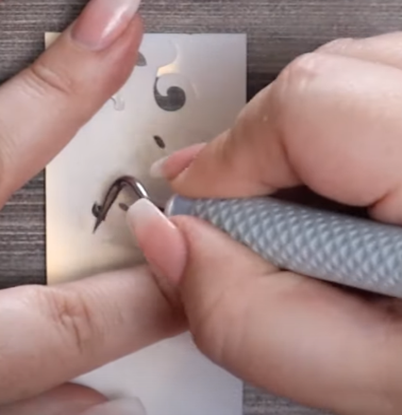
After cutting the material, take your weeding tool and remove extra vinyl from the Cricut mat. Following this, slowly weed out the HTV from the design using the weeding tool and keep the final design at the other end of the table.
![Cricut Design Space app]()
Step 3: Preheat Your Cricut EasyPress Mini Tool
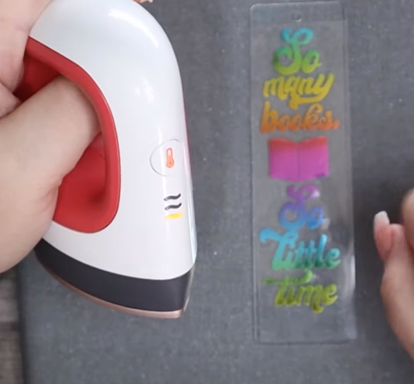
In learning how to use Design Space for Cricut, remove the sheet from the acrylic blank and clean it with baby wipes. After doing that, place your bookmark design on the blank. Now, preheat your EasyPress Mini at the lowest temperature settings.
![]()
After that, cover the entire bookmark with a Teflon sheet and slowly cover the craft by putting a little pressure on it. If you come across that the design needs to be adequately shifted on the blank, then wait for a few seconds and use EasyPress Mini again for perfect heat transfer.
![Cricut Design Space]()
Step 4: Show Your Final Bookmark
After transferring the design, follow these steps to complete the project:
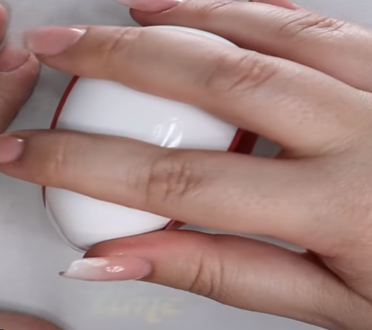
- Let it cool down for a few minutes, and then slowly remove the sheet from the blank.
- Remove the material from your vinyl and place it on the backside of your bookmark.
- Take a scraper tool and properly stick the vinyl on the blank without any of the bubbles remaining on the blank.
![How to Use Design Space on Cricut]()
Finally, you can share your DIY craft after collecting and learning how to use Design Space for Cricut crafts.
![How to Use Design Space for Cricut]()
Following the same steps, you can make other personalized acrylic projects from the Cricut app. However, you must take the correct steps while making any do-it-yourself project...
Read more -
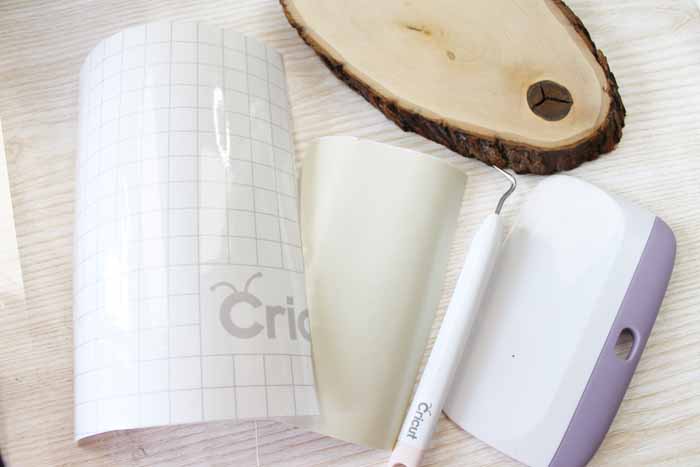
How to Use Transfer Tape With Cricut: A Beginner’s Guide
02/22/2024 at 13:10 • 0 commentsI’m glad you are here to learn how to use transfer tape with Cricut. Using transfer tape for your regular Cricut projects is very simple. I will cover a real project that I made using transfer tape. This accessory is as important as any other Cricut supply. However, if you haven’t used transfer tape before, I’ll ensure that you understand everything about it.
![]()
When I first started, I was a newbie, too. But, gradually, I came to understand all the important accessories and tools of Cricut. One thing that most crafters face is that they often get confused about which transfer tape to use. If you are one of them, don’t worry – I will explain it to you too.
What Is a Transfer Tape?
Before learning how to use transfer tape with Cricut, you need to understand what it is. A transfer tape is a strong grip tape to transfer iron-on vinyl onto the material. It holds the vinyl and then smoothly transfers it to the desired material. Generally, there are two types- Regular and Strong Grip transfer tape.
The regular transfer tape is great for general projects, whereas the strong grip tape will be useful for glitter vinyl, where you need extra effort to pull off the tape. So, if you are using a strong iron-on vinyl, you should use a strong grip transfer tape.
Where Do I Get Transfer Tape From?
Well, I use Cricut’s brand for all my craft needs. Cricut’s things suit my projects, and it has become my all-time favorite stuff to use now. But it’s all about someone’s choices. So, if you find some other brand good, go for it. Try different types of brands until you find your perfect one. I have been using Cricut’s transfer tape from the start, so I have never gone to other brands.
How to Use Transfer Tape With Cricut?
To get started with the transfer tape, you need to make a cut with your adhesive vinyl with your Cricut machine. I often use my Cricut Explore Air 2; you can use other Cricut machines, too. As you are a Cricut user, you know how to cut vinyl with your Cricut machine.
Once you cut your vinyl, weed out the excess of vinyl from the final design. So, when you get the design you need, it’s time to apply the transfer tape using my easy steps.
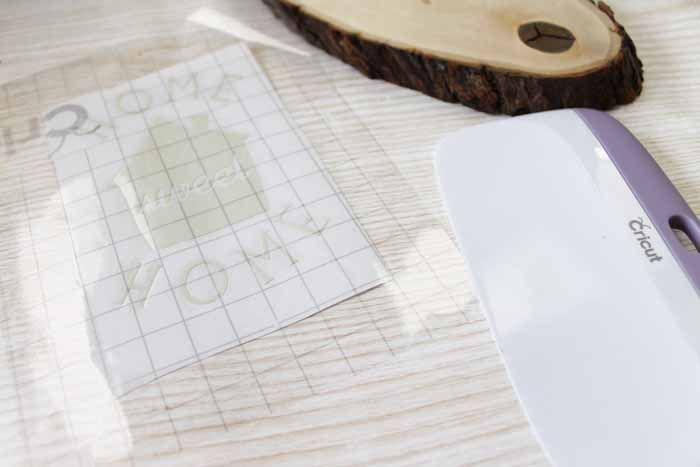
Step 1: Cut the Transfer Tape
In the first step, you need to cut a large piece of transfer tape compared to your design. You can use a transfer tape multiple times before disposing of it. There is one benefit to using transfer tape.
![]()
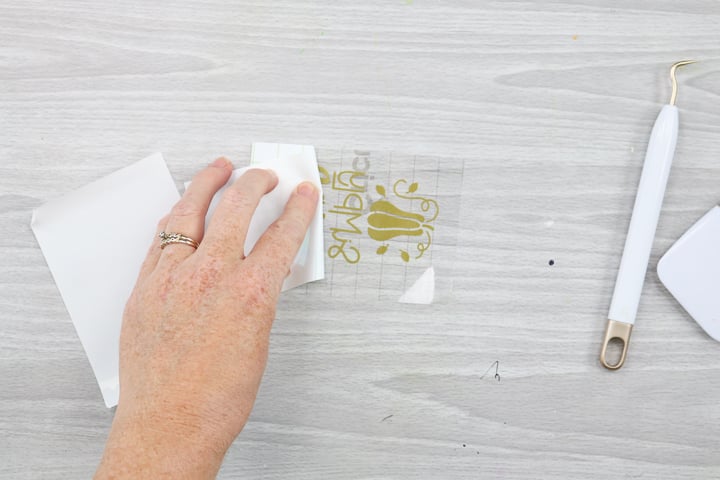
Step 2: Peel off the Backing Paper
After that, you need to peel off the backing paper. You can apply the transfer tape back to the backing paper to use in the future. Let’s move to the next steps to learn how to use transfer tape with Cricut.
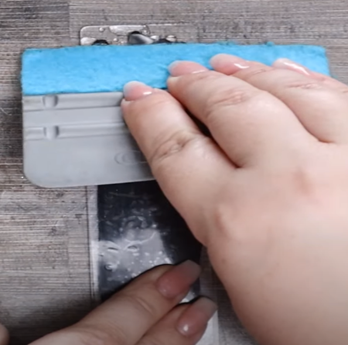
Step 3: Apply the Transfer Paper to Your Design
In the final step, you need to transfer the design and smooth it down using a scraper so no wrinkles or bubbles are left. If you don’t have a scraper, you can use your credit card or a gift card, too.
![]()
Step 4: Peel off the Backing Paper
Now, turn your piece and peel off the backing paper once again. Next, the tape will only be left with the design. You can press the transfer tape once again to take a neat and clean design. When your design is ready on the transfer tape, you can apply it to your material. Now, let’s proceed to the next step to complete the process of how to use transfer tape with Cricut Maker.
![]()
Step 5: Apply the Transfer Tape to Your Material
Then, you need to peel off the transfer tape once you place it on the material. Ensure that the vinyl sticks well to the surface of your project. If it does not stick well, remove it and burn it well once again. And then reapply on the material.
![]()
Conclusion
Finally, you have learned how to use transfer tape with Cricut. I am sure you will find this process easy peasy. A transfer tape is really necessary to apply adhesive vinyl correctly. So, if you are a regular Cricut user, a transfer tape is a must have for you. So, wait no more to get a suitable transfer...
Read more -
Which Is the Best Cricut Machine You Should Buy In 2024?
02/20/2024 at 13:31 • 0 commentsIf you are a crafter, you may always wonder which machine is the best and which is not. I can totally relate to you. When I started out as a crafter, I was greatly influenced by the internet, people, and friends. But there was one blog that really helped me make the right choice for me. So, if you are on the same page as I was, I am in your rescue. When you are looking for the Best Cricut machine, you should not think twice about it as these machines are amazing.
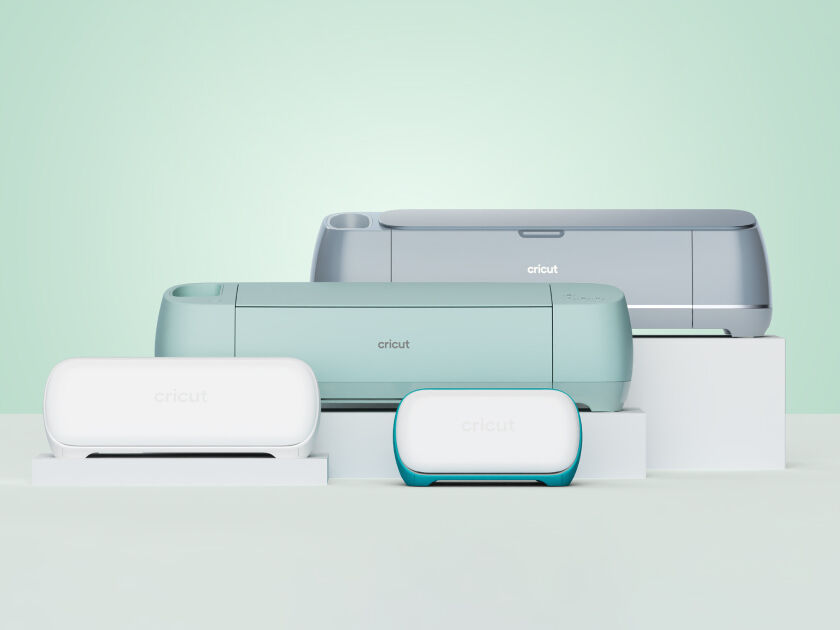
Through this guide, I will be telling you about the top 3 Cricut models that have been game-changers for most crafters and that can become a milestone for you, too. I am gonna talk about Cricut Maker, Cricut Explore, and Cricut Joy. All of these machines are old models, but they are very suitable for newbies. Let’s understand what these tools are.
1. Cricut Joy
This is really a fun machine that makes your crafts perfect and provides precise cuts and draws excellently. Also, it can use the Cricut Design Space software, a personalized software for all the Cricut machines. You can use many interesting designs from the Design Space Library and use them in your projects.
![]()
This excellent machine is compact and portable and measures 5” x 5” x 8”. Plus, it uses a wide range of Cricut materials to cut, including Smart Materials. Also, it’s the only machine that uses a card mat for making multiple cards simultaneously.
However, you can’t make bigger projects on a Cricut Joy and cut hard materials such as wood, fabric, chipboard, etc. Also, you can’t use the Print then Cut feature on it. So, overall, this machine would be a perfect fit for crafters who want instant crafts. So, if you are a teacher, mother, or student, Cricut Joy can be the best Cricut machine for you.
2. Cricut Explore Air 2
This is another machine on my list. However, this machine is big and can be used for complex projects. With a colorful lineup and elegant design, it attracts a large number of people. It is capable of cutting more than 100 materials easily with its sharp blades and impressive build-up. It needs a cutting mat of at least 12” x 12” to cut different materials.
Explore Air 2 can cut lots of materials, but it can’t cut thicker and harder materials like wood, leather, and fabric. In addition, it doesn’t allow matless cutting and can’t use Cricut Smart Materials. So, whoever has a minimal project requirement can use this machine.
![]()
3. Cricut Maker
Here comes the strongest Cricut machine that has various impressive features and can cut a wide range of materials. But why is it the best Cricut machine? All thanks to its powerful tools like blades and housing. Well, the tools of the Cricut Maker are interchangeable with that of the Cricut Explore. Hence, you can use them on both of these machines to perform engraving, debossing, engraving, and many more things.
![]()
Plus, the machine is known for its advanced cutting features and compatibility with a wide number of materials, from delicate to complex, such as fabric, wood, and even leather.
Hence, it’s clear that this machine is already ahead of the competition in every aspect and can deliver work faster and better than any other Cricut machine.
However, this machine doesn’t facilitate matless cutting. Apart from this, there is no point where this machine doesn’t persuade the users. Overall, this machine would be a perfect fit for serious crafters who are driven to create something unique.
Which Cricut Machine Should You Consider?
Since all the Cricut machines are pretty good, you need to decide what your expectations are as a crafter. So, when you are searching for the best Cricut machine for crafts, you must understand what type of projects you are gonna make. So, if you are a seasonal crafter and rarely need a cutting machine, you can get a Cricut Joy that will match your needs and offer you flexibility.
![]()
But,...
Read more -
How to Cancel Cricut Subscription: A Complete Guide
02/09/2024 at 12:28 • 0 commentsWondering how to cancel Cricut subscription? Cricut is an excellent DIY cutting machine that is leading in the market, and all passionate crafters rely on this tool due to its remarkable results. I am also a Cricut admirer and have been using this machine for the past few years. And you know what I love most about this machine? I like its capability to cut through a large number of materials, from delicate to hard.
Cricut Access is a Cricut membership that you take to access additional features of the Cricut machine. This membership is important for all crafters who are looking for a long-term career in crafting. The Cricut membership offers various powerful tools, such as design templates, fonts, images, and much more, to help you get creative and make something exciting.
But, if you don’t want to use that anymore, you have the option to cancel your membership. And you can do it by following me through this guide. So, let’s get started with the process of canceling the Cricut membership.
What Is a Cricut Access Subscription?
Cricut Access is a subscription, either monthly or annual. Cricut members are given this membership to offer them a large collection of images, fonts, shapes, and designs in the Design Space Library. Also, Cricut Access membership offers extra savings from Cricut’s website.
Under the Cricut Access plan, you get three main paid plans- Monthly Standard plan, yearly Standard plan, and Premium plan. These are the things included in the Cricut Access:
- Over 250,000+ images
- Many projects
- Over 700 projects
- Discount on licensed images of up to 10>#/li###
- Exclusive features of Design Space
How to Cancel Cricut Subscription on Browser?
If you use Cricut Access on a desktop computer, you have the option to cancel the plan and use your Cricut machine as usual. So, here I am giving some easy steps to cancel a Cricut plan. You can go through it.
- First of all, open the web browser of your choice and move to Cricut Access.
- Then, hit the Sign In option at the top bar of the website.
![]()
- Now, you can fill in your correct login information and then Sign In to your Cricut Access account.
![]()
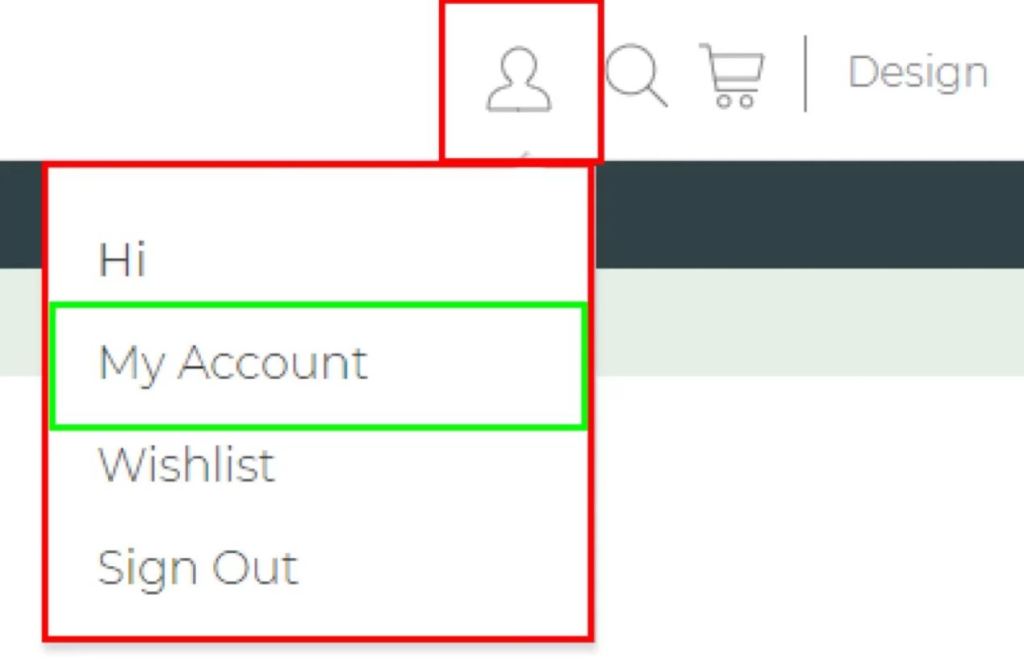
- When you successfully log into your Cricut Access account, hit the Profile option and select the My Account option from the list.
![]()
- On the My Account page, hit the Subscriptions section in the Payment Settings.
![]()
- Under the Subscriptions section, a message will appear as “click here to manage your..”
- Then, hit the “here” option, and you will be redirected to the Subscriptions page.
![]()
- On that page, you can click on the Cancel button in green.
![]()
- You can also check the status of Cricut Access.
So, these are the final steps on how to cancel subscription to Cricut Access on a desktop.
How to Cancel Cricut Subscription on Android?
After the desktop, let’s learn the procedure to cancel a Cricut Access plan on an Android device. Installing the Cricut Access is very easy from the Google Play Store. If you own a subscription and want to cancel it for some reason, here are the easiest steps for me.
- First of all, open the Google Play Store app, click on the Profile option, and select the Payments and Subscription from the options.
- Then, click on the Subscription option once again.
- Now, locate the Cricut Access app from the list.
- After that, click on the app icon and click on the Cancel Subscription option.
- Next, select your reason for canceling the plan (optional).
These are the simplified steps to cancel a Cricut Access plan on an Android device.
How to Cancel Cricut Subscription on iOS?
If you are an iOS user and use devices like iPhones and iPads, you will need to use different steps to cancel your plan on those devices. So, here are the steps you need to follow on iOS.
- First of all, launch the Settings App on your iOS device.
- Then, click on the Apple ID.
- Now, click on the Subscription option in the Payment and Shipping option.
- After...
-
A Guide to Cricut Design Space Download on Computer/Smartphone
01/17/2024 at 12:56 • 0 commentsDo you want to learn the Cricut Design Space download process on your PC or smartphone? If your answer is yes, then you have come to the right place. Here, I will provide you with an in-depth guide to downloading and installing the Cricut app. I have been using the Cricut machine and app for a long time now.
As a result, I decided to help other aspiring Cricut crafters start their journey. If you are also a beginner like I was, then this blog will be beneficial for you. Here, you will get the complete guide to download the Cricut Design app on Windows, iOS, Android, and Mac devices.
Cricut Design Space Download on Your Computer
The Cricut software is necessary for crafters who want to use a cutting machine of the same brand. These are the steps you need to follow to download the Cricut Design app on your Windows/Mac computer.
For Windows
- For the first step, browse the Cricut support website on your Windows PC.
- Access the Cricut Design Space software page and click on the Download option.
![]()
- You might agree to the Cricut Terms of Use and Privacy Policy checkbox to start the download.
- When the download is complete double click on the file in the browser.
![]()
- Or you can head to the Downloads folder to access the file.
![]()
- Follow the further instructions to start the installation.
- Once the software download is complete then sign in with your Cricut account.
![]()
- Finally, you can use your Cricut software or set up the Cricut cutting machine.
For Mac
- Access the Cricut official website and go to the Design Space for Mac window.
- Agree with the Terms and Conditions and click on Download.
- Now, a prompt will ask you to specify the folder to save the software after download.
![]()
- Once the Cricut app download is complete, open the .dmg file from the browser or the specified folder.
![]()
- When a new window shows up on the screen, drag the Cricut icon to the Applications folder; it will start the installation process.
![]()
- After that, double-click on ‘cricut design space’ in the Applications folder to launch the software.
- On the Mac notice, click on the Yes option to open the software.
- After opening the software, enter your Cricut account credentials to sign in.
![]()
- Lastly, use the software to create stunning DIY crafting projects.
Cricut Design Space Download on a Smartphone
You can easily download the Cricut Design app on your iOS/Android smartphone, as the process is so easy. Here is how you do it.
- Begin with launching the Play Store or App Store application on your respective smartphone.
- In the search section, type ‘Cricut Design Space’ to get relevant results.
- Next, tap on the Cricut (green C) icon from the result.
- Then, click on the Download or Get option to start the download.
![]()
- Once the app download is complete, the app will launch itself.
- Choose the option to set up your Cricut machine or create a design for a project.
![]()
Conclusion
In this blog, I have shared all the crucial information a crafter needs to download and install the Cricut Design app. Anyone can easily download the app on a computer or smartphone. Plus, the software is compatible with various operating systems, such as Windows, Mac, Android, and iOS, but has some additional system requirements. So, it is best to learn the app system requirements before you start the Cricut Design Space download. For any additional help, you can contact Cricut customer support or visit the official website.
Frequently Asked Questions
What Are the System Requirements to Download Cricut Design Space?
These are the basic system requirements a device should have to download the Cricut app.
- Your Windows device should have Windows® 10 or later operating system.
- For Mac devices, macOS 11 or later is necessary.
- The iPhone and iPad must be running on the iOS 15 or later version.
- Android 10.0 or higher OS version is required for the app download.
- The device must have an uninterrupted and fast network...
-
DIY Crafts With the Cricut Design Space App
12/08/2023 at 17:55 • 0 commentsGreetings to all my lovely crafters; welcome back to another Cricut Design Space app series. I have been in the crafting world for the last eight months and have managed to make my reputation among other experts. It took me a long time to become an expert at accessing the Cricut machine, so if you are wondering where to find quick and relevant info about the Cricut app, then this blog is going to be the perfect place for you.
![Cricut Design Space app]()
Design Space is Cricut’s private software that works with all Cricut cutting machines. Plus, it is a free program that gives me access to thousands of images, fonts, and ready-to-use projects absolutely free. If the Cricut software is mesmerizing you, calm down because I am going to guide you from the smallest to the most important details about Design Space.
What Are the Key Features of the Cricut Design Space App?
After getting the Cricut app overview, I will share with you some of the primary features that will clear all your doubts about the application. Have a look at the following pointers below:
- This free-to-use app works with all PCs as well as mobile devices. However, it’s essential to ensure that they fulfill all the system requirements needed to support the software to run on the devices.
- Apart from that, it is compatible with all cutting machines along with the heat presses. On the other hand, one can choose any image, font, shape, or project from the library.
- The Cricut Design Space app automatically controls how much pressure to use depending on the material that I am going to cut from the cutting machine. On the other hand, I can get the app from the official website as well as from the Play Store or App Store.
- Equally important, one more feature of the software is that it also offers a subscription known as Cricut Access. It is an ever-growing library with 2,00,000+ images, 700+ fonts, and 1000+ ready-to-make projects.
Following this, let’s make progress and collect content about the software installation download and installation into PCs.
How to Download Cricut Software on Desktop?
As I said in the opening lines of the blog, I can get the software for free on any of my devices. Now, in this part of the blog, I will teach you how to get the Cricut Design Space app on your Windows and Mac operating systems. Ensure that you go through each step very carefully without skipping any of them.
Windows
- First, I will switch on my Windows computer and go to the web browser.
- Next, go to the Cricut official page and tap the Download box.
- After the download process comes to an end, go to your web browser or Downloads folder and double-click the file.
- Now, a window will open asking you to trust the app; choose trust the application option.
- Following this, a setup window with the installation progress will appear in front of you.
- After the app gets installed, I will get to see its icon on my Windows home screen.
- Now, I will click it and create or sign in to the account using my Cricut ID and password.
- Finally, I can now create my design on its canvas using its tools and other functions.
Mac
Apart from the Windows software, I will now make you learn about how to get the Cricut Design Space app on your Mac system. To complete the download process, you need to have a look at the steps below:
- I am going to start the download process by opening the Safari browser and going to design.cricut.com.
- After reaching the page, tap the Download button and hold on till the download process is on the way.
- Next, I will go to the Downloads folder and double-click the .dmg file.
- Now, drag the Cricut icon to the Applications folder to start the installation process.
- Following this, I will double-click the Cricut Design Space and launch the application.
- Now, a ...