
-
10.) Summary
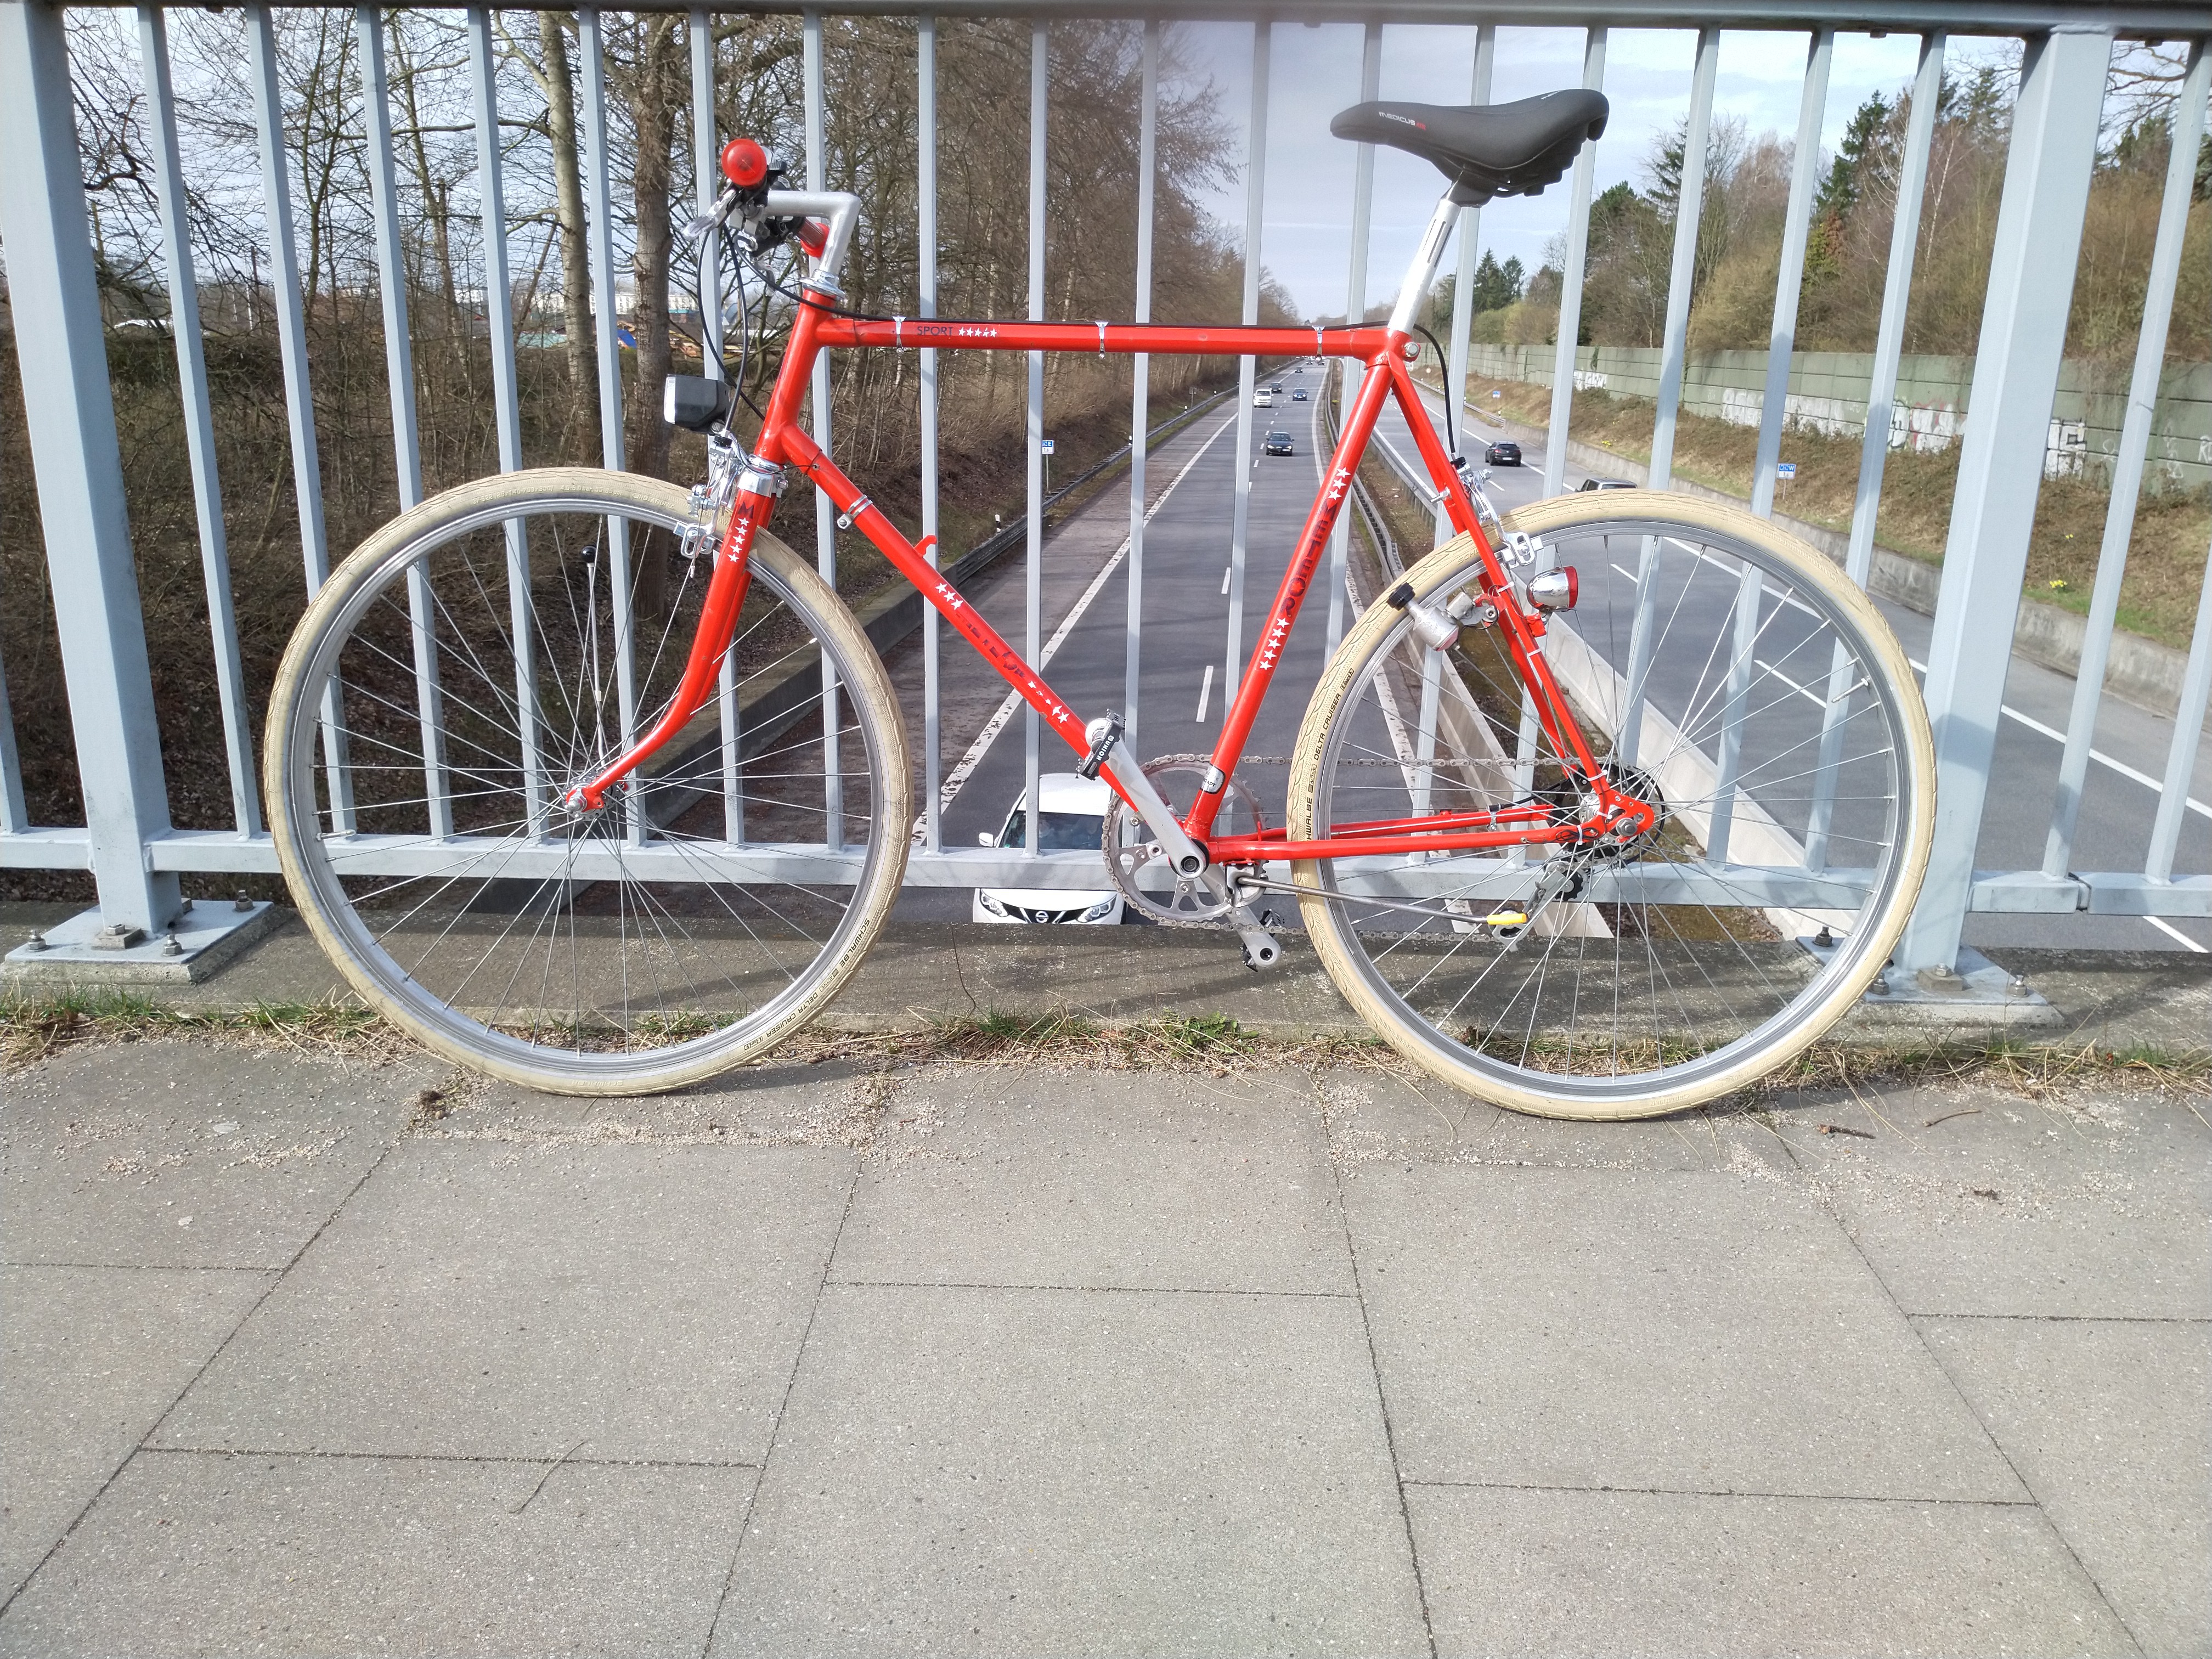
04/08/2021 at 17:04 • 2 commentsAfter four weeks I have finished the project now.
METEOR runs well, it´s lightweight (13,8kg / 30.4 lbs) and looks sporty.
I made a picture at its first tour.
![]()
METEOR - click for high resolution
There are no issues with the bottom bracket or the chainwheel. Everything is working as intended.
All the best - ride carefully - stay safe!
Entunassa
-
9.) Doing small things
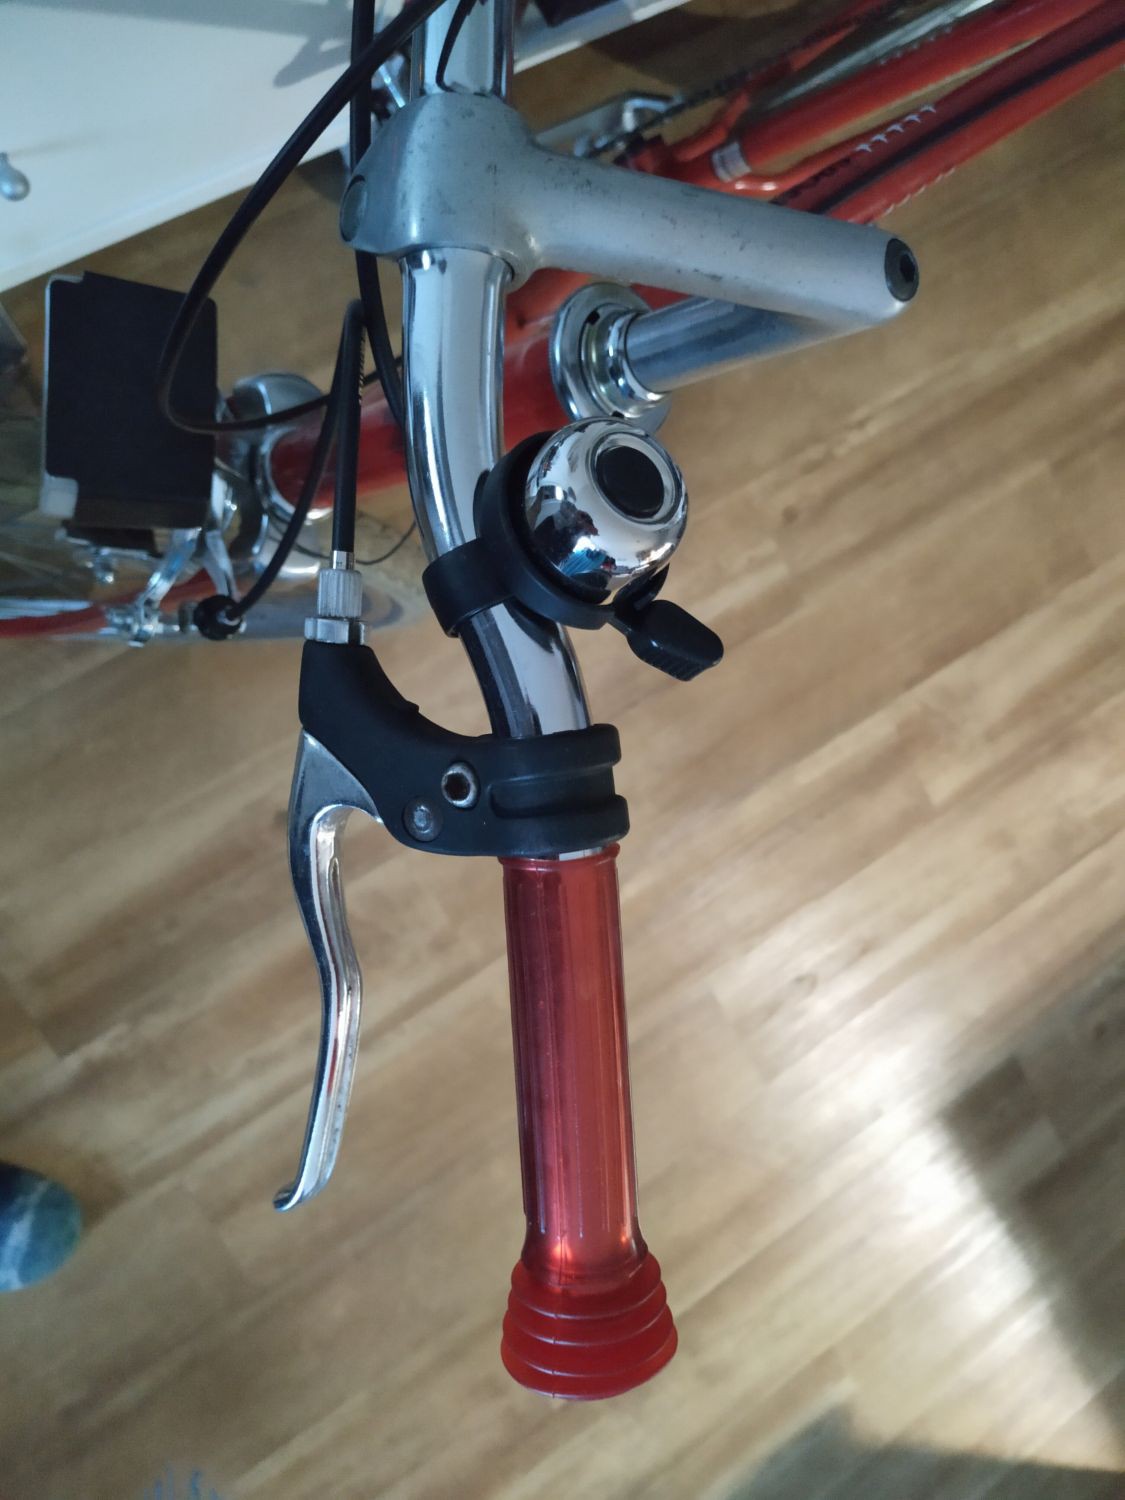
04/08/2021 at 16:53 • 0 commentsThe Handle Bar
The original handle bar was terminally rusty. Fortunately, it could be easily removed from the steering head.
I have maintained the head ball bearings with new grease and assembled it carefully. And the rusty handlebar stem is replaced by a refurbished aluminum part.
![]()
The aluminum handlebar stem from the DONATOR fits well to the METEOR
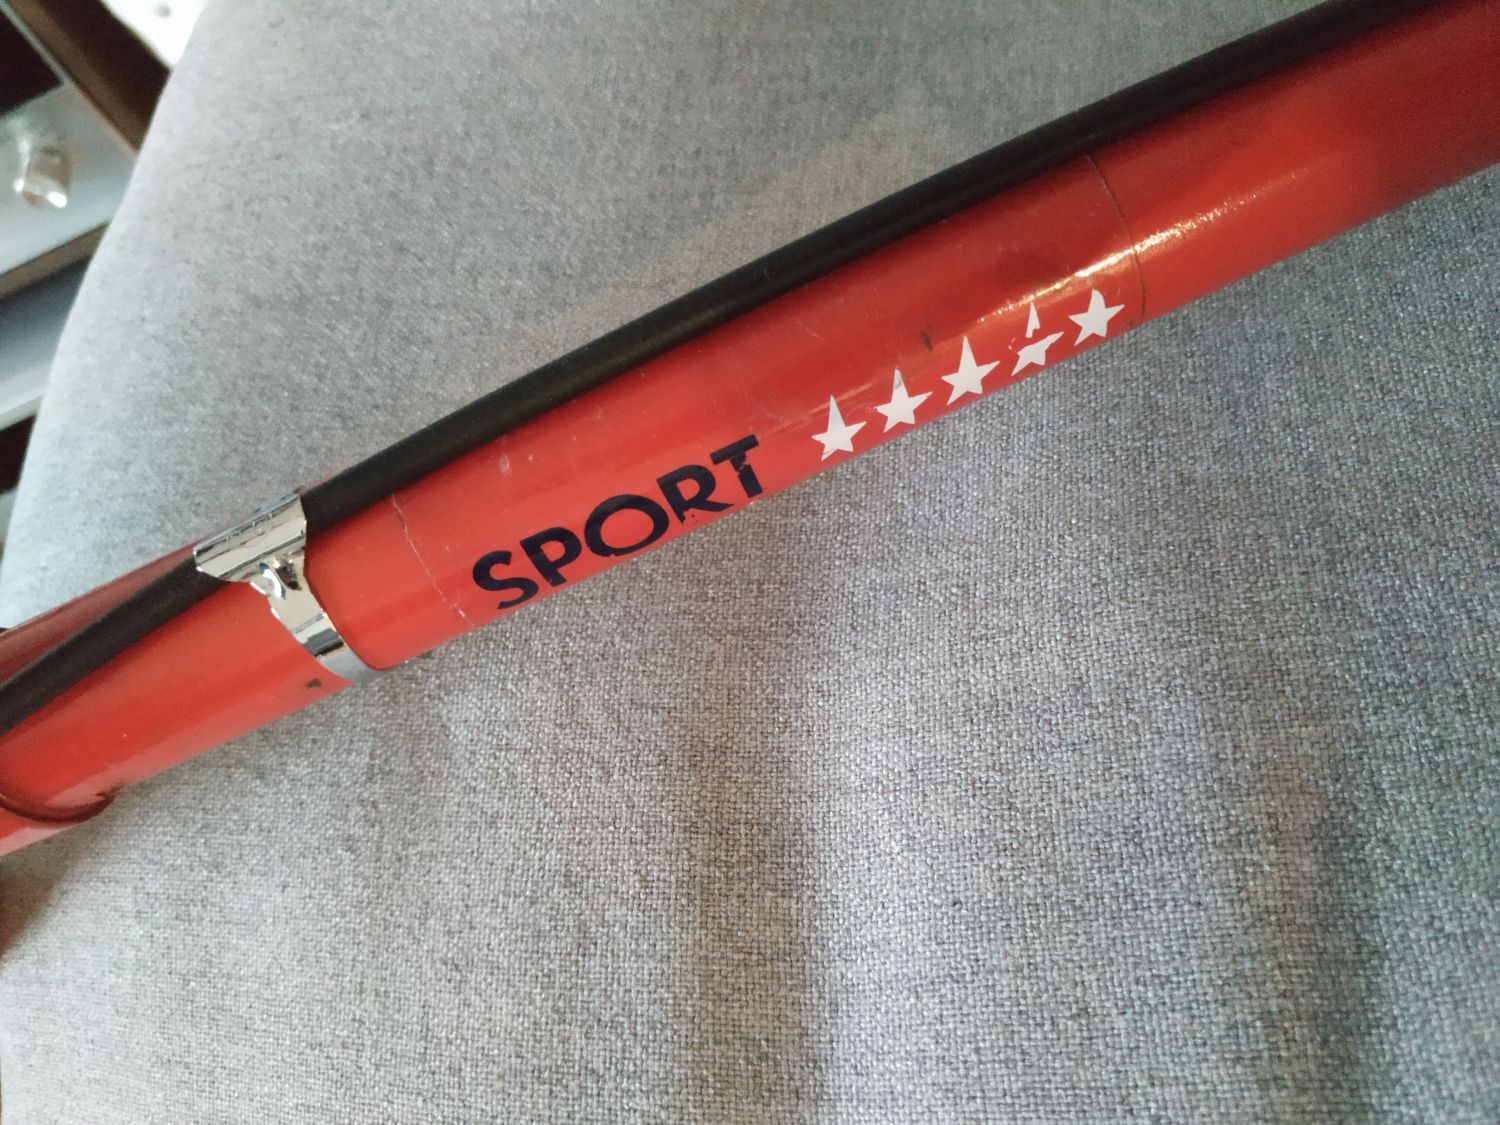
A steel handlebar "Sport Modell" (NOS from the 1960s) looks better compared to a modern straight aluminum bar. A pair of good brake levers also came from the DONATOR.
![]()
The new handlebar completed
Result: All handlebar parts together look really neat, especially with the red vintage grips on it.
Gear Cable
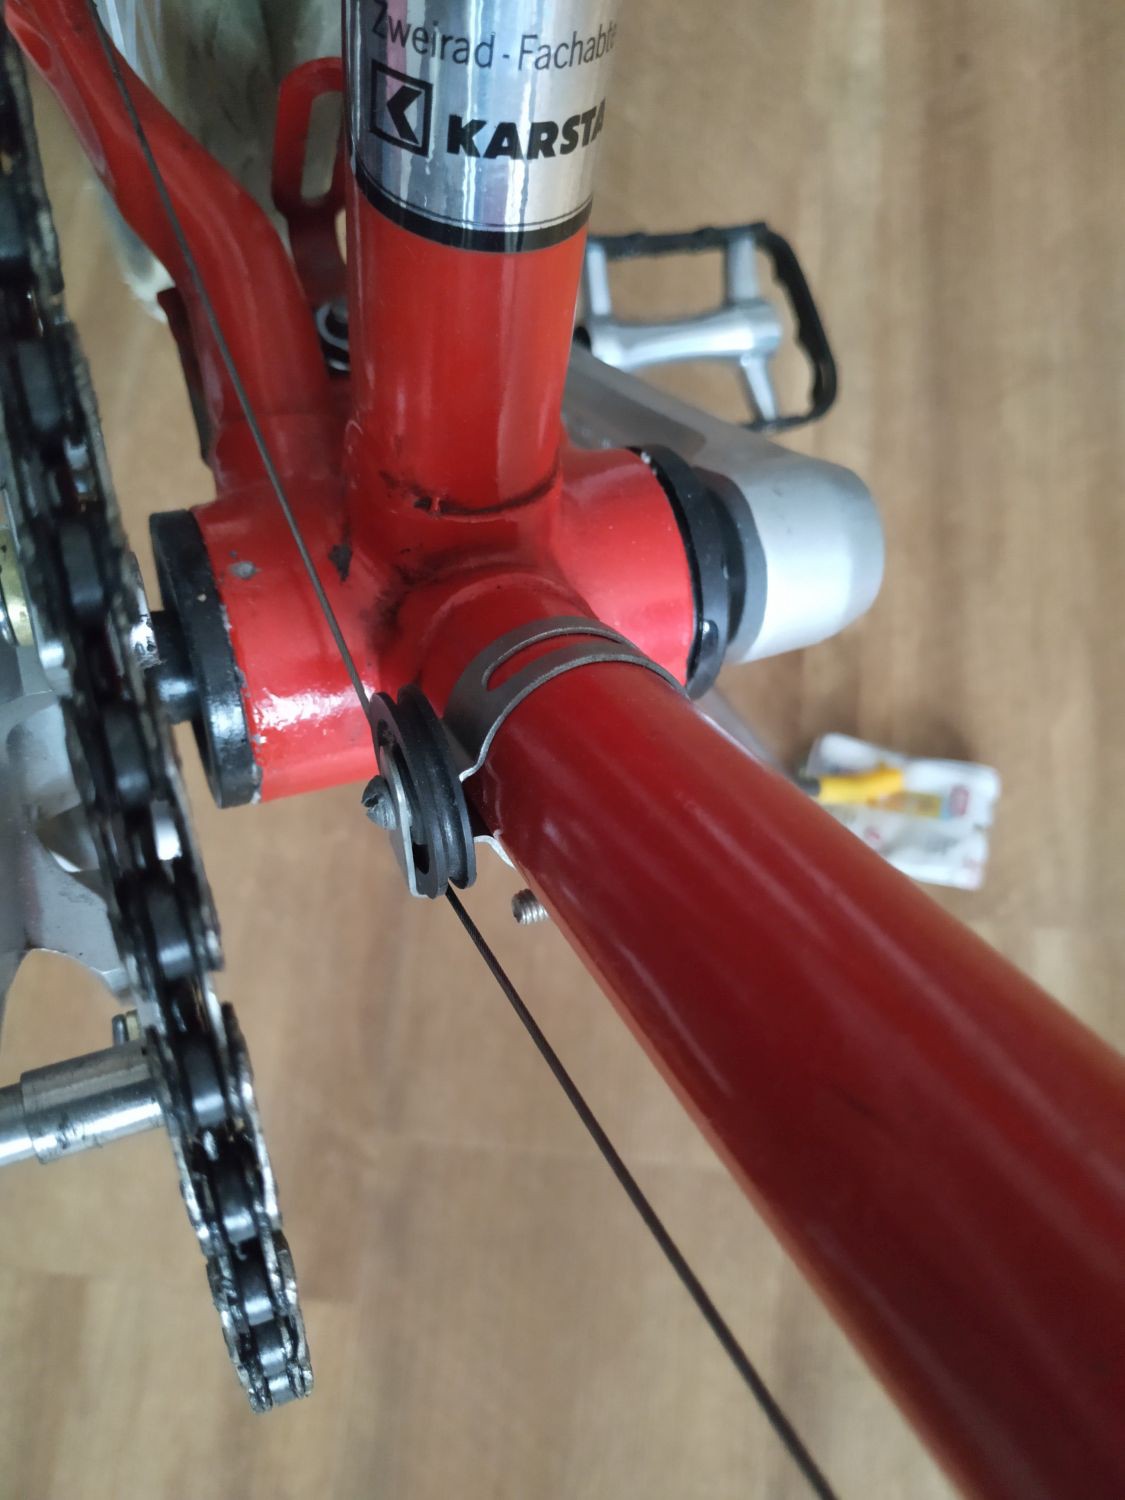
![]()
Gear cable cog and original 'KARSTADT' decal
The frame offers no cable guidings neither cable stops, as mentioned before. The gear cable is lead by a cog instead via a shift cable routing commonly located under the bottom bracket.
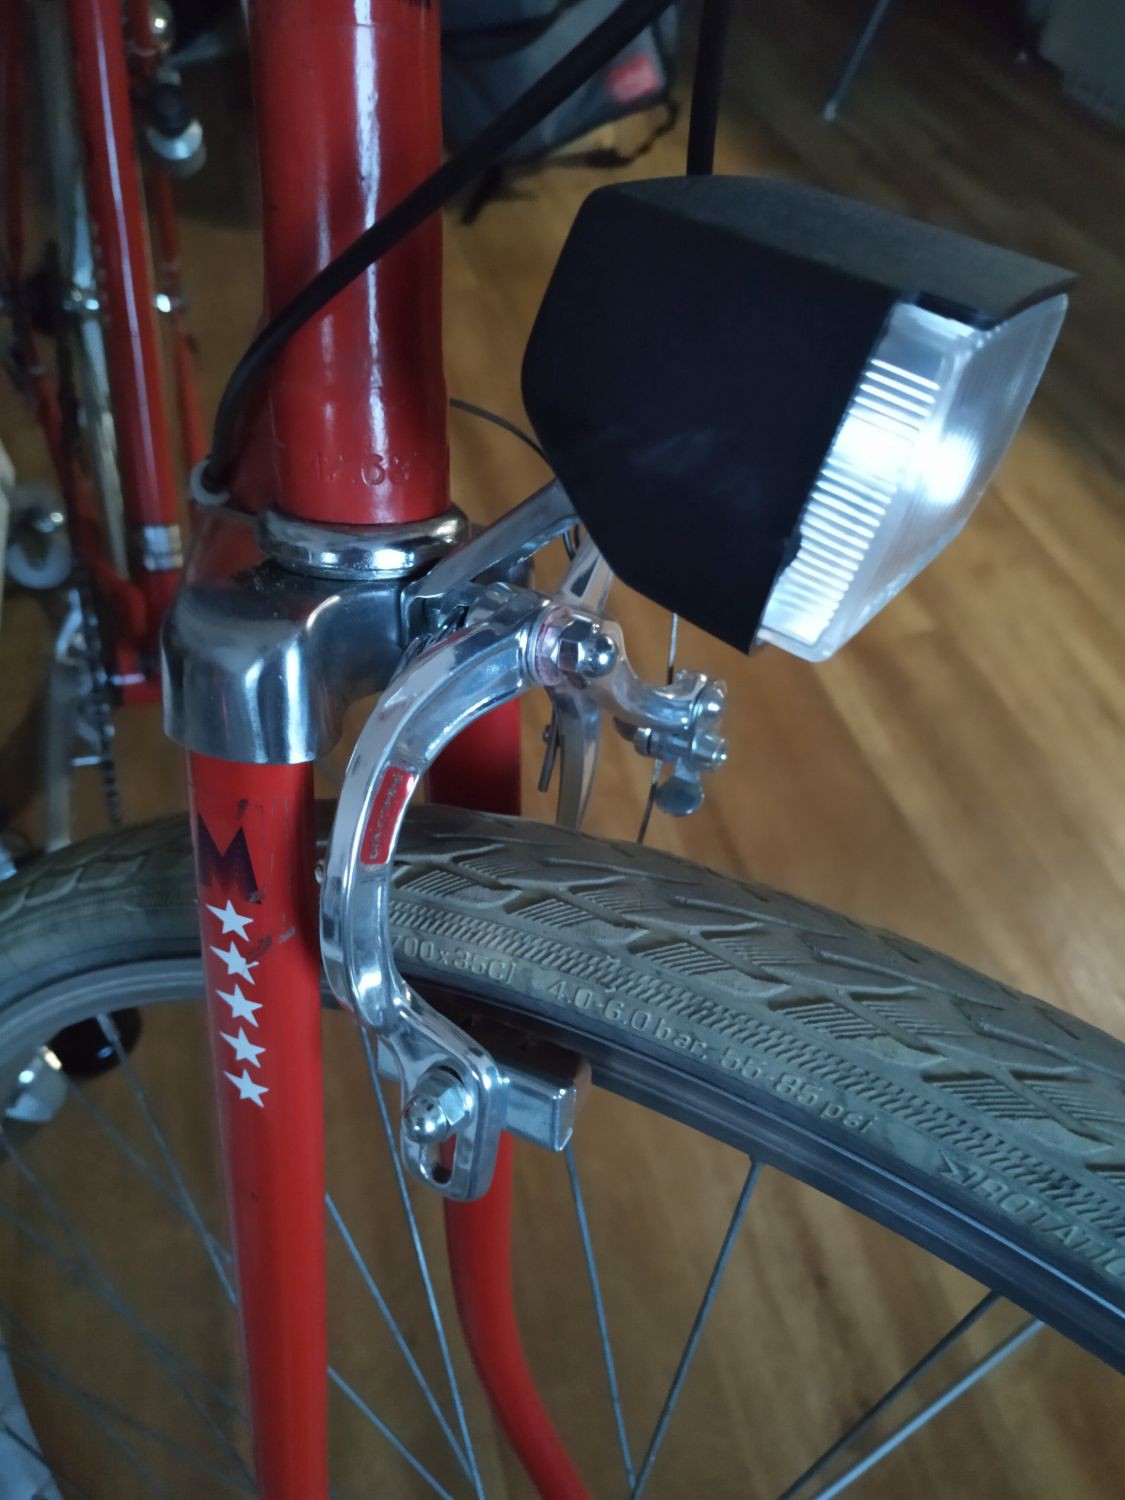
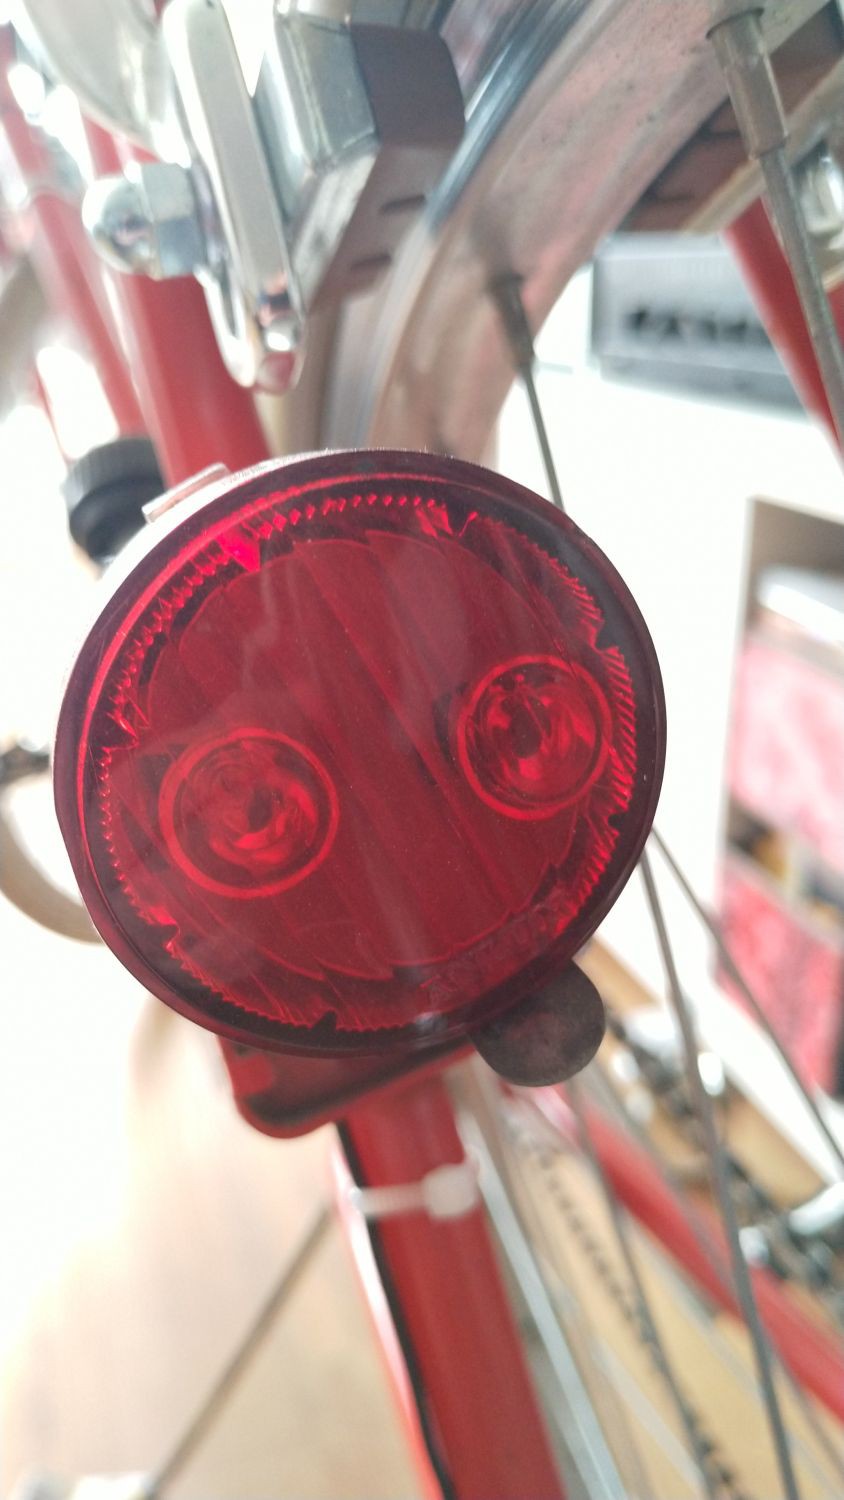
Lights
The original Predom Romet headlight remains - precisely because its cute ugliness. It´s powered by a classic bottle dynamo (6 Volts). The tail light is a classic type DIY LED lighting instead of a small 6V lamp.
![]()
Huge plastic headlight
*
![]()
Dynamo and tail light
*
![]()
DIY LED equipment :-D
To be honest, the head light is not brighter than a tea candle... but who cares. The main thing is: There's any light to please a police officer.
Check before doing a shakedown
- All electric cabling is fitted with cable ties;
- gear shifting is doing well;
- nuts and bolts are tightened;
- handlebar is tightended well;
- brakes are adjusted;
- tires are inflated to 5 bar / 72 psi
- kick stand is working
- saddle is adjusted to comfort height
Let's ride.
-
8.) The chainring, Pt. 2
04/08/2021 at 15:43 • 0 commentsThe mentioned Biopace chainring and crank arm set (refer to https://hackaday.io/page/10435-5-the-chainwheel-pt-1 ) were the next issue.
As mentioned also, the bottom bracket is a square taper model. The Shimano crank arms do have square taper also, but there are nice distinctions (refer 'ISO' vs. 'J.I.S'). To cut a long story short, the chainwheel took position on a wrong chainline, right of center, after mounting.
To bring it back to the middle there are four options:
- To file out the square taper hole in the crank arm;
- To choose another bottom bracket with JIS Sq. taper;
- To choose another bottom bracket with narrower axle;
- To shift the chainring.
For sure, #1 is a genuine hillbilly 'solution' that may ruin the crank arm. To be serious, it is a dead duck.
Also #2 or #3 bring up more work than wanted, remember my Waterloo with the BB mounting...At last #4 will remain.
![]()
Chainring (with distance washers) at final position
With turning over (its inner side faces out) the chainwheel *and* bringíng it to the inner position at the crank arm the chainline is shifted to a reasonable position, finally. Also the chain itself is running well with this chainring.
Missing part: Covering plug for the crank arm bolts.
Result: An odd solution that should last. I have to validate it while riding.
-
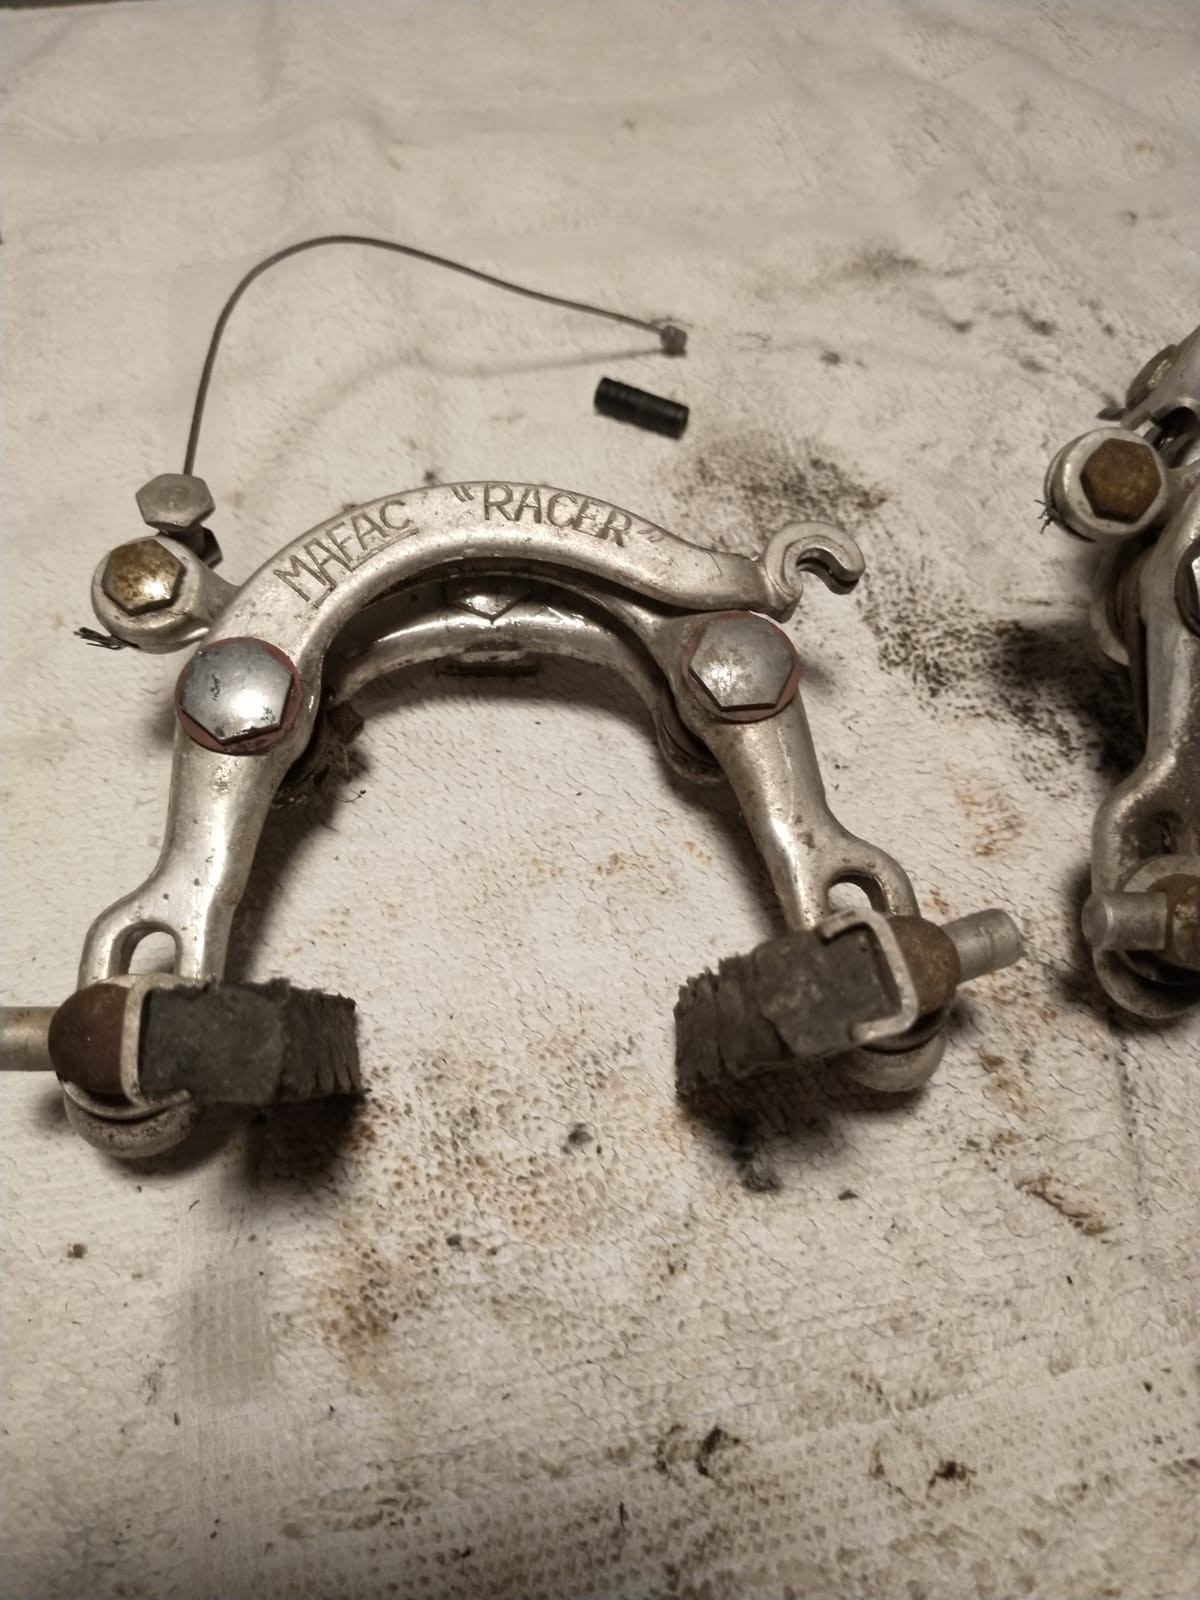
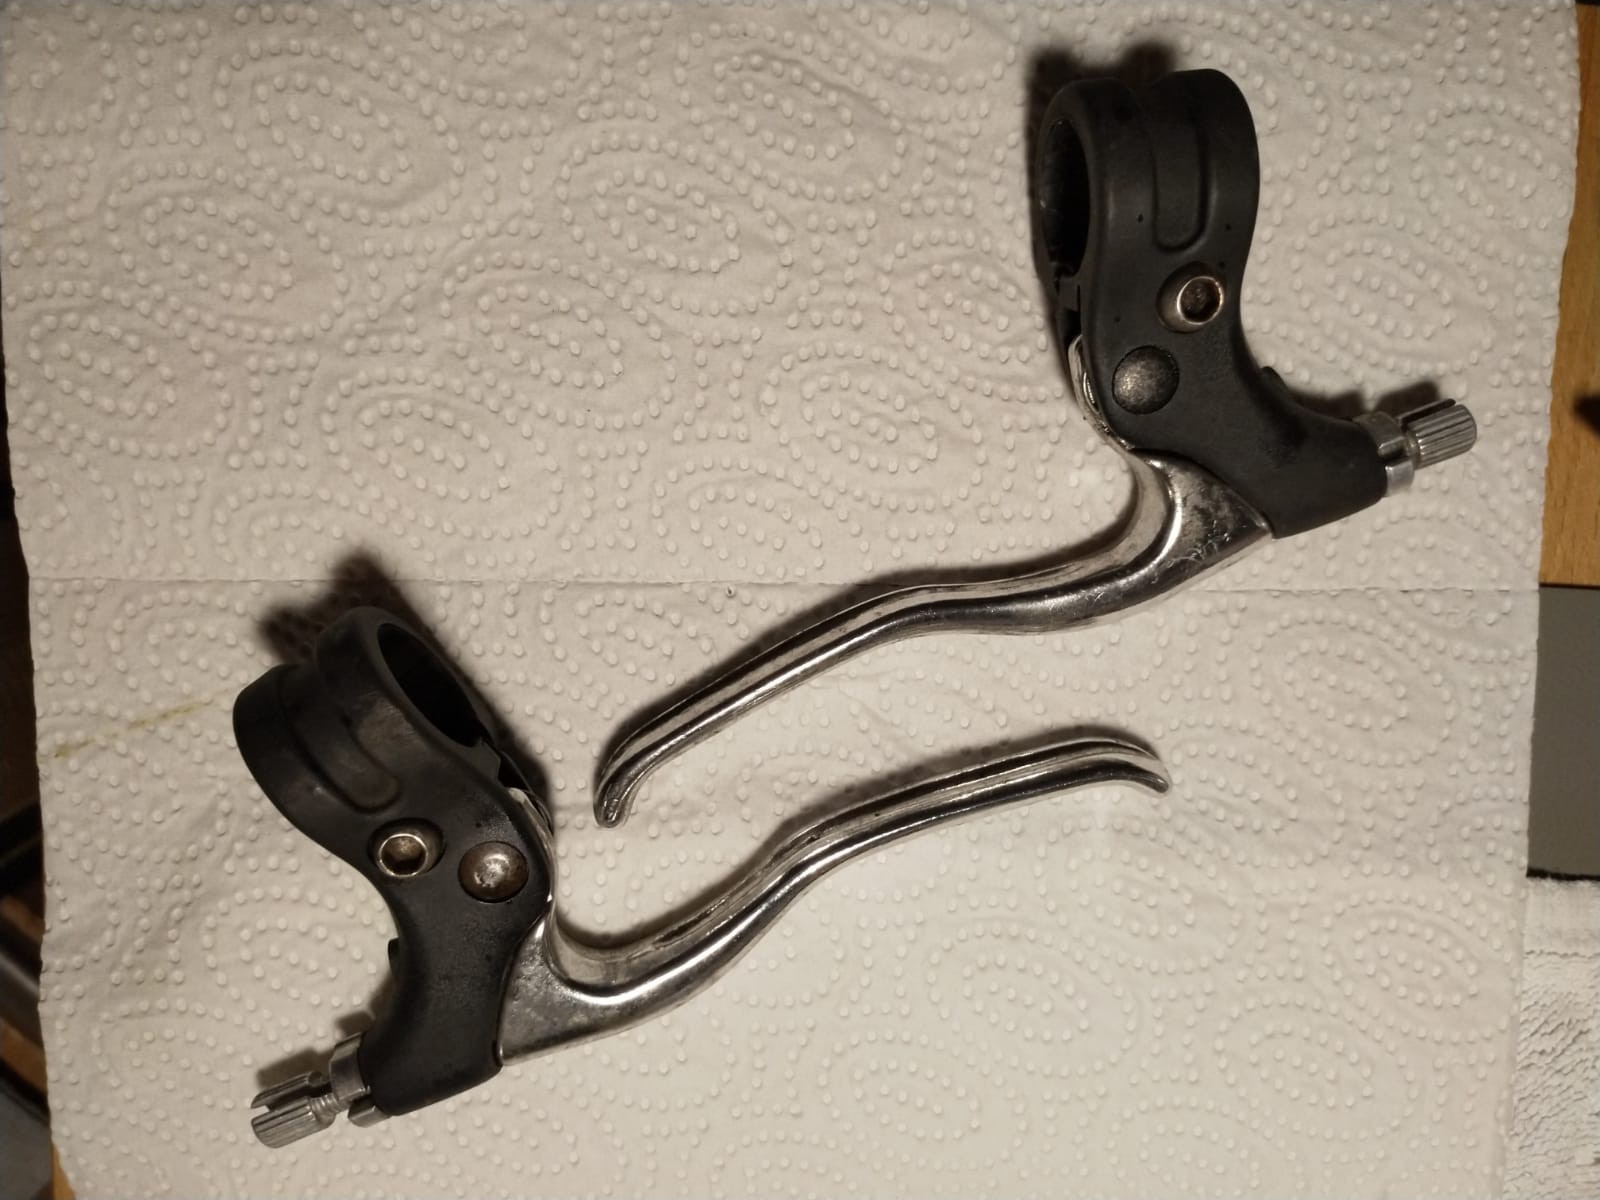
7.) The brakes
04/07/2021 at 18:15 • 0 commentsOff topic music advice click here.
Brake levers, front- and rear brakes originate also from the DONATOR mentioned above.
![]()
MAFAC "RACER" brakes from DONATOR cycle
*
![]()
Used brake levers from DONATOR cycle
The brakes are very nice french MAFAC central-pull brakes, but they don't match to the rims. Their arms are way too short. Did I mention the word 'issue'?
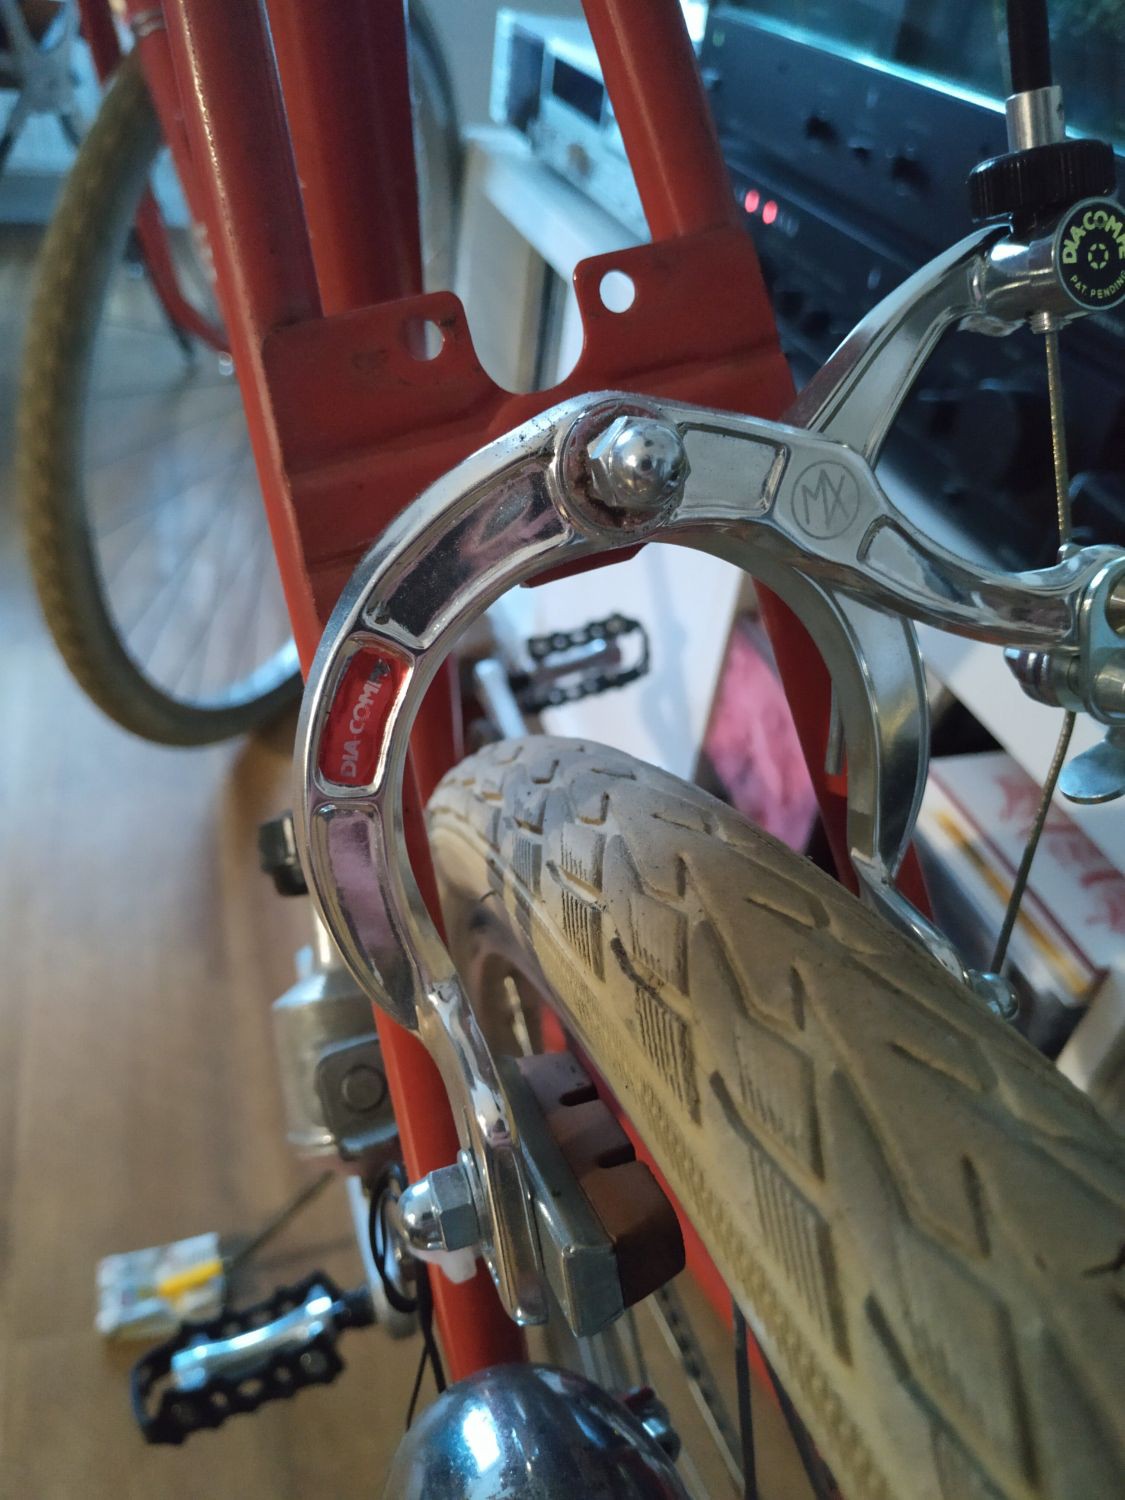
A funny solution might be a drop bolt (refer to Drop Bolt), but I assume the worst. What´s more, the frame does not offer cable stops for these types of brakes. To make it short, I have ordered a new pair of vintage style Dia Compe MX1000 side-pull brakes. Side-pull brakes do not need frame-linked cable stops.
![]()
Front brake and hefty headlight (original part)
*
![]()
Rear brake
*
![]()
Special old fashioned cable guides mounted on the top tube
To install the brake cable housing I need special cable guides. They came together with the cable stop. It looks waay better than ordinary cable zippers.
Result: It fits, it looks good, it works.
-
6.) The gears
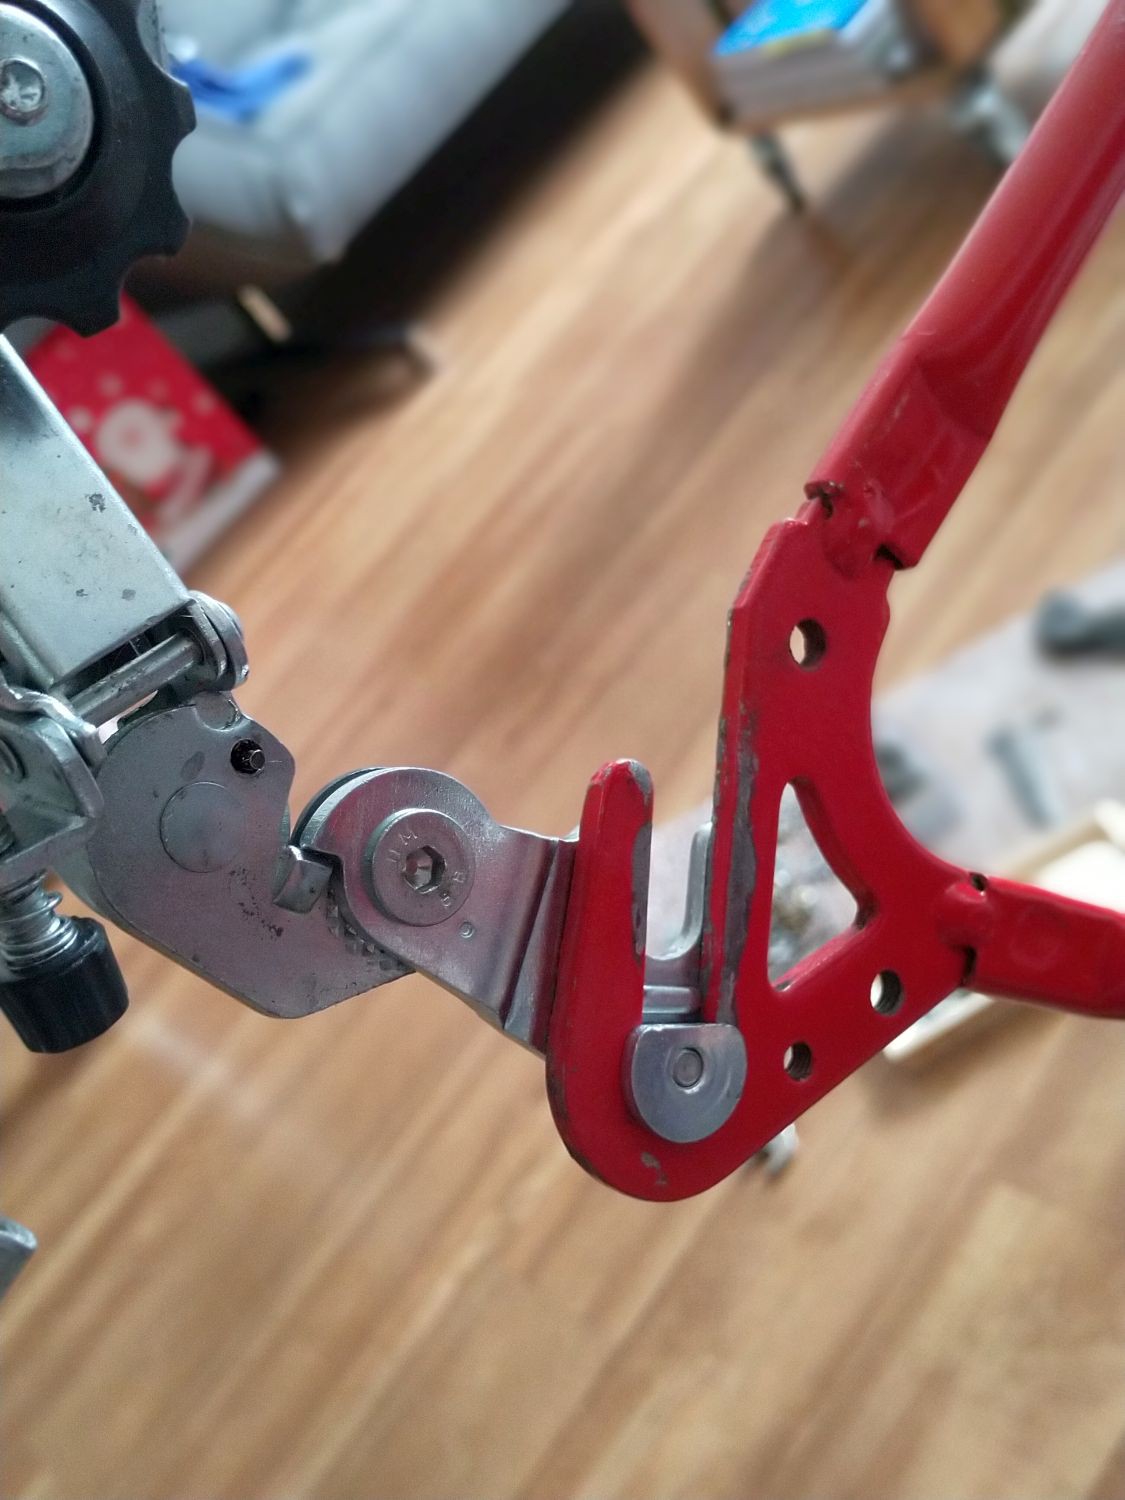
04/07/2021 at 17:33 • 0 commentsAs told, I wanted to replace the 3-speed hub with a 6-speed shifter. Another auction won at ebay brought me a 6-speed lever and a matching derailleur, "SPS"-Type from the 1990s. The derailleur does not fit to the frame without an additional part: I need a mech hanger. If you image-google for such part, about 200 different types appear… I went to my local bicycle repair man, who gave me one from his shelf. And - surprise - it was just the thing. I have linked the derailleur to the hanger by using some nuts, bolts and washers. A real DIY job, but very reliable.
![]()
The mech hanger and the safety-nut-and-bolt junction between the hanger and the derailleur (at the top of the picture)
*
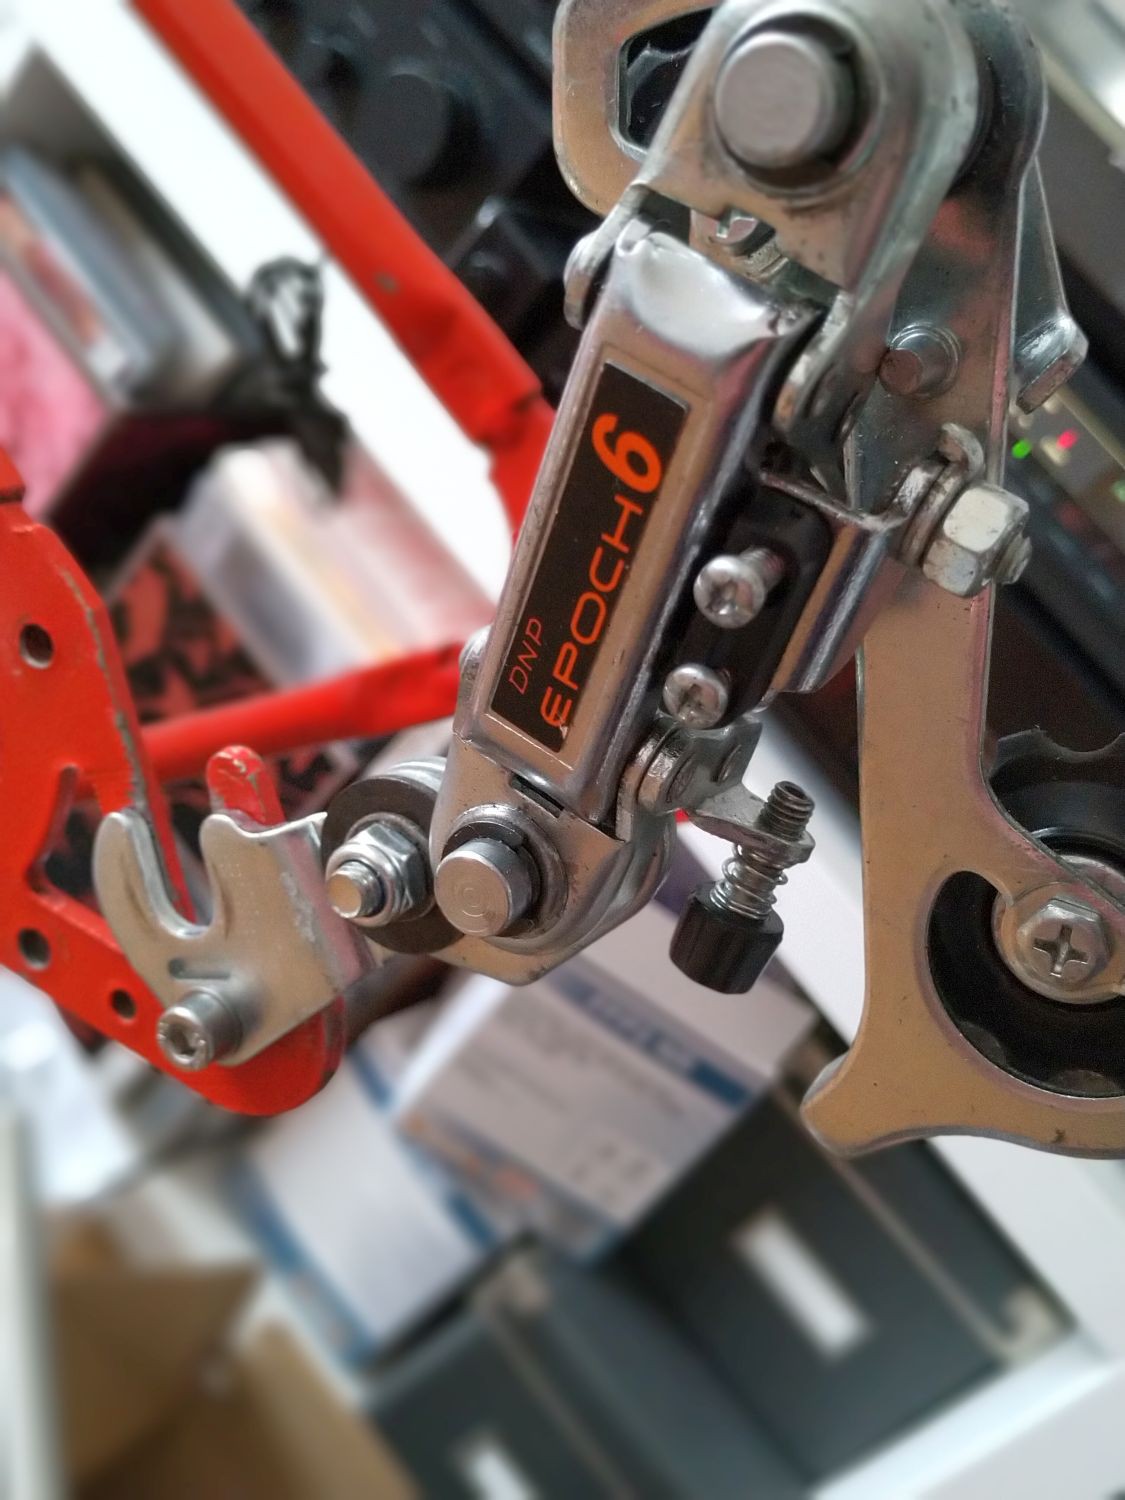
![]()
Mounting nut, mech hanger, derailleur in place
Unfortunately I had to re-respace the rear wheel a little bit to avoid the gear cluster rub to the mech hanger mounting nut.
*
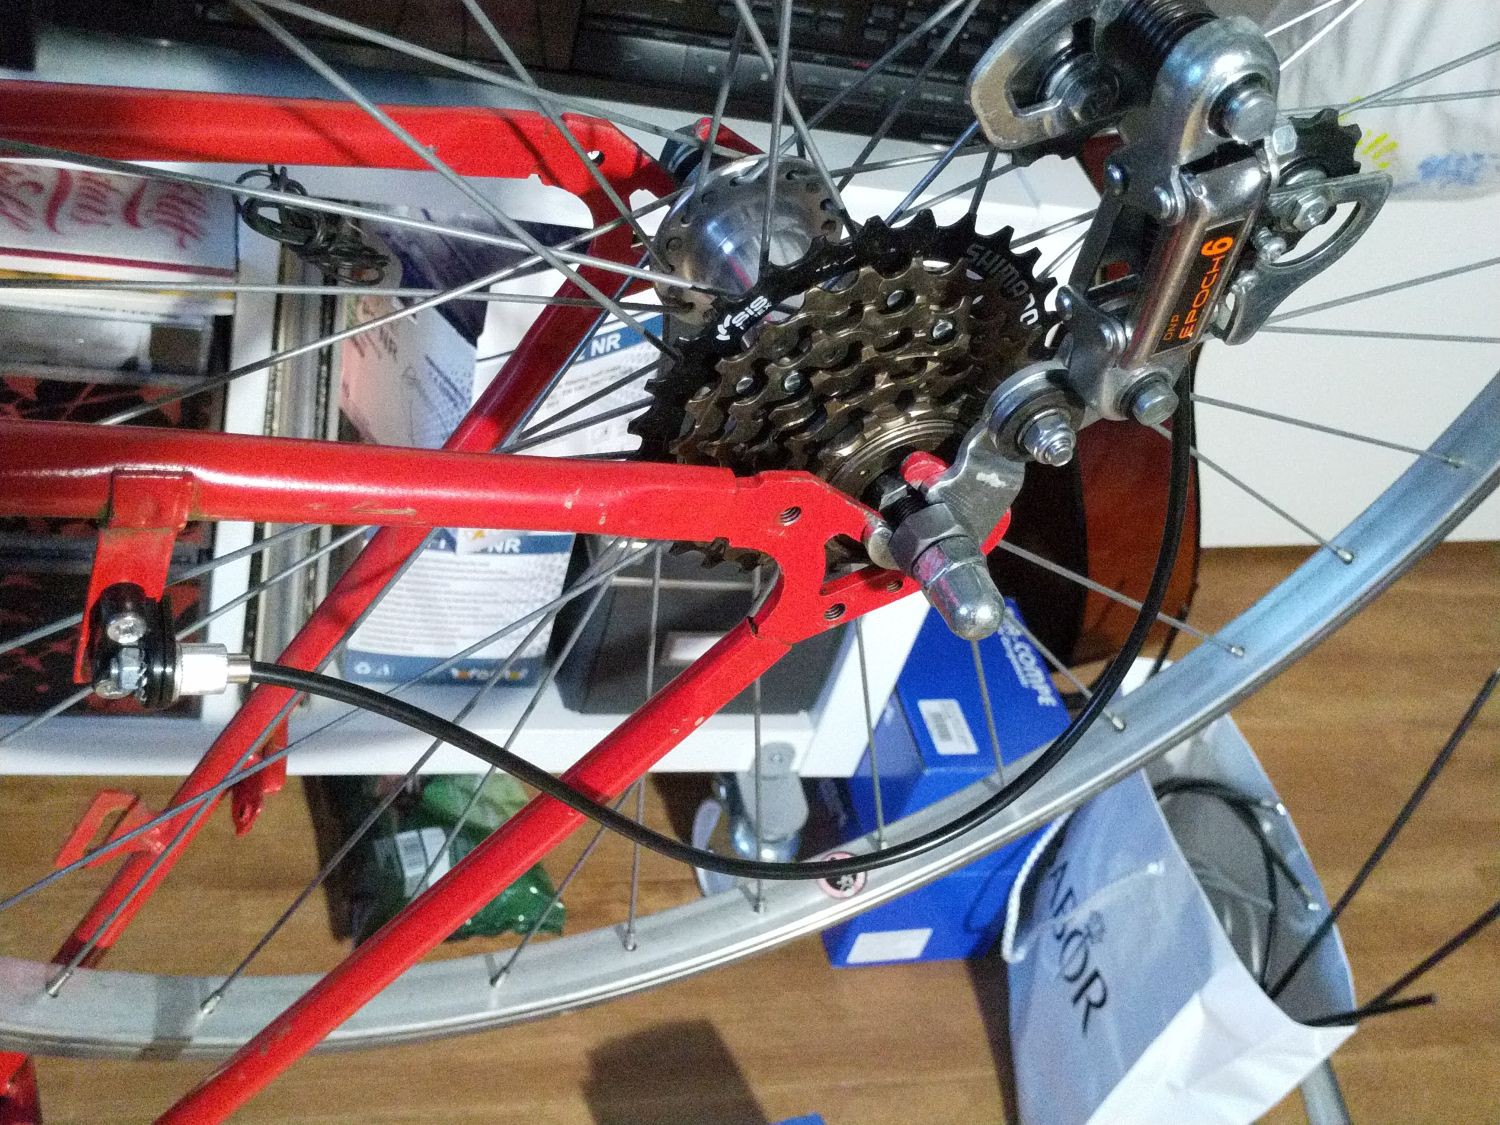
![]()
That looks good.
The frame is also missing a cable stop for the shift cable for the derailleur. I diy one from a nylon part and mounted it to a remaining chainguard bracket at the chainstay. That looks good also:
![]()
The diy cable stop mounted to a metal bracket (which is the former chain guard holder)
*
The next problem on a never-ending list: When running at gear 5 or 6 (the smallest cogs), the chain would run exactly over the top of the bracket and will seize up there when pedaling. With massive pliers I snapped off the chain guard bracket, filed the metal down and covered it with some varnish.
I found a shop with NOS cycle parts (link shows the cable stop) and have ordered missing things, also the cable stop.
A further issue showed up while testing around with the chain. The Kettler chainwheel does not like the chain, which is too narrow! The chain is a CONNEX 808 (1/2" x 3/32"), 2,4mm narrow type. The Kettler Chainwheel has a 2,8mm width (for 1/2" x 1/8" chain). Well... I have to bid on ebay again!
For a bargain price of 24€, I got a Shimano FC-M300 crank arm set, including a Biopace 48-t steel chainwheel mounted, both in good, used condition.
While waiting for delivery, I will mount the brakes.
-
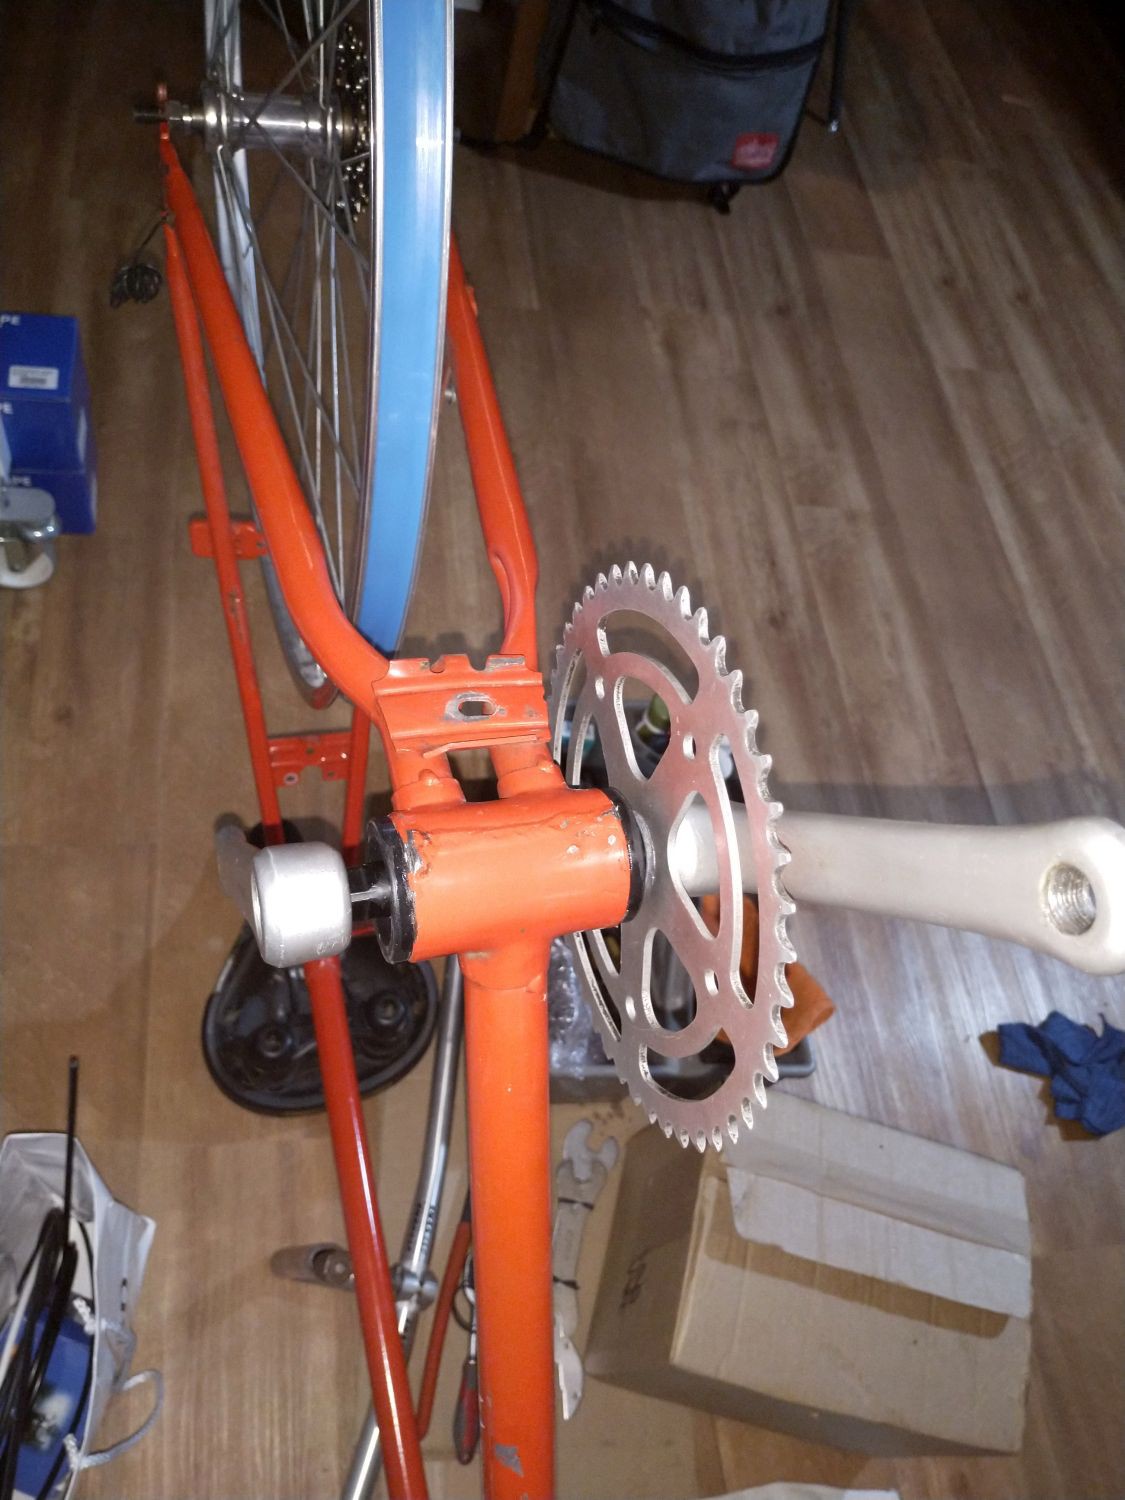
5.) The chainwheel (Pt. 1)
04/03/2021 at 13:24 • 0 commentsDiscovered at ebay, I purchased from an auction a nice aluminum 46-teeth chainwheel ('Kettler' brand). It 'snuggles' to the frame, the chainline looks well and it is in proper condition.
![]()
Kettler chainwheel and crank arms, mounted
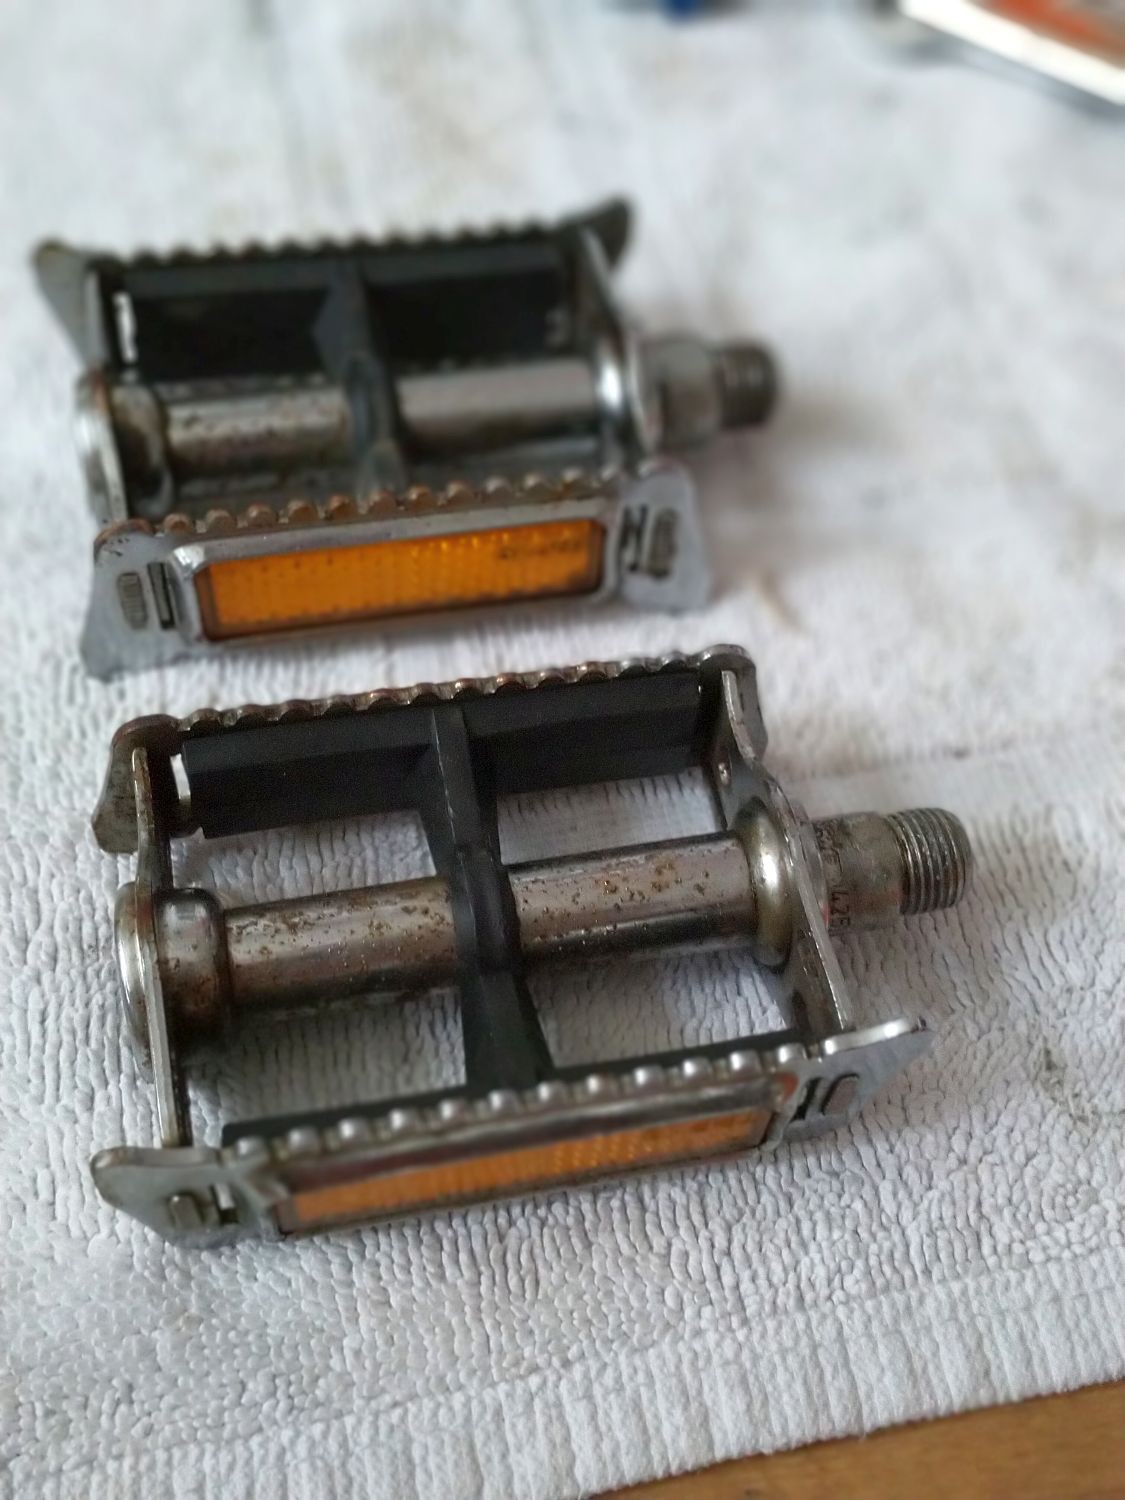
Also, I have a pair of french vintage pedals, taken from an another abandoned bicycle (I will mention the bike several times, then using the term 'DONATOR', because it donated many parts to METEOR).
![]()
French pedals
Unsurprisingly, a new issue showed up when trying to mount the pedals to the crank arms: All pedals, really-really *all* of the pedals I've ever changed, had a standard thread 9/16" x 20 tpi (~14,3mm) - while left pedals have a lefthand thread.
How shall I put it - these french pedals are different somewhat, haha. One of the threads has a similar thread to 14,3mm, the other one is about 13,5mm and can´t screwed in anyway!
![]()
No, not the crank arm thread is worn... the pedal thread is somewhat 13,5mm instead of 14,mm
One needs special crank arms to use them... what the heck!
So I decided to mount a pair of 90s mountain bike "bear paw" pedals instead.
Next chapter: The gears
-
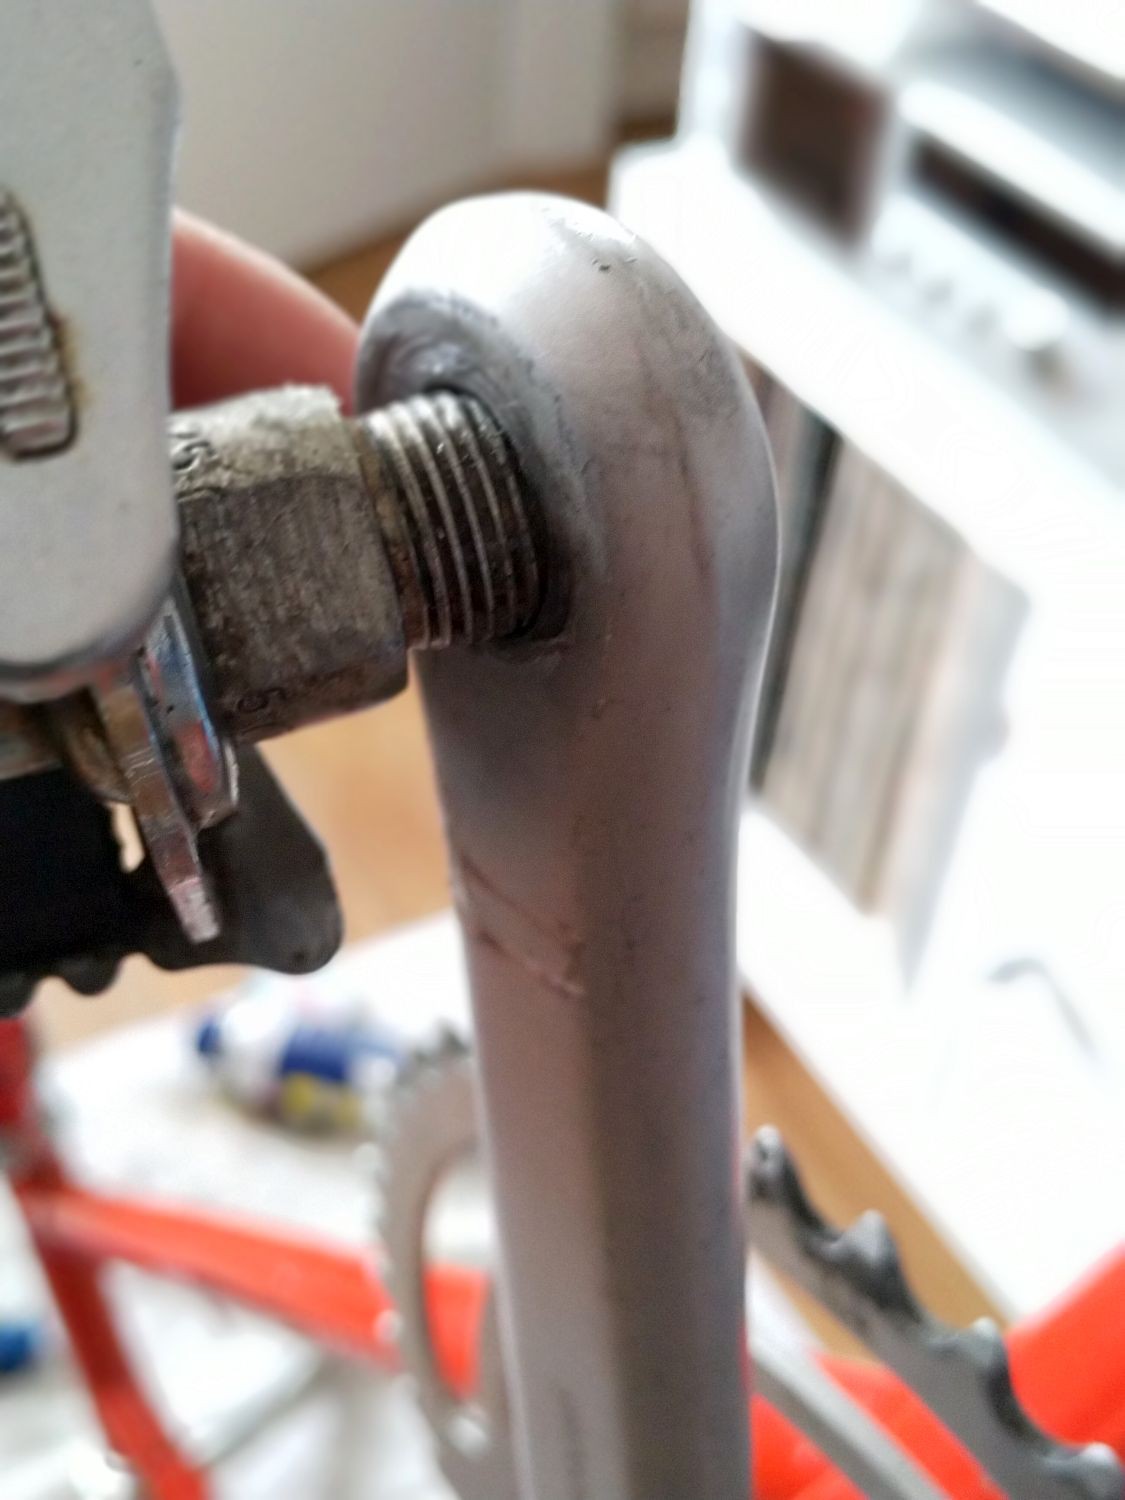
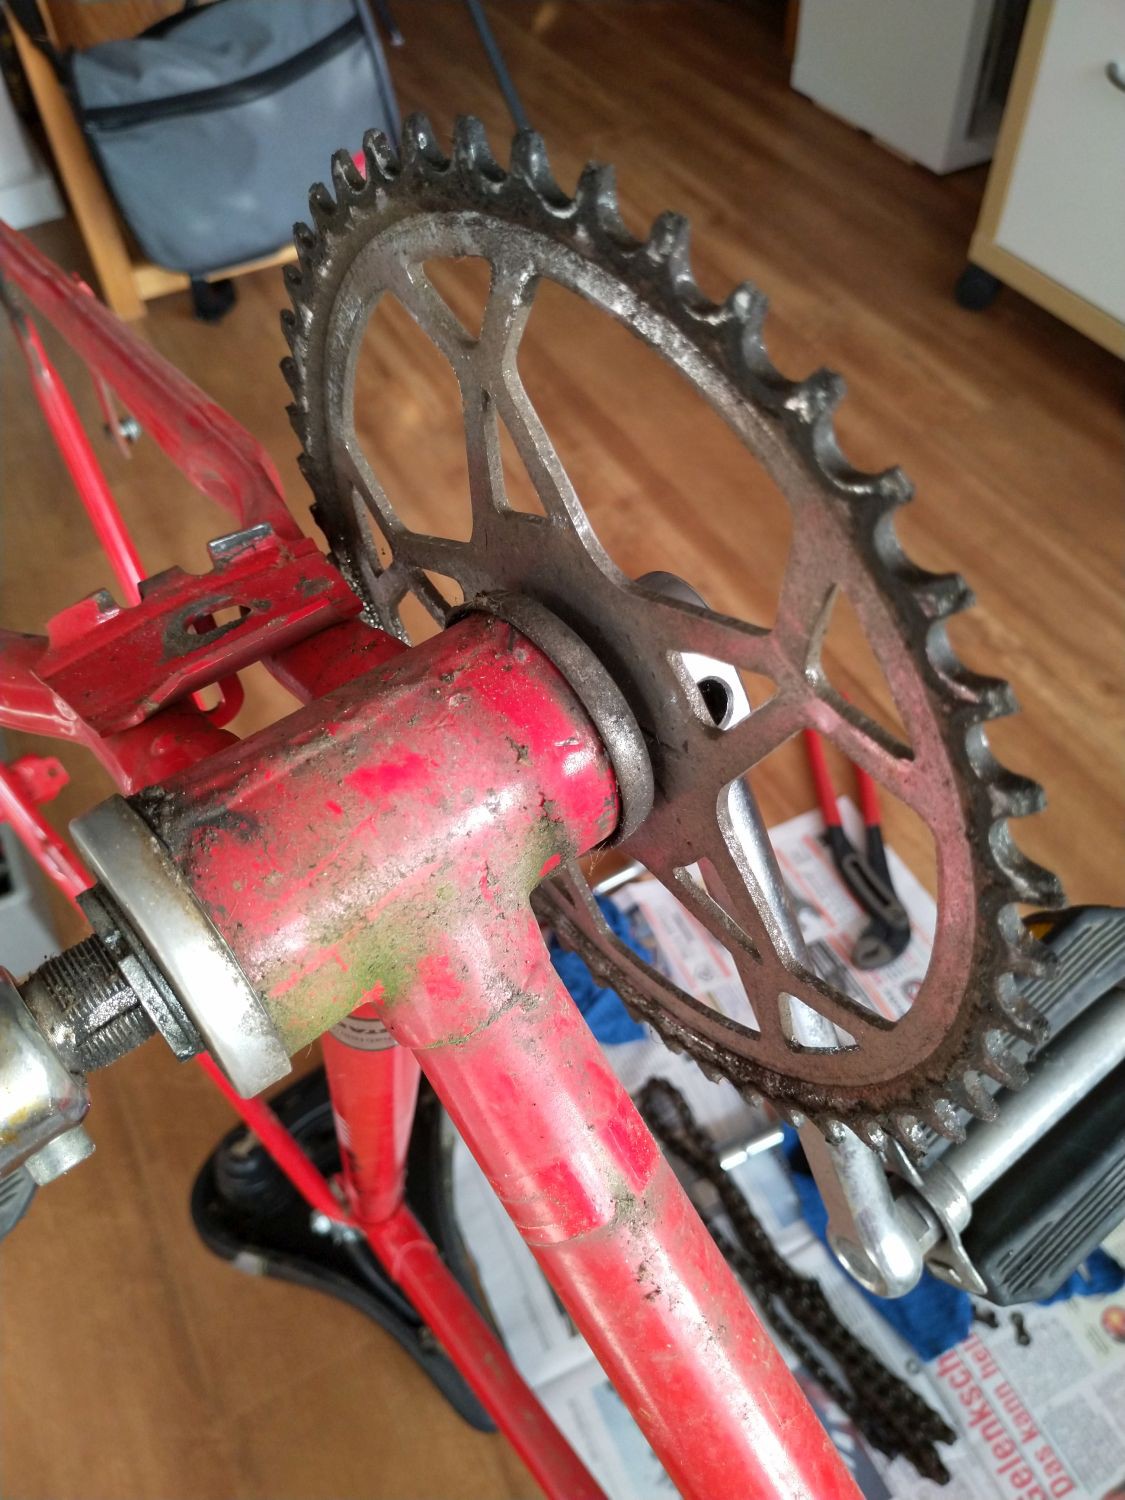
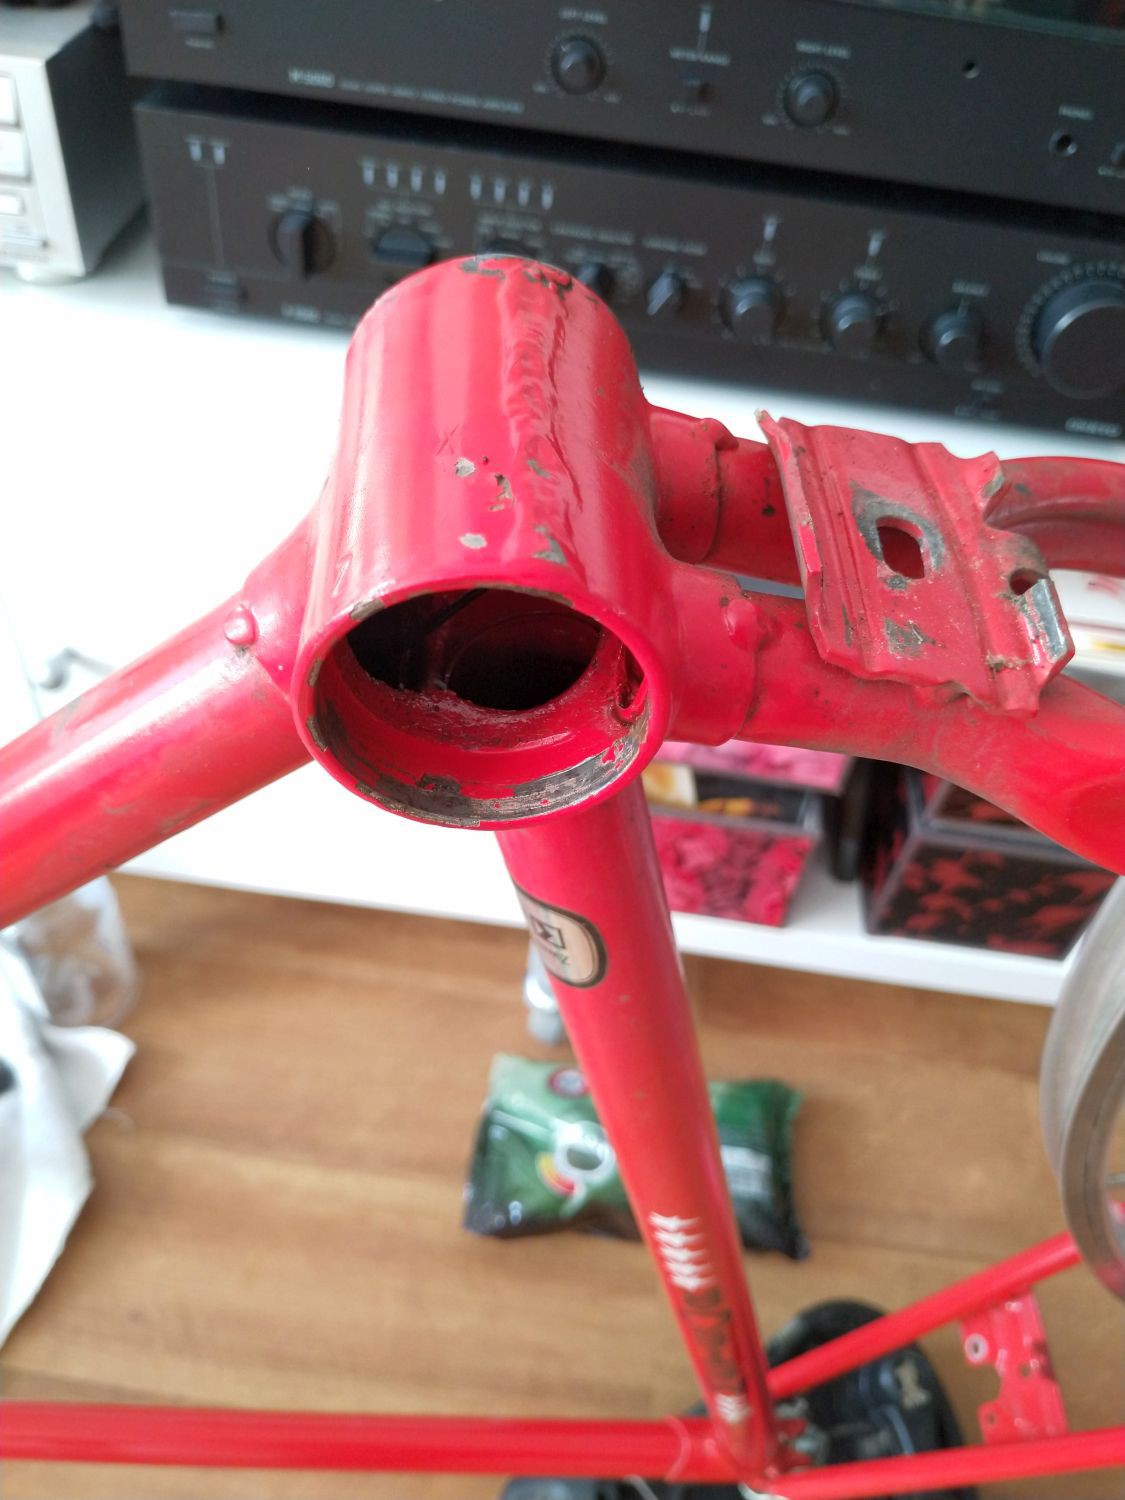
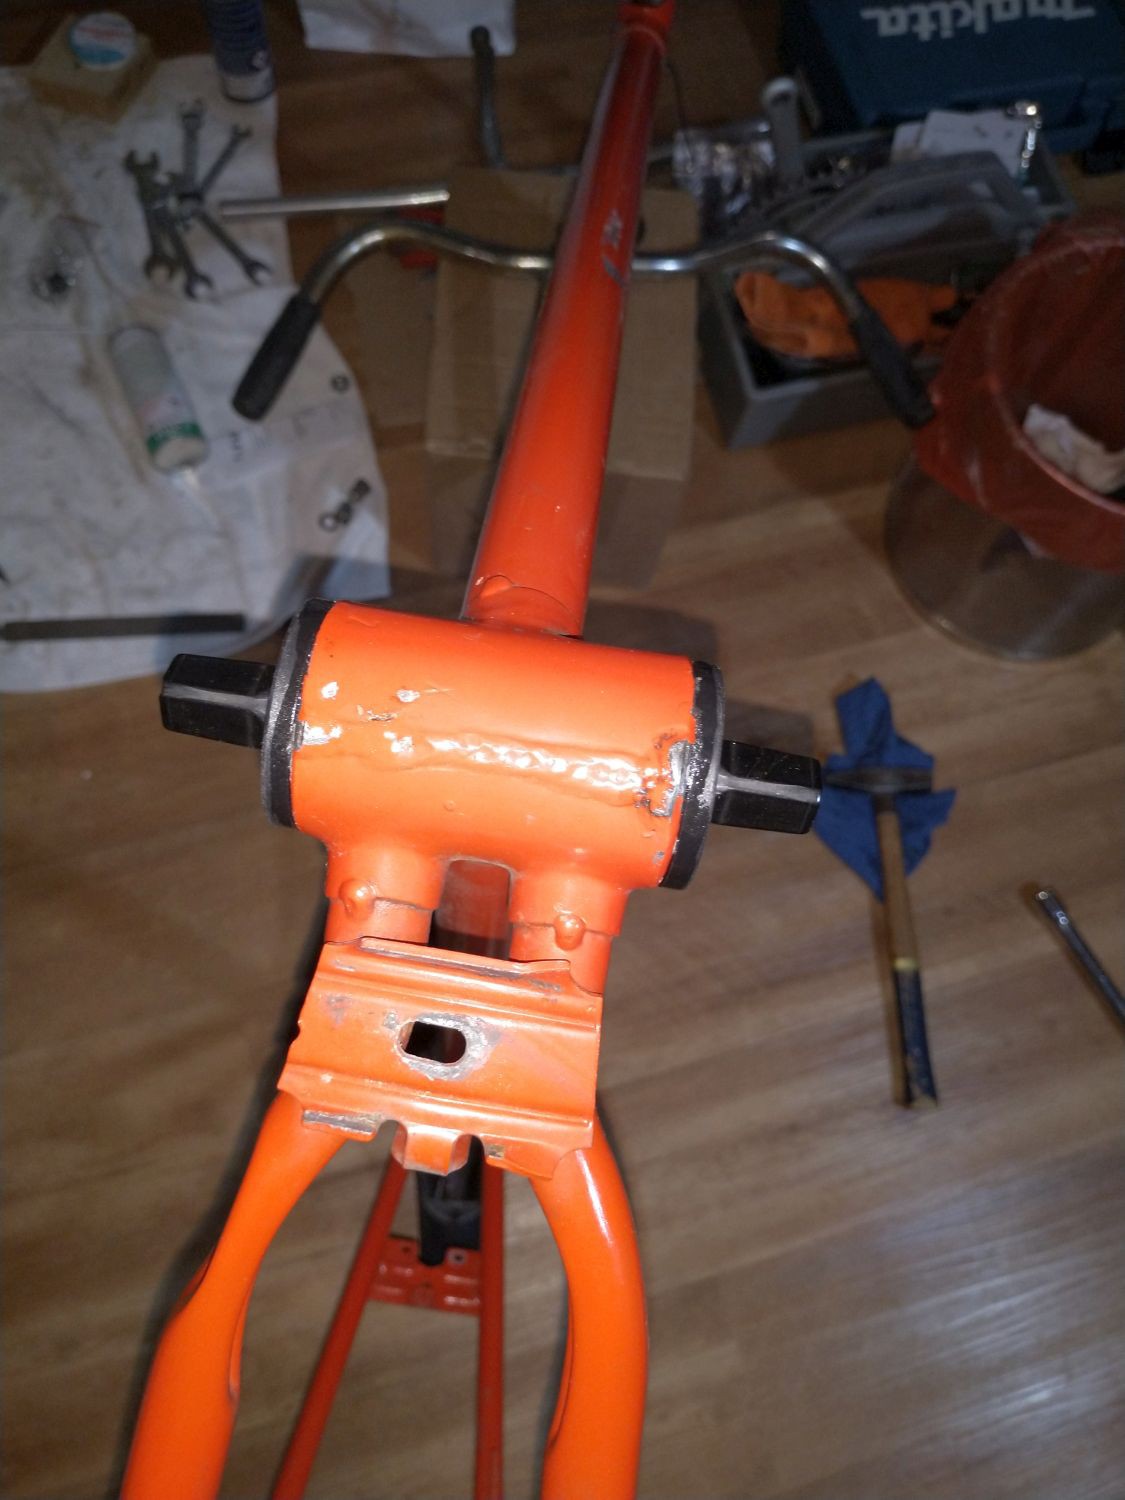
4.) The bottom bracket
04/03/2021 at 04:25 • 0 commentsI spent one afternoon and two evenings to modernize the bottom bracket (BB).
![]()
Original condition:
Thomson BB with 'all steel' chainwheel and 'wedge axle' crank armsThe original part was a Thomson type BB with wedge axle.
As mentioned, the crank arms were rusted and too heavy also. I decided to dismantle the crank arms and the BB completely.
The BB shall be replaced by a semi-modern square taper version.
![]()
Wedge axles are odd to square taper crank arms
*
![]()
Sturdy frame: All the residues on it were dirt and oil - no rust
I've purchased a 36mm bottom bracket, which was to small unfortunately. One shall read the description of the offer: "... not for replacement of 40mm Thomson bottom brackets." Silly, I am.
![]()
Wrong diameter = too small!
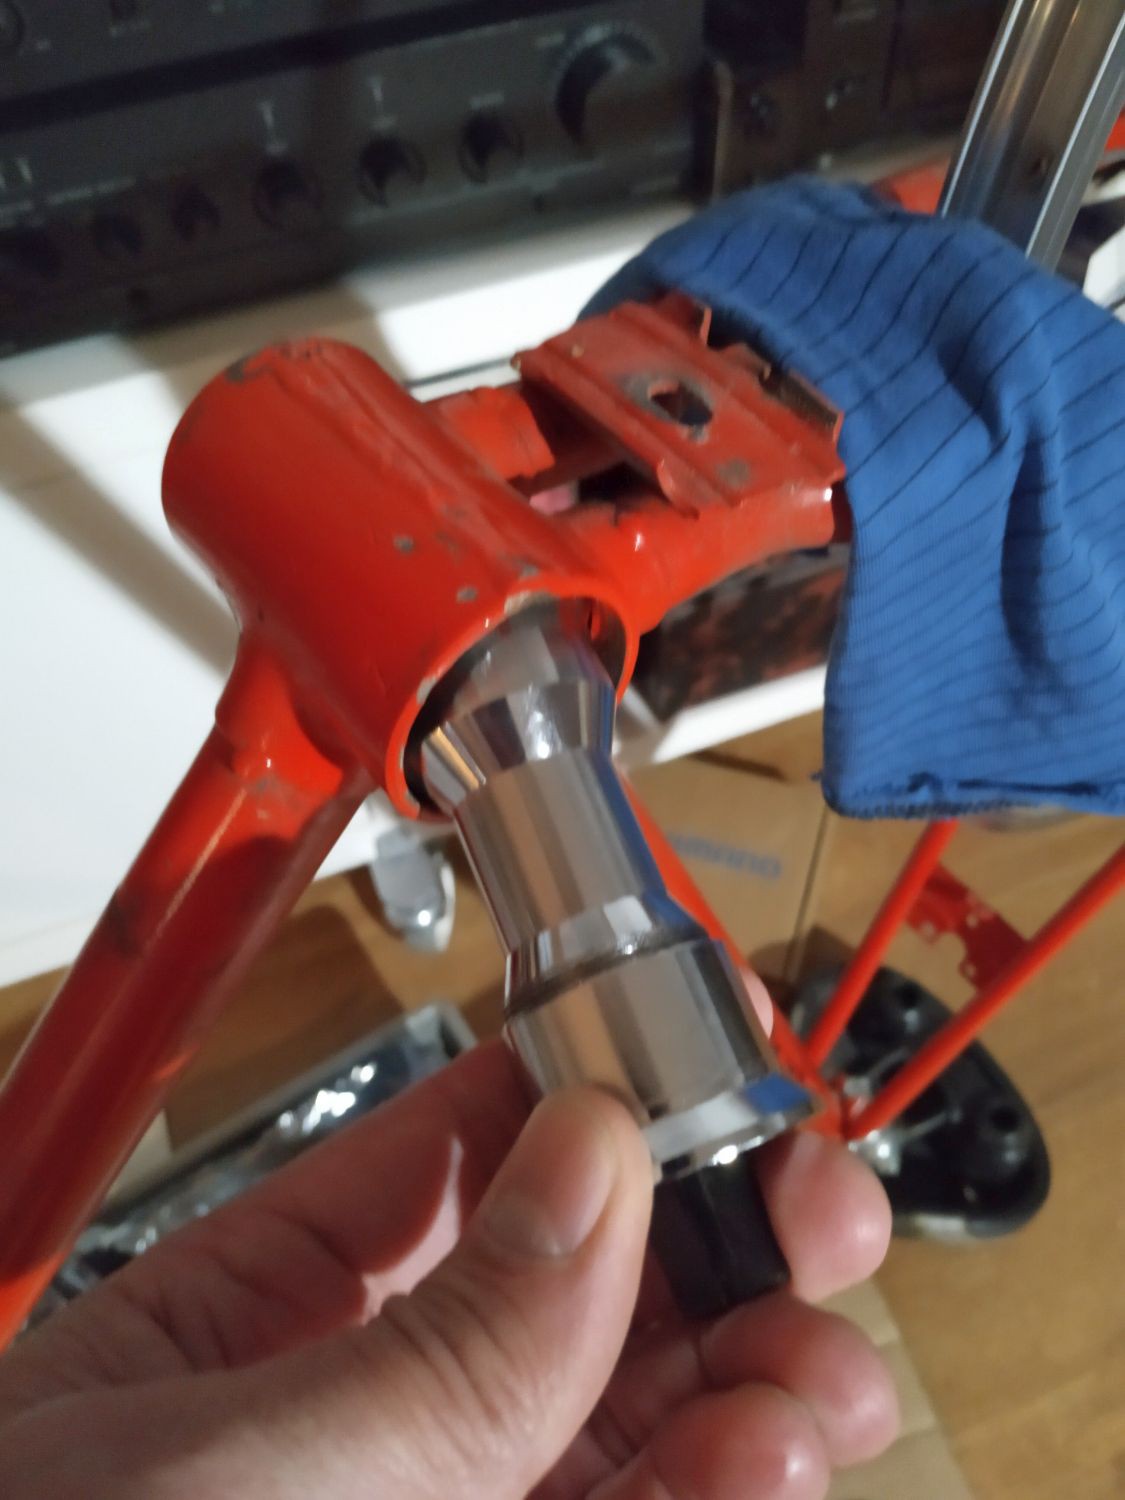
By searching the internet I found this: THUN-BB-40mm, but, alas, it´s out of stock. I haven´t found any similar part.
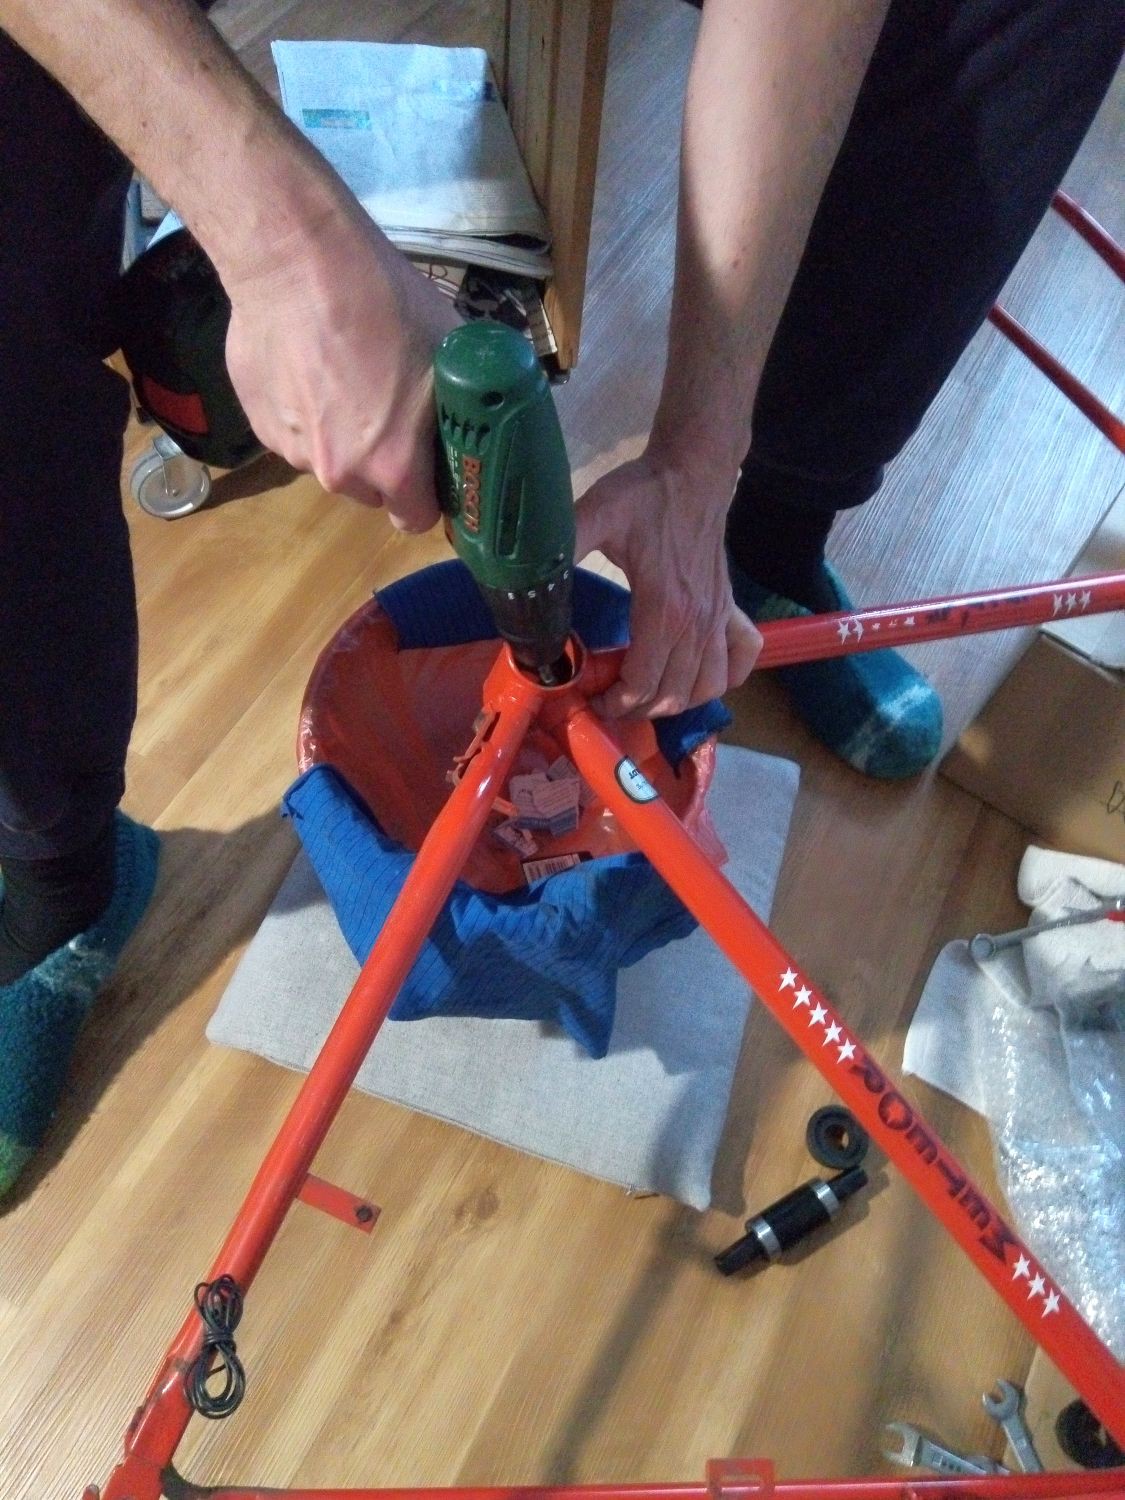
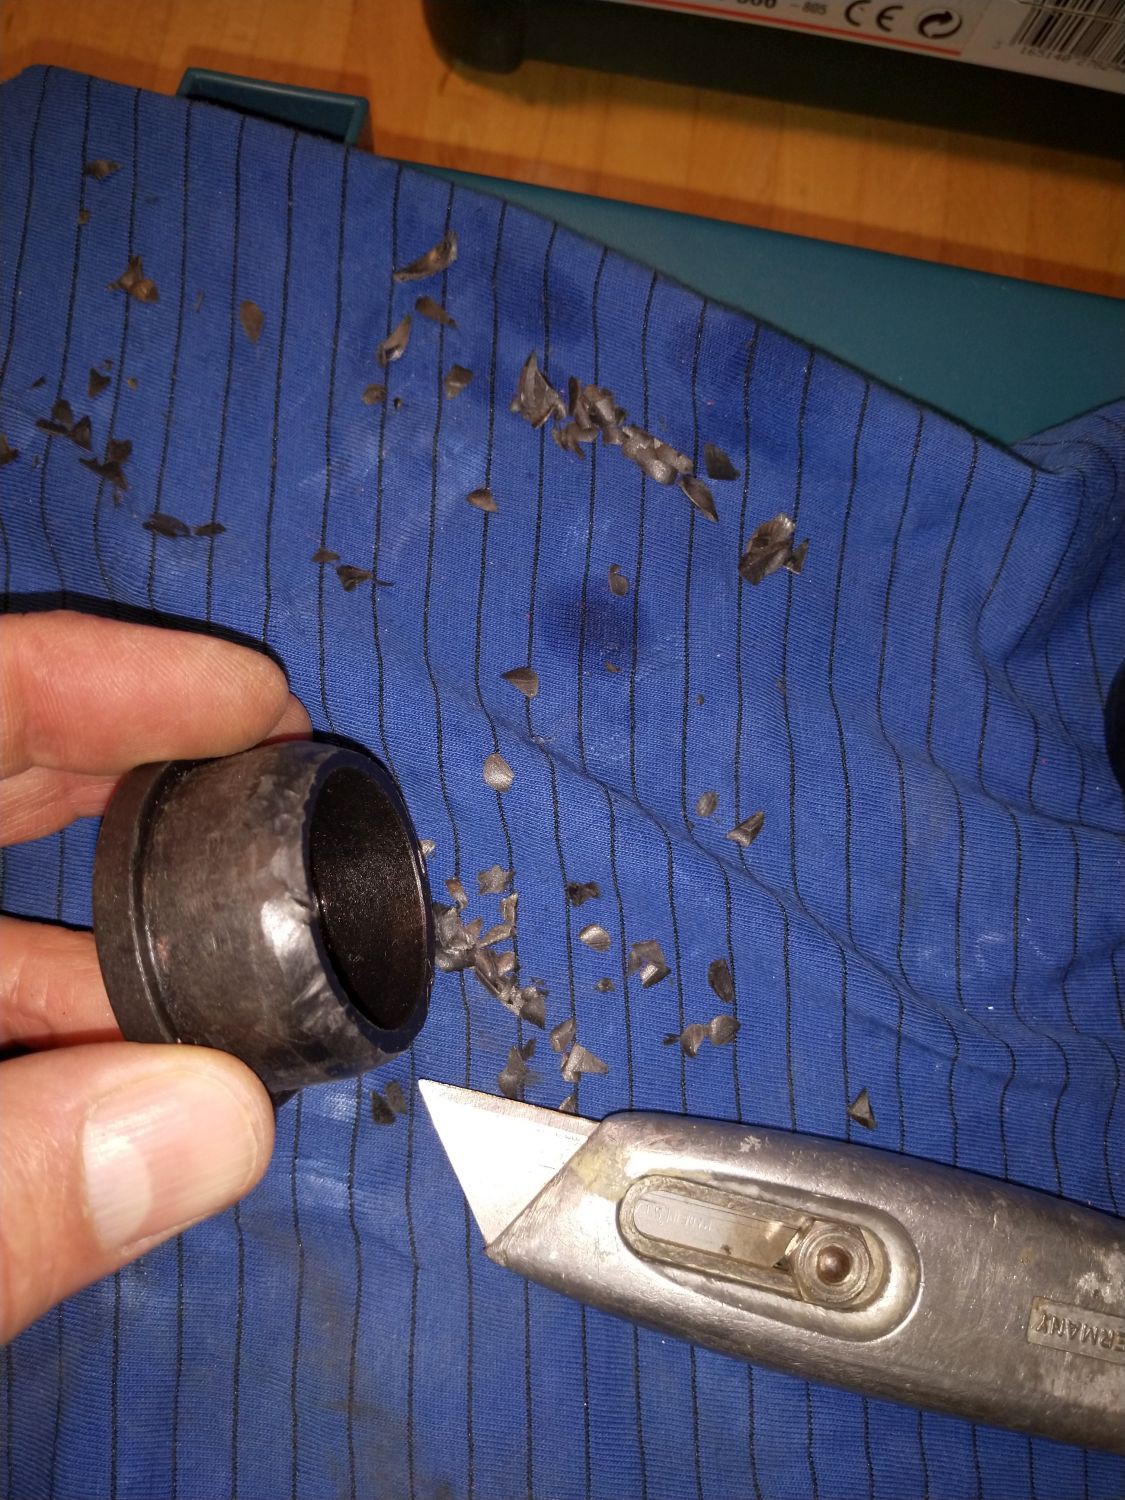
The second best solution would be the purchase of a Sunrace 40mm press-fit bottom bracket which theoretically shall fit.It does *not* fit! The polish frame builder has hollow turned the inner area just to fit in the Thomson bearing shells. The nylon shells for the new bottom bracket are more wide and the press-fit got blocked. I spent five hours grinding off the metal inside to make it sort of fit finally...
![]()
Grinding excess metal inside the BB housing
*
![]()
Cutting away excess plastics from press-fit bushing
*
![]()
Finally, after hours of trial and error, it fits in
A better solution would be to make turned parts from stainless steel to center the formely purchased, screwable 36mm bottom bracket into the frame, but I don't know anyone with a lathe to ask for.
Result: The press-fit bottom bracket is mounted. The time will show how durable this imperfect solution is.
Next chapter: The chain wheel, Part 1
-
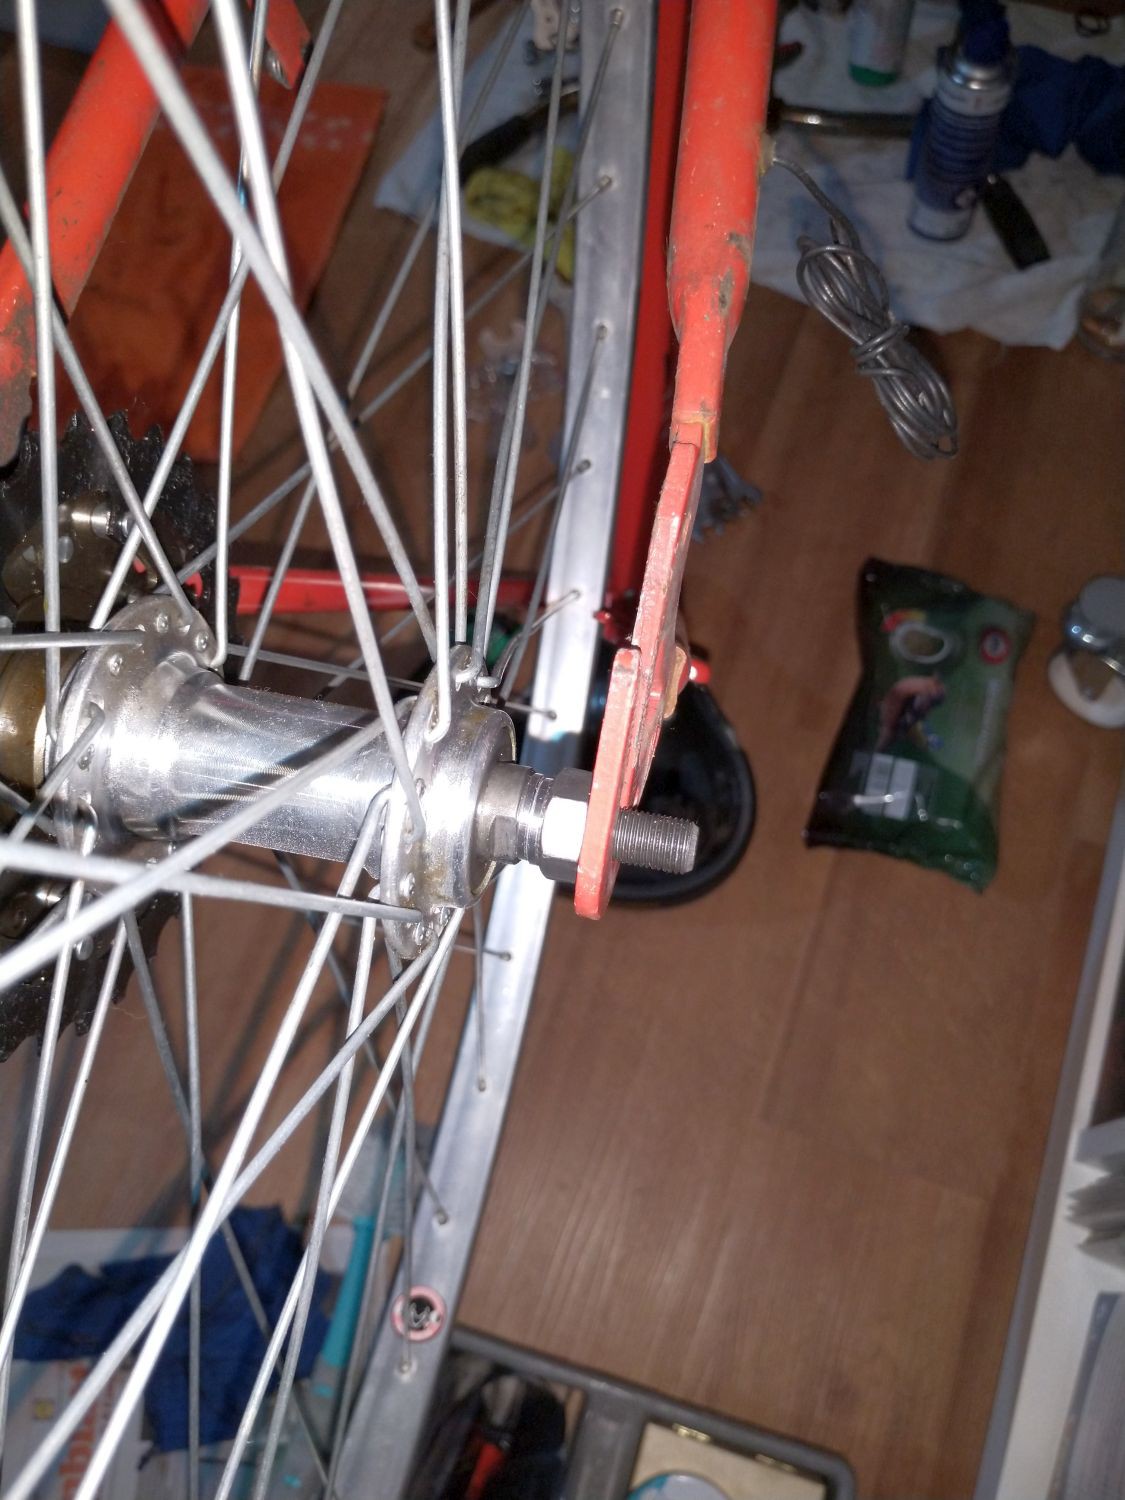
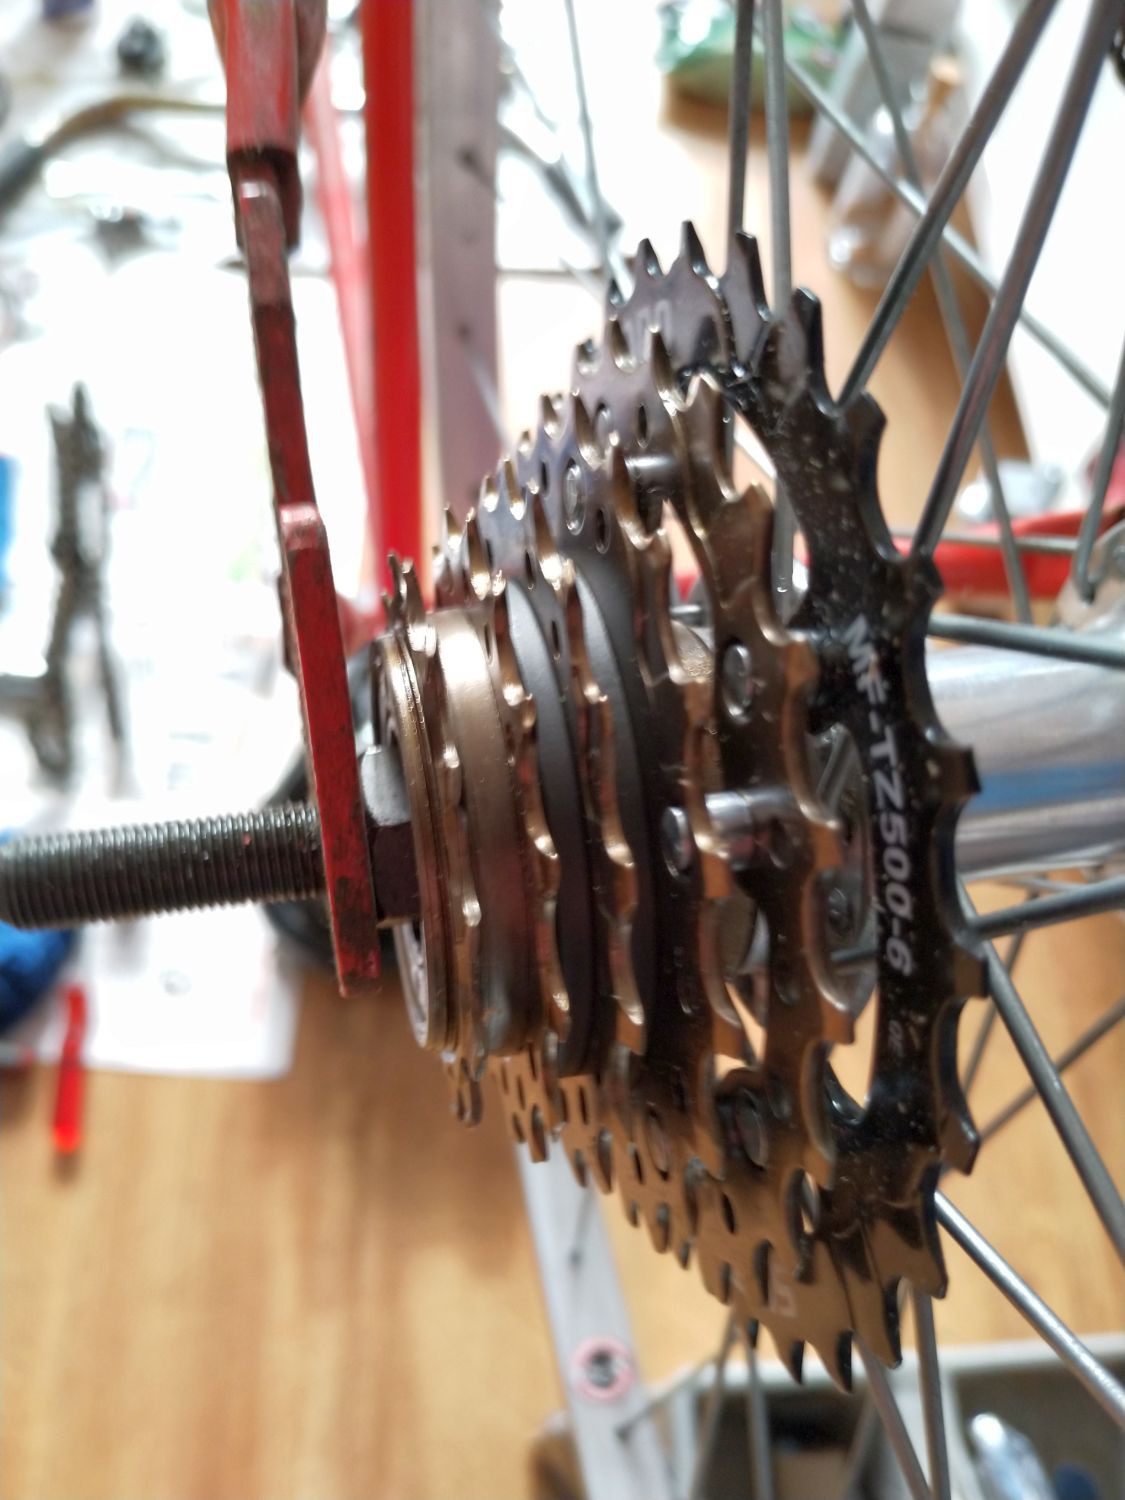
3.) The rear wheel
04/02/2021 at 18:14 • 0 commentsAs mentioned before, the re-spacering of the rear wheel has an additional challenge:
- the cogset must fit between frame and rear wheel;
- the rim must run centered between the chainstays;
- the rear dropout must not be bent apart or tilted.
That means: No frame modifications are accepted, I fear a crack in the stays.
![]()
The original condition fits in with too much force... not good
![]()
First attempt: The rim is *not* centered between the chainstays
After checking it with a caliper and recalculating the distances it turned out as follows:
![]()
Left side: 4mm bushing and nut taken from the front wheel
![]()
Right side: 8mm bushing and nut: The cogset fits perfectly
The rear dropout width is 120mm and the re-spacered axle now has 122mm. Good.
Next chapter: The bottom bracket
-
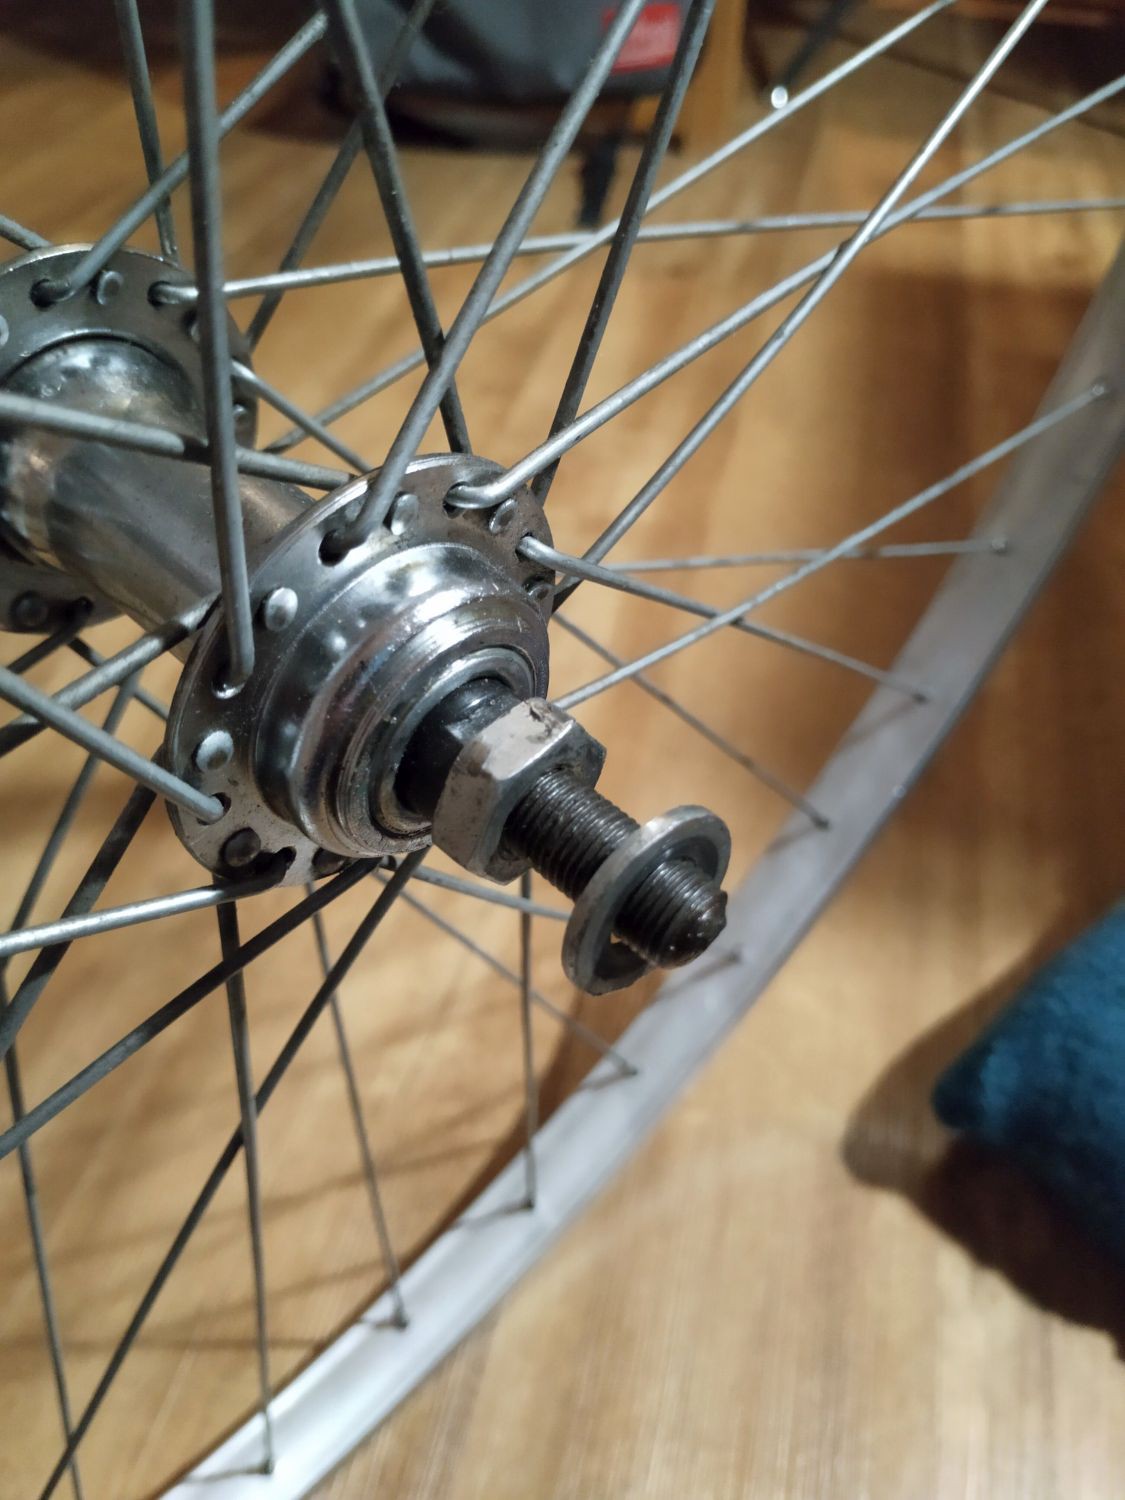
2.) The front wheel
04/02/2021 at 17:01 • 0 commentsI found a nice used pair of wheels at a flea market, for a good price of 25€. It is a standard pair of 28"-wheels: The axle width are 100mm (front width) and 130mm (rear width). The wheels should be appropriate to almost any of 1980...2000s bicycles. The rear wheel has also the wanted thread for a 5- or 6-gear sprocket wheel cassette (cogset), a perfect match to METEOR and exactly what I've searching for as a replace for the heavy-weighting 3-gear Sturmey-Archer hub.
![]()
Front wheel from flea market, unmodified (wide nut)
Less funny was the realizing the wheels are not matching into METEORs frame. Its fork width was 90mm, the rear width 120mm only. I haven't noticed that before and no clue what to do now.
I browsed many web sites formerly hosted by the bicycle genius Sheldon Brown. He describes a method to match wheels to frames by altering bushings on the axle (so-called 're-spacering').
To do so, one had to consider:
- the cogset must fit between frame and rear wheel;
- the rims must run centered in the frame;
- neither the fork nor the rear dropout must be bent apart or tilted.
A true imposition: Depending of the axles threads, I have searched the net for the needed nuts, bushings, and so on. The following table gave me a slight hint how complicated the matter really is:
(external link to wikipedalia.com) Table with thread measures
All these indications were confusing me deeply, because I´m living in a "metric spere" here in Germany and I wasn't aware with the imperial-alike threads in this table (which are actually a 'blend-o-mixture' of threads in more than 100 years of cycle technology history).
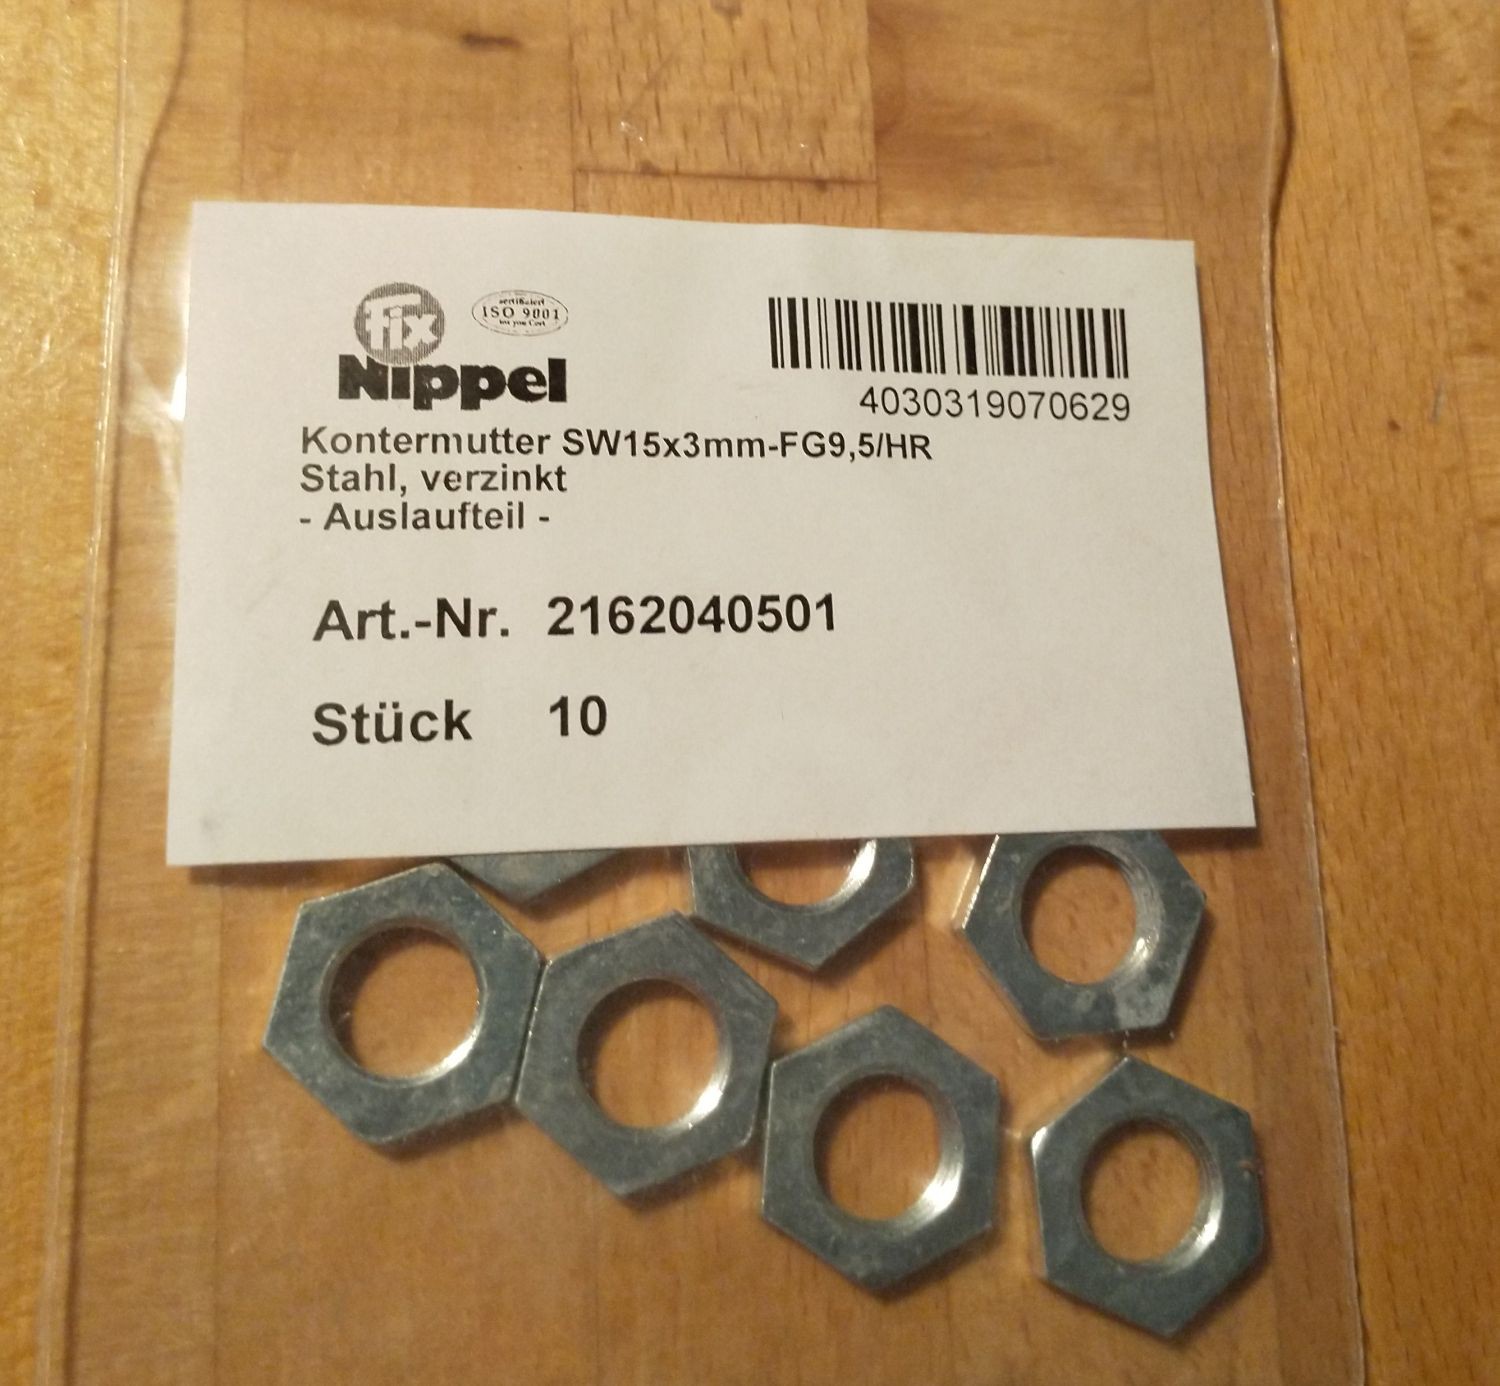
OK... the flea market wheels do have FG9,5 (Fahrradgewinde 9,5mm) = Bicycle thread 9,5mm) axles. Matching parts can be purchased at ebay, fortunately.
![]()
Rare narrow nut. 'Auslaufteil' means: No new manufacturing, remainder of stock
*
![]()
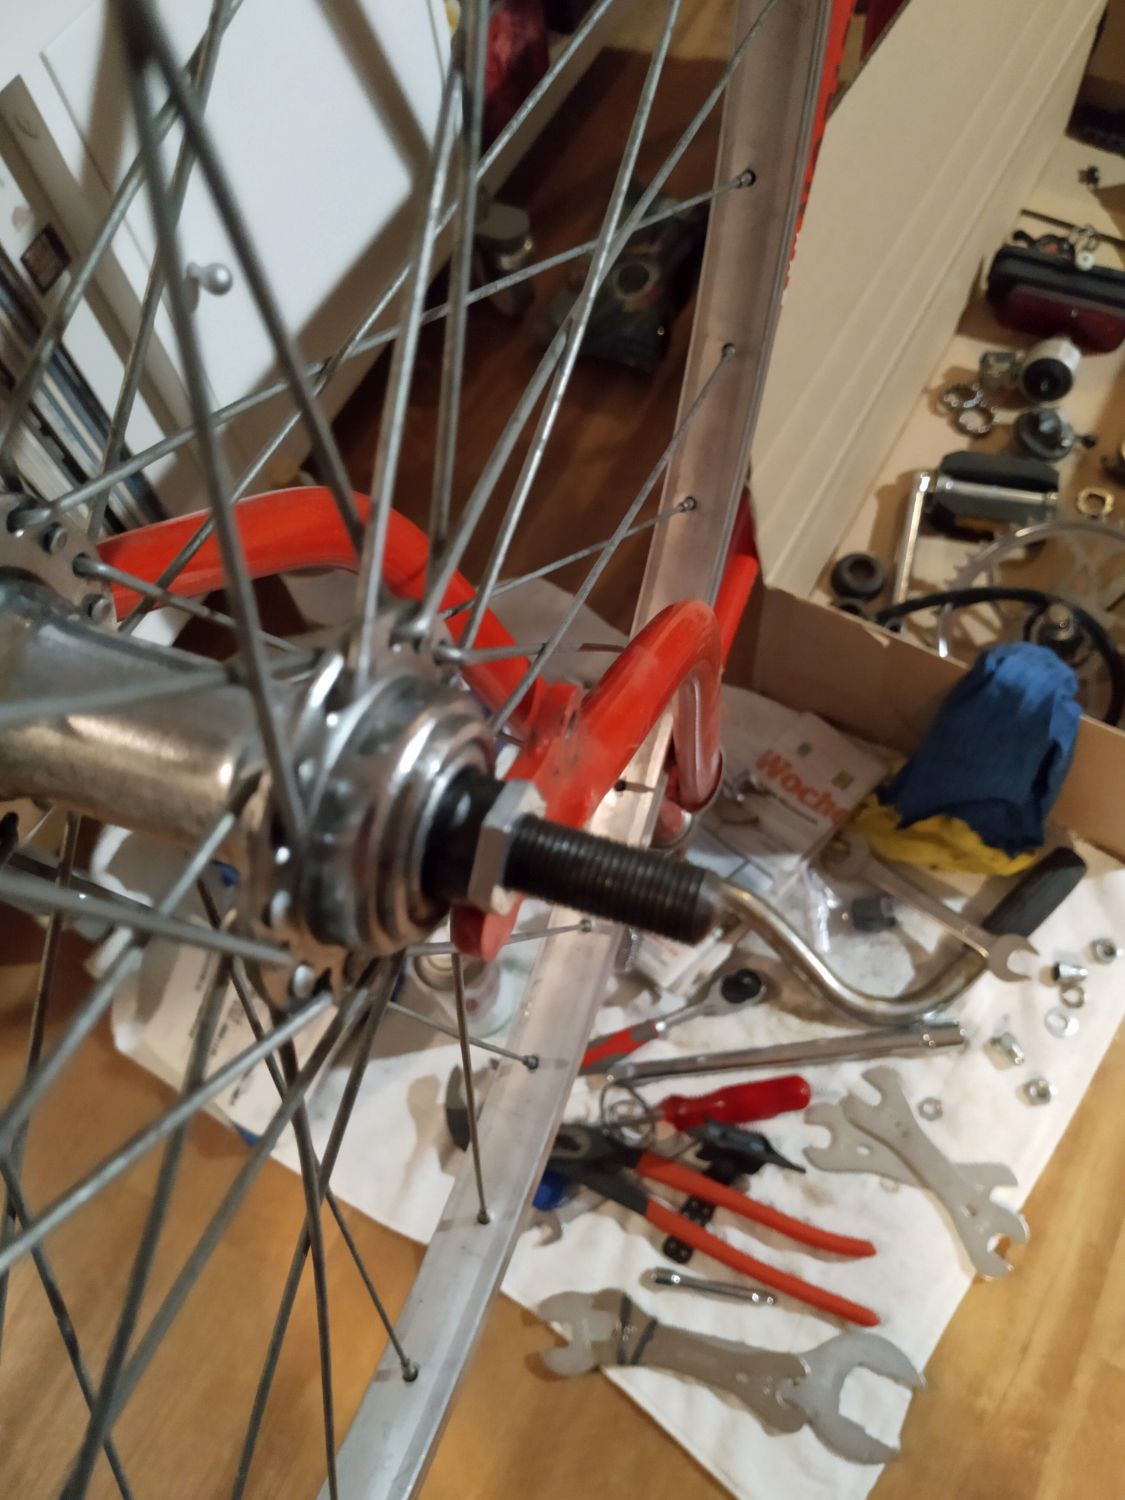
Front wheel, respacered, with special FG9.5 narrow nuts applied
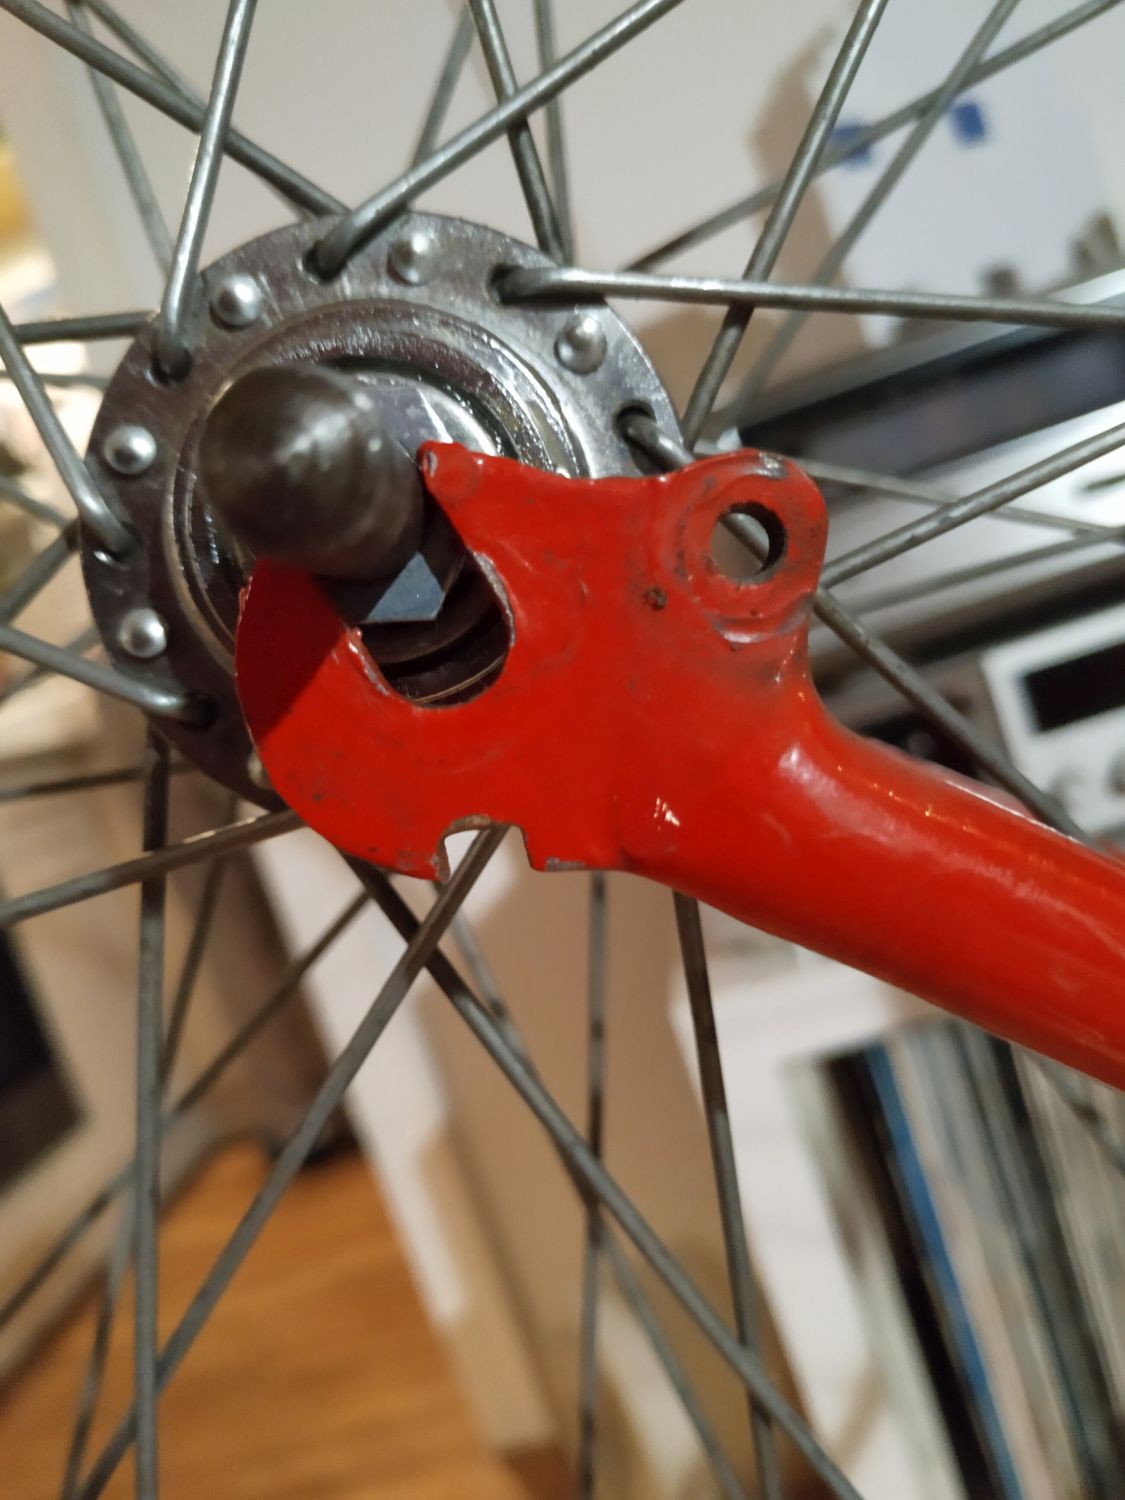
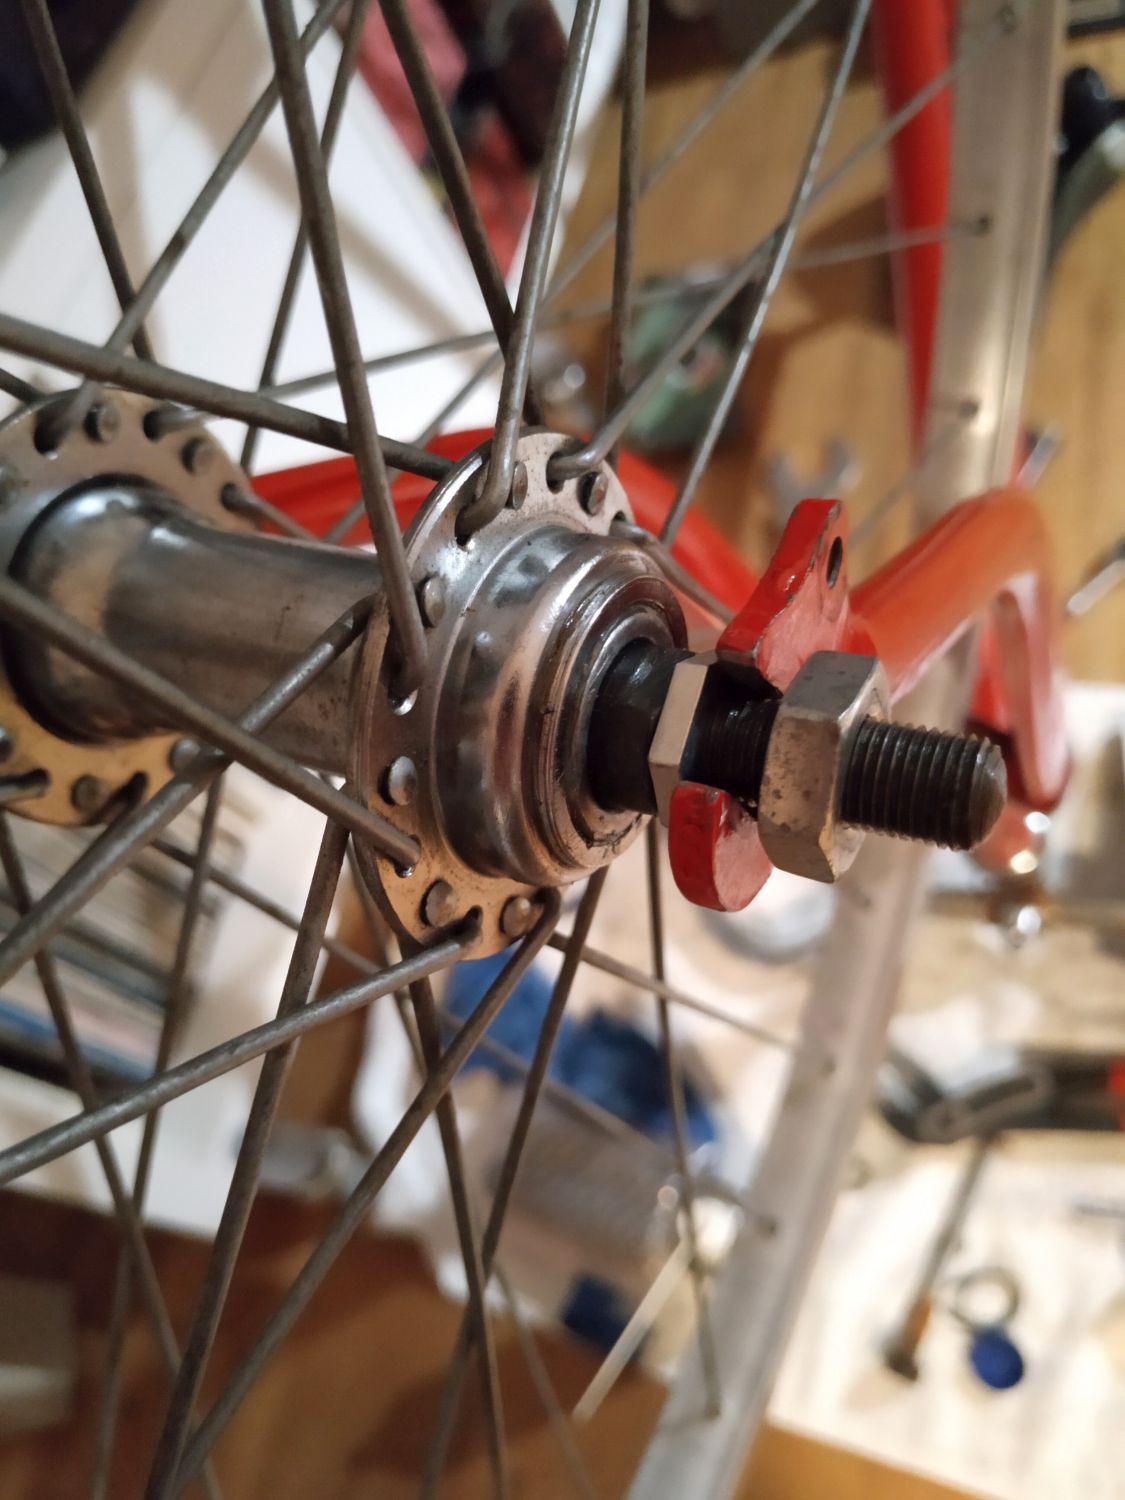
Result: The axle width is now mathing with the frame, but I had to file the front wheel axle clamp from 8.5mm to 9.5mm to fay:
![]()
Original clamp size was 8,5mm while axle diameter is 9,5mm...
*
![]()
Proper filing - done well :-D
The axles ball bearing then got all new grease, the rims also got trued well. The tire, model "Schwalbe Delta Cruiser" (ERTRO 37-622), in used but good condition, came from my stock.
Next Chapter: The rear wheel
-
1.) At a glance
04/02/2021 at 14:02 • 0 commentsHistory
METEOR is branded by 'Karstadt', a well-known and very long-established department store chain in Germany. The bicycle was made around 1980 in Poland. The genuine manufacturers name is ROMET.
As you might know, Poland was part of "Eastern Europe" before 1990, and, like all Soviet-bloc-countries, it always needed forex (foreign exchange). The export of e.g. receivers, TV sets or bicycles ensured this kind of revenue. The polish brother of METEOR can be searched as "Predom Romet Orkan".At a glance
METEOR is really old-fashioned, sturdy and massy. No aluminum parts were used on it. Chromated Fenders, handle bar, cranks, chainring, brakes, front rim, brake lever... it is 'all steel' work.
Due to its extended stay outside, nearly all unpainted metal was either stained, pitted or rusted heavily. Also, the tires and the saddle were crumbling from the sun.
I know, any other bicycle hobbyist would tell me: "Toss it.", but... no.
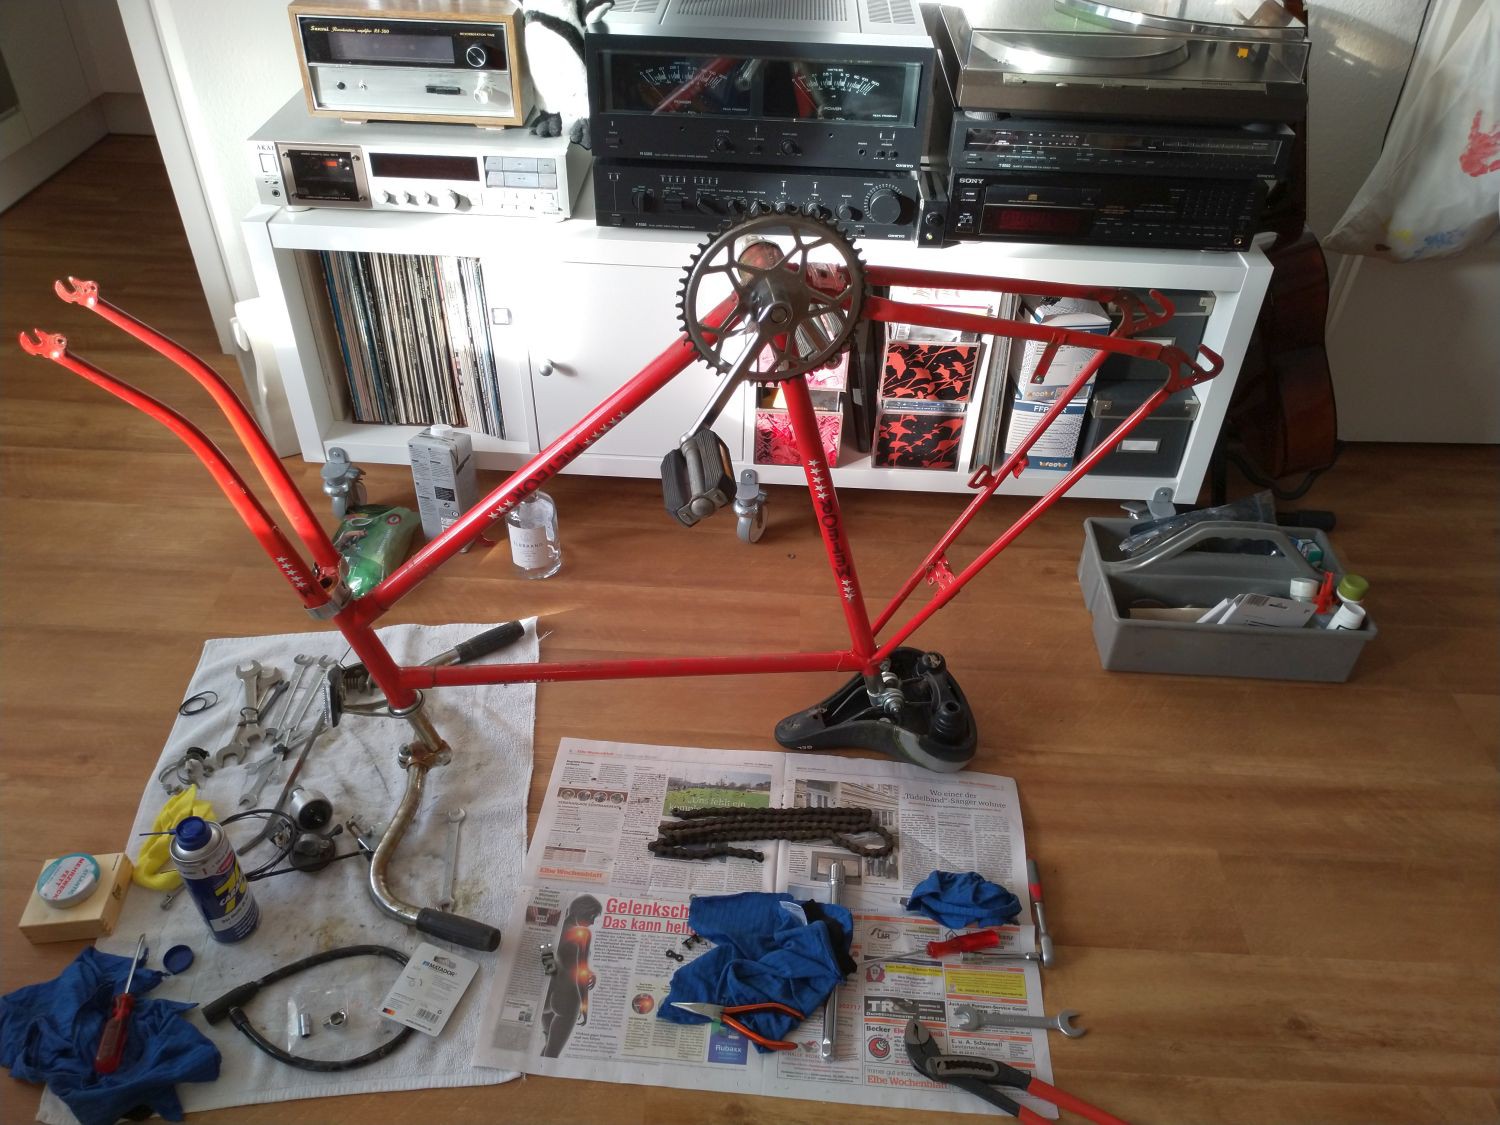
My order is to bring it to a new life.First, I have disassembled everything off the frame step by step...
![]()
Disassembling step by step
Note: The old rear wheel contains a Sturmey Archer 3 speed hub, also on a steel rim. The complete wheel is without rust and the hub itself seems to be almost undestroyable. I will put it on stock!
![]()
gear shifter
![]()
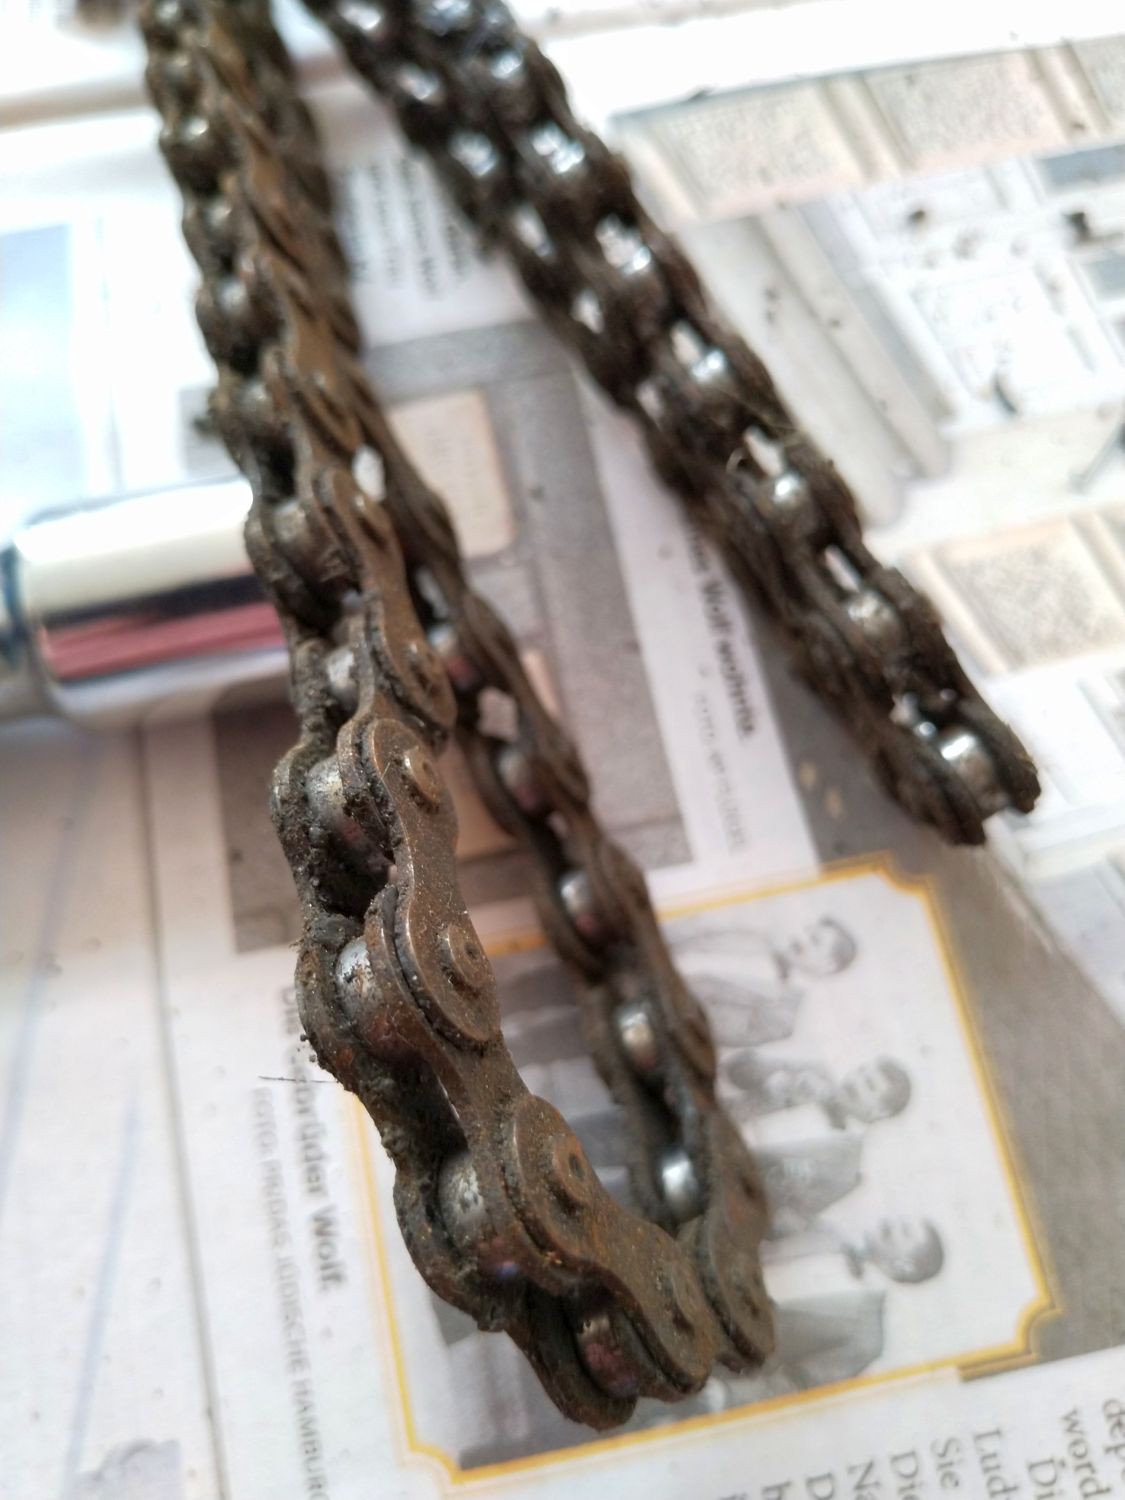
40 year old monster chain!
![]()
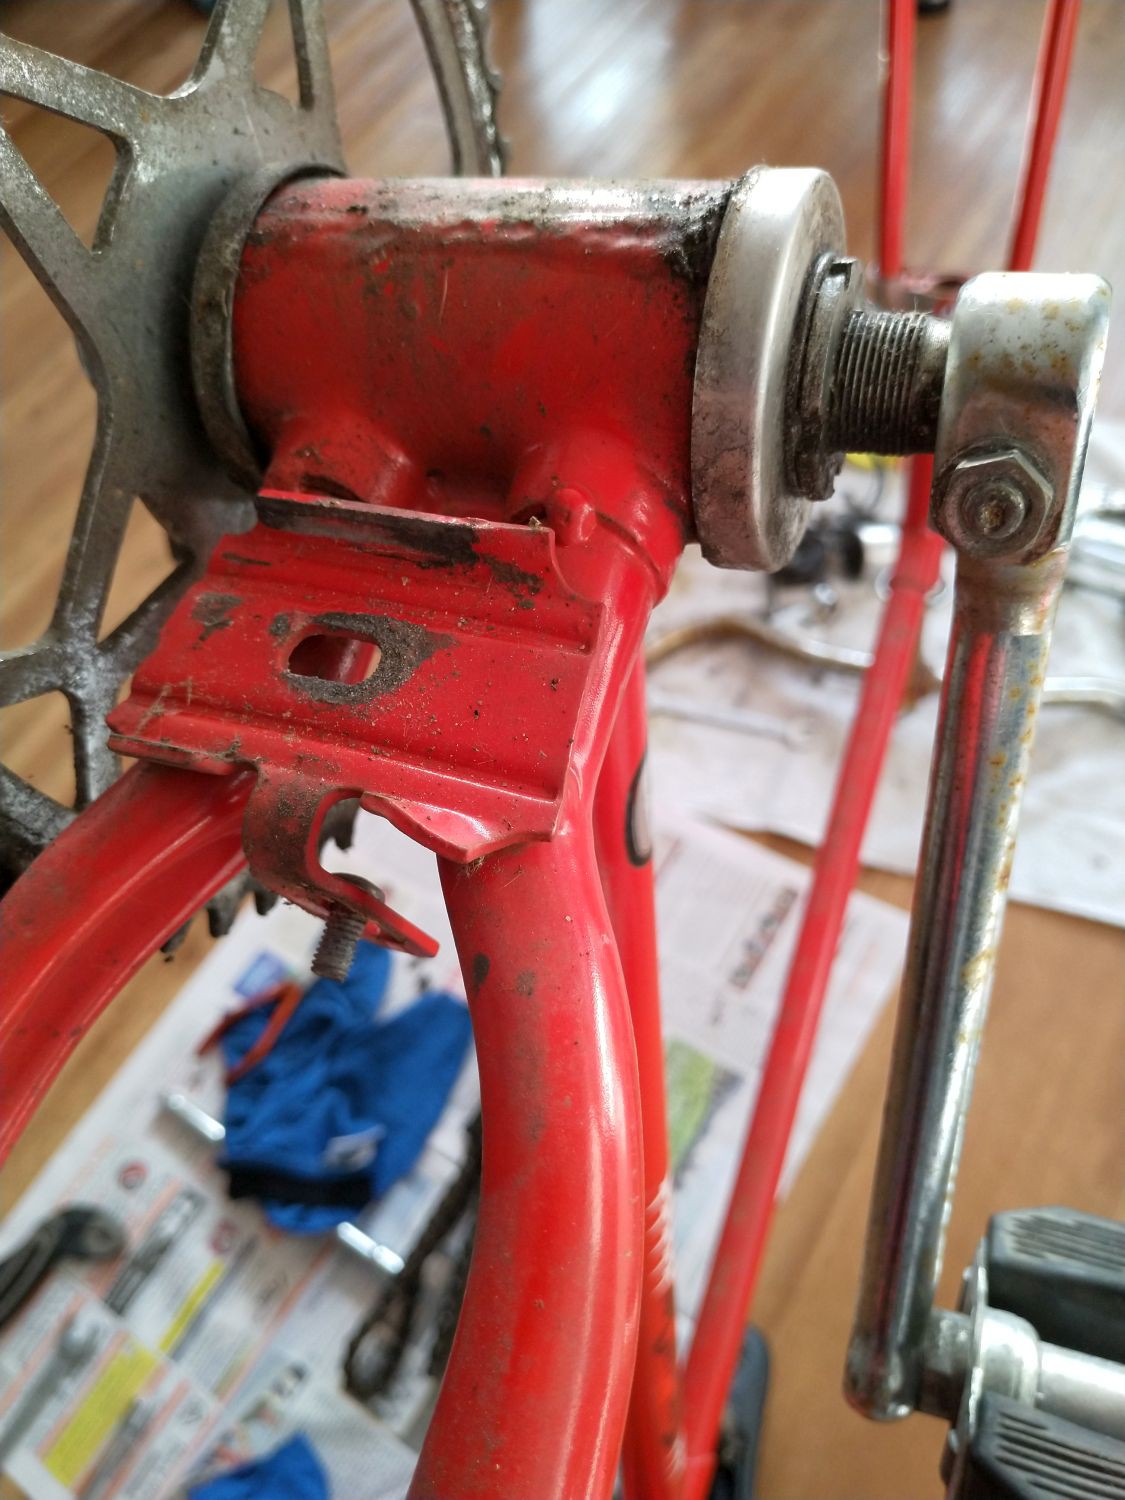
All-steel Thomson bottom bracket and crank arms
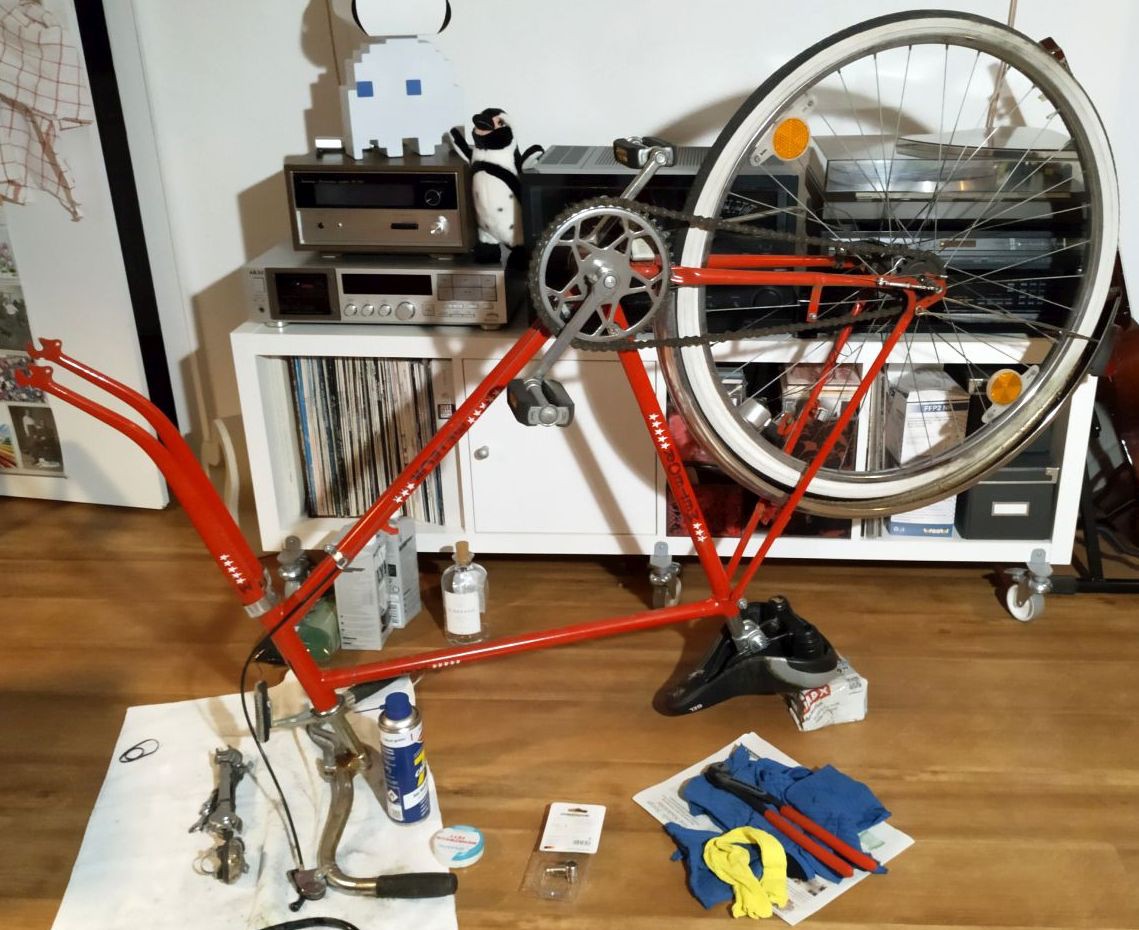
![]() Saddle and handle bar remain for now to let the frame stand upright (I have no workstand)
Saddle and handle bar remain for now to let the frame stand upright (I have no workstand)
Next chapter: The front wheel


 Saddle and handle bar remain for now to let the frame stand upright (I have no workstand)
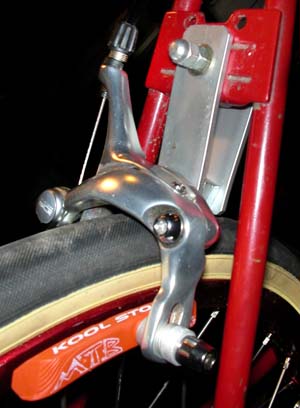