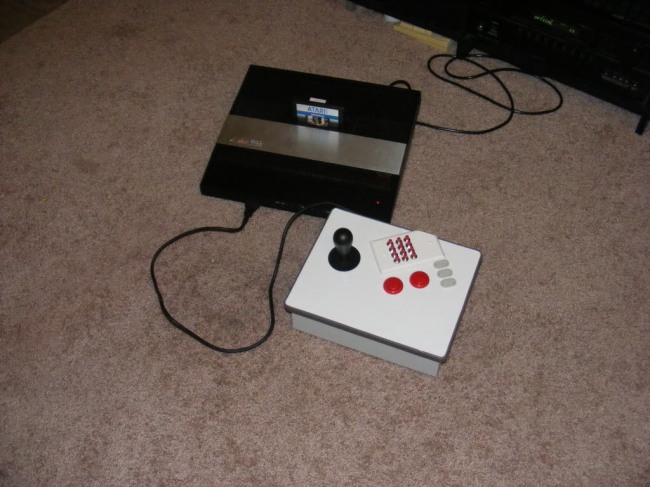
-
1Step 1
The problem lies in the lack of response, over time the little pads inside become corroded and unresponsive. Eventually, no amount of cleaning and disassembling actually fixes this and you end up replacing either the entire controller or purchasing one of those repair kits off the net. I ended up trying several different methods to solve the issue, first was just to replace the momentary contacts with micro switches.
This worked, but was severely uncomfortable to use and was just an experiment anyway :) With a bit of tracing around with a multimeter and a piece of paper, I came up with a schematic.
So, I decided that I wanted to make an arcade style controller. After a bit of pricing out “kits” and the cost of building it from scratch, I stumbled upon the Generation NEX controllers. They were cheap… very cheap and looked perfect! I ordered two.
Upon receiving them, and a quick tear down, things were looking up. They were perfect for my purpose and the switches all were actually quite high quality for the price paid :)
The only issue I really had was deciding what color to make the paper under the glass, and where to put the keypad that is found on the original controller. The keypad is your typical 3×4 matrix style. For this I made a quick pit stop at the local hardware store and 80 cents later I had some outlet covers to try.
After drilling lots of holes in the covers and installing momentary contact switches, and using my dremel with a fine tip to engrave what button it was right on the button, the assembly was almost complete. At least the hard part was done.
Oh, and I engraved the other switches too, just so I would remember what they were for…
The next step was to make a rough cut in the wood to allow access of the keypad wiring for installation, as there is a plexiglass top on this controller, it didnt have to be accurate, just a rough cut was fine.
Then a dry fit of everything and to make sure that it would all work, I did end up shaving off a corner of the outlet cover :>
The next bit was simply running a lot of wires and mounting the potentiometers in a nice spot to allow centering adjustment. This controller is essentially a digital device that converts the digital input to an analog resistance to be interpreted by the console as if you were using those horrible “full analog” stock joysticks. Yep, my wiring is a bit sloppy but in this case, that doesn’t really matter, the extra length allows me to easily open the bottom panel and not worry about ripping things apart. I used a couple staples as strain relief near the potentiometers.
The potentiometers are mounted so that they were accessible through the old battery compartment and can be hidden simply by closing the cover.
How does it work? For most games, it works beautifully! Games like Defender and Space Dungeon (you need two controllers for this one and why I built two) are absolutely wonderful to play! Games that do not work quite right with them are the ones that read an analog signal from the controller, this would include super breakout. I have considered installing a “spinner” type controller that is easily accessible to allow this type of game to be played or simply moving the horizontal pot. Another option would be to just add a DB9 port to allow the original Atari paddle controllers for the 2600 to be used.
DONE!
This controller works great for games like defender. If you build 2 of them, it is amazingly awesome to use in games such as space dungeon or robotron.
Thanks :)
Atari 5200 Custom Controller Build
Have you ever tried playing a retro-game and even though you really want to like the game, the controller just seems to get in the way?
 ThunderSqueak


Discussions
Become a Hackaday.io Member
Create an account to leave a comment. Already have an account? Log In.