lj
lj-
shake to reset!
06/17/2014 at 15:47 • 0 commentsI’ve been working on the controller slowly these last few days. I got a 9-axis imu hooked up now and have it controlling the reset. So far it just resets when you turn it upside down. No shaking required. I tried reading the X-Y data when it was upside down and being shaken but it just came in as a jumble of quickly changing numbers. I think its good enough for now. I’ve also switched to using the integral push buttons in the encoders for the up and down of the Z axis.
I’ve got it all stuffed into the frame to test. The problem is the cables for USB and HDMI are all long and thick. So I’ve been soldering in some direct connections where I can. So serial from arduino to raspi is direct over gpio instead of USB, one thick cable gone. And for the video from the raspi to the screen has been moved from the HDMI over to the composite video connection. And that connection is also using some bodged on header to do the connection instead of the barrel connections. Second thick cable out of the way. now it’s a mess of rainbow cable crisscrossing inside making all of the needed connections. I’ve made a resistor divider for the tx-rx from the arduino to the raspi since it needs to step down from 5v to 3v3 so as not to fry the raspi. Progress is coming along nicely.
I've found an old printer on the street that will be serving as the donor for the paper transport. I'm not sure if I'll be able to use the paper path intact or not, but if nothing else I'll be able to use the rubber rollers to move the paper around. I'm also planning on refitting the printhead carriage with an exacto knife to cut the roll after each picture. I'm planning on doing the disassembly and parts harvest with my kids. Hopefully the parts harvest will yield some good results. The last few printers I've taken apart have been somewhat disappointing. The older dot matrix and lasers always have better parts than these newer inkjet all in ones.
-
display progress 1
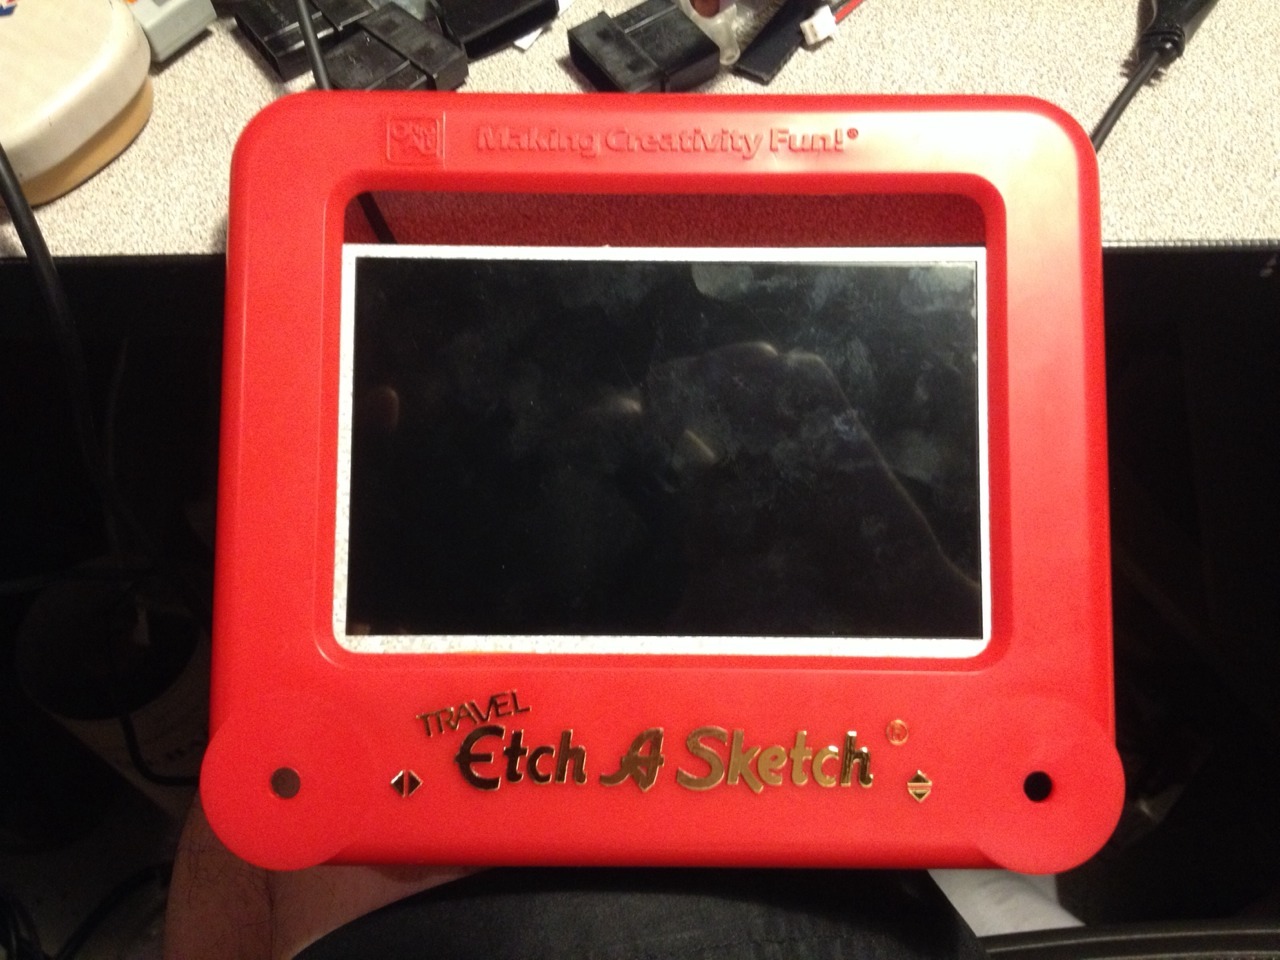
05/06/2014 at 03:19 • 0 commentsSo I got the display and stuff working. It is running a small 5" lcd panel shoved into the frame of the travel etch a sketch.
![]()
There's a small 0.5" gap along one edge, but I think it'll be ok. The slightly larger panels cost about $100 more, I don't think it's worth it.
![]()
I'll post a video of the whole thing working in the next few days. Next I have to dig out the 6dof imu board I bought ages ago but never got around to using for the balancing bot idea I had.
-
Initial log entry
05/02/2014 at 21:17 • 0 commentsI started building this and documenting it on a blog, but then saw this platform which might be easier to share/display on. I'll be double booking my entries between the blog and here, with the blog getting updated first most likely. So far I have my initial design done and the code functioning. moving the dials moves the CNC head. I'll be adding in more features as time permits. so far I have a processing sketch that draws the same coordinates on the computer screen so you can visualise the motion on the screen as well as seeing the CNC carry out the same commands. I'll be attempting to shove the electronics into an actual etch a sketch toy for authentic feel. I'll be attempting to cram in a small display in place of the drawing surface as well to add in more realism to the build. I'll be attempting to incorporate an accelerometer to allow turn upside down to reset functionality. And finally I'll be attempting to add in some automated paper handling to hand the user the completed drawing when they reset the display. That last one is a stretch goal and we'll see how close I can get to it.