Brenda Armour
-
Testing Node-Red
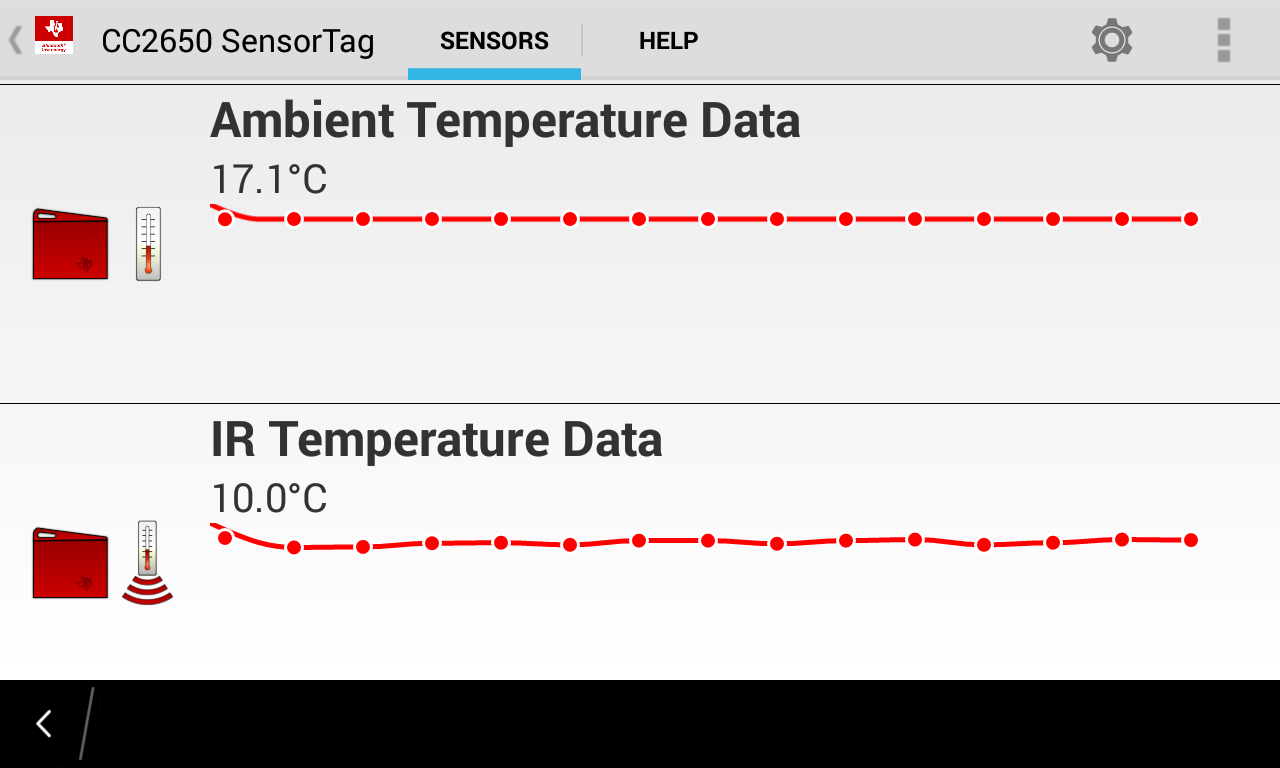
04/06/2016 at 22:48 • 0 commentsI am experimenting with my Blackberry Z10, Simple Link Sensor Tag and Node-Red on my laptop. Once I have configured the Sensor Tag Node with its MAC address , I started receiving notification in the debug window. The MAC address was easily obtained from my application on the Blackberry. So now I have set my threshold for Ambient Temperature for 18.0 C. Anything equal to this or above this should send a warning message to the debug window. I can also setup Twitter or Email notifications if the threshold has been exceeded.
For this testing stage I have my Blackberry connected to the sensor tag and sending sensor data to IBM Bluemix Cloud. This is only phase 1. I need to replace the smart phone with an IoT gateway and build a mesh network using Xbee modules to meet that goal of distance. Before that I would like to test email notification if a defined threshold has been reached. The Ambient Temperature in my room is about 18.2 C
-
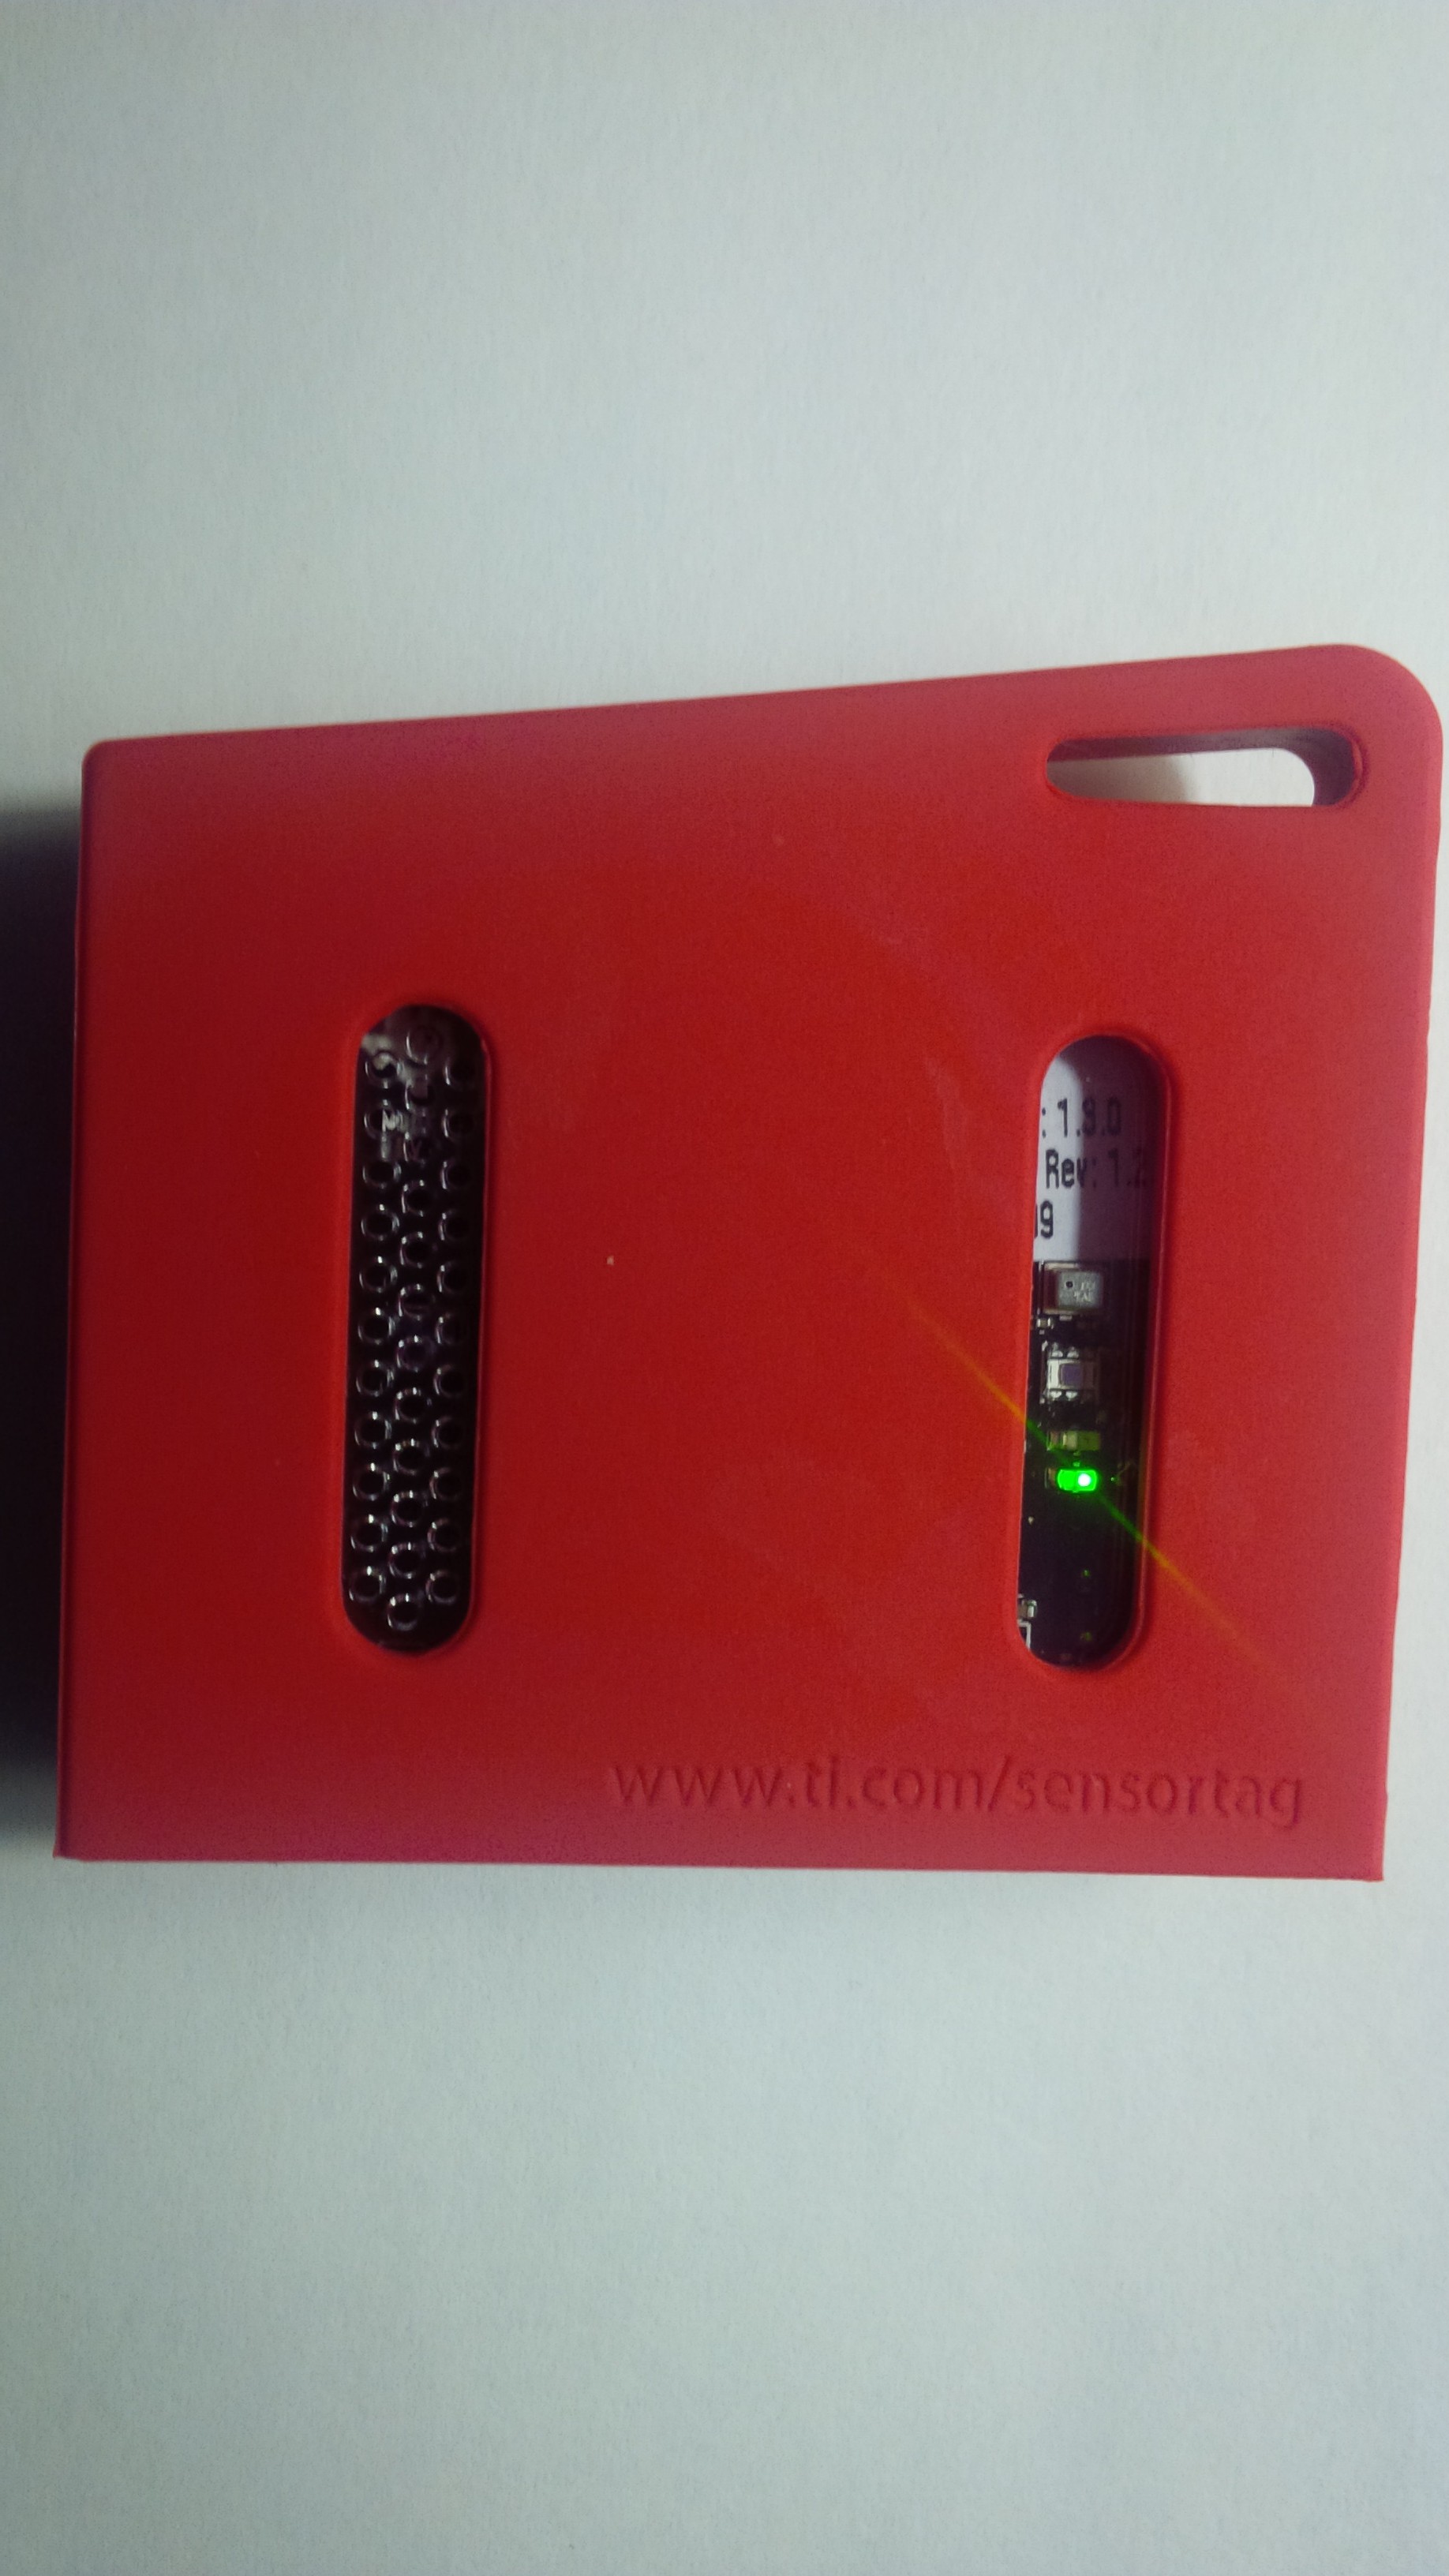
SimpleLink Sensor Tags did arrive !
04/05/2016 at 22:42 • 0 commentsSimpleLink Sensor Tag
This can be powered with a coin battery for a year and packs 10 sensors on one small form factor. The sensors for this project that I will be focusing on include:
- IR Thermopile Temp Sensor (TMP007)
Uses sensitythermopite to measure the infrared energy being emitter from the surface of objects.
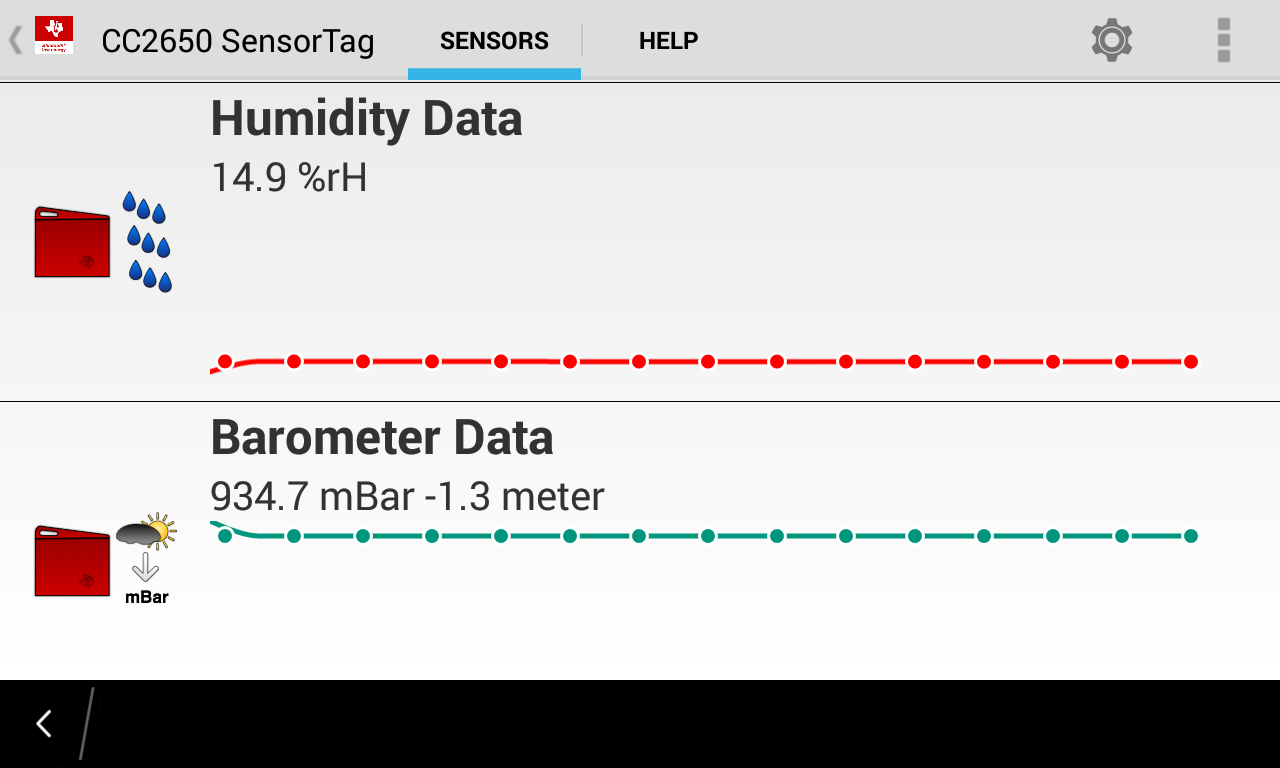
- Humidity Sensor (HDC1000)
A high accuracy digital Humiditysensor with a temperature sensor.
- Altimeter Pressure (BMP280)
Applications for barometric pressure sensors include weather monitoring, elevator / stair case detection, drop detection or indoor-navigation
- Ambient Light Sensor (OPT3001)
One can think of luminous flux as a measure of the total "amount" of visible light present. A given amount of light will illuminate a surface more dimly if it is spread over a larger area, so illuminance (lux) is inversely proportional to area when the luminous flux (lumens) is held constant. Measurement can detect if there is a full moon on a clear night, direct sunlight or a very dark overcast day.
One challenge was to upload the BLE sensor tag on my Blackberry Z10. I was able to find a SDK to install and with the version of Android on the phone there are a few limitations.
![]()
![]()
![]()
Xbee and ZigBee
1 XBee Explorer Dongle
2 XBee modules Series 1
These are the simplest and apparently plug and play. This is the very popular 2.4GHz XBee module from Digi. These modules take the 802.15.4 stack (the basis for Zigbee) and wrap it into a simple to use serial command set. These modules allow a very reliable and simple communication between microcontrollers, computers, systems, really anything with a serial port! Point to point and multi-point networks are supported. I am hoping to receive these soon.
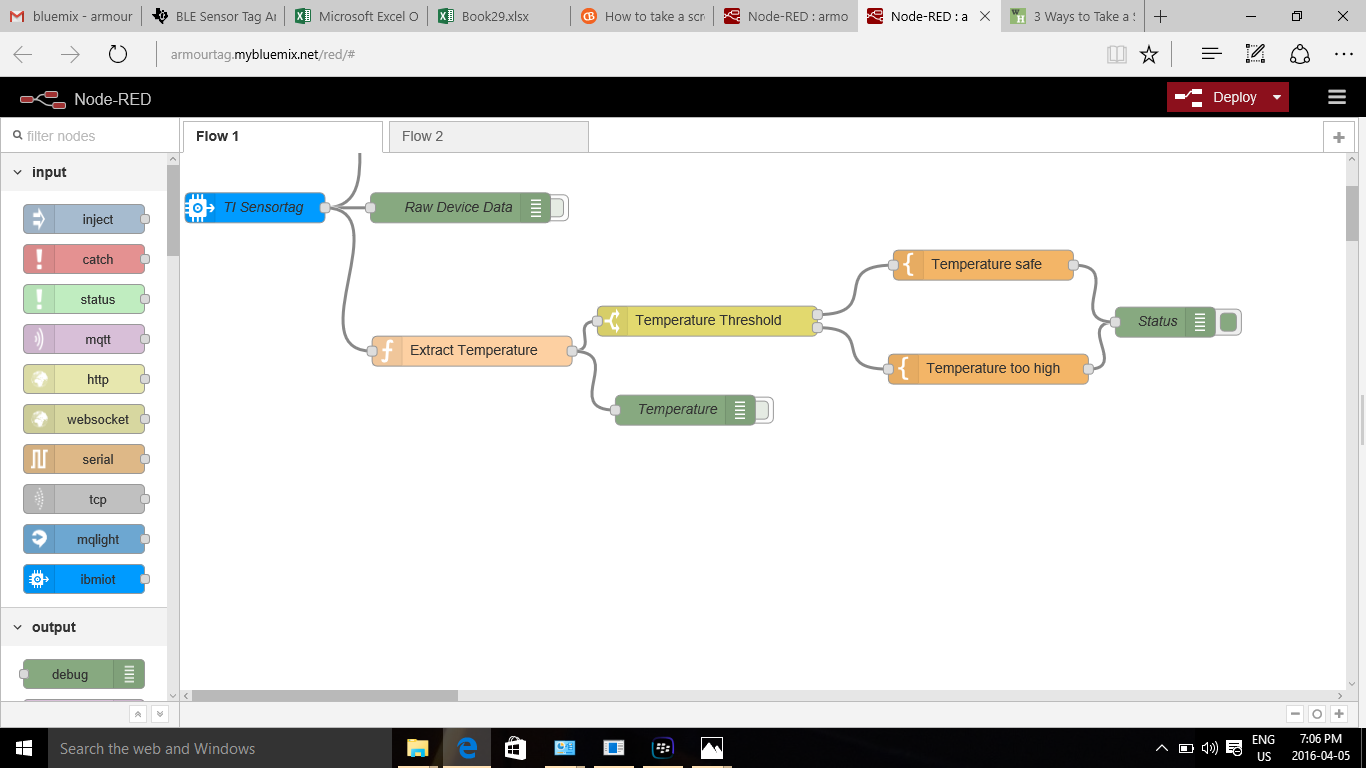
Sensor Data to Cloud
I am leaning towards IBM IoT Foundation service. I created a free account with IBM for BlueMix. The possibilities of creating thresholds to send alerts are limitless. Below is my first test setup using Node-RED.
![]()
-
Fast Action to get Your App on Android
03/26/2016 at 21:33 • 0 commentsEvoThings is pretty cool. Download the workbench to your PC and the viewer to Android and you can quickly prototype your app. Still waiting for my Sensor Tags but this is how quickly the demo shows on my Blackberry.
-
Raspberry Pi Camera and DropBox
03/26/2016 at 19:19 • 0 commentsRaspberry Pi camera and Dropbox
I have used the Raspi_Cam_Web_Interface to capture stop motion pictures and videos. But I decided I would like the process to be more automated. I looked at pushing the media to a cloud so I would not have to manually download the images. I decided to try Dropbox and it works well with very little python code.
You need to set up a DropBox account and then set up an app to link to your Raspberry Pi. You can set up your app at:https://www.dropbox.com/developers/apps/
Then choose “Dropbox API app”, “Files and Datastores”, and answer the final question “Can your app be limited to its own, private folder?” – either answer is OK, depending on your needs.
It supplies an App Key and App Secret. You will be using this to link to your Pi.
Now we want to install Dropbox for Raspberry Pi:
git clonehttps://github.com/andreafabrizi/Dropbox-Uploader/
Once downloaded you can make the script executable by using the following command:
chmod +x dropbox_uploader.sh
The first time you run the script you will be asked to enter the App Key and App Secret.
./dropbox_uploader.sh
HINT:Copy the Keys to a text editor first rather than copy and paste from Putty to DropBox. Otherwise it does not play nice and you may have errors.I used Notepad. Once your Keys are accepted it will ask you to open up a URL to confirm connection.Assuming you are using Putty, copy the contents to your clipboard and paste to a text editor. Now copy the URL to a browser. You may receive a message from Dropbox that the connection is successful but unless you perform the last step in Putty the token may still fail. Some oauth tokens are corrupt so you may have to try a couple of times.
RaPiCamcoder stores media files in /var/www/media. So I want a script to pull the .jpg files to Dropbox and see the media on my Blackberry and Laptop in real time.I tried a couple of test.jpg and it seemed to work like a charm.
I used this script to start the downloader:
pi@raspberrypi ~/Dropbox-Uploader $ ./dropbox_uploader.sh upload /var/www/media/ {*.jpg*} /Apps/PiRover
This was tricky. Most documentation did not include a target file for the upload and failed. I took several scripts and reduced the code to one line and added the target DropBox. The command tells Raspberry Pi to upload all files ending in .jpg in /var/www.media (location that Raspi_Cam_Web stores the images) and upload to my DropBox App called PiRover.
I setup a full Dropbox instead for final testing and called it PiRover. When I ran the script the images stored in /var/www/media uploaded to DropBox at a fairly good speed and now is accessible on my Blackberry and Laptop in minutes.
A cron job is added to run the script every minute and I’m done! I will add a cleanup cron job so the SD card does not fill up too fast.
![]() The camera in the foreground is the Raspberry Pi camera and the second is the Raspberry Pi Noir. I plan to include a Infrared light for the Raspberry PI Noir for night vision.
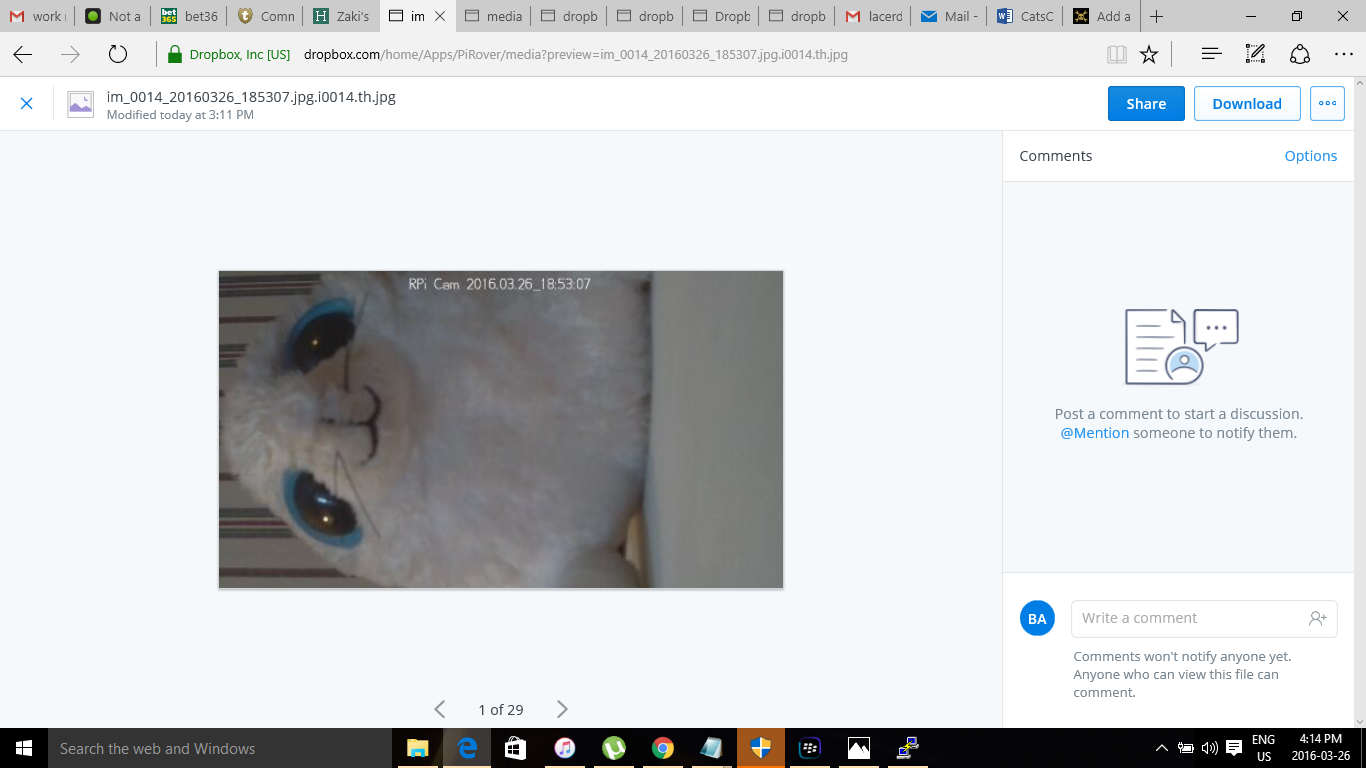
The camera in the foreground is the Raspberry Pi camera and the second is the Raspberry Pi Noir. I plan to include a Infrared light for the Raspberry PI Noir for night vision.Below is a sample screen shot from DropBox.
![]()
So there is more work on cameras. Enclosures will have to be weather proof .
Cats in Motion
To help build a perfect shelter for feral cats and protect them from the harsh climate. To reduce suffering for those who have no voice.
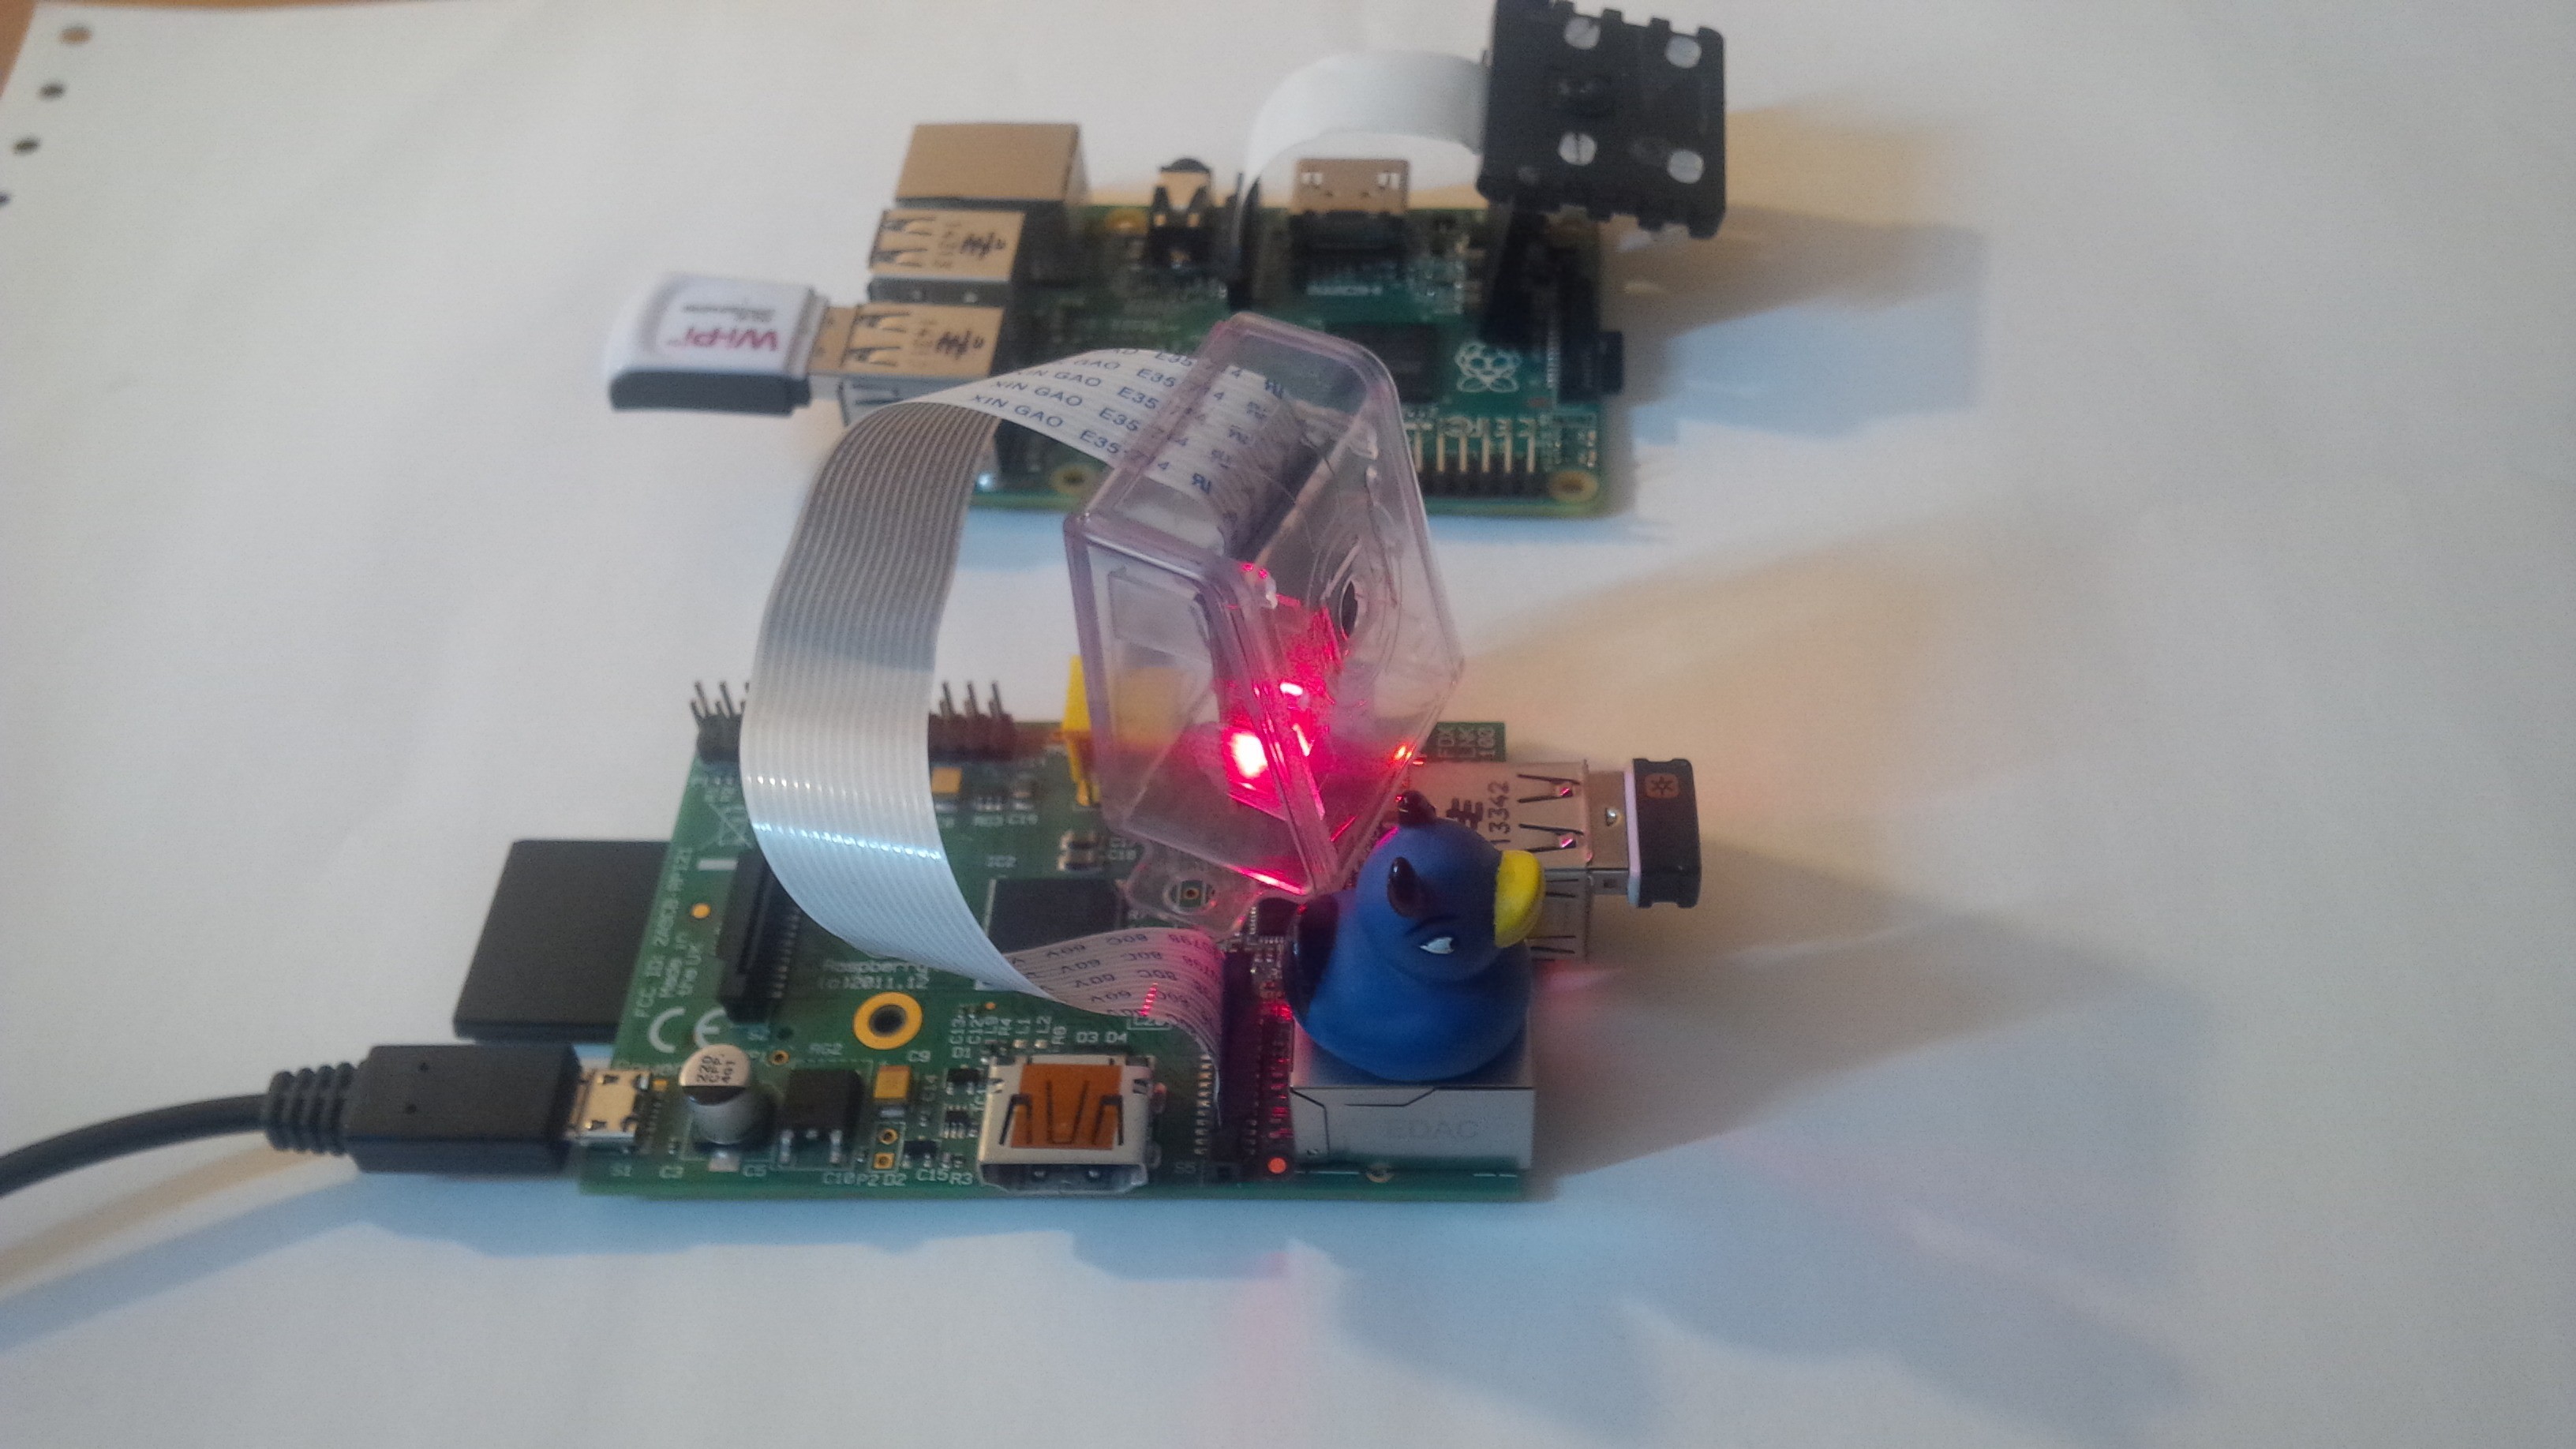 The camera in the foreground is the Raspberry Pi camera and the second is the Raspberry Pi Noir. I plan to include a Infrared light for the Raspberry PI Noir for night vision.