-
STATUS UPDATE: SupplyFrame DesignLab!
07/12/2016 at 18:52 • 0 commentsThere's still a lot of story left to be told about how we made it to the Mark II prototype, but in the meantime I wanted to mention an exciting update to the project that has come together over the past month or so since our time at Maker Faire.
![]()
Perceptoscope has been invited to be one of the inaugural residents at the SupplyFrame DesignLab! SupplyFrame is the parent company of Hackaday, and for the next three months we'll be working out of this amazing space to focus hard on building a bunch of new Perceptoscope prototypes. Winners of the Hackaday prize will also have an opportunity for a residency, and we can only imagine all the badass projects that will come out of here in the years to come.
![Optical Manifold and Prisms]()
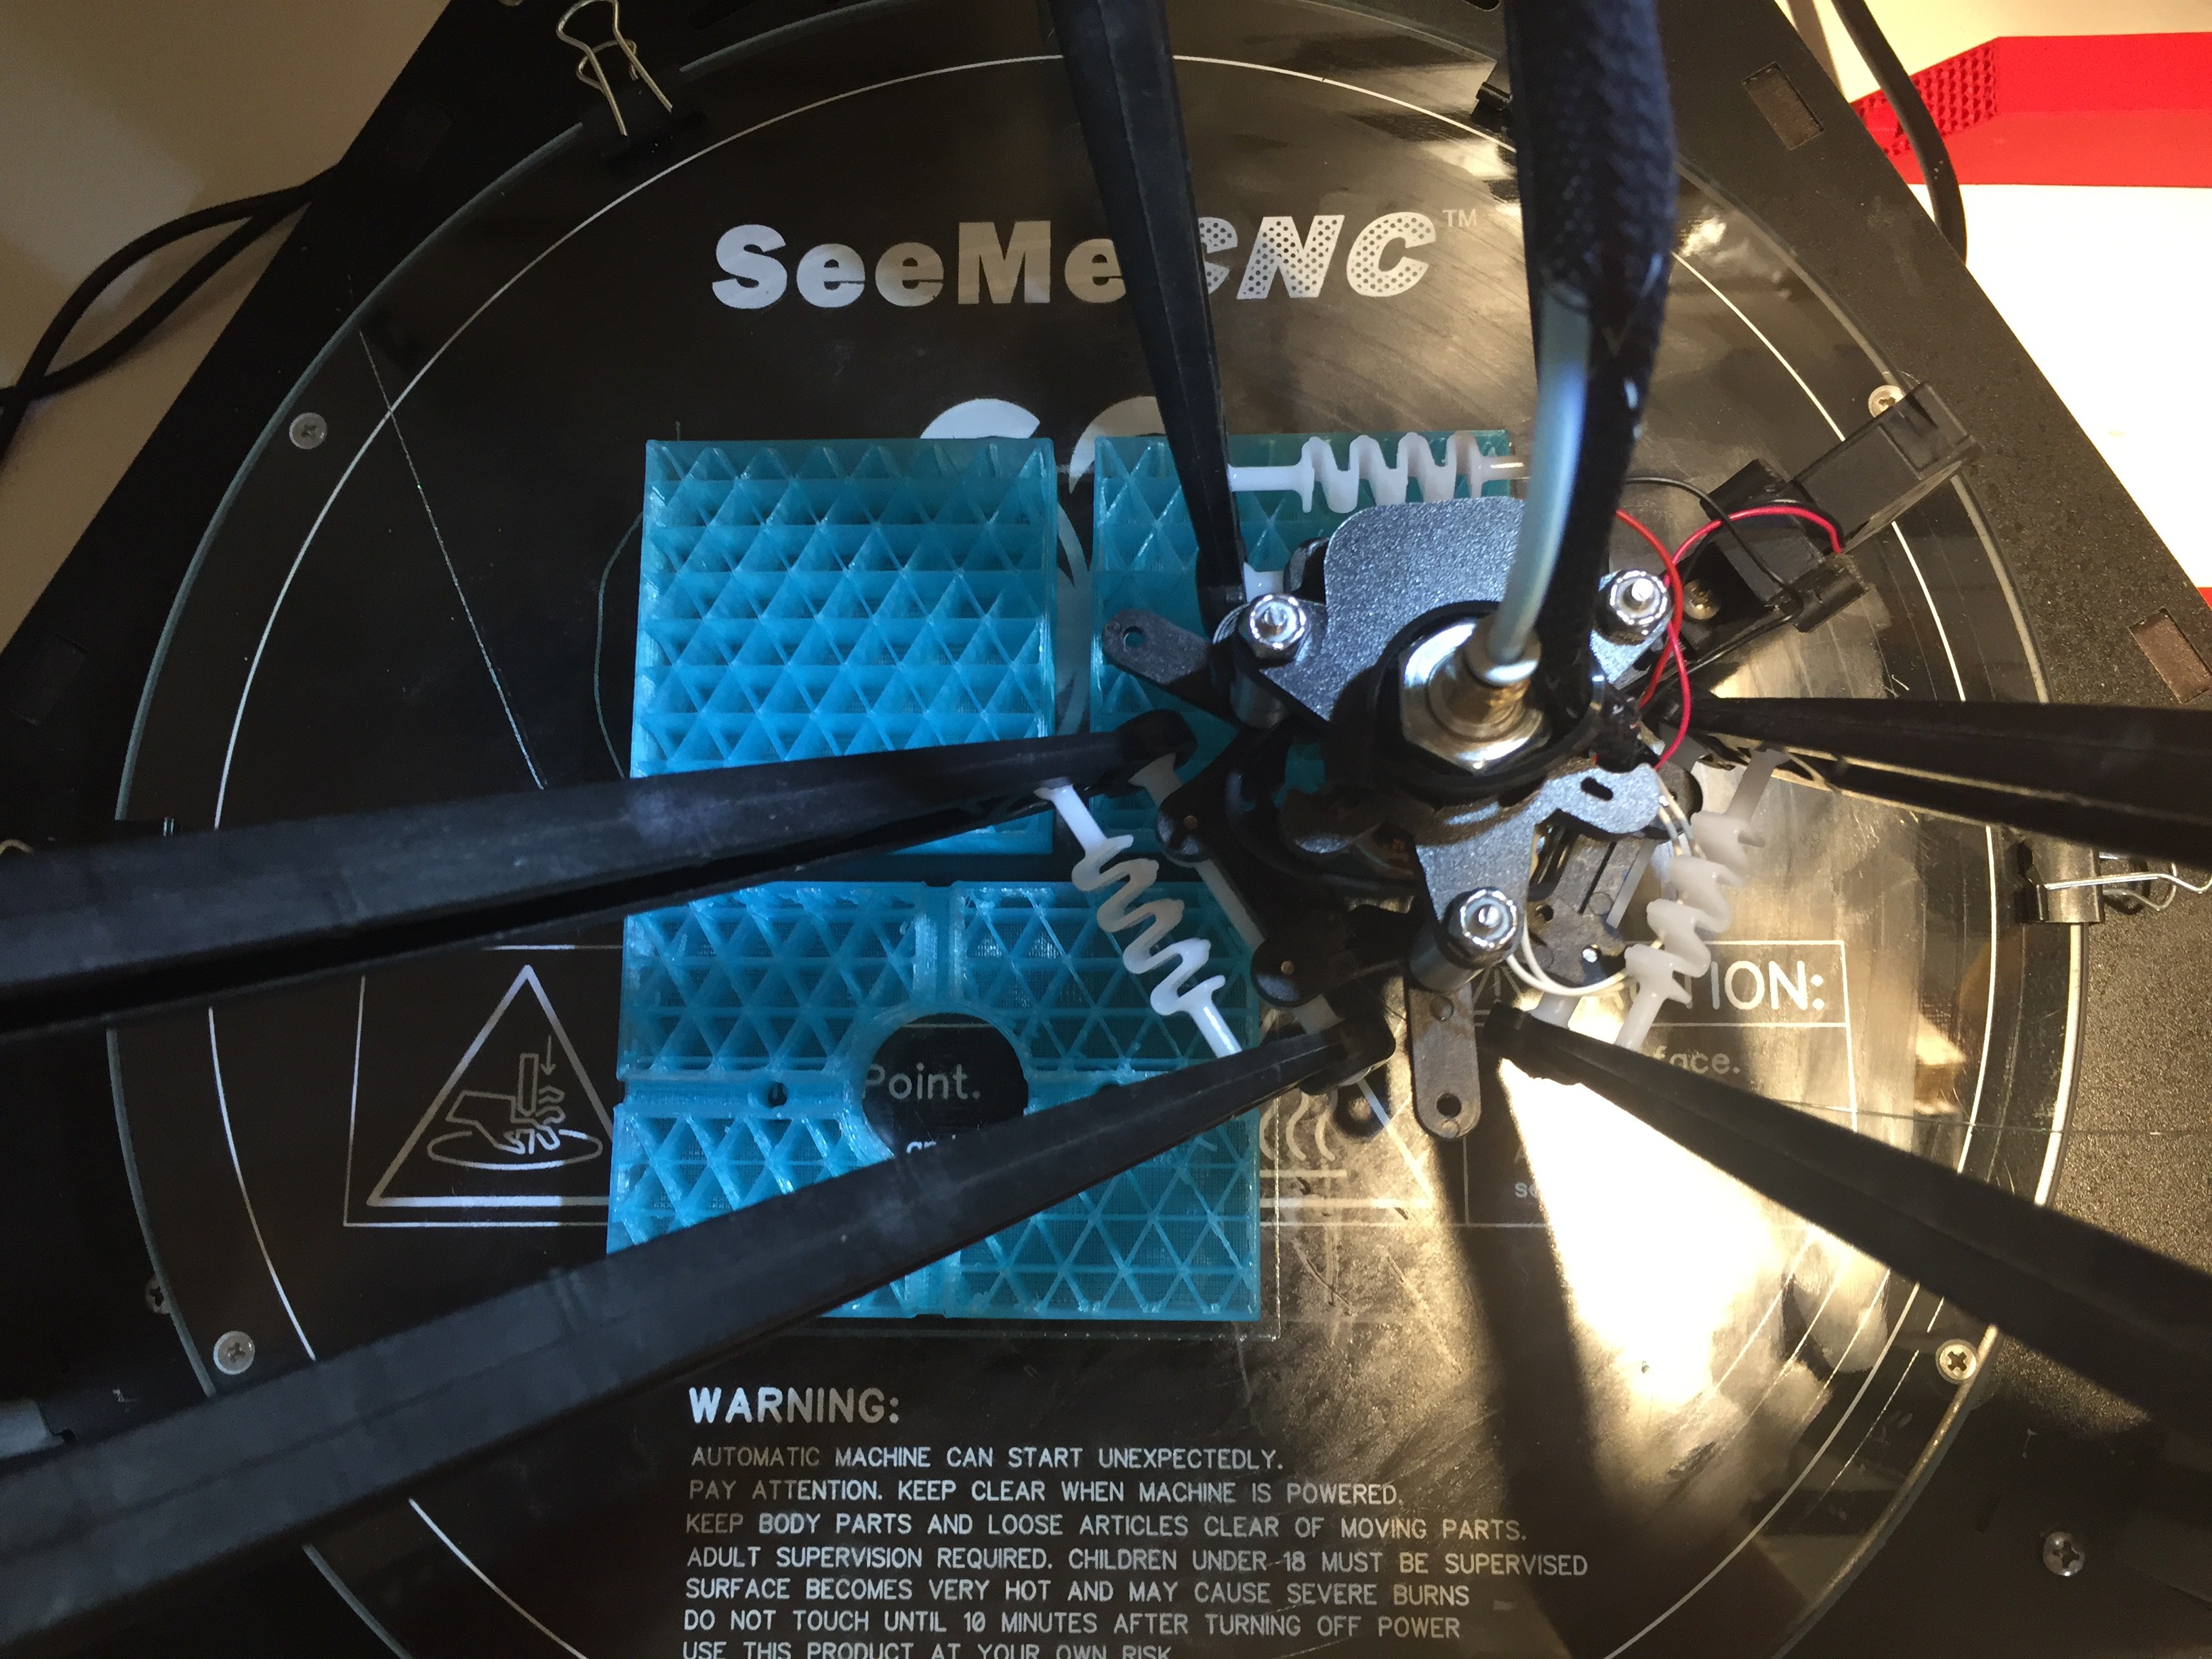
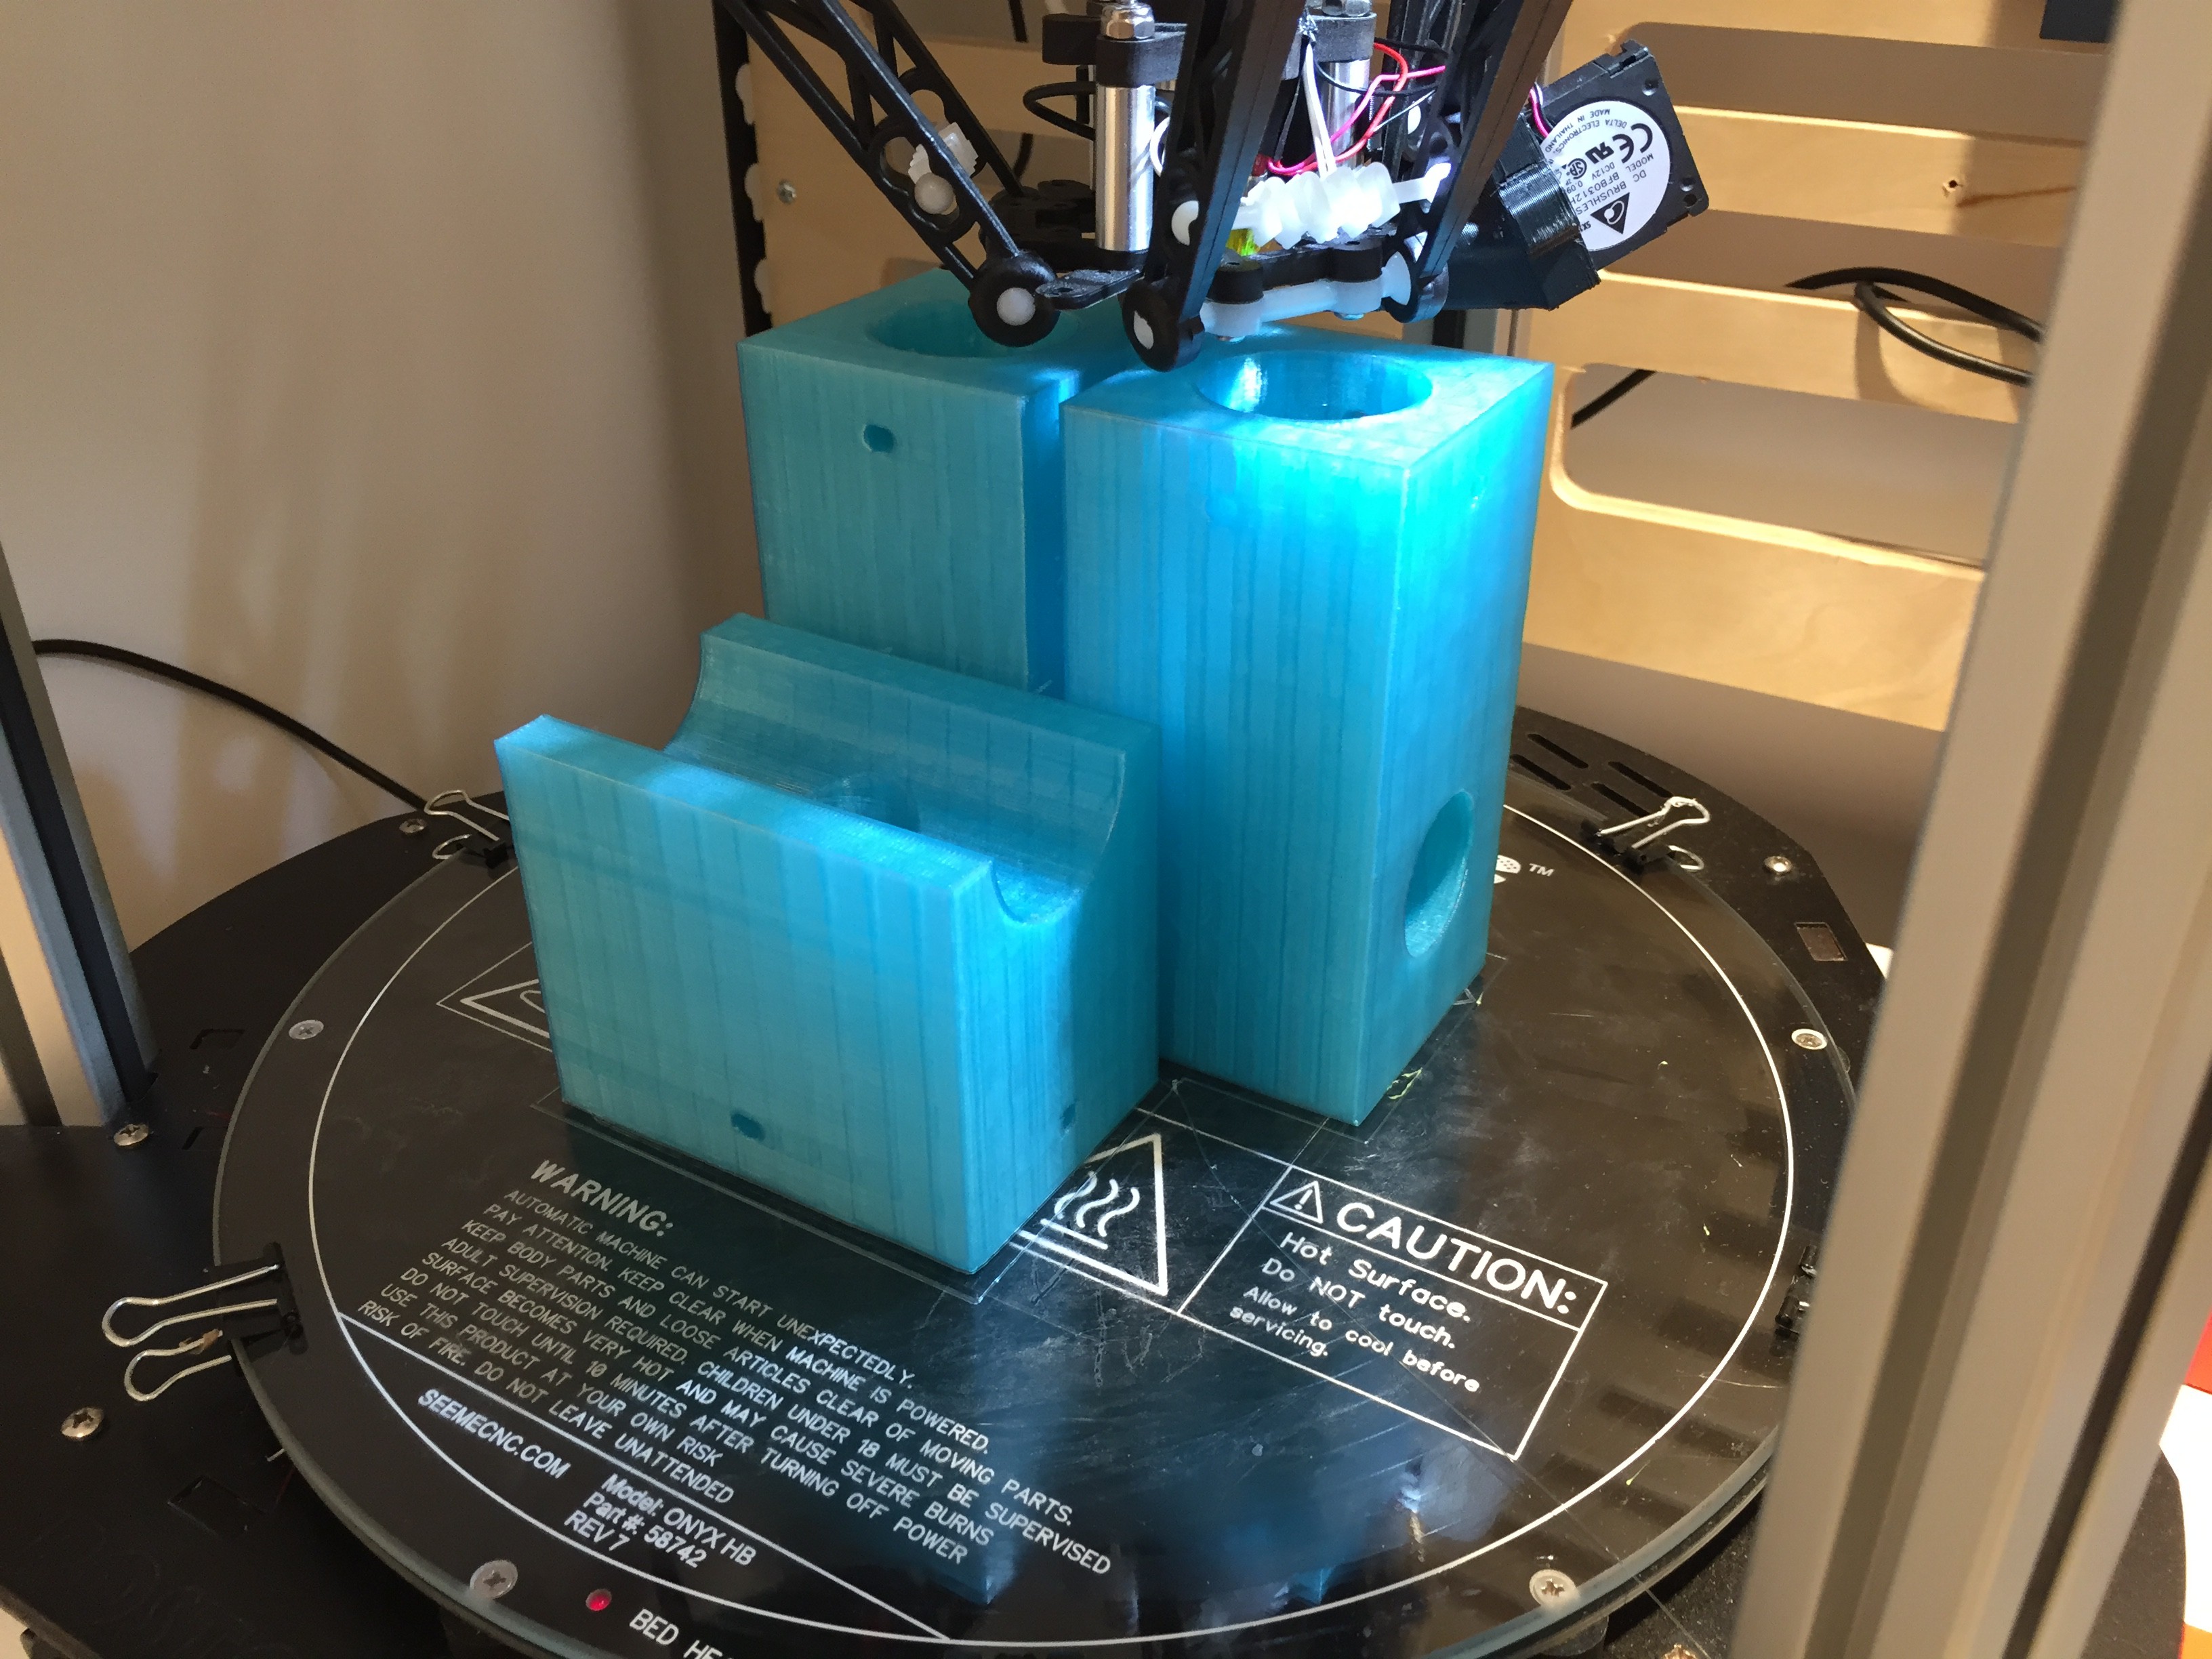
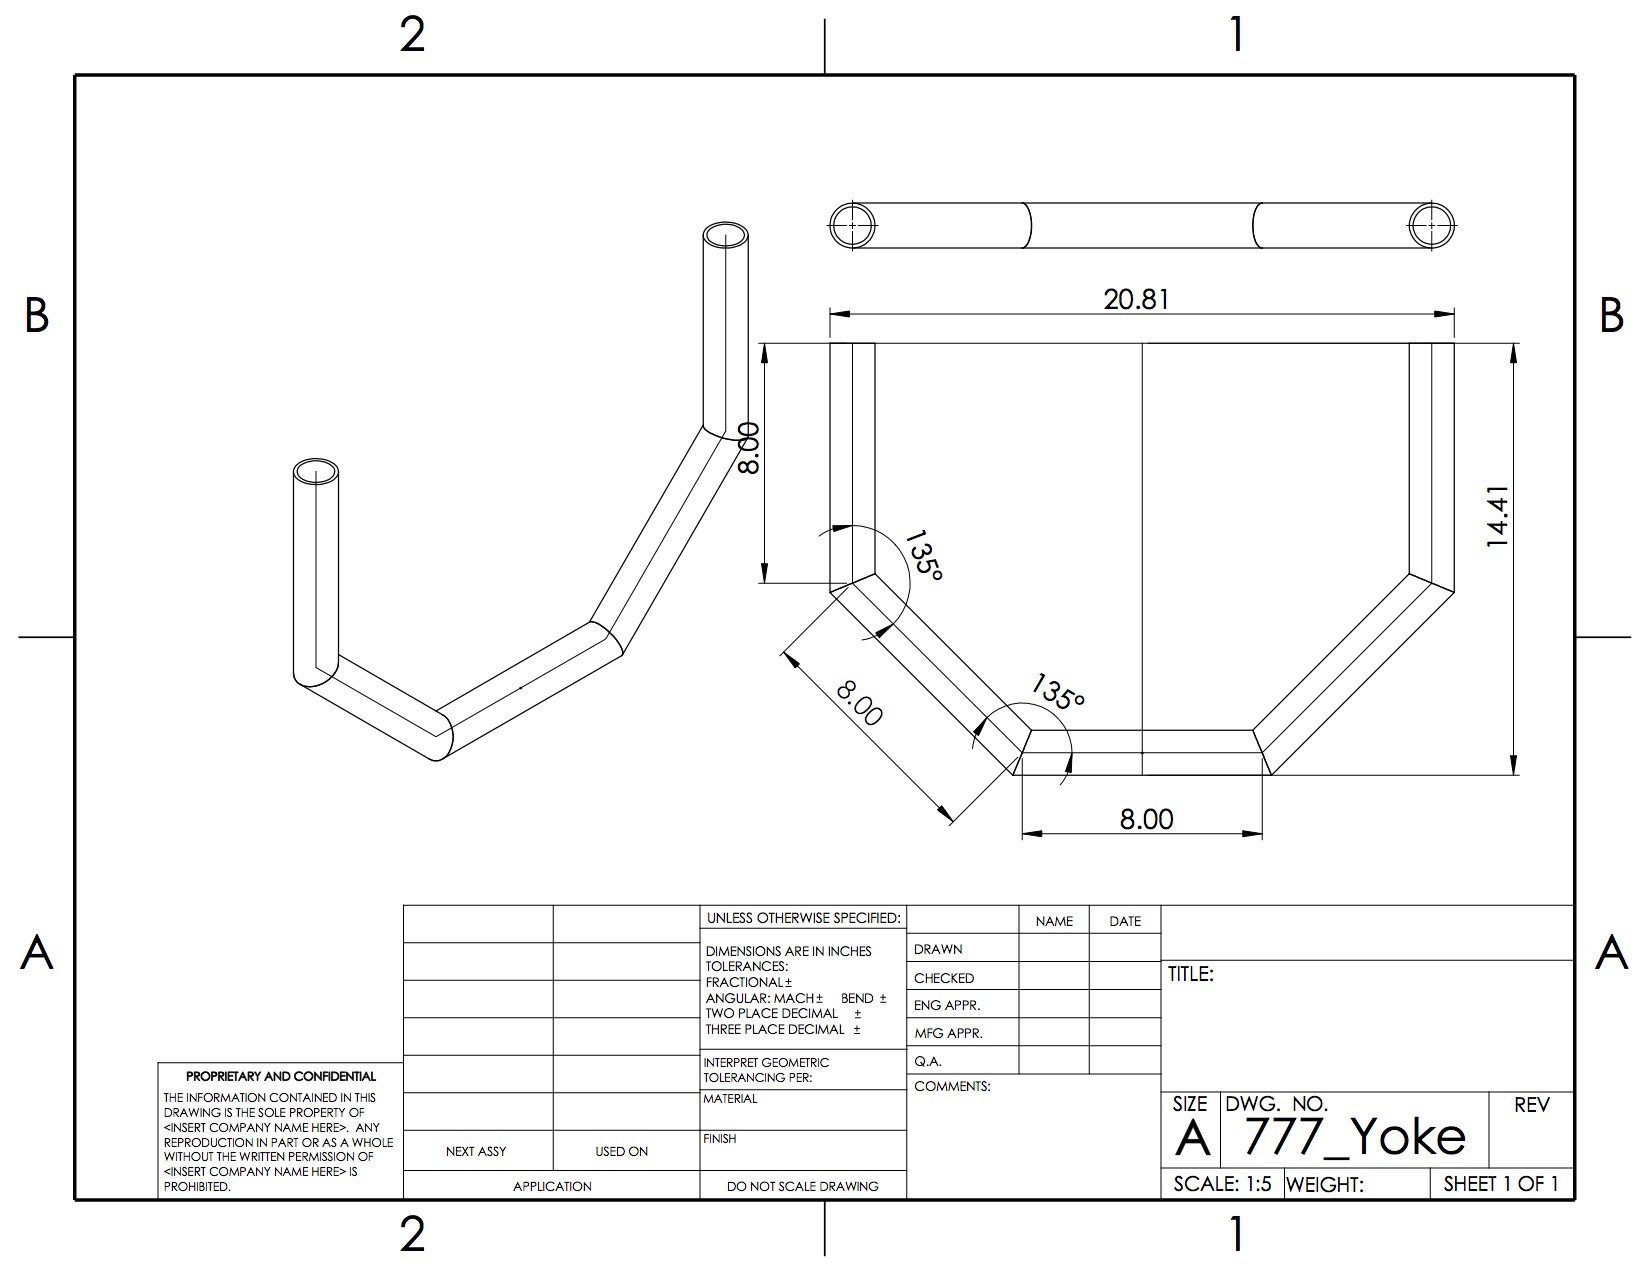
We've only been in the Lab a little over a week, but have already jumped in head first to printing another optical manifold and prototyping some bearing blocks for the next revision. We made a trip to Industrial Metal Supply to stock up on aluminum for the Tormach CNC, and have new yokes being fabricated by a pipe bender nearby.
![]()
![]()
![]()
Each week for the next three months I'll be posting updates of the progress we're making. There are still a number of technical and practical challenges ahead with something as complex as Perceptoscope. As I document our journey, I hope it can shine a light not only on the design and engineering issues hardware projects face, but also things like sourcing a reliable supply chain, engaging in public playtesting, and securing partnerships to help the project grow.
-
Getting it out there.
05/30/2016 at 06:37 • 0 commentsI started to show the Perceptoscope to people around the interactive arts and hacker scene in LA. It was a nice safe way to demo, get feedback, and begin thinking about how to improve. Along the way, I got introduced to the gang from Two Bit Circus, and was given an opportunity to have the Perceptoscope premiere publicly at their first ever STEAM Carnival.
It was an exciting but terrifying moment. This was more of a proof of concept prototype than a rugged unit designed for persistent public deployment. I was going to need some help to get it ready for the Carnival only about a month away.
I'd been becoming a more active member of my local hackerspace CRASH Space, and with the help of Steve, a fellow member and experienced inventor, worked to get the scope protected and ready.
We added a lock to the bottom of the case so kids couldn't open it, and laser cut a set of acrylic shrouds to cover the gears and encoders. I found an old UPS battery to supply the power, and scrambled to ruggedize the wiring and write the software for the experience.
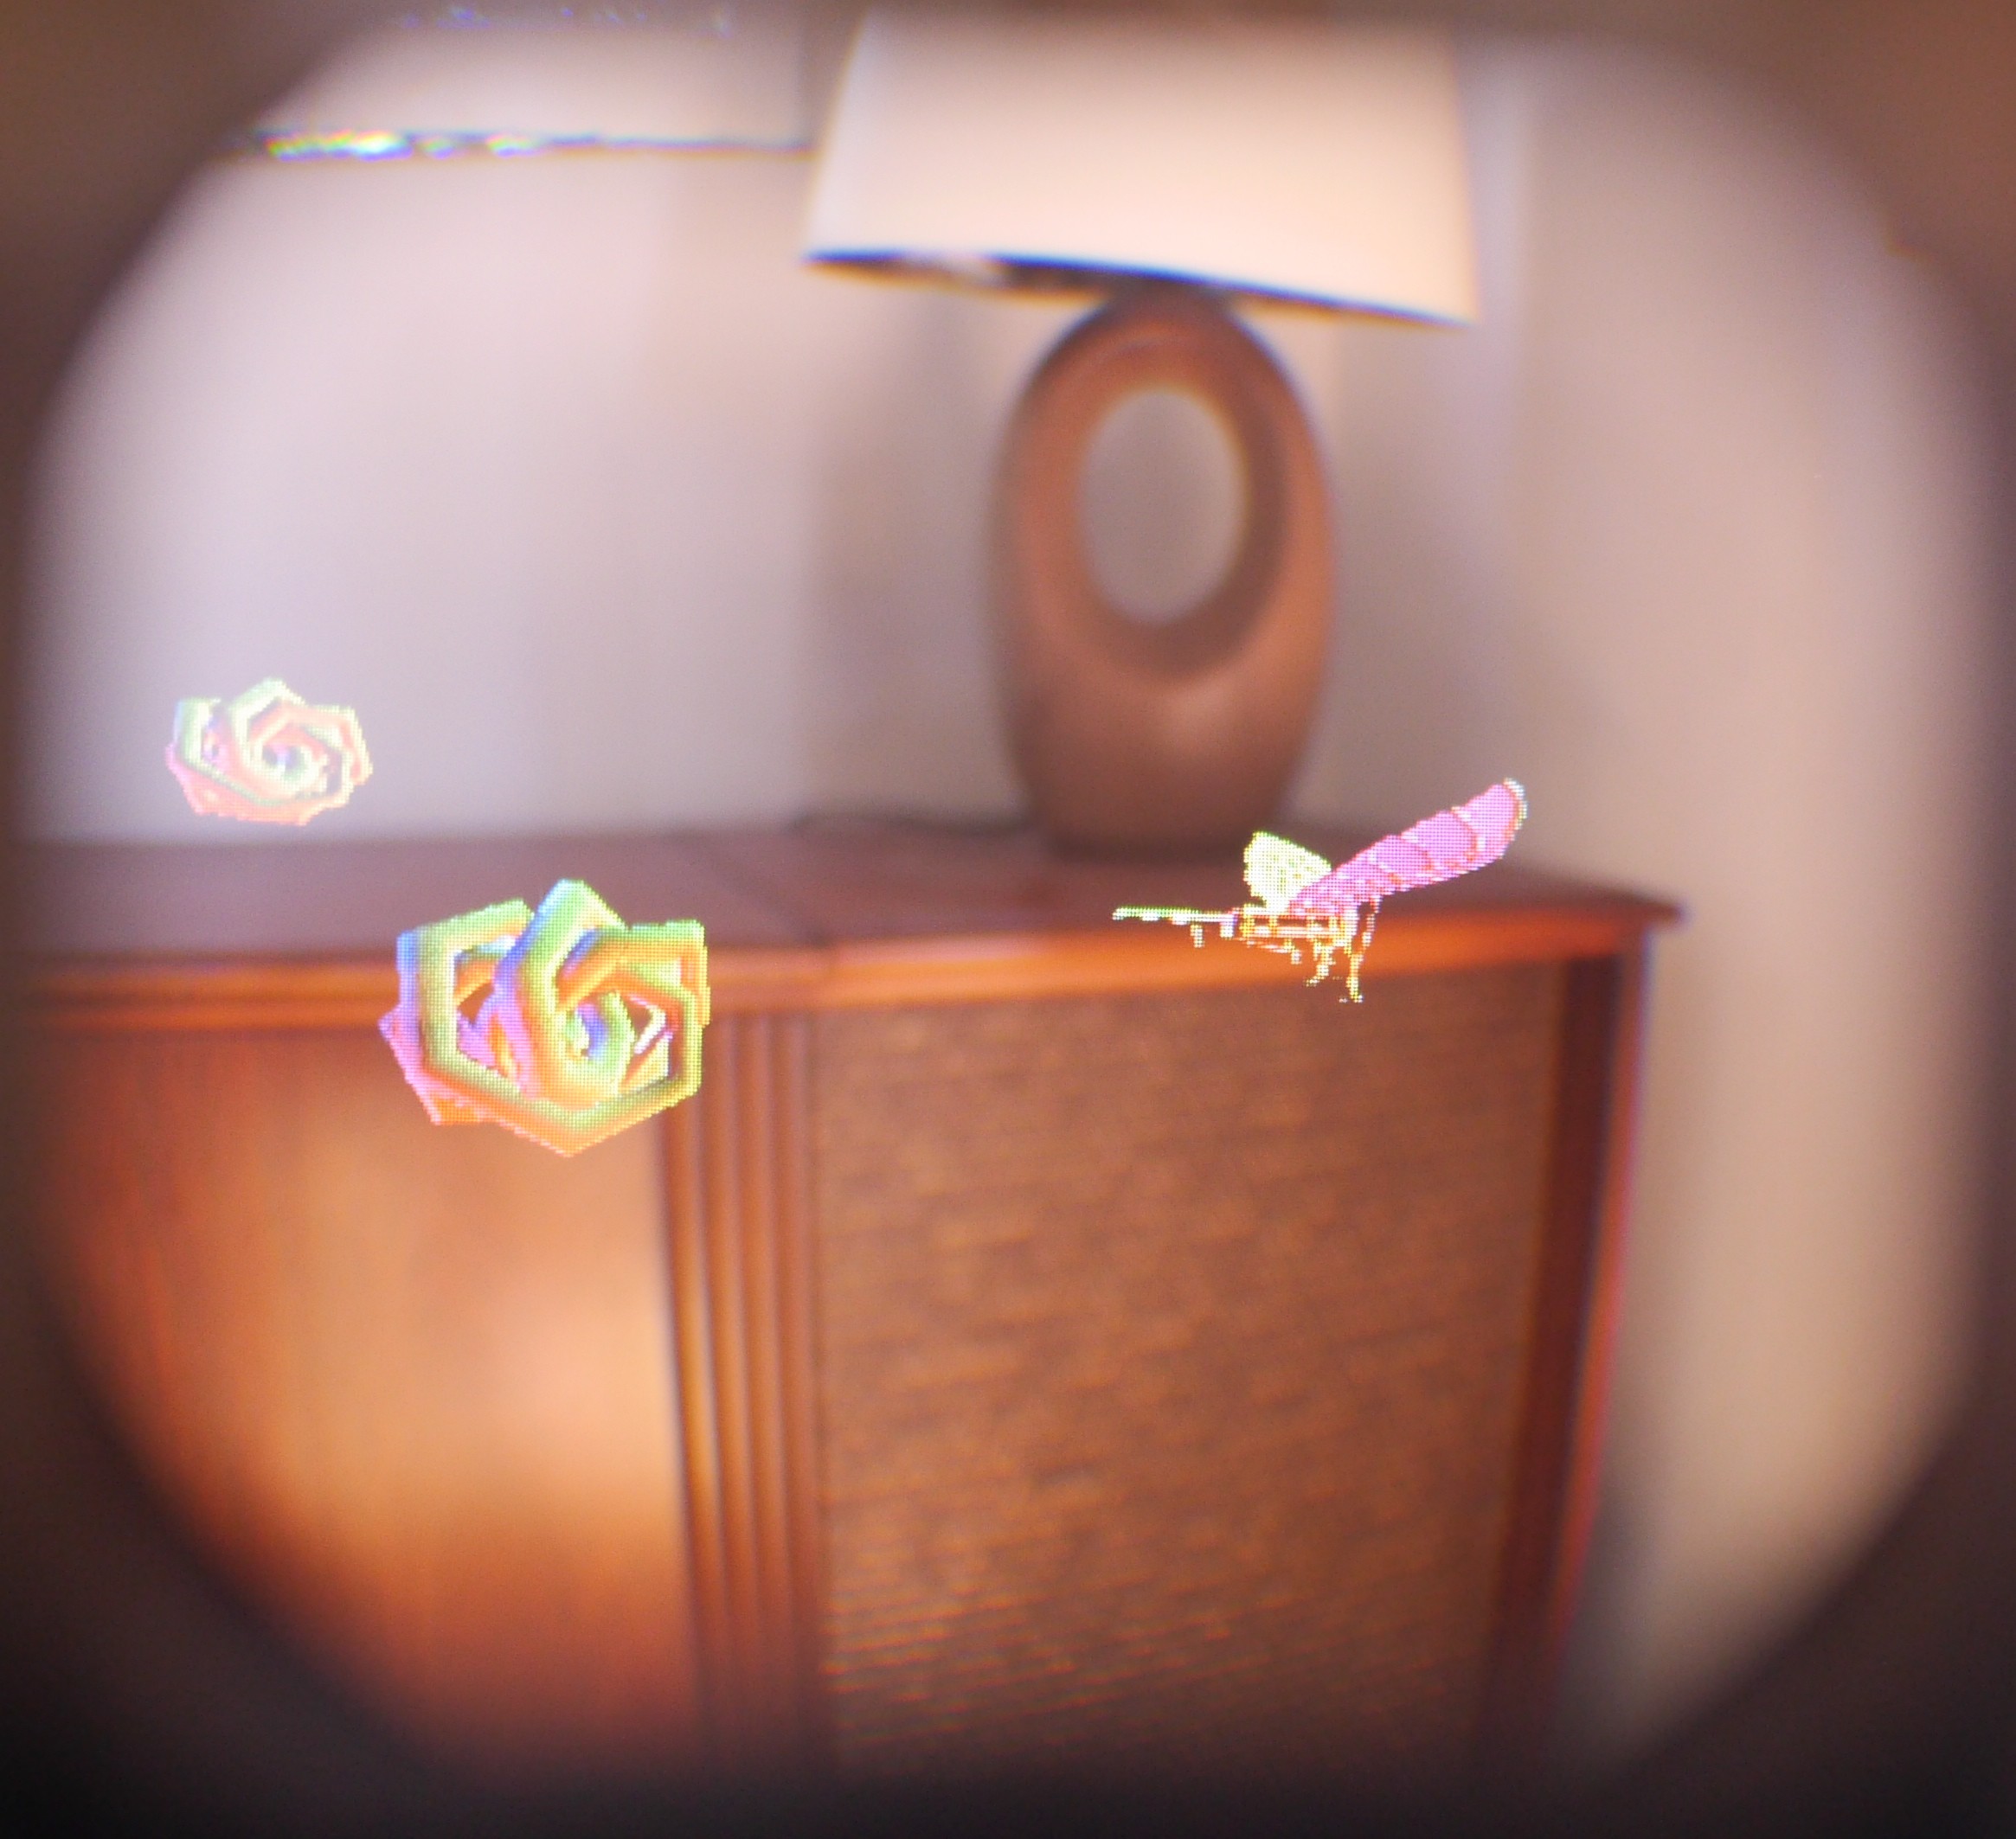
It was a simple experience. Using a physics engine, a random array of shapes would populate the space. Buttons on the scope allowed the user to shoot at and modify the shapes they were pointing to.
![]()
Over the course of four days at the Carnival, the Perceptoscope was played with by hundreds of kids and families, and I gained a huge amount of insight. However, it barely survived the experience, and I was constantly flighting short circuits, software glitches, and aggressive children pulling on delicate assemblies.
Exhausted and feeling a bit defeated, I took some time to regroup while I redesigned a more bulletproof Perceptoscope. The next step was getting together the courage and funding to build it.
-
Making it whole.
05/30/2016 at 05:18 • 0 commentsWith the optics produced and rendering concept working, it was now time to make the system self contained. Initially, I used usb and hdmi extension cables to tether the scope to my computer, but that wouldn't work in a public deployment. Figuring out what computer should go inside the system was key.
Because I was anticipating long deployments in areas of little to no power access, I initially worked towards using an ARM processor based system. My brother Adam had done some work previously in thin clients for digital kiosks, and gave me an ODROID X2 to play with.
Going with the ODROID meant we'd focus on Android as our OS, and though I had initially done some early prototyping pulling sensors from an Arduino into Unity through USB, we needed to go a different direction for ARM, particularly if we wanted to use the shaders required for stereo VR rendering.
We started playing around with Jmonkey, an open source Java game engine, thinking that a Java approach would translate well to Android. With a little nudging we got there, integrating an Arduino with sensors providing positional information to the virtual camera of the Jmonkey VR scene. I had to write a decent amount of the particulars of the renderer myself, as VR distortion shaders were just starting to make their way into the engine, but we couldn't have gotten there without the larger effort of the open-source community.
![]()
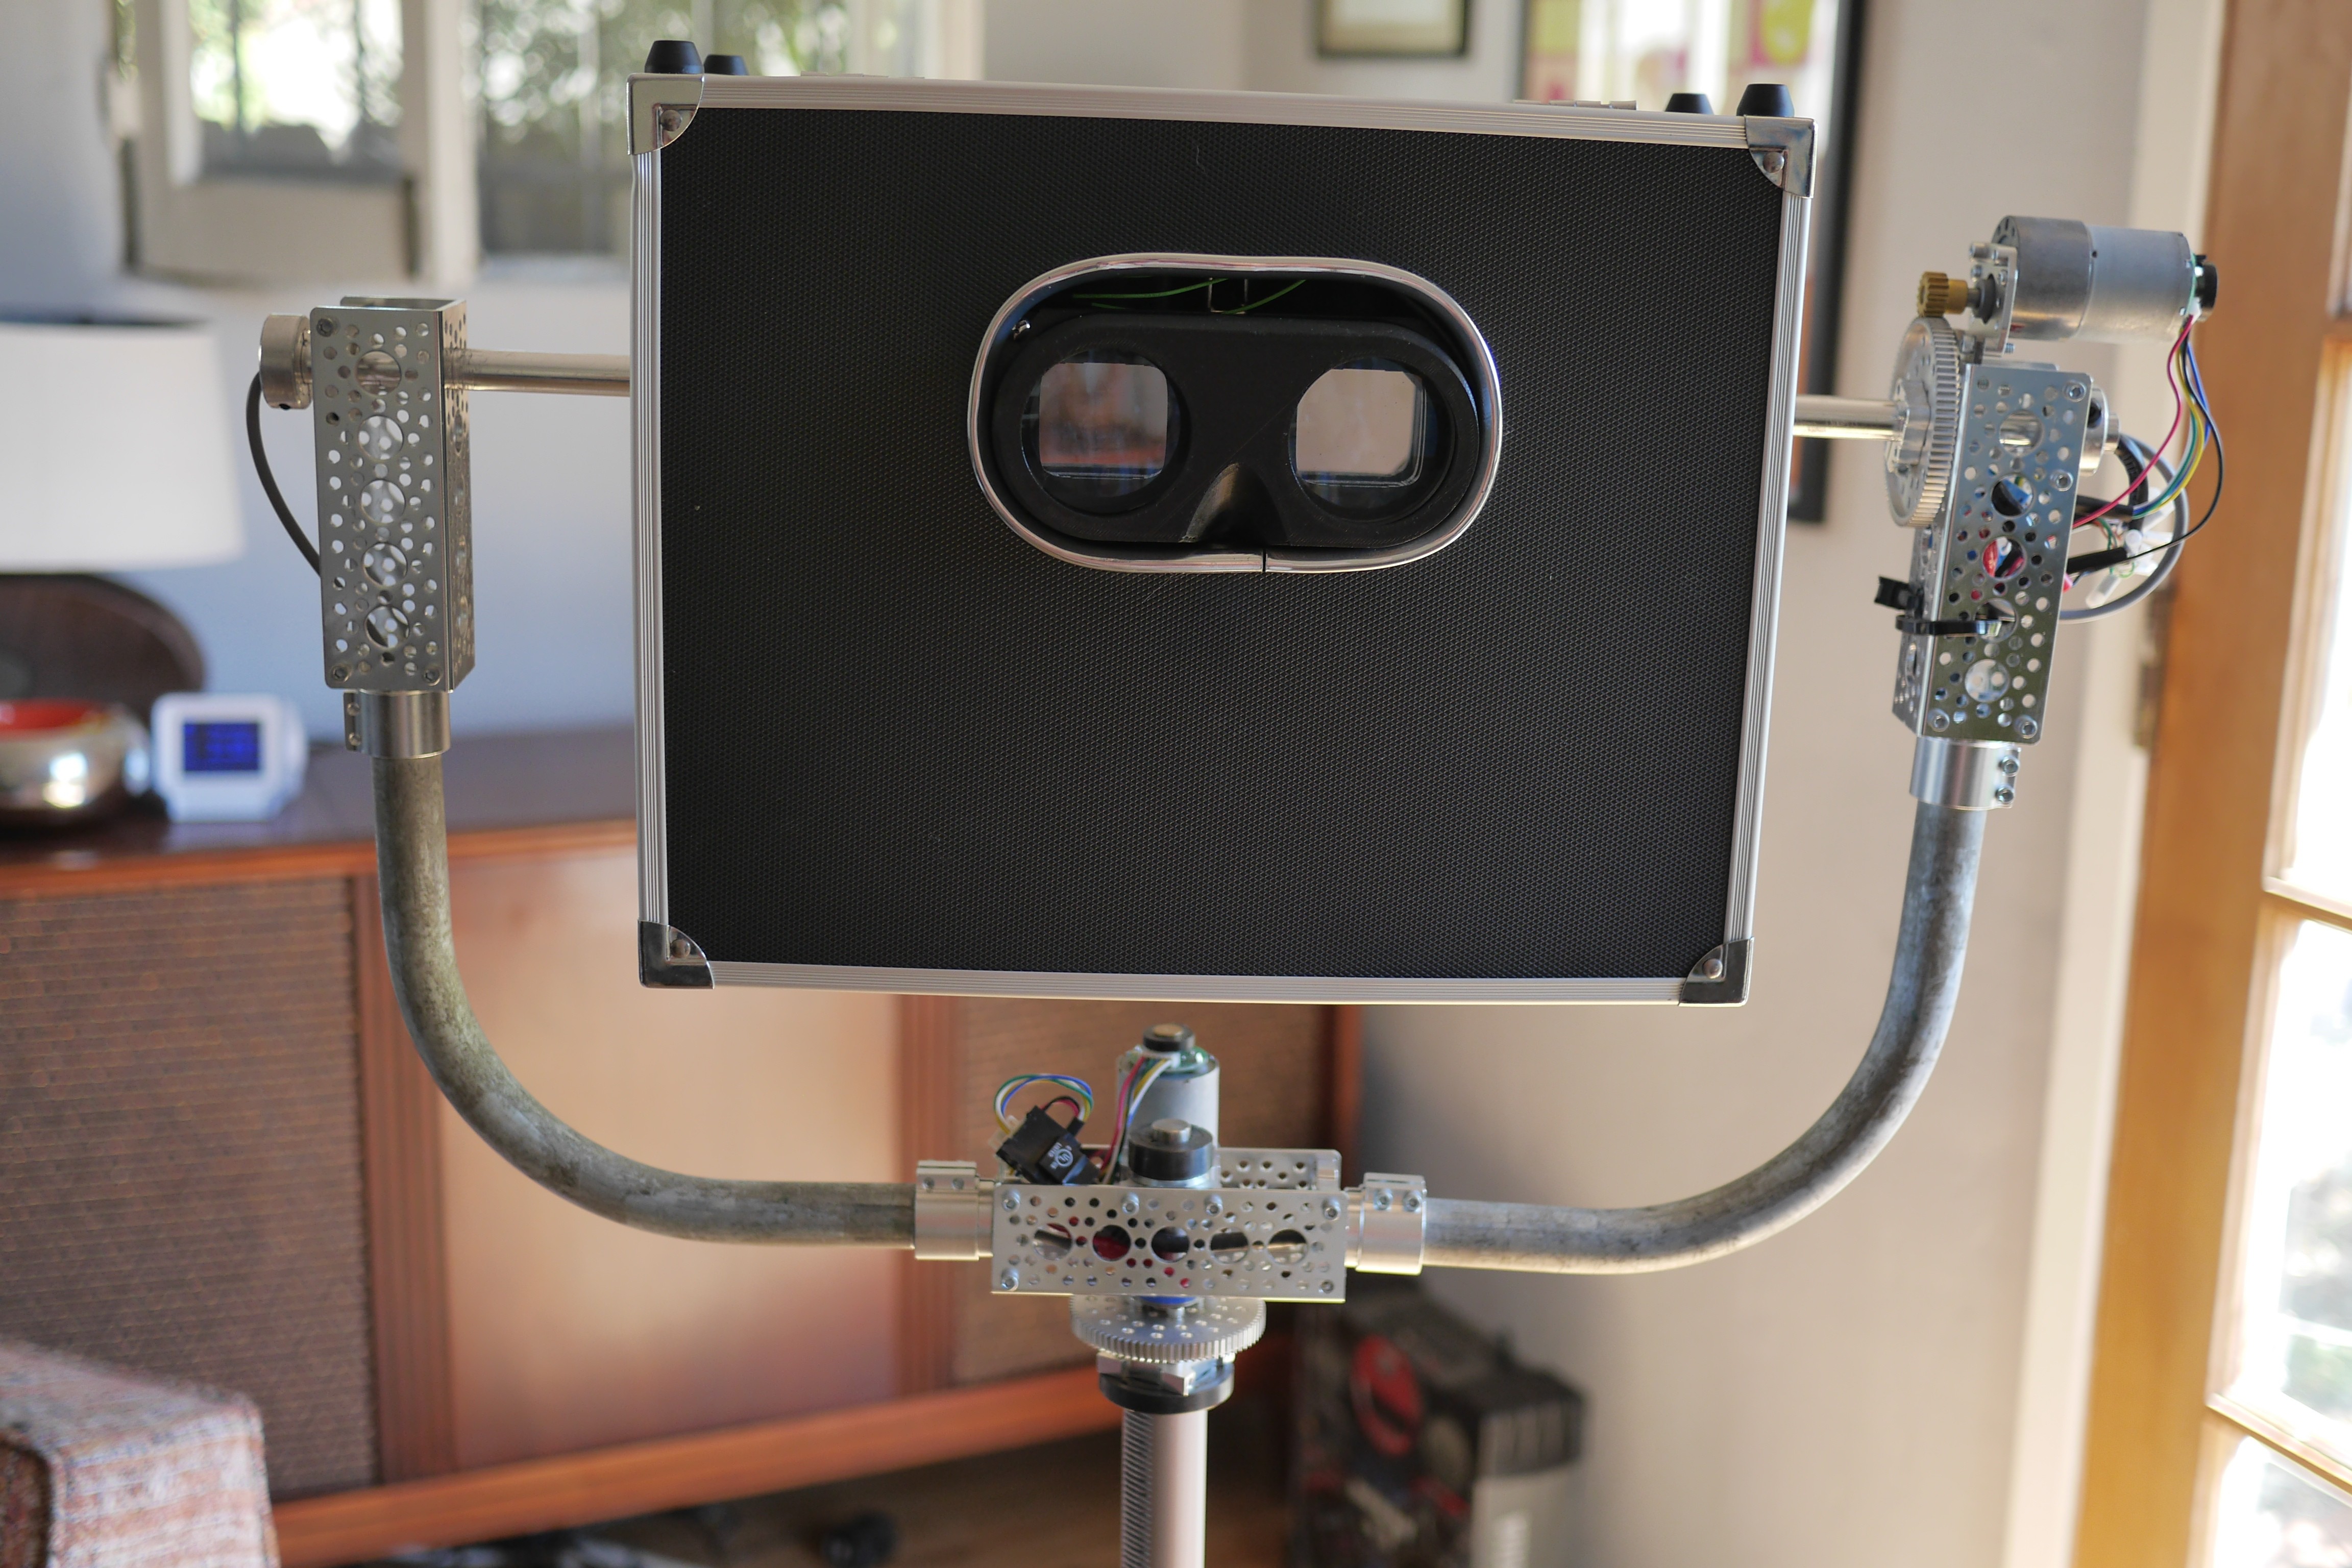
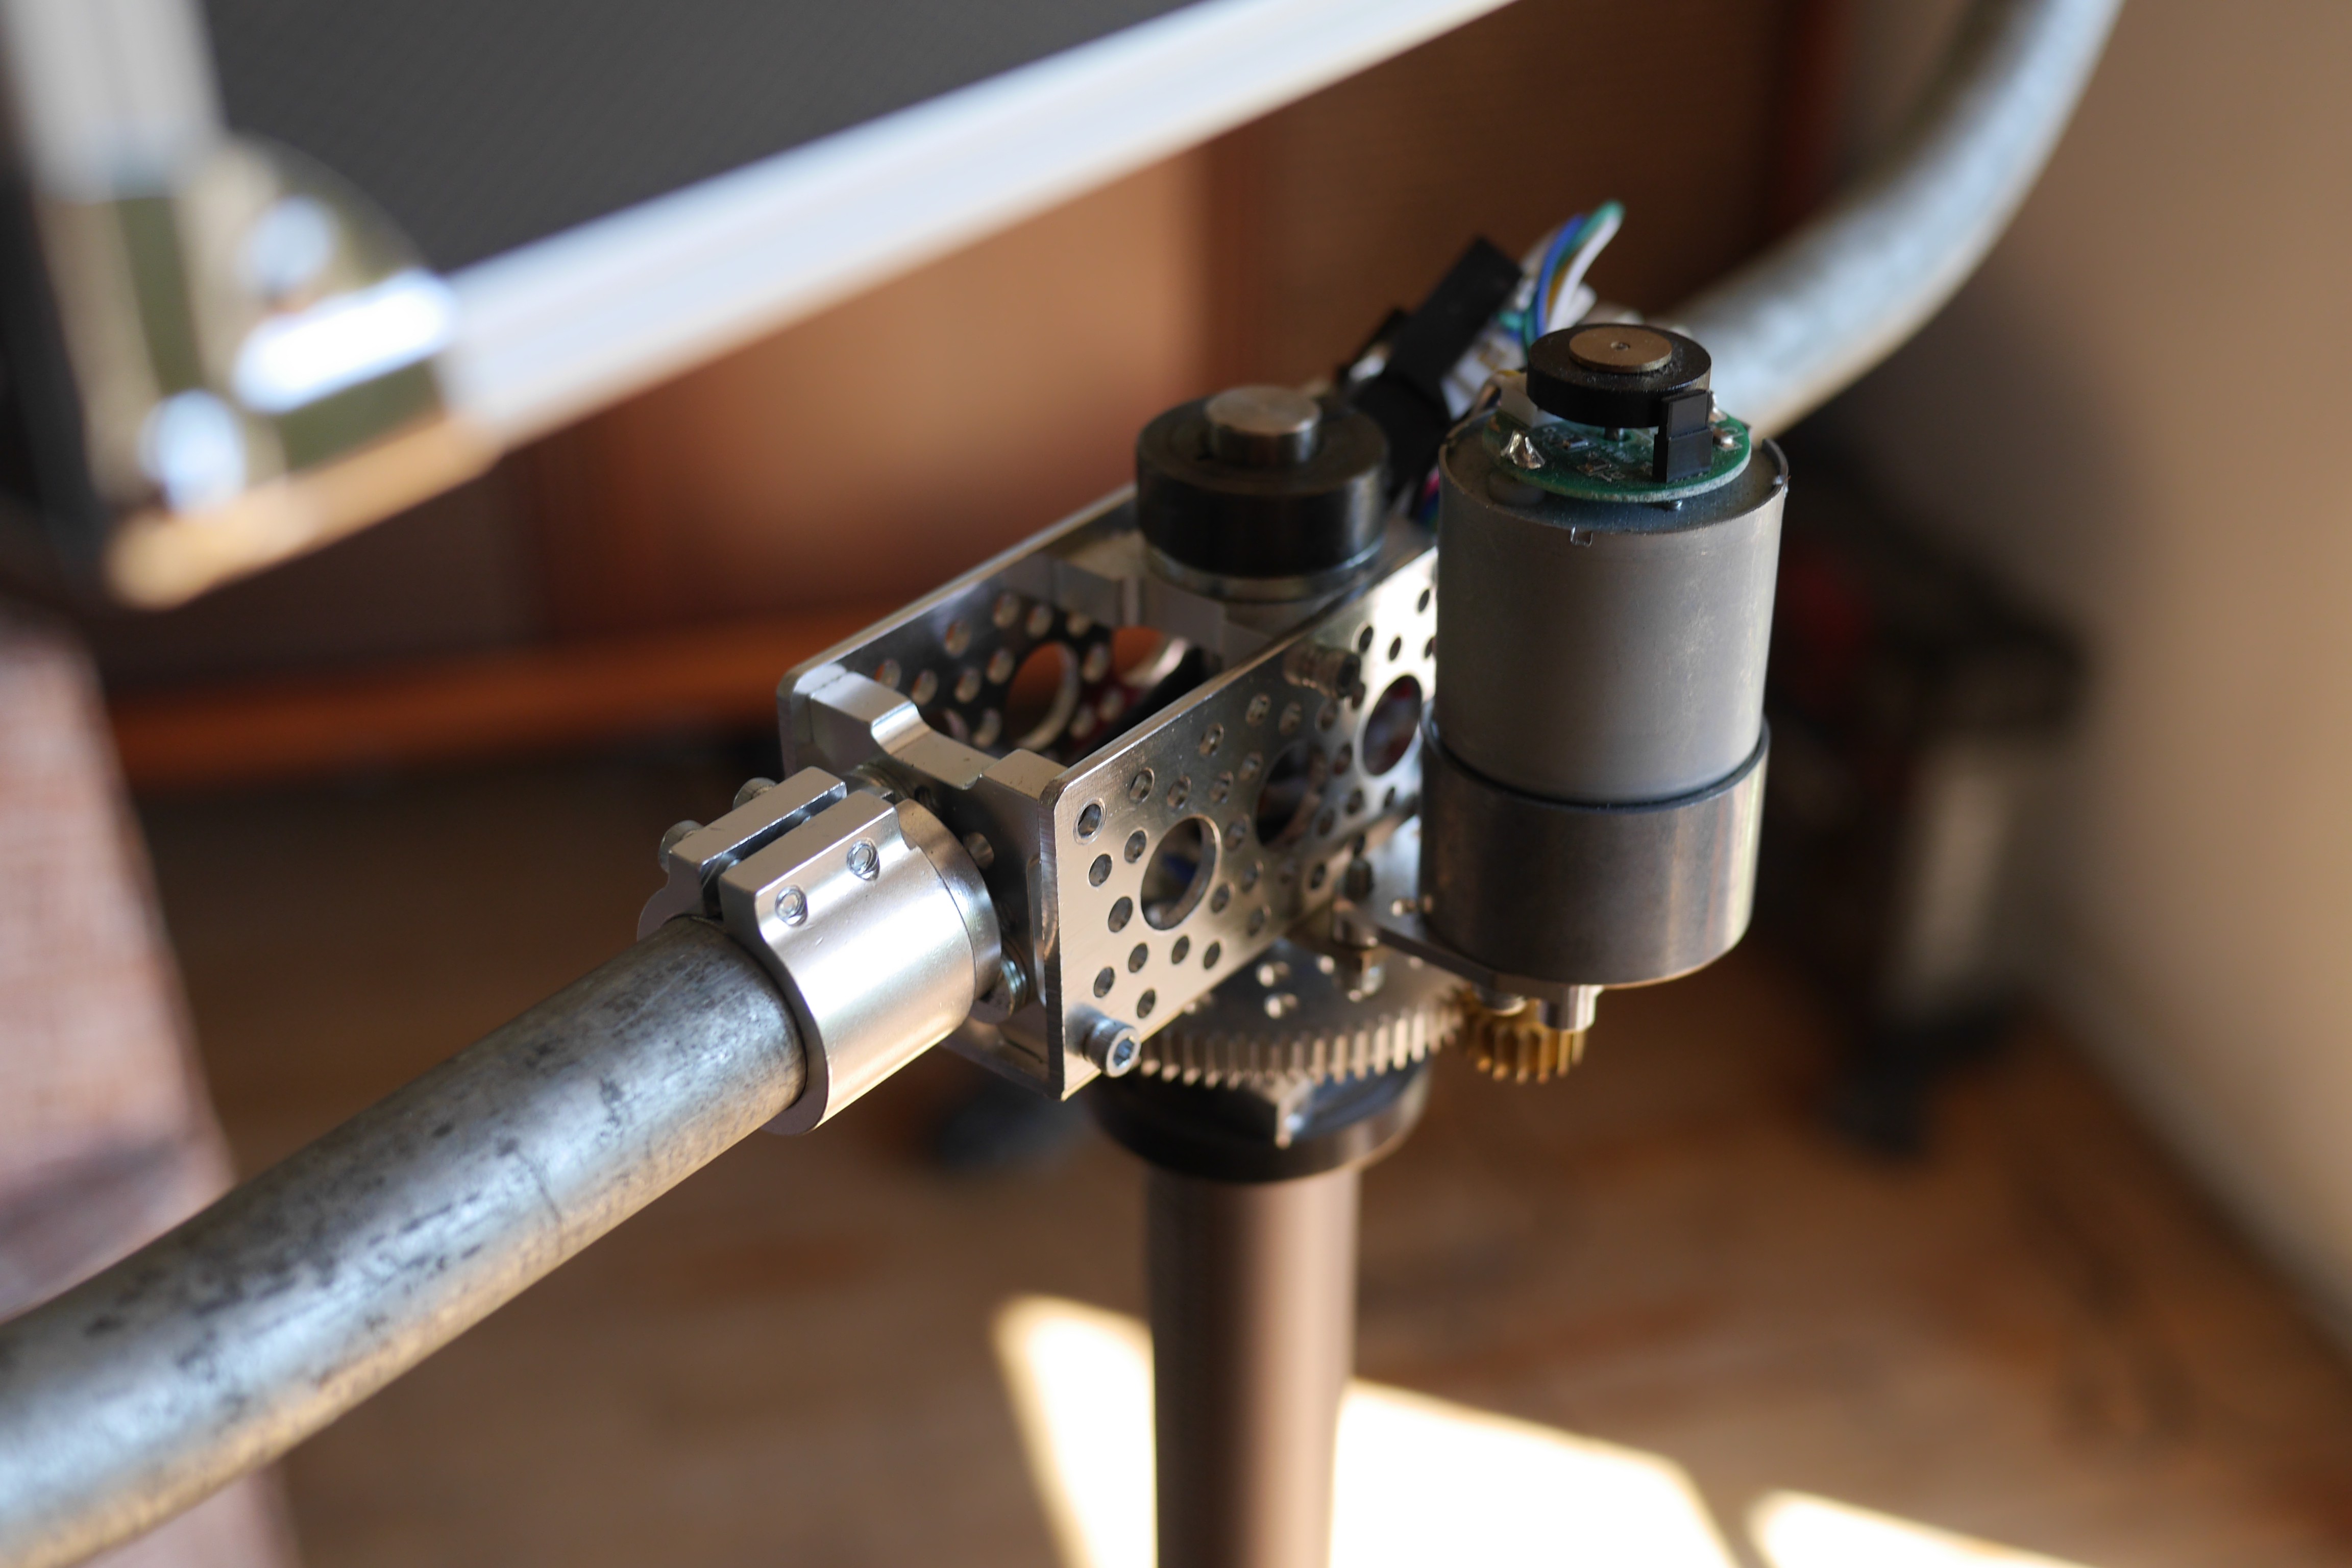
Along the way I started building a more rugged shell out of a cheap little camera case, and used Actobotics to create the geared axles and mounts for the encoders.
We were now ready to get the scope out of my apartment and in front of people.
-
What You See.
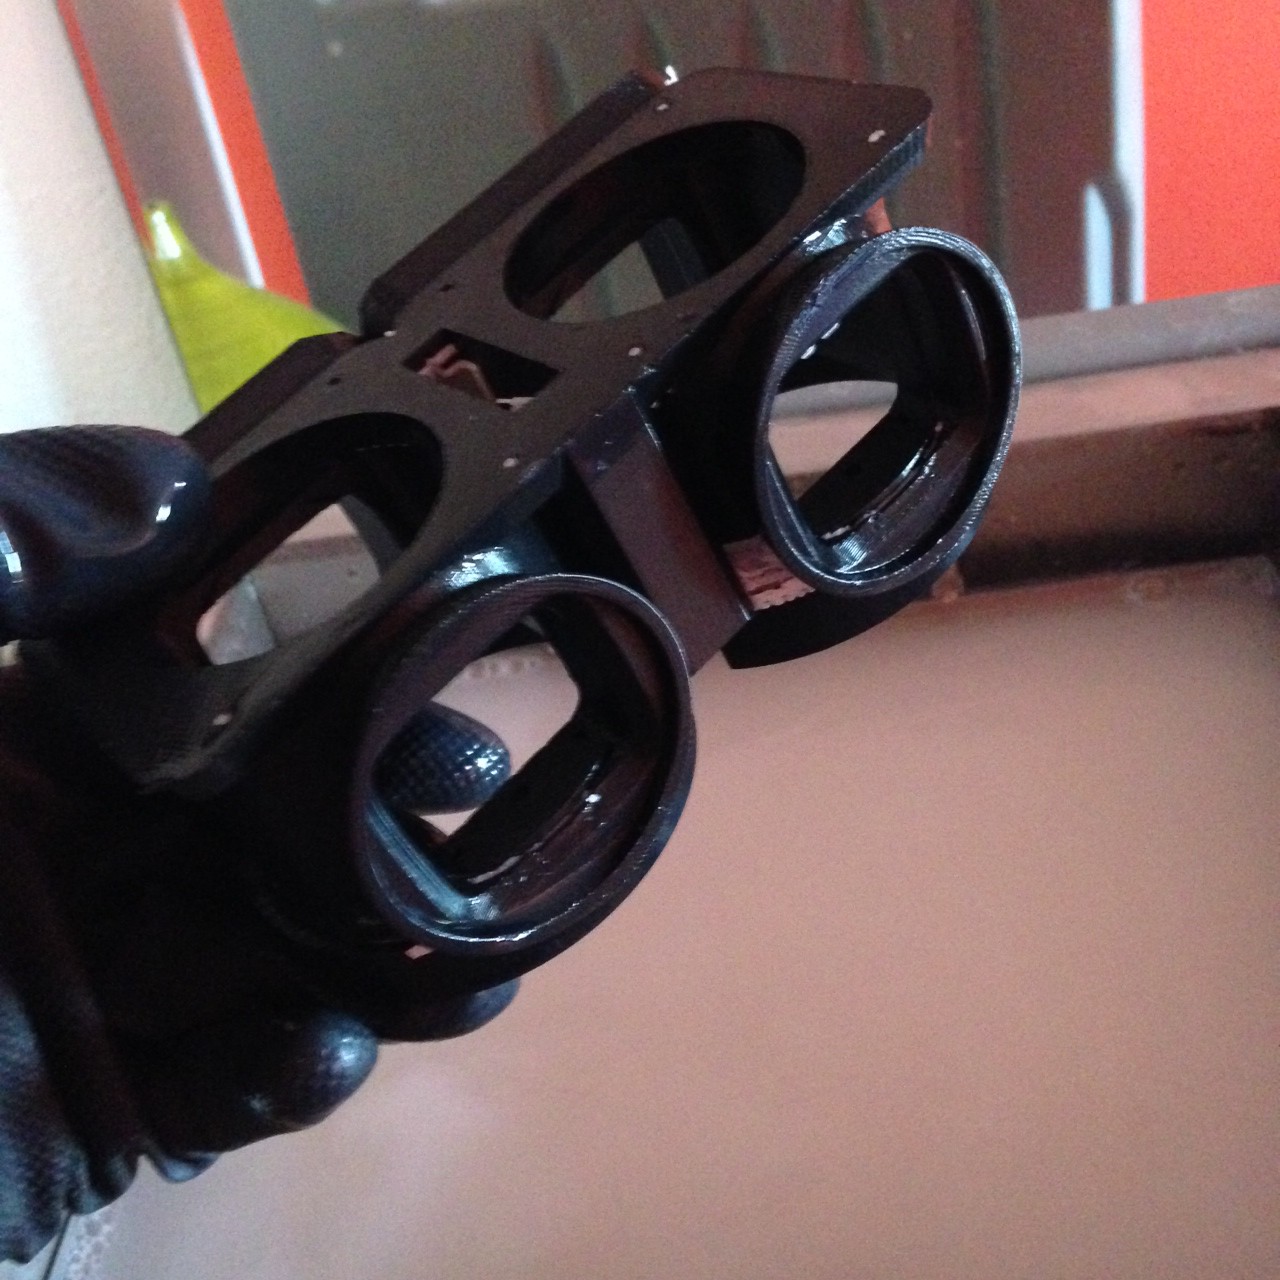
05/30/2016 at 03:18 • 0 commentsAfter defining the terms of what a Perceptoscope should be, and the broad strokes for how it would work, I went into a discovery phase of optical experimentation. I bought and took apart basically anything I could get my hands on with optics, and stayed up late into the night examining how combinations of lenses could modify a view of a flat image or the world itself.
Some of my earliest prototypes were sacrificed and torn apart in the chaos of experimentation. They were large and cumbersome, and I strained my eyes trying to make the stereo image converge in the space in front of me.
I eventually figured out the right combination of lenses to bring into focus both the outside world as well as the near eye screen, and waited patiently for the military surplus prisms I ordered to arrive.
Once I had everything in one place, I built a cardboard prototype of my entire optical system out of a Dremel box, and started to work with a script in Processing designed to mimic a stereoscopic display.
![]()
I started build a larger box for the optics out of a shoebox to hold this cardboard prototype so I could start playing with throwing objects further into the space.
![]()
Now that I was satisfied with the layout, I designed a housing for all the optics in Rhino, and sent it off to be 3D printed.![]()
There's still a lot of experimenting and math to be done to really perfect the system, but it also has some unique optical qualities that I never could have anticipated. For one, the way in which the outside world is brought into view actually gives users a wider angle than their typical sight. This effectively exaggerates the amount of depth between objects, and makes the outside world feel more three-dimensional. Even without the augmented reality compositing, Perceptoscope's optics were something which felt distinctly different from the everyday.
As we push the optics of the system further, it'll be fun to discover what other qualities emerge, and how much more impressive the system can be when we experiment with the ability to zoom in and out, or dynamically adjust to outside lighting conditions.
-
What makes a Perceptoscope?
05/24/2016 at 21:51 • 0 comments![]()
To understand the basics of how a Perceptoscope works, it's first important to recognize that there are two primary functional components when it comes to augmented and virtual reality devices beyond the computer that powers them: optics and tracking.
In many ways, the optics are the most obvious bit people notice when they put on a headset. VR researchers came to find that magnification of small screen could provide a wide field of view to the end user. By allowing the screen to render two side by side images which are magnified by lenses in front of each eye, the modern VR headset was born.
However, tracking is really the unsung hero of what makes modern VR and AR possible, and the ways in which a particular headset does its tracking are critical to its effectiveness.
Early modern HMDs like the Rift DK1 relied solely on accelerometers and gyros to track the movement of the headset through space. This provided a decent understanding of a headsets rotation around a fixed point, but could not really track a person as they leaned forward or backward. Current holdouts still using this approach are mobile phone based devices like Google Cardboard and Gear VR.
The next generation of devices combined those standard motion sensors with computer vision techniques to track lateral movement of the headset within a volume of space. The Rift DK2 uses infrared LEDs and an IR camera attached to your computer, similar in concept to a WiiMote in reverse. Headsets like the HTC Vive use an array of photosensors on the HMD itself which take note of how synchronized lasers move across them from mounted emitters throughout a space called "lighthouses".
Perceptoscopes take an entirely different approach to tracking which is based on a human sense known as "proprioception". Essentially, proprioception is the inner image we all have of our bodies orientation through touch. It's the way we can stumble through a bedroom in the dark, or touch a finger to a nose with our eyes closed.
Perceptoscopes are not a wearable extending the human body, but a physical object present in the space. This fixed and embodied form factor, with a limited range of motion along two-axes (pitch and yaw) allows us to use rotary encoders geared to each axis to record a precise angle that a scope is pointing.
![]()
So while traditional HMD tracking techniques can be thought of as an analog to the inner ear and eyes working in combination, Perceptoscope's sense of orientation is more like how dancers understand their bodies' shape and position in space.
We've since gone on to incorporate other sensor fusion and computer vision techniques in addition to this proprioceptive robotic sense, but this core approach significantly reduces computational overhead while simultaneously providing an absolute (rather than predictive) understanding of a Perceptoscope's view.
As for what makes our optics special, that's for another post entirely.
Perceptoscope
A public viewing device for mixed reality experiences in the form factor of coin-operated binoculars.