Lex Kravitz
-
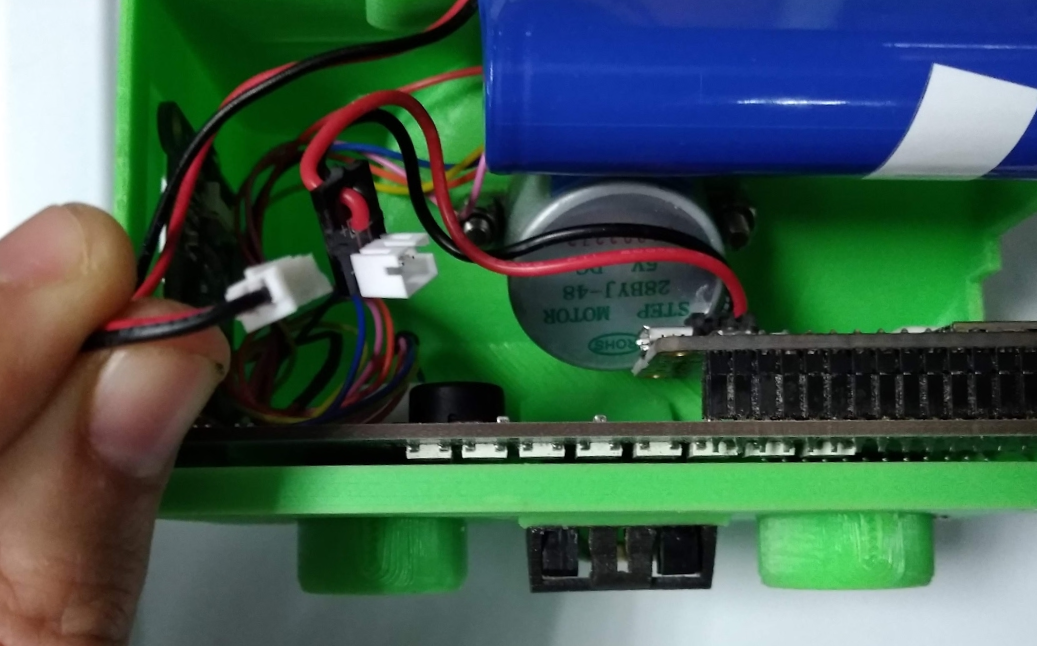
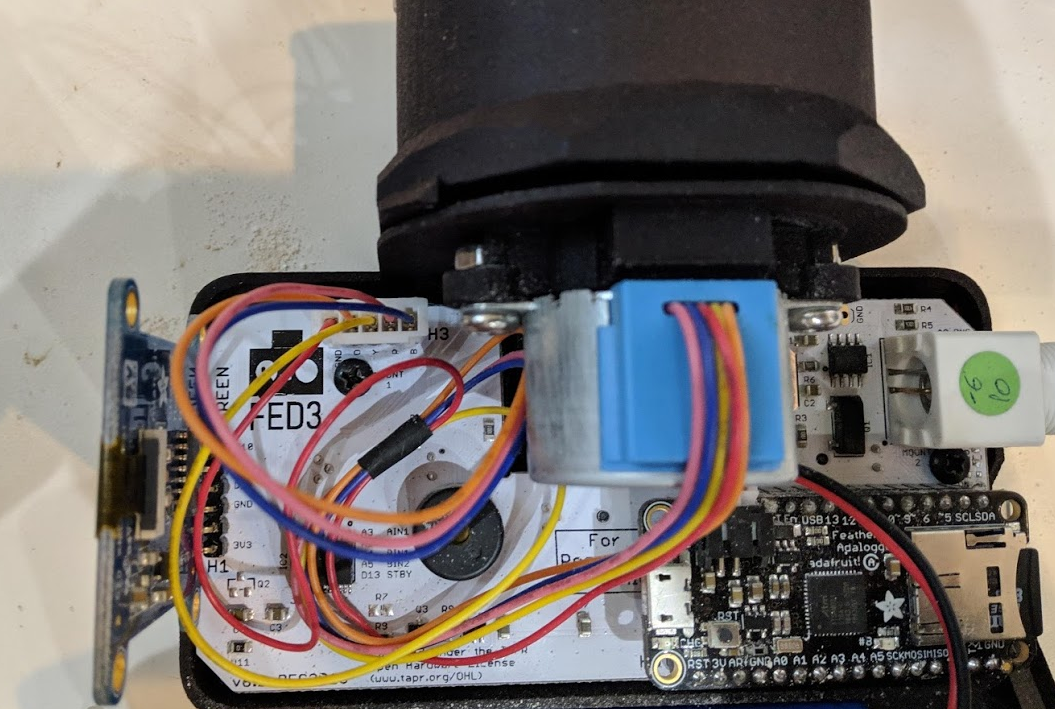
JST battery extension
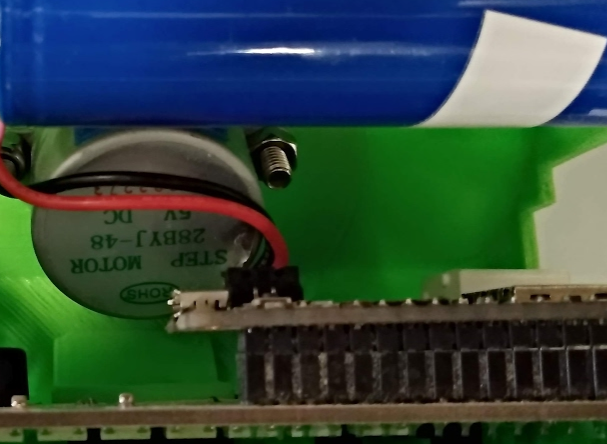
11/16/2020 at 16:02 • 0 commentsThe battery connection on FED3 is pretty annoying, as it is right next to the stepper and is difficult to plug in when swapping batteries. As a workaround I looked online for a small 2-pin LiPo extension cable be couldn't find one. The closest I found was this JST jumper, which won't do it, or this long extension, which won't fit inside of FED. If anyone can point me to a short extension that would be great!
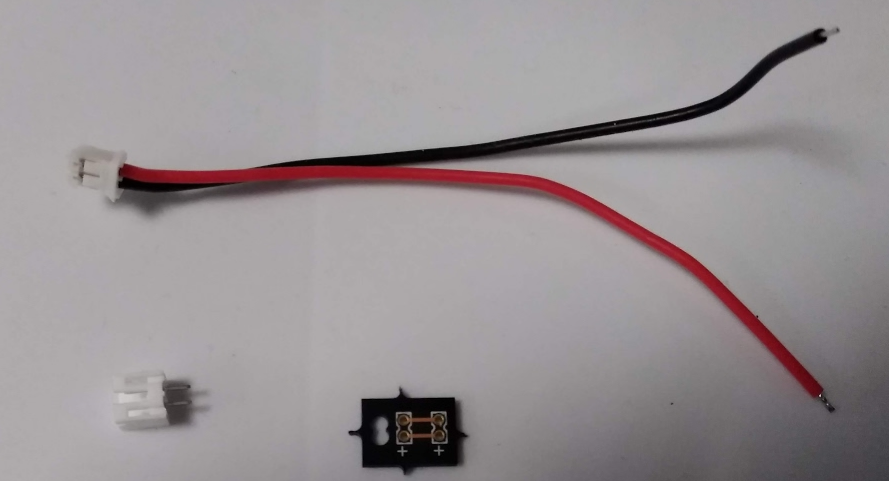
Anyway as I couldn't find one to purchase, I designed a small PCB to fit this need. Here is a link where you can purchase it from Oshpark, the PCB costs 25 cents each.

You will also need a JST PH 2.0 2-pin female connector with cable, and a male through-hole connector (here). Watch out when buying these parts from Amazon and make sure to read the reviews, apparently the polarity (red/black wire locations) can be reversed from some suppliers.
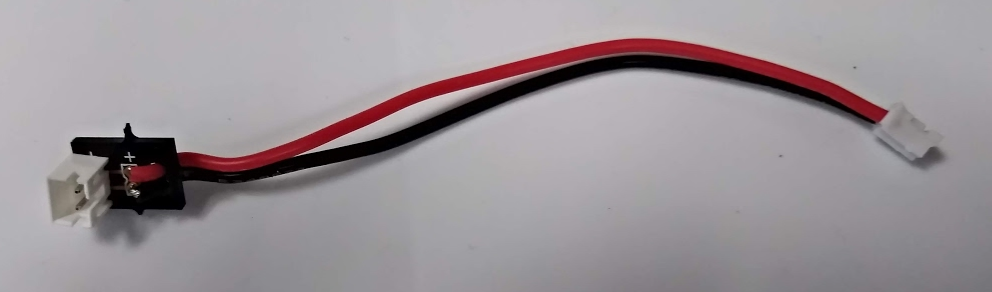
Solder the JST female pigtail and male connector into the PCB and plug the cable into the Adalogger on the FED3. Now you have a battery extension that makes it much easier to swap out the battery!
-
FED3 GitHub site
11/16/2020 at 15:36 • 0 commentsWe set up a pretty extensive GitHub site that includes the latest design files, code, and documentation.
https://github.com/KravitzLabDevices/FED3
Look for the newest files there!
-
Angled dispenser
11/16/2020 at 15:30 • 0 commentsWe have been working with the horizontal pellet dispensing design of FED since 2016, but while stuck at home during the Spring of 2020 I started experimenting with a completely different pellet dispensing approach, using an angled dispenser. This dispenser is much less likely to jam, and we've switched over completely to these in my lab. Here's a demo of how it works:
The 3D files and more info can be found at the FED3 Github site.
-
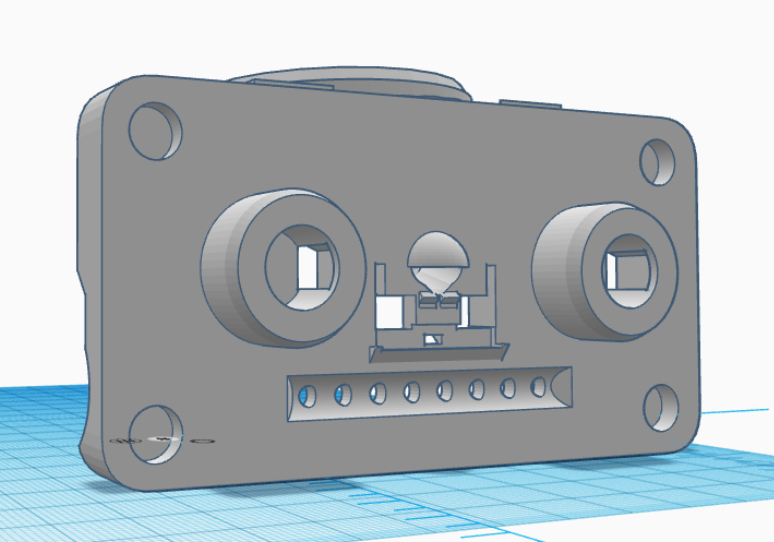
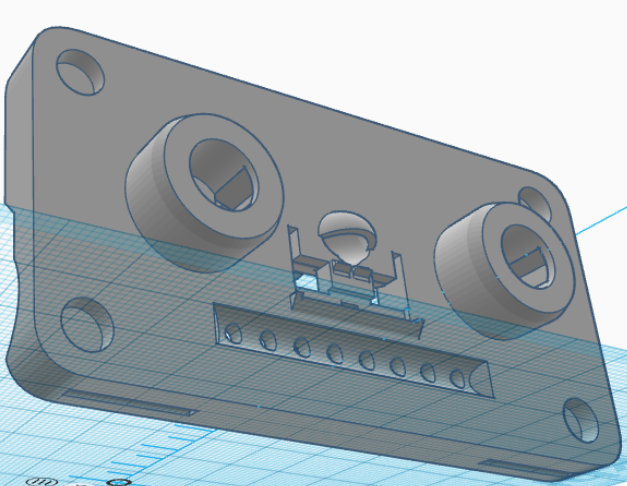
New parts for May 2020
05/27/2020 at 03:09 • 0 commentsOver the quarantine I've been working on tweaking a few things on the FED3 parts. This log will go over the new tweaks, which are available in the Files area.
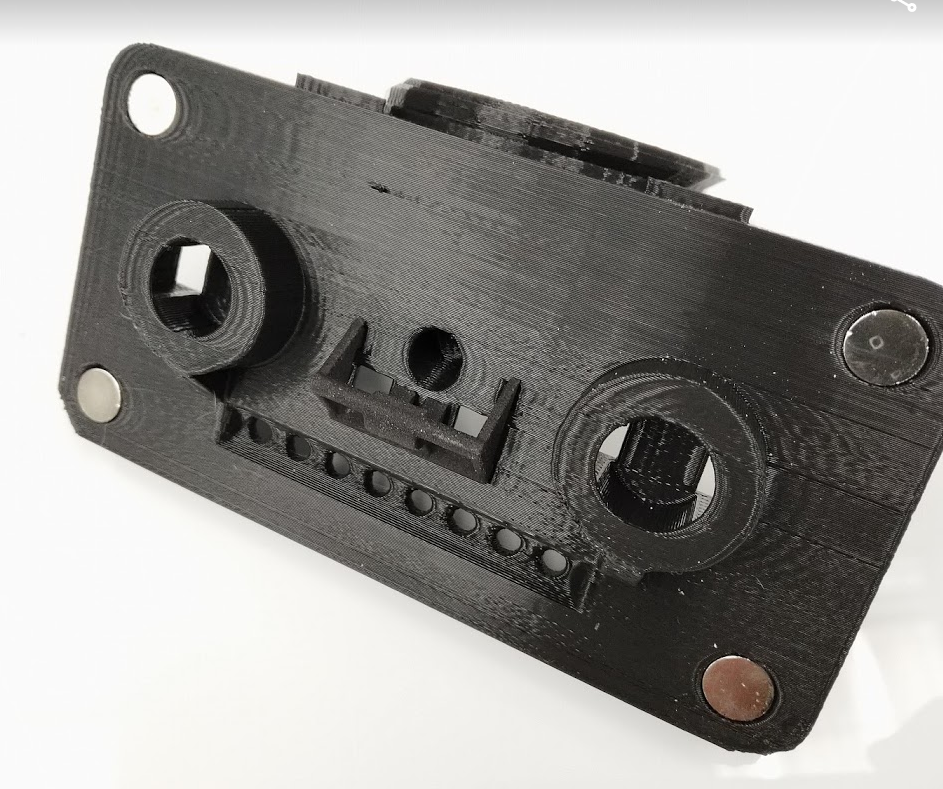
1. The back cover latching mechanism has always been a bit hard to use. I've now put notches in the part to make it easier to take on and off:
2. The motor mount used a clip, combined with small self-tapping screws. The screws could cause problems by either stripping the 3D plastic, or tapping in with the motor misaligned. Either one could run the print. Now I use two 8mm M4 0.7 threaded bolts with M4 0.7 nuts to secure the motor. This is much more reliable than the self-tapping screws and does not risk destroying the print if the screws go in misaligned. Because the bolts work so well I also removed the clip, which makes this part easier to print.
3. Finally, researchers Zane Andrews and Claire Foldi at Monash University showed me that mice could steal an extra pellet by poking their nose in the pellet well and grabbing the pellet before it enters the photo-beam. This would cause FED to not register a pellet was dropped, and therefore drop another one. I updated the front piece to include a "canopy" over the pellet well to prohibit this behavior.
So those are the newest edits. Editable TinkerCAD parts are here. -
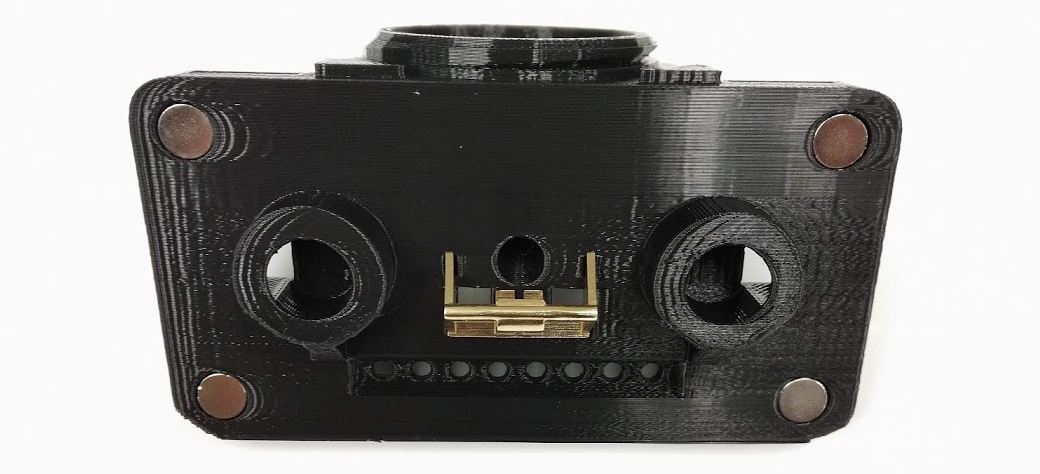
Cage insert to protect FED3
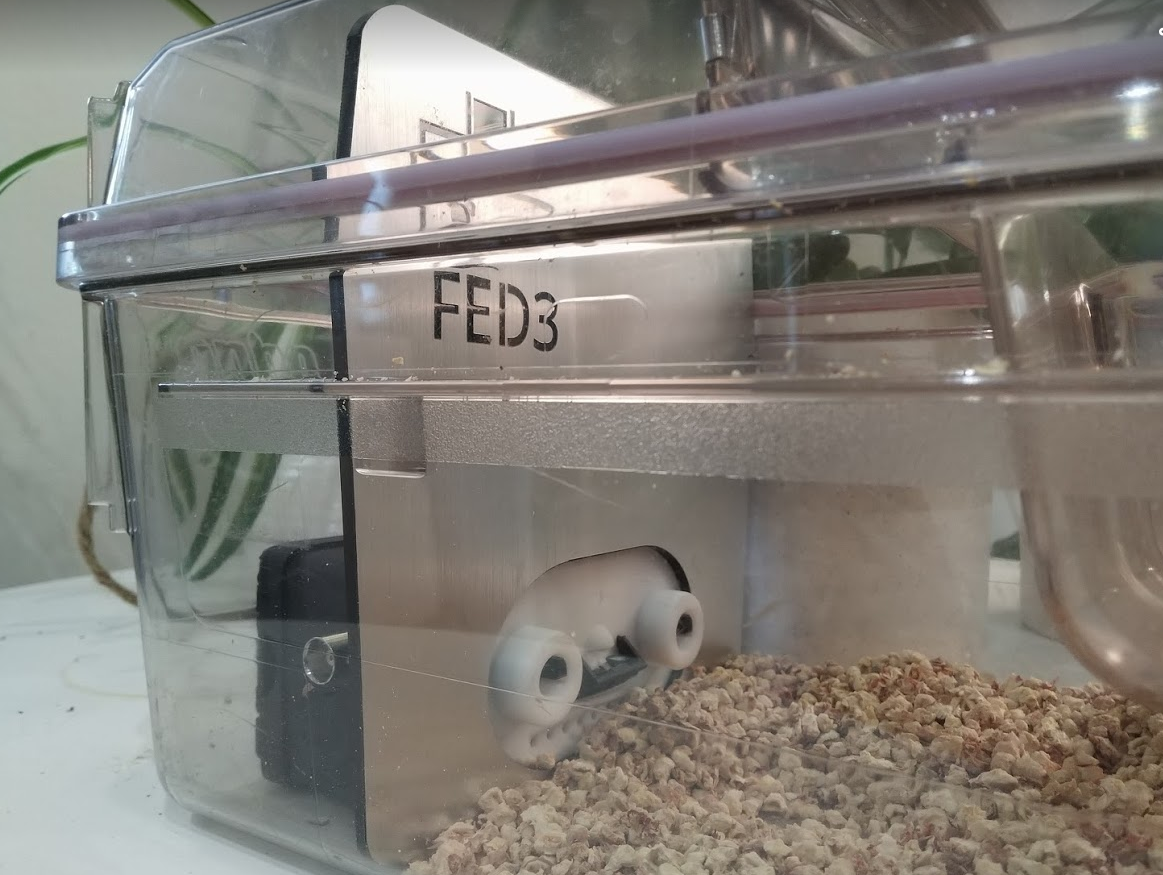
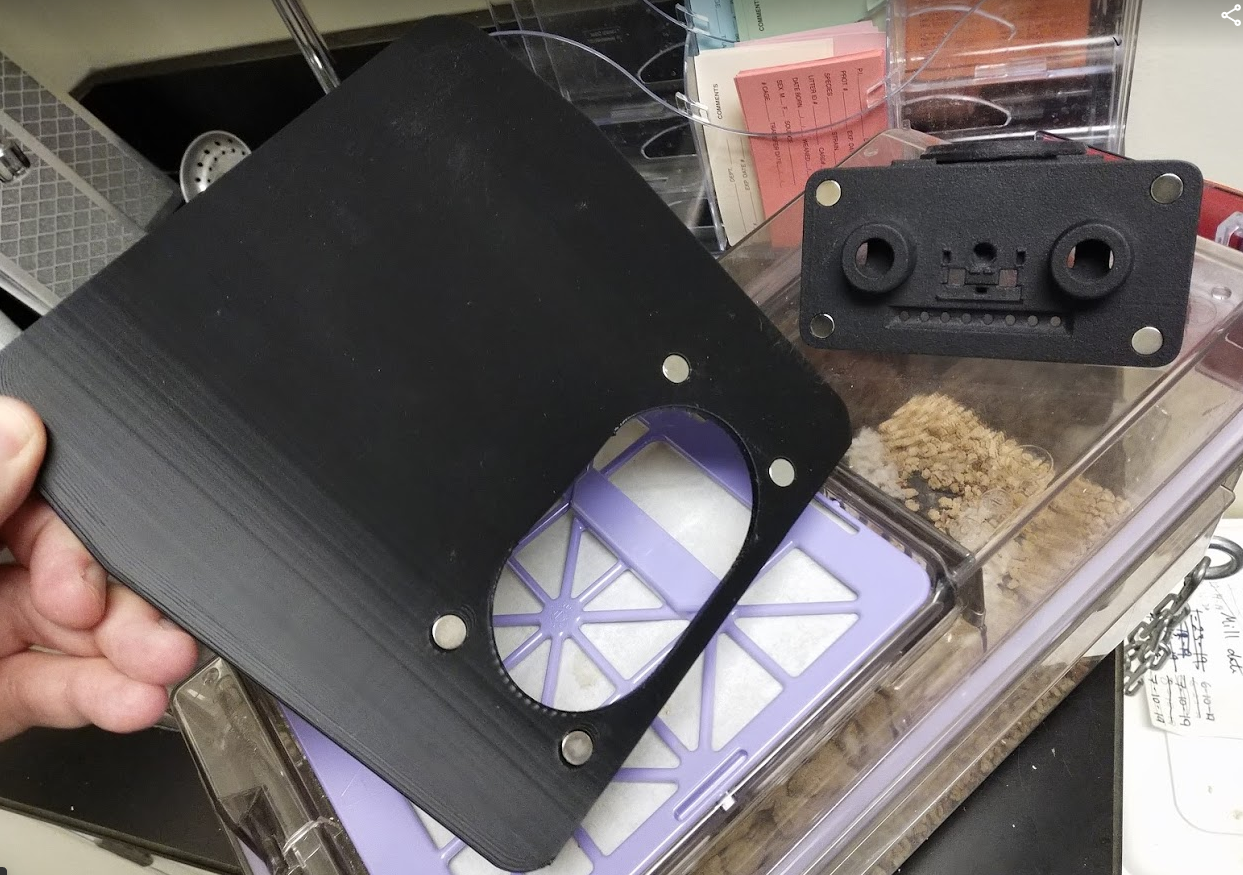
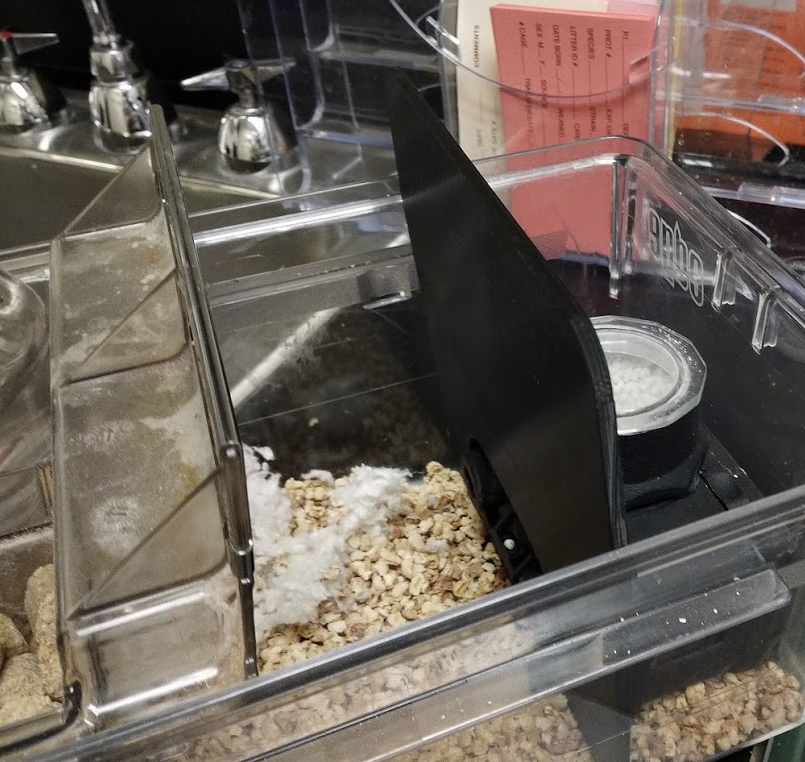
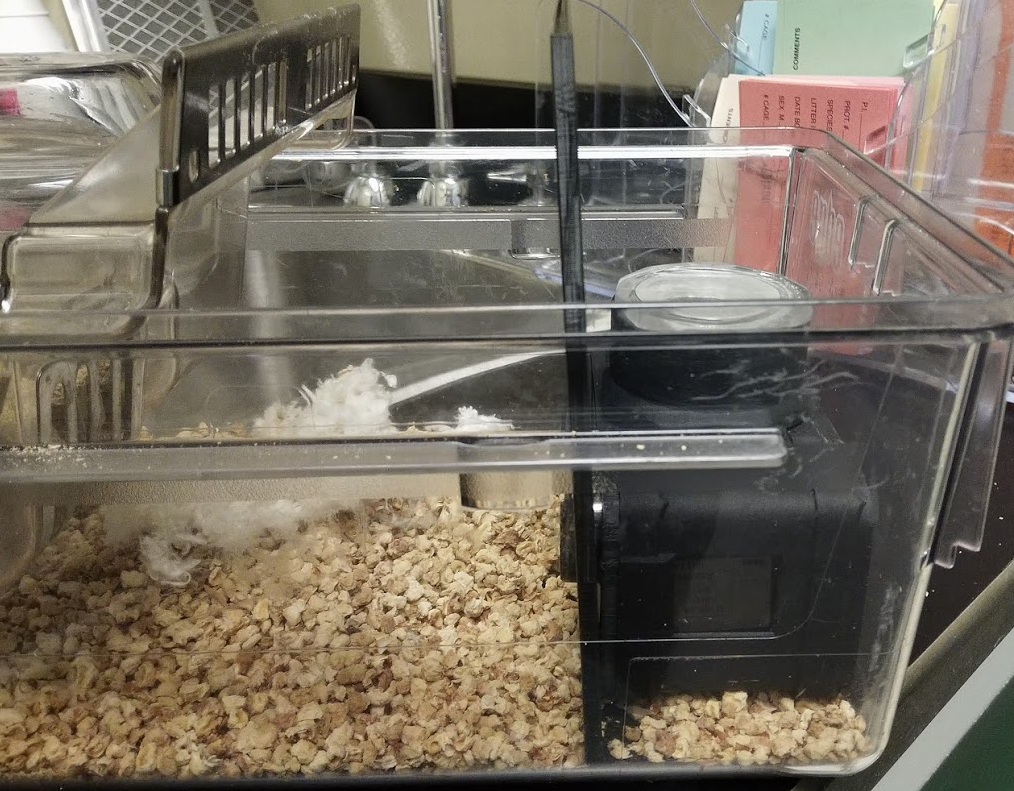
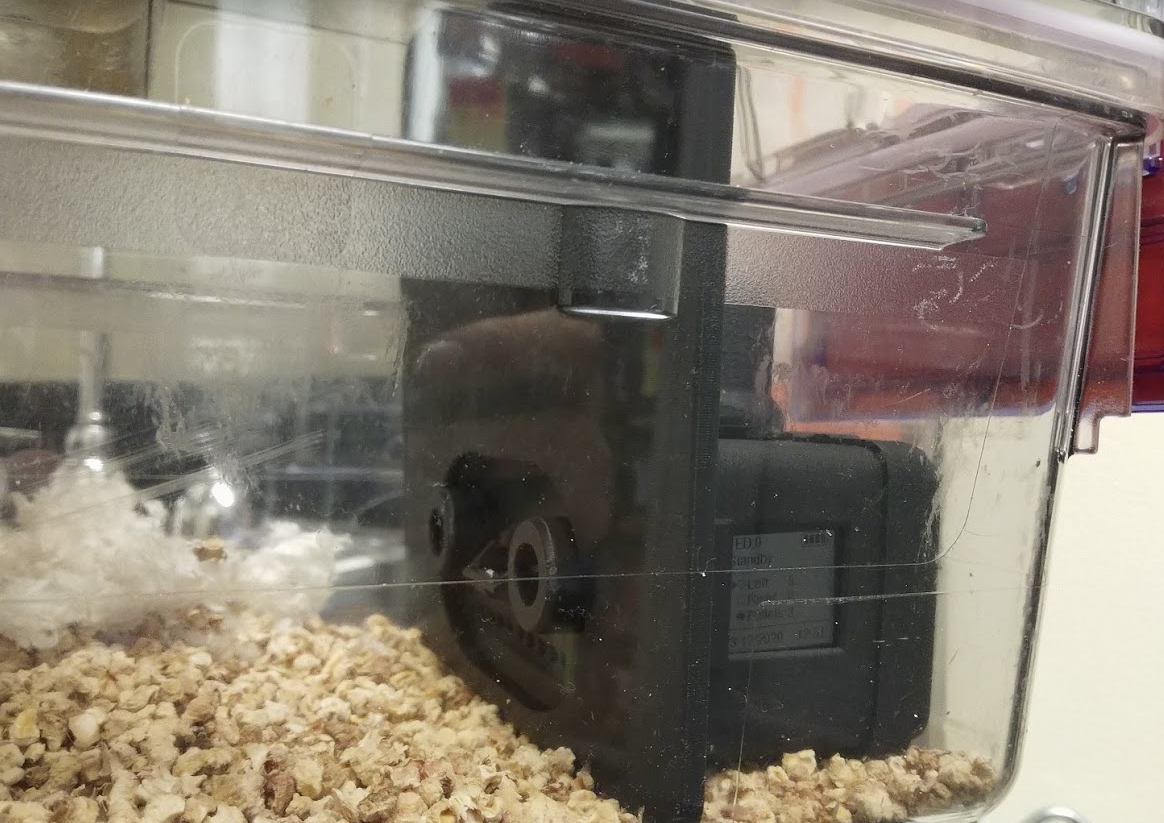
03/29/2020 at 15:40 • 0 commentsIn June of 2019 Zane Andrews and Nino Benci from Monash University posted a cool idea to the FED3 forum. They used a simple laser-cut piece of acrylic in the cage to block the mice from climbing on the top of FED3, keeping the FED3 cleaner. Here is a photo of their design, they also provide PDF files for laser cutting in their post linked above:
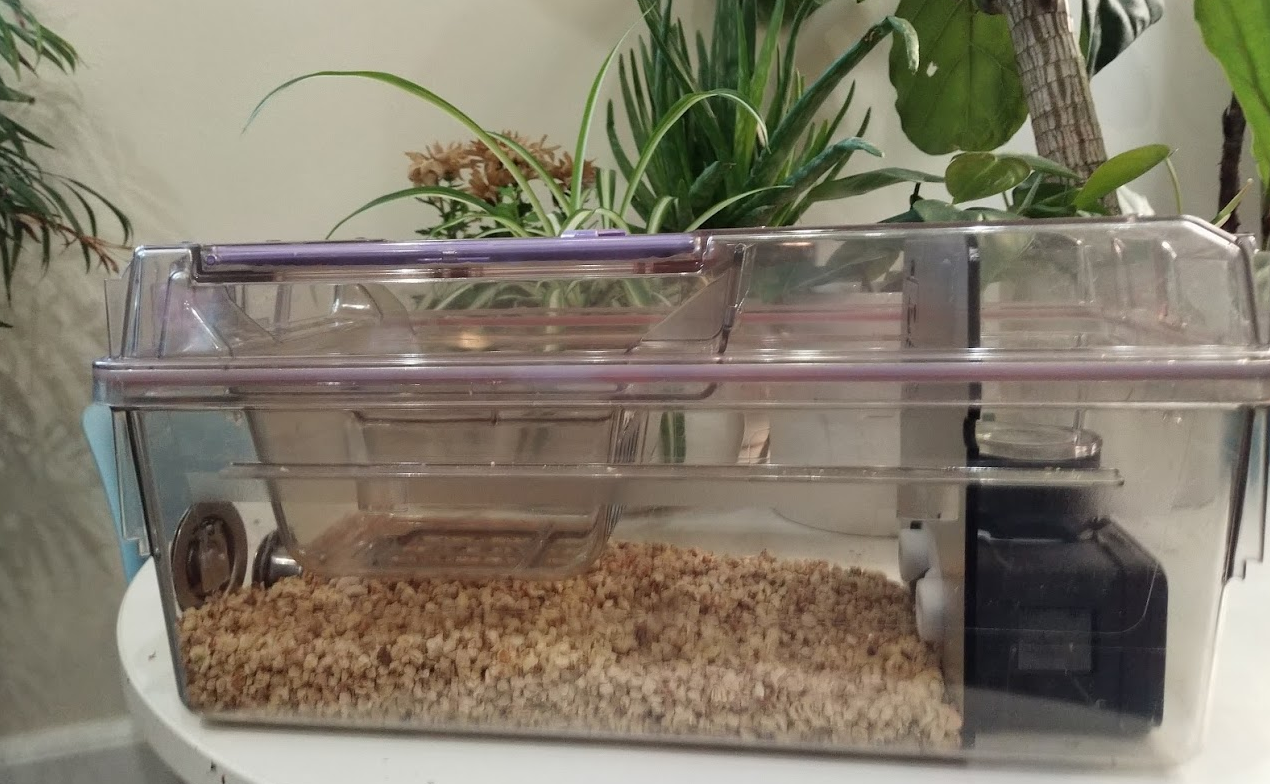
I recently re-made this idea to fit in our cages (AllenTown NexGen caging), and put editable 3D print files available here (you can edit them to fit your own caging). I also included small cut-outs for 3x8mm round magnets (the same ones on the front-plate of FED3) to hold it in place. The extra cut-out on the right side is a customization in case you need any wiring to pass from the BNC output jack on FED into the cage (for controlling an LED for instance).
While 3D printing works fine, these can also be laser cut - I just received these parts from Ponoko for ~$3-5 each for acrylic (black was the cheapest). I even got it cut in Delrin (bottom piece), which is autoclavable for $9.50.
The best looking laser cut version I made was to use the 0.5mm thick "Silver on Black Adhesive-Backed Plastic" ($8.77 each) for the front and 3.0mm thick "Black Matte Acrylic" ($5.24 each) for the back.
The adhesive backed "front" can be carefully aligned and stuck to the back, and 8mm x 3mm round magnets can then be glued into the holes in the back part. These mate with identical magnets on the FED3.
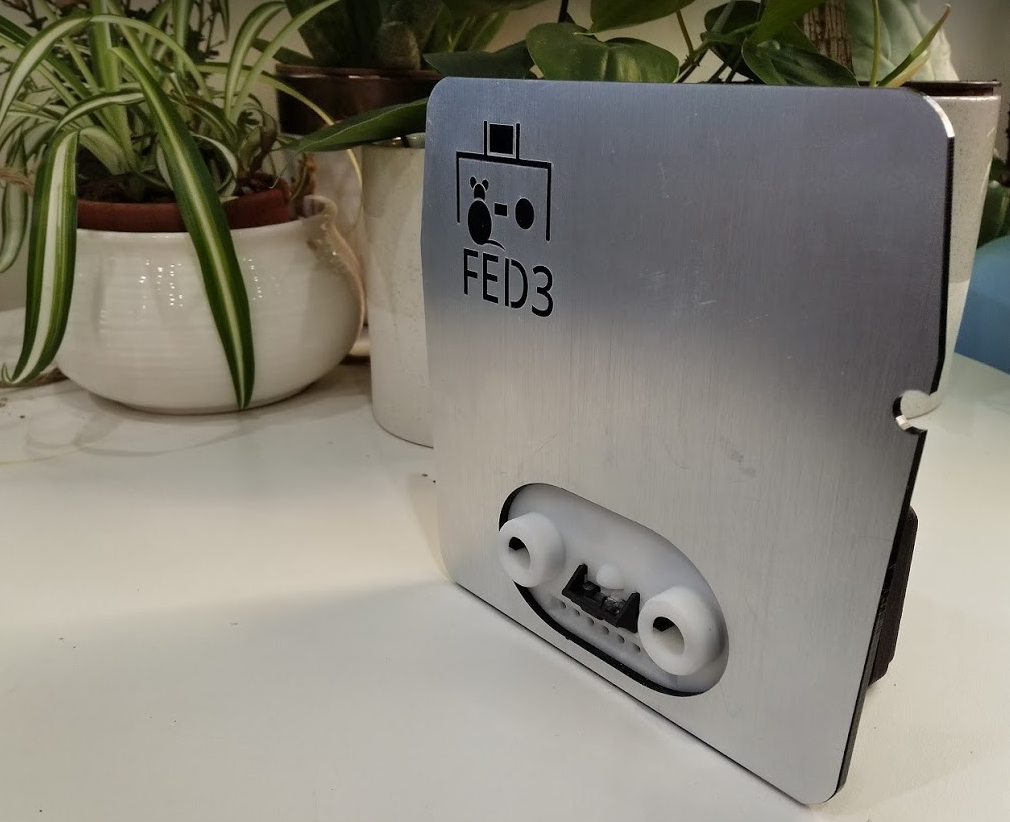
Here's a photo in a cage (note that plants are not normally found in our mouse facility... I'm doing all of this testing at home due to the pandemic).
-
Aligning the motor to reduce pellet jams
09/21/2019 at 22:09 • 0 commentsThe biggest issue with FED is jams, and this video will show one source of them and how to fix it to improve dispensing.
The most important thing is to make sure the pellet disk is completely stable inside the hopper. If you can wiggle it back and forth it's likely the motor is misaligned and the device may jam. In this case, either take it apart and try to align things better, or you may even need to re-print the FED front. See video for more info:
When everything is aligned well FED can dispense reliably. Here is a timelapse of 1200 pellets being dispensed in a row. Under normal conditions this would be ~1 week of continuous feeding. I still recommend checking the FEDs and cleaning crumbs out daily if you run it over multiple days.
-
Quantitative error testing, July 2019
07/11/2019 at 12:34 • 1 commentWe have built 6 FEDs using the new STL files and done some quantitative error testing on them. Specifically, we dispensed 200 pellets from each manually and recorded 4 types of errors. These included:
- Pellet "jumps", where the dispensed pellet jumped out of the pellet well, leading to a 2nd pellet dispensed. n=28/1200 dispenses, 2.3%
- Double pellets, where the dispensed pellet was not detected, resulting in a 2nd pellet dispensed, n=23/1200 dispenses, 1.9%
-Jams (self-cleared), where the FED took longer than 10 tries to dispense, activating its self-clearing motor movements, n=9, 0.8%
-Jams (not cleared), where the FED required experimenter intervention to clear, this did not occur in these tests, n=0!
Our next tests will involve mice in cages, stay tuned!
-
Updated FED3 3D design files for July 2019!
07/09/2019 at 00:01 • 2 commentsThe last release of STL files was in October of 2018, and I have made many tweaks since then to improve the function of FED. I have just uploaded a new set of STL files. These parts result in better dispensing, better aesthetics, and they solve some unexpected problems (like mice stealing SD cards!)
These include tweaks to all of the parts, which I'll quickly review here:
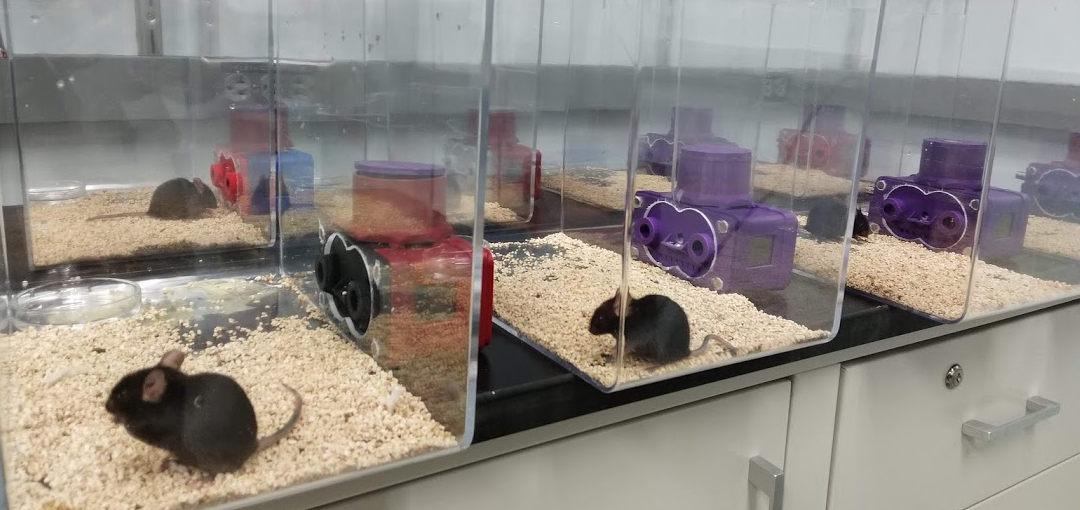
1. Wall Mounts. The front now includes corner insets to hold 8mm magnets for wall mounting. This allows FED3 to be mounted externally on a cage or wall, or be placed inside of it:
Here are 8 FEDs mounted on plastic boxes in my lab. Wall mounting keeps the FEDs cleaner but it requires dedicated space to run them.
2. Option for a metal pellet well. I included 2 variants of the front file, one (above) that is printed in one piece, as before, and another (in the STL pack) that has the "nose" removed. This is so the nose can be printed as a separate part in metal to stop mice from chewing on it (I've been doing this commercially through Shapeways at $15 each for the metal part). Here it is in brass (nose-piece STL is in the files area too):
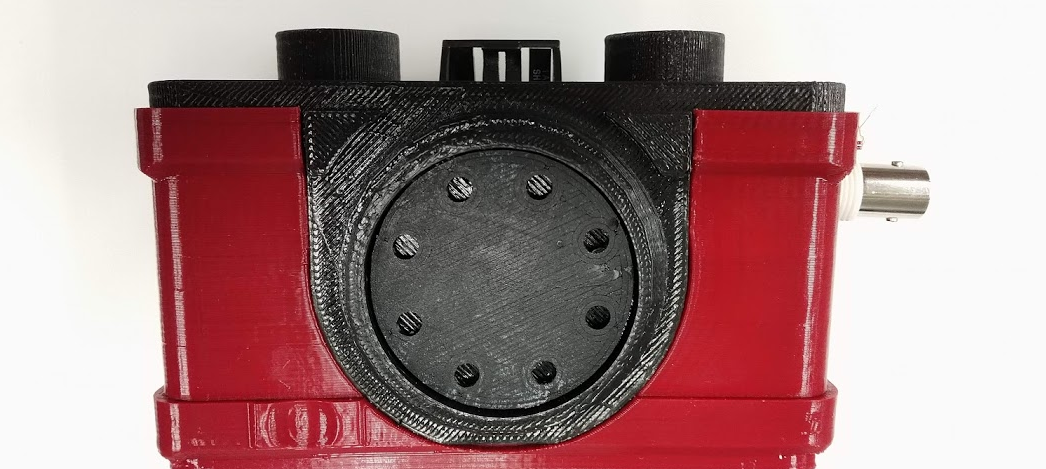
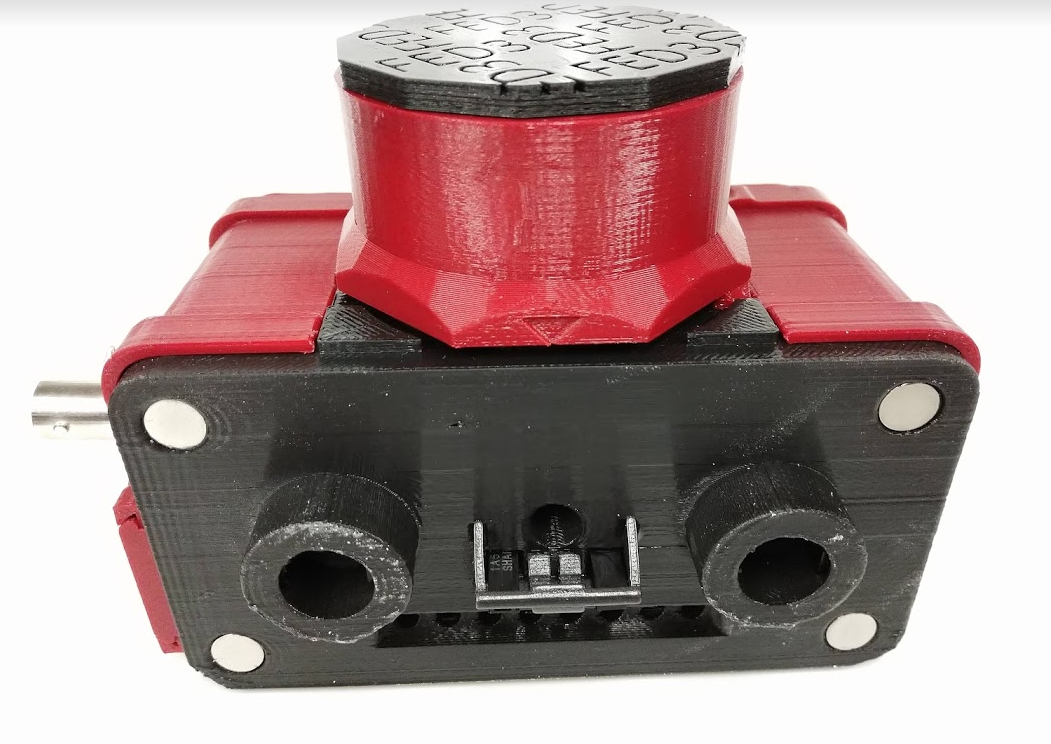
3. SD card door. The housing now has a sliding door for covering the SD card and USB port (take that, curious mice!)
It has a nice "click" to it too, see here.
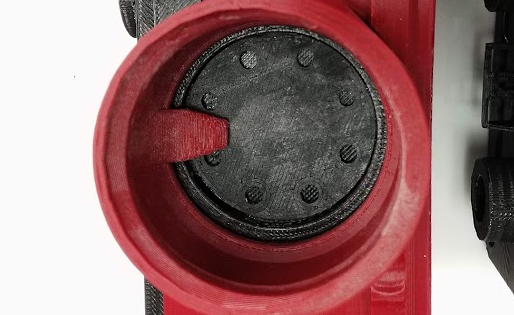
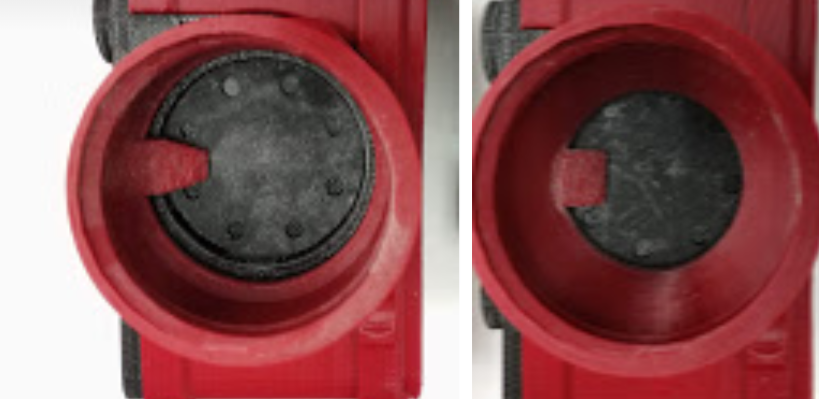
4. Larger diameter pellet disk. The diameter of the pellet disk was increased by 2mm to reduce the chance of pellets getting in between the disk and the wall of the pellet hopper, creating a jam. During assembly, it is important to "center" the disk so it rotates freely.
5. More reliable hopper. Four significant changes were made to the hopper itself. First, the pellet "foot" was decreased in size to just cover the dispensing hole. I found this reduced pellet "grinding". (Fun fact, this was like this in the FED1 design!)
Second, I removed the inner "ring" inside the pellet disk. This was designed to stop pellets from becoming jammed between the pellet disk and the wall of the pellet hopper, but it ended up creating a new place where pellets could become jammed if the hopper was not seated perfectly. With the wider diameter pellet disk this is no longer necessary. New (left) vs. old (right):
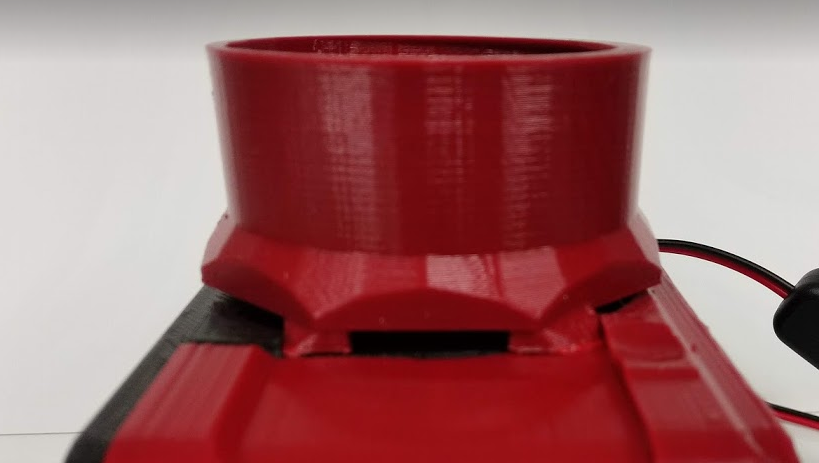
Third, I added "feet" to secure the orientation of the hopper correctly. When screwing the hopper on, the feet should align like this:
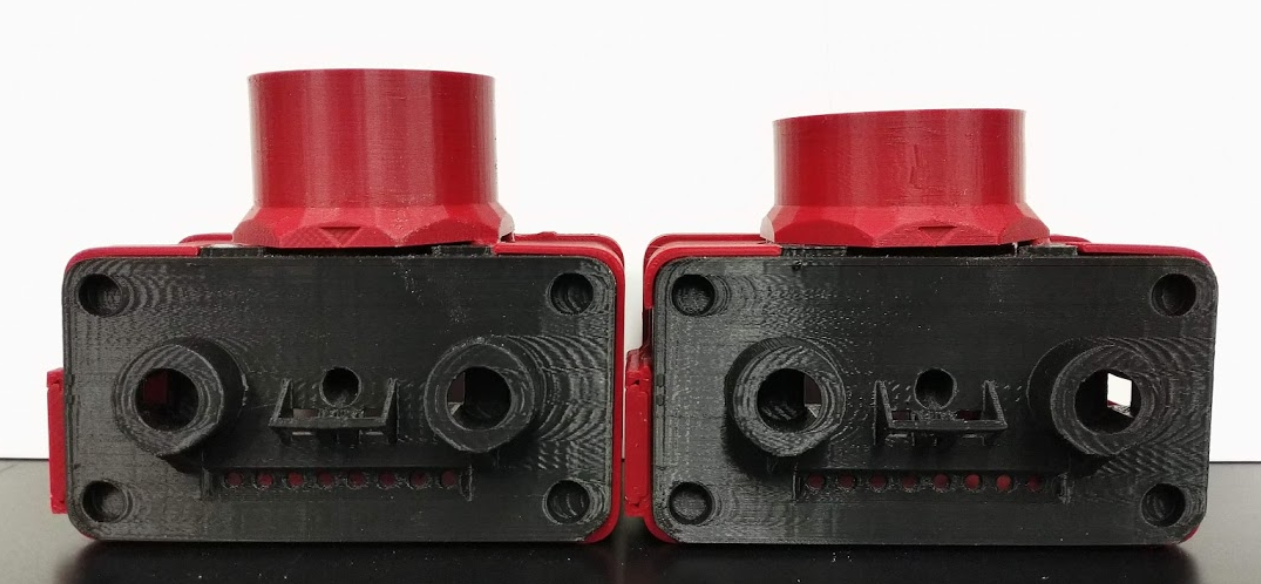
Fourth, I reduced the height of the hopper by ~1cm, which will allow FED to fit in even more caging (we had some caging that the old design was just barely too tall to fit in with the lid comfortably closed. In terms of capacity, the hopper previously fit ~2000 pellets, and now holds ~1500. This is an estimated drop from ~13 to ~10 days of dispensing, which I think is worth it for the decrease in height. FED3 needs to be checked more often than that anyway so it's sort of a moot point.
Old (left) vs new (right):
6. Tessellated lid text! (Update 11-16-19 - while awesome looking, I found that this tessellated text design wasn't ideal as it got dirty really easily and was hard to clean inside the text, I've removed the text in the most recent version in the files area).
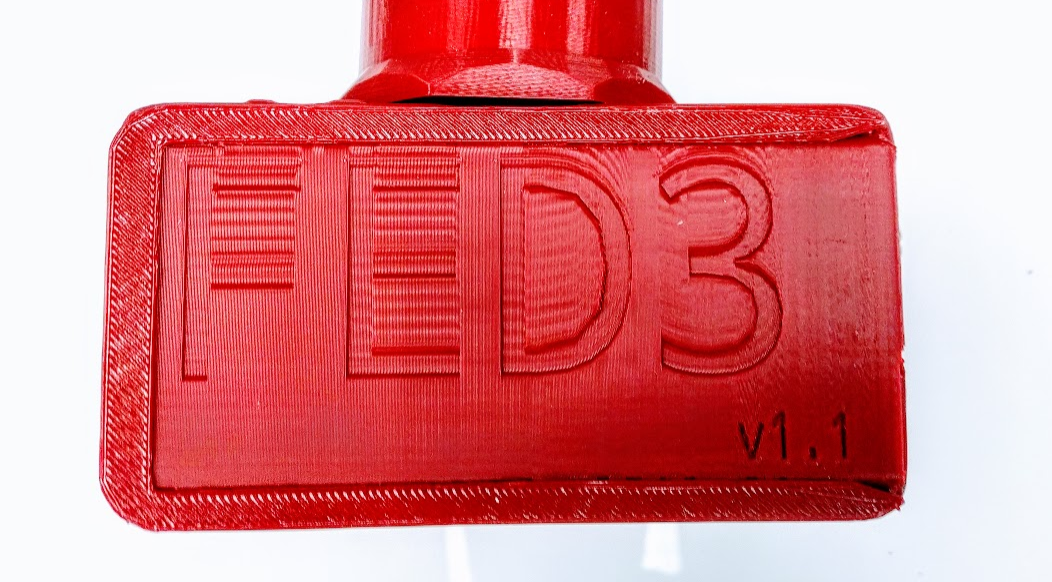
7. Tweaked back cover. Very minor tweaks to improve how it slides, and update the label to FED3 version 1.1!
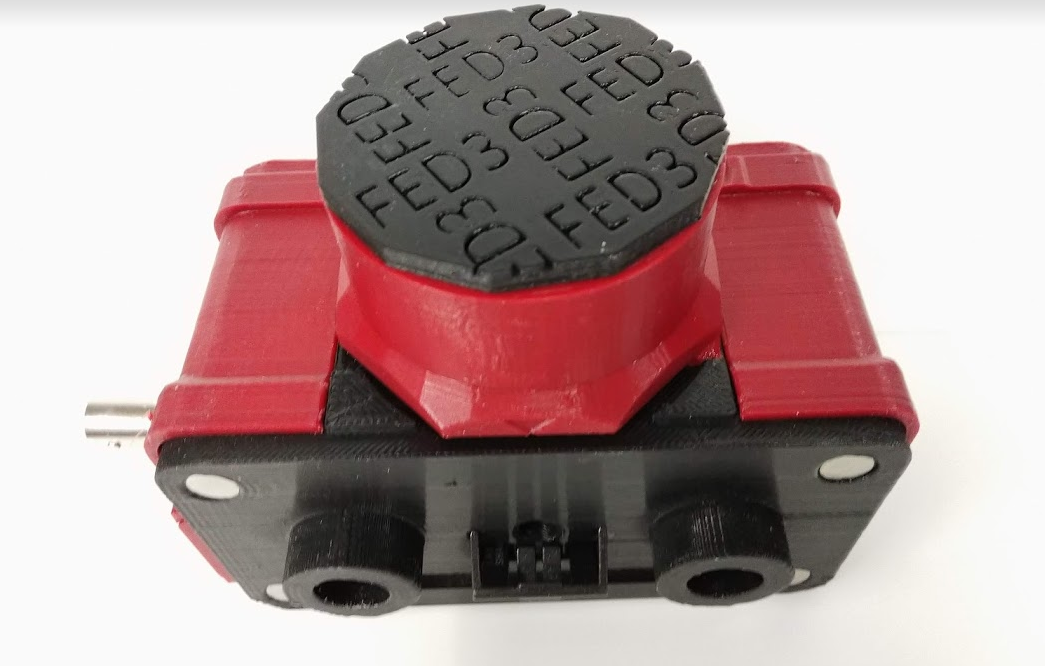
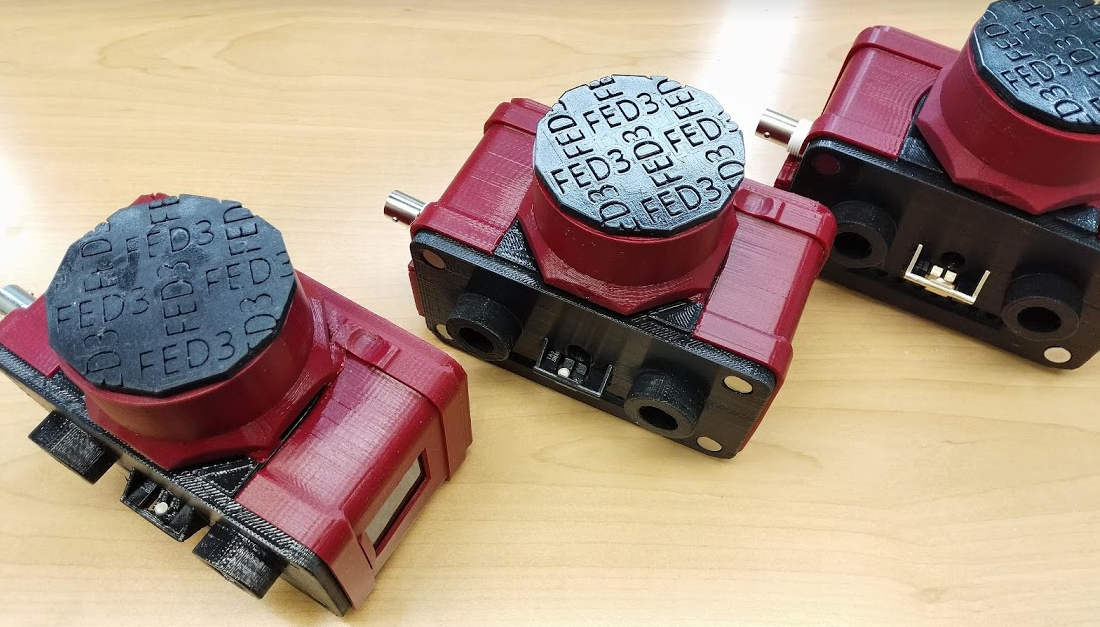
If you made it this far here are photos of completed FED3 with the new parts:
-
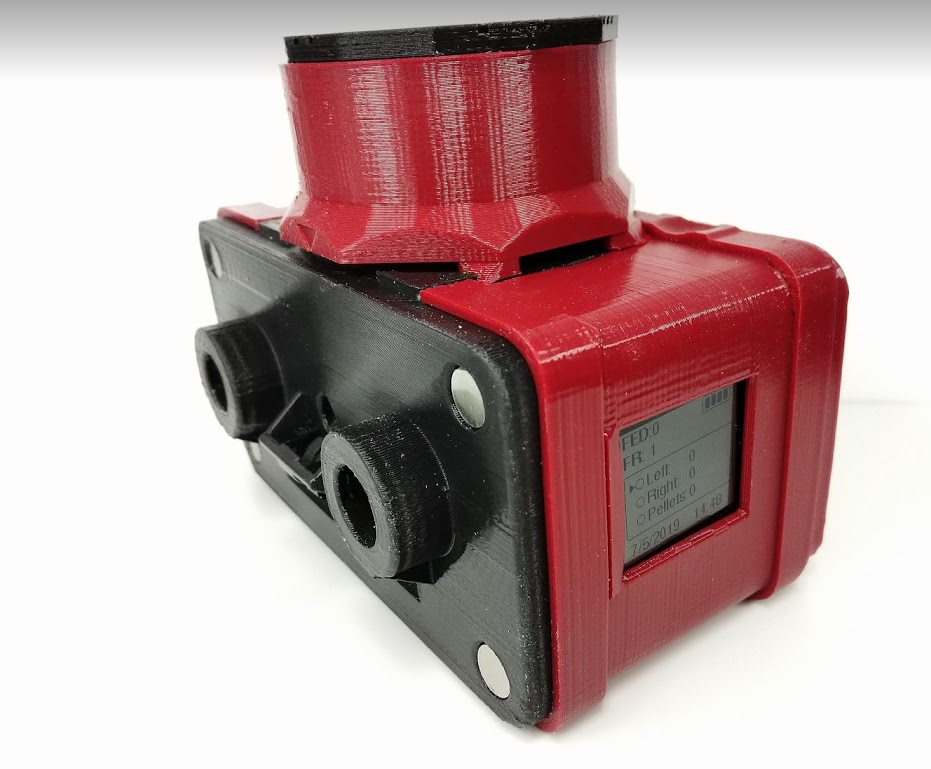
New programs
05/20/2019 at 16:22 • 0 commentsBased on feedback, I've updated the number of programs to 10! Here are the modes present in the newest version of the code. Use the left and right pokes at startup to scroll though:
0 Free feeding
1 FR1
2 FR3
3 FR5
4 Progressive Ratio
5 Extinction
6 Light tracking FR1 task
7 FR1 (reversed)
8 PR (reversed)
9 Optogenetic stimulation
10 Optogenetic stimulation (reversed) -
Interfacing FED3 with Bonsai
04/18/2019 at 20:47 • 0 commentsHi,
Many of you may be using the FED3 in satellite mode, logging the data locally and extracting it for later analysis. Lex and I wanted to codify a platform where the outputs from the FED3 could be read in real-time and paired with other neural circuit manipulations like fiber photometry that use open source platforms like Bonsai. Briefly, Bonsai is an open source program with near limitless potential to read out and drive multiple pieces of hardware, software and provide you with behavioral or physiological data in real time. All for the low low price of $0. It uses a visual programming language to control different functions which means zero front end coding - the flow of commands appear as nodes that move left to right. Check out and install Bonsai here at https://bonsai-rx.org/
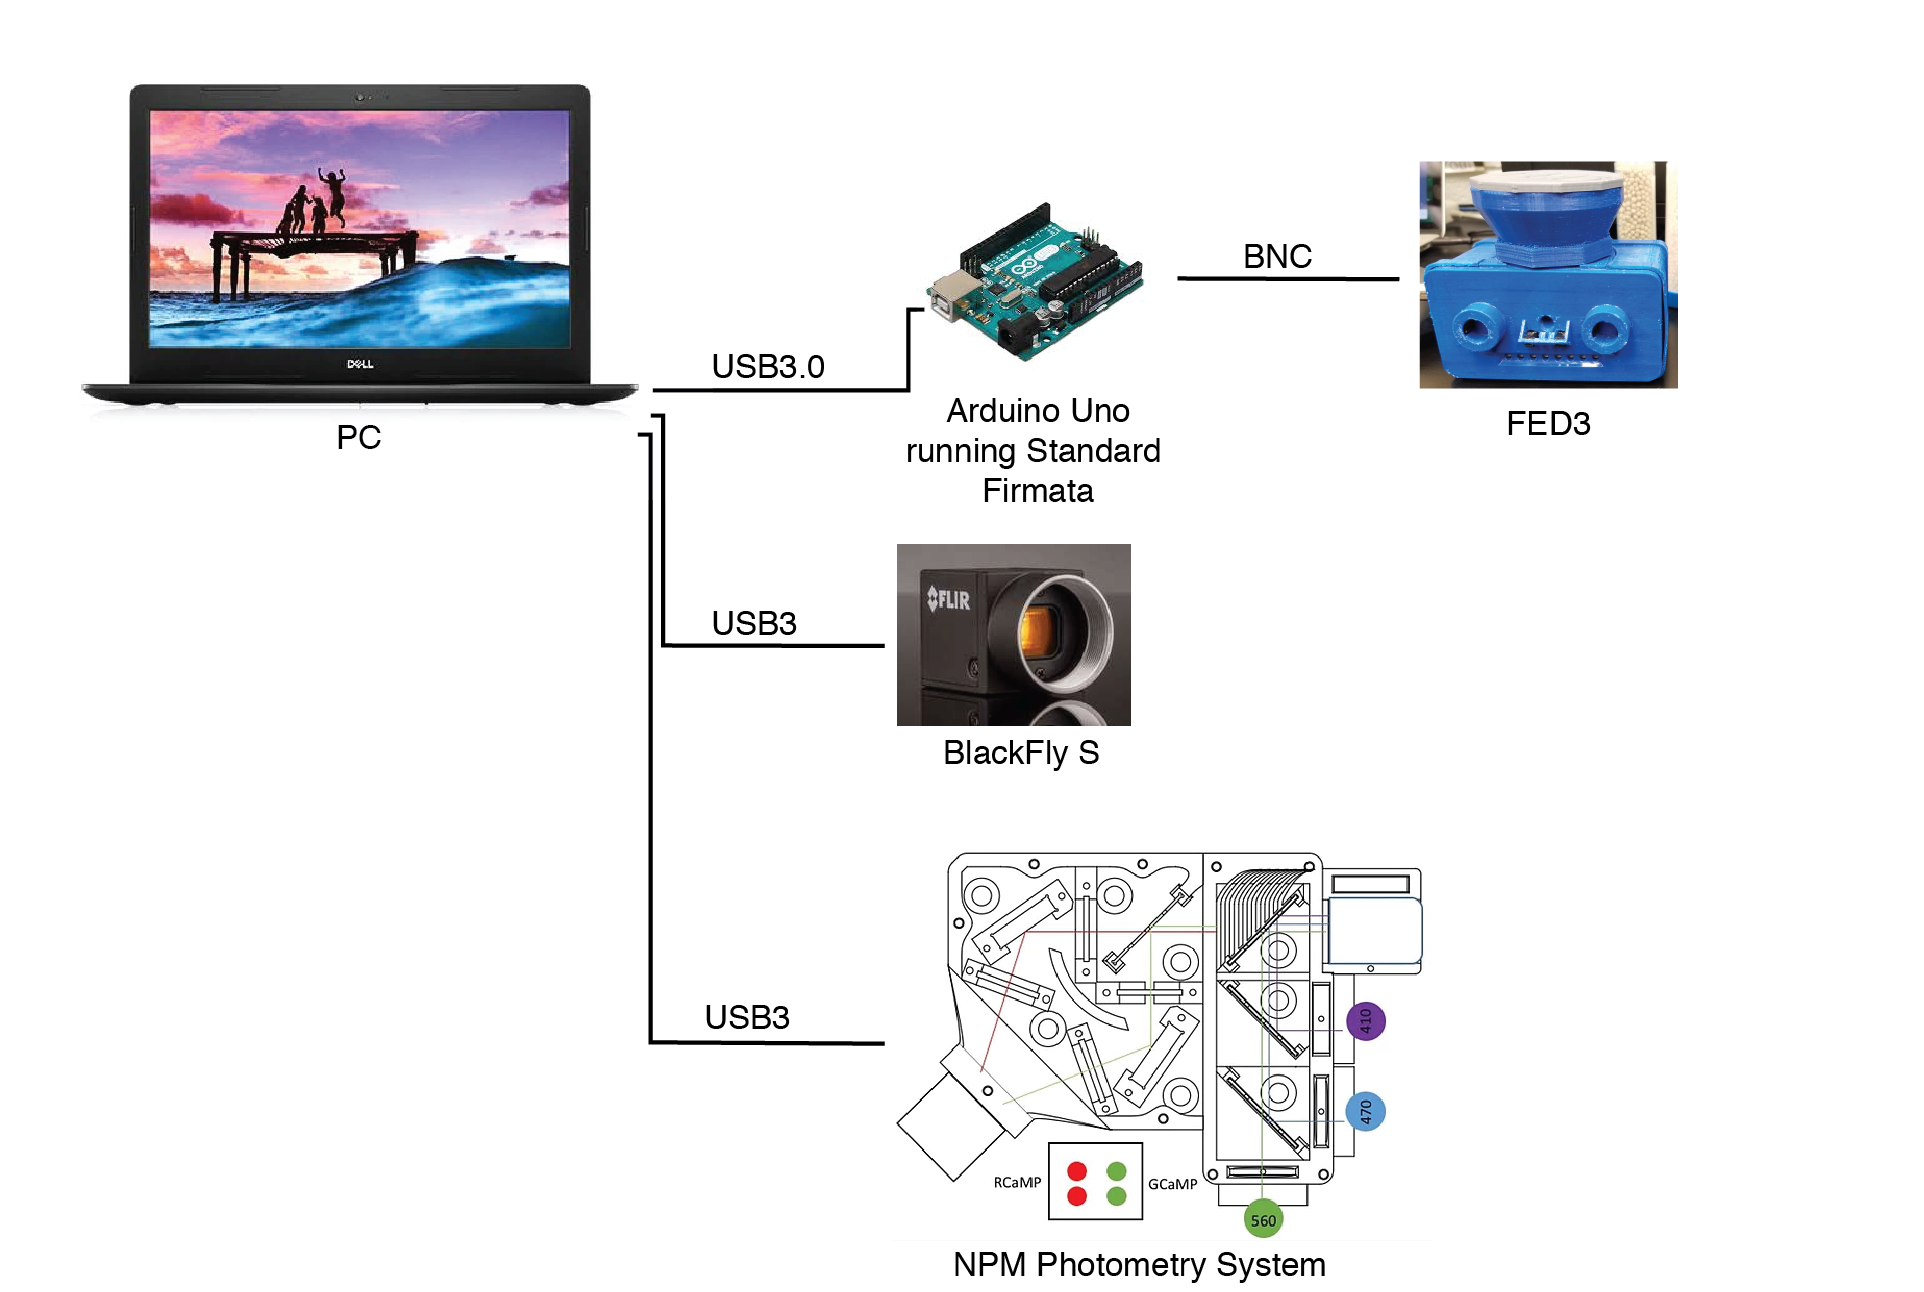
My goal was to use the FED3 as an operant feeding device reading out the sensors in real time to generate time stamps that I could then extract from fiber photometry data sets. I'm using the Neurophotometrics (NPM) System with 3 LEDs 415, 470, and 560 and a BlackFly Camera. Sage Aronson of NPM provided us with some starting bonsai files to control his system and I've adapted it and combined it with the FED3 bonsai layout. You can access the Bonsai layouts in the Files section above. Ultimately it does 3 things: 1) Talk to the FED3 and generate a timestamp file of the different sensor outputs 2) Talk to another camera to capture video of the chamber and 3) Talk to the NPM and generate fiber photometry signal data in csv format. A simple schematic of the hardware is below. Notably, you will need a separate Arduino to function as an I/O Box for the FED3.
![]()
Feeding Experimentation Device 3 (FED3)
Version 3 of our home-cage feeding device, FED. FED3 includes nosepokes and stimuli for behavioral training.

 I recently re-made this idea to fit in our cages (AllenTown NexGen caging), and put editable 3D print files available
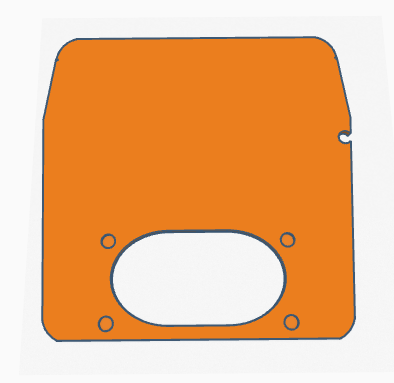
 The best looking laser cut version I made was to use the 0.5mm thick "Silver on Black Adhesive-Backed Plastic" ($8.77 each) for the front and 3.0mm thick "Black Matte Acrylic" ($5.24 each) for the back.
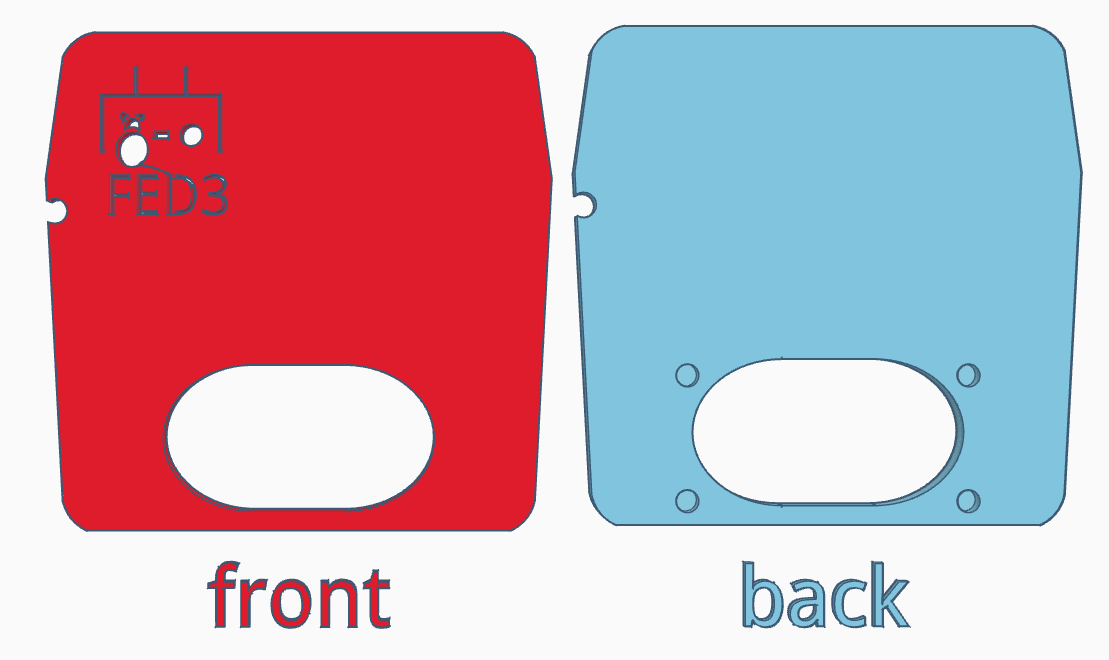 The adhesive backed "front" can be carefully aligned and stuck to the back, and 8mm x 3mm round magnets can then be glued into the holes in the back part. These mate with identical magnets on the FED3.
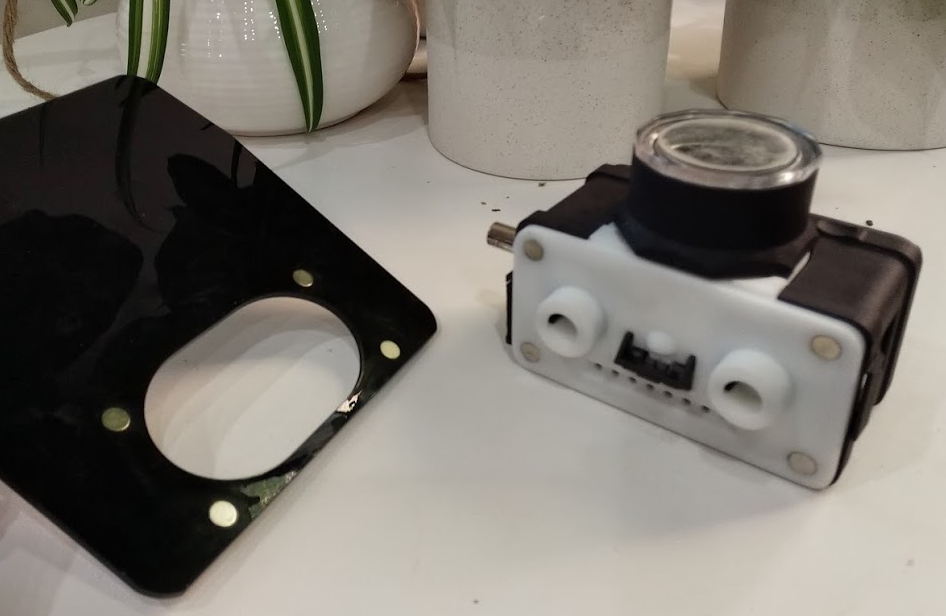
 Here's a photo in a cage (note that plants are not normally found in our mouse facility... I'm doing all of this testing at home due to the pandemic).