Close
0%
0%

Church bells

To rebuild a old church bell system that I have already built once. This time I hope to clean it up and document it.

Similar projects worth following
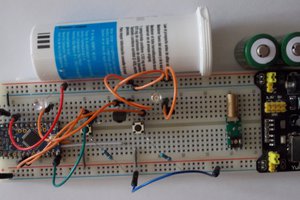
My church once had a old system to ring the bells each hour. At some point it stopped working and my dad asked me to look at it ( I had no idea how to fix it, It really is just a brass bar taped close to a microphone) so I built him one that would play mp3 bell sounds through the out door speakers (not to hard right..... Not). He then said that it would be great to add a few extra bell songs that he could play at the touch of a button. After looking around for a wile I came up with what would work and now some of the equipment is out dated and so this project is to document how Im going to rebuild it now that I have a 3d printer and a little more info under my belt. The first photo is what it looks like now.

I first plan to have the arduino check the time from the RTC, from there It will display the time and or date on the LCD wile checking the alarm set points in the code to see if its time to activate the Mp3 trigger to play the corresponding bell chime for that set time. On the Mp3 trigger it has selectable play positions for Mp3's named with that corresponding position I will wire them up to momentary buttons so the files can be independently selected and played. This will lock out the serial connection from the arduino so that it will not be interrupted ( or I hope it does). I will be switching the type of RTC this time around to a better stable one, as for the one that I use now drifts a lot. I have always had to go up and change the code when ever Day Light Saving time comes around (twice a year), so I would like to add a switch to move the time ahead or back with out interfacing with it. Wile working on this I hope that I can clean up the Code that I have or write better code that is easier to fallow.---------- I will update the details better as I go along I just wanted to give a general direction of where I was headed with this project

b_display_code.ino

ino - 2.71 kB - 09/29/2016 at 19:20

Download

c_alarm_code.ino

ino - 3.99 kB - 09/29/2016 at 19:20

Download

ch_bell_v9262016.ino

Main file you have to have all files to make this work. Open this file the rest are are sub-files/tabs in the Arduino IDE

ino - 3.02 kB - 09/29/2016 at 19:20

Download

f_DST_switch.ino

ino - 160.00 bytes - 09/29/2016 at 19:20

Download

e_led_code.ino

ino - 243.00 bytes - 09/29/2016 at 19:20

Download

View all 7 files

View all 11 components

  • Looking for a new case

    Bobby Feather04/10/2017 at 14:24 0 comments

    Well I have not forgotten this project. It just got cold in my work shed and I had to put it aside for the time being. now its warmer and well I'm back on it. Every thing tested good the last time I checked worked like the other one. I now need a better looking project case for it to go in, or maybe I might repaint the one I have. The brown I picked looked good on the can but after painting it. It kinda looks poo brown and that not what I want in my church playing bells. I will be updating This week with a video of it working now that I'm back working on it I need to make sure that it is running like it should. I will post a pic of the case before I repaint it just to remind me never use that color again. If the paint don't fix what I don't like about it I have a new 3d scanner (kinect V2 and V1) I will scan it and use it to make a better looking box with my 3d printer.

  • Buttons for the MP3 Trigger

    Bobby Feather10/17/2016 at 14:19 0 comments

    I have been meaning to add a video of it working on here but now that I needed the space to work on another project it will have to wait till I get it ready for it to go in the box be before I get it on here.

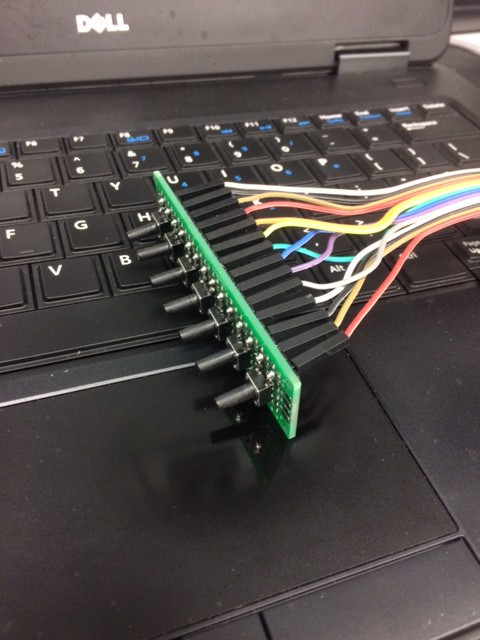
    I did get my buttons wired up this week for the MP3 Trigger selectable music. I used some small proto boards and put the buttons on it then wired the stand off above it. Using a solder short to connect the two I can use the jumper wire from amazon to connect them. I will probably use a bead of hot glue to keep them in-place so they don't move

  • Up loaded the code :P

    Bobby Feather09/29/2016 at 19:28 0 comments

    I know there is a better way of having this sketch, but this is the way that made sense to me wile I was working on it. But this is the code I'm working with. Down load it to a single folder and open the church bell file. This will put all the files in the right tabs in the IDE. It seems to woke farely good I found a way to get the Day Light Savings time worked out to a switch, and I have the MP3 trigger working on serial2 now. If you see any thing that you would change besides the formating of the sketch feel free to let me know. Also I working on a drawing of how every thing is wired so that will be coming soon.

  • Wired up the Boards

    Bobby Feather09/26/2016 at 15:14 0 comments

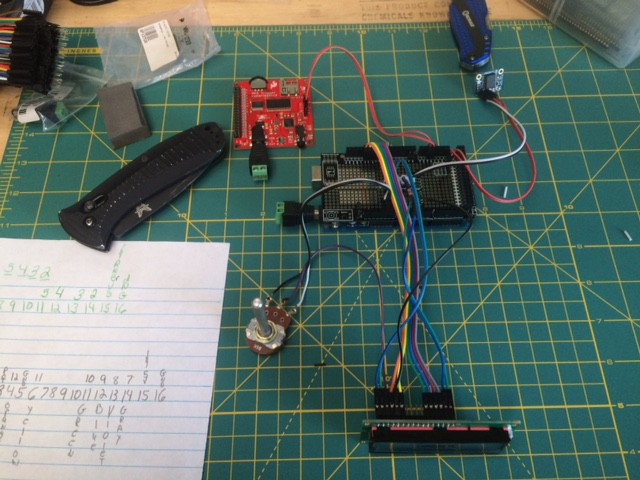
    Well I stop neglecting this project this weekend. Yeaaaa! I got all the parts that I have received as to-date together. I have wired up most of all the boards that I'm going to use but I was asked to use a small amp to boost the power to my larger amp for some reason when the bells play it is not very loud so I'm going to get me one to test with once I get everything up and working. As you can see in the photos that it is wired and all I am waiting on is power. I will make a diagram once I have tested all the boards separately and then together. To make sure it all works before I post any thing. Pulse it will be easier to understand in stead of my rambling about what went where.

    I have been looking for a small power supply to power the Arduino board, mp3 trigger and large amp without the need for a separate power supply for the boards and amp. I think I might have found one in the price/watt range I wanted. We will see.

    I will be testing tonight I hope (Smoke test) and see what noise I can make. If all goes well once I get the buttons ordered I will be 3d printing the enclosure in a week or so.

    All Files (Arduino and plans ) will be uploaded after testing.

  • Never ordering parts from China Again!

    Bobby Feather05/27/2016 at 16:15 0 comments

    Well remind me never order anything from China again !!! It has taken forever to get them in. On a good note I have more parts coming in and I hope I can get started building/testing the new system next week or even start on it this weekend.

    I will start off by using the old code that has been working for the past years on the older system and then make changes and test them as I go along. I would like to add new options like : DST switch, On-board computer to make changes to the code only needing a keyboard and monitor( raspberry pi one), on special days play a song representing that day at Noon, and heck I might even have it play Happy Birthday at noon on my birthday. I dont know; before the only goal was to have it play the bell chimes on the hour and a few slectable bell songs to play when needed but now that Im updating it, I have seen where there is room for improvement.

    Once the main parts are in I will start taking pic's and update as often as I can on my progress.

  • Well

    Bobby Feather04/17/2016 at 22:57 0 comments

    Well I was looking for my extra Rpi2 and with some luck I found a arduino 2560 in the box . I don't know why I would have labeled the box Rpi2 and put a arduino in there but I'm another part closer to getting this together. I wonder If the house trolls made a trade. :P

  • Ordered the first part and might be the hardest part to find

    Bobby Feather04/09/2016 at 22:56 0 comments

    Just ordered the MP3 trigger from ebay. I really wanted to get it from Sparkfun but they have it back ordered if I run into any problems i may have to look at the wav trigger as a replacement.

    https://www.sparkfun.com/products/13720

  • Getting started

    Bobby Feather04/09/2016 at 19:21 0 comments

    So today Im just getting this page up and looking for the components I will need. I have built this before and want to make sure that I get every thing like before but updated. The code for this is already made I will tweak it a little once I get the new one built but for now Im going to post the one that is working on the old one ( no picking on my code it is a little bad but it works and its been working for 7 years.)

View all 8 project logs

Enjoy this project?

Share

Discussions

Similar Projects

Does this project spark your interest?

Become a member to follow this project and never miss any updates