 Curt White
-
1A Look at the M3 Activity Tracker
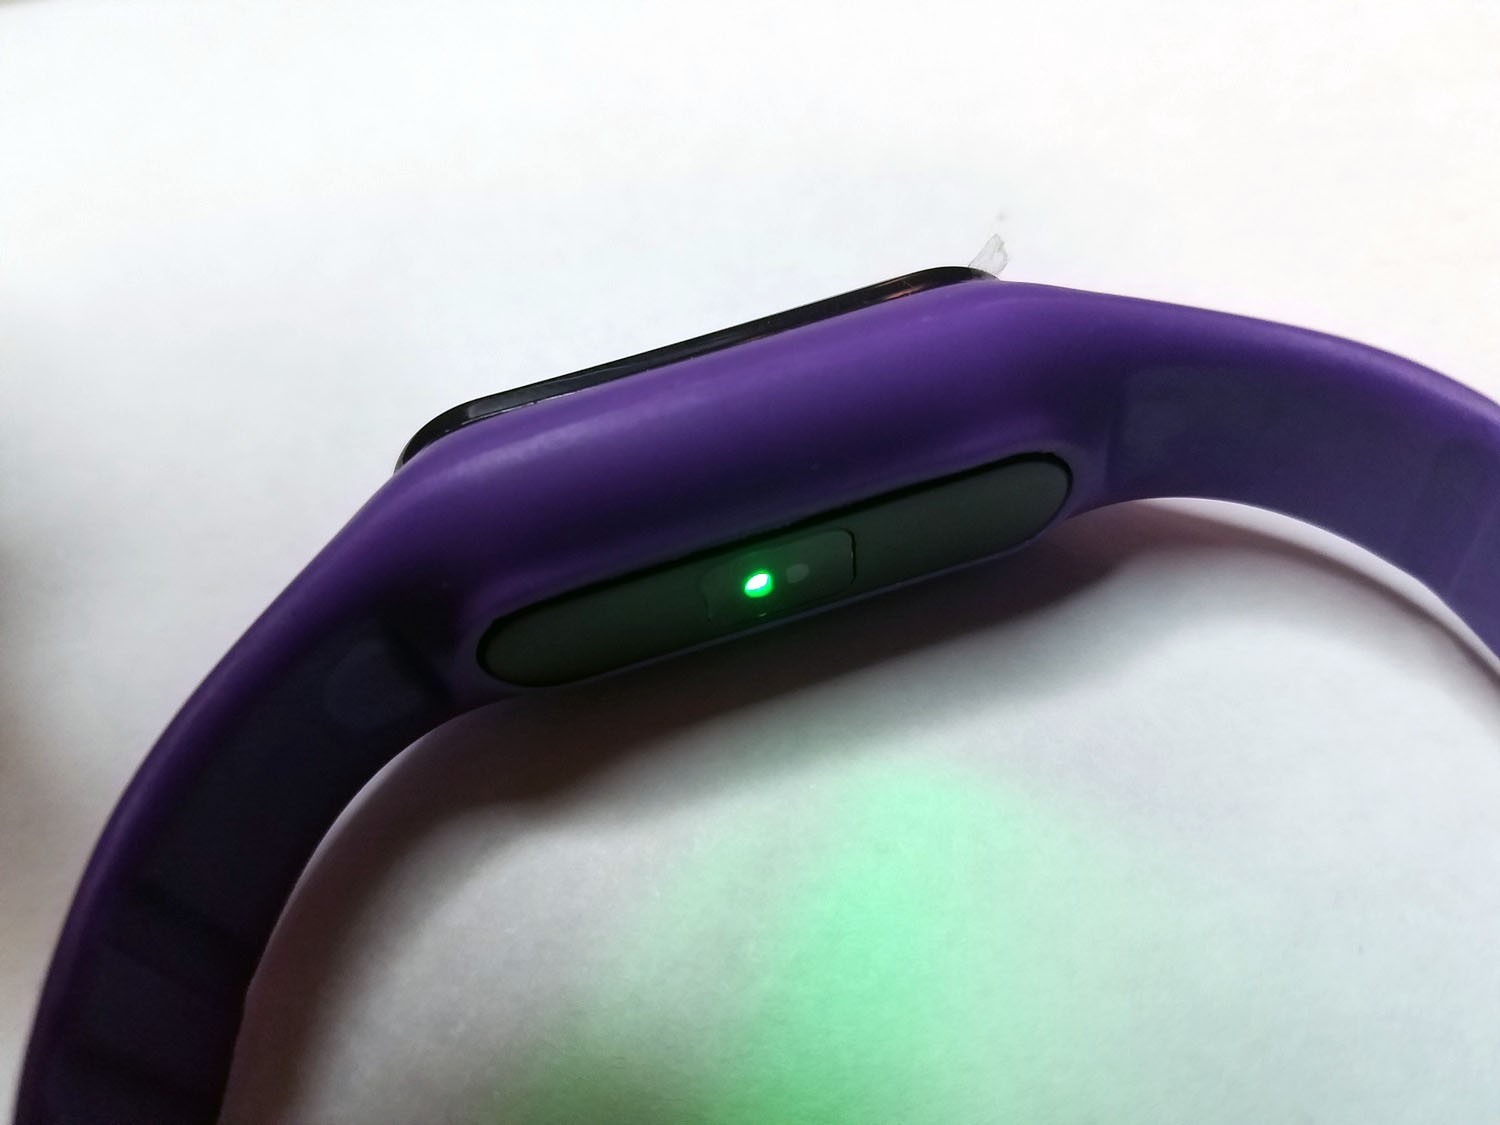
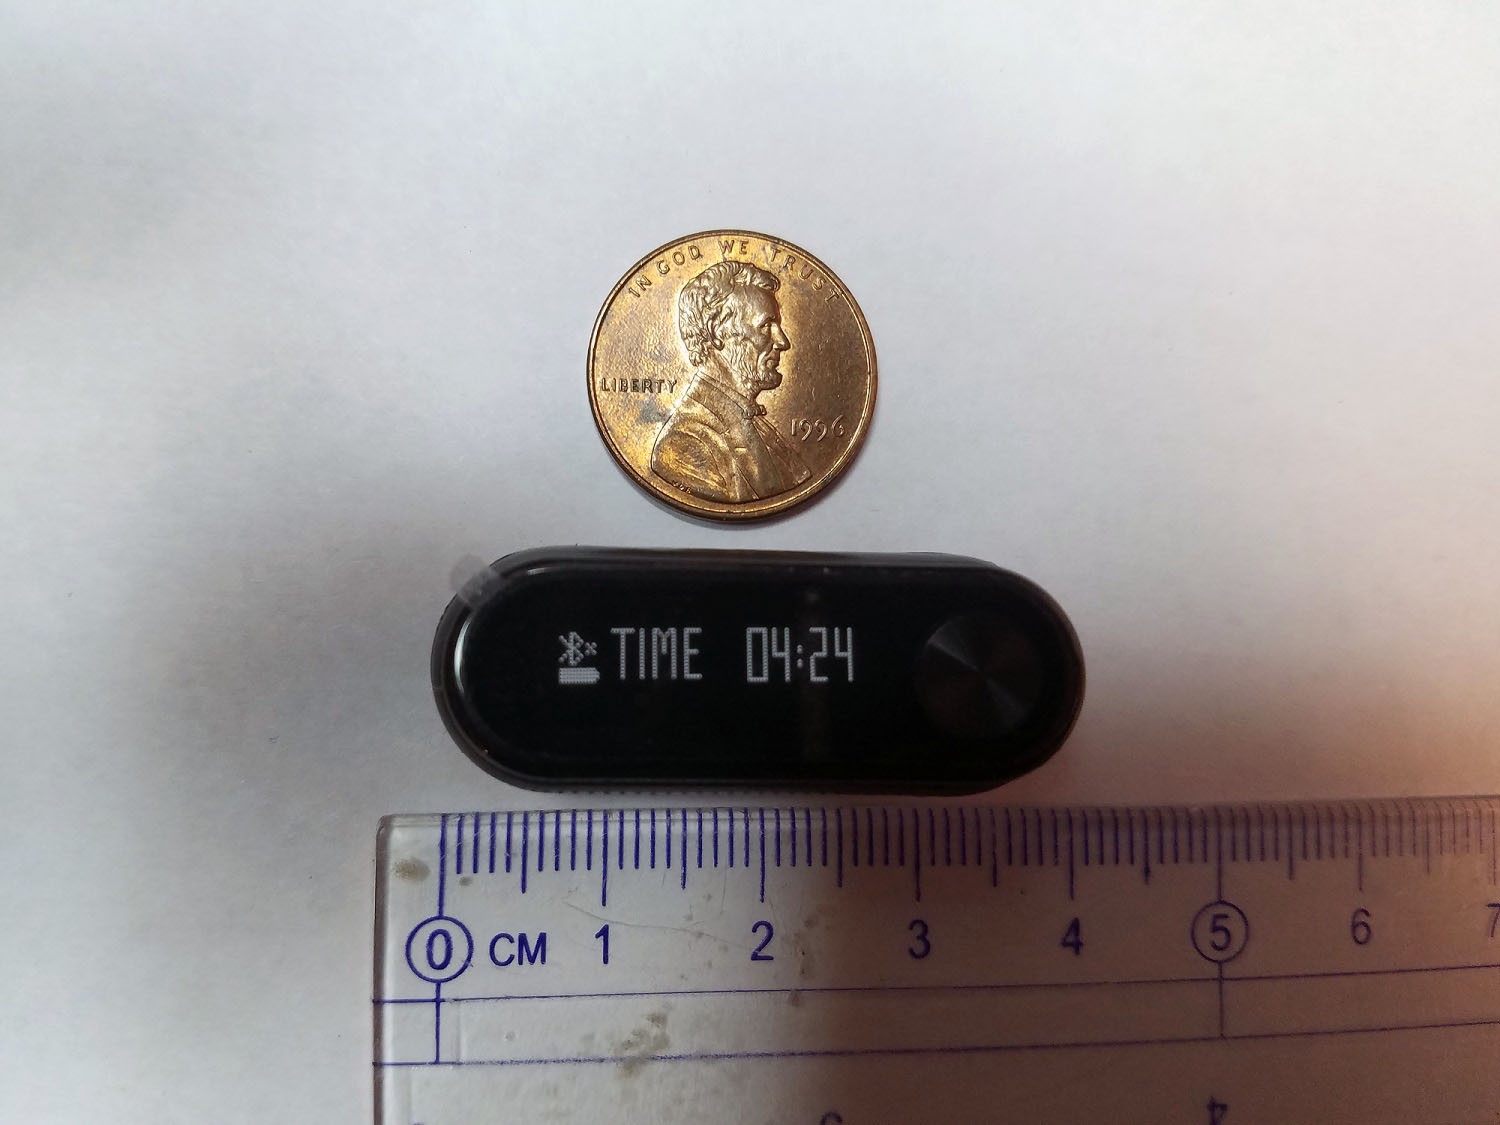
Here is what the M3 looks like out of the box:
![]()
![]()
![]()
-
2Enclosure Disassembly
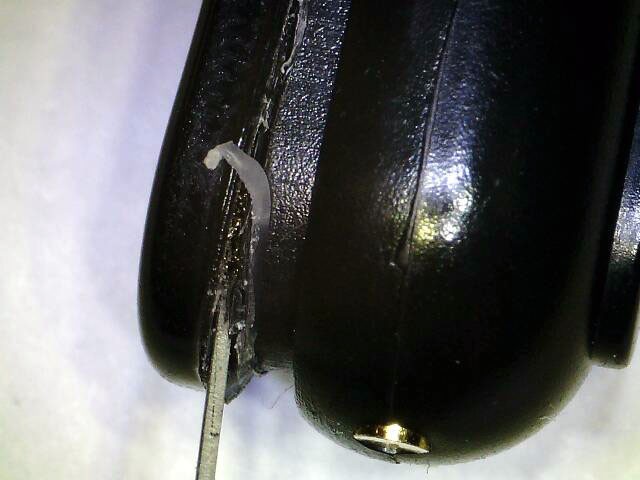
The translucent enclosure cap of the M3 is glued to the opaque main enclosure body. The cap is not recessed into the enclosure body, it lies flat on top so it is fairly easy to remove. All you need is an X-acto knife (hobby knife, scalpel) and some patience. Run your knife along the corner where the enclosure cap and body meet. The idea is to slowly cut the glue bond and eventually wedge the cap and body apart. Patience is key. You might consider setting a 15 minute timer and repeatedly cut into the meeting point before trying to pry the enclosure cap and body apart.
![]()
Eventually your knife will reach past the inside of the enclosure body wall. Start wedging the knife (or another small prying tool like a tiny flat head screwdriver) between cap and body. Work around the edge until the cap comes off.
![]()
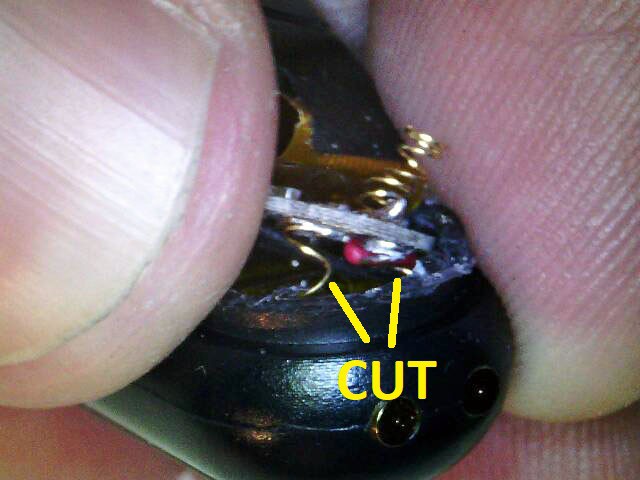
In order to program the M3 you'll have to lift the main board and other components out of the enclosure body. The test pads for the SWD connection (SDIO & SDCK) and power are on the bottom of the board. The external connection points for USB charging are wired to the main board with little springs. The point at which this connection is soldered to the main board is extremely fragile. If you try to lift the board out of the enclosure without cutting this connection that solder points and connection traces will rip off the board.
![]()
-
3Programming the Device
You must use programmer that supports SWD interface. I use a Segger J-Link but there are many programmers that support SWD. You can even turn an Arduino into a SWD programmer: https://learn.adafruit.com/programming-an-m0-using-an-arduino/overview
You must also use software capable of delivering the Nordic "Softdevice" (kind of like an OS) along with your code. I use the Nordic nRFGo Studio application: https://www.nordicsemi.com/chi/node_176/2.4GHz-RF/nRFgo-Studio
There are a couple different projects that allow for programming nRF51/nRF52 based devices directly from the Arduino IDE: https://github.com/sandeepmistry/arduino-nRF5 , https://learn.adafruit.com/bluefruit-le-micro-atmega32u4-microcontroller-usb-bluetooth-le-in-one/using-with-arduino-ide
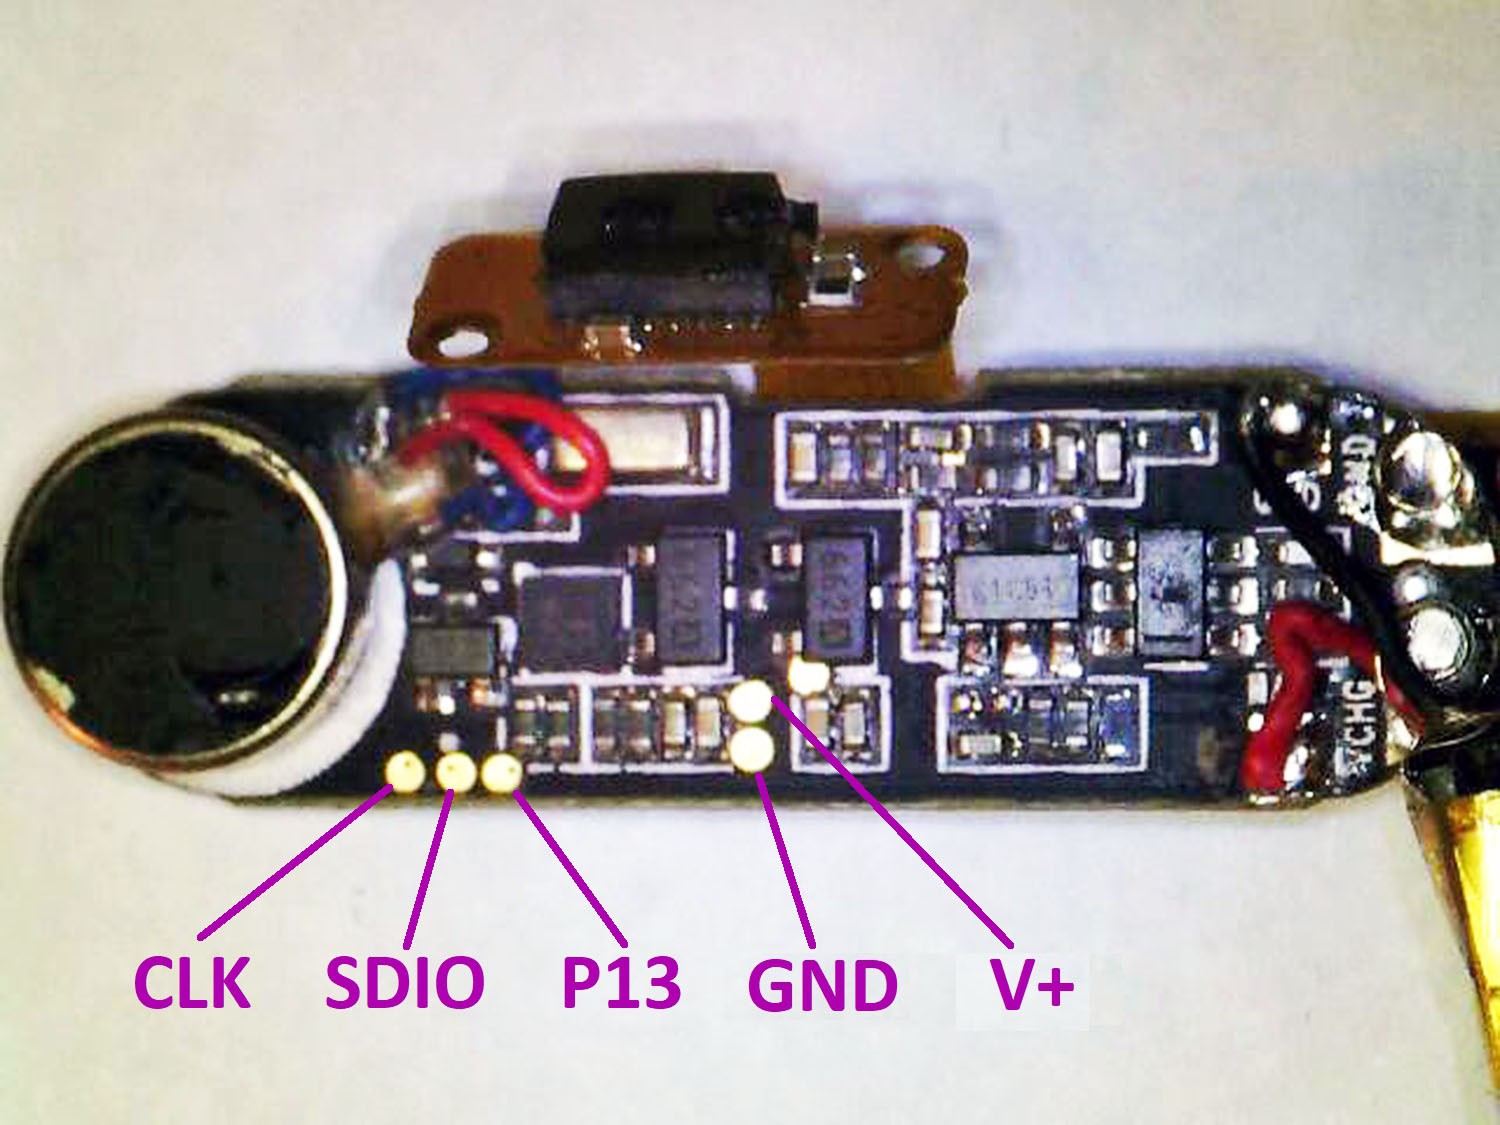
First however we must wire up the programming connections on our M3 activity tracker:
![]()
You can use P13 for serial debugging with any serial to USB adapter.
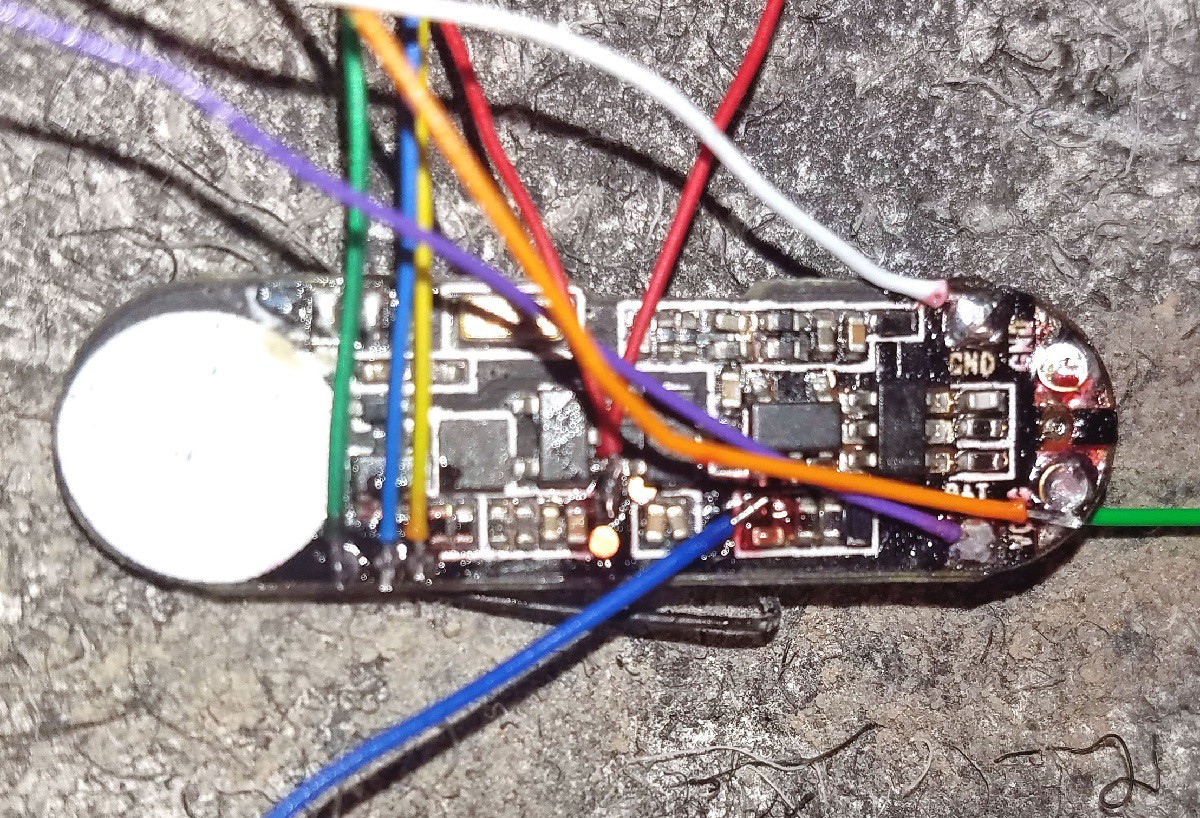
![]()
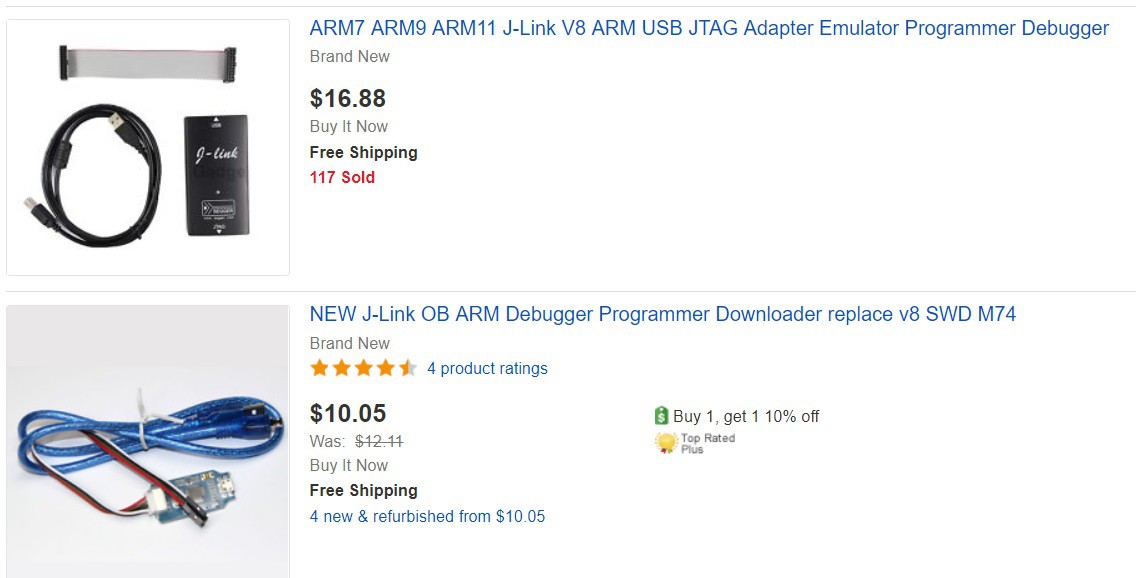
Once you have your device wired up connect it to a power supply (3.3v) and your programmer. J-Link programmers are very handy and can be found for a very reasonable price on ebay:
![]()
From here on all instructions assume use of J-Link programmer, J-Flash software for connecting to J-Link programmer and Nordic nRFGo Studio for actual programming.
Download and install J-Flash software for J-Link programmer: https://www.segger.com/products/debug-probes/j-link/tools/j-flash/about-j-flash/
Download and install nRFGo Studio for programming Nordic devices such as nRF51822 (what we use here with the M3), nRF52832, nRF52840 etc. : https://www.nordicsemi.com/chi/node_176/2.4GHz-RF/nRFgo-Studio
Open J-Flash and select SWD programming interface and the nRF51822 MCU. Then open nRFGo Studio.
Once you have succesfully connected to the M3 over SWD and wiped it's flash memory you are ready to program it with your own code. There are many ways to do this but for the purpose of this tutorial we will use the Arduino IDE with Sandeep Mistry's nRF5 Arduino Core. The nRF5 Arduino Core is essentially a wrapper around the Nordic SDK that translates supported Arduino code into corresponding Nordic SDK instructions. The nRF5 Arduino Core will allow you to compile and export your nRF51822 application as hex code which you can then load directly into the M3 activity tracker.
If you haven't already, download and install the Arduino IDE. Then download and install the nRF5 Arduino Core: https://github.com/sandeepmistry/arduino-nRF5
The nRF5 Arduino Core uses "Variants" for a variety of devices and breakout boards. I've created a variant for the M3 activity tracker which you can find in the GitHub repository for this tutorial: https://github.com/curtpw/M3-nrf51822-activity-tracker
![]()
-
4Using the KX022 Accelerometer
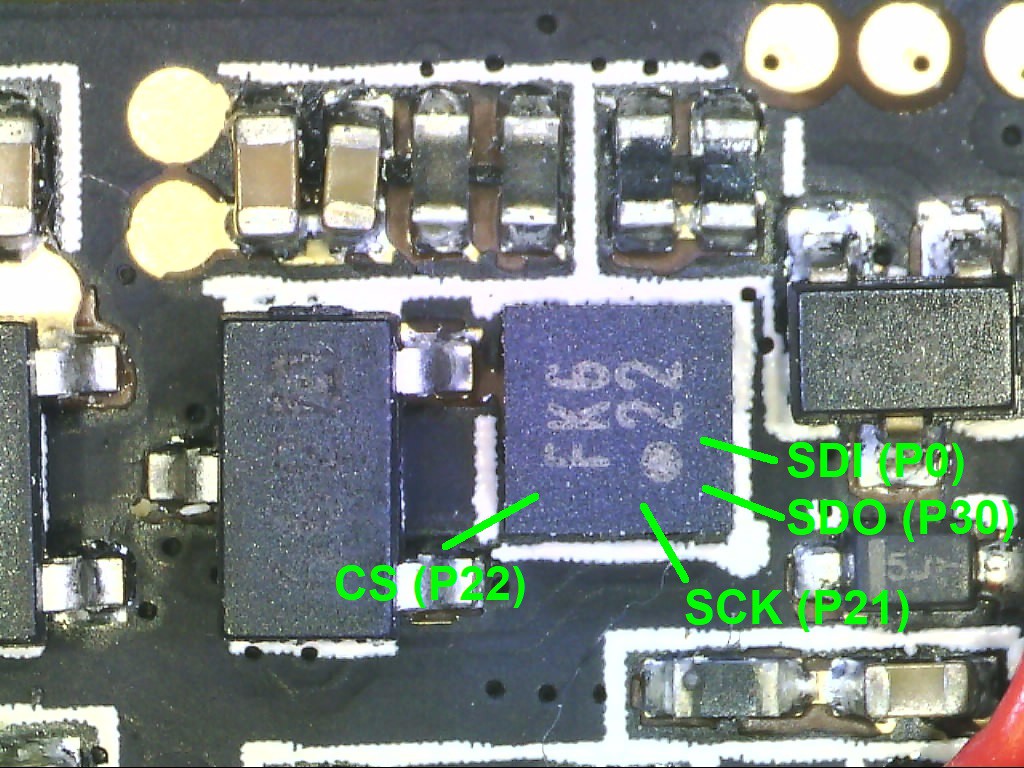
The on-board KX022 accelerometer is connected to the nRF51822 MCU over an SPI interface. The pins for the connection are as follows: SDI(P0), SDO(30), SCK(P21), CS(P22), INT(P13) . The SPI interface will already be setup in the Arduino Core variant, so all you have to do is load the SPI library and invoke an SPI object. A library for the KX022 accelerometer is included in the project GitHub repository.
![]()
Here is some sample code to get you started:
#include
#include#define CS_PIN 22
KX022_SPI kx022(CS_PIN);void setup()
{
Serial.begin(115200);
Serial.println("Starting test ");
Serial.print("Init response was ");
Serial.print(kx022.init());
}void loop()
{
Serial.print((float)kx022.getAccel(0));Serial.print(",");
Serial.print((float)kx022.getAccel(1));Serial.print(",");
Serial.println((float)kx022.getAccel(2));
delay(100);
}The original un-hacked M3 activity tracker uses the KX022 to create a pedometer. Hypothetically, steps could be counted by continuously sampling data from the accelerometer, calculating angular position and analyzing change over time. This would consume huge amounts of battery power so the M3 and pretty much all other activity tracker pedometers do not continuously sample their accelerometers. Instead they use an interrupt with carefully chosen threshold values. The nRF51822 MCU is put in low power sleep mode and the KX022 is programmed with a threshold value that corresponds to a single step, in other words the process of taking a step requires passing this threshold a single time. When the accelerometer value passes this threshold it fires the interrupt pin which wakes up the MCU so the step can be counted. I do not make use of the interrupt pin (P13), but it is connected so there is nothing stopping you from using it. More information can be found on the KX022 datasheet.
Hacking a $25 nRF51 ARM Cortex Activity Tracker
$25 wearable device development platform: nRF51 ARM CortexM0 w/ Bluetooth, accelerometer, 16x64 OLED, vibration motor, HR sensor, battery


Discussions
Become a Hackaday.io Member
Create an account to leave a comment. Already have an account? Log In.
by modifiations, how many new features are added or improving working ?
Are you sure? yes | no