 Rieul Techer
-
1Step 1
Ethereum installation on a Raspberry PI
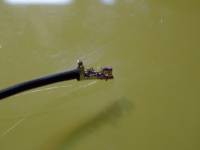
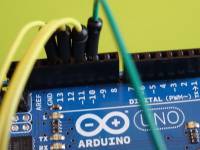
![]() An Ethereum node running on a Raspberry Pi. Photo by RIeul (CC-BY-NC-SA)
An Ethereum node running on a Raspberry Pi. Photo by RIeul (CC-BY-NC-SA)
Equipment
- 3 Raspberry
- 3 SD cards
- 2 computers
Other solution
- Using Wio Link to simulate energy p
- Get the energy balance data on the blockchain from the past hour
- Call the smart contract with input. Show the effective SC transaction
Communication
- Before making 2 Raspberry Pi commnicate on a same blockchain it is necessary to mine a 1st block manually to get a common base (same root). One the case of Blockfest, the fist blocks have been given to us by the mentors.
Transactions
- Steps to be followed here.
Installation on a Pi
For each Pi, here are the steps for setting up a local blockchain.
- To launch the Geth console : geth attach ipc:/home/pi/data4/geth.ipc
- Install Raspbian Jessie Lite on the SD card for each Raps
- Turn on the raspberry and SSH connect : ssh <user>@<ip_adress>
- Install Go Ethereum on the raspberry
- wget
- tar -xvzf v0.3.3.tar.gz
- cd Raspi-Eth-Install-0.3.3/
- ./geth-installer.sh
- Add "geth" in the PATH
- export PATH=$PATH:$HOME/go-ethereum/build/bin
- Get and copy the folder "data4" from Xavier (mentor) containing a local blockchain (few nodes/blocks)
- Modification of the key in nodekey in order to make each node unique
- vi /home/pi/data4/nodekey
Connection of nodes
- Launch the node on the Raspberry
- geth --rpc --rpcaddr <ip_adress> --rpccorsdomain="*" --networkid <network_id> --identity <node_name> --datadir <data_dir> --verbosity N --maxpeers M --ipcpath <ipc_path>
- <ip_adress> : ip of the raspberry
- <network_id> : common id for all the raspberry
- <node_name> : name of the node of a raspberry which will be different for each raspberry
- <data_dir> : folder
- N : log level
- M : max number of nodes
- <ipc_path> : path to geth.ipc
- Connect to node
- geth attach <ipc_path>
- <ipc_path> : path to geth.ipc
- Add the other Rasp
- PI Information
- b8:27:eb:20:64:45 / bf7-1 / ssh pi@10.19.244.249
- b8:27:eb:7c:65:bc / bf7-2 / ssh pi@10.19.244.247
- Users
- Sur bf7-1,
- Account #0: {60d6f22d9b5684160065542a9a1c76f6139019a4} /home/pi/.ethereum/keystore/UTC--2016-06-12T05-11-22.486302973Z--60d6f22d9b5684160065542a9a1c76f6139019a4
- Passphrase = bf71
- Sur bf7-2,
- Account #0: {088a02f7ab6ea9f007ce4cd4b0aa2710a2e99725} /home/pi/.ethereum/keystore/UTC--2016-06-12T05-11-50.666476289Z--088a02f7ab6ea9f007ce4cd4b0aa2710a2e99725
- Passphrase = bf72
- Sur bf7-3,
- Account #0: {655eb76642212093c8d2a5f59ae671c9601607fc} /home/pi/.ethereum/keystore/UTC--2016-06-12T05-12-03.156618517Z--655eb76642212093c8d2a5f59ae671c9601607fc
- Passphrase = bf73
- Sur bf7-1,
- Adding nodes in static-nodes.json for automatically adding nodes
-
2Step 2
CitizenWatt Sensor Building
![]()
Most of the documentation is coming from the CitizenWatt.
- Sources for Hardware part of the CitizenBoard can be found HERE.
- Sources for Software part of the CitizenBoard can be found THERE.
- Step by step CitizenWatt Sensor mounting can be found THERE.
- We've done our best to translate in English and enhance the doc.
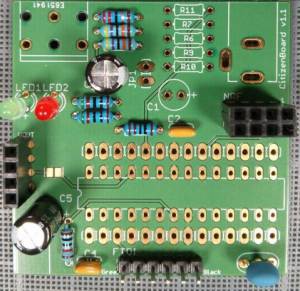
Components
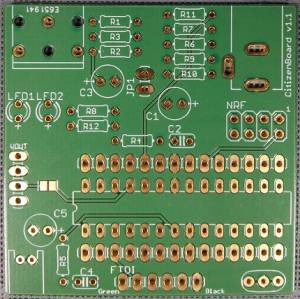
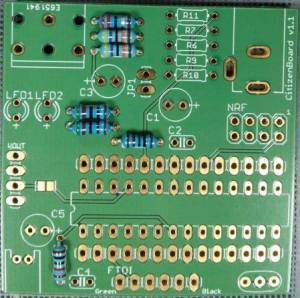
- 1 v1.1 CitizenWatt PCB (for which you would find the plan on the hardware github repo)
- R1 : 22 Ohms @ 1% resistor
- R2 & R3 : 470 kOhms @ 1% resistors
- R4 : 1 kOhms @ 5% resistor
- R5 : 10 kOhms @ 10% resistor
- R8 & R12 : 510 Ohms @ 10% resistor
- C2 & C4 : 0.1 µF capacitor
- C3 & C5 : 10 µF capacitors
- LED1 : 3mm green LED
- LED2 : 3mm red LED
- Y1 : 16MHz resonator
- NRF :Female support for CI 2 x 4 pins
- FTDI : Male support for CI 1 x 6 pins
- JP5 : Female support for CI 1 x 4 pins
- 1 Jack 3.5“ connector
- 1 Atmel ATMega368P-PU
- 1 support for a 28 pins microcontrolor
- VOLT : 3,3 V regulator + female support for VOLT 1×4 pins & male support for a 1 x 4 pins regulator
Check list for PCB
- Check if all the components are in the right position
- Check if all of them are soldered to the PCB
- Check if there is a short-cut in the circuit
- Check if the volt regulator is in the right position (polarization) and if i works well
- Check if the electricyt supply reaches the ATMega (see in the ATMega328P datasheet the "pinout" and measure with a multimeter if the value is 3.3V)
- Check if the ATMega is well positioned and flashed (is the bootloader well installed ? is the CitizenWatt firmware well installed ?)
- Check is the LEDs and cpacitors are in the right position (polarization)
- If all is checked then a LED should flash every 8-10 secondes for a hundred millisecondes.
If the connection doesn't work :
- Check the Raspberry
- Check the NRF
It happens that there might be a problem with the electricity supply of the PCB.
![]()
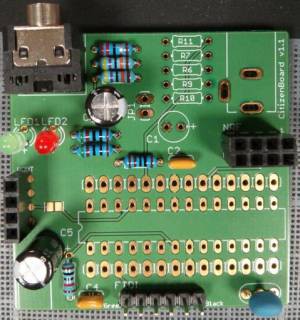
Place the PCB in order for you
![]()
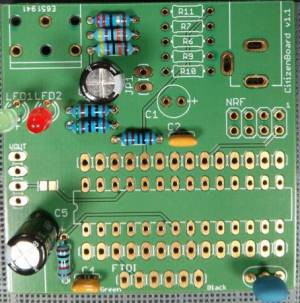
Solder each components to the board.
- Twist the feet of the resistors as close as the resistor as possible
![]()
- Put it in its location on the PCB
![]()
- Solder the resistor to the PCB with some tin
- Cut the resistor's feet
- Repeat for all the resistors
![]()
- You can then do the same with the capacitors, the LEDs and the resonator
![]()
Note : Resistors do not have polarization, however capacitors (appart from C2 and C4) do. For the capacitor the longer foot should go the hole refered as "+". The same apply to the LED which are polarized as well. The resonator is also polarized but... you can mount it as you want to.
- Then solder both the FTDI connector, the VOLT regulator connector, the NRF connector
![]()
- Solder the Jack 3"5 connector
![]()
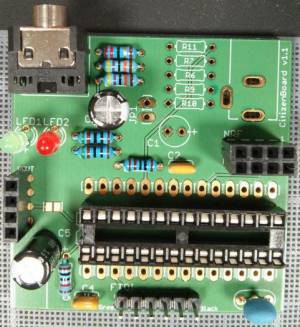
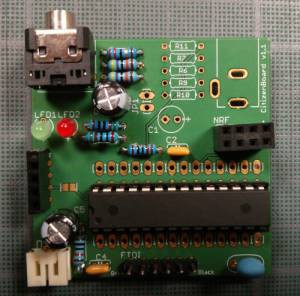
- Solder the ATMega. Careful that the ATMega is well positioned as shown.
![]()
- Last of all you can solder the battery connector
![]()
Your PCB is almost ready... you need to mount the battery connectors and Pololu regulator.
Mounting the battery
The battery connectors are not difficult to prepare. You must be careful about the polarization.
- First you have to striped the wires
- Then you fit the wires into the metallic support and crimp it
![]()
- Finally fix the wires into the connector (Be careful about the polarization: when taking the connector with the crenel up-facing the black wire comes at the right of the connector and the red one at the left)
![]() Mounting of the Pololu Regulator
Mounting of the Pololu RegulatorThe regulator is delivered without metallic feet for soldering to the board. Thus you need to solder those in order to connect the Pololu regulator to the PCB.
Once the feet are soldered, the Pololu regulator should look like that
![]()
Atmega Flashing Process (source)
Once the CitizenWatt PCB is full of its necessary components, we have to flash the ATMega with the Arduino Bootloader and then put the CitizenWatt code in it (HERE).
To flash the Arduino bootloader on the ATMega here is a procedure:
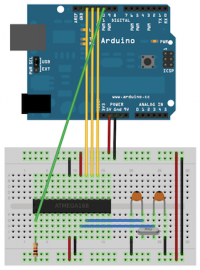
- Get the necessary equipment (an Arduino board with USB cable, a breadboard, a 1kOhms resistor, a 16MHz resonator.
- First prepare the Arduino environment:
- connect the Arduino to a computer
- launch the Arduino Sorftware and open the ArduinoISP sketch (Exemples > ArduinoISP)
- compile the Sketch and upload on the Arduino
- you're now ready to work.
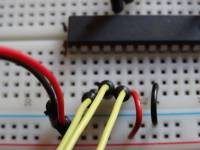
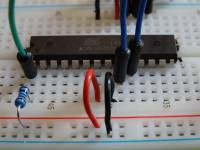
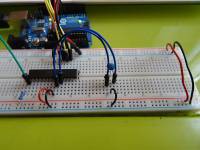
- Then connect the arduino to the breadboard as followed
![]()
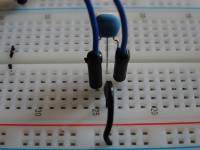
Please note that a resonator is used in place of a quartz and a capacitor. The mounting then requires to be adapted. The central feet of the resonator is connected to the ground while the 2 other feet must be connected to the blue wires shown on the sketch.
![]()
![]()
![]()
![]()
![]()
![]()
![]()
- Flashing the bootloader
- Connect the Arduino Uno to a computer with an USB.
- In the Arduino IDE Software: Tools > Program & Choose “Arduino as ISP”
- Tools > Card type, select “Arduino Uno”
- Tools > Engrave initialization sequence
- The process must return no error
-
3Step 3
Ethereum & CitizenWat Installation on a Pine64+ board
![]()
Pre-requisite
sudo -i /usr/local/sbin/pine64_update_uboot.sh /usr/local/sbin/pine64_update_kernel.sh resize_rootfs.shreboot
and last of all update the linux distribution (via
Ethereum installation on a PINE64+
Install
$ mkdir Ethereum
$ cd Ethereum
$ wget https://storage.googleapis.com/golang/go1.6.2.linux-armv6l.tar.gz
$ sudo tar -C /usr/local -xzf go1.6.2.linux-armv6l.tar.gz
$ export PATH=$PATH:/usr/local/go/bin
$ sudo apt-get install -y build-essential libgmp3-dev golang
Install
$ git clone https://github.com/ethereum/go-ethereum $ cd go-ethereum $ make geth $ export PATH=$PATH:/home/debian/Ethereum/go-ethereum/build/bin$ geth init genesis.jsonCreate the ether account that will get the ether from mining :
$ geth account newStart the node :
$ geth --networkid 69 --nodiscover consoleStart mining :
> miner.start(2)![]()
![]()
CitizenWatt + PINE64+ Connection & Interface
Please note that, since the PINE64+ do not have RF support, it is necessary while using CitizenWatt Sensor to use an intermediary component integrating an RF receive and making the link with the PINE64+. As a result, we use an Arduino Uno to bridge the CitizenWatt Energy Sensor with the PINE64+ to build the full CitizenWatt Energy Monitor.
Some modifications have been done
- the activation of the DEBUG MODE by default
- remplacing the receive.cpp program by a Python coded program because of the addition of the Arduino as a necessary intermediary
$ aptitude install python3 gcc python3-pip python3-dev$ aptitude install postgresql supervisor avahi-daemon redis-server iptables-persistent$ aptitude install postgresql-server-dev-all$ sudo pip3 install requests sqlalchemy pycrypto numpy cherrypy psycopg2 redis$ sudo adduser citizenwatt- Set the password
- Create the database
$ sudo -u postgres psql [sudo] password for debian: psql (9.4.9) Type "help" for help. postgres=# CREATE DATABASE citizenwatt; postgres-# CREATE USER citizenwatt PASSWORD 'citizenwatt'; postgres-# GRANT ALL ON DATABASE citizenwatt TO citizenwatt; postgres-# exit postgres-#Note: the right user is
![]()
- Set-up the firewall
iptables -t nat -A PREROUTING -p tcp --dport 80 -j DNAT --to-destination :8080 /etc/init.d/iptables-persistent savedebian@citizenwatt:/opt/citizenwatt$ mv supervisor_citizenwatt.conf /etc/supervisor/conf.d/supervisor_citizenwatt.conf- Note: the current version necessitate to manually start receive.py and (see
debian@citizenwatt:/opt/citizenwatt$ sudo ./startup.sh![]()
Communication via the nRF24L01+ transceiver
![]()
Note: The current versions of the Linux distribution for the PINE64+ do not support the SPI interface necessary for the communication with the
![]()
![]()
nRF24L01+ Arduino Uno Vcc 3.3V GND GND CSN D8 CE D7 MOSI D11 MISO D12 SCK D13 IRQ not connected - Use the TMRh20's RF24 librairy :
- Arduino Sketch :
- receive.py
- process.py
![]()
Note: Some issues remain unsolved yet (see
ISSUES
Erreur 500
![]()
![]()
Not receiving any data
Check points:
![]()
![]()
![]()
nRF24L01+ PINE64 Vcc 3.3V GND GND CSN GPIO 67 PC3 CE GPIO 71 PC7 MOSI GPIO 64 PC0 MISO GPIO 65 PC1 SCK GPIO 66 PC2 In our case, even if
debian@citizenwatt:~/debs-wiringPi-2.33$ sudo dpkg -i libwiringpi2_2.33-1_arm64.deb
Selecting previously unselected package libwiringpi2.
(Reading database ... 241647 files and directories currently installed.)
Preparing to unpack libwiringpi2_2.33-1_arm64.deb ...
Unpacking libwiringpi2 (2.33-1) ...
Setting up libwiringpi2 (2.33-1) ...
Processing triggers for libc-bin (2.19-18+deb8u4) ...
debian@citizenwatt:~/debs-wiringPi-2.33$ sudo dpkg -i libwiringpi-dev_2.33-1_arm64.deb
Selecting previously unselected package libwiringpi-dev.
(Reading database ... 241654 files and directories currently installed.)
Preparing to unpack libwiringpi-dev_2.33-1_arm64.deb ...
Unpacking libwiringpi-dev (2.33-1) ...
Setting up libwiringpi-dev (2.33-1) ...
debian@citizenwatt:~/debs-wiringPi-2.33$ sudo dpkg -i wiringpi_2.33-1_arm64.deb
(Reading database ... 241762 files and directories currently installed.)
Preparing to unpack wiringpi_2.33-1_arm64.deb ...
Unpacking wiringpi (2.33-1) over (2.33-1) ...
Setting up wiringpi (2.33-1) ...
Processing triggers for man-db (2.7.0.2-5) ...
Sensor mounting process
![]()
Transceiver connection.
Note: currently the CitizenWatt sensor is made to function with Raspberry PI 1 and no other board. That's the reason why a lot has been re-thought and re-developed.
CitizenWatt configuration
![]()
![]()
![]()
![]()
The
Error when starting receive.py
The receive.py file does not receive any data (connection via Arduino)
Check if the red LED of the CitizenWatt sensor does not blink.
-
4Step 4
Peer-to-peer energy transaction "smart-contract"
Note: all the code can be found (and remix) in the GitHub Repo.
![]()
NEED
One or few smart-contract, meaning algorithms that automated peer-to-peer small transaction between prosumer exchanging electricity on a same grid/network.
DESIGN
Questions to be asked and answered before coding the smart-contract
- DATA
- The blockchain might be used for
- being the common oepn and transparetn ntwork for data sharing and secured and automated contractualization of exchanges
- auditable and verifiable tracked data
- transaction based on consumption and production electricity balance
- TRANSACTION
- If the transaction is done after the exchange it makes it possible for avoiding energy shortage
Technical questions
- Blockchain > Ex. BigChainDB > IPFS
![]() From the
From the Deployment
Tested version = commit 200601753ff348ad402d4a712560cd87b5bf5c2a (11/06/2016)
Note: this is a deployment test.
Get the
![]()
![]()
- Contract mined! address: 0xcbf118609b57be92029ee56fa79dc17c38df97cd transactionHash: 0x16c388e7a25dc321c8363b7be343855714d05d3d85b4251a125a9d8a57e5435f
DEVELOPMENT
Smart-contract definition
- The smart-contract must enable to make an electricity transaction between 2 distinct users.
- private and public adresses
- electricity balance account
- ether wallet
contract Daisee {

    // variables
    //// tarif de l'énergie en finney
    uint public rate;
    //// utilisateurs
    address public owner;
    mapping (address => uint) energyProduction;
    mapping (address => uint) energyBalance;
    mapping (address => uint) energyConsumption;

    // constructeur
    function Daisee003() {
        rate = 15 finney; // (= 0.015 ether = 0.15 euros)
    }

    // définition des events pour les appels à partir des clients légers
    event Prod(address from, uint kwh);
    event Cons(address from, uint energy);
    event Buy(address from, address to, uint energy);


    // fonction permettant de mettre à jour l'énergie produite et
    // donc dispo à la vente
    // seul le propriétaire du compte peut mettre à jour sa prod
    function setProduction(uint kwh) returns (uint EnergyBal) {
        energyProduction[msg.sender] += kwh;
        energyBalance[msg.sender] += kwh;
        return energyBalance[msg.sender];
        //event
        Prod(msg.sender, kwh);
        }

    // fonction permettant de consommer de l'énergie
    // seul le propriétaire du compte peut mettre à jour sa prod
    function consumeEnergy (uint energy) returns (uint EnergyBal) {
        // on vérifie d'abord qu'il y a d'énergie
        if ( energy > energyBalance[msg.sender] ) throw;
        energyBalance[msg.sender] -= energy;
        energyConsumption[msg.sender] += energy;
        // event
        Cons(msg.sender, energy);
    }

    // fonction permettant la vente d'énergie
    function buyEnergy(address seller, uint energy) returns (bool transactionOK) {

        // on vérifie d'abord qu'il y a suffisamment d'énergie dispo
        if ( energy > energyBalance[seller] ) throw;
        // on verifie que l'acheteur a suffisamment de fond
        if ( (energy * rate ) > msg.sender.balance ) throw;
        // on met à jour les balances de chaque utilisateur
        energyBalance[msg.sender] += energy;
        energyBalance[seller] -= energy;
        //event
        Buy(msg.sender, seller, energy);
    }

    // fonction permettant de connaitre sa balance d'energie
    function getEnergyBalance() returns (uint energyBal) {
        return energyBalance[msg.sender];
    }

    // fonction permettant de connaitre sa production totale
    function getEnergyConsumption() returns (uint energyBal) {
        return energyConsumption[msg.sender];
    }

    //la variable rate est déjà publique dans le contrat donc accessible
    // fonction permettant de connaitre le tarif de l'energie
    function getRate() returns (uint energyRate) {

        return rate;
    }

}
Contract mined! address: 0x9a094ac04fb3a3c302cddf2b388ff4f891fd67fb transactionHash: 0x5877ec24acf2cd42522b290c71670febc406e7ebbf303b6878f359cb31b6f502
Variables definition
> var abi = [{"constant":false,"inputs":[{"name":"energy","type":"uint256"}],"name":"consumeEnergy","outputs":[{"name":"EnergyBal","type":"uint256"}],"type":"function"},{"constant":true,"inputs":[],"name":"rate","outputs":[{"name":"","type":"uint256"}],"type":"function"},{"constant":false,"inputs":[{"name":"seller","type":"address"},{"name":"amount","type":"uint256"}],"name":"buyEnergy","outputs":[{"name":"transactionOK","type":"bool"}],"type":"function"},{"constant":false,"inputs":[{"name":"kwh","type":"uint256"}],"name":"setProduction","outputs":[{"name":"EnergyBal","type":"uint256"}],"type":"function"},{"constant":false,"inputs":[],"name":"getRate","outputs":[{"name":"energyRate","type":"uint256"}],"type":"function"},{"constant":true,"inputs":[],"name":"owner","outputs":[{"name":"","type":"address"}],"type":"function"},{"constant":false,"inputs":[],"name":"getEnergyBalance","outputs":[{"name":"energyBal","type":"uint256"}],"type":"function"},{"inputs":[],"type":"constructor"},{"anonymous":false,"inputs":[{"indexed":false,"name":"from","type":"address"},{"indexed":false,"name":"kwh","type":"uint256"}],"name":"Prod","type":"event"},{"anonymous":false,"inputs":[{"indexed":false,"name":"from","type":"address"},{"indexed":false,"name":"energy","type":"uint256"}],"name":"Cons","type":"event"},{"anonymous":false,"inputs":[{"indexed":false,"name":"from","type":"address"},{"indexed":false,"name":"to","type":"address"},{"indexed":false,"name":"amount","type":"uint256"}],"name":"Buy","type":"event"}] > var address = "0x9a094ac04fb3a3c302cddf2b388ff4f891fd67fb" > var daisee = eth.contract(abi).at(address)![]() Note: do not forget to define an default adress to pay the transaction > web3.eth.defaultAccount = "0x98181b49bf309364fba5d75ff57d30509b2a24fd". If not done, an "invalid account" error will pop.
Note: do not forget to define an default adress to pay the transaction > web3.eth.defaultAccount = "0x98181b49bf309364fba5d75ff57d30509b2a24fd". If not done, an "invalid account" error will pop. -
5Step 5
DApp development and deployment
Note: Sources can be found in the GitHub Repo.
Inspired by :
- http://hypernephelist.com/2016/06/21/a-simple-smart-contract-ui-web3.html
- https://github.com/tomconte/solarchain-dashboard
![]()
Previous steps:
The DApp (Decentralized Application) is based on Ethereum JavaScript API
In the following examples, tests are running directly on the previously created private local blockchain (that's why we are not using tools such as
Create a dedicated folder
[XXX@XXX-manjaro-pc DzApp]$ mkdir DzApp
[XXX@XXX-manjaro-pc DzApp]$ cd DzApp
Initialize the project
[XXX@XXX-manjaro-pc DzApp]$ npm init
This utility will walk you through creating a package.json file.
It only covers the most common items, and tries to guess sensible defaults.
See `npm help json` for definitive documentation on these fields and exactly what they do.
Use `npm install <pkg> --save` afterwards to install a package and save it as a dependency in the package.json file.
Press ^C at any time to quit.
{
"name": "dzapp",
"version": "1.0.0",
"description": "",
"main": "index.js",
"scripts": {
"test": "echo \"Error: no test specified\" && exit 1"
},
"author": "",
"license": "ISC"
}


Is this ok? (yes)
[XXX@XXX-manjaro-pc DzApp]$ npm install web3
[XXX@XXX-manjaro-pc DzApp]$ sudo npm install -g browserify
![]()
Source
Procedure:
- You then need to generate the
[XXX@XXX-manjaro-pc DzApp]$ browserify init.js -o main.js- Start the node:
[XXX@XXX-manjaro-pc ~]$ geth --networkid 69 --nodiscover --rpc --rpccorsdomain "*" console![]()
-
6Step 6
Updating energy data on the blockchain
![]()
![]()
from eth_rpc_client import Client

def padhexa(s):
    return s[2:].zfill(64)

client = Client(host="127.0.0.1", port="8545")
myAddress = '0x98181b49bf309364fba5d75ff57d30509b2a24fd'
contractAddress = '0x124f1fb67f450bd3234ec0e12d519fa61e6bc543'
# exécution de la fonction setProduction
# le compiler indique : 567cc2b6 setProduction(uint256)
hashSetProduction = "567cc2b6"
watt = 1000
hashData = hashSetProduction + padhexa(hex(watt))
response = client.send_transaction(_from=myAddress, to=contractAddress , data=hashData)
print("hash Transaction= " + response)
Python script to update Energy Balance from CitizenWatt sensor
To avoid blocked accounts, the default account is unlocked on geth launch
geth --networkid 69 --nodiscover --unlock "0x520f9b737b97a52945075dbf393d29adca000cca" --rpc --rpccorsdomain "*" consolePlease note that It's not a secure way, it's only for prototyping
Python Script
Please note that code is not completely clean yet... you're welcome if you wanna contribute to clean it :-)
import json
import requests
import time
import serial
from eth_rpc_client import Client

client = Client(host="127.0.0.1", port="8545")

def padhexa(s):
    return s[2:].zfill(64)


def getEnergySum(t0, t1):
    sumEnergy = 0
    headers = {'Content-Type': 'application/json', }
    data = 'login=debian&password=debian'
    # TODO : URL as parameter
    result = requests.post('http://192.168.0.34:8080/api/4/get/watts/by_time/' + str(t0) + '/' + str(t1),
    headers=headers, data=data)
    parsed_json = json.loads(result.text)
    print('=> 1 = ' + str(parsed_json['data']))

    for n in range(0, len(parsed_json['data'])):
        watt = int(parsed_json['data'][n]['value'])
        print('=> 2 = ' + str(parsed_json['data'][n]['value']))
        sumEnergy = sumEnergy + watt

    return sumEnergy


def getDateTime()
    headers = {'Content-Type': 'application/json',}
    data = 'login=debian&password=debian'

    # TODO: URL as parameter
    result = requests.post('http://192.168.0.34:8080/api/time',
        headers=headers, data=data)
    parsed_json = json.loads(result.text)
    return parsed_json['data']


# DAISEE smart-contract address
contractAddress = '0x124f1fb67f450bd3234ec0e12d519fa61e6bc543'

# PINE parameters (to externalize in a parameter file)
pine1 = {'address': '0x520f9b737b97a52945075dbf393d29adca000cca', 'url': 'http://192.168.0.34:8080', 'typ': 'C'}
pine2 = {'address': '0x98181b49bf309364fba5d75ff57d30509b2a24fd', 'url': 'http://192.168.0.29:8080', 'typ': 'P'}
pine3 = {'address': '0x8915cf74dff23cbca59f356317098d4cf3d47203', 'url': 'http://192.168.0.xx:8080', 'typ': 'P'}

# used board (to externalize in a parameter file)
pine = pine1
time0 = getDateTime()

while 1:
    # delay to define
    time.sleep(20)
    time1 = getDateTime()
    sumWatt = getEnergySum(time0, time1)
    time0 = time1

    # Consumer
    if pine['typ'] == 'C':
        # to update Energy balance (consumer)
        hashConsumeEnergy = "298d65a1"
        hashData = hashConsumeEnergy + padhexa(hex(sumWatt))
        response = client.send_transaction(_from=pine['address'], to=contractAddress, data=hashData)

    # Producer
    else :
        # to update Energy balance (producer)
        hashSetProduction = "567cc2b6"
        hashData = hashSetProduction + padhexa(hex(sumWatt))
        response = client.send_transaction(_from=pine['address'], to=contractAddress, data=hashData)
[2016] InternetS of Energy - Call me DAISEE
Decentralized Autonomous Interconnected Systems for Energy Efficiency - A blockchain based energy DAO
 An Ethereum node running on a Raspberry Pi. Photo by RIeul (CC-BY-NC-SA)
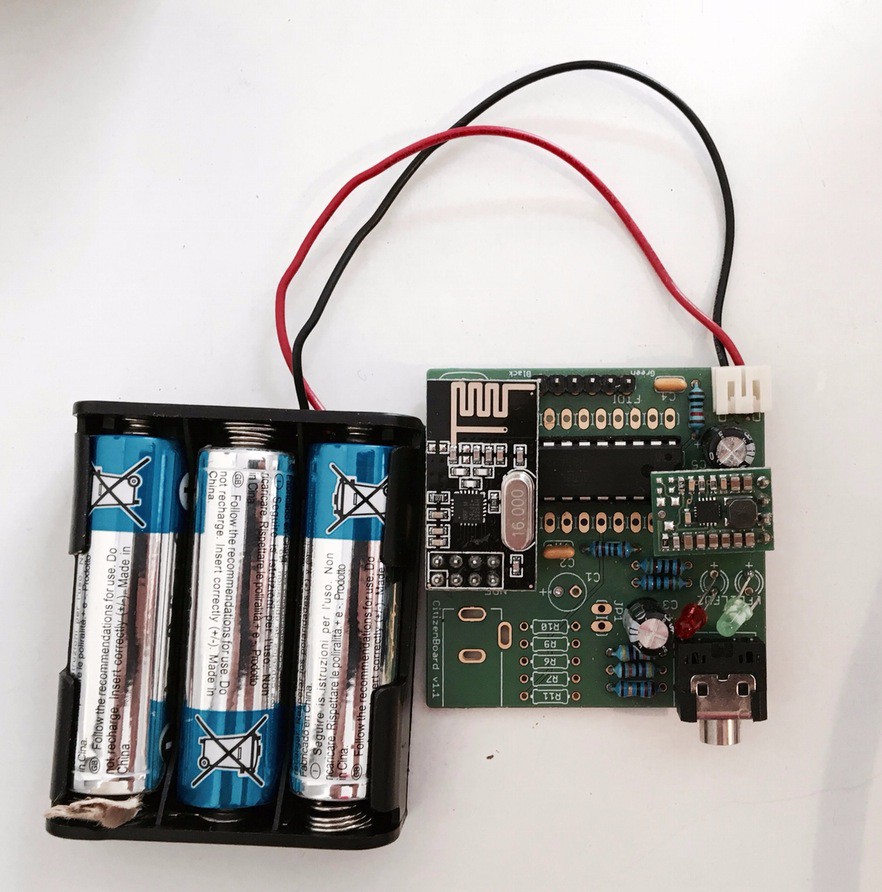


 Mounting of the Pololu Regulator
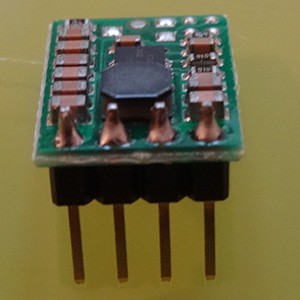


 From the

 Note: do not forget to define an default adress to pay the transaction >


Discussions
Become a Hackaday.io Member
Create an account to leave a comment. Already have an account? Log In.