Close
0%
0%

old plotter new tricks with closed loop control

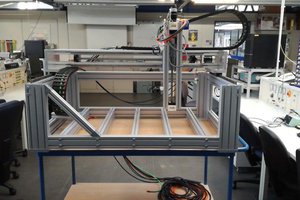
My goal is to upcycle this old plotter using off the shelf parts and turn it into a vinyl cutter

Similar projects worth following
the original plan was to keep the original chassis, replace the original DC motors with encoders with steppers and use an arduino mega board that has the headers for 3d printers (KFB2.0). but seeing as i no longer have access to a machine shop, accuracy would suffer in trying to make adapter plates for the steppers. so my focus turned to putting the original motors back and trying to interface with the encoders on the motors, z axis solenoid, and endstops. after doing countless hours of research, i stumbled across a similar project: http://arduino-pi.blogspot.ca/2014/04/my-journey-into-building-3d-printer.html. He was able to control DC motors with encoders and Not use steppers. but the site is 4 years old and it looks like its not being updated anymore. but precedent had been set, and i knew it was in fact possible.

The purpose of this project is to use off the shelf parts and open source software to breathe new life into otherwise useless tech. My vision is to put together a package that would allow old/broken printers, plotters, scanners etc. to be reused with easily obtainable parts and software, and to maybe transform these machines into beginner 3D printers and such. So far I am using Marlin software that, as soon as i learn how to do properly, I will fork into a new version to accommodate a number of different machines and setups. I am learning as I go, I am bound to make mistakes but I am confident in this project. I want to pool all the scattered resources regarding rotary encoders on DC motors, which are common in most consumer printers, using Teensy to do the complicated work on those while using a KFB2.0 board as the main brain so to speak. I would like to expand into reusing keypads and LCDs originally present in printers et.al but will start off with off the shelf LCDs for 3D printers for simplicity sake. I have delved into Marlin firmware, its numerous variants and how to manipulate the software to my whim. Its been a lot of compiling, getting errors, looking up errors and how to correct them. I am learning a lot in something I had absolutely NO idea how to use. I want to have as much control with Marlin as possible, and that includes customization. Especially LCD menus, so that you can load the G CODE for your project on an SDCARD and have all the control on the machine without the need for a dedicated PC. This will make things easier for people that can't have a dedicated PC for their machine. So I'll update with stuff as I get them to work and will attribute to everyone possible that I cribbed notes from to get this thing working and be neat for everyone.

  • 2 × teensy 3.6 32 bit microcontroller
  • 1 × L298N Interface and IO ICs / Peripheral Drivers and Actuators
  • 2 × DRV8825 Evaluation, Demonstration Kits, Boards and Modules / Evaluation Kits, Boards and Modules
  • 1 × KFB2.0 Arduino Mega 2560/RAMPS 3D Printer Controller board

  • New parts order and an explanation of basis of project

    Shawn Alfaro04/10/2018 at 08:07 0 comments

    1. ordering another, more powerful power supply (24v vs 12v) to drive the DC motors
    2. going to breadboard the Teensy and the connections to the rotary encoder on the DC motor then flash the right firmware to it for control. The Teensy will then interface with the KFB2.0 as its main controller. 

    The theory of using a 32 bit controller for rotary encoded DC motors was introduced by Benjamin McKittrick Weiss in his thesis: Closed-Loop Control of a 3D Printer Gantry for Washington University. the .pdf is here: https://digital.lib.washington.edu/researchworks/bitstream/handle/1773/26048/Weiss_washington_0250O_13644.pdf . I hope to combine his work with mine as well as the work of Michael Ball's work on RepScrap (which is basically what im doing) and using a more powerful Teensy than he had. So these, two solid leads have made things much easier than trying do from scratch. I do realize that i am standing on the shoulders of giants, and go out of my way to make sure that everyone knows that although I am working on an original idea for this plotter, the hard work has already been started by people much more smarter than I.

View project log

  • 1
    build instructions will come after completion of project.

View all instructions

Enjoy this project?

Share

Discussions

Similar Projects

Does this project spark your interest?

Become a member to follow this project and never miss any updates