makeTVee
-
Update 2020
02/24/2020 at 17:32 • 0 comments![]()
After using the matrix for several years and supporting many other person to realize their own version, it is time to update my matrix based on all the learning from the last years. So now it has the following features:
- Replacing the old Raspberry Pi A+ with a Pi Zero W
- Removing the Arduino board and just driving the WS2812B LEDs with the Pi
- Using a Bluetooth gamepad instead of the large WiFi-Controller
- Using inbuilt Bluetooth and WiFi from the Pi
- Updating all used Python libs to the latest state
- Adding new features to the software:
- Auto-connect to the gamepad, reconnect when switched off and on
- Shutdown the Pi via gamepad
- Highscore for Tetris and Snake
- Improved gameplay
- Adapt the simulator to the new input device
So it should be easier now to rebuild the matrix using available components and latest libs. Therefore I wrote an instructable to provide a step-by-step guide to build your own matrix. It is also planned to offer a set with the main components like wood veneer and laser cut parts on Tindie soon. So stay tuned and enjoy making ;-)
-
UART speed issues
01/26/2019 at 05:07 • 0 commentsAfter discussing this issue with several people who want to build their own matrix, I decided to sum up the main points in a project log.
In the newer versions of the Raspberry Pi with integrated Bluetooth like Pi3B/B+, ZeroW and the new 3A+, the hardware UART is used for the Bluetooth module. The second UART, which is connected to the extension header, is a software UART implementation. This second UART seems to be limited to 250kBaud. You can read more details on this website:
https://www.raspberrypi.org/documentation/configuration/uart.md
This project uses 500kBaud for transferring the LED data between Pi and Arduino. I am using an old, non-Bluetooth Pi A+. The only thing, I have changed, was adding this line at the end of the /boot/config.txt :
init_uart_clock=64000000
There is an option to change the UART configuration on newer Pis by connecting the hardware UART to the extension header and the software UART to Bluetooth:
https://blog.adafruit.com/2016/03/07/raspberry-pi-3-uart-speed-workaround/
I didn't have time to test this, but it looks quite straight forward. Also if there are other solutions, I will update this post.
Of course, it is also possible to reduce display update timings to reduce the UART speed to 250k.
-
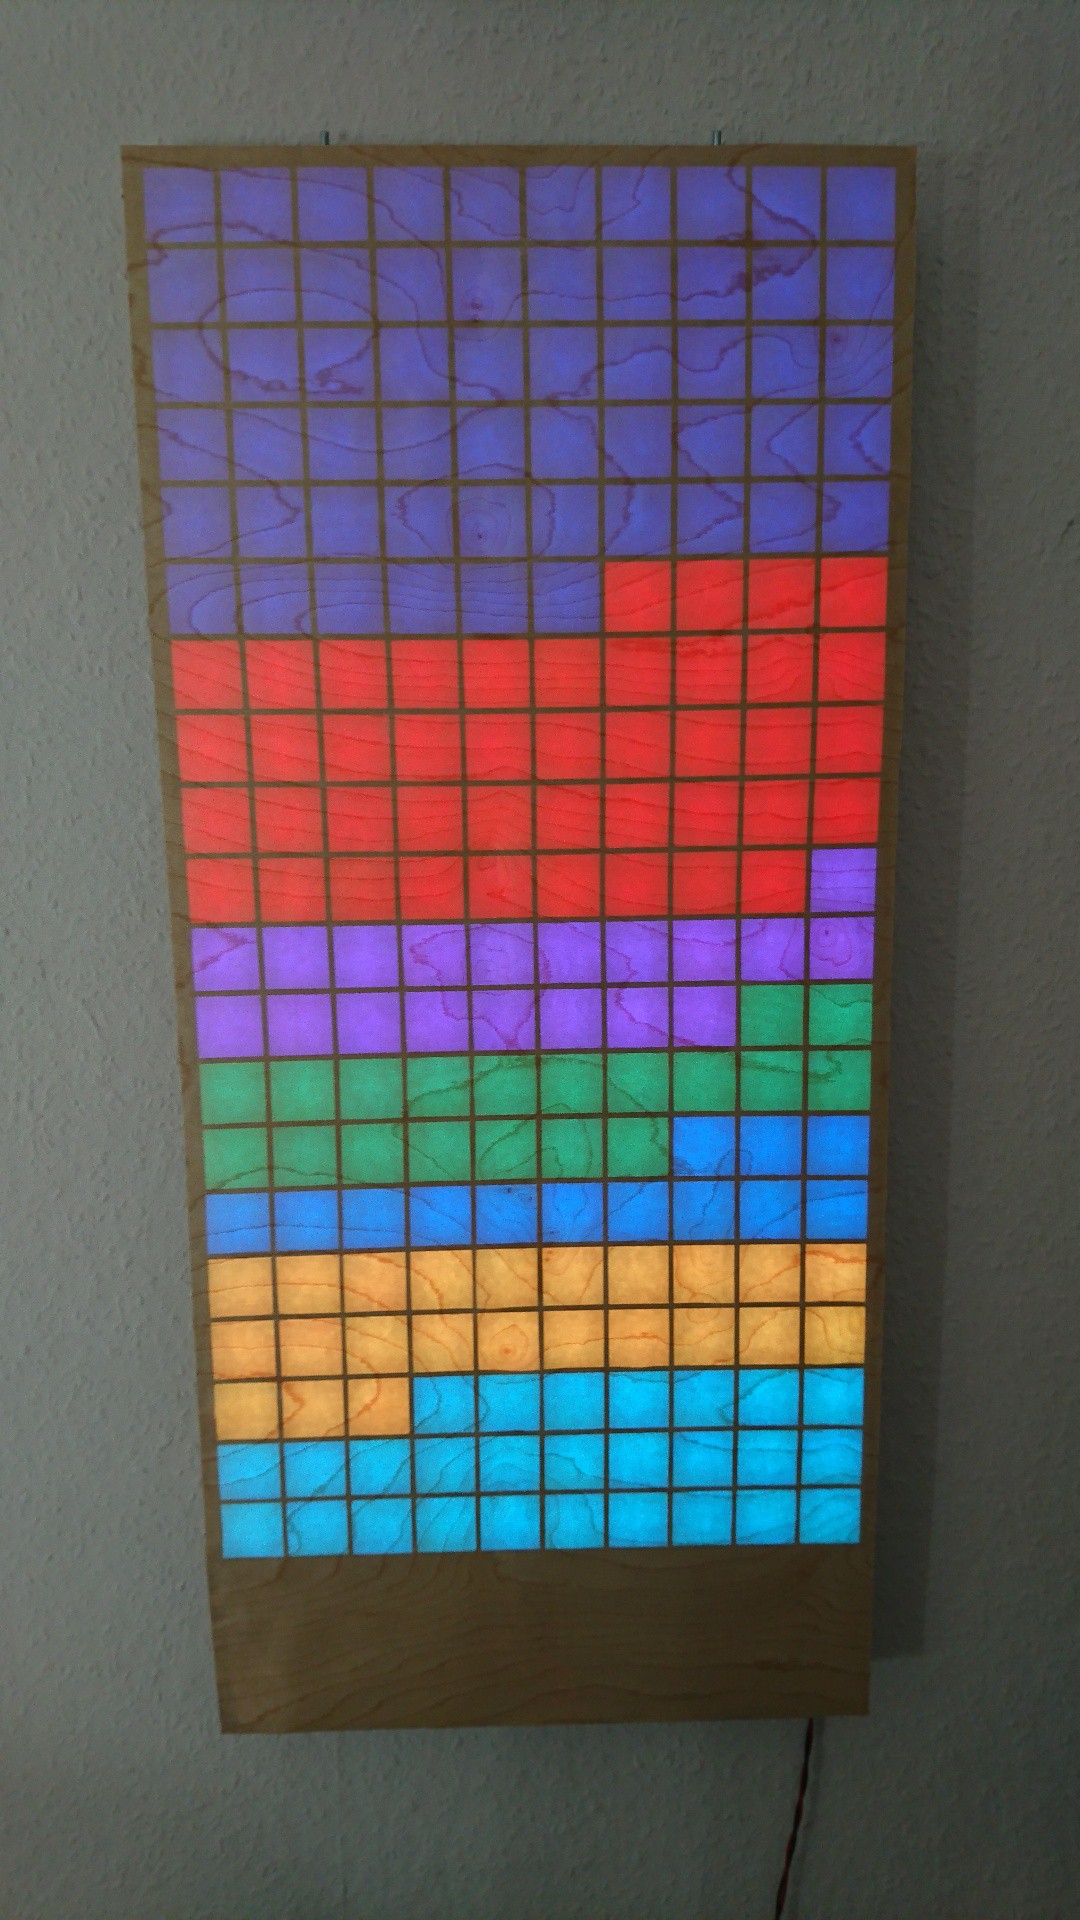
Data visualization (German parliament)
09/29/2018 at 15:25 • 0 commentsI just started to play around with parsing data from internet sources to the matrix.
Starting with this page (German parliament seat distribution):
https://www.bundeswahlleiter.de/bundestagswahlen/2017/ergebnisse/bund-99.html
![]()
and extracting data and colors from the SVG image using this code:
doc = minidom.parse('diagramm.svg')  # parseString also exists
    style_string = [path.getAttribute('style') for path in doc.getElementsByTagName('path')]
    label_string = [path.getAttribute('aria-labelledby') for path in doc.getElementsByTagName('path')]
    text_string = [text.getAttribute('id') for text in doc.getElementsByTagName('text')]
    data_string = [text for text in doc.getElementsByTagName('text')]
    rgb=[]
    percentage=[]
    index=0

    for i in range(0,7):
        rgb.append(style_string[i].split("(")[1].split(")")[0].split(","))
    for i in range(0,text_string.__len__()):
        if text_string[i]==label_string[index]:
            percentage.append(int(round(200*int(data_string[i]._get_childNodes()[0]._get_data().split(": ")[1])/709)))
            if index < label_string.__len__()-1:
                index=index+1

    doc.unlink()
    pix=0
So after sending this data to the matrix, I got this:
![]()
Nice starting point...
-
Matrix size
04/28/2018 at 13:19 • 0 commentsAfter several questions regarding code adaption for different matrix sizes, python code now has global pixel settings called PIXEL_X and PIXEL_Y.
-
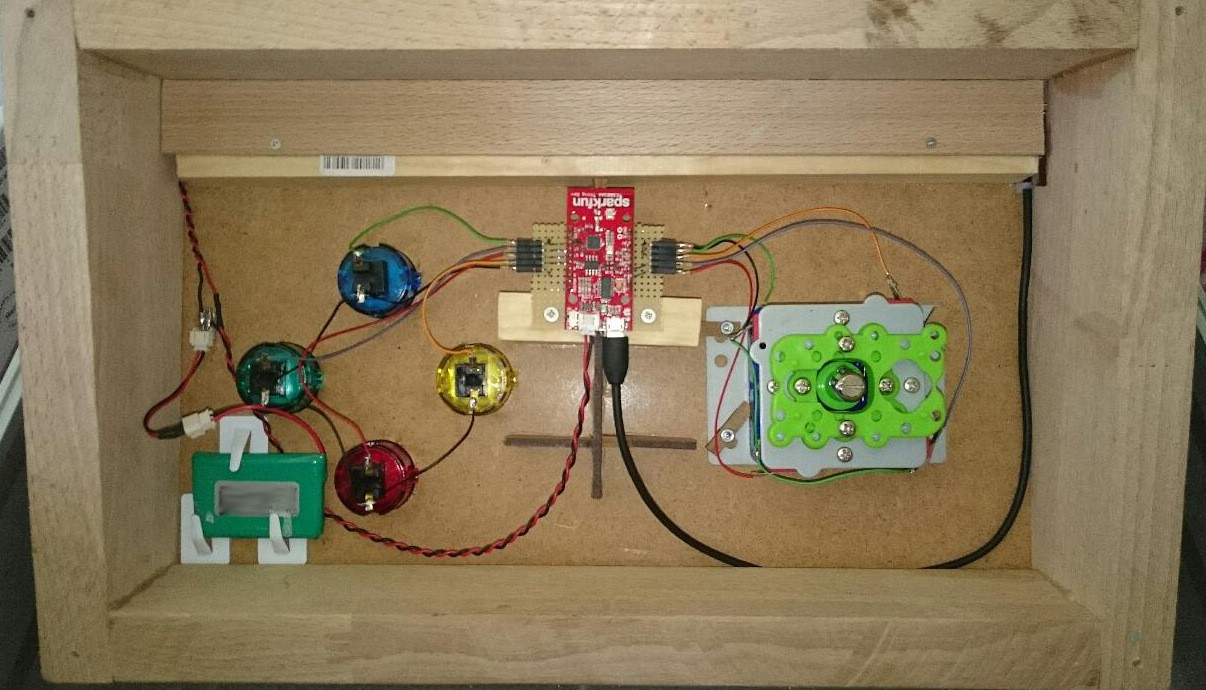
Controller details
03/04/2017 at 07:47 • 0 commentsI have uploaded the Arduino sketch of the ESP8266 based controller to Github.
Wiring is pretty simple, using a Sparkfun Thing and a single cell LiPo.
![]()
-
Schematic
06/12/2016 at 14:58 • 0 commentsThe schematic is now available. There are only three relevant connections:
- UART between Pi and Arduino (connected DTR-pin for programming the Arduino firmware from the Pi), with a simple voltage divider for 5V to 3.3V conversion
- SPI for the MAX7219 matrix display
- Serial connection from Arduino to the WS2812 stripes
-
Android app control
05/26/2016 at 20:40 • 1 commentInstead of the retro controller there is also a small Android app for game control. It provides the same functionality, so no additional controller hardware is needed if you already have an Android device.
There is a video on Youtube showing the app in action:
-
Github
05/12/2016 at 19:33 • 0 commentsPython code and Arduino sketch now on Github. I will add more documentation how to use the code within the next week.
-
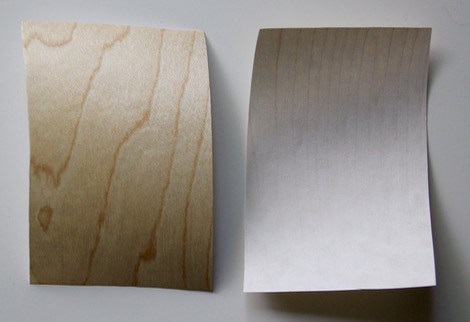
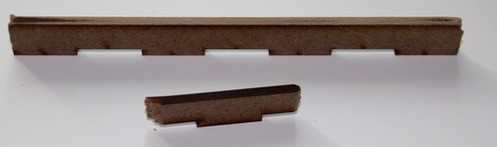
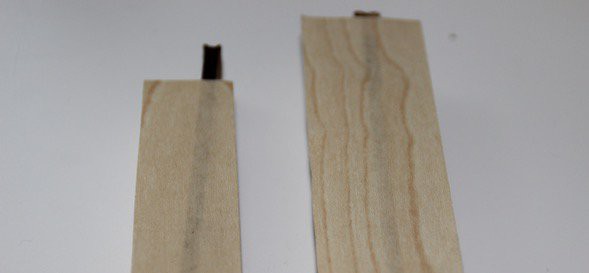
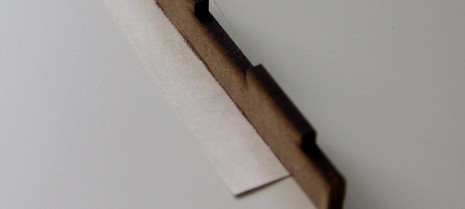
Veneer application
05/11/2016 at 19:24 • 0 commentsIn reply to a comment, I will describe how to apply the veneer paper to the MDF matrix. The veneer I have used, is called Microwood, which is a 0.1 mm veneer with paper backing.
![]()
Before the final full-surface bonding onto the MDF matrix, I did some pre-testing with the glue and the surface preparation of the MDF. To avoid paper curling after the adhesion, I used a solvent based all purpose adhesive (UHU black), which worked as expected. For testing purpose, the black laser cutting edge on the MDF surface was removed with sand paper:
![]()
The following image shows the veneer glued on the MDF sanded off (right) in comparison to the veneer glued on the more or less black MDF. For me, this difference was not enough to polish all the MDF parts and the final result proved me right.
![]()
Because of the paper backing, it is quite easy to apply the veneer and there is no problem with dissolving, although the veneer was rolled up when it arrived.
![]()
If you have any questions, leave a comment.
-
CAD files
05/04/2016 at 15:49 • 0 commentsI have now uploaded the DXF files of the MDF matrix. I have used 3mm MDF. The next version will be a combination of MDF and cardboard to save some cost.
Raspberry Pi Retro Gaming LED Display
20x10 WS2812 LEDs driven by Raspberry Pi/Arduino to play games like Tetris in the living room