Close
0%
0%

Invisible

A public art campaign inspiring people to share the differences that separate us, increasing social awareness and strengthening community.

Similar projects worth following
People are invisible all over the world for many reasons: some by choice, some by necessity. We all have parts of us we want or need to be invisible- be it your sexual preference, race, income. The list is endless.

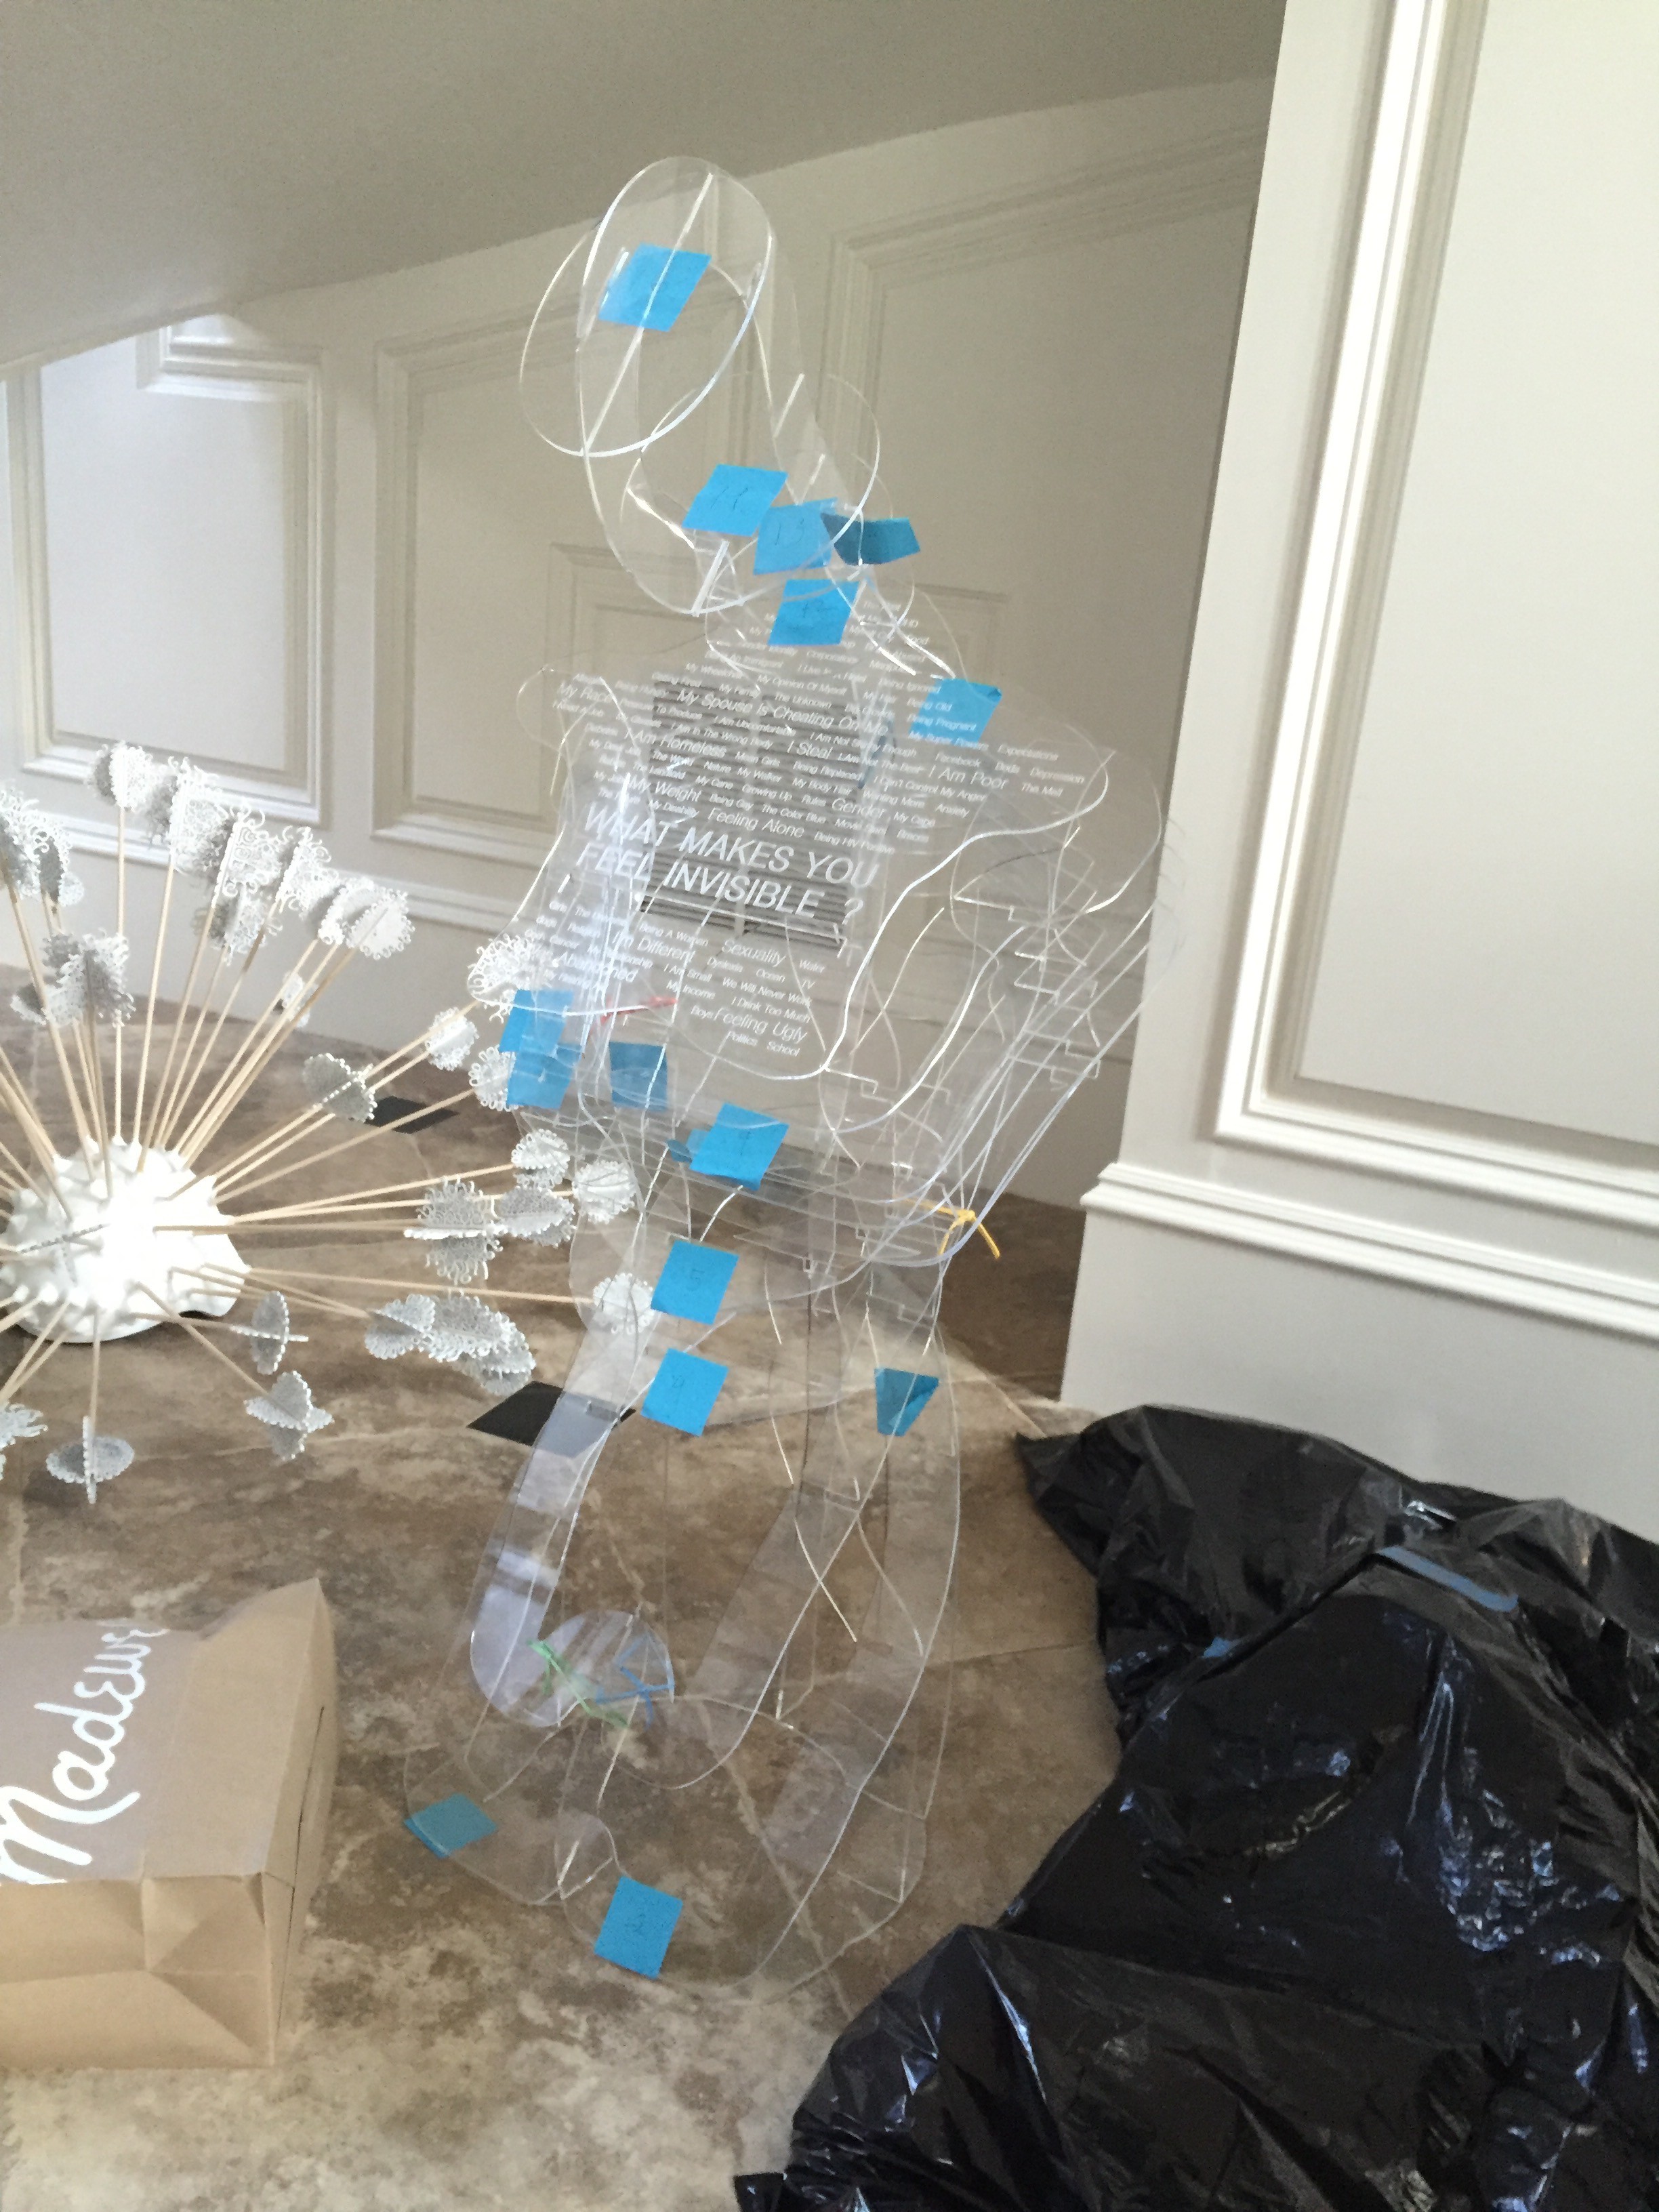
Invisible is a campaign that places interactive translucent sculptures all over the world for people to contribute their inner invisibilities to and be empowered by the sharing of others. This human silhouette asks a question etched on its heart, “What makes you feel invisible?” Scribble your answer on a piece of paper and drop it into the sculpture.

The more people who donate their invisibilities, the more empowered the campaign becomes. As the sculpture fills with thought donations, the sculpture itself becomes more visible.

A stranger’s thought donation will be given back to you when you donate yours, or will be anonymously posted online for all who seek. We all struggle out of fear of our differences. Acknowledging these fears can lead t

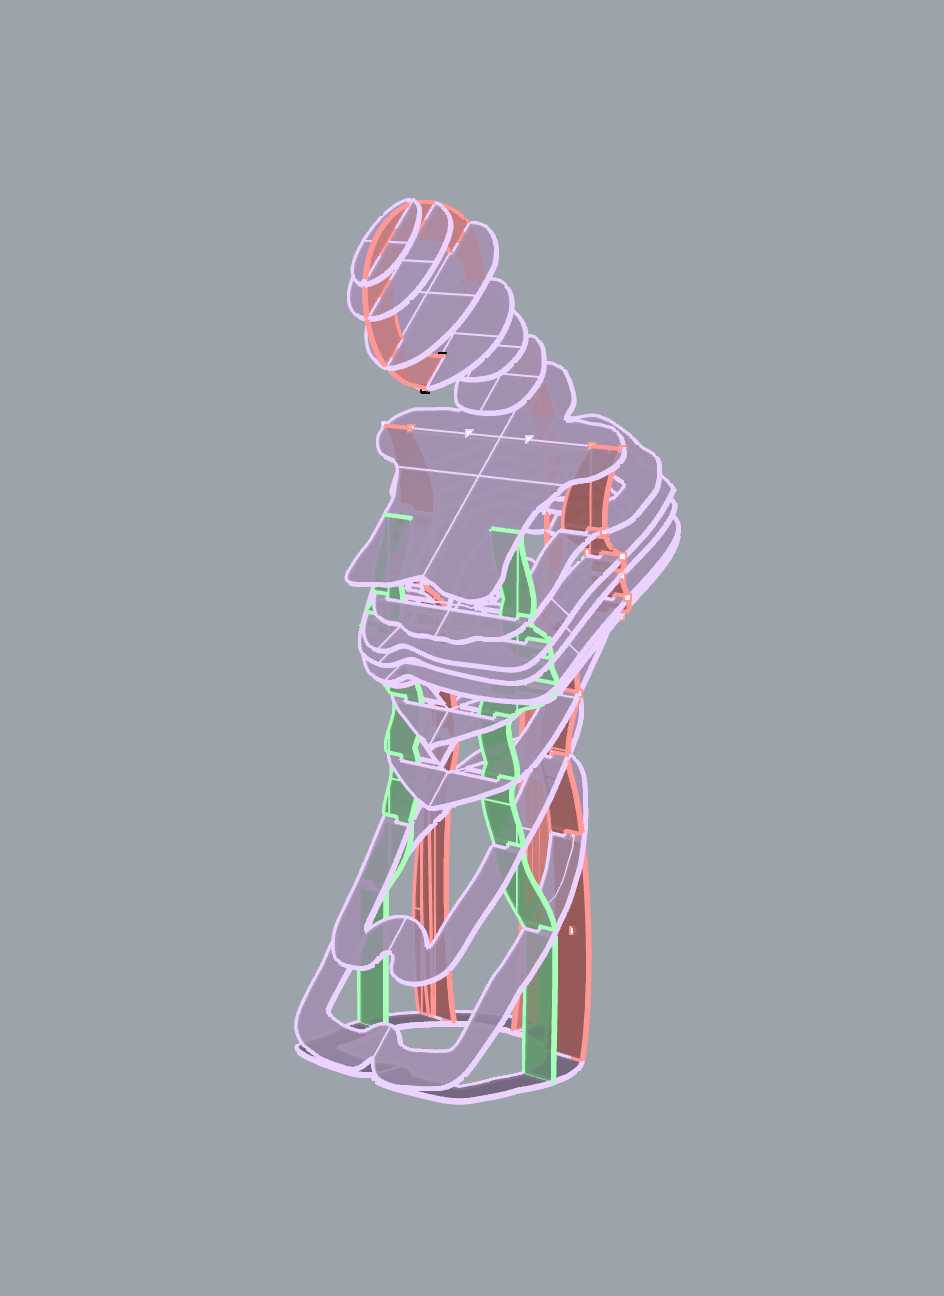
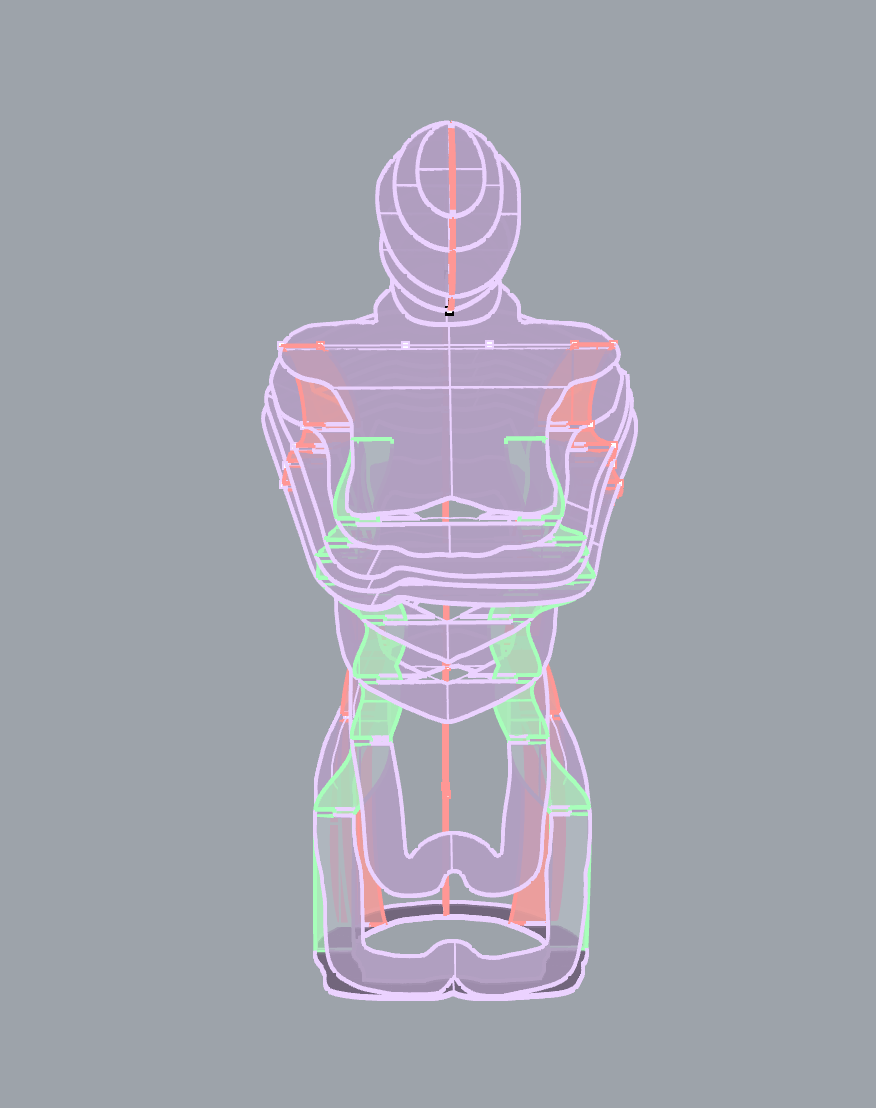
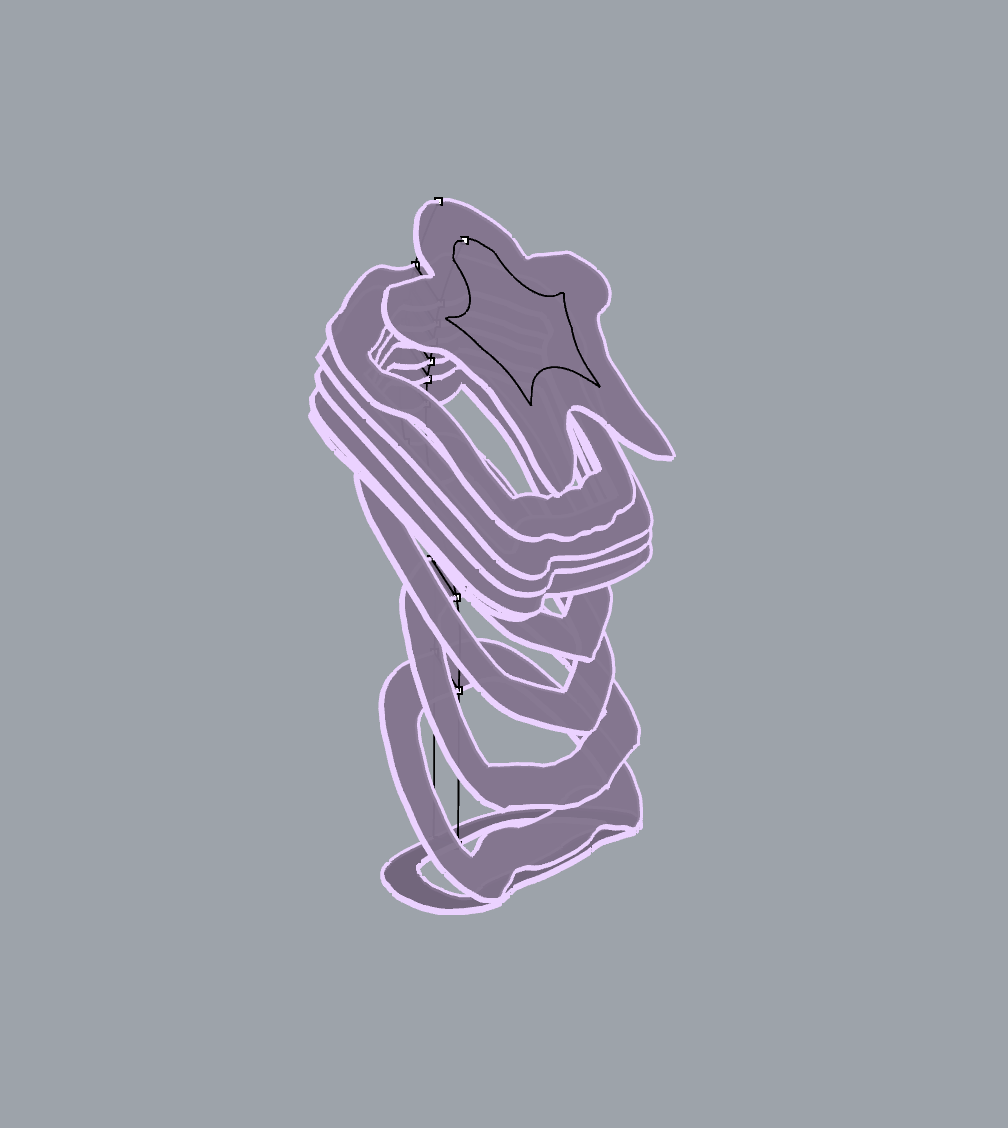
Each sculpture will be made from a series of laser cut layers made of either plywood or acrylic that will fit together through three spine pieces, creating a sculpture of a human. Each sculpture will then be completely wrapped in plastic wrap.

Each sculpture will have decorative pieces around the opening at the heart for thought donations to be added. In some of the sculptures, there will be some sort of mechanism created to mix and retrieve notes.

Each sculpture can be completely different and can be a representation of the community it is placed in. Sculptures can be found in libraries, subways, parks, schools, museums, town halls, and online.

Invisible Sculpture Files For Hackaday.3dm

The Latest Model Of The Invisible Sculpture

3dm - 996.91 kB - 04/18/2016 at 16:29

Download

  • 3 × Sheets of 33" x 44" Clear Acrylic
  • 1 × Plastic wrap
  • 1 × Epoxy
  • 2 × 100 Meter Spool of Clear Stretch Magic Elastic

  • Reaching Out

    Kate Reed08/30/2016 at 15:31 0 comments

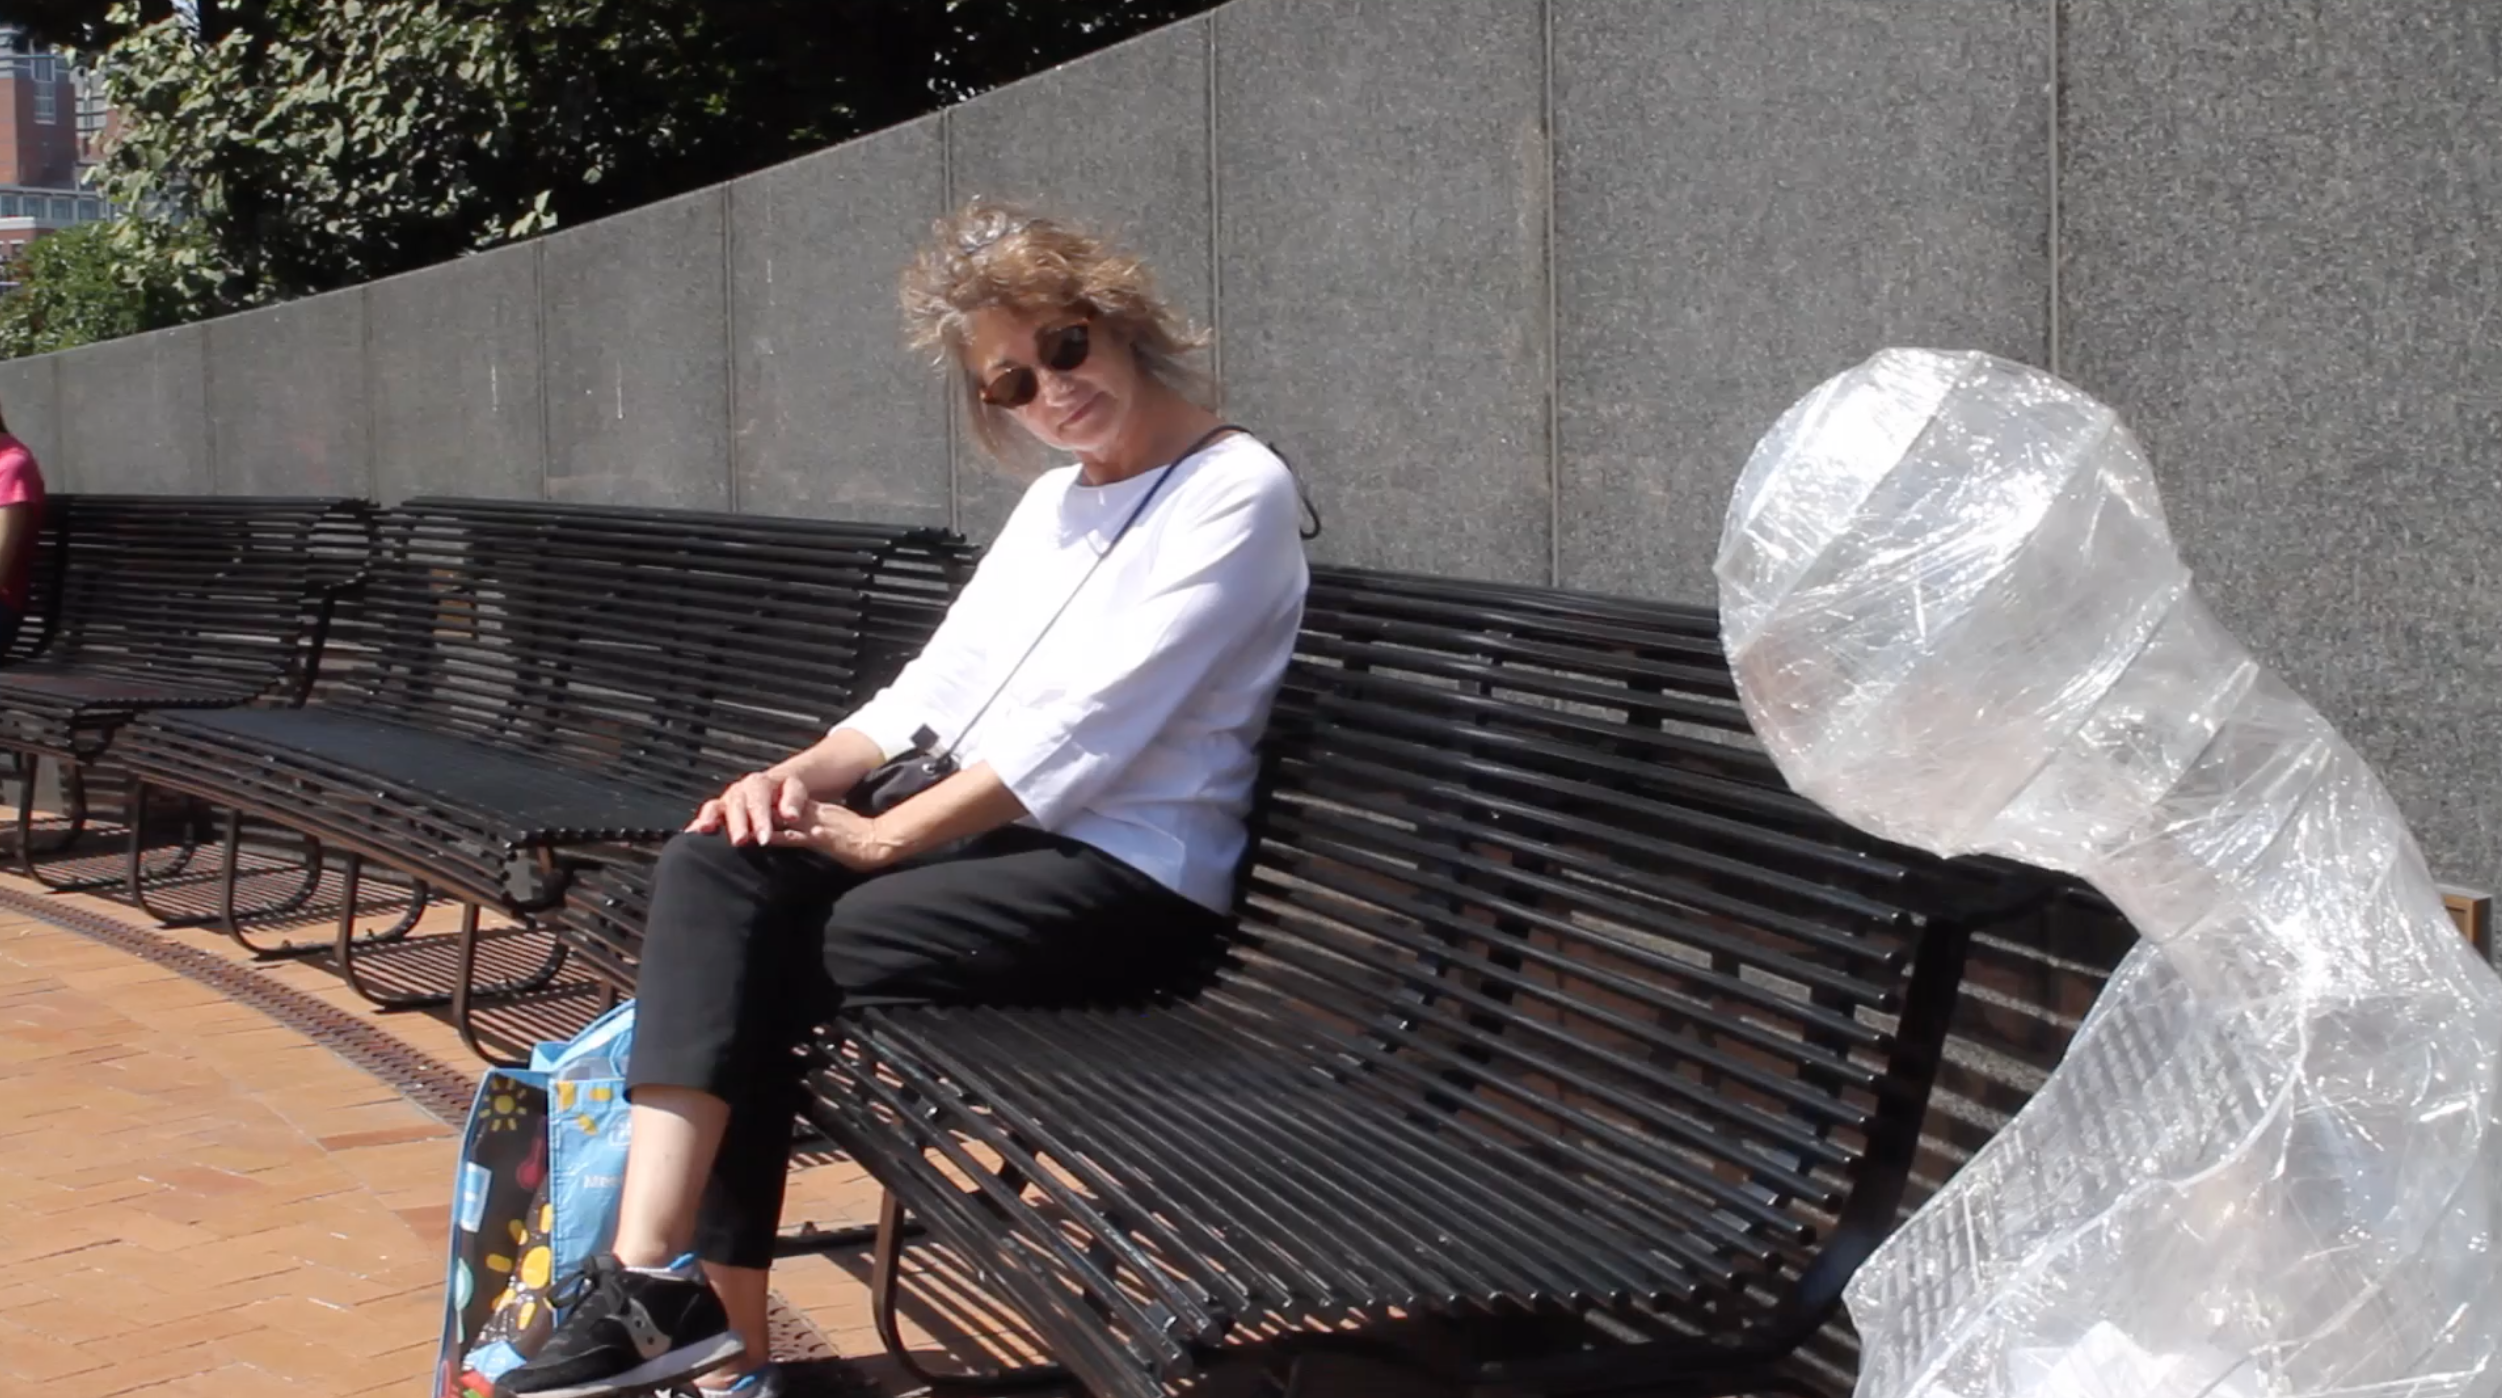
    I’ve taken the plastic wrapped Invisible out in the world. It’s fun to see people engage with it. As I was setting it up for filming people came right up to ask me about it. It captivates people- especially kids. As we chatted about it, it immediately put people in a calm and thoughtful state and they were happy to add their notes to the sculpture.

    I did have one accident. I had and Invisible sculpture set up in Copley Square in Boston, and a huge gust of wind blew it over and caused some damage. I had to take that Invisible apart, re-cut the damaged parts and reassemble it. I now know how careful I have to be stabilizing the sculpture at the base. Right now I’m using natural rocks, but for a long-term installation each Invisible needs to be screwed down to a secure base.

    I’m now beginning to work up an Invisible website with photos, footage of Invisible in action, and a blog spot to post notes. I am also exploring installation locations within local communities and thinking of how I might adjust the words on the chest plate to make Invisible appropriate for various school settings. So far, this has been an amazing project to work on and I’m super excited about the next steps.

  • Design Two

    Kate Reed08/30/2016 at 15:28 0 comments

    With Version 1 of Invisible complete, I started to address my desire to have people be able to put in and take out their invisibility. For this to happen with the current design of Invisible, the sculpture would have to be emptied and re-wrapped every so often, which makes it a bit of a hassle. Plus, there is a lot to be gained from a person being able to put in a note and immediately take one out- to learn something about the community they are a part of. I started thinking about different materials invisible could be wrapped in that would allow more flexibility in terms of taking things out of the sculpture.

    One idea is to line the entire sculpture with fishing line. The fishing line would hug the form even tighter, so it would show more of the form than the plastic wrap would. In the space between the strands of fishing line, you could also reach your hand in and take a note out. The downside of the fishing line is that it is not waterproof, so this Invisible would need to live indoors, in a library or museum. I also realized the fishing line might not be stretchy enough to reach your hand through to take out a note, so I decided to use clear elastic string instead.

    Once I had decided on the elastic, it was a nightmare to make it happen. I re-cut all the Invisible pieces, but this time with 3 mm holes arrayed around the edges of the pieces. I also had to project a ring of holes around the neckpiece on the chest piece so that the neck wouldn’t drop off. The first time around I forgot to change the chest piece, and it didn’t work at all.

    Once I had all the pieces changed and cut out, I assembled it just like any other Invisible. When it came time to wrap the sculpture, I pulled up a chair, and began the long process of stringing the Invisible up. I spent 30 hours sitting by invisible stringing layer by layer until the whole thing was done, but it was worth it!

    This invisible is breath taking! From afar, the string reads extremely well. I like how it is truly transparent with the string. My only critique is the chest plate becomes a little harder to read because the fishing line distracts your eye. This Invisible achieves the goal of being able to both add and take out a note at the same time.

    My mind is already leaping ahead to a third version. I’ve started experimenting with dripping epoxy down the sides of the frame to create a web-like natural aged look, also fully translucent. I’ve stuck some of the leftover acrylic shards from the frame through boxes to use for experimenting. So far it has been hard to catch the epoxy at the exact moment it is hardening to get the kind of dripping I’d like. I’ve tried two kinds of epoxy, and various recipes of hardener to epoxy, and haven’t found my magic formula yet. Stay tuned.

  • Plastic Wrap

    Kate Reed06/23/2016 at 21:59 0 comments

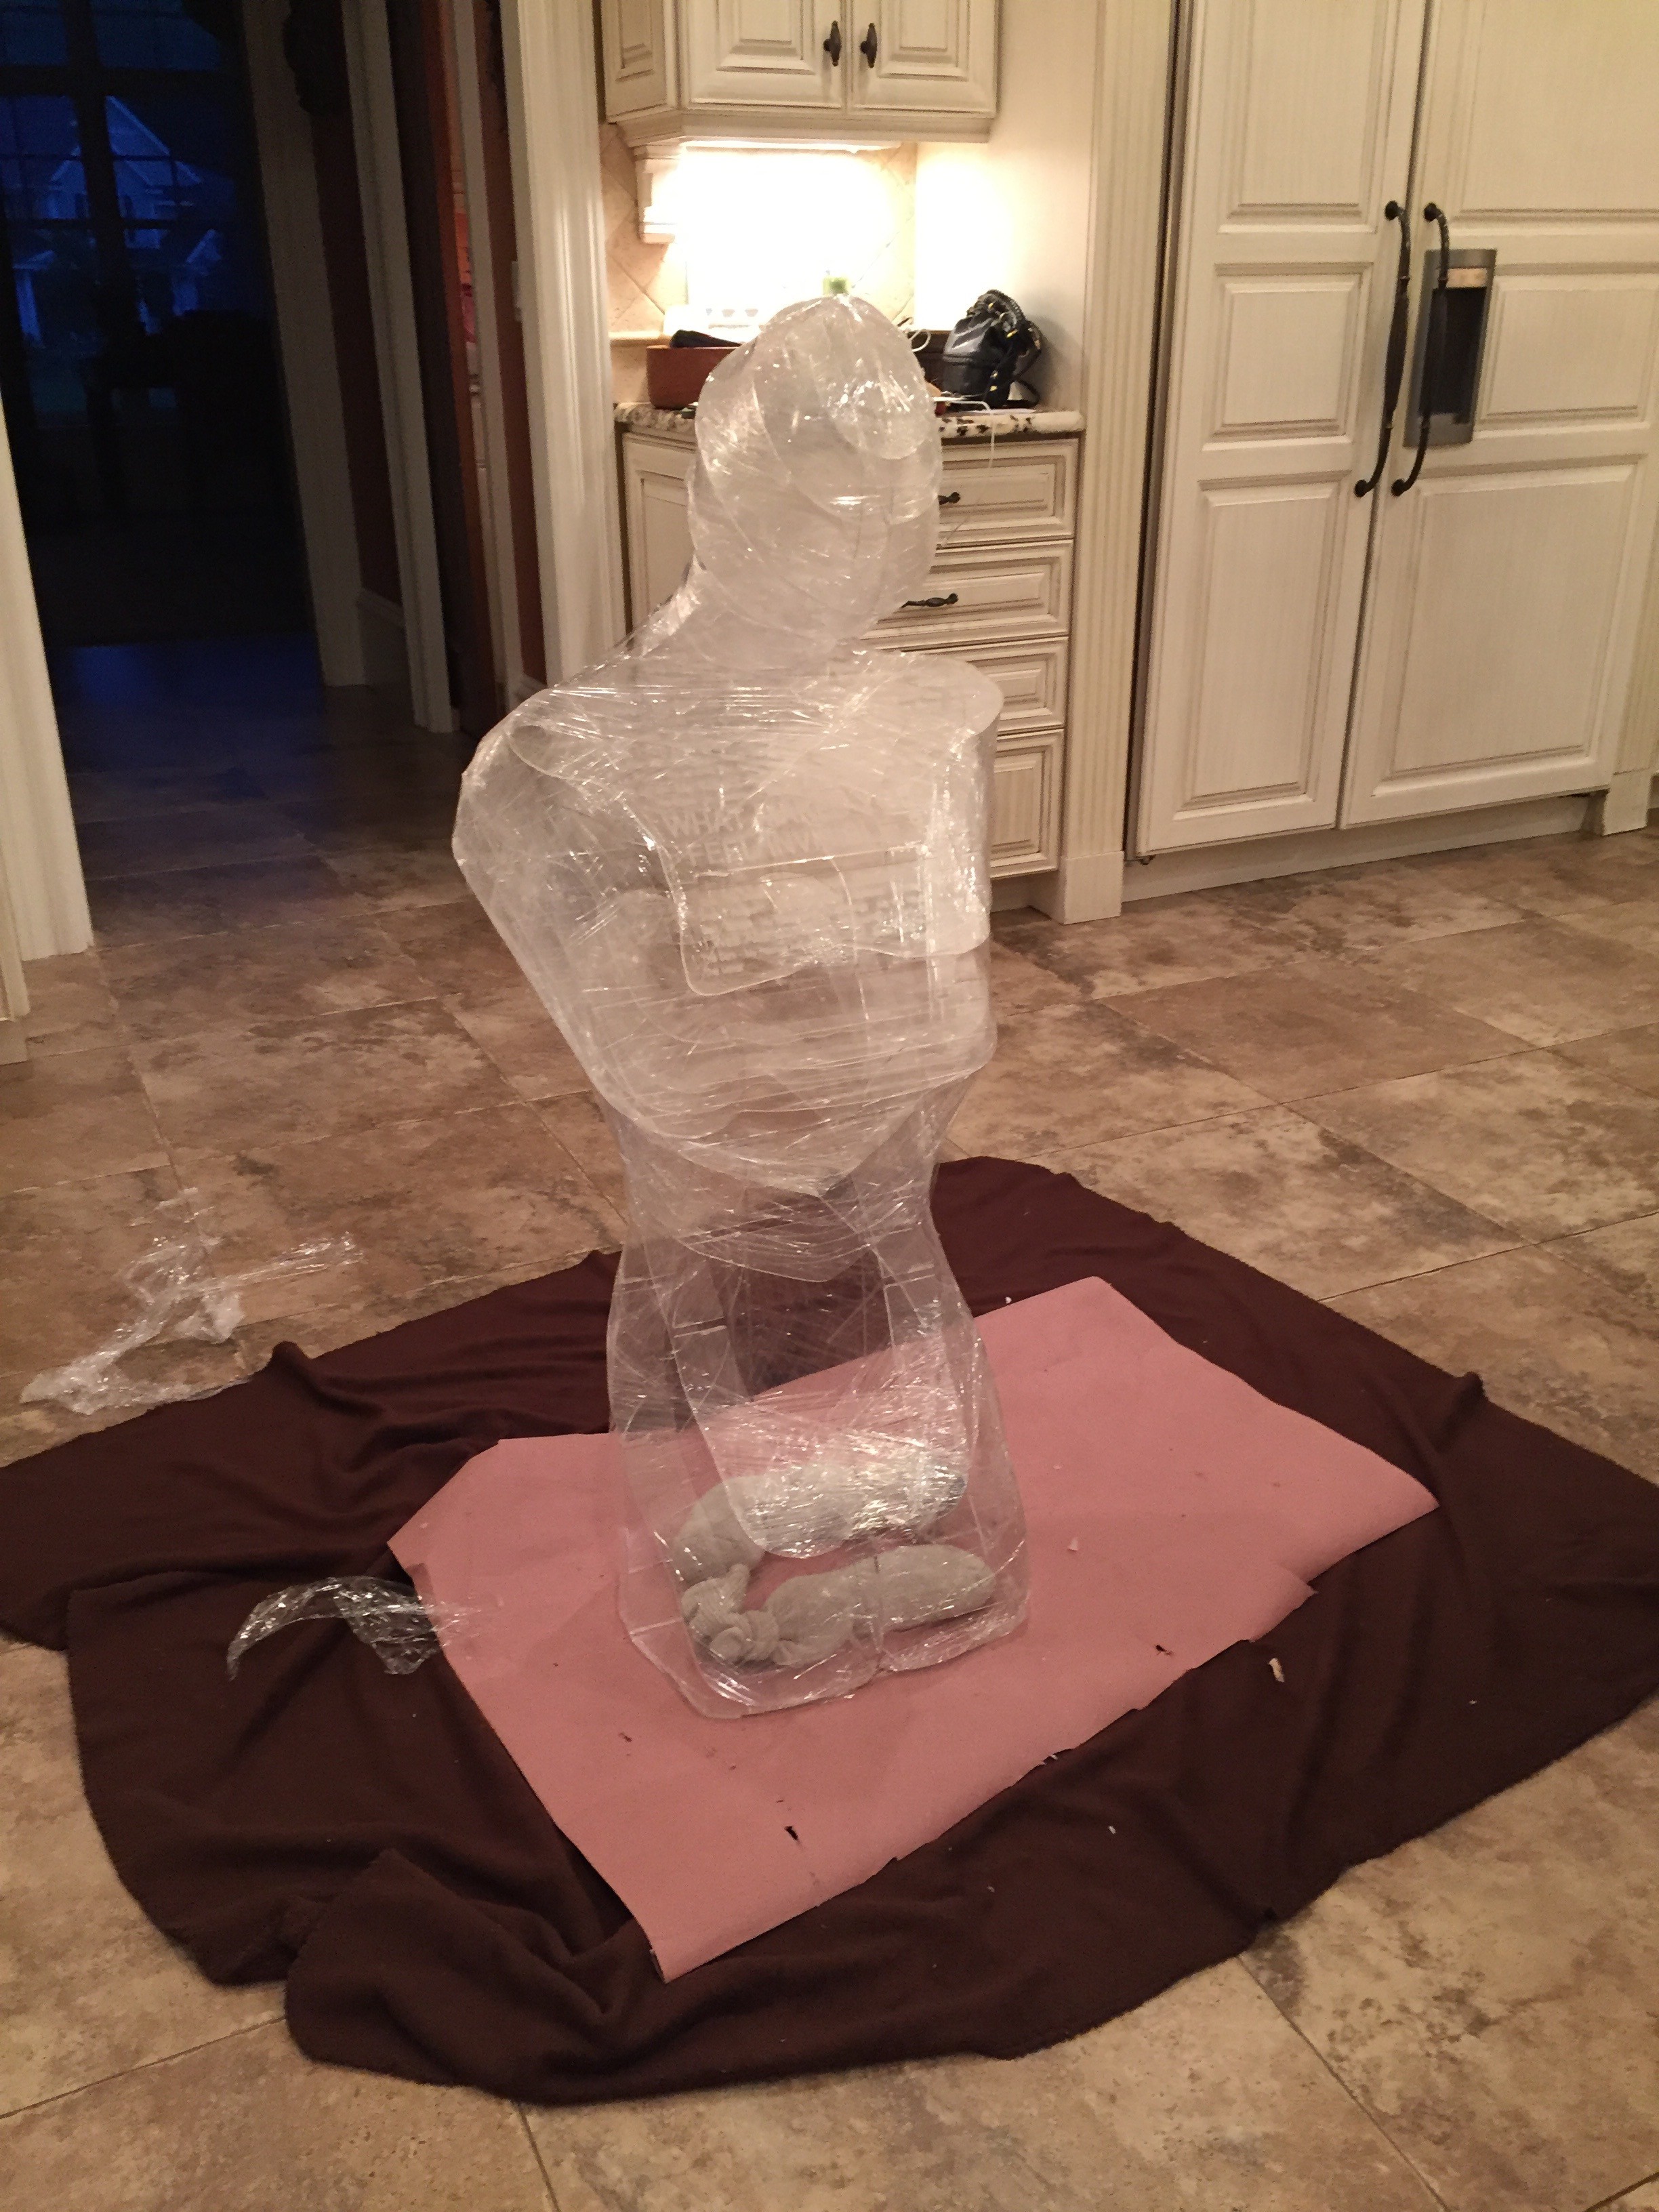
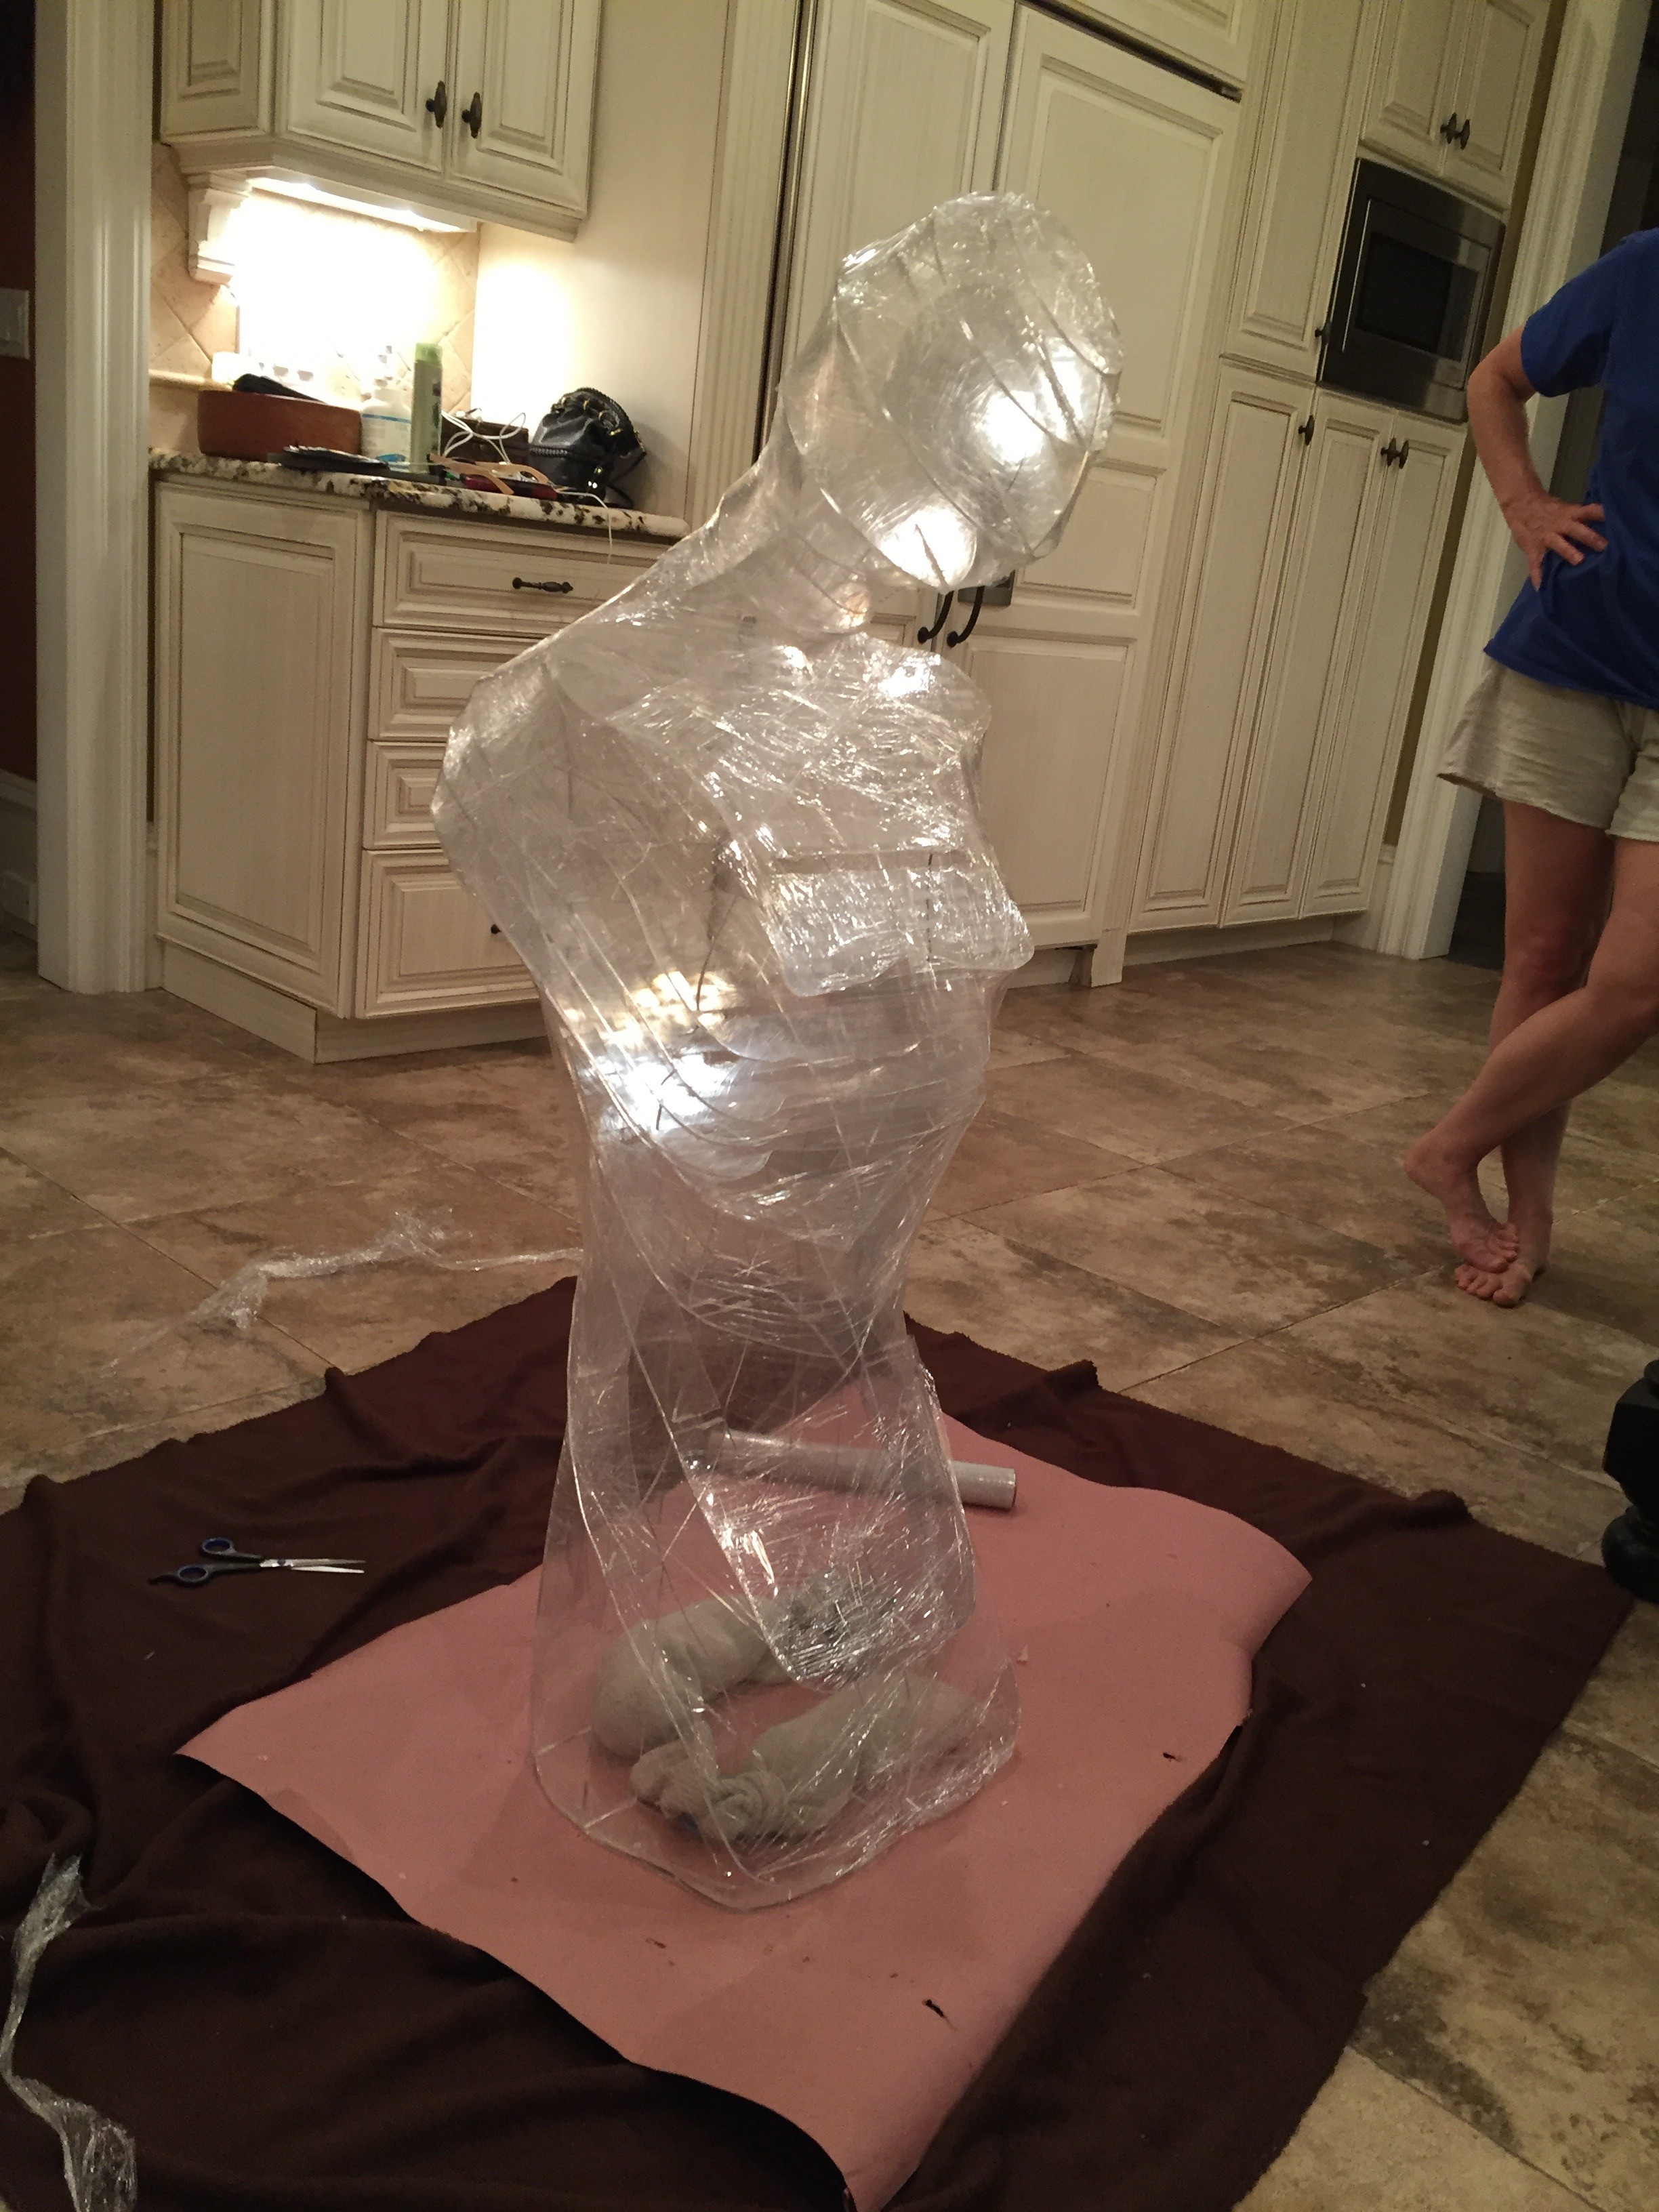
    Once the frame of the sculpture was assembled and glued, it was time to start plastic wrapping the body of the sculpture. The plastic wrap is what turns the laser cut frame into a human form. I started at the bottom of the sculpture, and pulled the plastic wrap around the knee and chest area. As I made my way around the form, I quickly realized that I wasn’t going to be able to just wrap it all in one try. I started experimenting with smaller hunks of plastic wrap, cutting and pulling it around the intricate shape of the human form. I tried to get as little folds in the plastic wrap as possible, trying to keep it as transparent as possible. The more I wrapped, the more wrinkles I got, but it also started to take on the light in a different way that was quite beautiful. I decided to embrace the wrinkles.

    The higher up on the body I got, the harder it became to wrap the sculpture. Once I got to the arms and the chests piece, the edges just kept getting very awkward and hard to wrap. I wanted to keep the chest plate as clean as possible and first tried to avoid putting plastic wrapping over the chest plate. I realized that it would leave a rough edge if I didn’t go straight over the chest plate though, and that covering the chest plate would give an added level of support to the structure. The plastic wrap does not interfere with reading the words at all.

    A happy surprise was that the plastic wrap really secured the sculpture as a whole. It’s much stronger now and functions as a unit. When the light catches it, it turns the whole piece into a prism. I’m very pleased with this first sculpture.

  • The Re-Assemble

    Kate Reed06/23/2016 at 21:57 0 comments

    I am wiser now. With the broken pieces re-cut, I know how to safely assemble the sculpture so that it won’t break. Back over a rug, we assembled the sculpture in half the time. This time around I am not taking any chances and I’m epoxy-ing each joint immediately after assembly. Because the entire sculpture is transparent, it’s very hard to tell where your hands are within the sculpture. As I glue, all the layers of acrylic blend in front of my eyes. What a nightmare.

    I need the sculpture to remain as clean as possible- to keep its invisibleness, which makes the gluing very stressful. I’m using toothpicks and match sticks in an attempt to have the smallest glue footprint as possible. I keep thinking I have the glue in the right place, only to find my hand on a completely different layer than where I thought it was because I can’t see where I'm going. It’s a bit comical. In the gluing process I broke one more vertical support, but luckily it was one that I hadn’t glued into place yet. I glued every support except that one, so that I could switch out that support.

  • Assembling

    Kate Reed06/23/2016 at 21:54 0 comments

    With all of the pieces in place, it is finally time to cut the Invisible sculpture out of the clear acrylic! I double-checked my measurements several times, just to be sure, and now it is ready to cut. I spent a few hours trying to pack all of the pieces as tightly as I could on each sheet of acrylic, so that I can laser cut them in the most efficient way possible. I was able to arrange the pieces so that I can cut out one sculpture from two big sheets and one little sheet of acrylic.

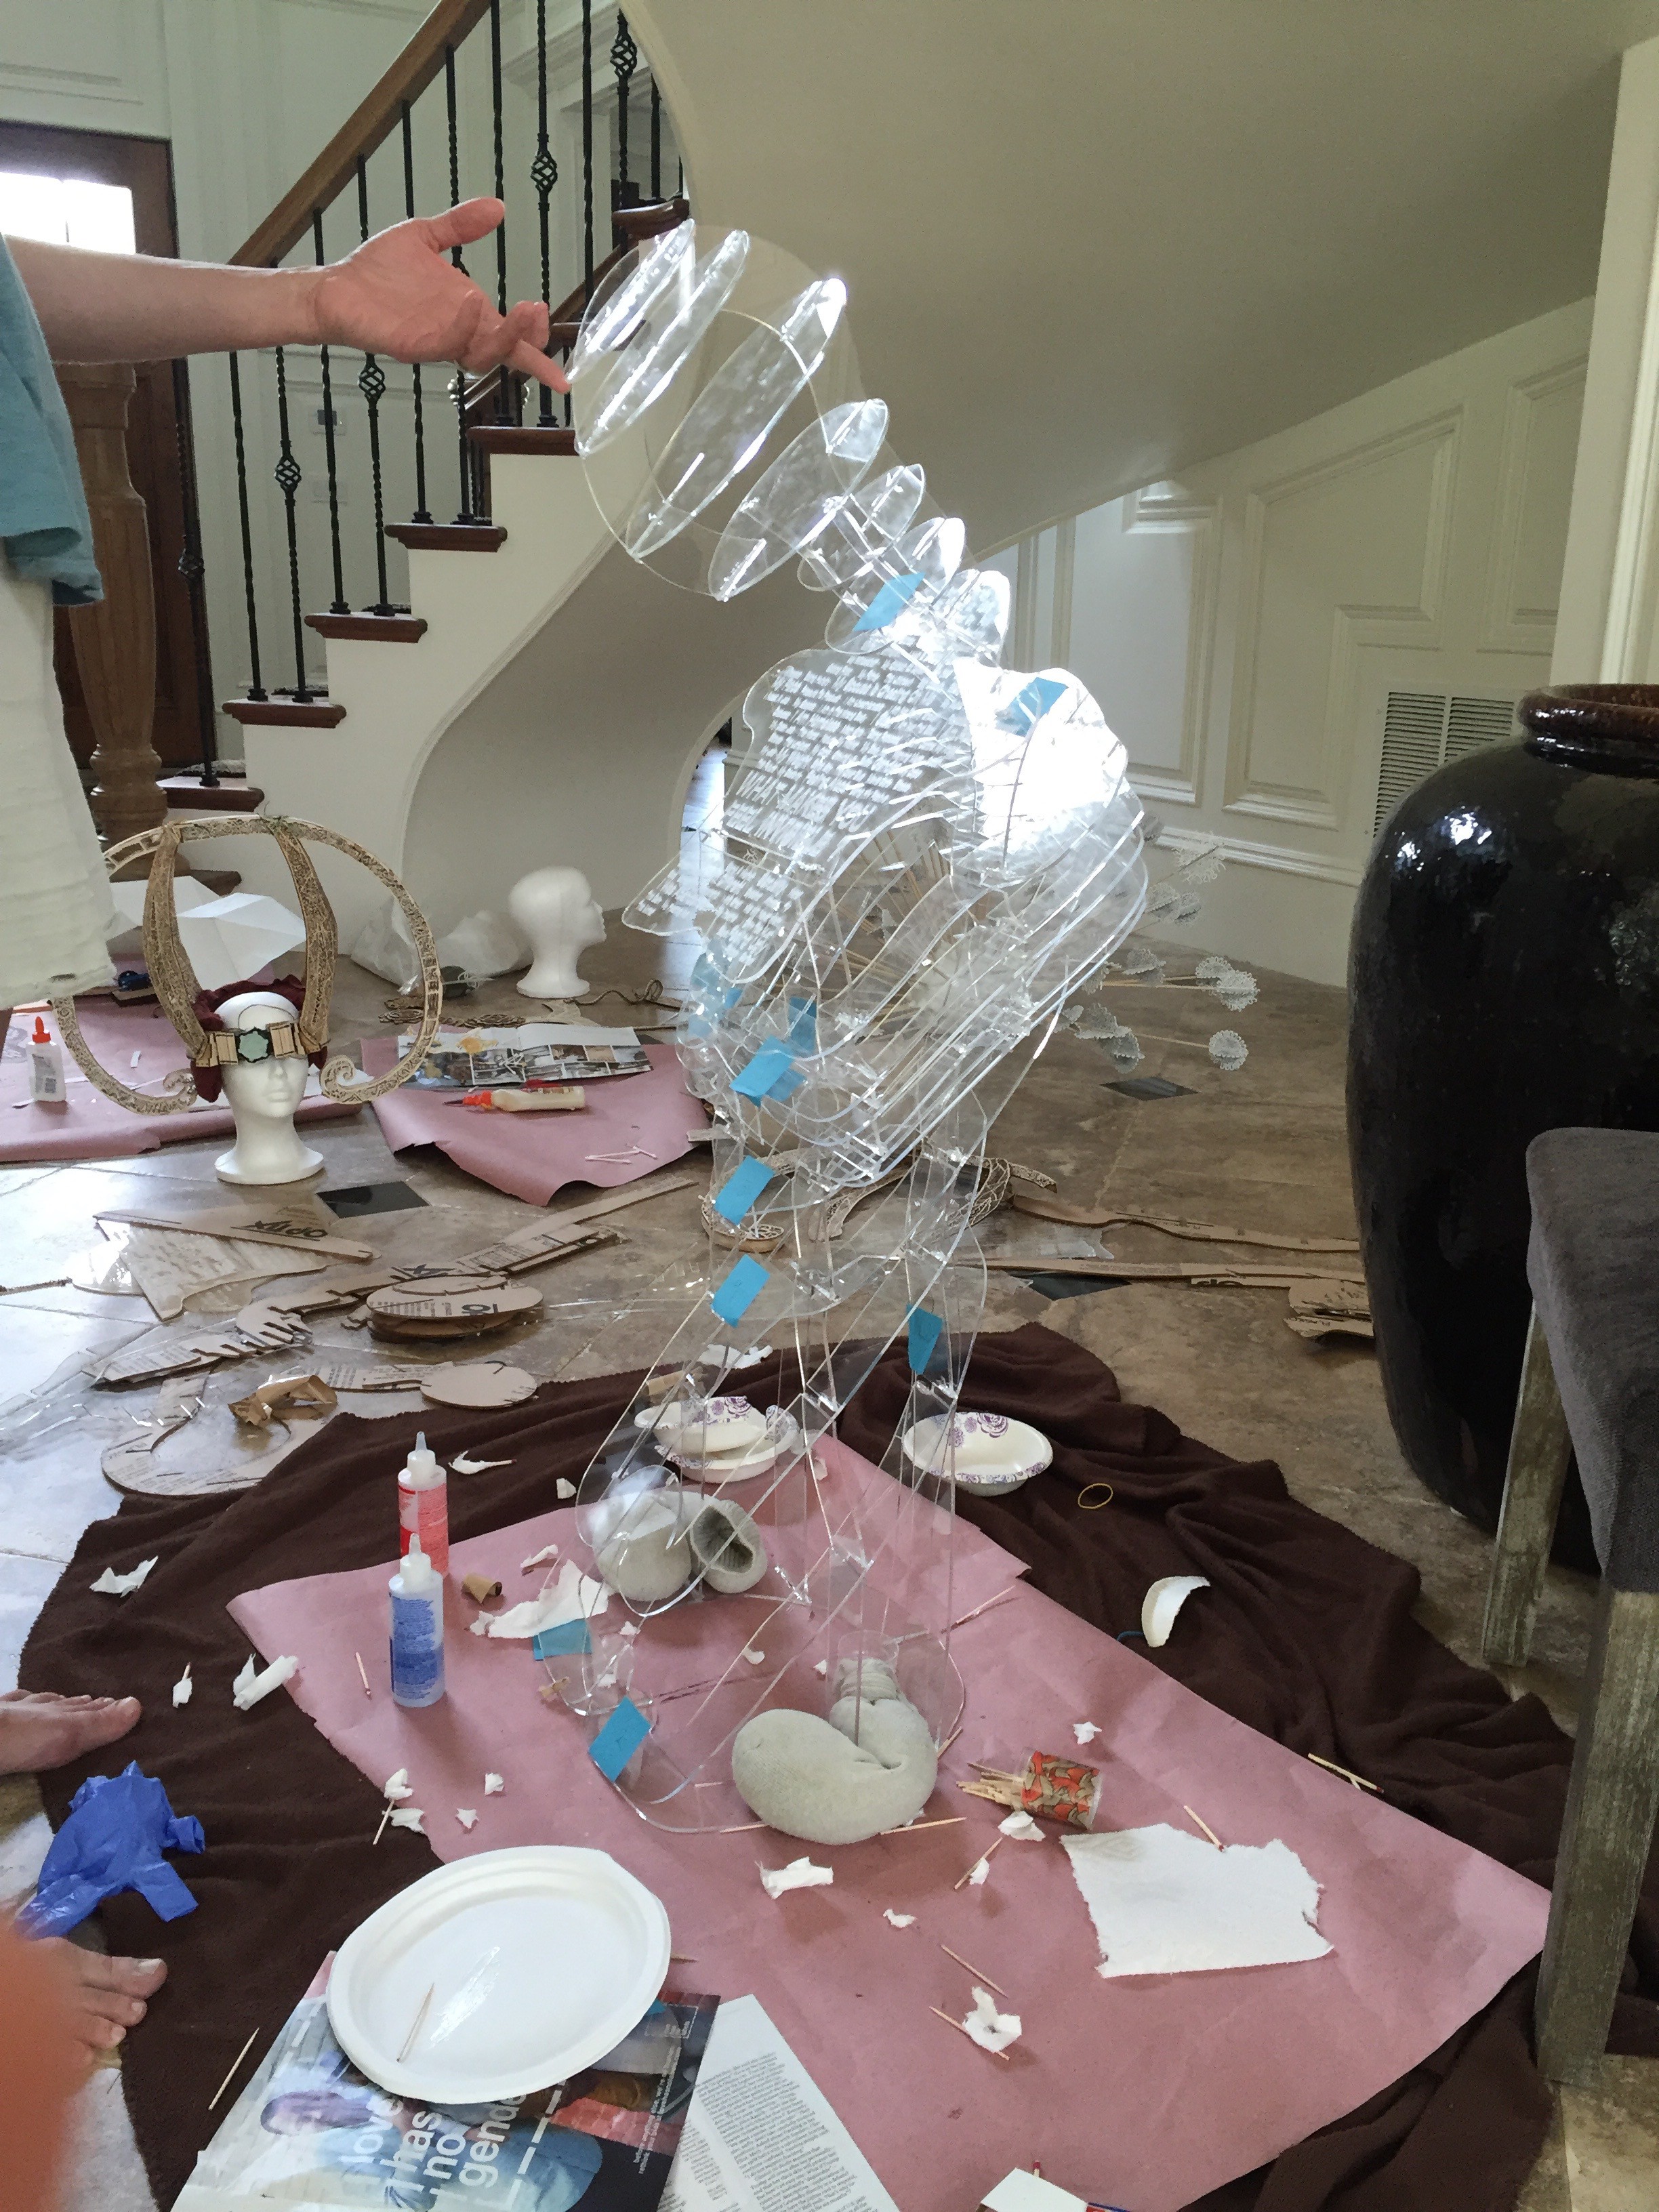
    Once I had the pieces cut out, I had to keep them as safe as possible to transport them so they wouldn’t get scratched, cracked or break. When I had the pieces safely at home on my rug, I started to take off the paper coating on the acrylic and lay all the pieces out. I labeled each part with a sticky note so that I could keep them in the right order. I kept loosing pieces on the rug because they were all transparent. They were, literally, invisible.

    I realized that I had forgotten to cut one of the pieces out of the acrylic. I went ahead to start assembling the sculpture anyway, thinking I could add the piece later, but about ten minutes in, I realized that I couldn’t assemble the pieces out of order, and I would have to wait until I had the last piece.

    A few days later I went to assemble the sculpture again, this time with all of the pieces in order. It is definitely a two-person job assembling invisible. My mom was holding up the spine, as I started to string each layer and lock it into place on the spine. One by one we started adding in the vertical supports, as we would squeeze the whole sculpture to keep the pieces in place. Once we got to the chest piece though, we ran into a problem because there wasn’t enough support to hold it up. I missed this on my cardboard model because the cardboard was so light it didn’t really need much support. Luckily this wasn’t a difficult fix, I just needed to add a notch in two of the vertical supports, and then it could notch into the slot for the holes.

    Wanting to salvage the acrylic supports we already had, we tried to cut the notch by hand, which was not an easy thing. We got our Exact-o Knife out and tried to saw through the acrylic, which didn’t work so well. We then started heating up the Exact-o in a candle and melting through the acrylic, which worked better. It was a very long process cutting the corner notch out of the acrylic. Once we finally got it cut, it did not look pretty so we had to sand down the edges. In the end it didn’t look that bad, but it didn’t look laser cut, and ultimately it didn’t fit in the apple store vibe of the sculpture.

    Nonetheless, we put the supports back in the sculpture to see if it would support the chest piece, and it worked just fine. I then went on the computer and added the notch to the design, so that I could re-cut the piece when I got the chance. I decided I didn’t want to glue the sculpture together at this time and wanted to wait for the new laser cut pieces. We moved the sculpture over to a safe place. Just as I was moving the extra pieces of the sculpture over to that same area, I must of bumped something, and the entire sculpture came tumbling down. The chest piece slid out and caused a chain reaction, and all of Invisible went down hard. It was devastating. The entire sculpture was on top of me. I decided that was enough work for one day, piled up the pieces, and walked away.

  • Chest Plate Version Two

    Kate Reed06/23/2016 at 21:52 0 comments

    After taking a step back and looking at the chest plate design for Invisible, I realized that it didn’t quite match the rest of the sculpture. As a whole, the sculpture has a very sleek look; all the angles match and it is very linear. When I put the organic chest plate on top of the sculpture, it just didn’t seem to pop. The chest plate I designed was fluid and natural in feeling, and the design of the sculpture was more of an apple store feel.

    I decided to completely start over with the chest plate design. After looking at some clear acrylic, I realized that it was almost too clear, and I wanted a textured chest plate to give it some dimension. I started to think about how I could add some texture using only a laser cutter and clear acrylic.

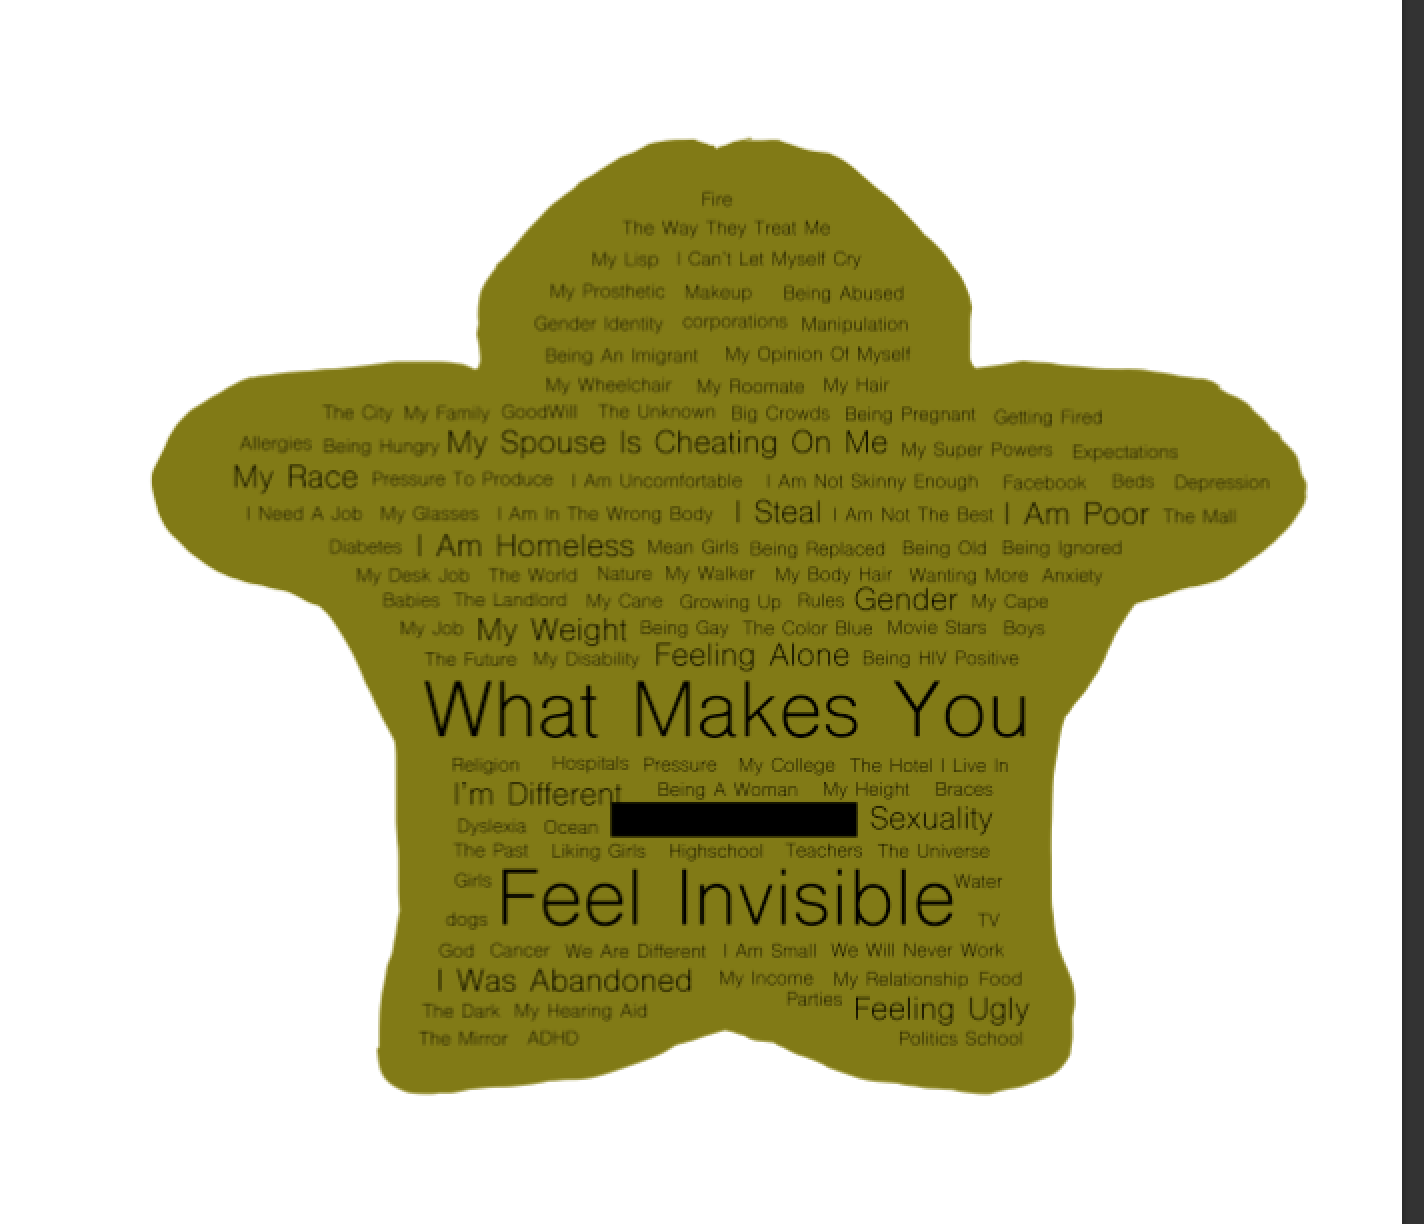
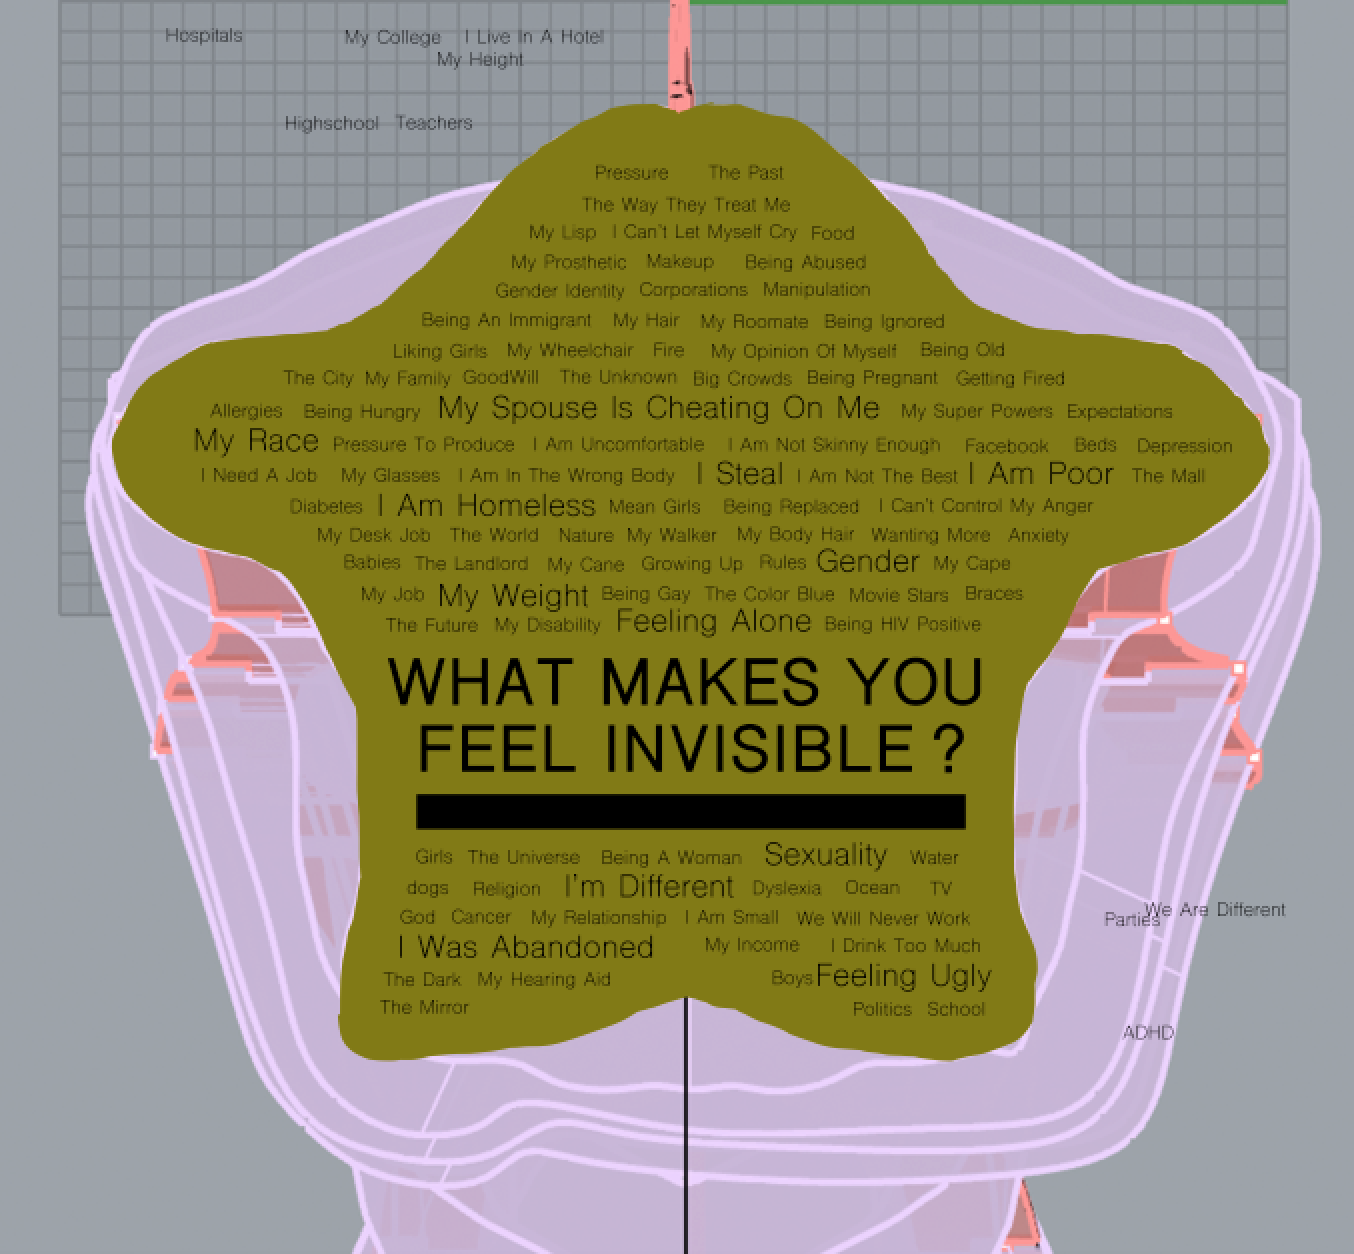
    The laser cutter turns clear acrylic white when it is engraved. How are the word examples going to be able to be seen above the texture if everything is going to be engraved white? I briefly thought about engraving then filling in the engraved areas with a colored material, but that started becoming much too complicated.

    I then thought that if the problem is making the texture distinguishable from the words, why don’t I just make the texture the actual words? I started looking at word clouds and word cloud generators that create masses of words in a beautiful way. Instead of using a computer generated word cloud, I decided to make one myself.

    I went into Photoshop and started thinking of as many invisible examples as I could. I asked everyone around me what made them feel invisible, so I could get as many real answers as I could. Then I started arranging the answers on the chest plate so that they would all fit evenly. I put answers that came up more than once in a bigger font. My goal was to make this chest plate version for Invisible very angular.

    Once I had my word texture made, I had to rethink the slot where people would put their answers in. I first had the slot placement in the middle of the question, “What makes you feel invisible?” but after feedback from my community, I decided that I should move the slot underneath so that it felt more connected. I also decided to make the slot really long, because it looked better graphically. In this version, I added a question mark on it just to make the spacing work out better.

    With the chest piece design complete, I moved it from Photoshop into Illustrator, and then into Rhino and started preparing the acrylic to be etched.

  • Cardboard Model

    Kate Reed06/23/2016 at 21:49 0 comments

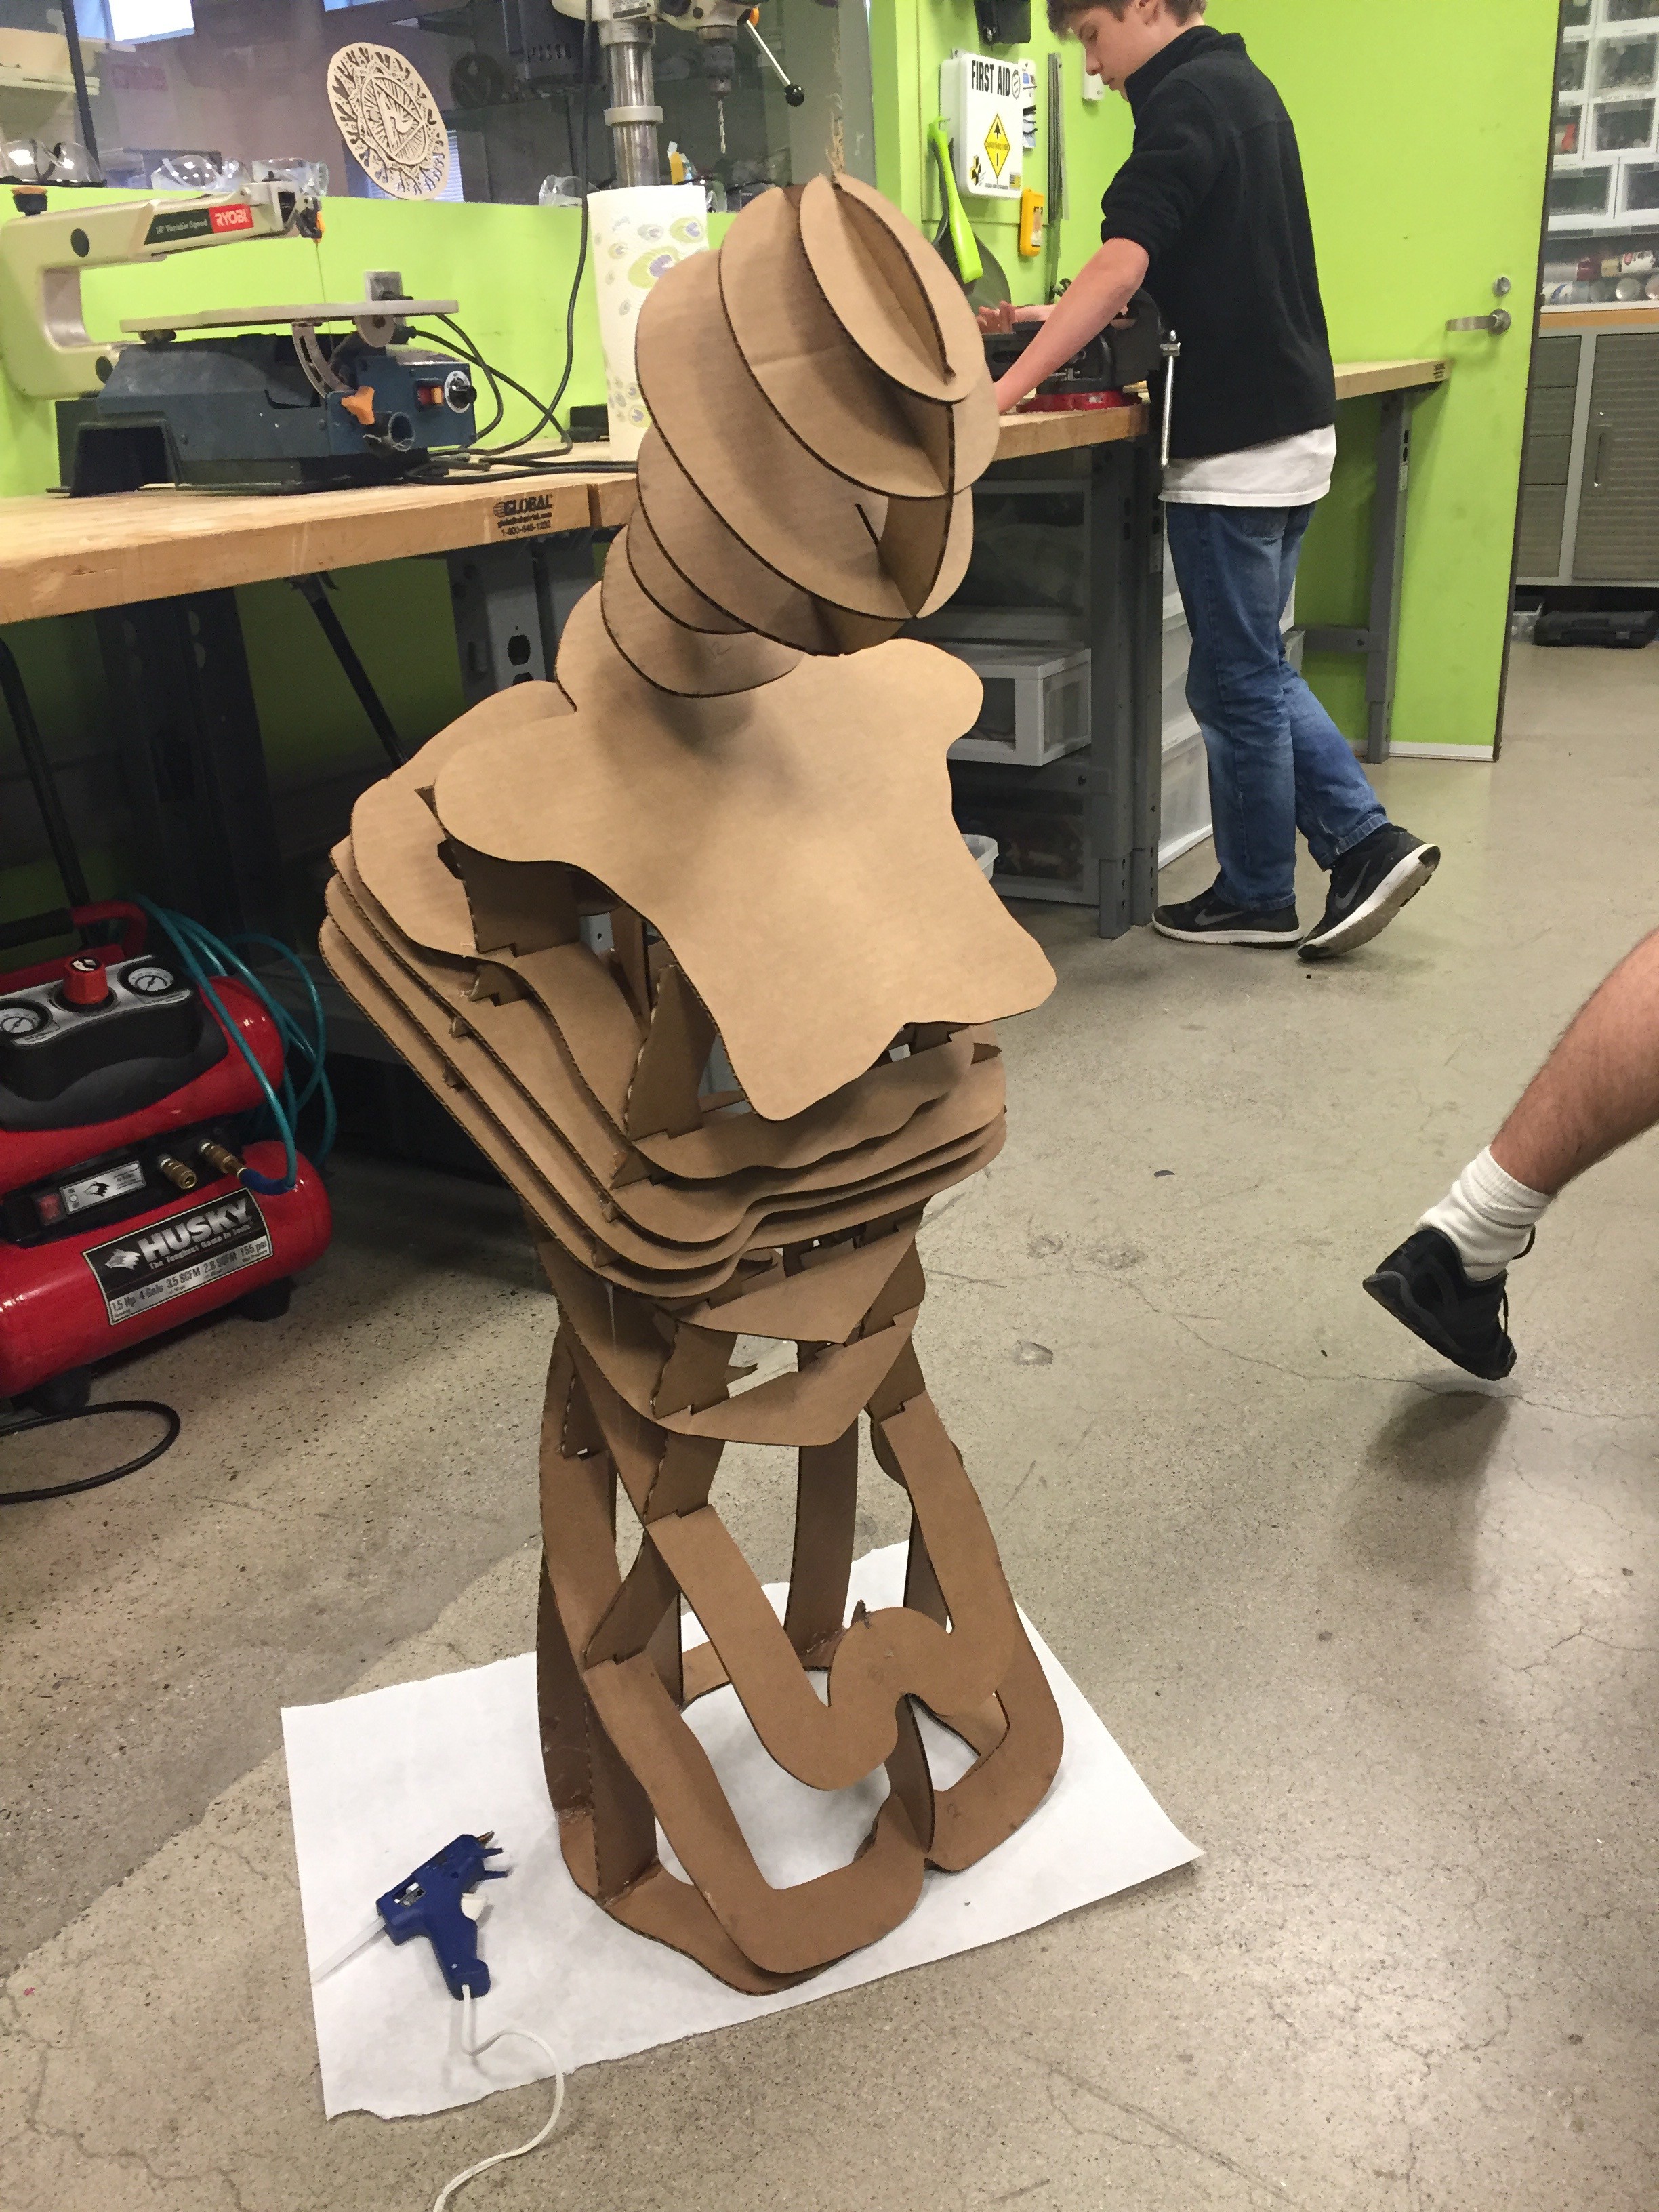
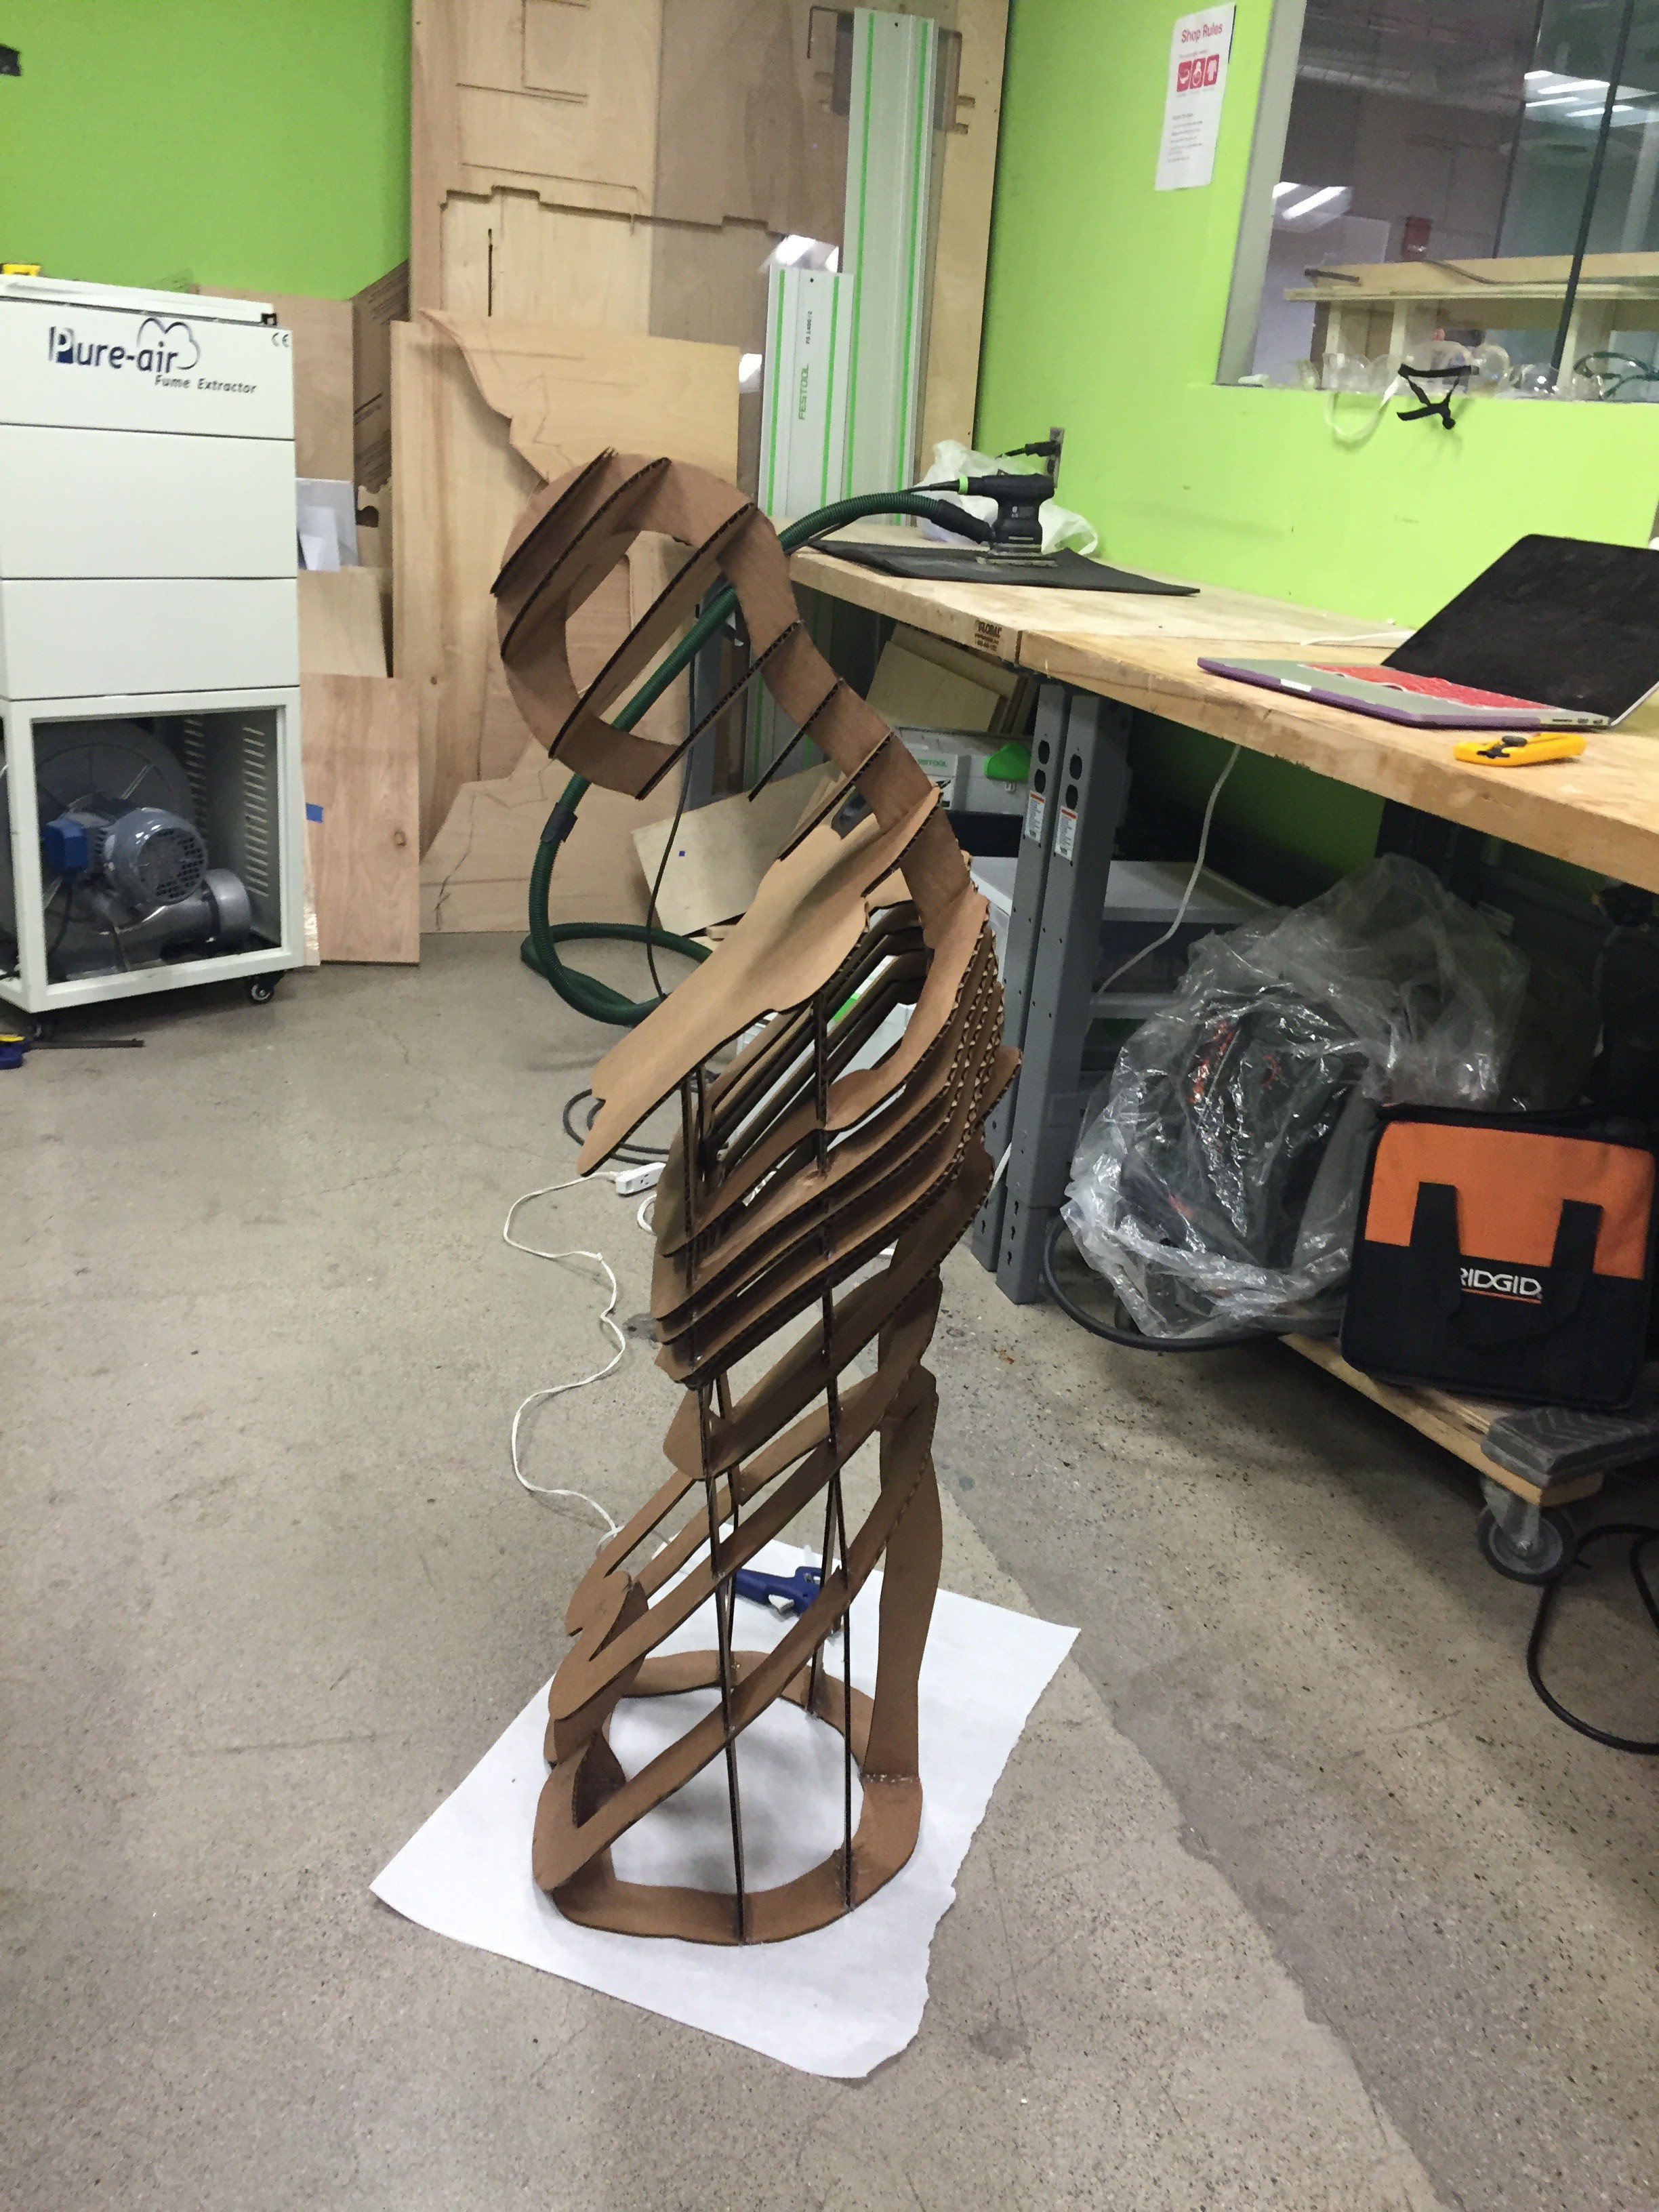
    Once I felt like I had my design for Invisible all squared out, I decided to cut a cardboard model first, just to be safe. I was nervous about cutting the acrylic because it’s so expensive, and thank goodness I waited! I learned a lot while assembling the cardboard model.

    For my first step in assembling, I started gluing the supports to the base piece of Invisible, then tried to hook each of the layers into the supports. I quickly realized that this was not going to work. Each layer was a different size and each layer was supposed to lock into place, and because of this it was impossible to add any layer on while the vertical supports were glued in place. I l figured out that I needed to put all the layers on one of the vertical supports, then add the vertical supports one at a time. It was very stressful because each time I had to add a vertical support, the process of getting it in the right place would pull the other supports out of line. I ended up enlisting an extra set of hands for holding pieces in place.

    After 45 minutes of ripped cardboard, glue gunning and stress, I finally had the cardboard model finished. All of the pieces fit together just as I expected them too. However, I did notice that when I went to show it off, as soon as I sat the sculpture down, the head started to wobble. It became clear that the head was too fragile and needed some supports. I designed some head supports, and switched out the wobbly parts. I also added a support between the legs, which really helped the structure stand up.

    With the cardboard model made, it was clear that the more vertical supports I could have, the better.

  • The Chest Plate

    Kate Reed05/21/2016 at 03:57 0 comments

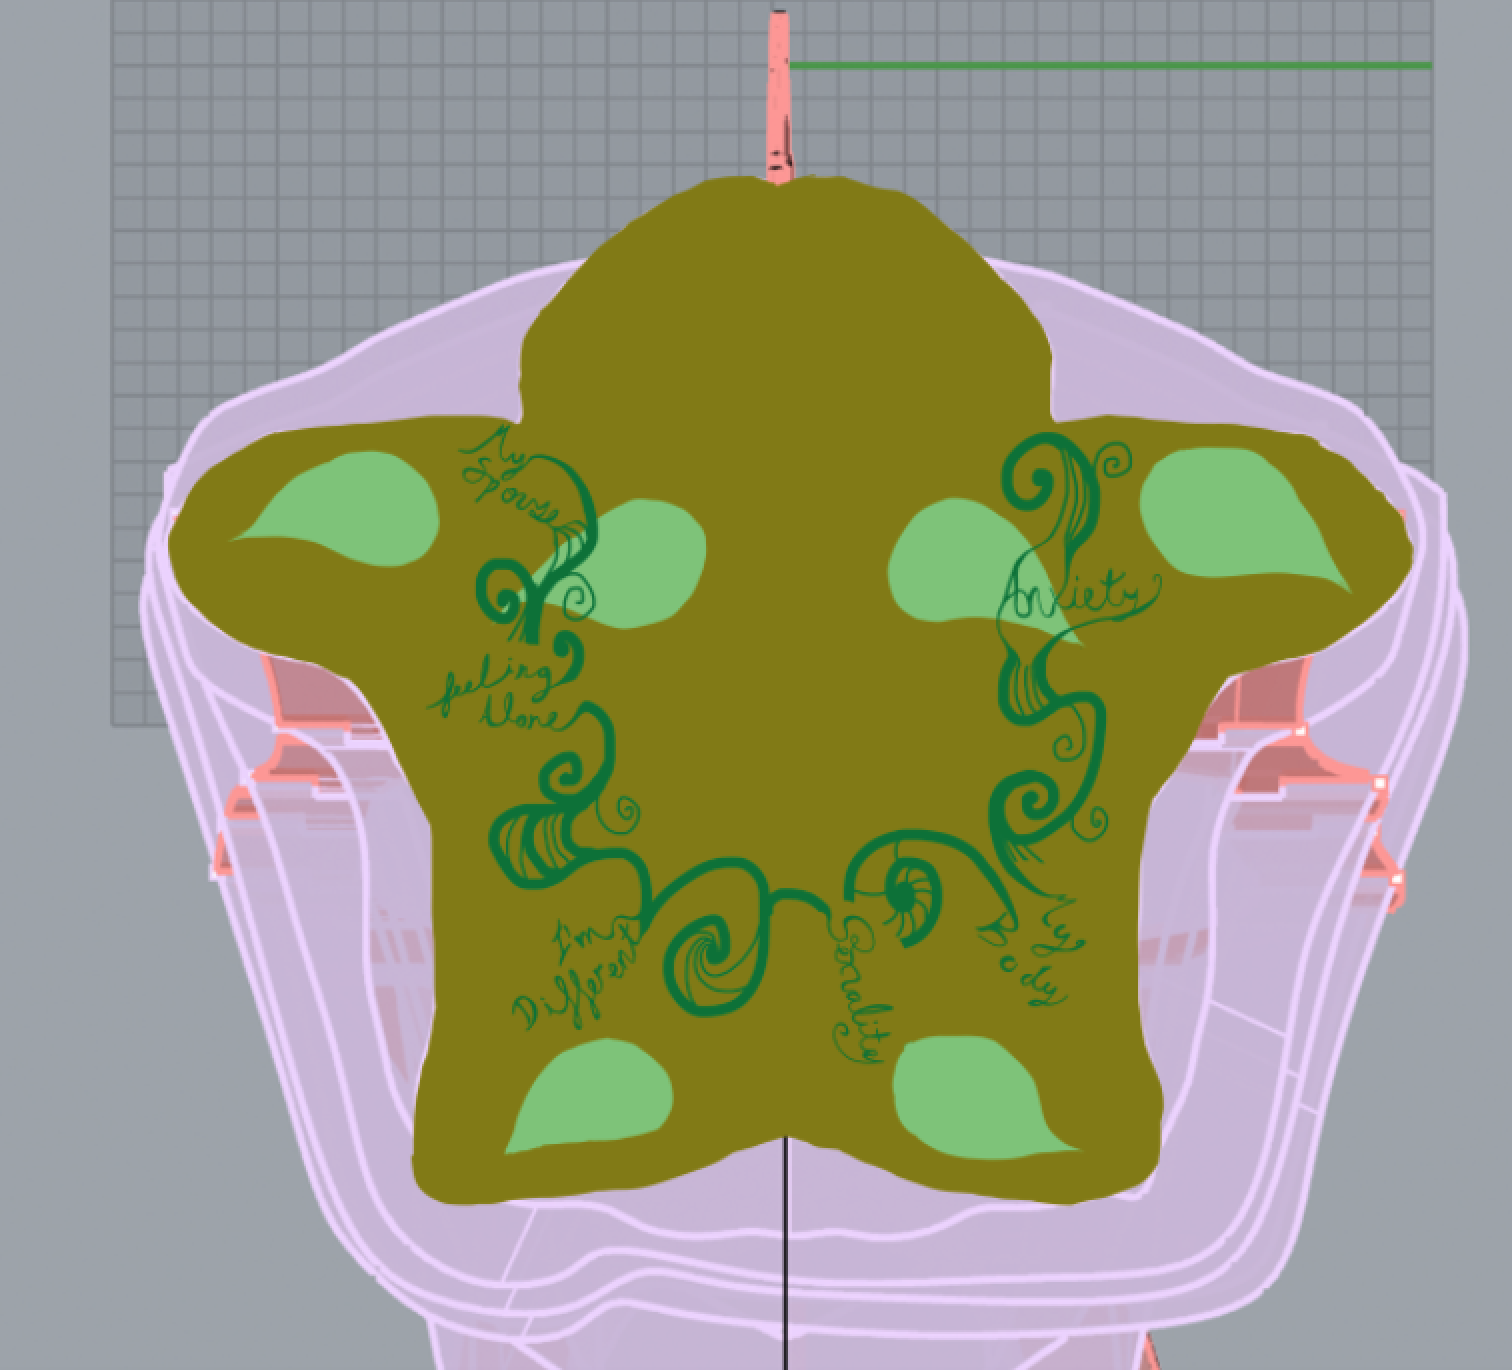
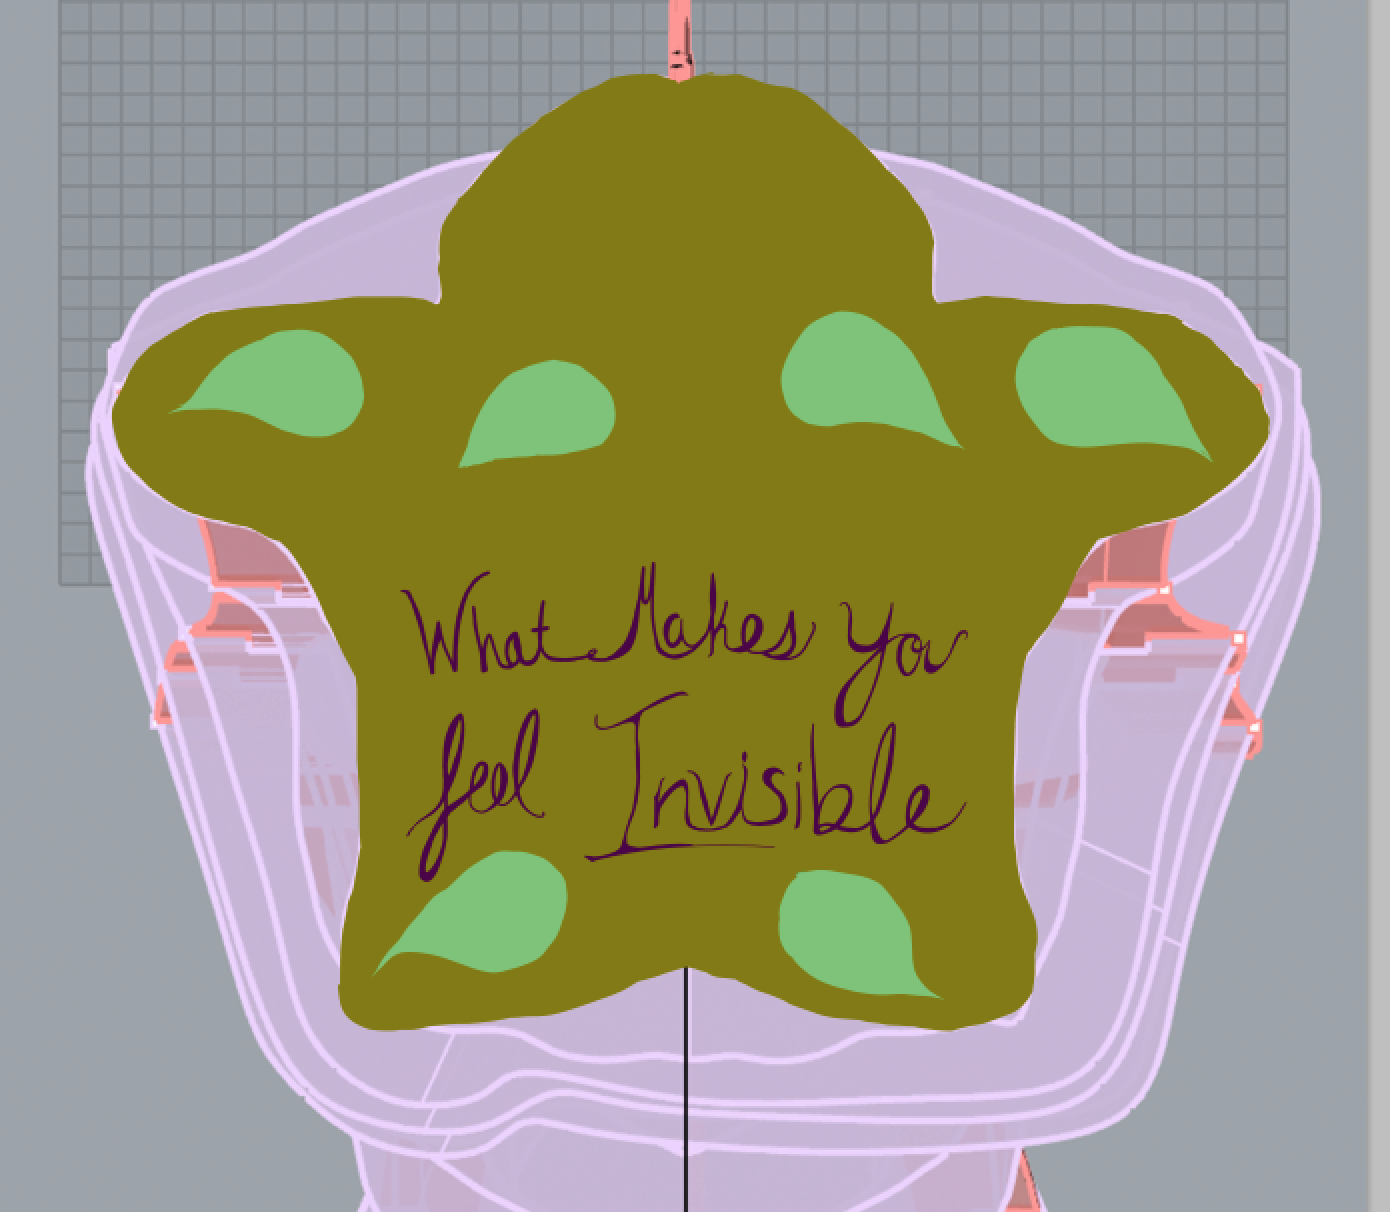
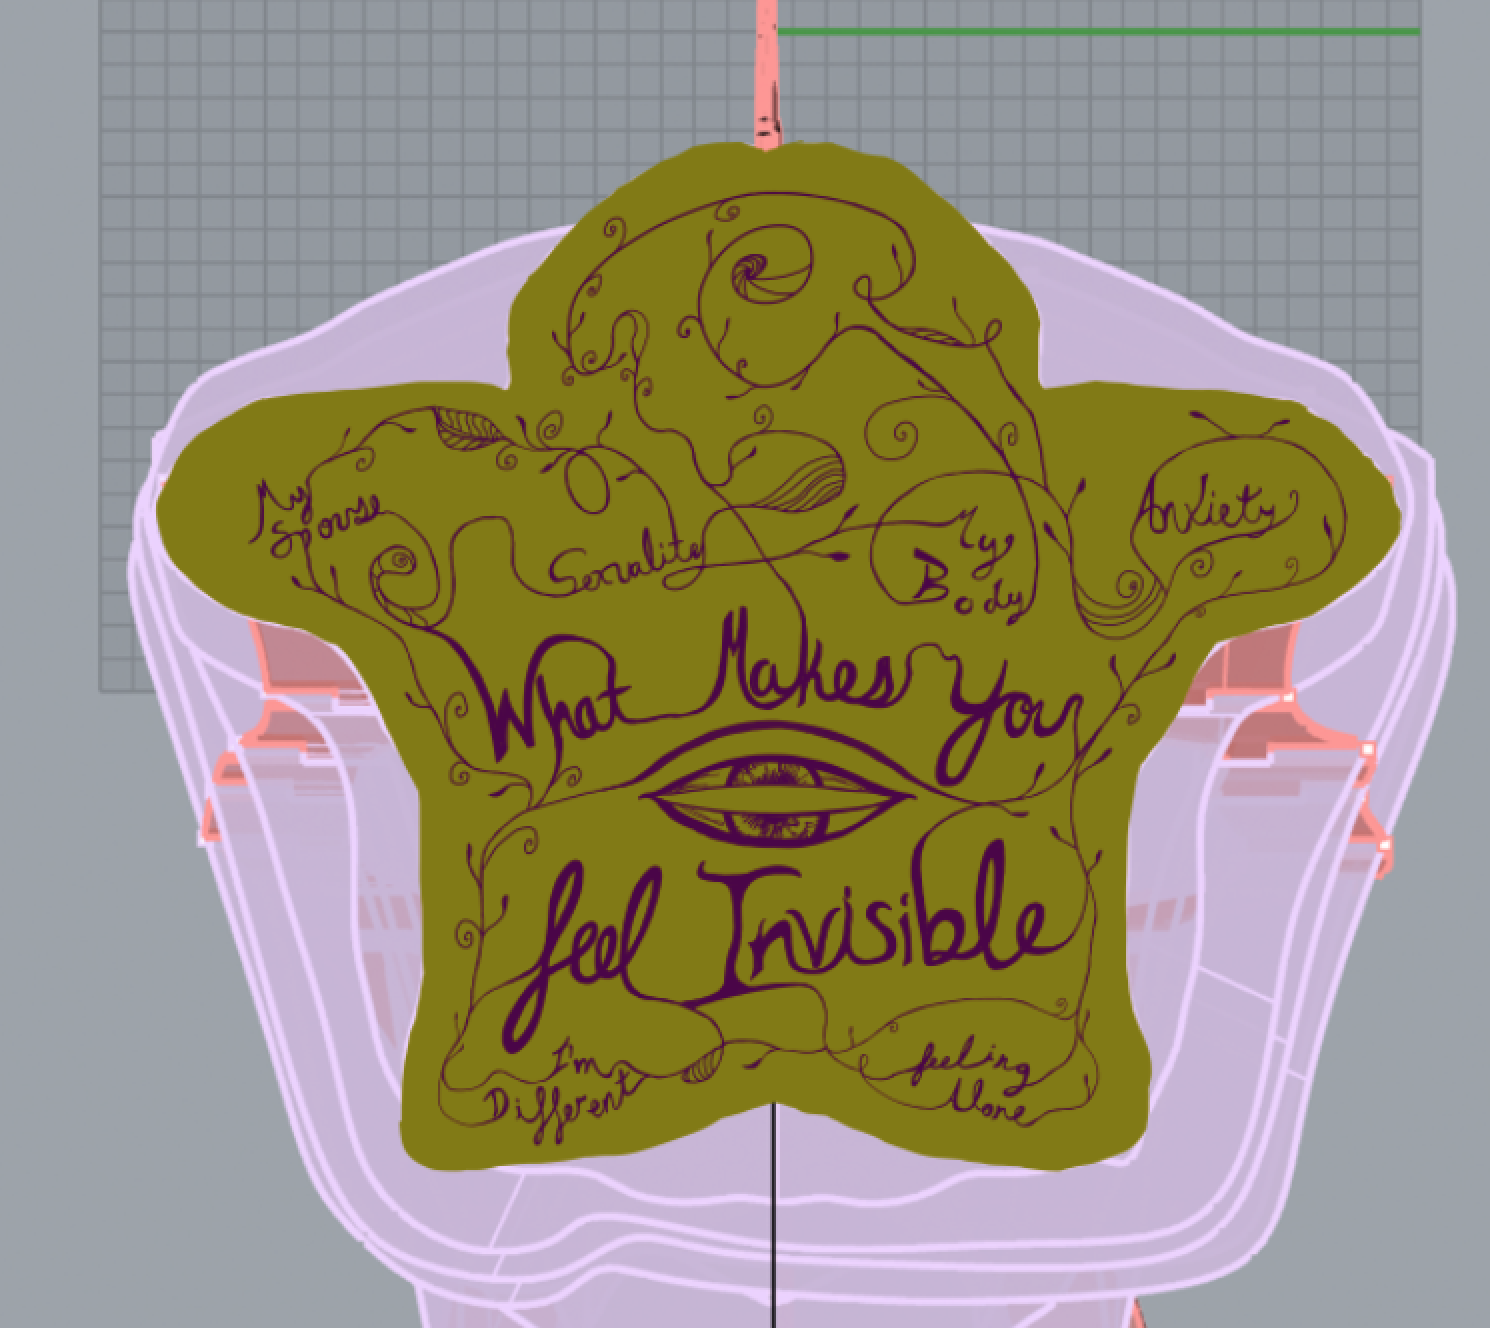
    Once the piece was visually and structurally sound, it was time to design the chest plate. The chest plate is where people are actually going to put in their notes, and it is the part of the sculpture that pulls people in. I was first thinking of having text asking, “What makes you feel invisible?” The text would be surrounded by vines and leaves, and written in the leaves and vines would be example answers that people have given. Once I made that version, it didn’t look as good as I thought it would. I realized that the text might get lost under the head of the sculpture.

    For my next iteration I decided to move the text down to the outer most point, to make sure that it will be readable. I decided that I wanted to go with flowing cursive writing so it will mesh with the vines nicely. There is also something about the cursive writing that plays towards your soul. It is a very intimate font.

    I decided to ditch the leaves. There really isn’t enough space on the chest plate to have the words and the leaves and it’s hard to know where to look with your eyes. It’s too busy. I toned down the line weight on the vines and I beefed up the line weight of the text to try to make it more clear where to look. I finagled the white space around the edges, and tried to get the vines to be as consistent as possible. I tested the design by etching into a plywood sheet to see if it was readable. There are a few changes I want to make, but it looks quite lovely, if I do say so myself.

  • ​Enhancing the Body

    Kate Reed05/21/2016 at 03:55 0 comments

    Once I had the basic form of the body from the manikin, I started to edit and enhance it. The file looks a lot like a manikin, which makes sense, as it is a manikin. I want it to look like a more human form though, so I want to add arms. I thought a lot about the position of the arms, and how they would effect the vibe of the piece. If I had the arms hanging straight down, it would take away the beautiful curve of the body, and turn it into a rectangle once it was plastic wrapped. I didn’t want the arms to be folded over the chest because I needed that space to put the text. I decided that if the arms were in a cradling position it would be best. This idea is like the form cradling itself, reflecting inward.

    Once I got through all the crazy technical work of adding arms, the form looked like a bust, and not a human, so I decided to add legs. I didn’t want the form to be standing up, because I knew that that would just become a nightmare to balance and assemble. Thinking about the structure, I wanted to play it safe, and keep the figure close to the ground, this way it is much easier to make it structurally sound. I decided to make the form kneeling, this way it connects back to the homeless theme.

    Once I got through the crazy technical work of making the legs, I added a head. The head was very tricky, because it was a balance between what looked good and leaving enough room so someone could put their hand there to put the note in the chest. After a lot of finagling to get the perfect angle, I went through all the crazy Rhino work to make it a reality. I added some slanted pieces that would sit on top of the spine piece to create the dimension of the head. It is hard to get the slanted pieces to attach to the head. They cannot slide in the way the other pieces do because they need to attach both at the front of the head and the back. After a lot of thought of cutting the pieces in two, or making large slits in the pieces we decided that it would be best to slide the slits up from the bottom.

    Once the form was complete visually, I had to revamp the support pieces so that it could accommodate the new shapes. The knees shoot out a lot, so I had to add another side support. I don’t mind the extra side support, but I don’t need it. I haven’t decided visually yet if I want both supports or just one.

  • Designing In Rhino

    Kate Reed04/18/2016 at 16:08 0 comments

    After making the bottle-shaped iteration, I realized that it was possibly the ugliest sculpture on the planet. I decided that the more human-looking iteration was a much better direction, and I began to expand upon that one.

    The human looking iteration is the one based off of a laser cut cardboard manikin that I downloaded from Autodesk. The original manikin is constructed out of slanted cardboard, giving it a really nice feel. I wanted to keep the slanted cardboard for my invisible person because it provides a really nice chest plate that could be beautifully cut for the heart opening. I moved that 3D model into Rhino and started making it my own. It was a nightmare.

    The file had already been sliced in 123D Make and was sliced for material that was twice as big as the material I was planning on using. I thinned out the number of cardboard layers, and chose a select few to be the frame for the plastic wrap. Then I completely recalibrated those surfaces in Rhino.

    Because I had taken the original Autodesk file completely apart in Rhino, I then had to figure out how the frame would stay together and stand up. If the pieces weren’t slanted this would be easy, but because the pieces were slanted, I had to create a custom spine. There were so many things wrong with the model that I easily spent ten hours working everything out, just to get the shape the way I liked it. I now have the body nearly complete and I’m starting to think about the head.

View all 13 project logs

  • 1
    Step 1

    Laser-cut the Invisible frame file out of 1/8 inch clear acrylic.

  • 2
    Step 2

    Assemble body rings onto the spine. This takes two people. Be sure to fully support the spine, and take note to get the body rings in the right order and the right side up.

  • 3
    Step 3

    Add the vertical supports- one short one in front, then the four longer ones on the insides.

View all 7 instructions

Enjoy this project?

Share

Discussions

Similar Projects

Does this project spark your interest?

Become a member to follow this project and never miss any updates