 David H Haffner Sr
-
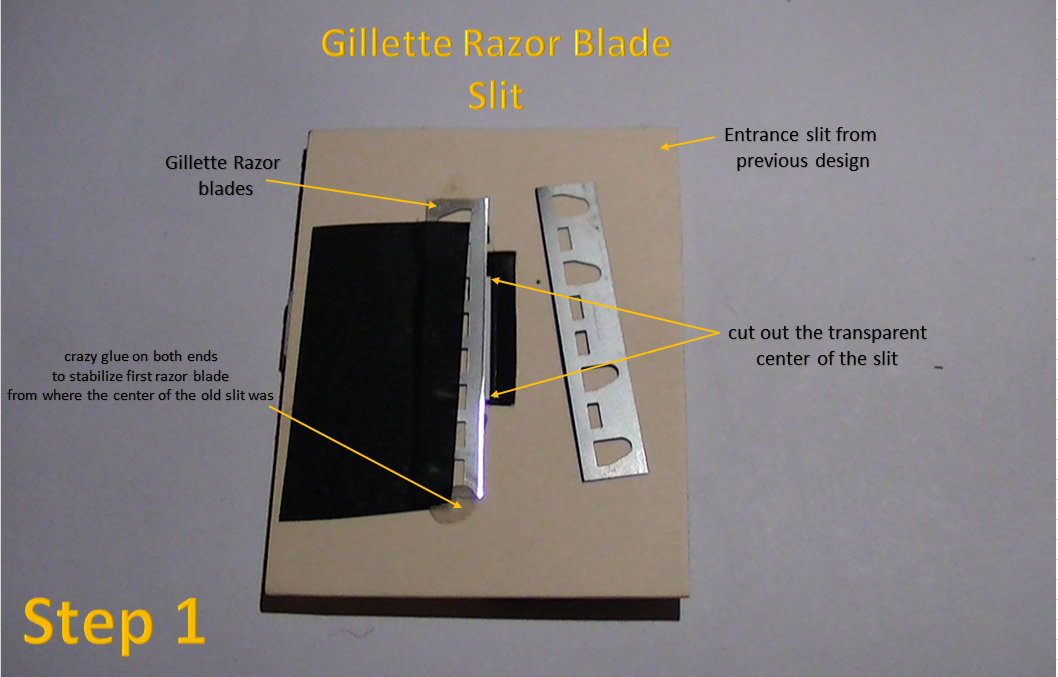
1Step 1
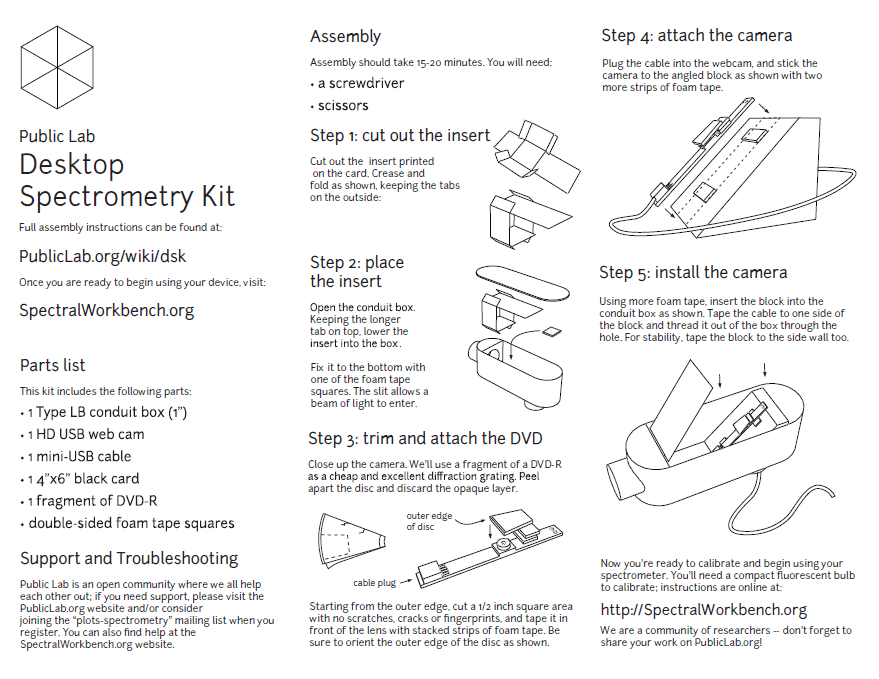
![]() These are the initial instructions for building the version 2.5 spectrometer, from these and with much pratical application and modifications the v2.5 (build 3.0.1) was born.
These are the initial instructions for building the version 2.5 spectrometer, from these and with much pratical application and modifications the v2.5 (build 3.0.1) was born. -
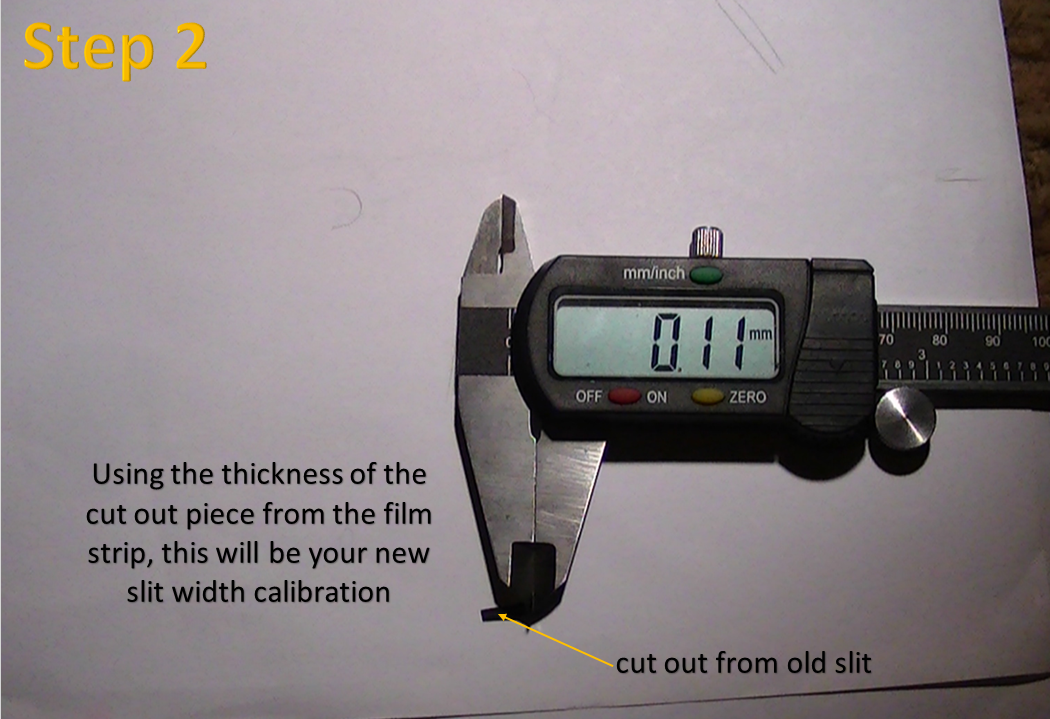
2Step 2
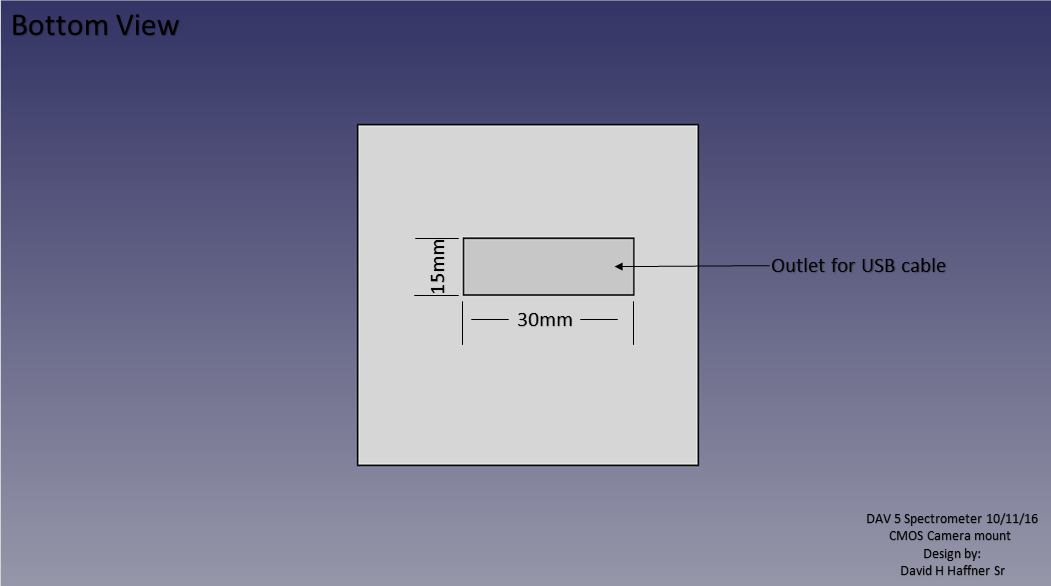
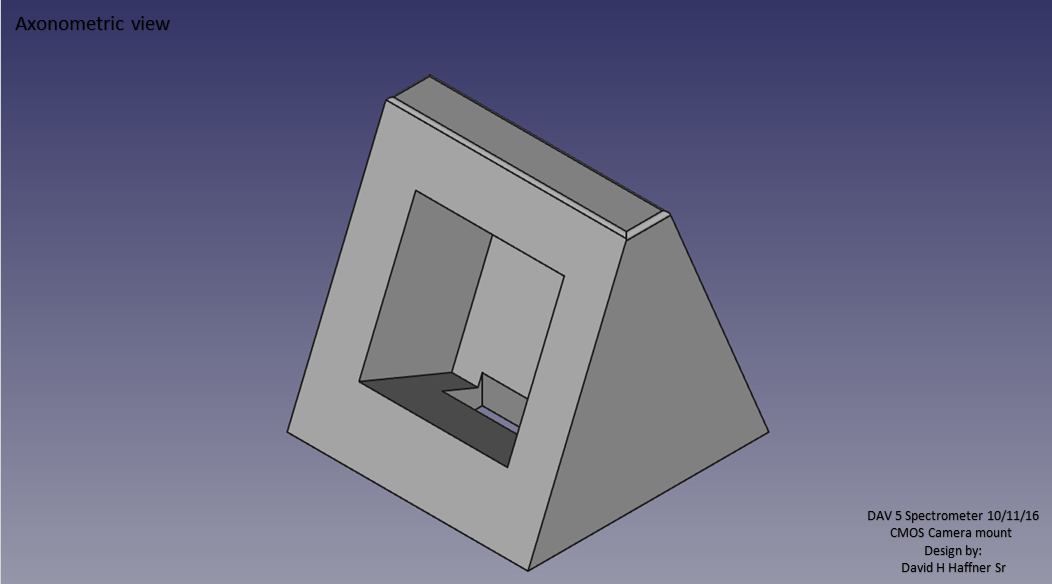
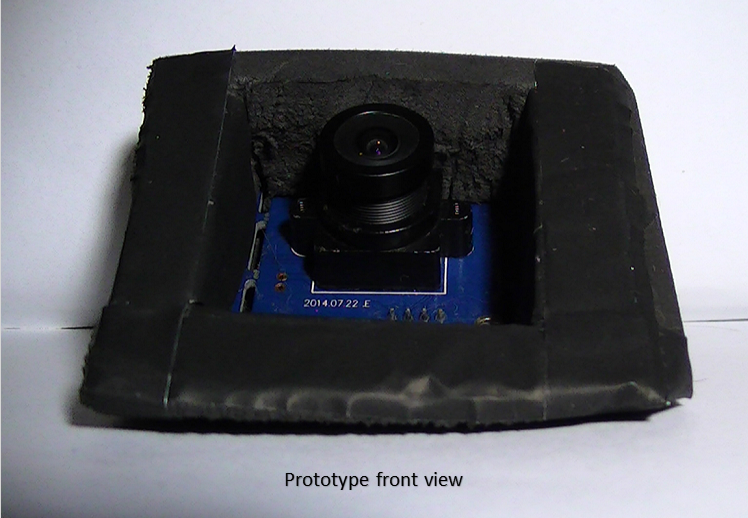
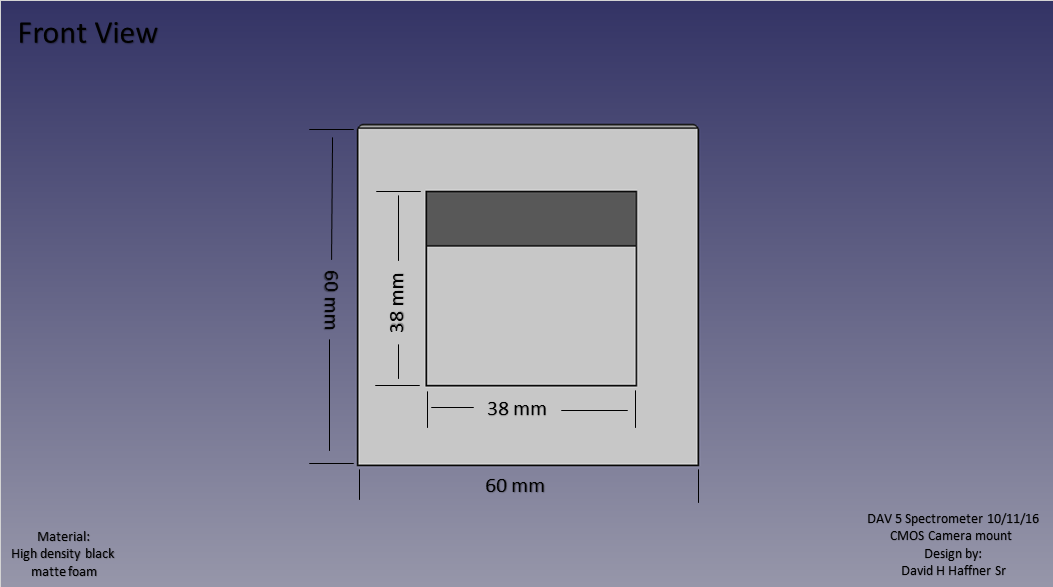
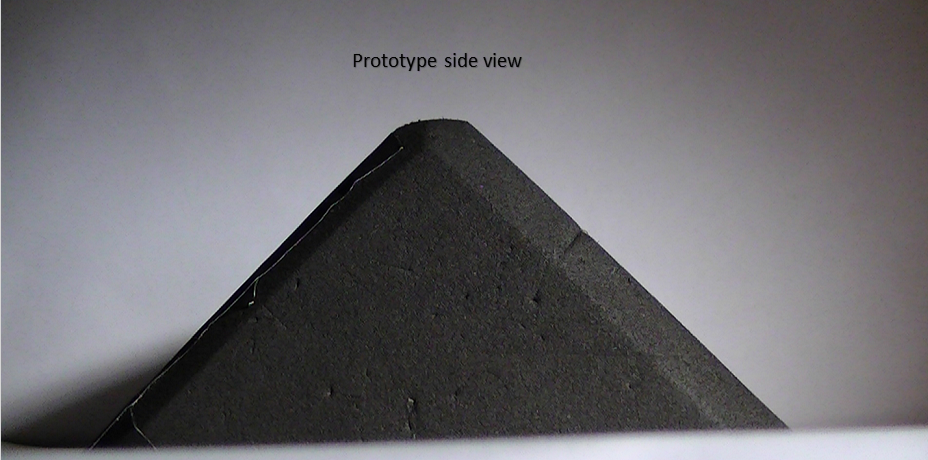
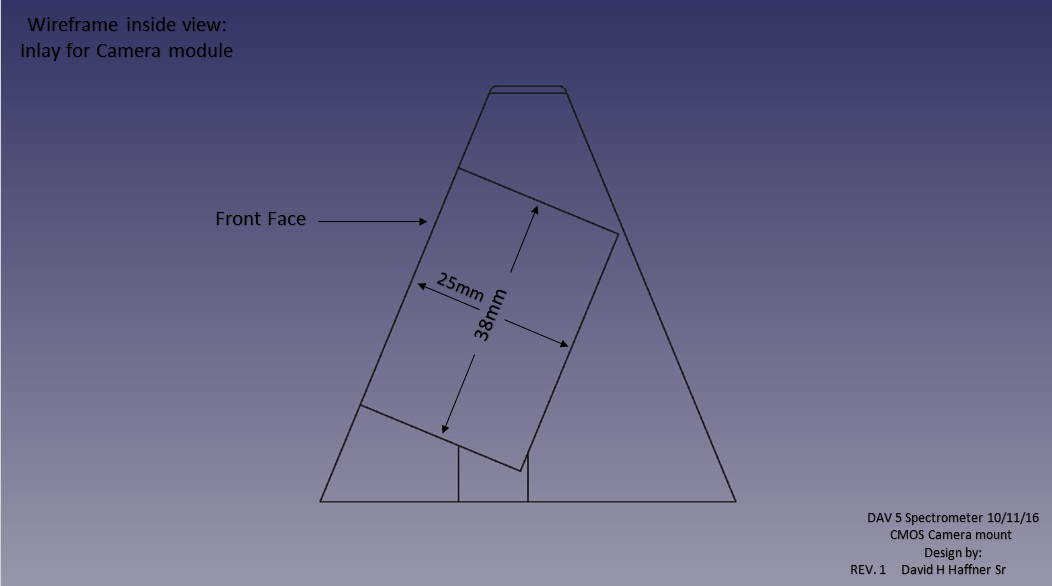
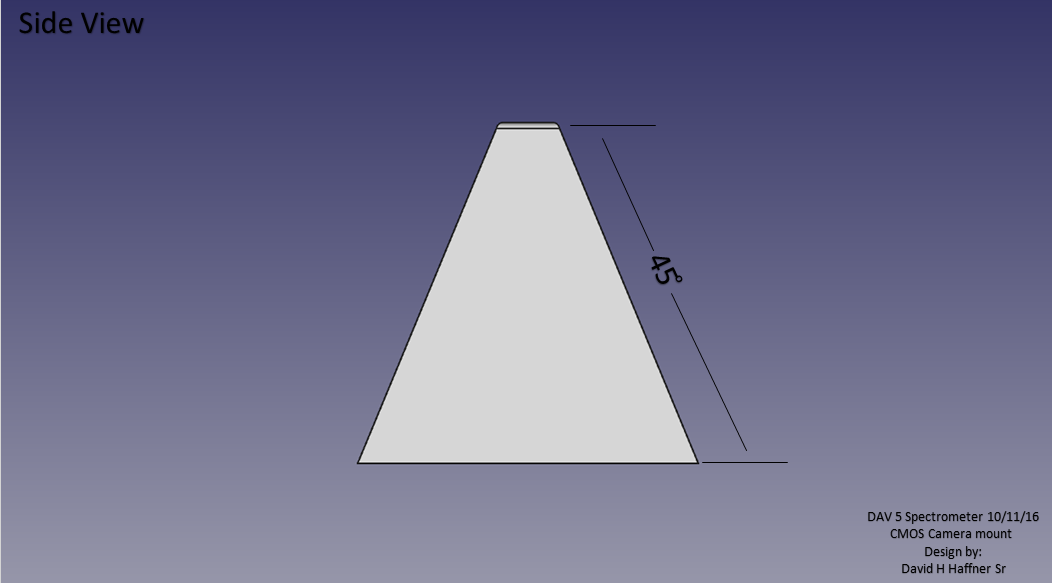
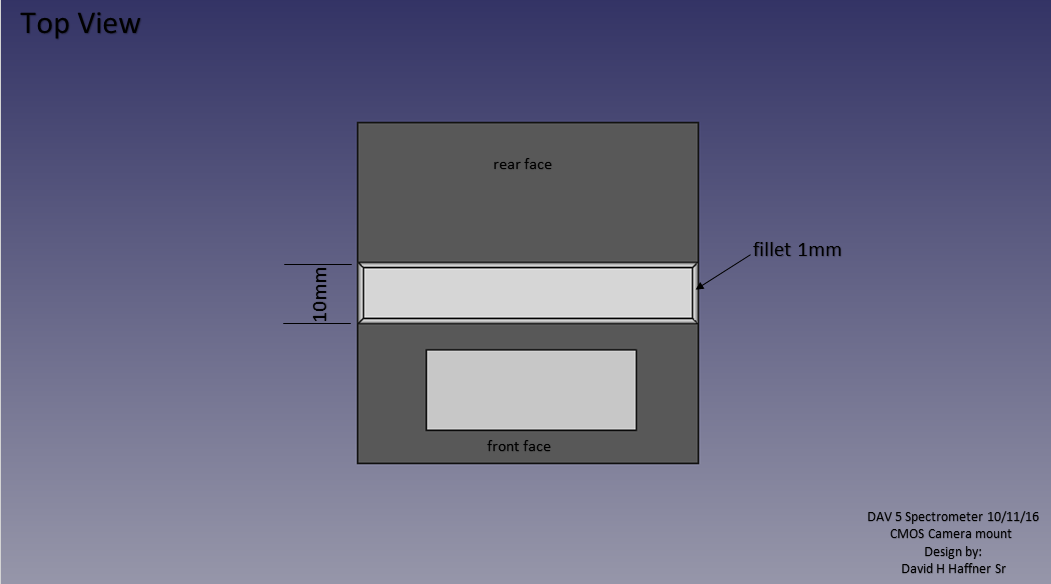
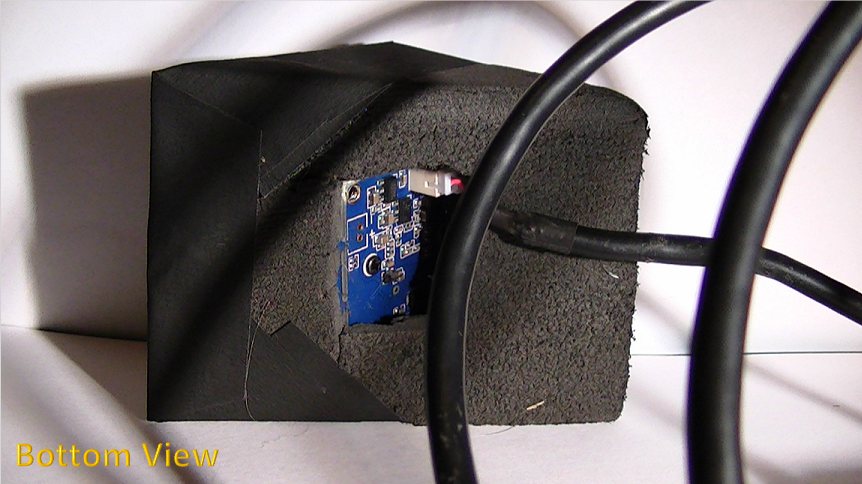
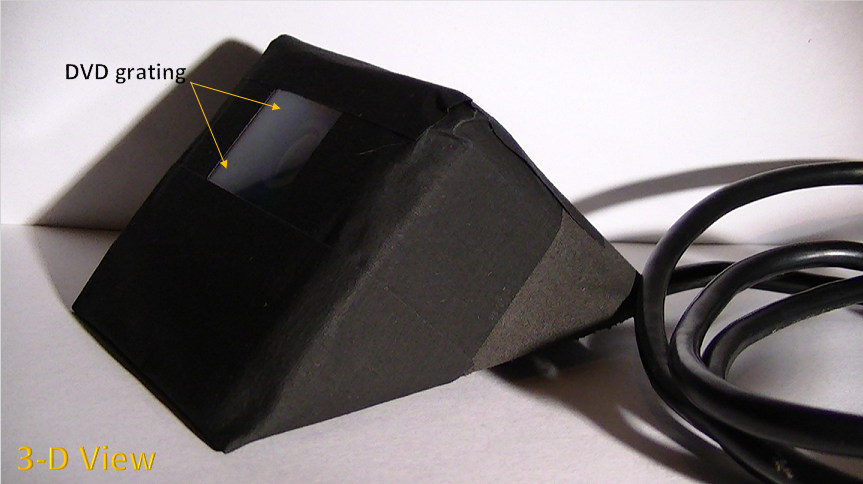
This is the new proto type CMOS Camera module mount, for the DAV 5 UV/VIS Spectrometer which I am now starting to bring back to life. I designed the camera mount using FreeCad version 0.16 and sculpted a working model out of high density matte foam.
![]()
![]()
![]()
![]()
![]()
![]()
![]()
![]()
REV.1
![]()
![]()
![]()
-
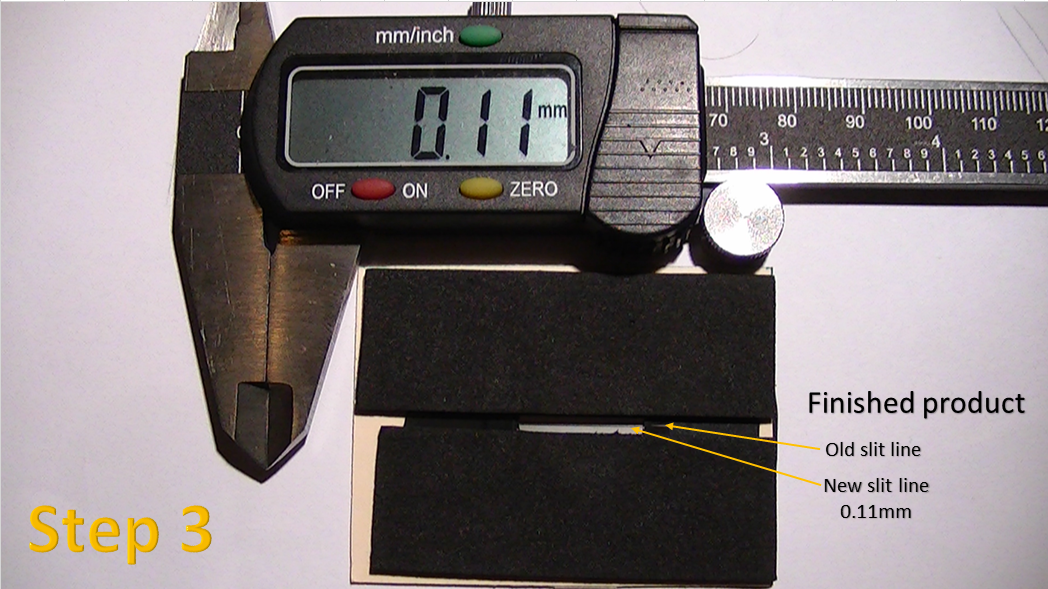
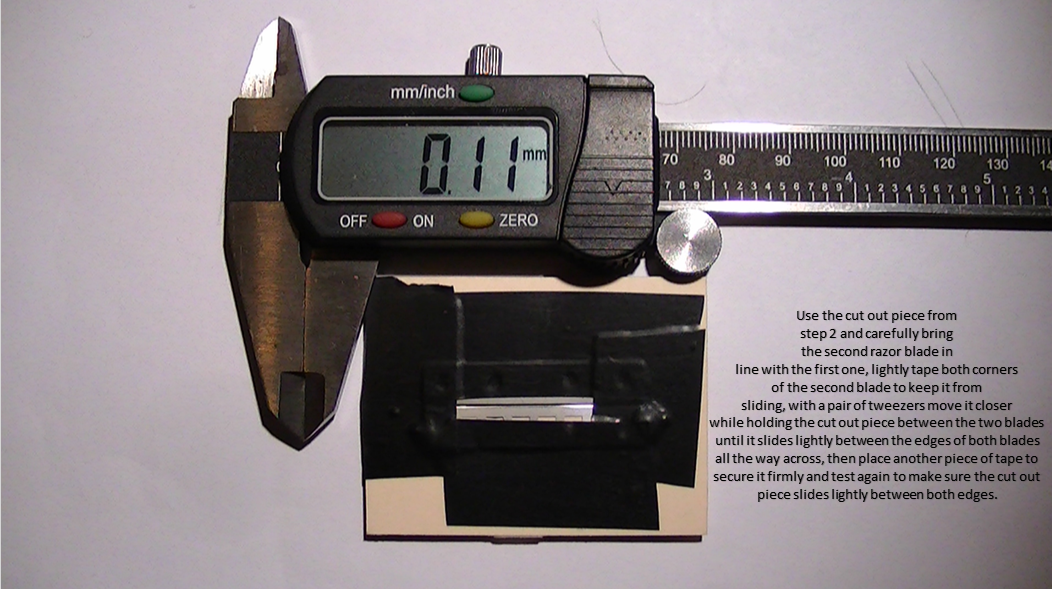
3Step 3
This is my new Gillette razor blade open-air slit design; 0.12mm slit width. Verified using my Aries DPSS 150mW 532nm Green Laser through a quartz cuvette containing 99.99% purity Isopropyl alcohol (lab grade certified.)
![]()
-
4Step 4
![]()
-
5Step 5
![]()
-
6Step 6
![]()
-
7Step 7
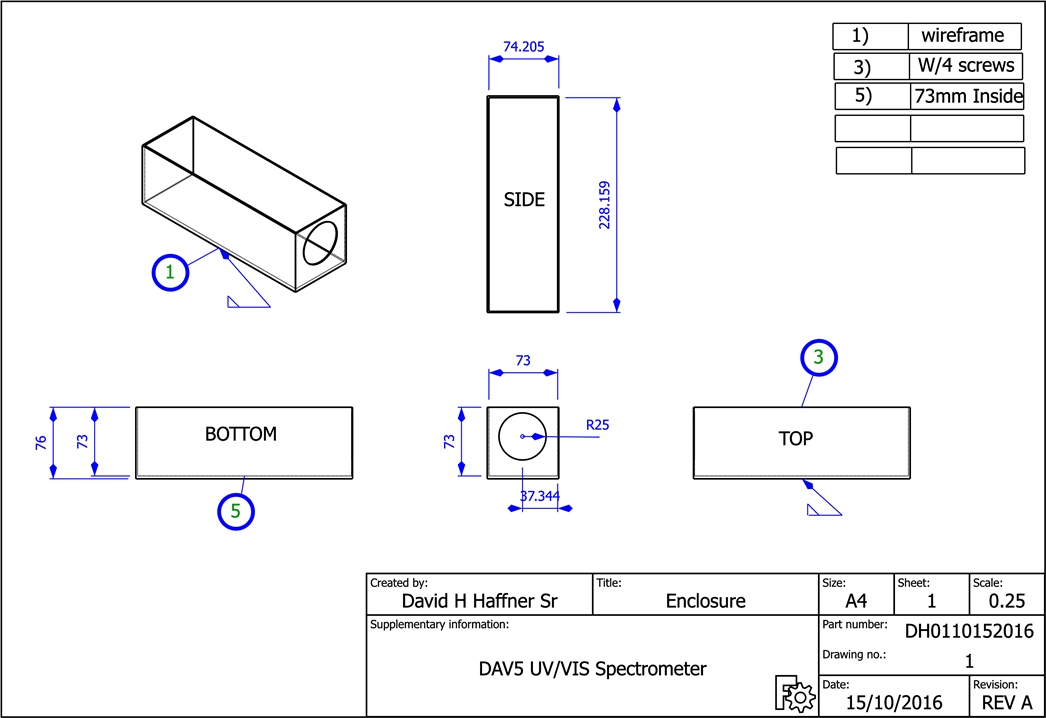
![]()
This is draft number 1 for the DAV5 spectrometer that will house all the internal parts.
-
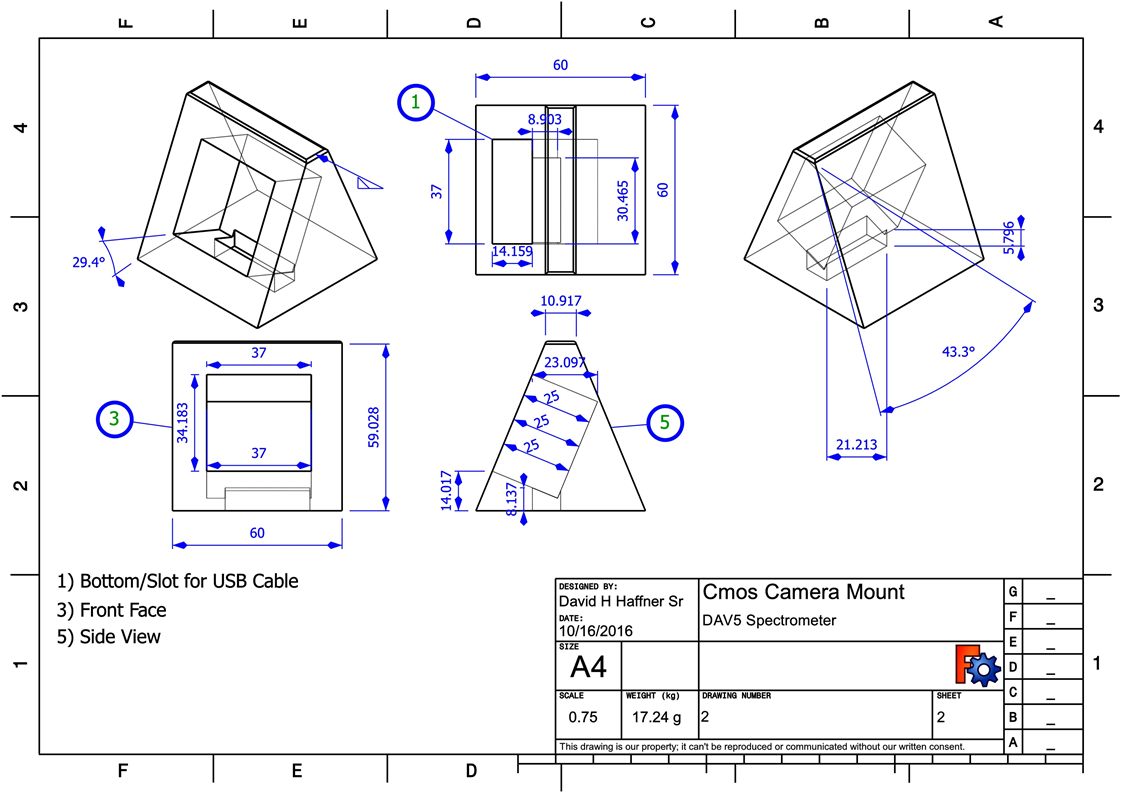
8Step 8
![]()
This is the camera mount for the ELP cmos camera for the DAV5 Spectrometer, I have built the prototype and will post the pics soon.
-
9Step 9
![]()
![]()
![]()
This is my prototype build for the ELP cmos camera for the new DAV5 spectrometer.
DAV 4 UV/VIS Spectrometer
Well, this is the next evolutionary step from when I first bought the Plab 2.5 spectrometer kit
 These are the initial instructions for building the version 2.5 spectrometer, from these and with much pratical application and modifications the v2.5 (build 3.0.1) was born.
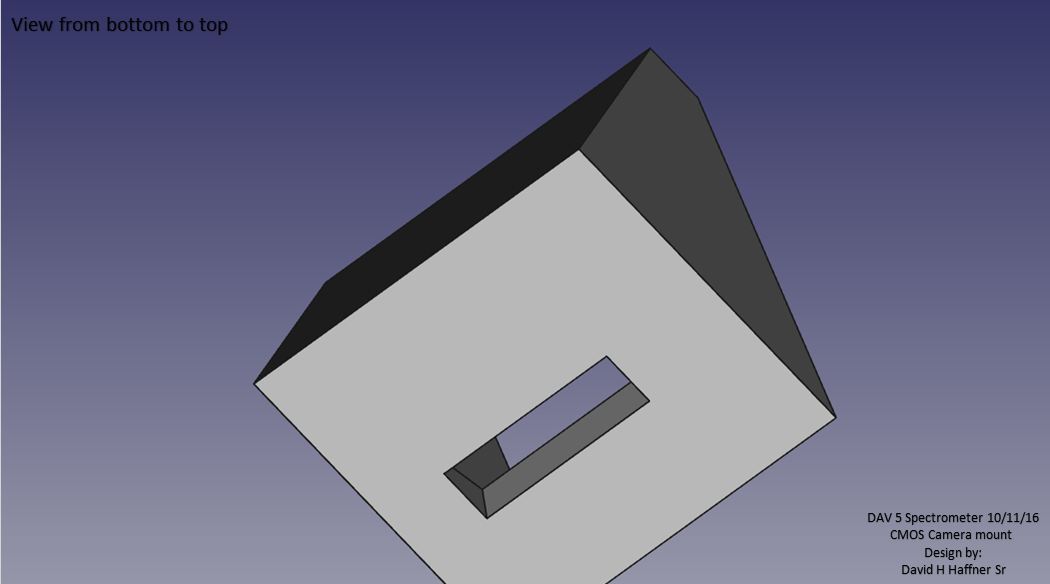


Discussions
Become a Hackaday.io Member
Create an account to leave a comment. Already have an account? Log In.