Nick Thatcher
-
Wireless Medical Data Transfer to the WEB
09/15/2014 at 19:39 • 2 comments![]()
![]()
![]()
![]()
-
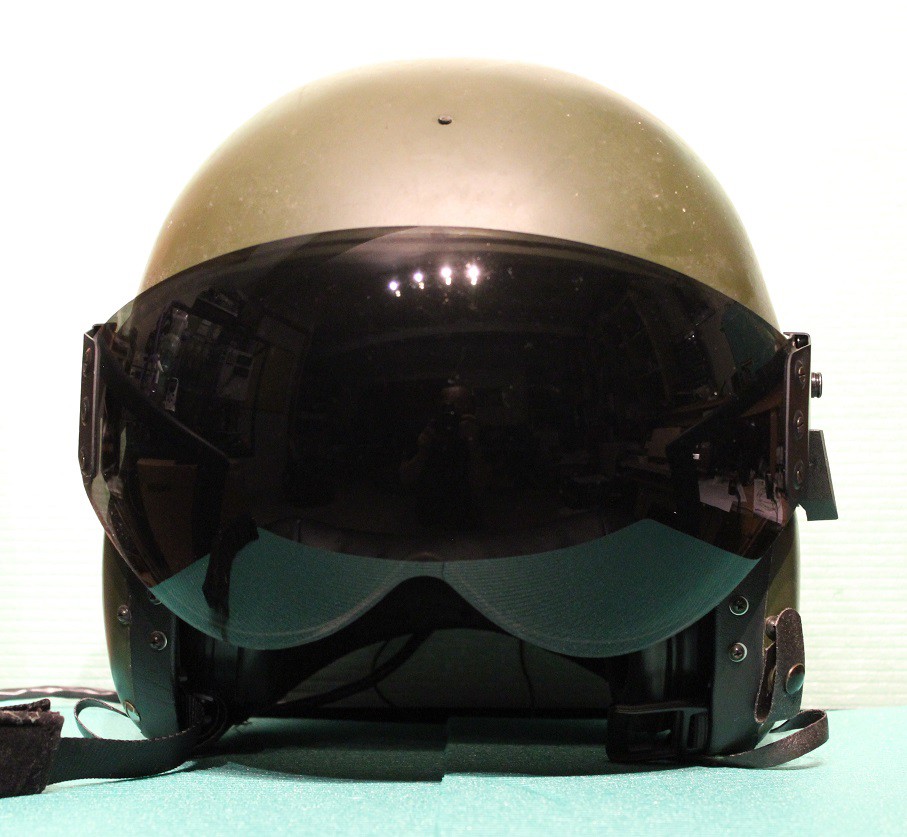
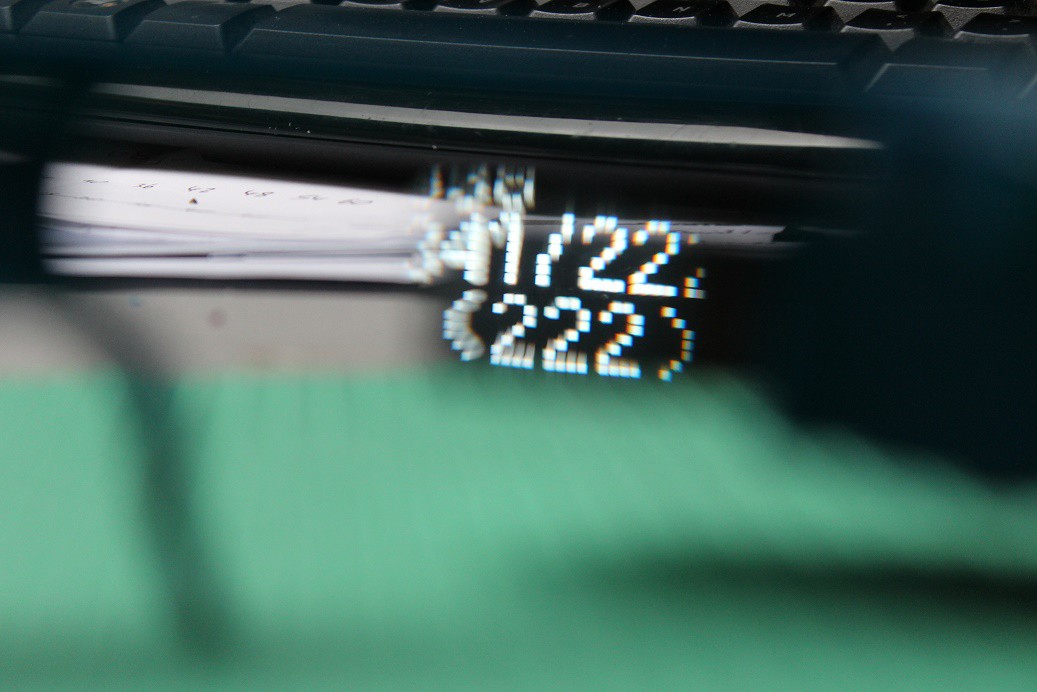
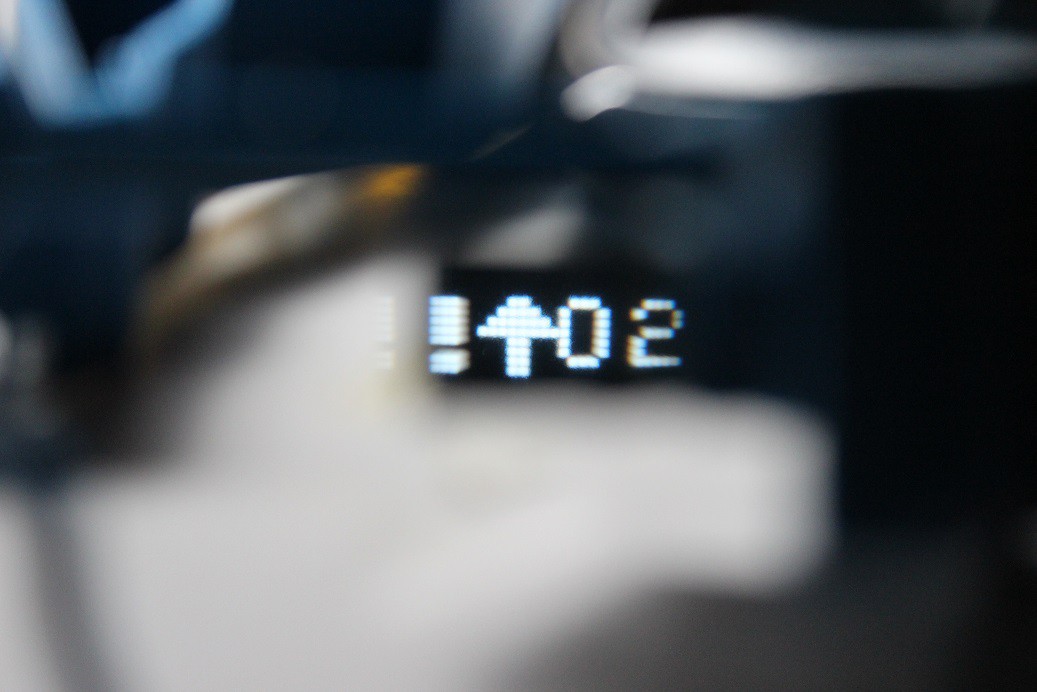
Head Mounted Display Progress!
09/15/2014 at 19:35 • 0 commentsJohn and Dave are doing a great job, to get all the aspects of the project ready for the deadline is not easy task but we are almost there, this super cool head mounted display could have been a prize entry on its own!
![]()
![]()
-
Discovery Channel - Daily Planet
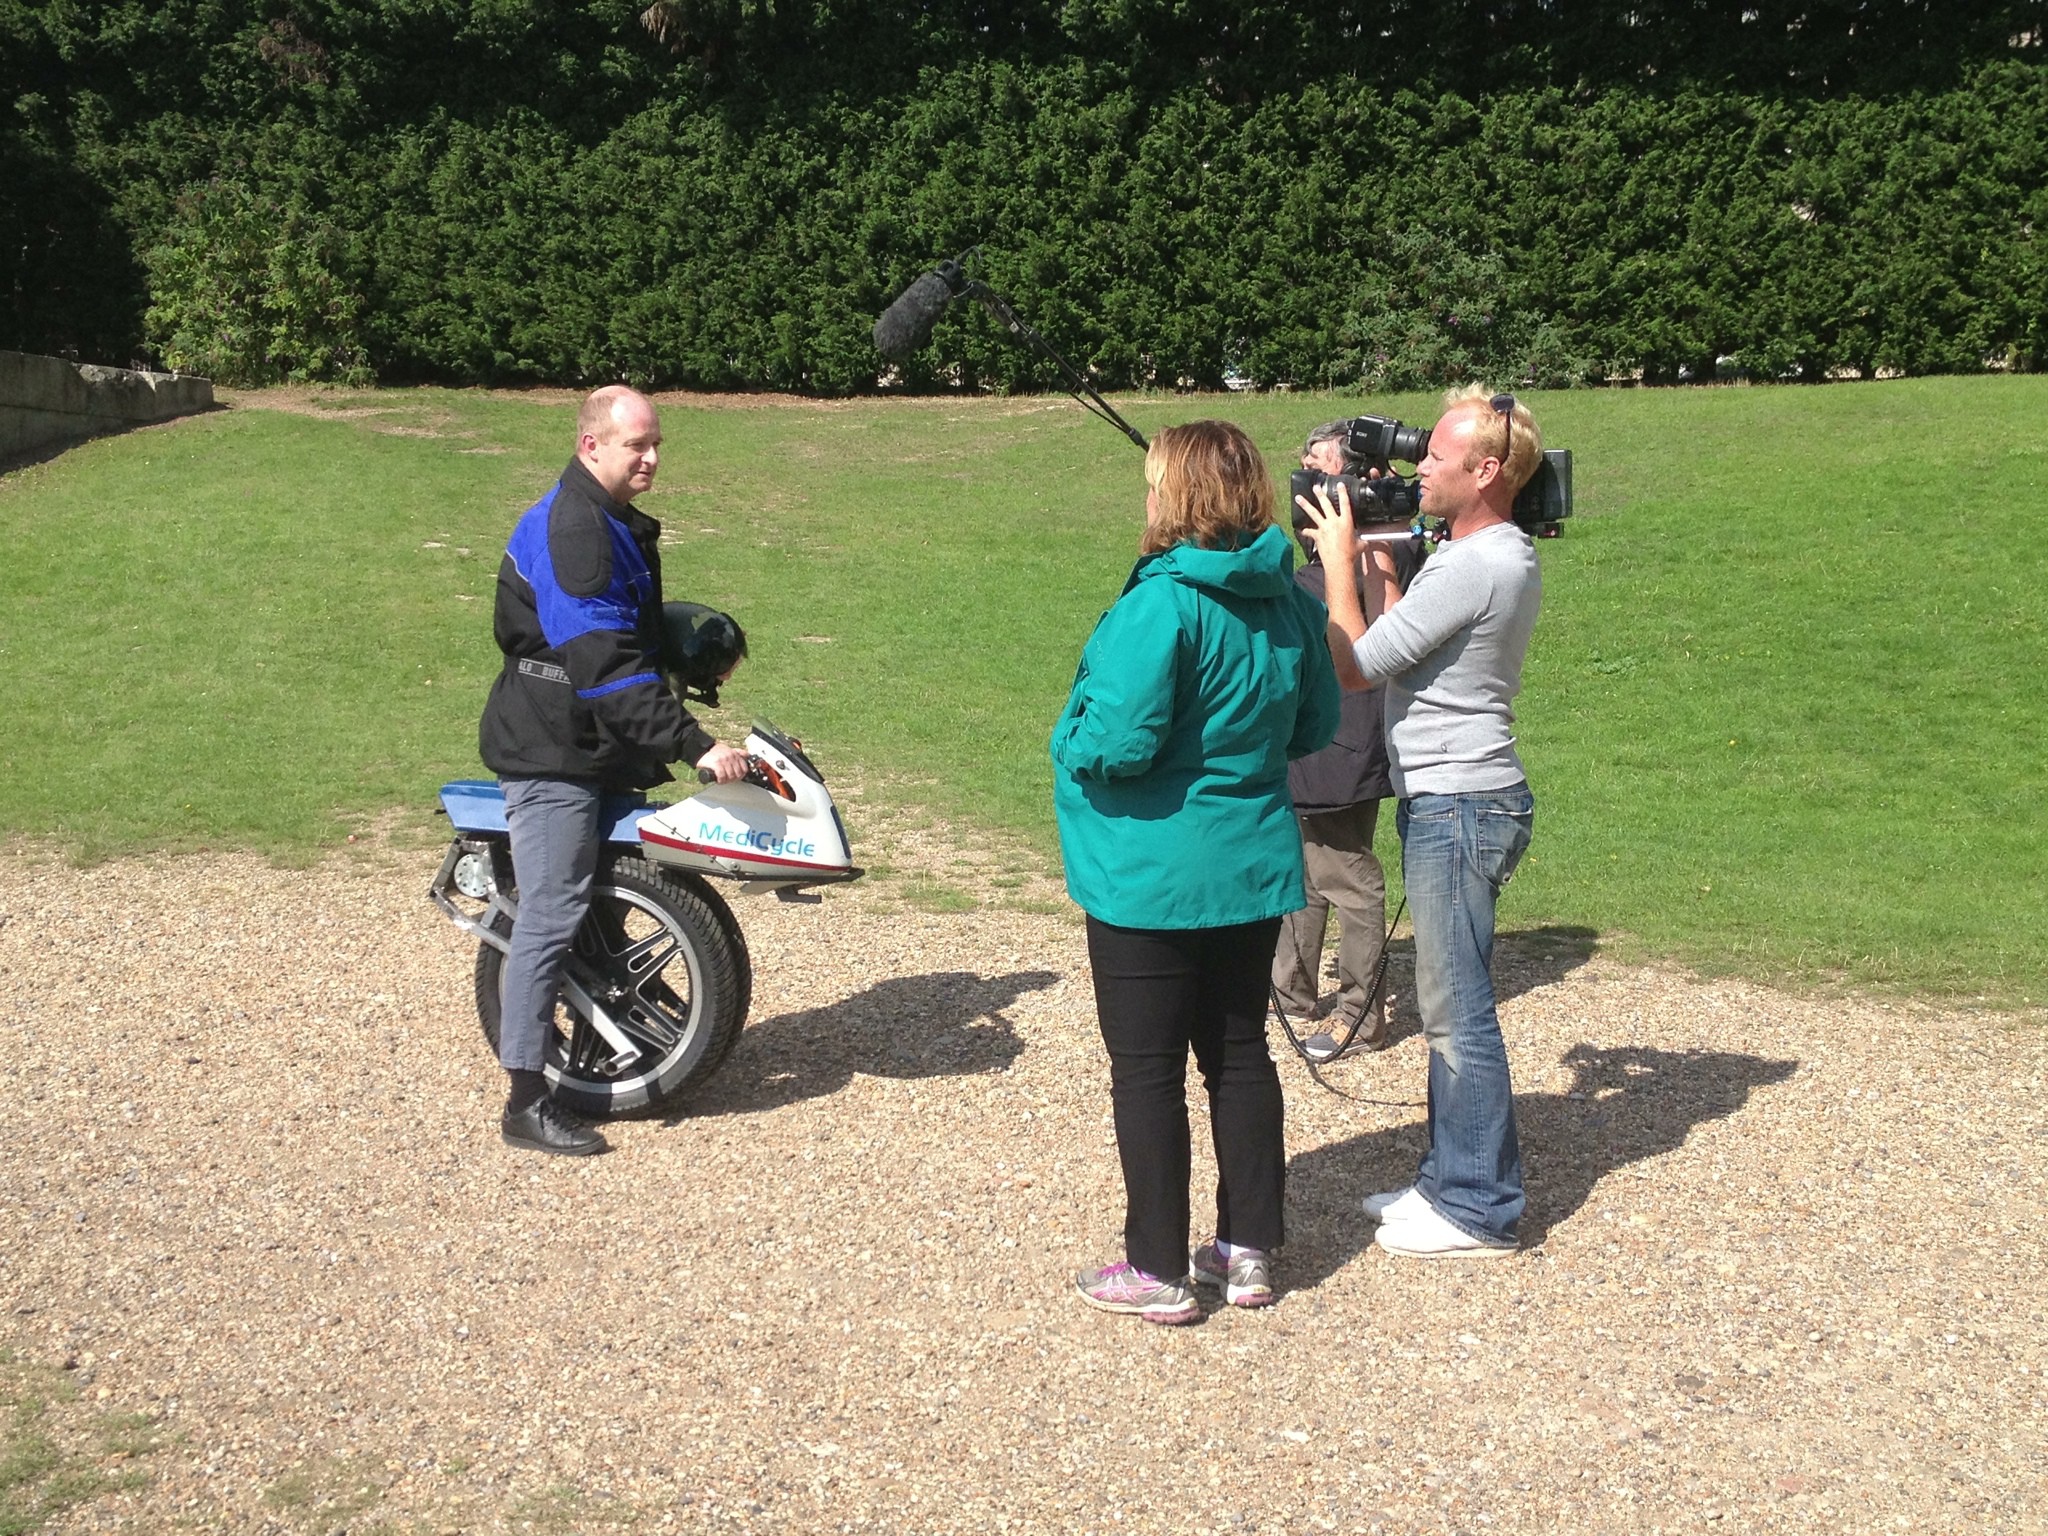
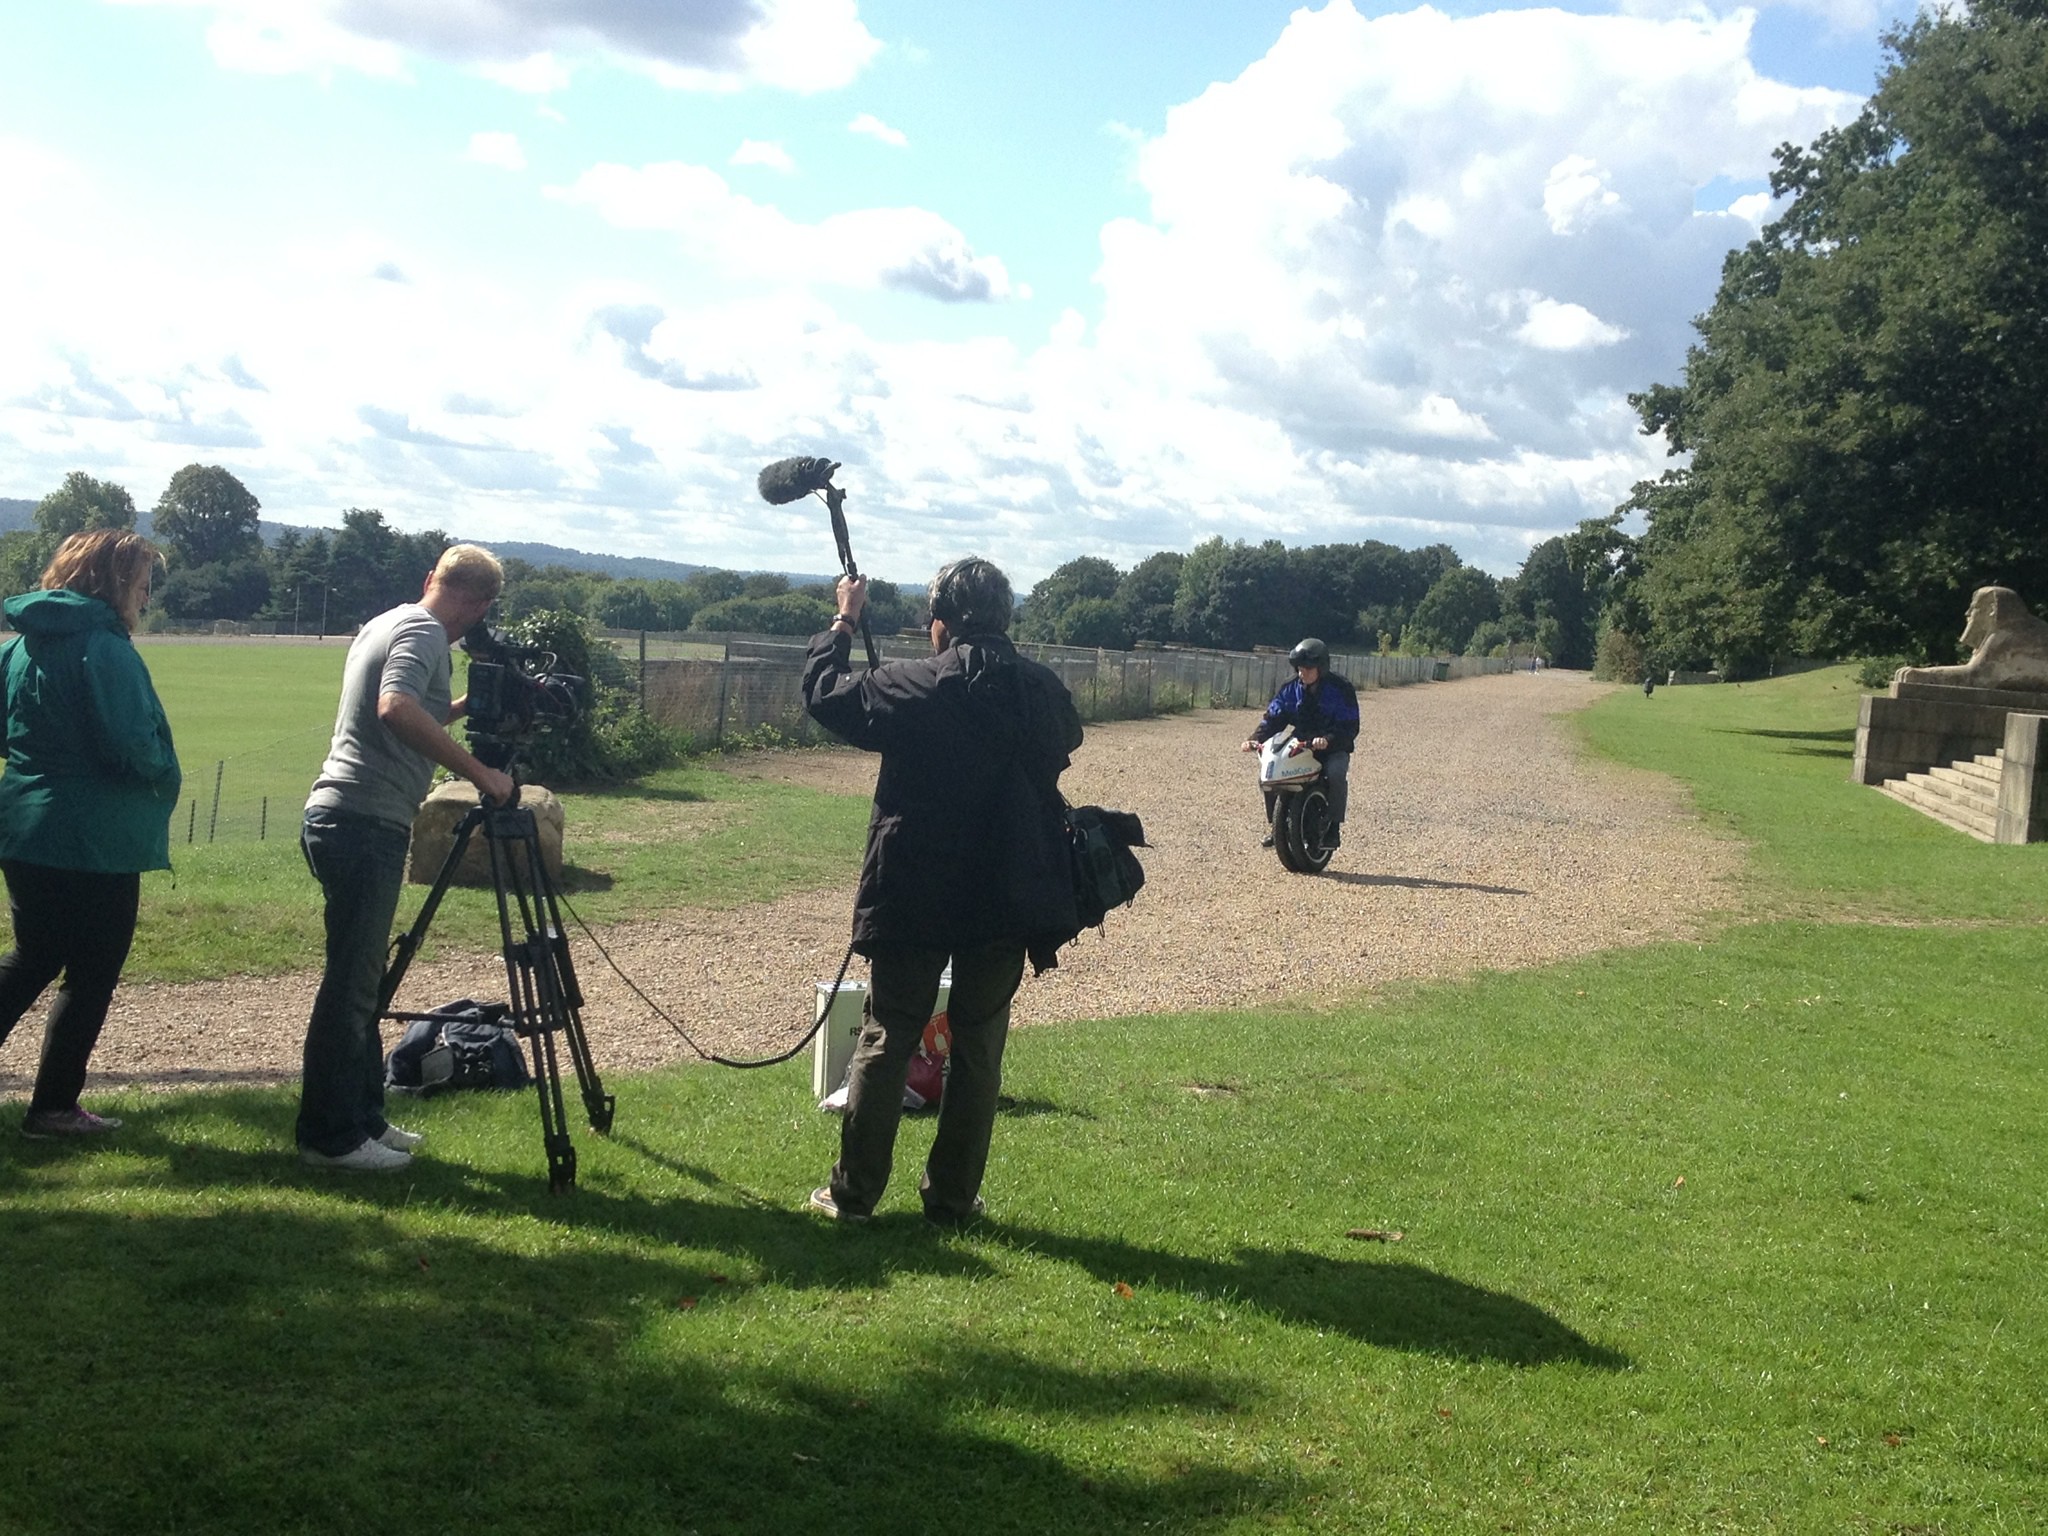
08/28/2014 at 19:23 • 0 commentsA couple of weeks ago a researcher from the Discovery channels Daily planet program stumbled across our 2min video for the HackaDay prize, they later contacted us asking if they could film the Medicycle in action.
After altering a few holiday plans we met up in London and spent the day filming, the Medicycle perfomed flawlessly, the extra wide wheel even made it possible to ride across gravel without issue.
![]()
![]()
![]()
-
We Have Decals
08/21/2014 at 22:09 • 0 commentsThe Medicycle decals and have arrived and they look good!
![]()
![]()
-
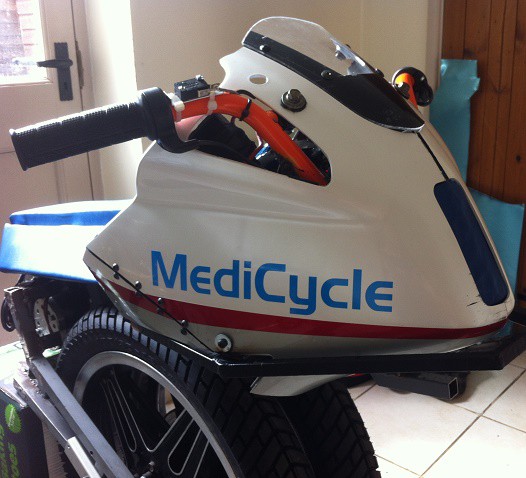
MEDICYCLE WEB-CONNECTED MEDICAL TELEMEDICINE MODULE
08/15/2014 at 19:10 • 0 commentsMEDICAL PACK
A “MediCycle” needs a medical pack obviously…………………….
![]()
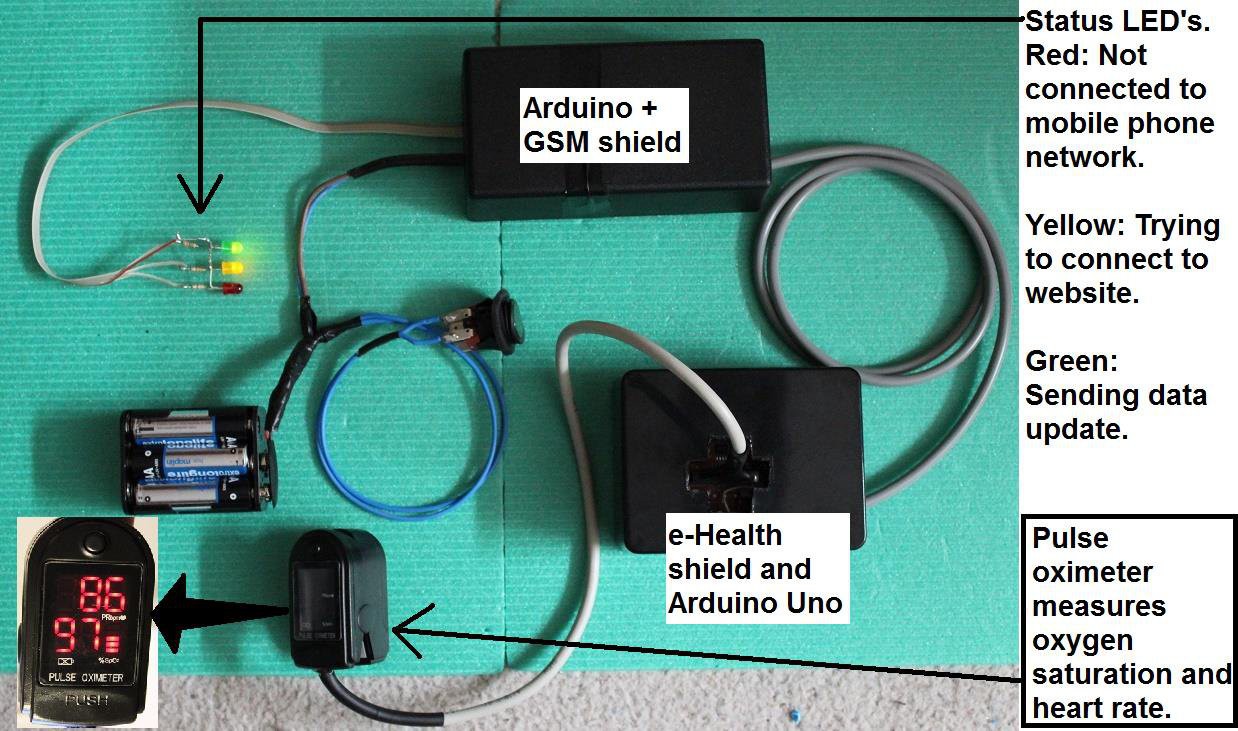
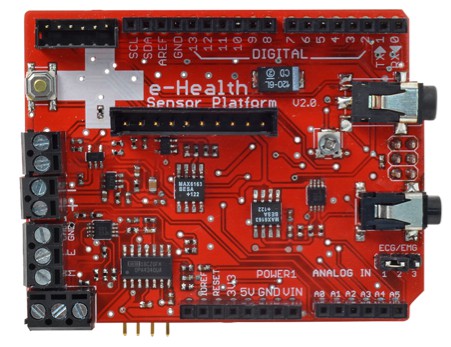
Cooking Hacks (http://www.cooking-hacks.com) produce a biometric shield for Arduino and Raspberry Pi: the e-Health Sensor Platform V2.0.
The e-Health Sensor Shield V2.0 allows an Arduino user to perform biometric and medical applications where body monitoring is needed by using up to 10 different sensors.
This information can be used to monitor in real-time the state of a patient.
Initially we will look at 4 basic medical parameters by having sensors in a pack built into the nose of the MediCycle.
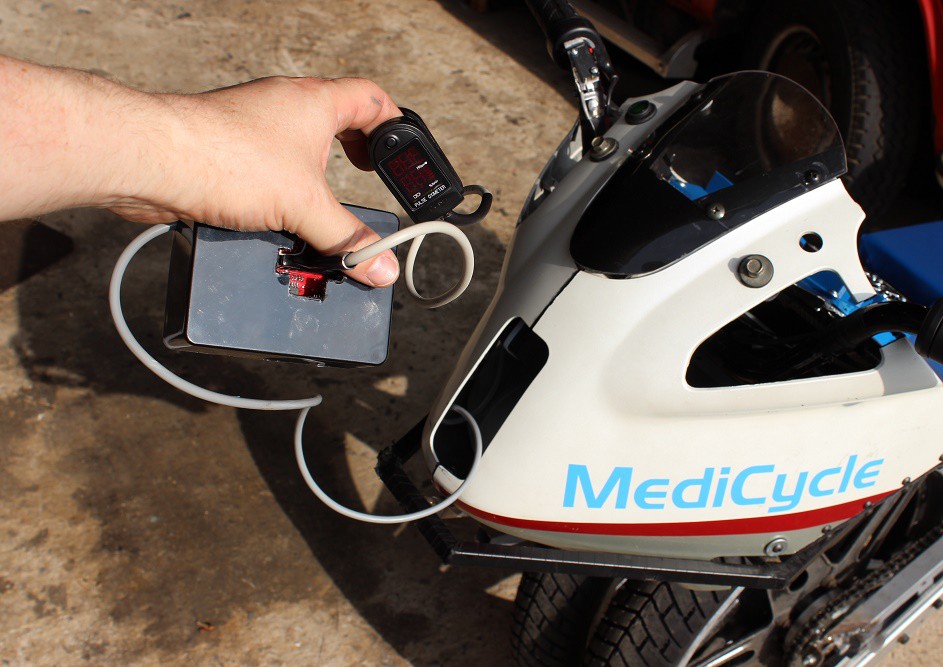
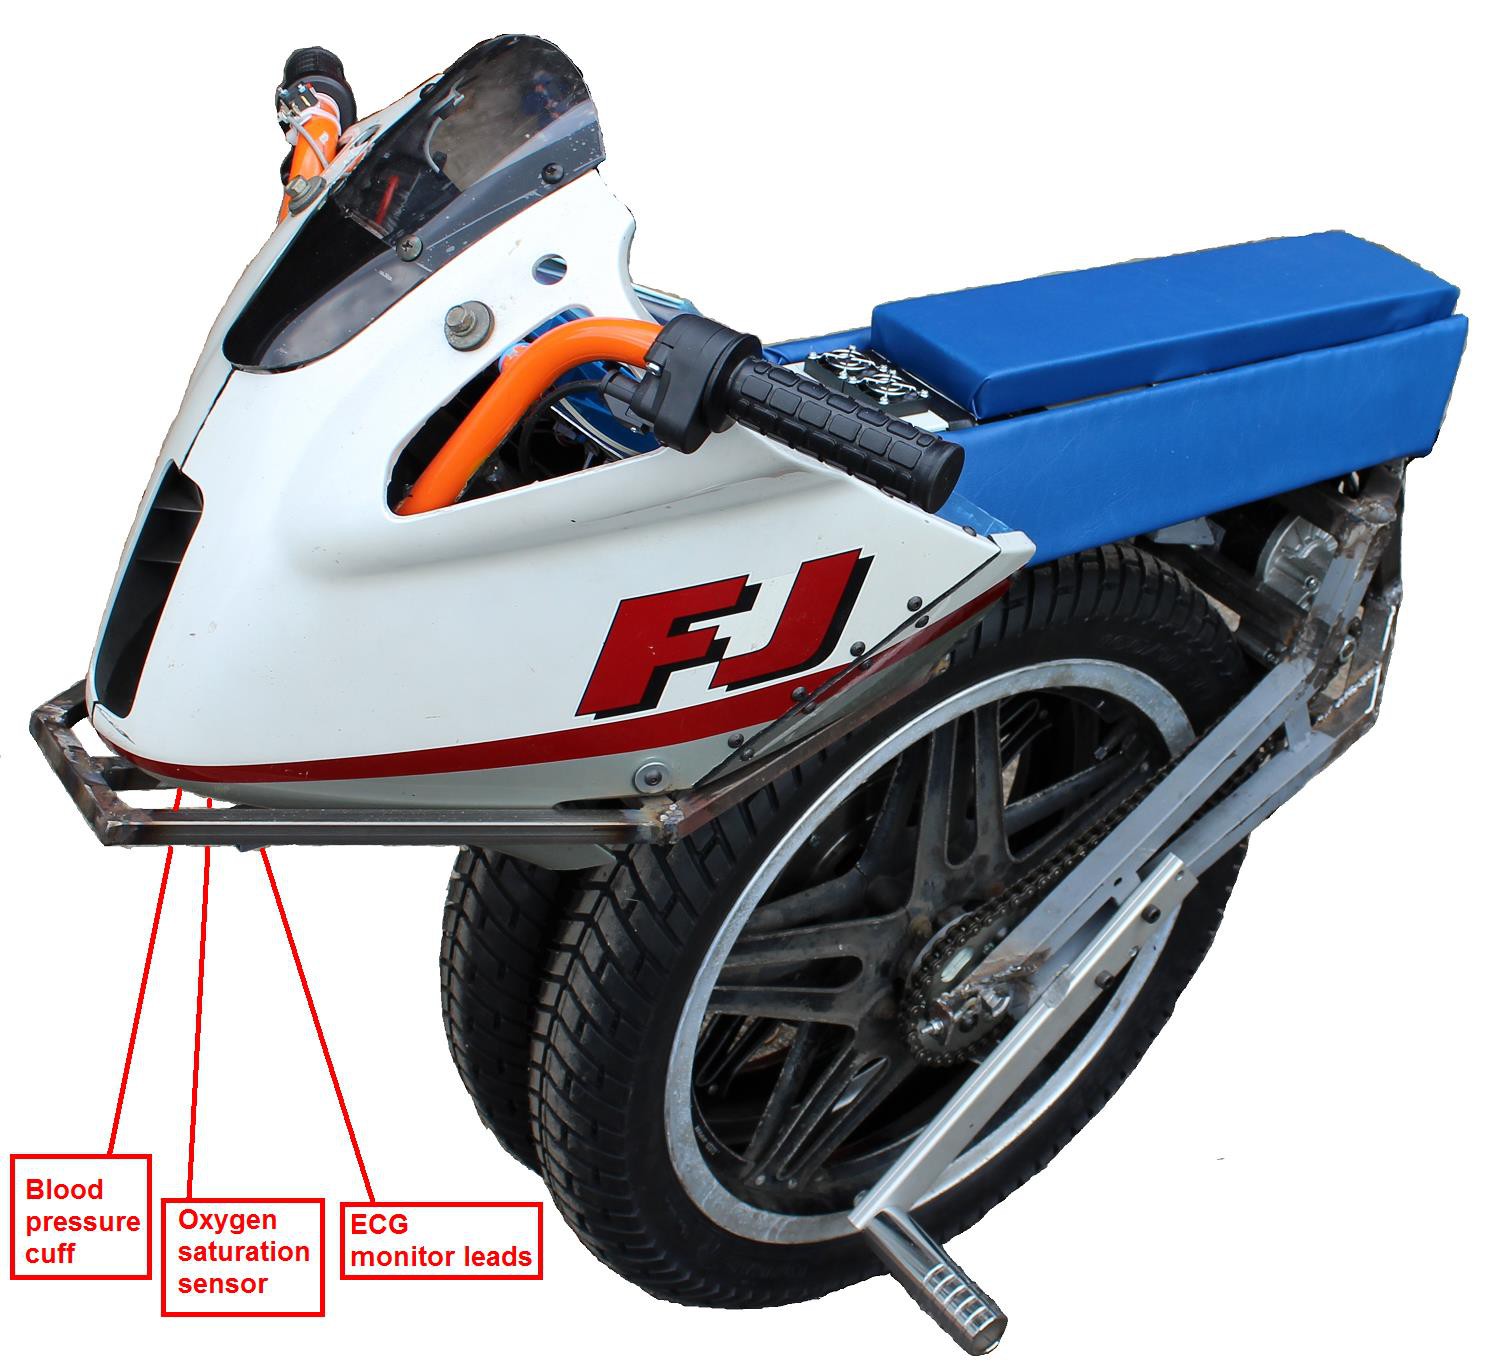
The leads and sensors for the following parameters will emerge from the front compartment of the MediCycle and be attached to the nearby patient:
- Blood pressure,
- Electrocardiogram (ECG),
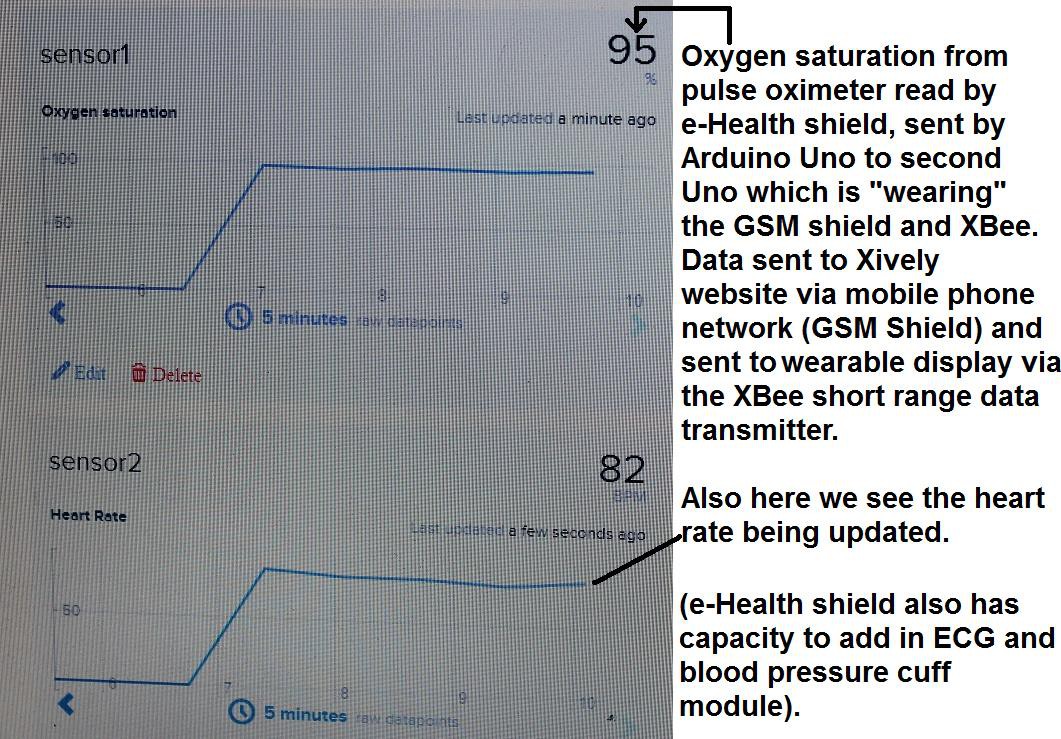
- Oxygen saturation (SpO2),
- Heart rate.
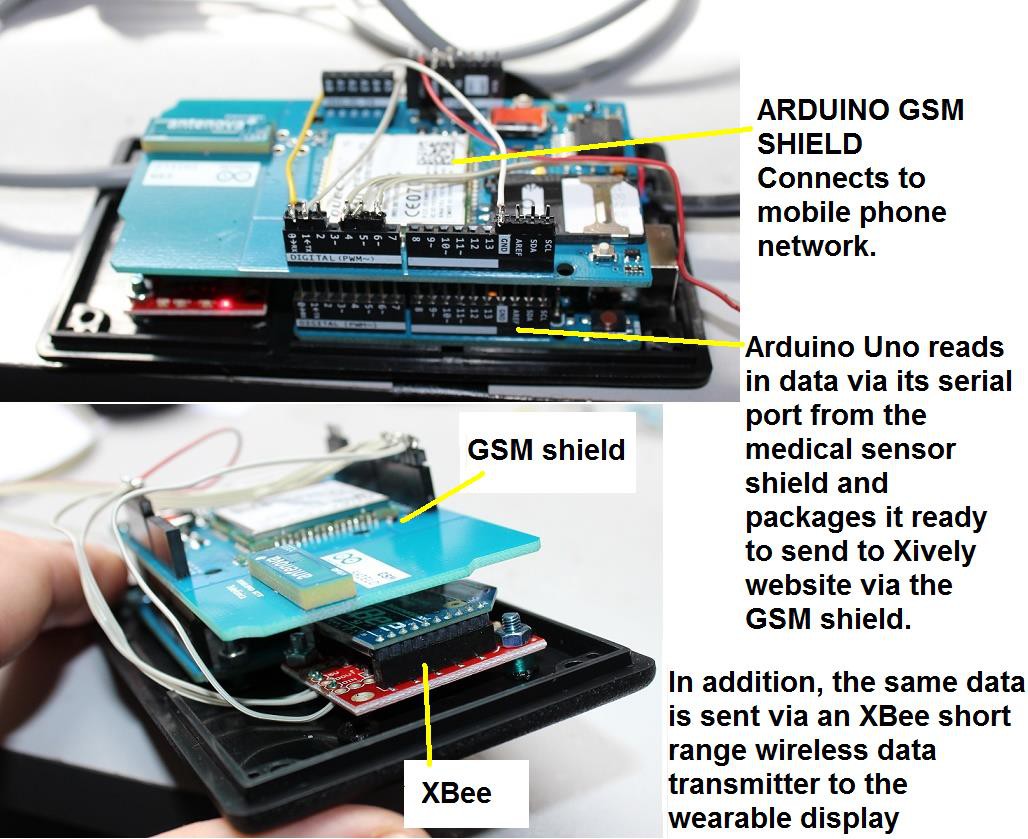
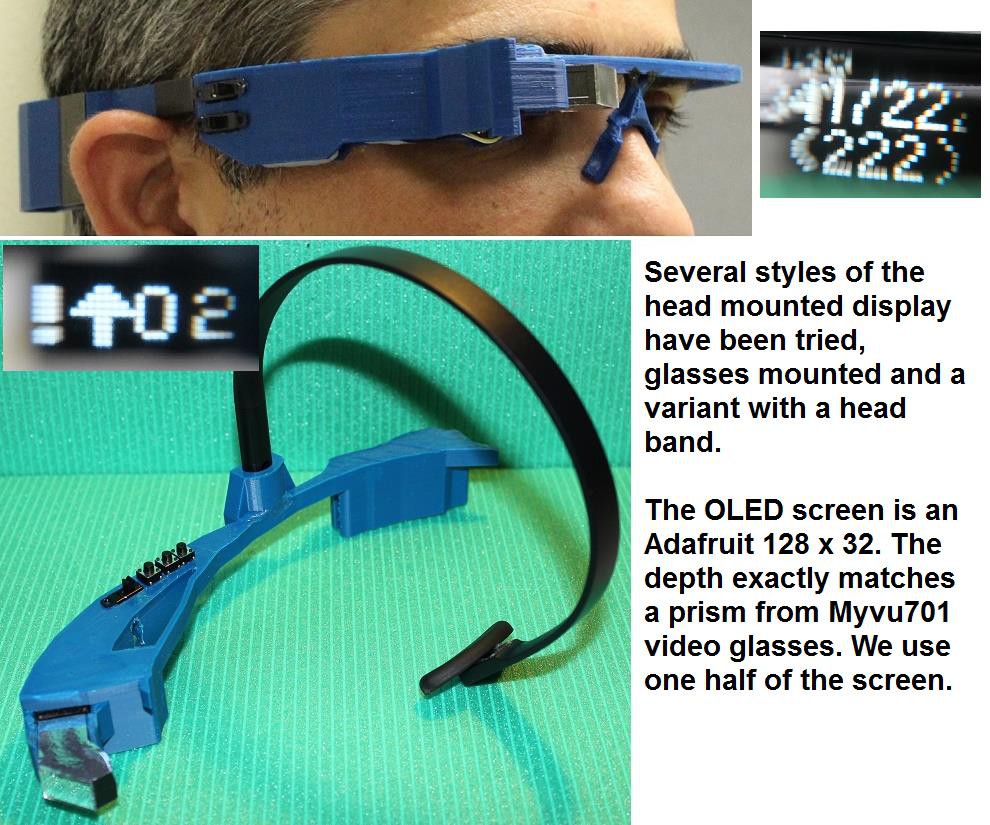
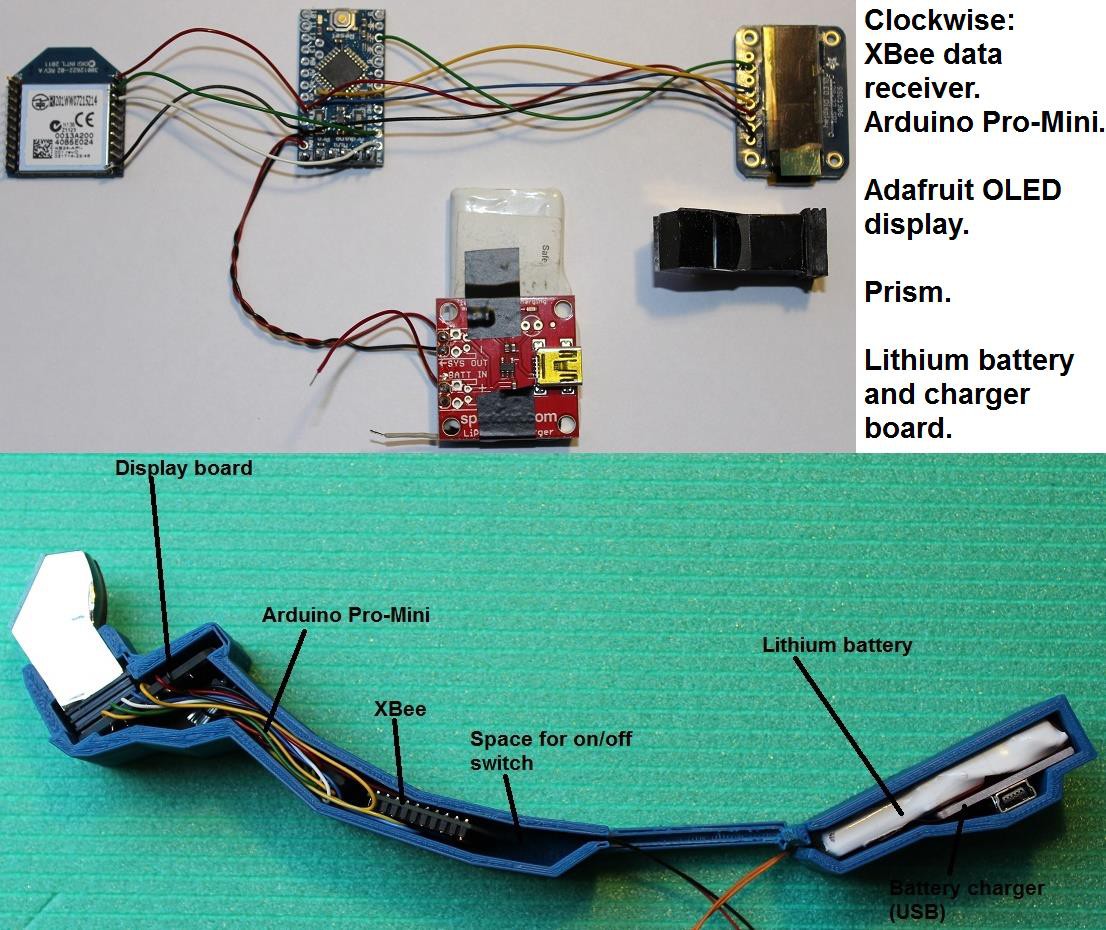
The data will be sent to the MediCycle rider via a pair of XBees (short-range wireless data transmitters) and displayed on the wearable display in front of the right eye.
The data will also be sent via GPRS/3G mobile phone network over the web so it can be viewed remotely by a physician.
![]()
Monocular display for the Medicycle Rider
![]()
![]()
![]()
-
Mini Update
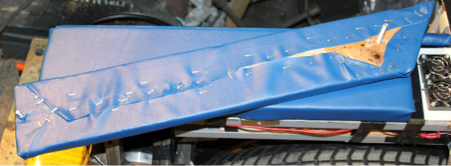
07/26/2014 at 08:20 • 0 commentsSaddle:
Saddle panels made of marine ply 1cm thick. They bolt on to top and sides so thighs do not rub on tops of the wheels, always a good idea.
![]()
“Café Racer” very dense foam for racing motorcycles used to make a seat pad that is comfortable but very shallow (2cm thick) , so feet can still reach ground. The sides are padded in much thinner foam, about 5mm.
![]()
Foam is self-adhesive. Blue upholstery vinyl attached with spray upholstery glue, folded over the back of each panel and attached with staples using a manual staple gun.
![]()
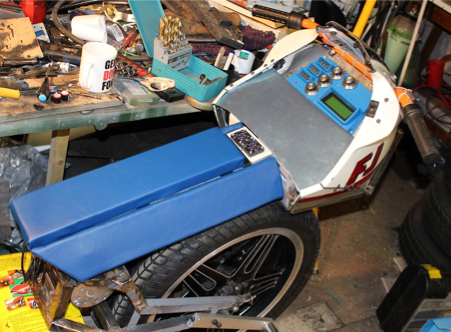
Saddle finished here. The two small fans at the front cool the OSMC power controller.
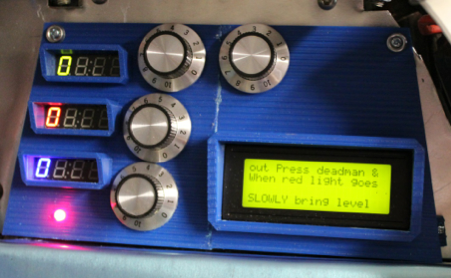
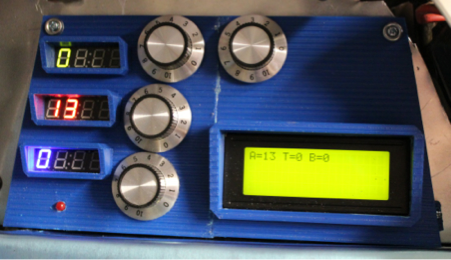
Dashboard:
Some photos here of the dashboard during “boot up” and then when machine is balancing. The values displayed are Angle of tilt (degrees), Torque to motor (0 – 100%), Battery voltage.
![]()
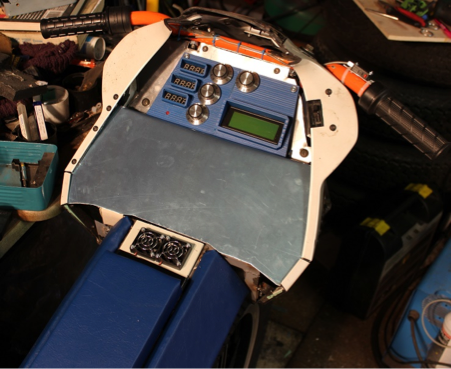
Alloy panel made to tidy lower half of dashboard. Easily removed. Cereal box cardboard is great for making templates for things like this.
![]()
![]()
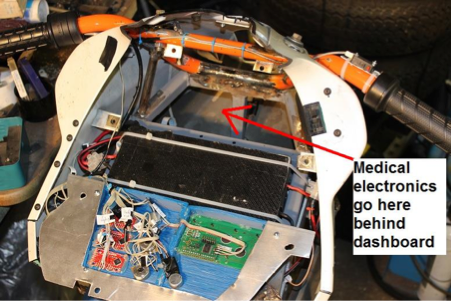
Web-connected medical package:
Now the basic self-balancing machine is progressing well, need to think about the medical package and where it will go. This will consist of an electronics package which will collect data on blood pressure, heart rate, oxygen saturation (pulse oximetry) and ECG as the initial parameters and send this to a remote physician wirelessly via the web.
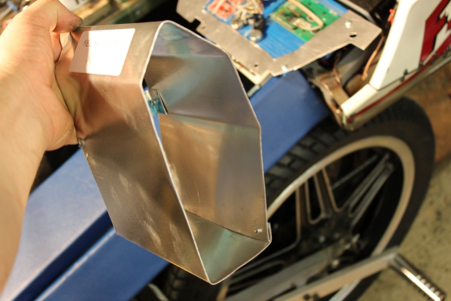
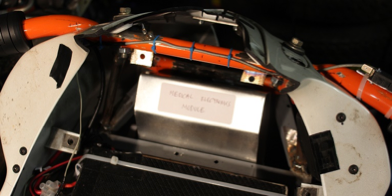
The electronics will be in this unusual shaped box which has been made to exactly fit a space behind the dashboard.
![]()
Box for the medical electronics
![]()
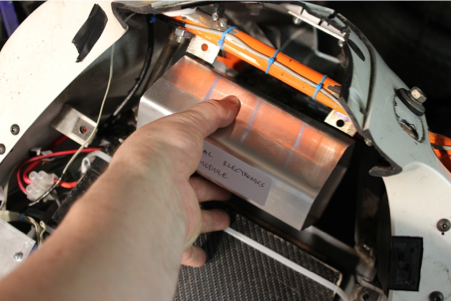
Inserting box behind dashboard
![]()
Medical electronics box fully inserted behind dashboard
![]()
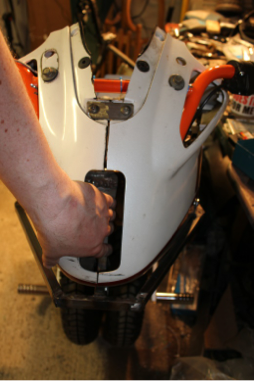
The cables and leads for attachment to the patient will be stored in and emerge from, this area in the nose of the Medicycle.
![]()
-
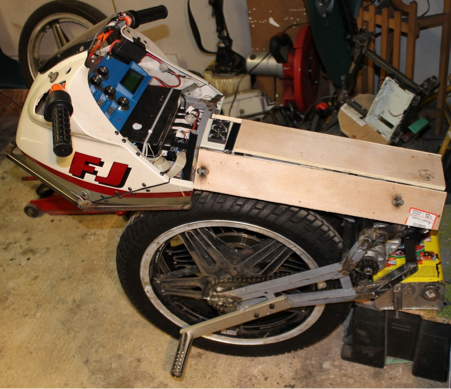
Big Build Update
07/21/2014 at 23:51 • 2 commentsA lot has been going on since the last build update. There are no formal build instructions yet for a very good reason; with machines like this you have to build something and then iteratively develop it. This means the design deviates from the original, which was a best-guess at what would work, based on our previous designs.
So, progress so far:
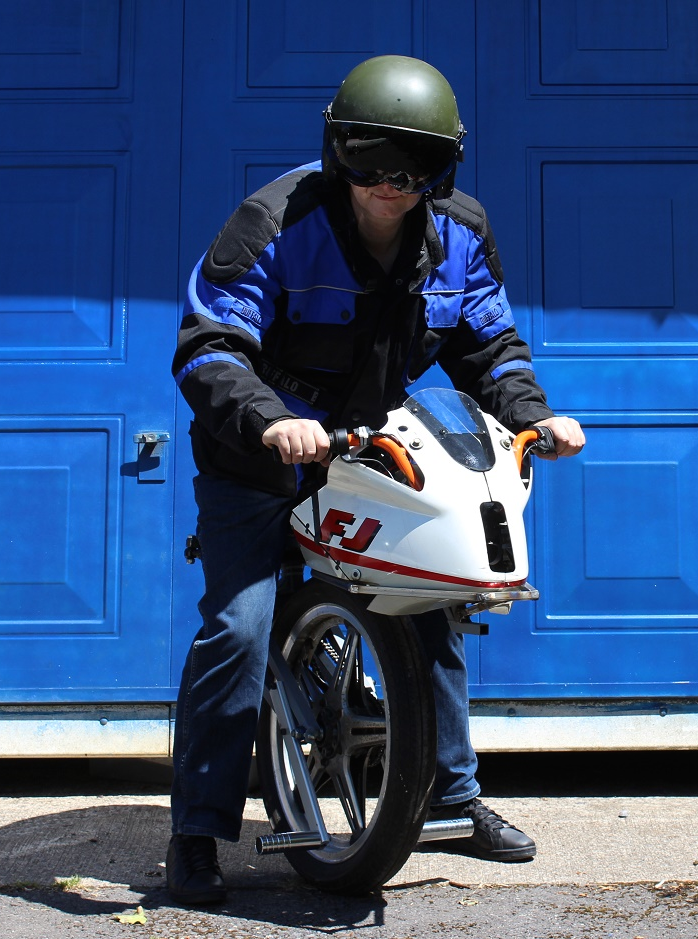
- A version 1 Medicycle has been built well enough to allow testing of mechanicals and software. It does self-balance. You can ride it.
![]()
- The first version with a single narrow tyre was almost impossible to ride despite the pivoting mechanism that allowed you to move your weight around over the wheel by pushing down on the relevant footpegs. Therefore the lower frame containing the entire drivetrain has been widened to take a second wheel in tandem on the same axle. Note that there is still only one motor, the two tyres turn together and are joined to each other. If the machine works well like this, then they can ultimately be replaced with a car wheel of similar width. However, as a test machine, this configuration gives lots of adjustment options.
![]()
- The pivot system at rear of frame now has a locking bolt you can screw in which stops it pivoting if you so wish. Again this gives more options for practical experimentation. The previous Uni-Mig01 scooter John previously built was perfectly controllable with an 8 inch wide go-kart tyre simply by shifting your weight and adjusting speed in turns, so we are not sure we need the pivot in the frame or not. More testing will determine this.
https://sites.google.com/site/onewheeledselfbalancing/Home/one-wheeled-scooter
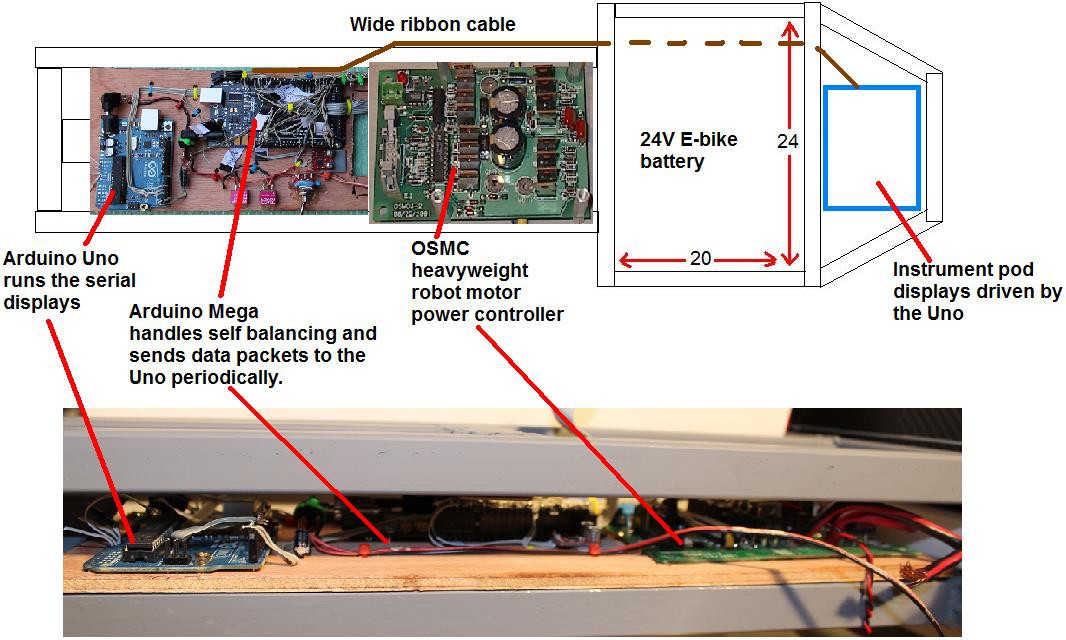
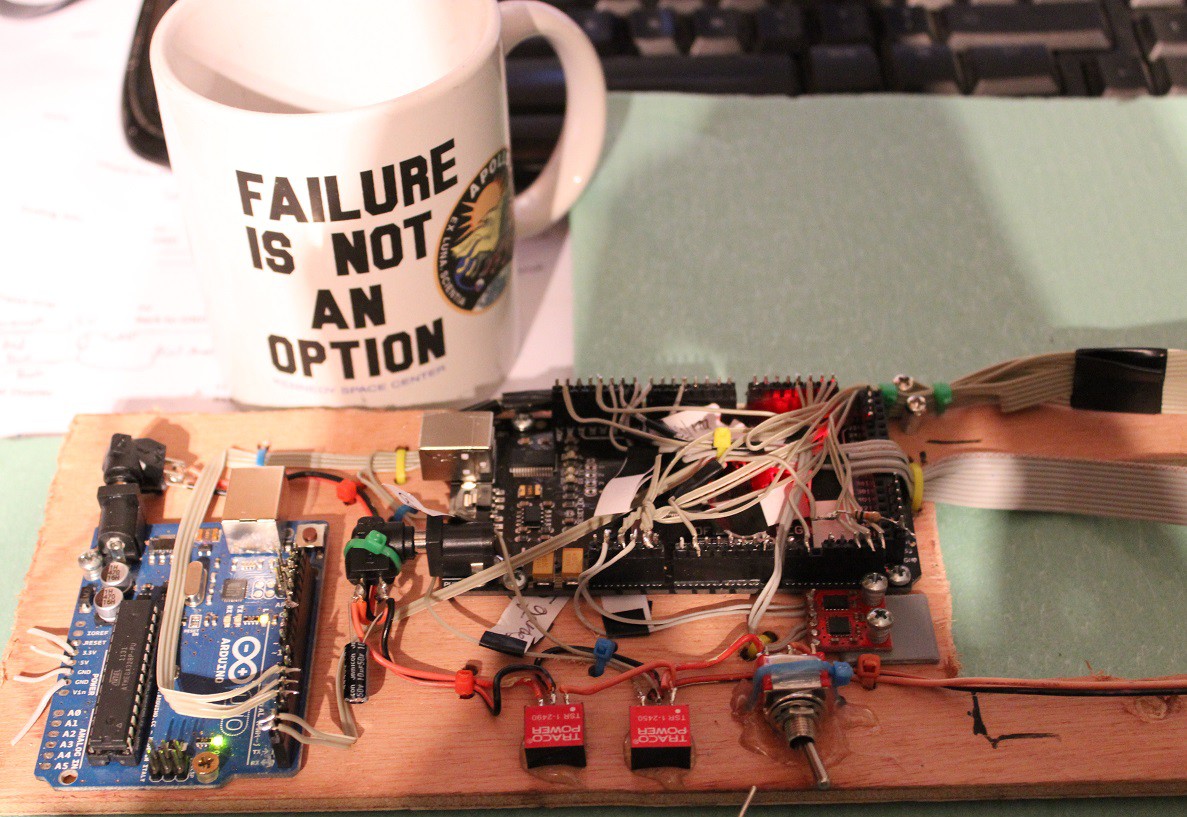
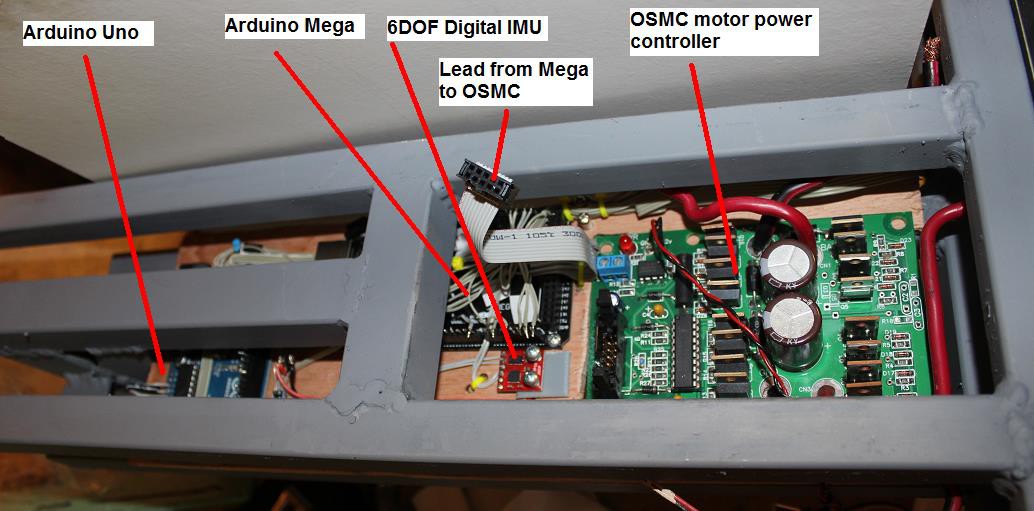
- The Arduino Mega 1280 balance controller now has both a digital inertial measurement unit (IMU) and also a more old-fashioned circa 2008 analog IMU as well. We can now compare the performance and reliability of each and we have software versions to work with each type of sensor package. The analog IMU’s may be out of fashion now but they simply put out a varying voltage proportional to tilt, which is quite comforting if you believe in the KISS (Keep It Simple – Stupid) approach to reliability.
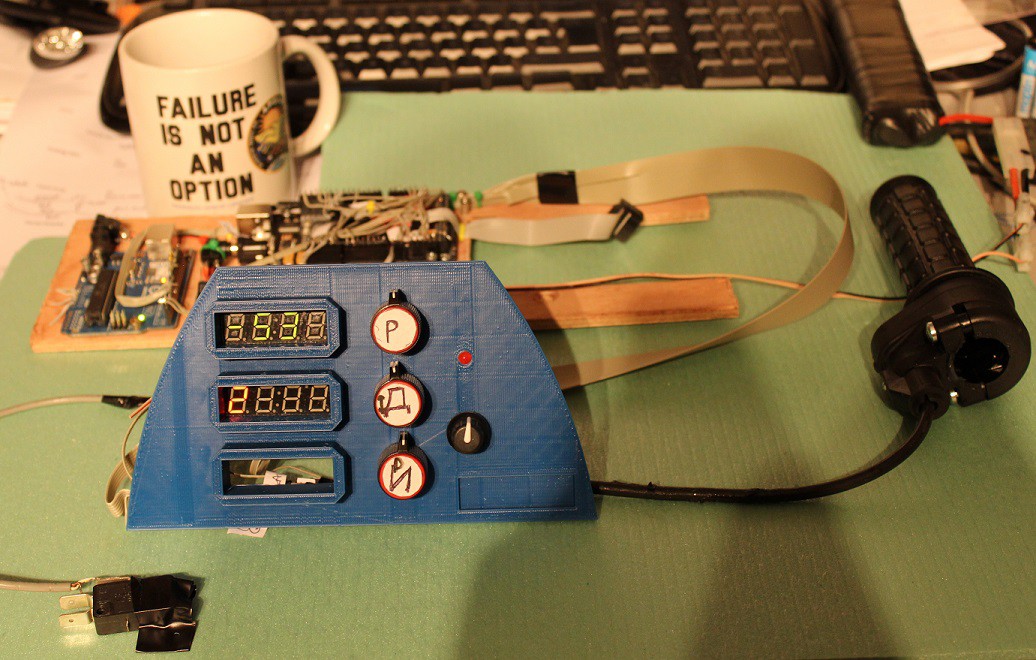
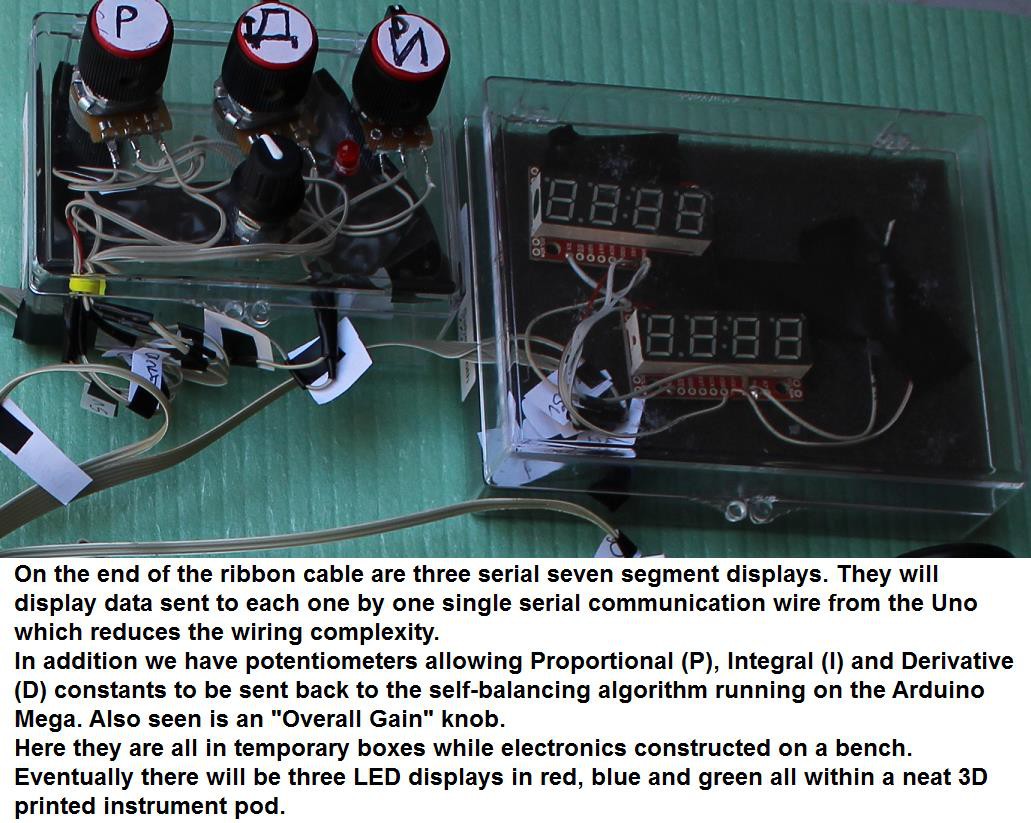
- The instrument pod has been changed and now has three LED 7 segment displays (which look cool) plus we have added a 20 x 4 row LCD backlit display as well (much easier to read in bright sunlight), which can display more data and is handy for debugging software.
![]()
- The P, I and D plus “overallgain” control knobs seen in the previous update are now more widely spaced and a slightly retro-design with position numbers on each (they don’t go up to 11 though – yet). We could possibly later have a 3 position switch for the “overallgain” ride-quality settings labelled “soft,” “quite twitchy” and “insane.”
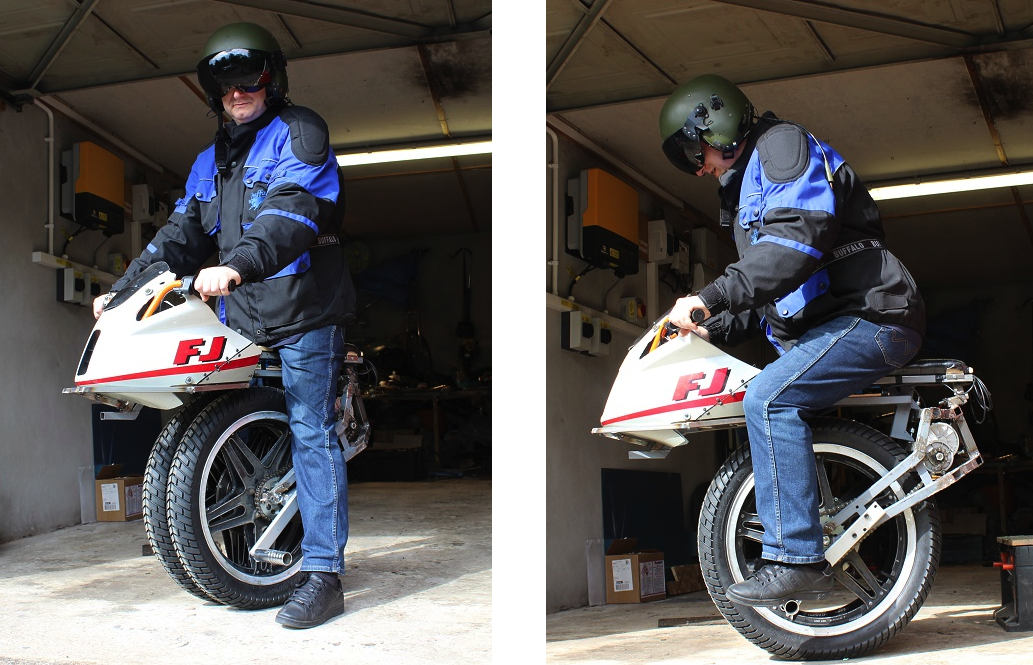
- The twist-grip “accelerator” on the left handlebar is proving to be really useful in riding this machine. You can ride it by leaning forwards to make it go forwards, and back to slow down. However if you twist the handgrip, it alters the target angle from vertical the machine “aims for” when it is self-balancing. If you set this angle as a forward-tilt using the twist grip, then the machine starts to fall forwards, and the self-balancing software speeds up the motor to stop you falling over any further. The effect of this is to make the machine just tilt forward and off you go, no leaning required. If you back-off on the twist grip, it will lean back a little and slow down. This gives you good control of speed.
![]()
- If we put a motorbike saddle on this it will be too high, wrong shape and feet will not touch the ground. Therefore the saddle will be made of marine ply so foam and a vinyl cover can be fitted, folded under and staple-gunned to the underside of the wooden panels. The padded panels will be arranged so they form an inverted U shape viewed from the rear. This stops your inner thighs contacting the tops of the tyres, always a good idea. The saddle will deliberately not vary in shape along its length (unlike in a modern motorbike) so you can adjust your seating position easily in the fore/aft direction to find a comfortable balance point that suits you, with your arms in a comfortable position.
- Wearable wireless monocular display is also coming along well but we will save that for another update.
- As you can see from the pictures, it does already self-balance and it can be ridden by a human being.
![]()
-
MEDICYCLE BALANCING AND POWER ELECTRONICS update 3
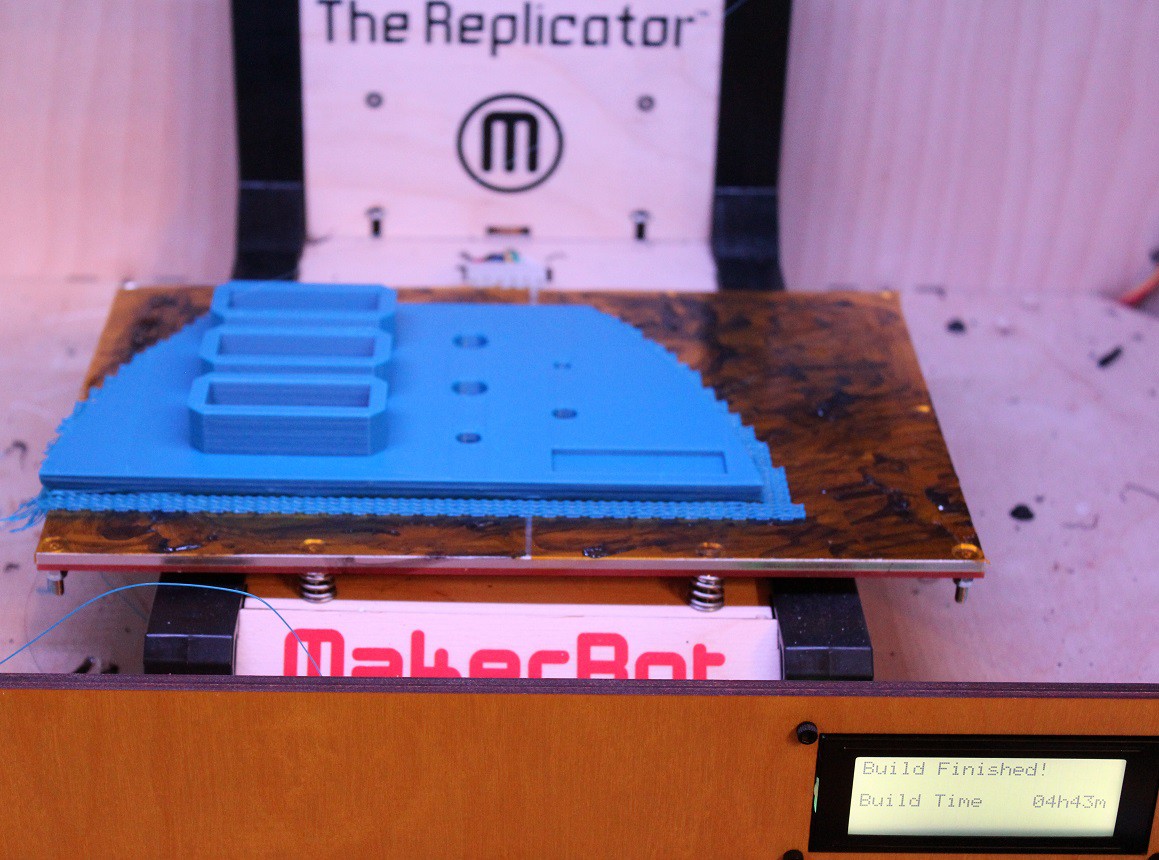
06/29/2014 at 21:32 • 0 commentsThe Medicycle build is progressing at lightning speed, The frame is mostly complete and John has almost completed the electronics required to make the unicycle balance, the instrument panel has even been 3d printed.
This is not the first machine we have built, if you want to find out more then visit this website https://sites.google.com/site/onewheeledselfbalancing/
Watch this space there is more to come
![]()
![]()
![]()
![]()
![]()
![]()
![]()
![]()
ANALOG INPUTS To Arduino Mega
int forwardbackPin = 1; //analog voltage from a potentiometer I have connected to a "twist grip" on left handlebar.
//It allows machine to be moved by adjusting the point at which it thinks it is "level" as well as just by leaning of the rider.
//Not essential to have this will work fine just by leaning.
int potPin = 9; //Potentiometer for adjusting the overall gain i.e. the "tightness" or "sloppiness" of the ride experience.
int ppotPin = 13; //analog input 13 is from wiper of the potentiometer that adjusts p gain
int ipotPin = 14; //analog input 14 is from potentiometer that adjusts i gain
int dpotPin = 15; //analog input 15 is from potentiometer that adjusts d gain
int batteryPin = 7; //analog pin 7 on Arduino has Vbattery/7 applied to it from the OSMC so we can work out the battery voltage.
-
MEDICYCLE MECHANICALS update 3
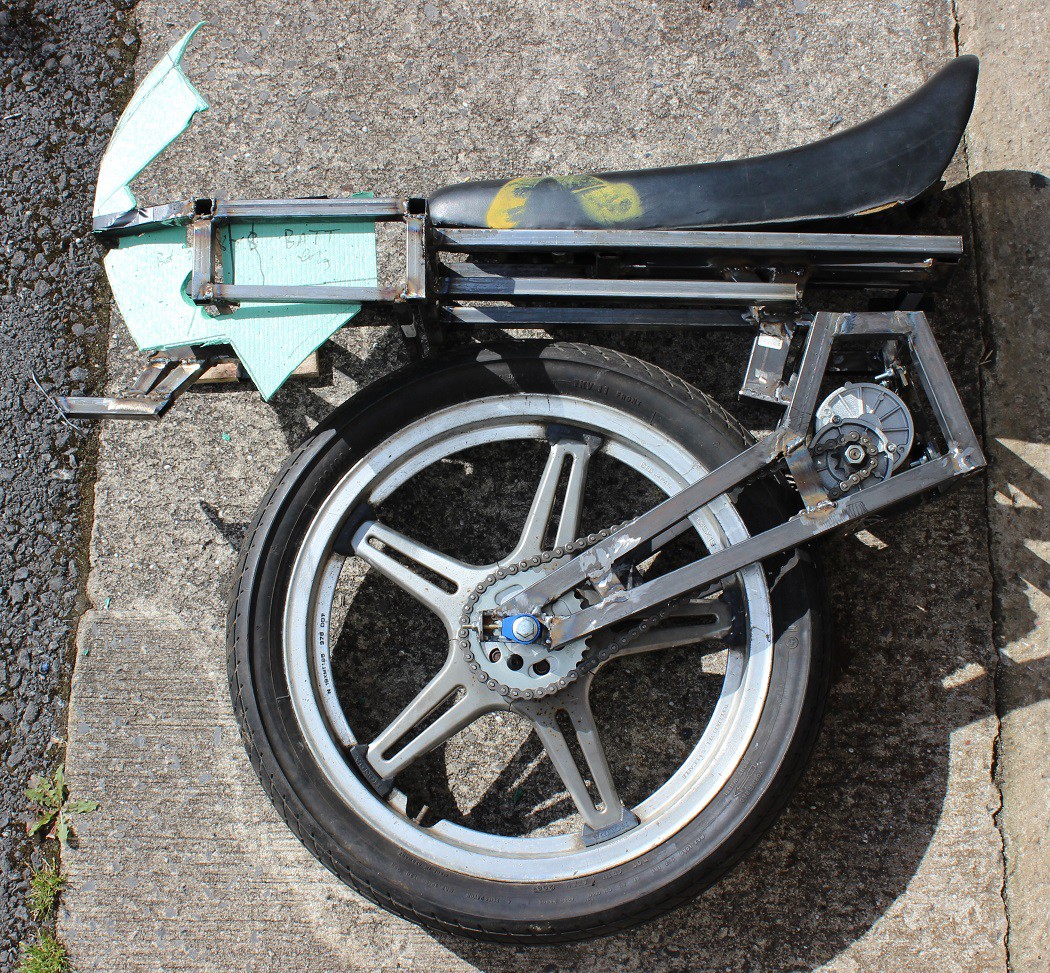
06/23/2014 at 22:53 • 0 commentsThe Medicycle is taking shape, John has done a fantastic Job of welding the frame together, the frame is primarily composed of steel box section and has some cool features... stay tuned for updates.
When building a device like the Medicycle you have to design it to survive unexpected situations, like a TV presenter crashing it into the floor. This is why the Medicycle has a welded steel frame, its reasonably light weight and its strong enough to survive rough handling.
![]()
![]()
-
MEDICYCLE MECHANICALS update 2
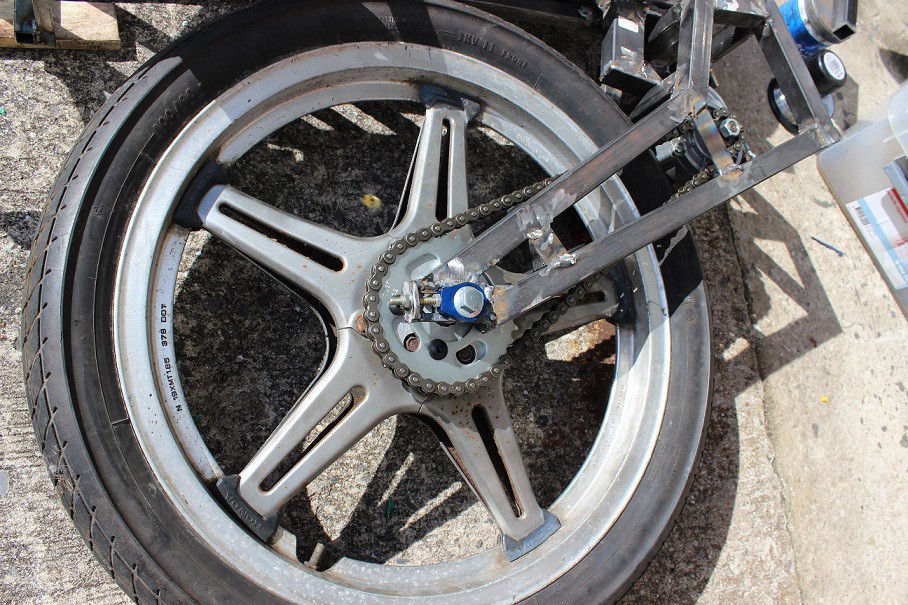
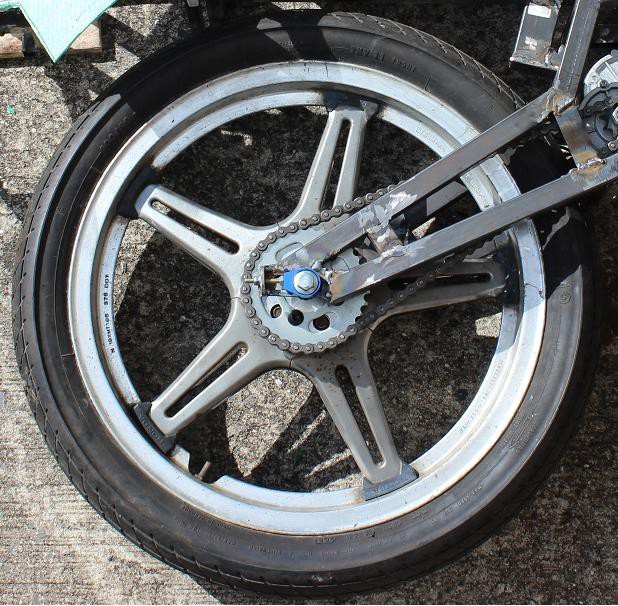
06/19/2014 at 21:54 • 0 commentsOn the Medicycle the wheel is one of the most important components, it certainly wouldn't work very well without it.
There are thousands to choose from and its easy to think that just about any wheel will do, so long as you can provide drive to it you should be able to balance, there are however a few things to consider before choosing.
Size - this is probably the most important factor, if you are using a small wheel you save on weight but you are going to feel the bumps and this can affect balance and can even cause the unicycle to fall over.
In this application a larger wheel is better, bumps are not going to have as much of an effect on the unicycle and the extra gyroscopic force exerted by the larger wheel will help you balance, remember though you will need to be able to sit on top of this and it helps if you can touch the ground.
Drive - when buying a wheel make sure that you will be able to either bolt a sprocket to it or fix an axle, its best to got for the rear wheel of a motorbike as they will be designed to fit a sprocket, depending on the size of the sprocket you may have to find or make an adaptor plate.
Width - its going to be easier to stay balanced on a wide wheel then on a thin wheel, however remember that on a unicycle you need to lean to steer, if the wheel is too wide it could interfere and you will end up with the same turning circle as a ship.
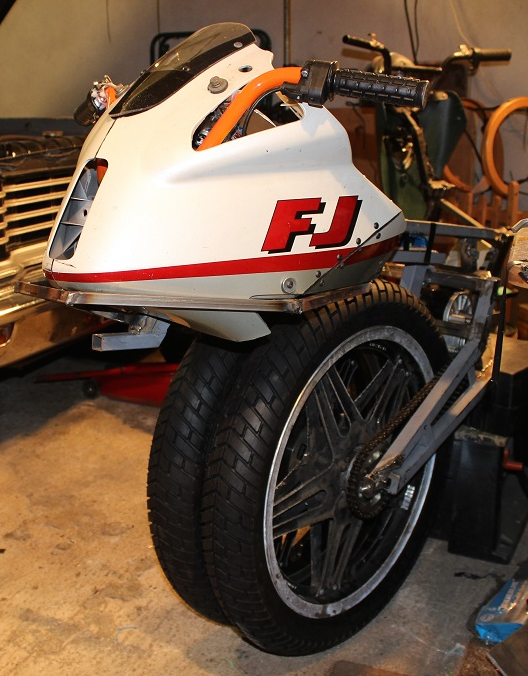
The wheel we are using on the Medicycle is a 19" motorcycle wheel from a 1980 Honda CX 500
![]()
Medicycle - Urban Responder
We are living in the future, Medics now need motorbikes to navigate our congested cities but they no longer need two wheels