Joseph Demers
-
Putting it back together
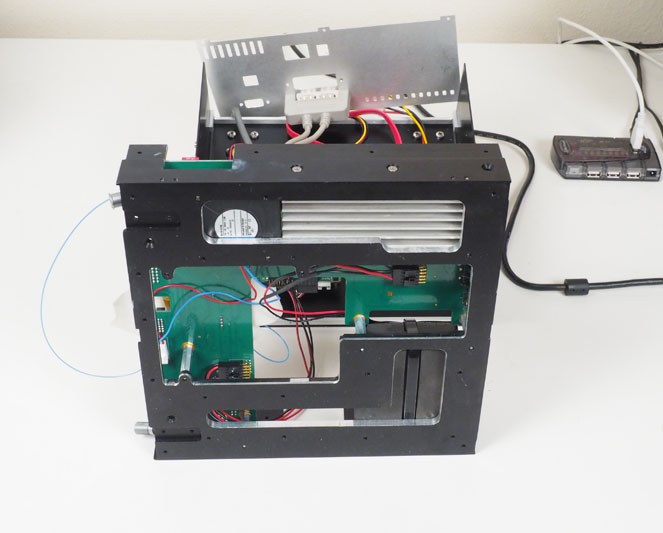
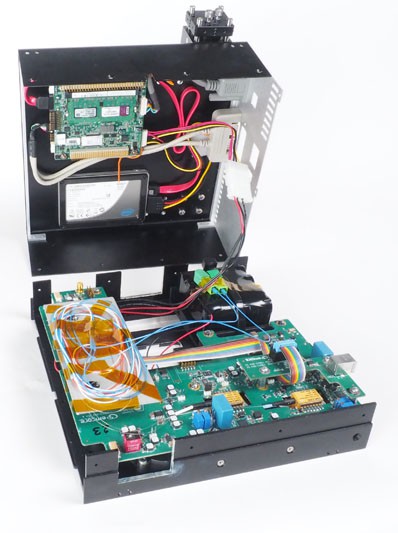
05/28/2016 at 20:37 • 0 commentsI have received the machined lid and chassis back from Descher Automation They did a fantastic job machining away the parts of the chassis I didn't want and putting the features in the lid for mounting the PC-104 and the SSD. They even made a drawing of the changes to the stock PB7220 chassis that I have posted in the supporting info. The machining had removed around .2 kg from the chassis. Next, the PP7220 parts were transferred to the modified chassis. Everything fit as it should and having the large holes in the bottom of the chassis made getting to the underside of the board easy!
![]()
![]()
While the parts were out for machining I figured out how I was going to mount the THz optics to the lid. Originally I was going to have a special mounting bracket made, but I realized that the off-axis parabolic mirror mounts could be mounted directly to the lid with little effort. This would save a little bit more weight. I would try and keep all the parts towards the center of the chassis so that the weight distribution would be good. I drilled the holes and mounted the THz optics with little trouble.
![]()
During the rebuild, I also realized that the stock 14.4 volt battery was likely a much greater capacity than it needed to be at 69 Wh. What is the point in operating the spectrometer for hours when the drone can only operate for 15 or 20 minutes. The Ultralife battery weighed in at .35 kg. They had a 14.4 volt battery that was half the size so I assume it would save us another .15 kg if we swapped it in. However, the battery would be an extra $100 bucks plus shipping. So, for now, we will stick with the stock battery.
In order to power the SBC and hard drive, it was necessary to create an adapter cable that would connect to the PB7220 motherboard and deliver switched 5 Volts. The parts were ordered and the cable was easily constructed. The parts are listed.
-
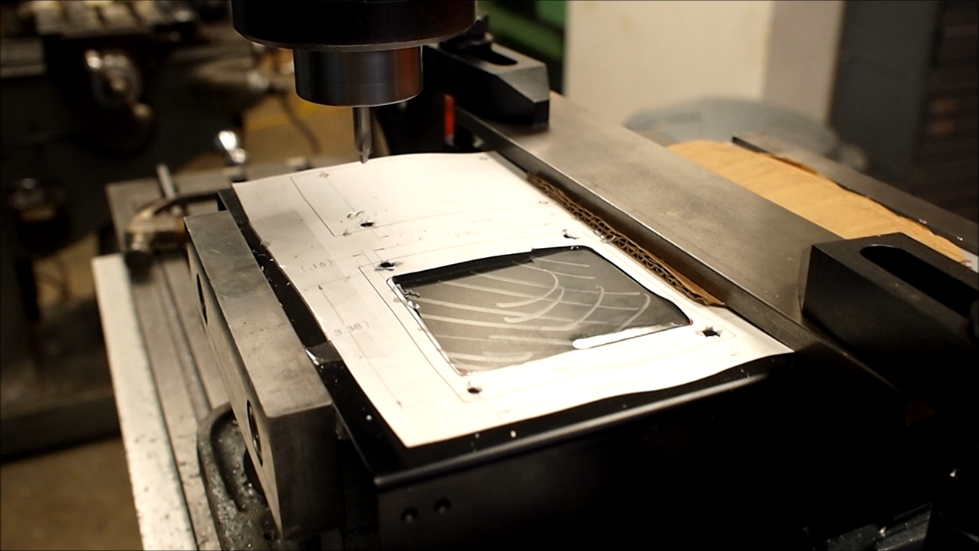
Modifying the Chassis
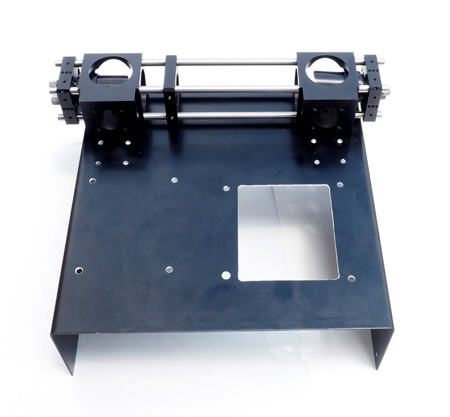
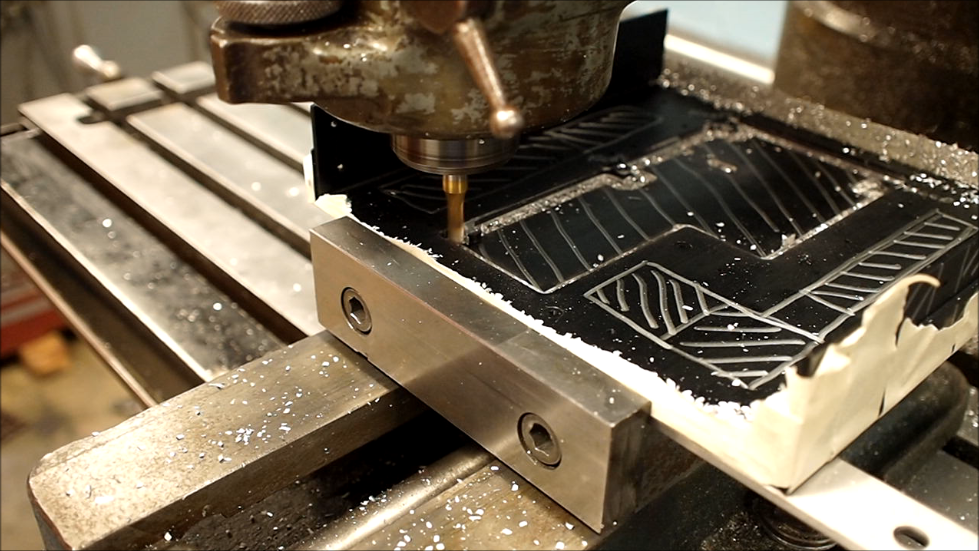
05/28/2016 at 20:23 • 0 commentsAfter making sure that the SBC would operate the system, the next question to answer was could the drone lift the system: I had a 7 kg weight limit. I put all of the components onto a scale and did an initial weigh in. Surprisingly everything together weighed 3.8 kg - well under the 7 kg weight allowance. I was told this would give me approximately 15 minutes of flight on the DJI-S1000. While this is adequate, it would be nice to have more time. So I set about trying to find ways to cut the weight. I took a careful look at the chassis and found section of the chassis that could be physically removed to save weight. I then marked these sections and sent them to Descher Automation in Raleigh NC out for machining. I also sent along an extra chassis cover that needed to be modified to allow the SBC and hard drive to be mounted to it.
![]()
![]()
-
Operating the PB7220 with an SBC
05/25/2016 at 18:30 • 0 commentsIn order to make sure that a single board computer (SBC) would have the power to operate the PB7220 I assembled the Advantec PCM-3362 with the 40G SSD drive, and attached both to an external power supply. I have had these components for around 5 years, so I was concerned that they wouldn't be up to the task. Data acquisition can be slow if the computer is not powerful enough and this in turn makes taking the spectra slower. I then installed Windows 10, the USB drivers and .NET and had the SBC booting up fine. Next was the compiled Visual Basic code that operated the PB7220. This went smoothly and I found that the little Intel Atom did a remarkably good job at operating the software at speed. After using the SBC to operate the spectrometer and measuring some water vapor lines (shown in pictures) I then went about figuring out how to mount it to the existing systems with as little modification as possible and without the need to make new parts. I decided to attach them to the lid of the spectrometer along with the THz optics rail.
The THz Drone Project
I am working on a project to fly a THz Spectrometer on a drone. This will enable spot measurements of important atmospheric molecules.