Close
0%
0%

LUMOS

1m 12w RGB LED WiFi Artnet Controlled Cubes

Similar projects worth following
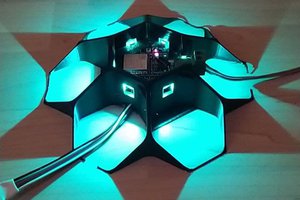
LUMOS nodes are esp8266 based wifi controlled rgb led cubes that talk artnet (theatrical lighting control protocol) that will be around the campsite at the EMF hacker/maker camping conference in the UK.

This project is a realisation of a stalled project back at the first emf to bring light and interactive fun to the whole of the event at night.

Spread over 50 cubic meters of glowing led cubes, the nodes will be responding to the central control server via the camps wifi network. They will be nestled around the camp in prominent and hidden locations, perfect for a timed treasure hunt based on blinking morse code nodes, or a visualisation of data from tweets about the event. The magic of the nodes will come from what the attendees make of them.

There are currently plans for some control uses, but we are also issuing a public call for participation to the emf camp atendees.

Currently the hardware is locked down for this year but there is an open call for people to design control software to change the colour of the lights at the event. If you would like to make something, see the "LUMOS - Server" link on the left of the page to see details of the json rest api to make control calls and apply to join the team on hackadayio or contact me via email: charlesyarnold@gmail.com or via IRC on freenode nick: solexious.

  • Getting ready, in a field

    Charles Yarnold08/30/2016 at 08:57 0 comments

    To the field!

    I got to arrive slightly before the public as I was part of a village and had the nodes to setup, I'm so glad I did as setting up all the nodes was so much more work than I expected.

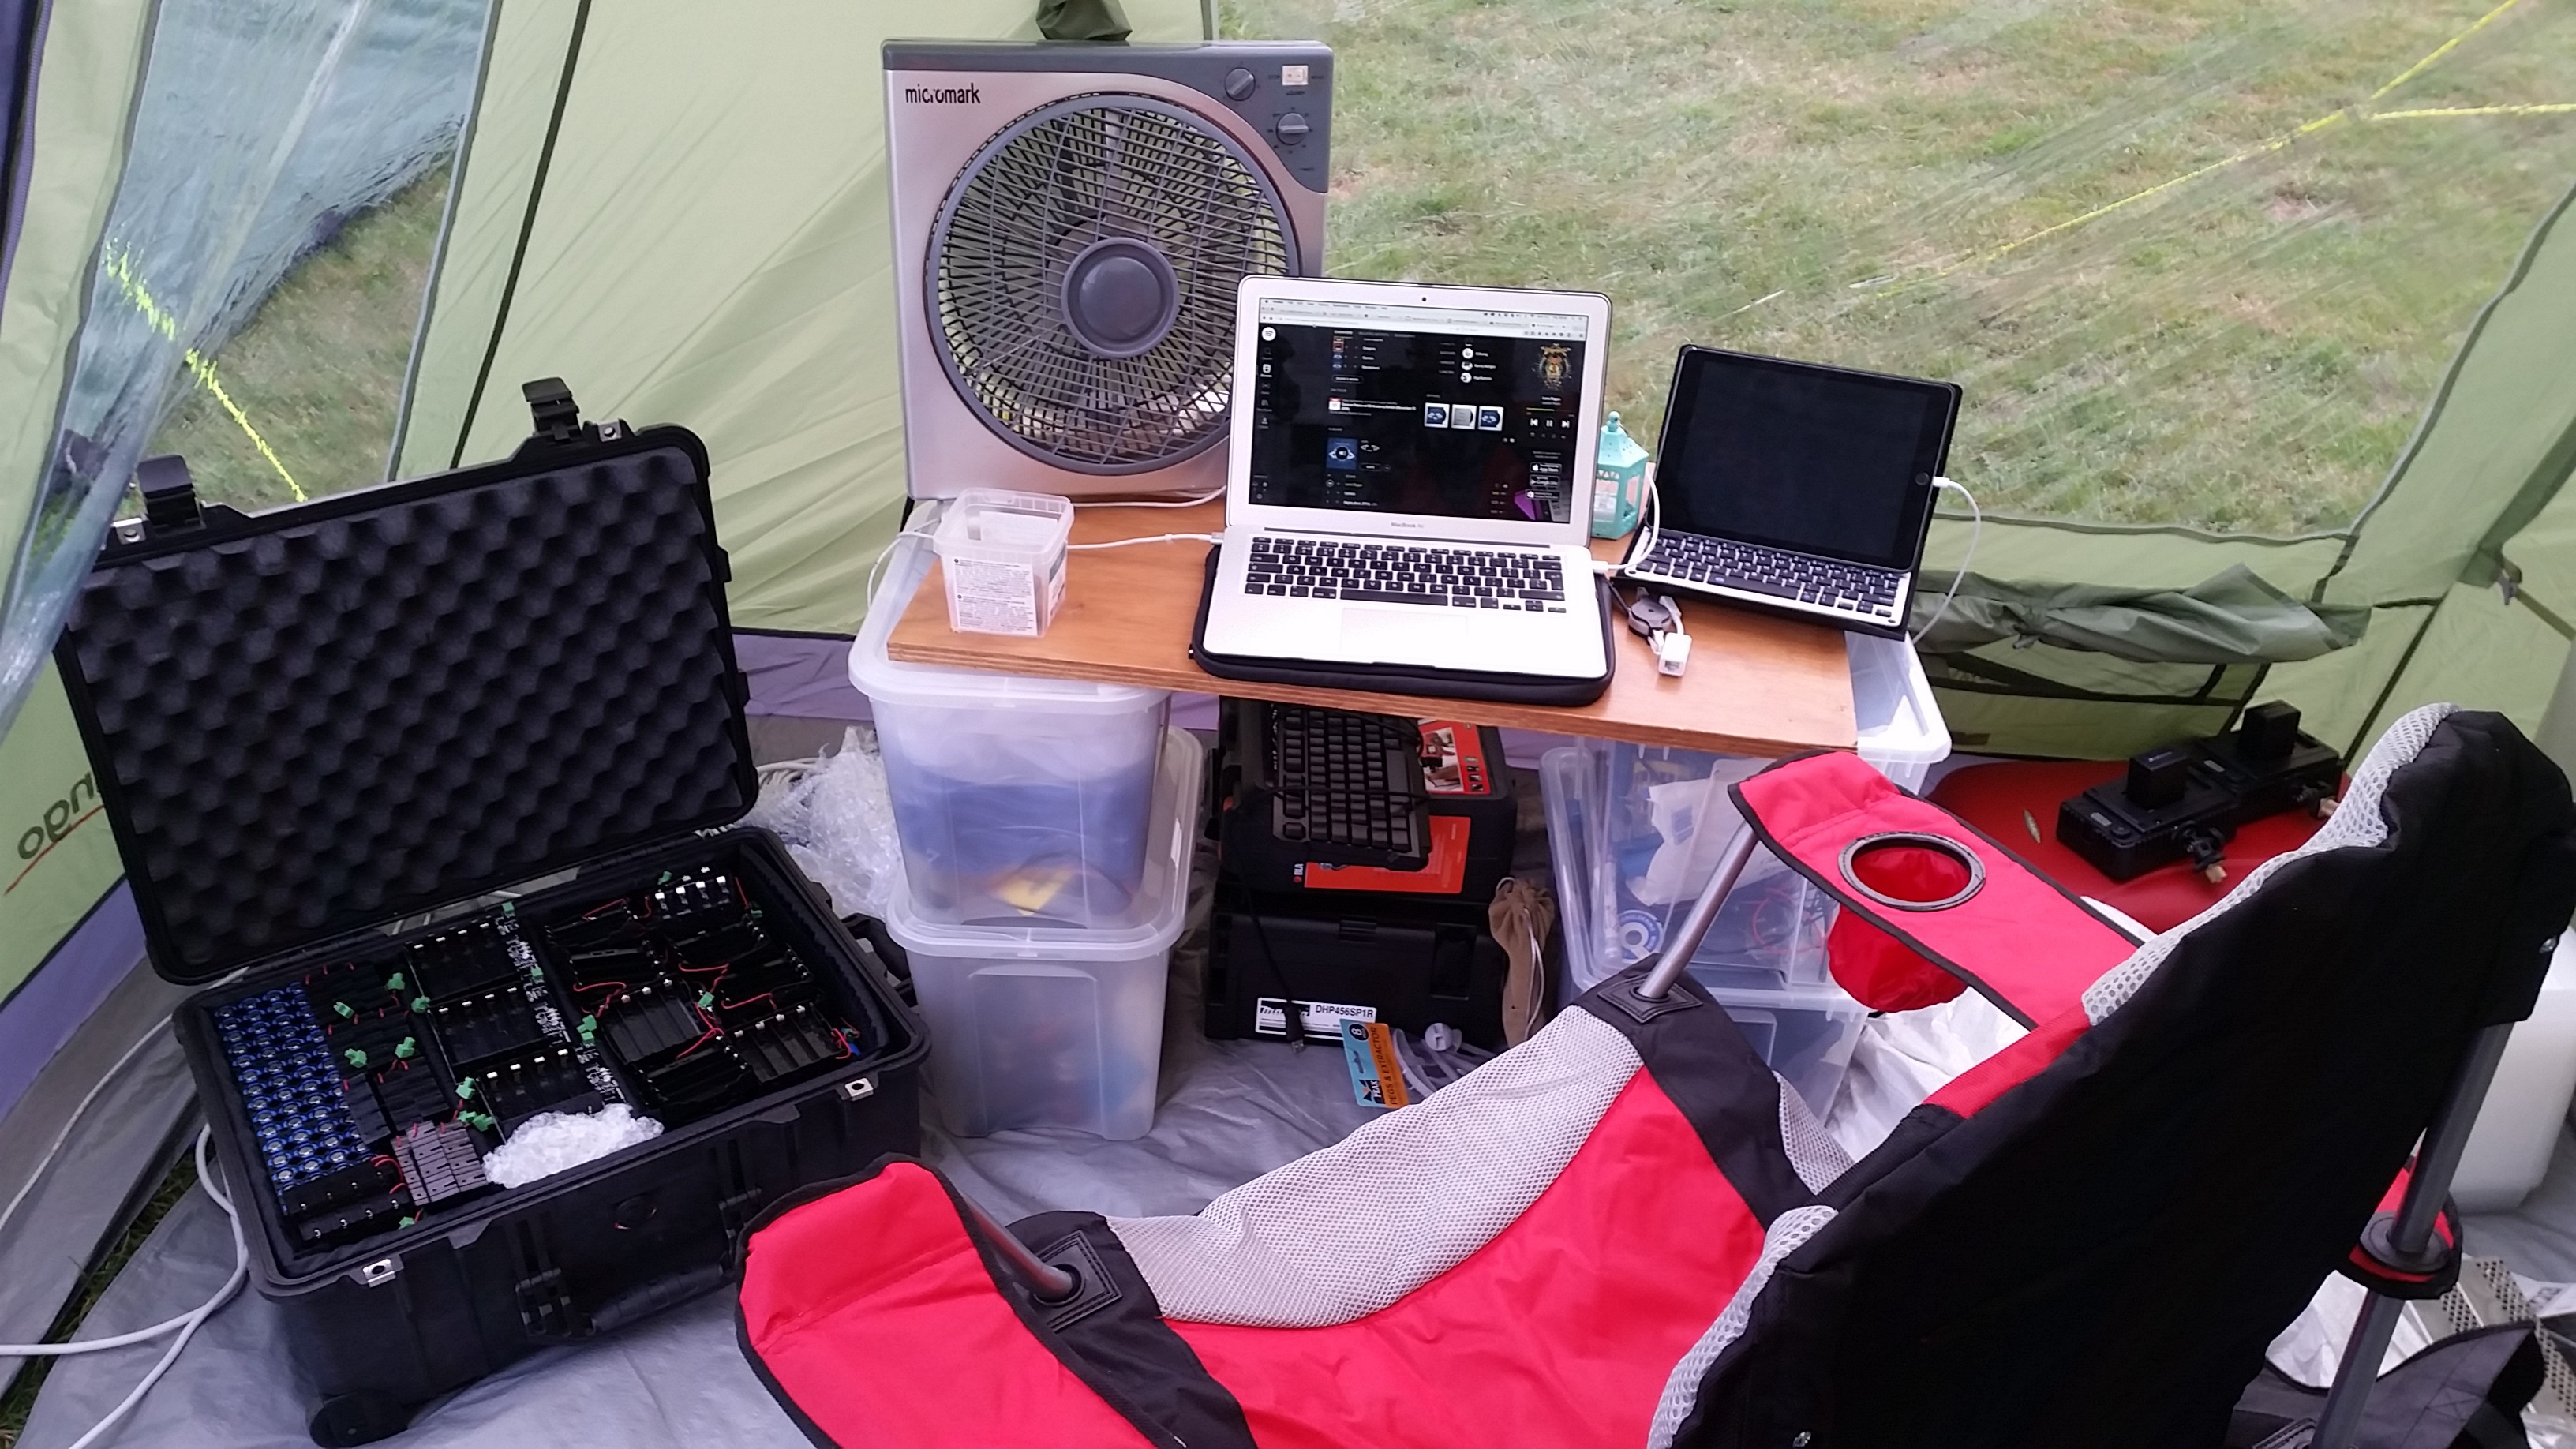
    First things first, setup out new tent and get my workshop setup inside for the LOC (Lumos Operations Centre)

    Including, makita drill set, hot air gun, reflow station, network switches, toolbox, assorted tools, soldering station, fan (next time we are bringing aircon), portable work lights, a hat with led ring, ipad, macbook air and desk. This was a pita to get up and down 3 flights of stairs, but came in useful for working on the nodes and knowing I had everything to hand.

    On the left is also the peli' case loaned to my by Nexus Interactive Arts who sponsored the project, it was packed to the gills with all the lipos and electronics. It could just hold everything but the big boxes themself.

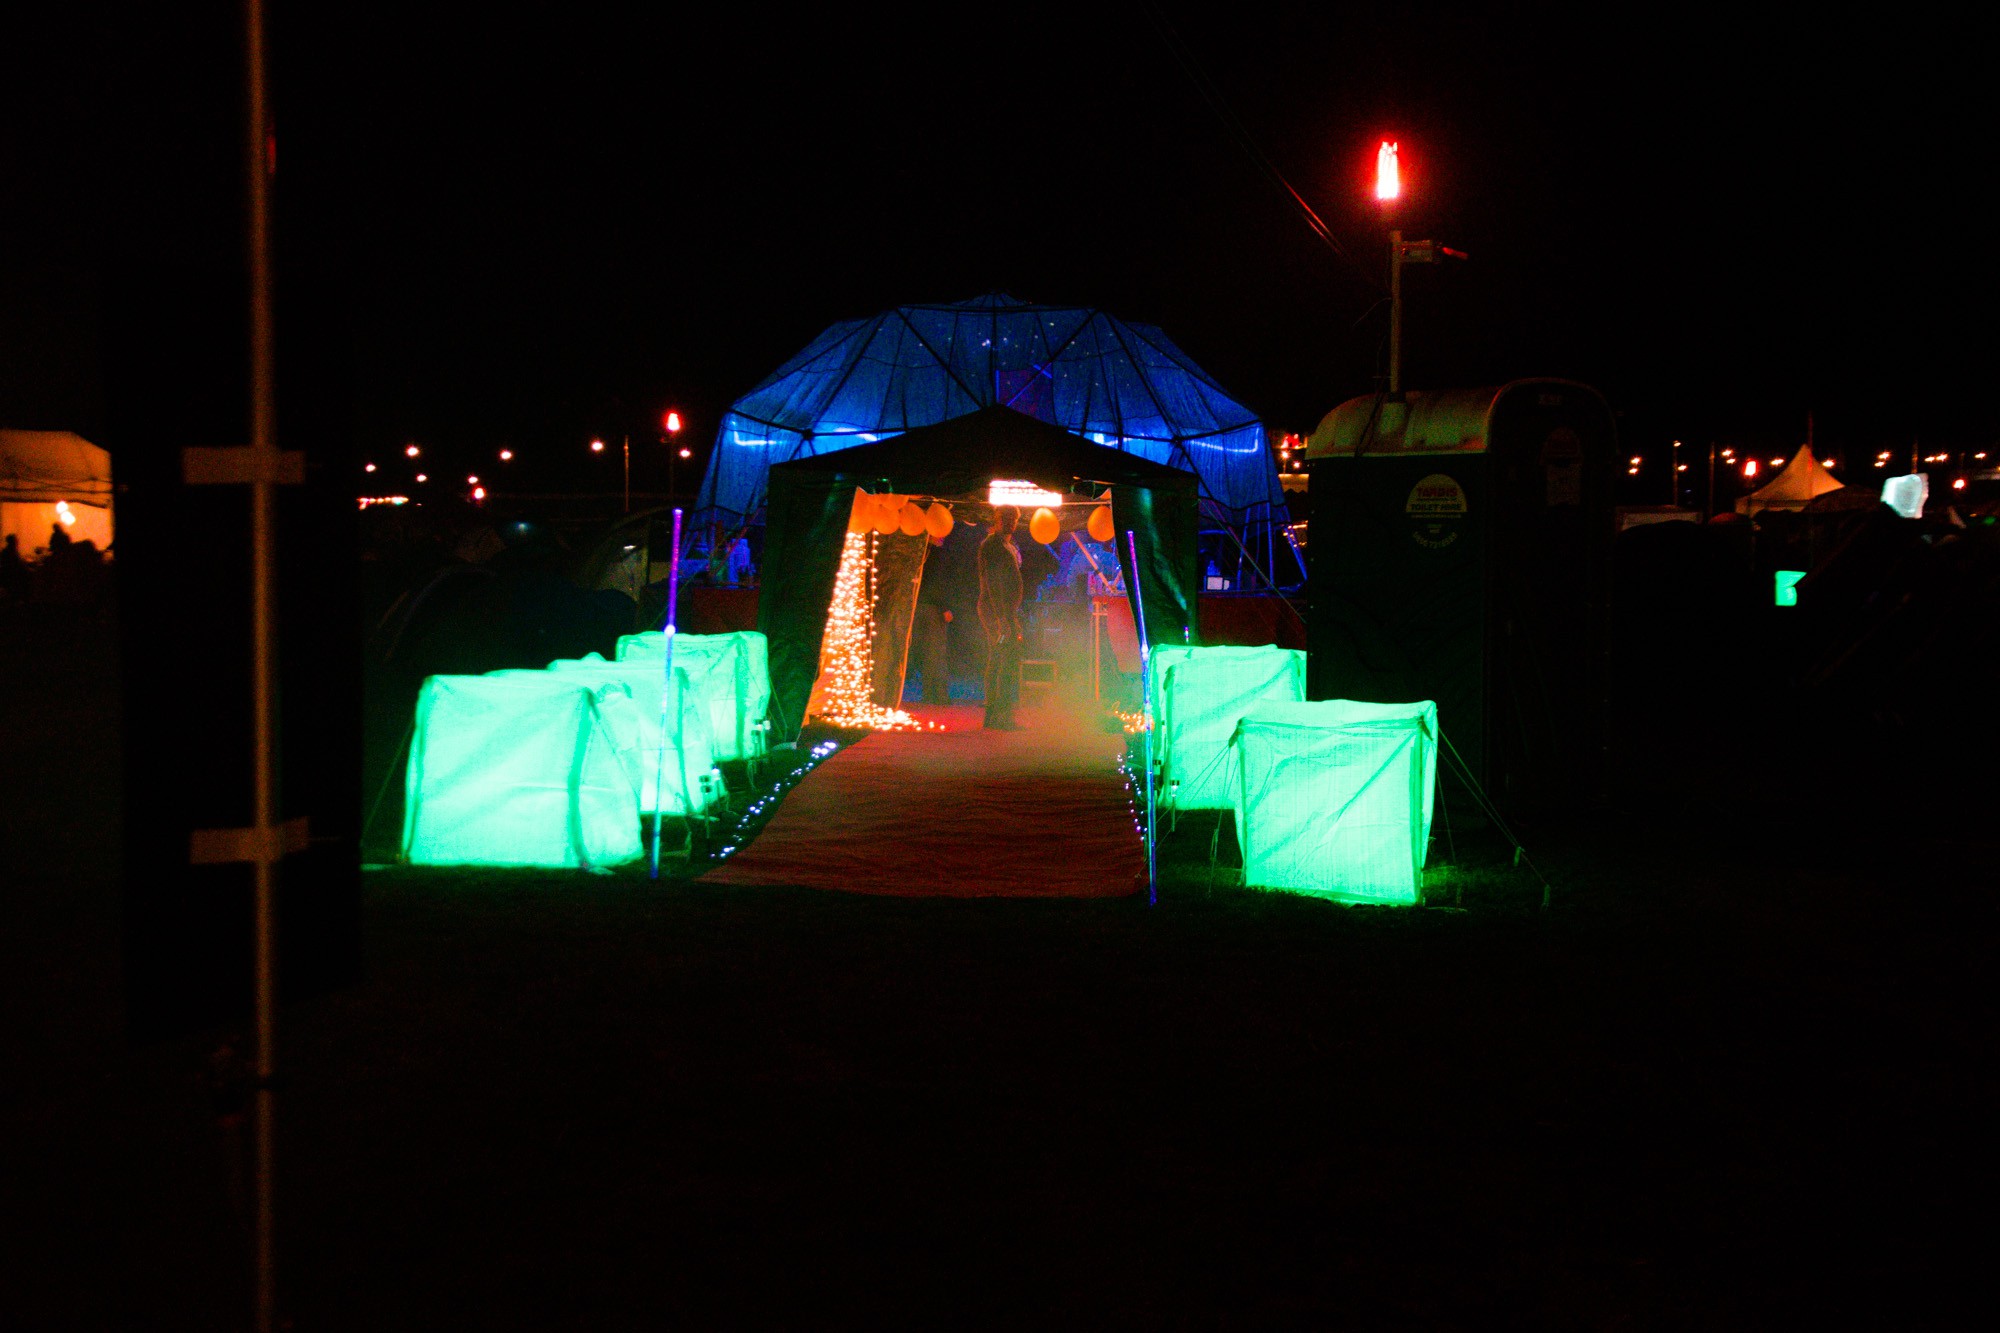
    Just outside the LOC was the Gold Members Lounge that our village made (the joke is there are no gold members at emf), a large geodesic dome with a lounge in the middle:

    (Photo by Mitch Altman)

    Perks of making the installation, I lined the red carpet entry to our entry gazebo with 6 of the nodes.

    But setting up all 50 proved to be a challenge. With a time crunch it meant that I would need to push up setting out the nodes. I had planned to walk the site the first night checking locations for signal and the amount of ambient light in the area, then work on making the housings during the day and setting them out during the next 2 nights. This time got cut in half, meaning I needed to put out the housings during the day. Sounds ok, but in reality putting these up in the blazing sun saps all your energy, even with a big hat for shade that doesn't help with the heat reflected from working inches away from white cubes all day.

    The rest-bite I got form the heat was to install the central server in the data centre, a walk in freezer unit normally designed for food and drink, repurposed to house the servers for the event! It was so nice, I could have easily taken a nap for an hour or two.

    Done with hiding 40 cubes around the site I had enough energy to turn on a rainbow script I wrote to turn all the nodes the same colour and went to sleep to recharge for the next day!

  • Making the housings aka "how I shredded my hands"

    Charles Yarnold08/21/2016 at 16:23 0 comments

    After much musing on Twitter and checking coatings for quite a few different designs I settled on a low cost design for this iteration of the nodes.

    The main criteria were

    • Low cost
    • Large size, around a meter squared
    • Robust against wind
    • Waterproof enough to survive the event
    • Easy to setup

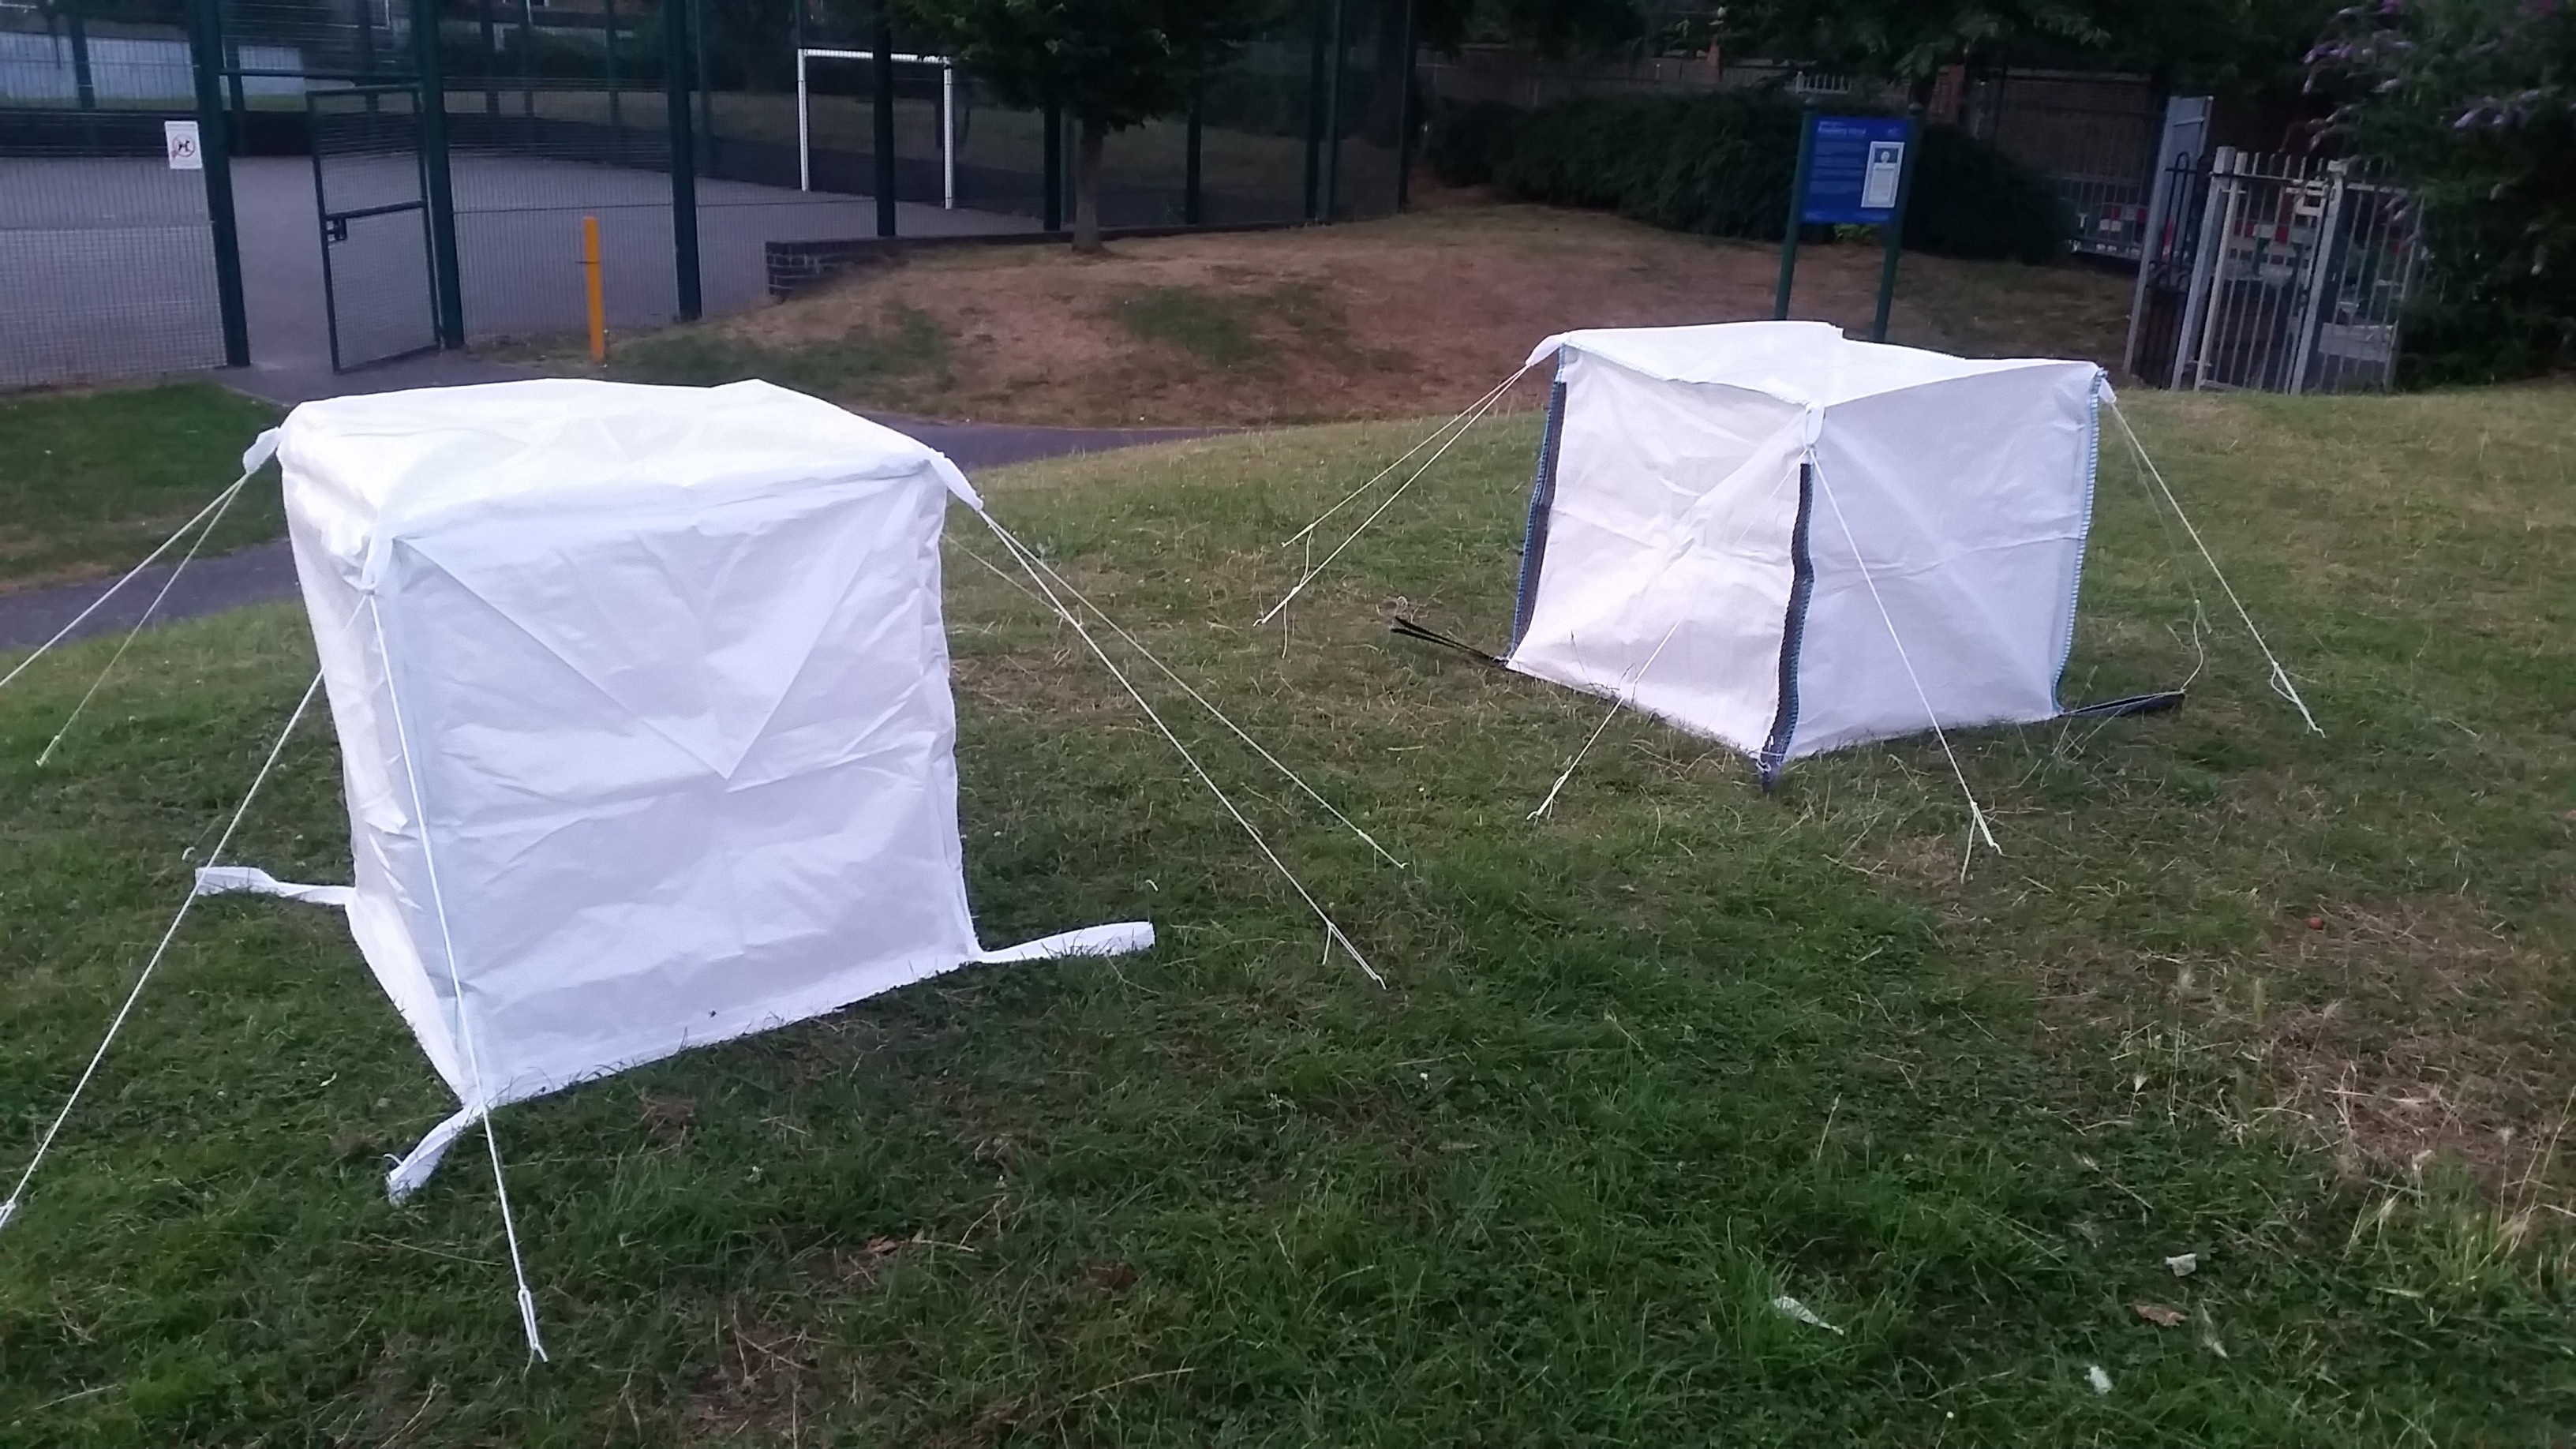
    The winning suggestion was to use rubble sacks, these are cubed and come with straps to allow them to be moved around a building site with a forklift. This was great for me as I could just run it upside down and use those straps to peg them down. This kept them from blowing away and when pegged right tensioned the bottom into a nice square shape.

    When tested the woven plastic material was perfect at taking the colour of the nodes and fluorescing with a nice bright light, but also containing the light so it didn't shine too much into the surrounding tents etc.

    The main remaining issue to solve was keeping the rest of the cube rigid. First I tested making a makeshift truss inside by taking chicken wire, cutting strips of 3 holes wide and folding them into a triangle. This worked well, but was a pain to make and needed quite a lot of it to keep square.

    The winning solution was to just add in 4 upright sticks of bamboo, with the pegged out base holding the bottom of the canes secure it just needed some guy ropes at the top to pull the top section square. Then hey presto, a waterproof cube that won't blow down and makes a lovely housing for the led light.

    Now to make 50 of them...

    The main pain here was the fact that they looked much better if I turned the cubes inside out, this hid all of the canes inside, along with the blue coloured stiching, it looked great. The pain was the skin on my hands getting shredded by the woven plastic. To add in the webbing that holds the canes, along with the webbing in the top corners to allow for attaching the guy ropes, I had to turn each of the 50 inside out, then back again (then inside out during setup at emf). The woven plastic is like a dull cheese grater and shredded the skin on my hands. I tried to use gloves, but the loss of feeling made manipulating the bags hard and more of an issue than the pain, so time to grin and bare it. In all it was 4 seasons of deep space 9 to make all 50 housings. Felt good to make the last 1.

    I'm glad we have a nice kick arse sewing machine that I use for making corsets. It only does straight stich, but it does it at great speed and can much through many layers of tough leather without breaking a sweat, so it made short work of multiple layers of woven plastic with thick webbing on top. Hate to think how long it would have taken on a £10 sewing machine.

    Up next, setting this up in the field at emf!

  • Netflix and Pick & Place

    Charles Yarnold07/21/2016 at 14:29 0 comments

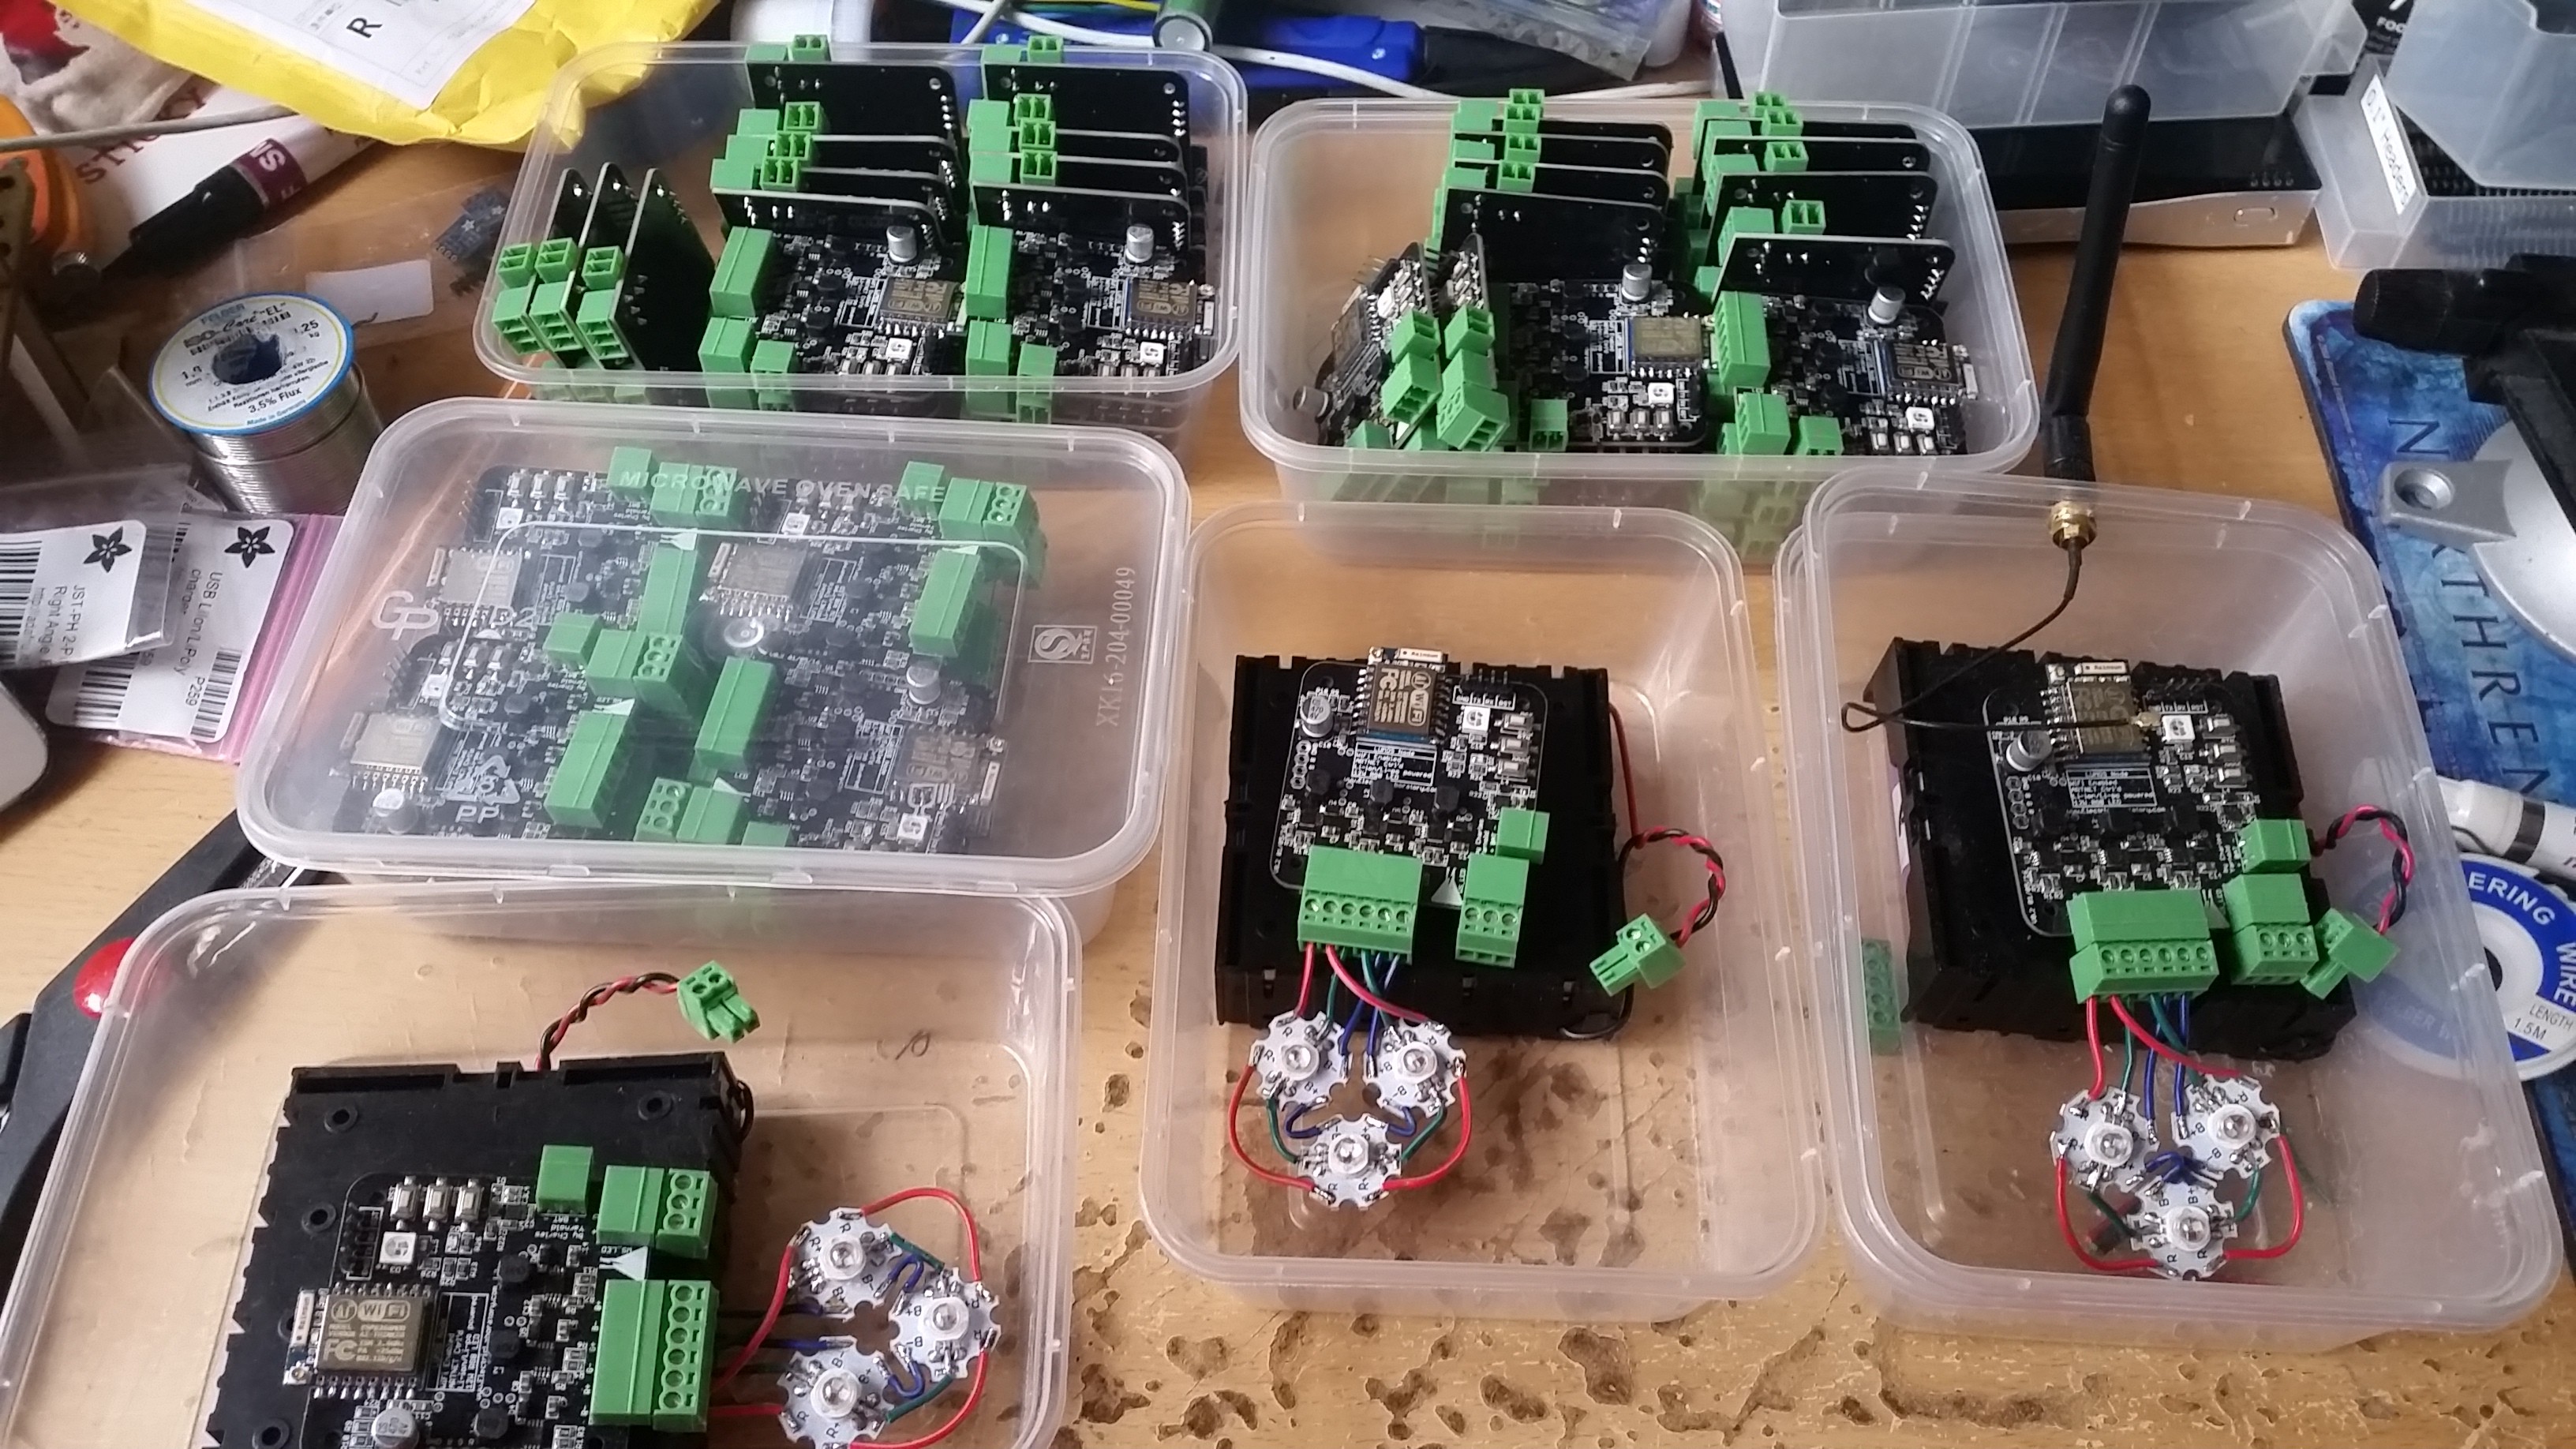
    I'm so glad I happened to start a netflix subscription before starting this project. I now have all 50 nodes hand populated, reflowed and tested. Doesn't seen like much, but that equates to about 3000 components over the course of all the nodes, not including the custom chargers too.

    Luckily I could binge listen to iZombie while making them, I managed to get populating a board down to just under the time my reflow oven takes to do a cycle, so I got a quite nice production line going where I could take a 30 second break to stand up and have a drink between nodes.

    Behold! (most of them)

    I had about a 90% pass rate, most of the failures were due to me slightly miss-placing the driver chips or applying slightly too much solder to the last bit of the stencil, but my return improved as the batch went on.

    Now they are all made I'm now going through them, recording their ID's (obtained from their mac addresses) and calibrating their feedback to the adc for battery voltage sensing and setting this in their config. Once that's done they will be ready to give one final firmware flash and popping in anti-static bags for transport before moving to the site.

    The largest job left if to make all the 50 housings that the modules will sit inside and illuminate. Time to prepare my sewing machine!

  • Refactor!

    Charles Yarnold07/21/2016 at 12:38 0 comments

    After making the web ui for the nodes I found a rekindled interest in Angular.js

    Time to refactor all the code! I think this is the biggest refactor in a personal project I've done in a long time. Usually its quite freeing to be less constrained by having to do testing, optimisation, commenting and making road maps that are needed in my professional work. Coding till it works then chucking it out the door on personal hacks is quite nice. So this is rare for me.

    That said the differences have been worth it, the page loads so much faster, issues like needing to wait to render the charts only when needed are handled automatically and not having the tangled mess of jquery looking fugly and slowing down the page is much better.

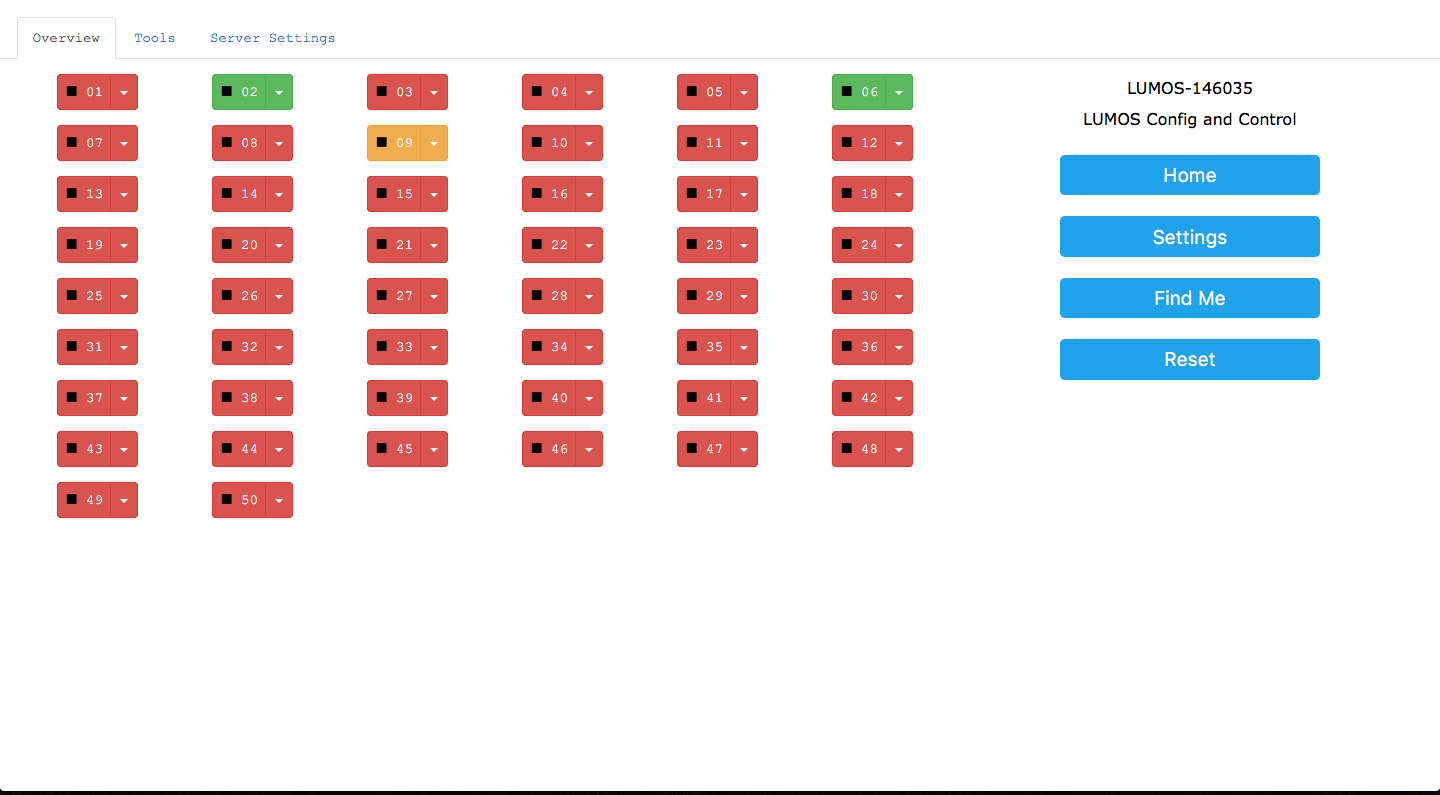
    It's also lead to a lot less work to add in new features to the ui, its now almost everything I need in the field to trouble shoot the installation. Along with added graph data customised to each nodes calibration, I now have the start of a suit of tools for testing and controlling.

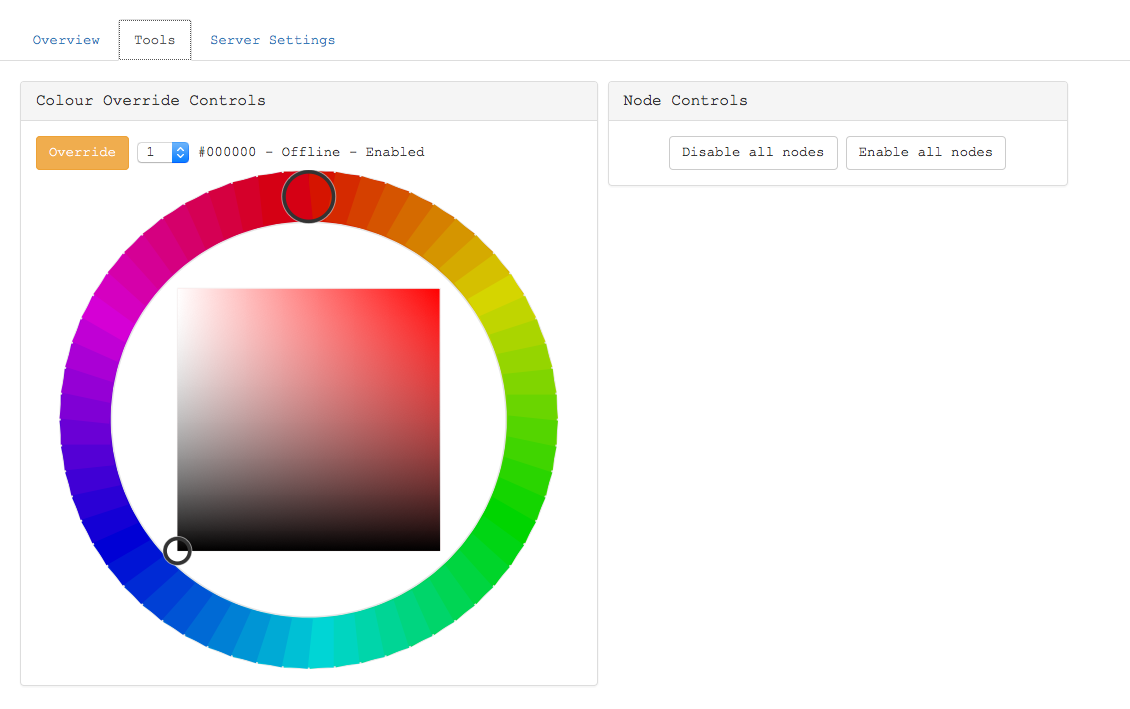
    A nice and big (for touch screen use) colour wheel that allows you to override control of a node and send colour values to it, handy for fault finding hardware as well as data connections. And on the right the first of the tools for allowing mass controls of the nodes, useful for turning the while installation on and off!

    During this I've made a lot of use of github's issue tracker, while its just me making and responding to tickets, I've found it much more motivating than using a trello board, I think due to being only a click away from the code of the project. Hopefully it will be useful when I open this project up imminently!

    The last thing to slay on this web ui is to pull out all the hard coded settings on the server into a config file and to provide changing those settings on the currently blank Server Settings tab. Ideally I want to be able to do everything from my ipad and not need to ssh into the main server to do anything.

    Onwards!

  • Building a better server

    Charles Yarnold06/22/2016 at 14:54 0 comments

    I'm one of those people who doesn't seem to like the same programming languages as my mates, python frustrates me, C# has enough differences to confuse my C and C++ knowledge and I've only just managed to really feel at home with object orientated programming. (my first language other than html was PHP).

    So what did I write my command an control server in? Node js of cause! I first played with node a year and half ago and quite liked it. I'm not really using it for managing lots of simultaneous connections in and out, I just found it really fun to program in and I wanted a webui for controlling the nodes to allow for cross platform support. (I know there are other options, but hey, this is a passion project, I need to enjoy making it)

    The main things I wanted to hit with it were, see all nodes health at a glance, more detailed logging available, control of disabling nodes from outside control to allow for fault finding.

    As its node js I can easily output json for control programs to see what nodes are available to them as well as accept json from colour control programs. You can also receive and craft network packets with node, allowing the server to send out the artnet packets itself to the lumos nodes and receive json in udp packet form as well.

    Also, while it's likely only going to be me using the admin console at emf, I really enjoy socket.io, all calls with the admin interface use it so that all connected admin pages sync up when I take an action with no refreshes needed, it really helps with grabbing any device I have to hand to see what's up. (it's also fun to watch my ipad screen auto update while I'm changeing stuff with my laptop)

    In that vein too I used bootstrap to design the ui to easily adapt to laptop, ipad and phone when I'm (literally) out in the field.

    I'm still adding extra tools like setting all lumos nodes to enabled/disabled and I need to make the server settings tab to allow me to change settings without editing the servers files, but its main goals are done and tested, time to build the remaining 35 nodes electronics and build their housing too!

  • Scaling production & soldering 150 LEDs

    Charles Yarnold06/03/2016 at 01:11 0 comments

    The main focus budget wise on this project is to keep the cost down as much as I can to build as many units as I can to have around the camp at night, so a £1 saved per unit can mean 5 or 6 more nodes.

    That does mean that I need to treat my time as free though, as this is a passion project that none of the sponsor cash is being spent on person hours, its a fair traid off in my opinion.

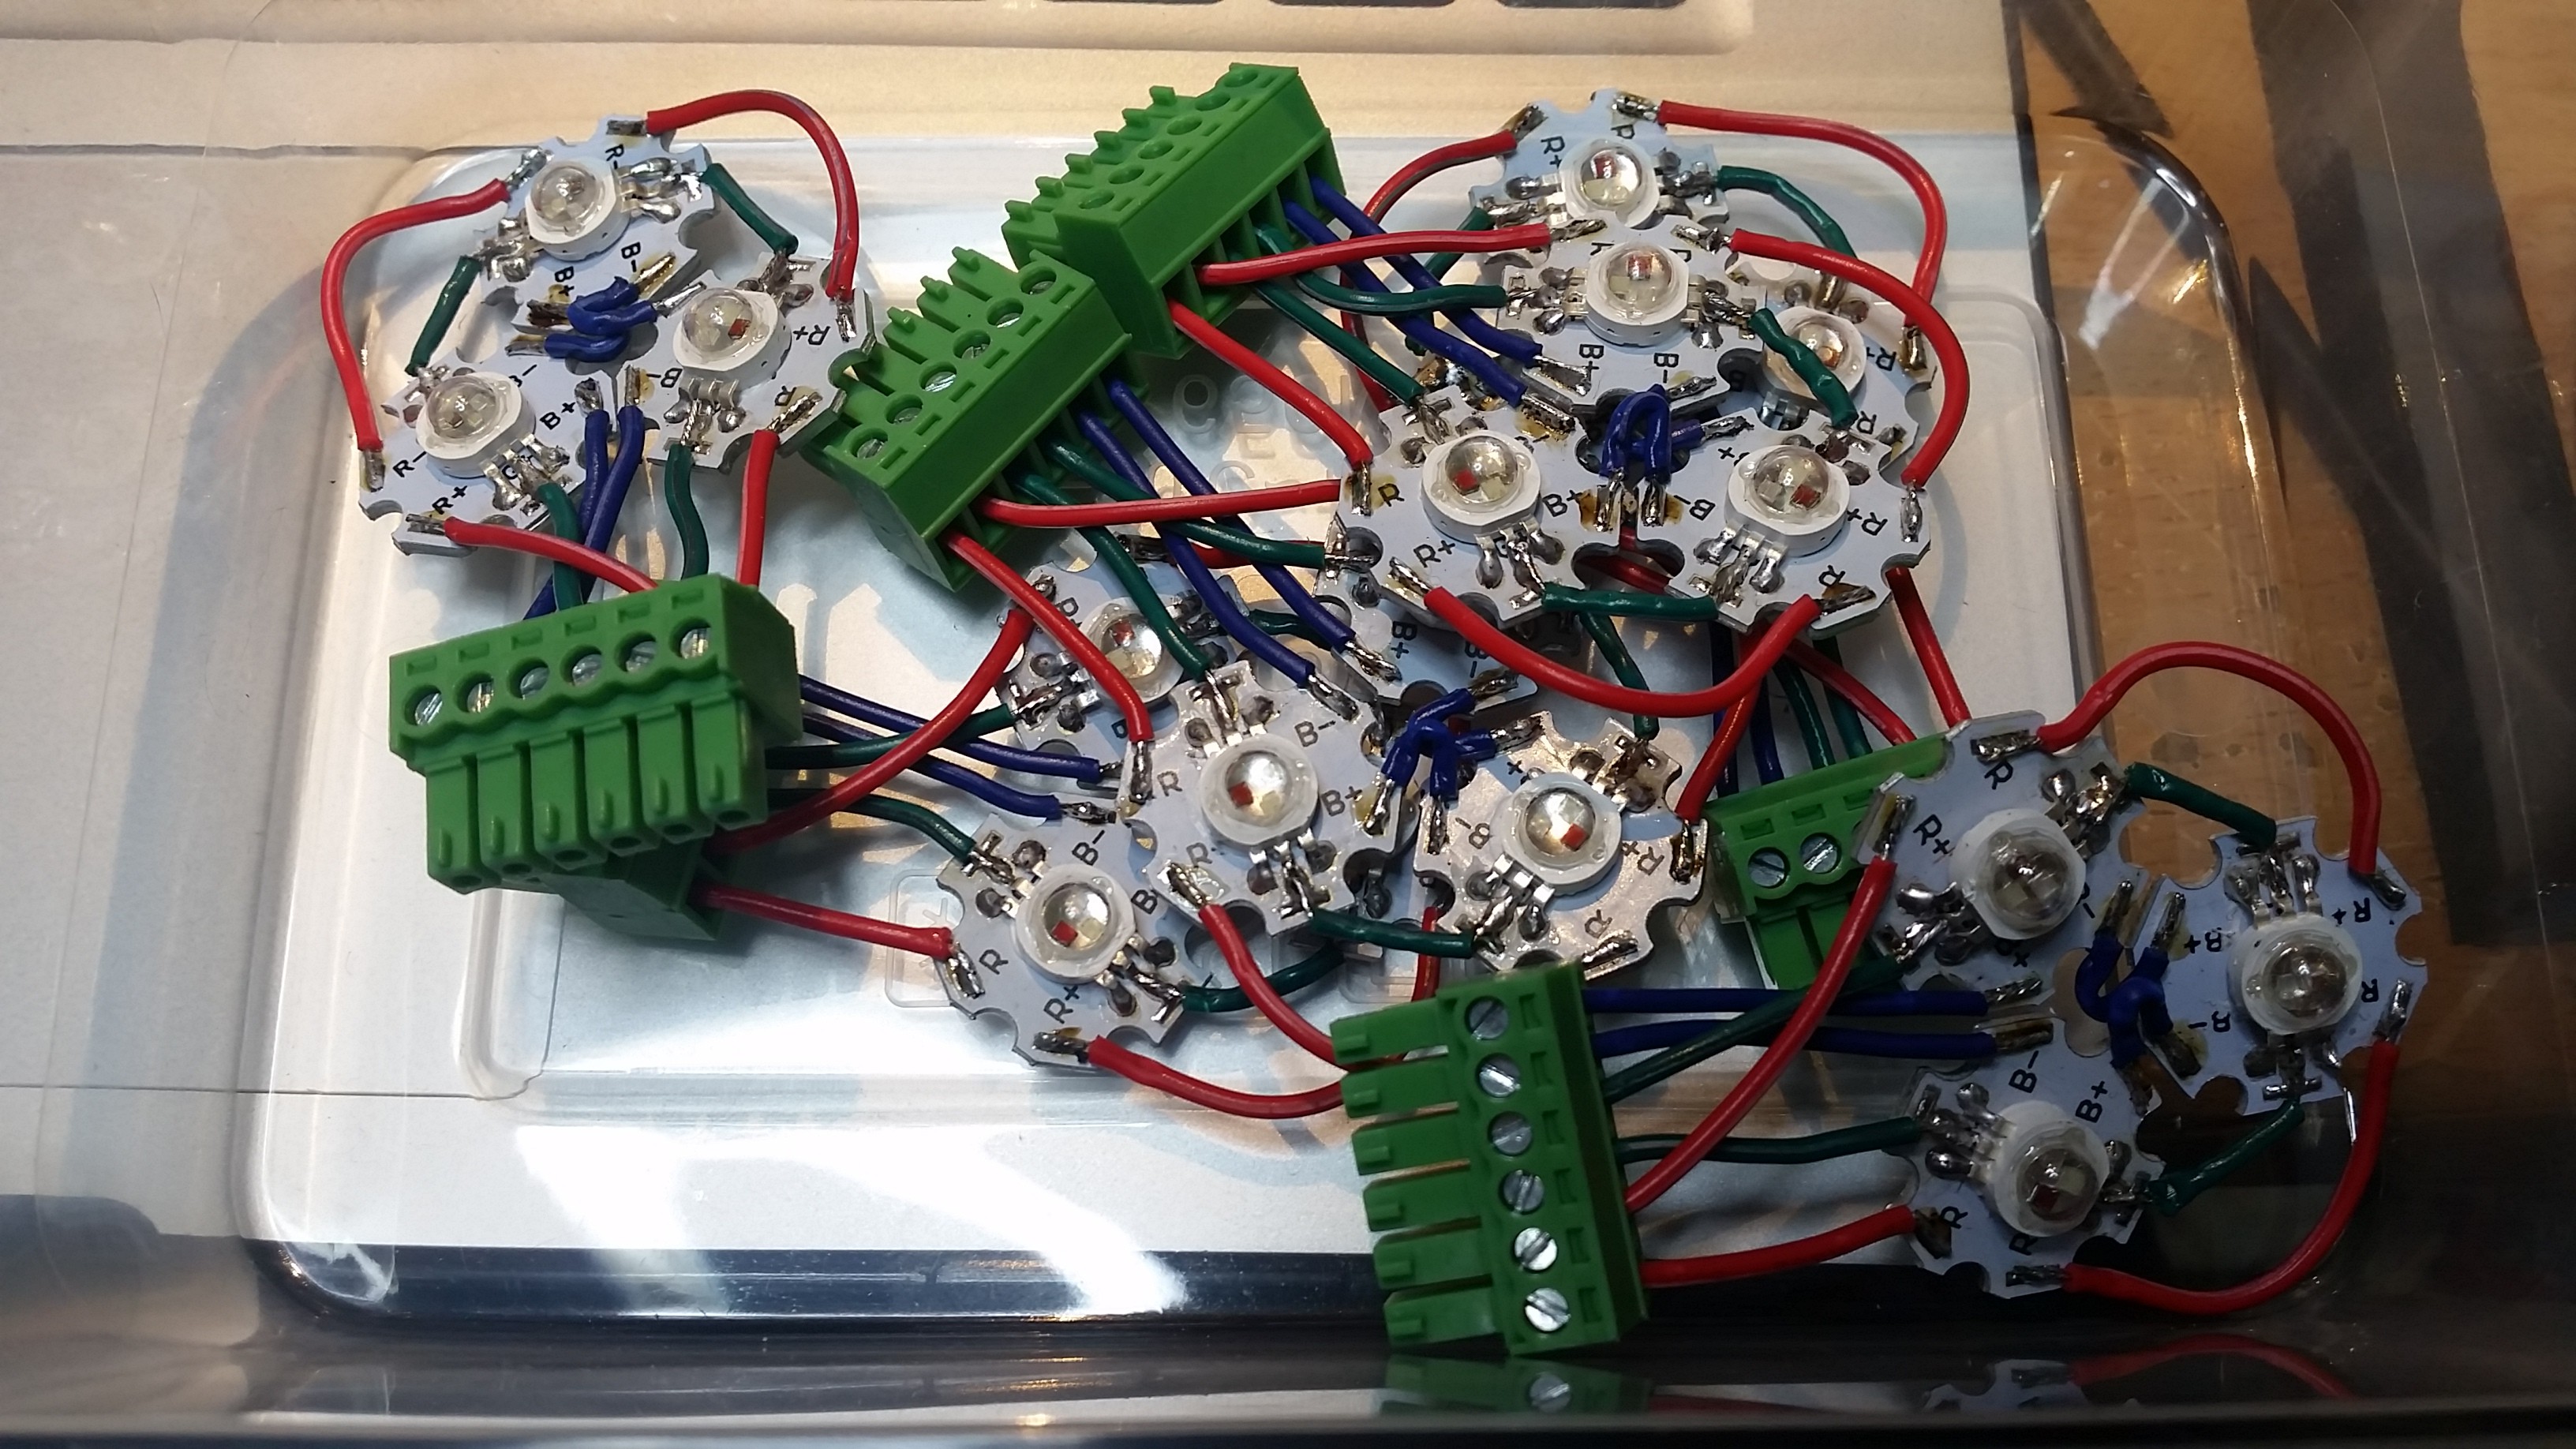
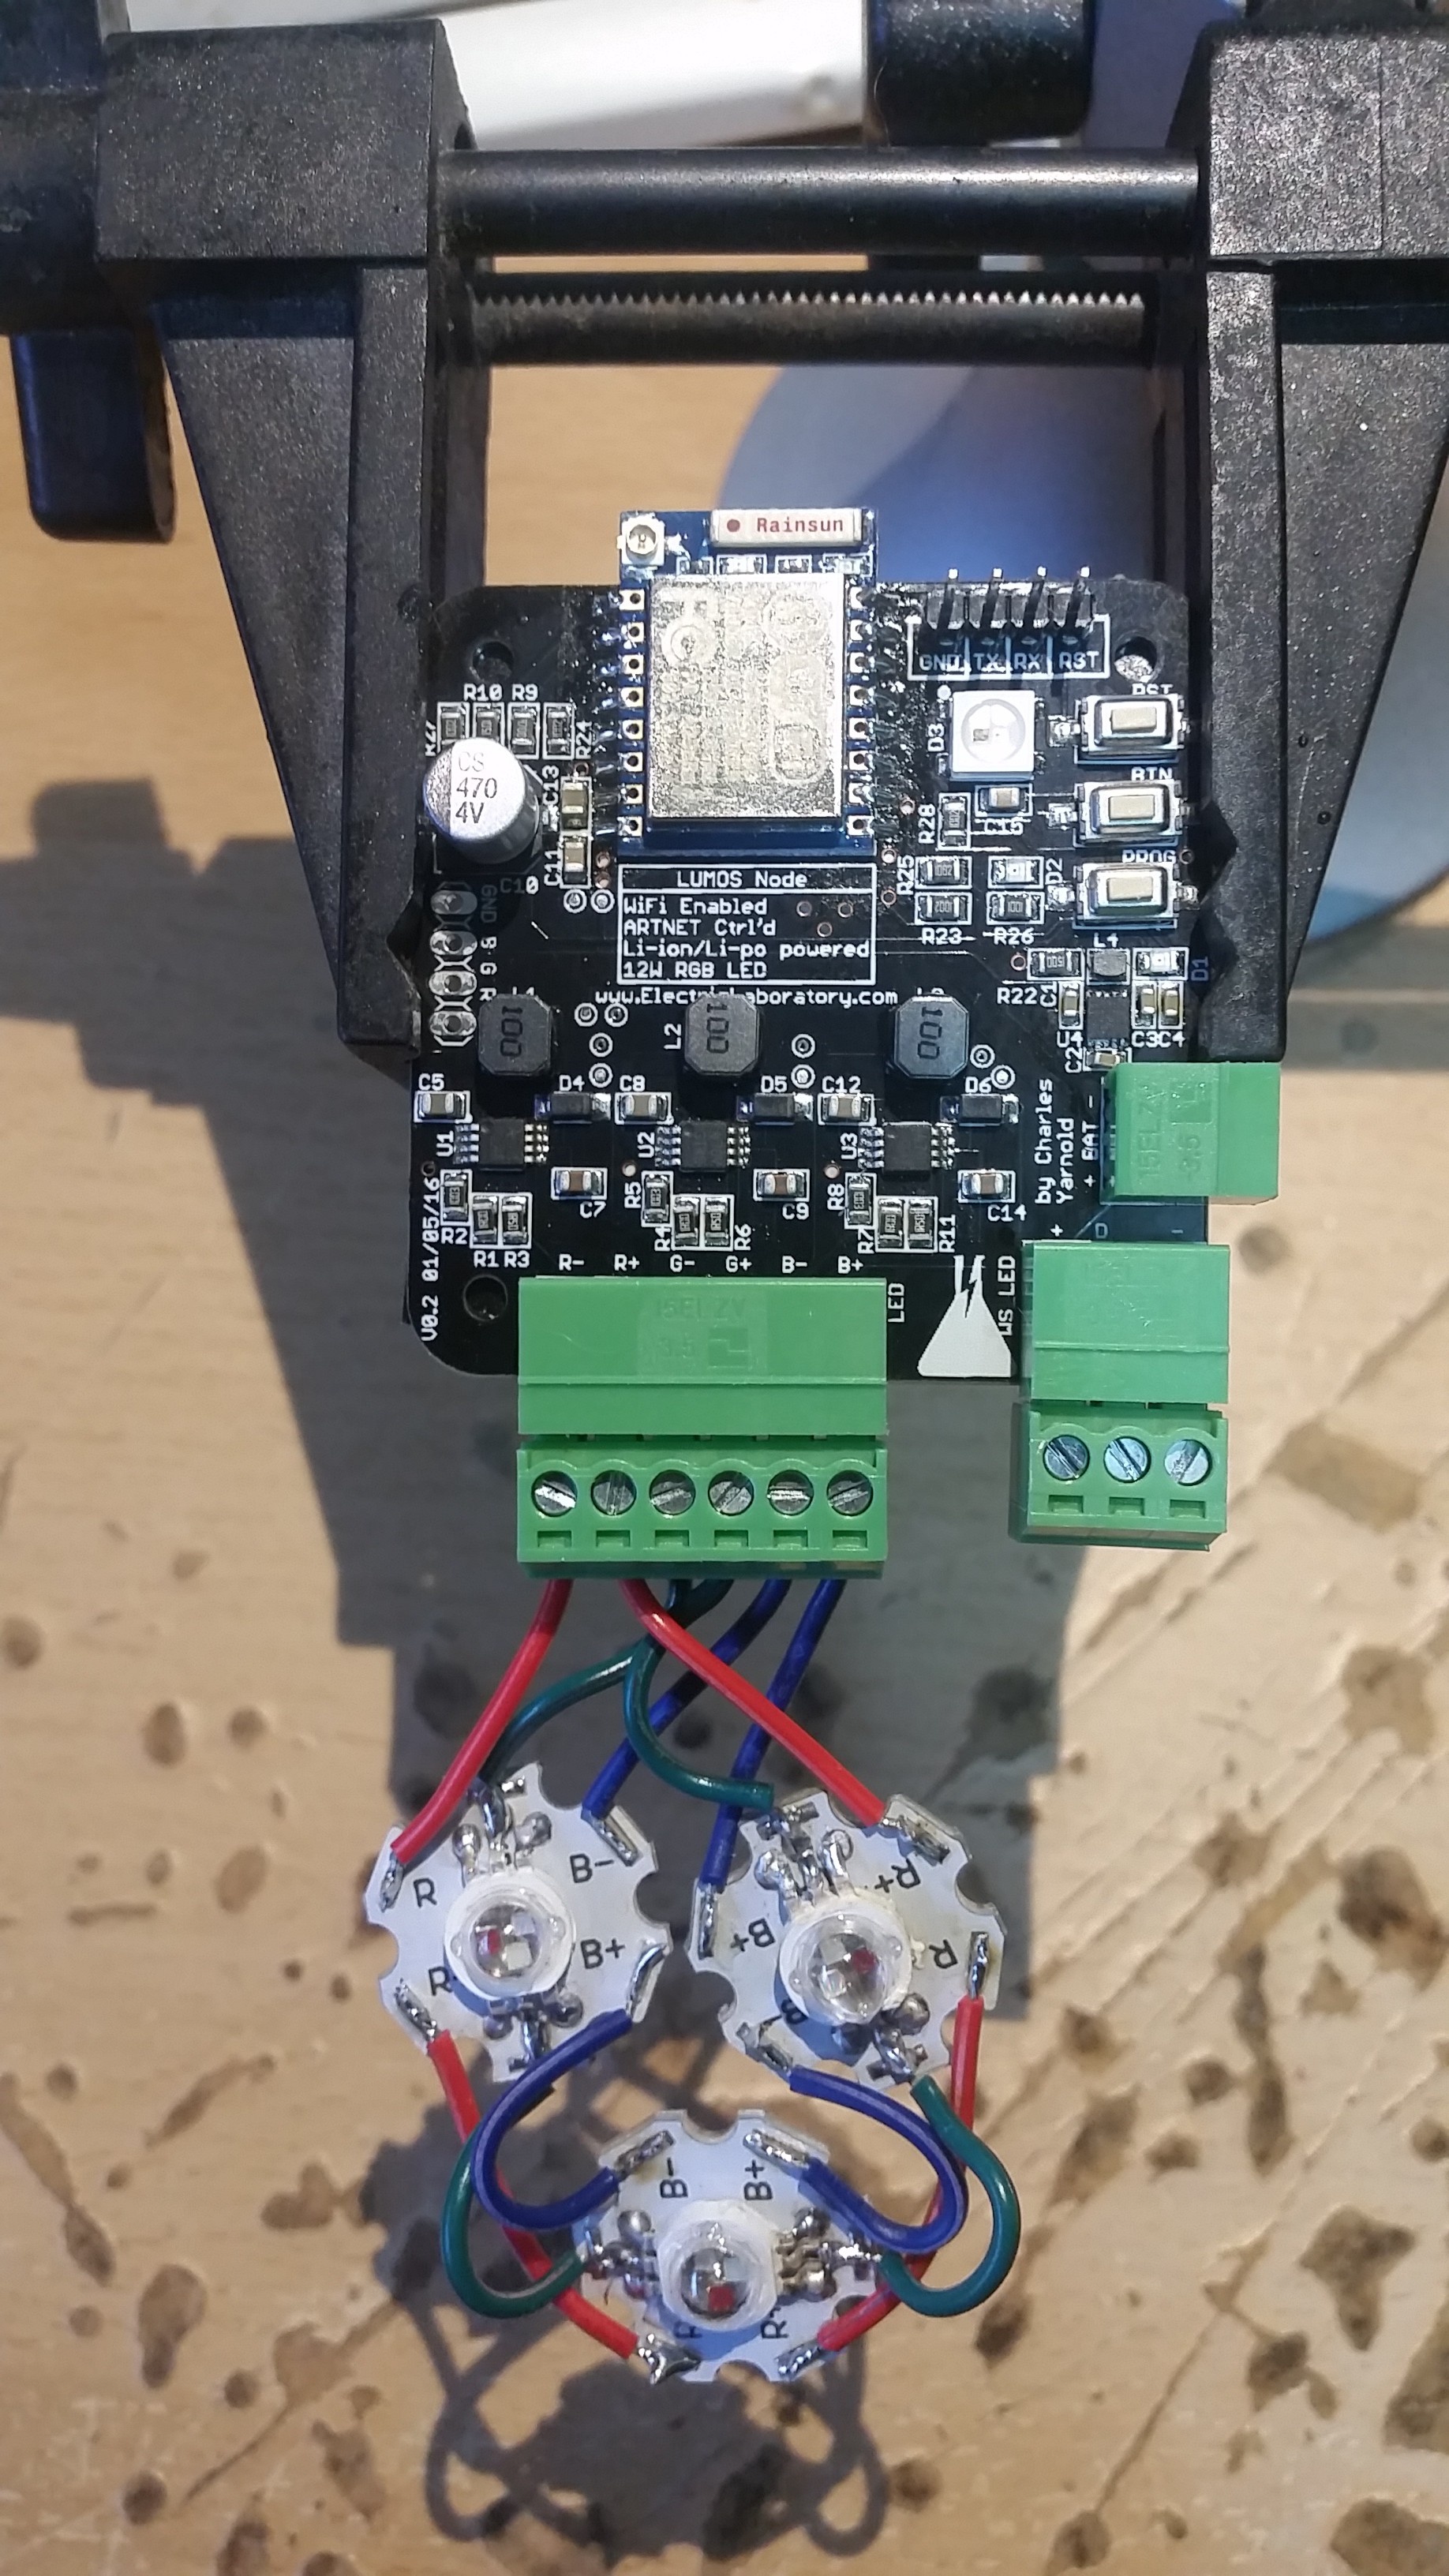
    That does mean though that I need to spens quite a bit of time making all of the units. One of the main things I've found that I would do differently if I had the budget and a fixed unit number to hit are the LEDs. I'm using 3 x 3w rgb leds for each node, this means I need to solder wires down the series chain and back to the plug that goes into the node. Doesn't sound like much but with a goal of 50 units that means 900 solder joints and 600 correctly cut lengths of tinned wires. Ideally I would have had a heatsink pcb made with the 3 leds in the correct spacing and series configuration to allow for alot less work.

    But as it is I can save alot of cash by soldering these together by hand sat in front of netflix in the evening, while not the most fun job its going to be worth it, hopefully!

  • The trouble with JSON

    Charles Yarnold05/26/2016 at 05:19 0 comments

    I'm writing this after wrestling with json to save config settings to the esp file system and get them back out again, so I may be a little biased and reserve the right to remove this post!

    I had initially chosen to use json as there is the ArduinoJSON library for parsing and creating json. I already have json in the sketch that gets sent as a udp packet as its heartbeat. This is just a sprintf that throws together a few variables and passes it to the udp send bits.

    The main issues I was having with the ArduinoJSON library was due to it needing to use a small set of variable types, notably "const char*" but not "char*". Alot of the other libraries I use expect char* so I got into a hell of needing to recast variables all over the place. To the point where I ended up recasting around back in a circle without realising. Along with this I ran into the issues of arduino pushing structs below functions in the compile order so I needed to move the settings struct to its own h file.

    Another big issue was that I needed to have my settings available right away to setup pin modes. After that I call my WiFiManager setups and this seems to interfere with my struct, wiping out my const char* variables! This meant having to run the function again to correct this after finishing with WiFiManager (I think this is to do with that lib using json parsing itself, something to look into another day).

    This still caused issues, so instead of a global struct with the settings in I reverted back to my independent global variables and recasting at the function to parse the JSON so the rest of my sketch could go back to how it was.

    Its a horrible mess I don't want to look at for a bit, but at least that mess is contained to the 2 functions dealing with the JSON and I can come back and fix it once I'm done with the rest of my todo list. I'm tempted to rip out the json and just store it as plain text...

    Next on my list is adding a find me function so I can pick the esp I'm talking to out of a box of 20+ of them. Then build the internal server to set the settings these horrible json functions are using, maybe I'm revisiting this sooner than I thought :/

    I'm making myself happy by hooking 10 of them up to a power supply and sending a mass ota update just to watch them turn cyan, reset then re-join the network at once. Its purdy to watch.

  • OTA Updates

    Charles Yarnold05/25/2016 at 01:06 0 comments

    I've spent some time adding ota updates to the nodes. You might think this would be easy, it seems to there are lots of ways to add ota updates to the esp8266, especially when programming though the arduino ide.

    But I've found each comes with its own issues. The "arduino ota" version mostly needs the ide to work and uses network voodoo to find your esp and allow you to add it to the ide. This has been too slow, cumbersome and prone to just not working. Also with the heatbeat function I already know the ip address of all the nodes.

    The other main option is using the webserver examples, there are quite a few of those too! I ended up using a version that would let me use a http post to transfer the bin file to the esp. This means that I could turn off the Tickers that run things like the heartbeat, turn the status led Cyan and also password protect the transfer. I can use curl to post the output bin from hittting the compile button on the arduino ide.

    I'm going to be using this at the camp, its a hacker/maker camp and while its not the chaos conference, the network is still a little hostile from people just exploring and having fun. Hopefully using httpauth for passwording the settings will be enough to protect me from casual trolling. Outside of the camp I would be using the nodes on a private network so would be even safer from having the firmware overwritten. (more than artnet that doesn't have any password protection on its update protocol!)

    Next on the list is more work on it's internal server coupled with moving settings to a json file on the esp to allow for settings to be set remotely as to not need a physical connection or even ota firmware update to put the nodes into different modes.

  • The journey so far

    Charles Yarnold05/23/2016 at 18:20 0 comments

    I'm starting to log this project when already feature complete and tested. This is due to wanting a fully working prototype and roadmap for getting it made and ready for the event before taking funding.

    That said, there is still a lot of work to do to make all the units and to improve them from the bare minimum to have working.

    I'm currently on v0.2 of the hardware design, the main change from v0.1 was a change in pin usages. The pwm pins driving the led drivers would oscillate while the esp8266 was in program mode. This would turn all 12w of rgb led on, this caused the flash chip to die on the esp in some situations. Swapping pins to pins that don't do this (4, 5 and 15) has solved this.

    The second change was swapping the led driver package as I could save ~£1.50 per unit with a different package from a different supplier. I also get a better yield when reflowing the larger leaded package.


    On the software side the large amount of the initial work was just porting my arduino artnet library to use the esp8266. I'm using artnet to control the LUMOS Nodes as I come from a theatrical background and like the compatibility with existing lighting control methods. For the event however they will be controlled via a central server that will allow for outside control through different protocols.

    On top of the basic control the units use the great WifiManager library by @tzapu to provide an AP mode to set the wifi settings without needing to reflash or connect over serial. https://github.com/tzapu/WiFiManager

    They also have a heartbeat function that sends json data via a udp packet to the central server. This allows me to see an overview of the currently connected nodes, including battery voltage levels, ip and mac address. In the future this will expand to include more data.

    The other main feature is an auto led shut off at one battery level to allow the node to broadcast a distress beacon for a while to allow me to come and change its batteries. Followed by a total shutdown at crytical battery level.

    The 3rd part of the system is the central control system, this is written in node.js and currently features a page that publishes the heartbeats in an easy to read manner. This will see a lot of upgrades in the near future as it will be my main way to view the health of the system and to help me fix any issues that arise.

    I'm also hoping for further funding to bring the number of nodes to 50, that won't currently fit on this screen without scrolling off the bottom, so a much nicer ui is on the cards!

View all 9 project logs

Enjoy this project?

Share

Discussions

emma wrote 08/27/2021 at 07:50 point

I think this is a good idea. Also, I'm working on a similar project with my site, you can check it out https://nyapk.com/

  Are you sure? yes | no

jigsawloves wrote 09/18/2020 at 18:00 point

This seem good. I'm also working on the same project with my camping site, you can see here https://campinggoal.com/

  Are you sure? yes | no

jaime wrote 04/05/2017 at 04:38 point

How did you power them?  If a single battery each, did it last for the whole event?  Or did you have to charge them each day?  :) 

  Are you sure? yes | no

jaime wrote 03/31/2017 at 20:09 point

This sounds pretty awesome.  Do you have video of the network in action?

  Are you sure? yes | no

Charles Yarnold wrote 03/31/2017 at 20:13 point

huh, seems my last update has disappeared, will post it again showing it :)

  Are you sure? yes | no

Similar Projects

Does this project spark your interest?

Become a member to follow this project and never miss any updates