 Gianlu Owen
-
1Step 1
To be able to read the data from sensor I need an Arduino/Genuino board Firefly FIRMATA firmware uploaded.
this firmware allows to interface the board with some software like Processing or Grasshopper
Here the FIREFLY Firmata website
http://www.fireflyexperiments.com/
Here the standard Firmata website
https://github.com/firmata/arduino
It is a library for Arduino IDE and it is very easy to load the firmware
A lot of details about Firmata are here: http://www.firmata.org/
The desctiption of the pin used in Firefly Firmata in my case with Arduino UNO board
/*****ON STANDARD BOARDS (ie. Uno, Diecimila, Duemilanove, Lillypad, Mini, etc.)***** ANALOG IN pins 0-5 are set to return values (from 0 to 1023) for analog sensors DIGITAL IN pins 2,4,7 will return 0's or 1's; for 3 potential digital sensors (buttons, switches, on/off, true/false, etc.) DIGITAL/ANALOG OUT pins 3,5,6,11 (marked with a ~) can be used to digitalWrite, analogWrite, or Servo.write depending on the input status of that Firefly pin DIGITAL OUT pins 8,9,10,12,13 can be used to digitalWrite, Servo.write, or analogWrite depending on the input status of that Firefly pin *****/ -
2Step 2
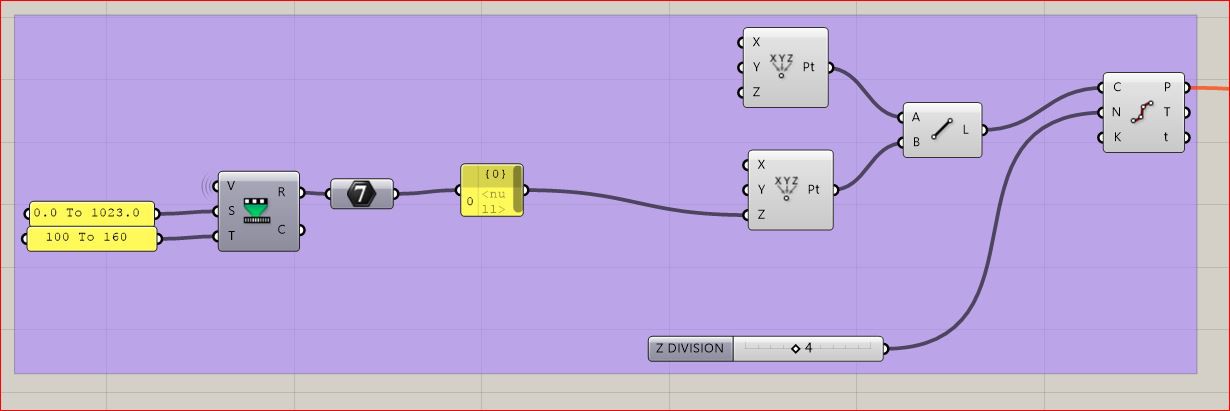
- In Grasshopper I had to create a line as a Zaxis subdivided in a number of parts editables with a slider
![]() then, I've created a series of hexagons to obtain a shape like a Low poly geometry, each hexagon is connected to a section of the vertical line, and it is possible to choose the number of the sides of the hexagons.I've added the Arduino control with a port reader and the component UNO Read, to listen the analog pins of the board. With the timer component, I can choose the refresh speed
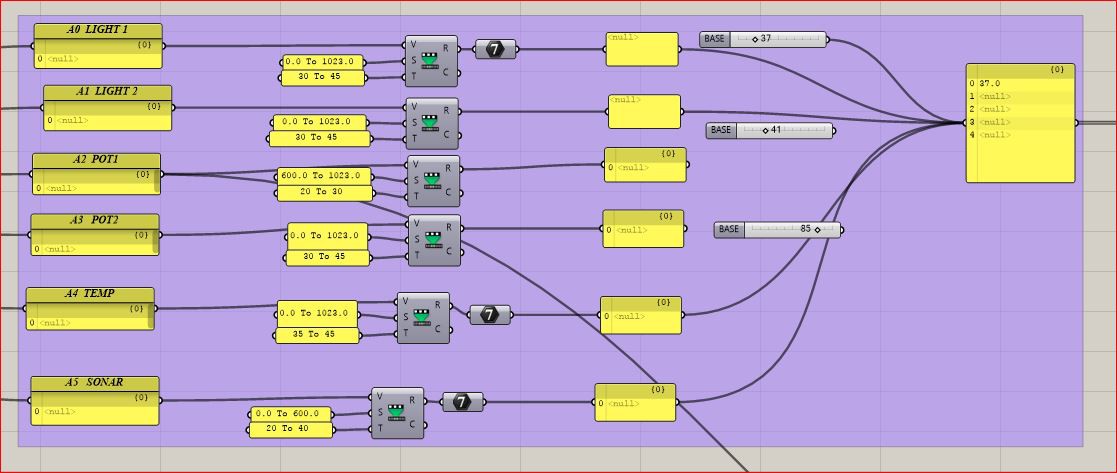
then, I've created a series of hexagons to obtain a shape like a Low poly geometry, each hexagon is connected to a section of the vertical line, and it is possible to choose the number of the sides of the hexagons.I've added the Arduino control with a port reader and the component UNO Read, to listen the analog pins of the board. With the timer component, I can choose the refresh speed![]() From each analog pin it is possible to read a value that shifts between 0-1023, I've then converted this value in a range which was more compatible with the project, and scaled it to a range between 20-60. All the values are converted automatically in millimeters and used to modify the diameter of the hexagons and so, the shape of the vase.
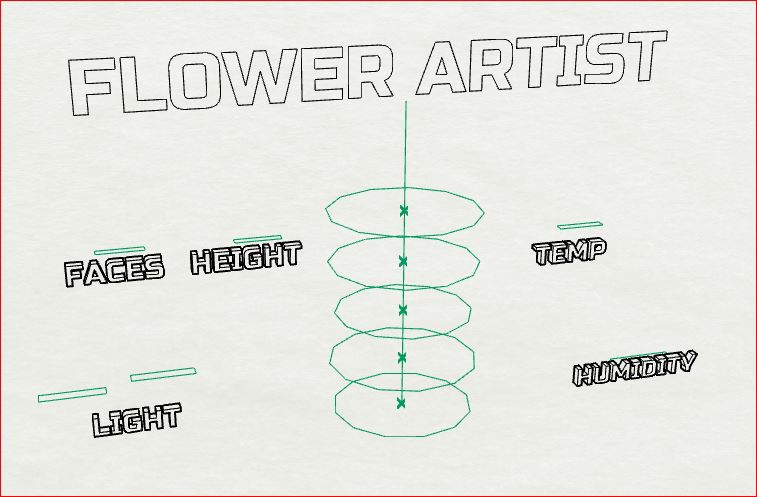
From each analog pin it is possible to read a value that shifts between 0-1023, I've then converted this value in a range which was more compatible with the project, and scaled it to a range between 20-60. All the values are converted automatically in millimeters and used to modify the diameter of the hexagons and so, the shape of the vase.![]() Finally I've made another controller that reads the Analog pin Value and with the resulting values, I was able to modify the height of some boxes just to have a graphic interface like this one
Finally I've made another controller that reads the Analog pin Value and with the resulting values, I was able to modify the height of some boxes just to have a graphic interface like this one![]()
- In Grasshopper I had to create a line as a Zaxis subdivided in a number of parts editables with a slider
-
3Step 3
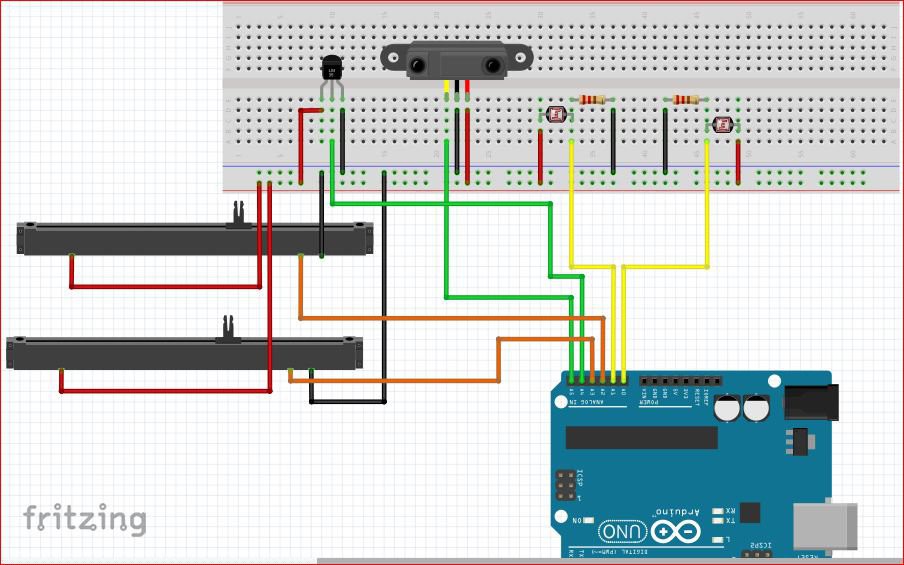
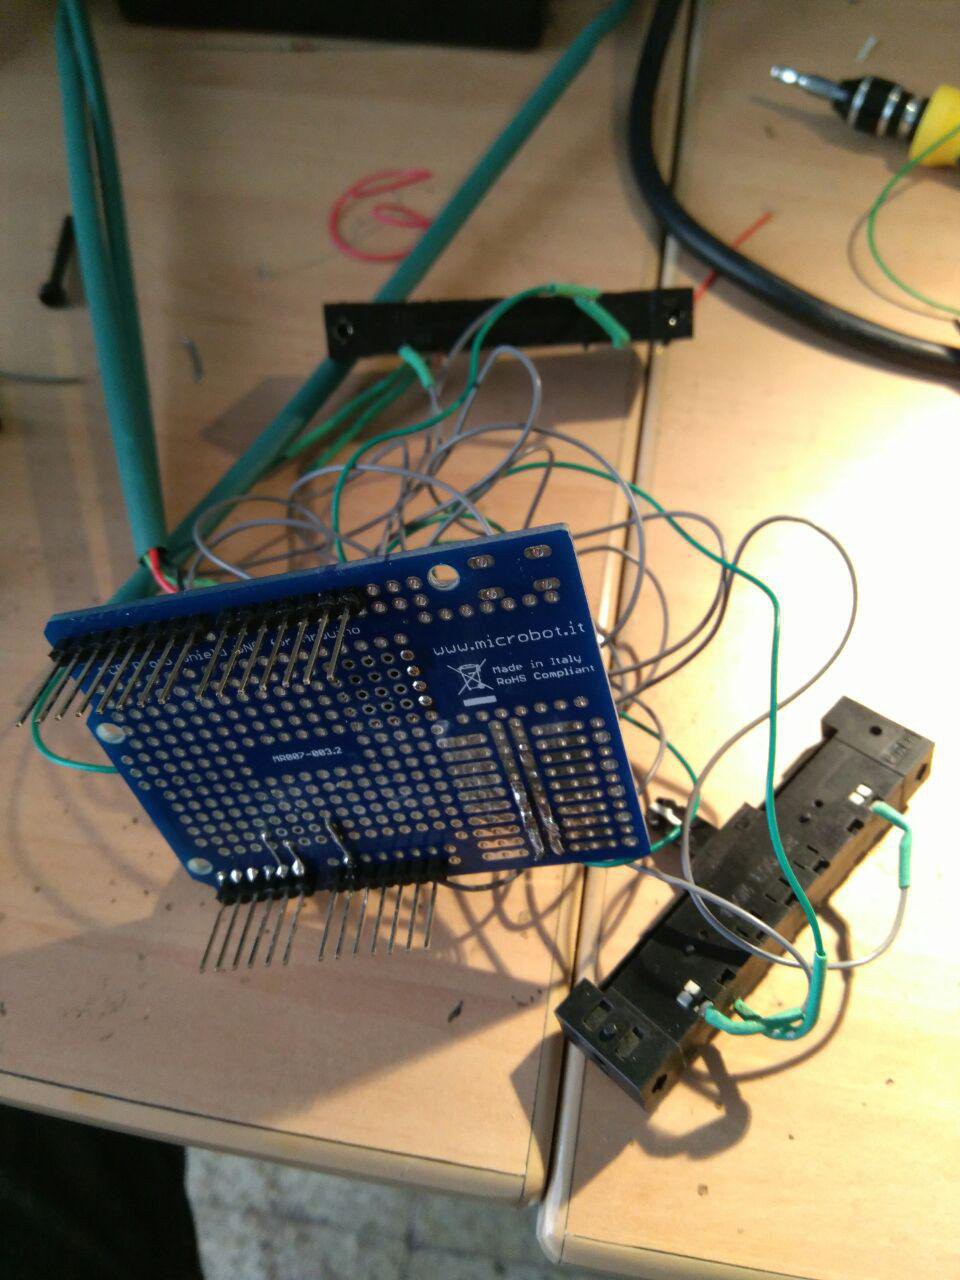
preparing the electronic board
I made a simple circuit on a protoboard directy connected like a shield on the arduino board
![]()
![]()

Discussions
Become a Hackaday.io Member
Create an account to leave a comment. Already have an account? Log In.